

 Tweet
Tweet
Okay, I am a FIRM believer in doing ALL maintenance items on-time or early. The owners manual says the plugs are due at 75,000 and most people who drive the same car I do claim to generally do it at about 90,000. I figured, I have 58,000 and it can't hurt anything but the wallet.
If you want a job that you KNOW is done right, do it yourself.
The Dealership quoted $196 for doing the spark plugs!
Personally, I figured that is WAY to much, so I purchased the EXACT right plugs. I have a theory that you should ALWAYS stick with the factory plug... especially, DON'T change type or heat ratings. If you have a regular plug, stick with a regular, if you have a platinum stick with it, if you have an iridium you had better use the same type. If you have a German car probably buy Bosch, if Japaneese probably NGK or Denso, if American probably Champion or Autolite... regardless => this is NOT the place to save $12
This car came with FordMoCo ILTR5A-13G Laser Irridium (by NGK re-branded for FordMoCo and used in Mazda & Fords)..
My replacements were NGK ILTR5A-13G Laser Iridium... they ARE the EXACT same plug only $12.73each vs $28.99 each
******************************
I personally put anti-seize (of the same type of metal) on the threads, but I do it VERY light... I dab it and then use a dry brush to wipe it all off just leaving the threads tinted. I.e. If you don't have copper threads, don't use a copper anti-seize.
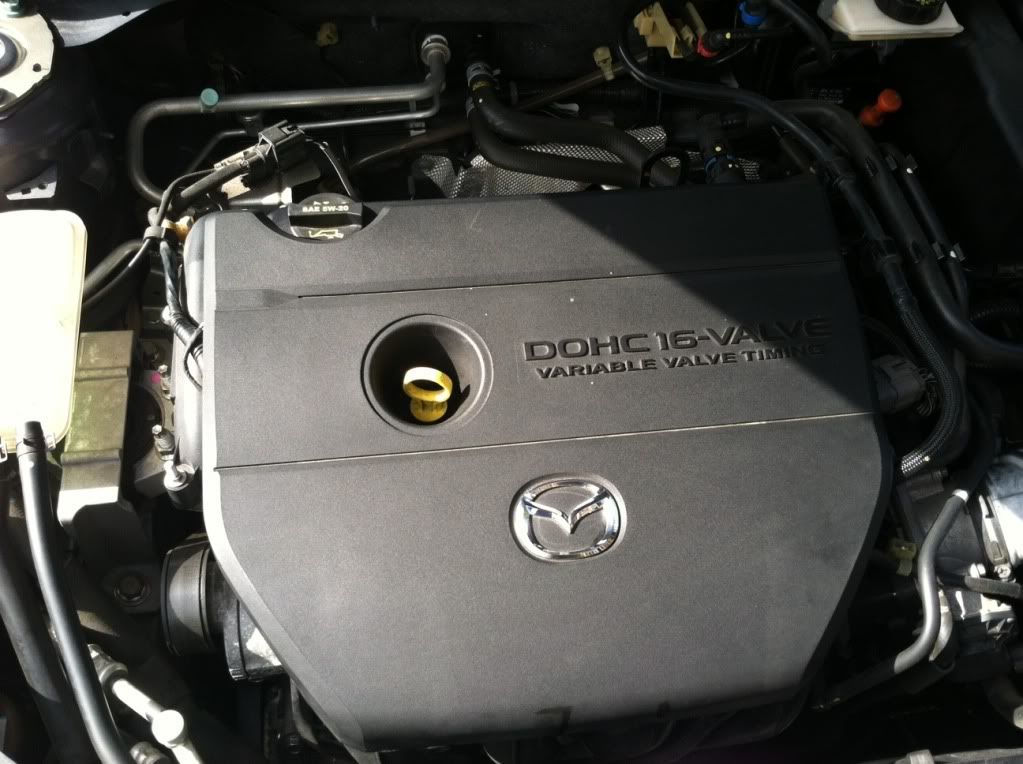
First I removed the plastic cover:
I then used a 15mm wrench to remove the plastic clips that serve to hold the plastic cover in place:
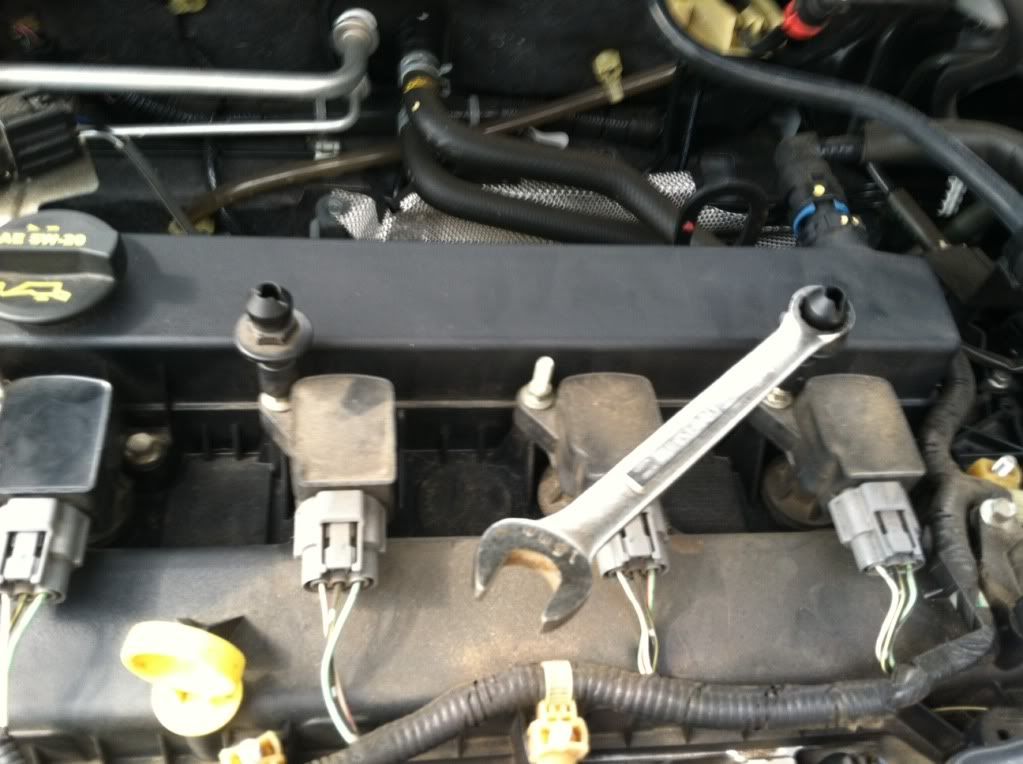
Next, I removed the coil pack bolts... These are NOT nuts but bolts with their heads very low, so you need a deep socket... I think they are 9mm but cannot remember. Regardless if you have a metric deep socket set, you should be all set.
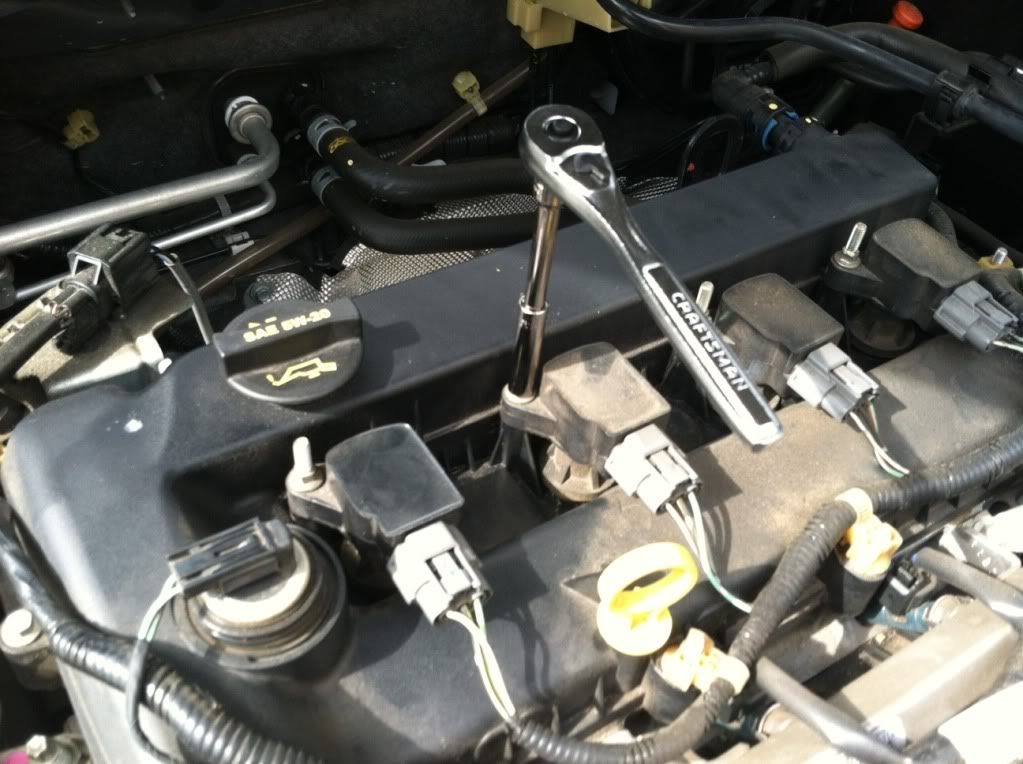
I then removed the wires that feed the coil packs. On this particular car you cannot get them mixed up:
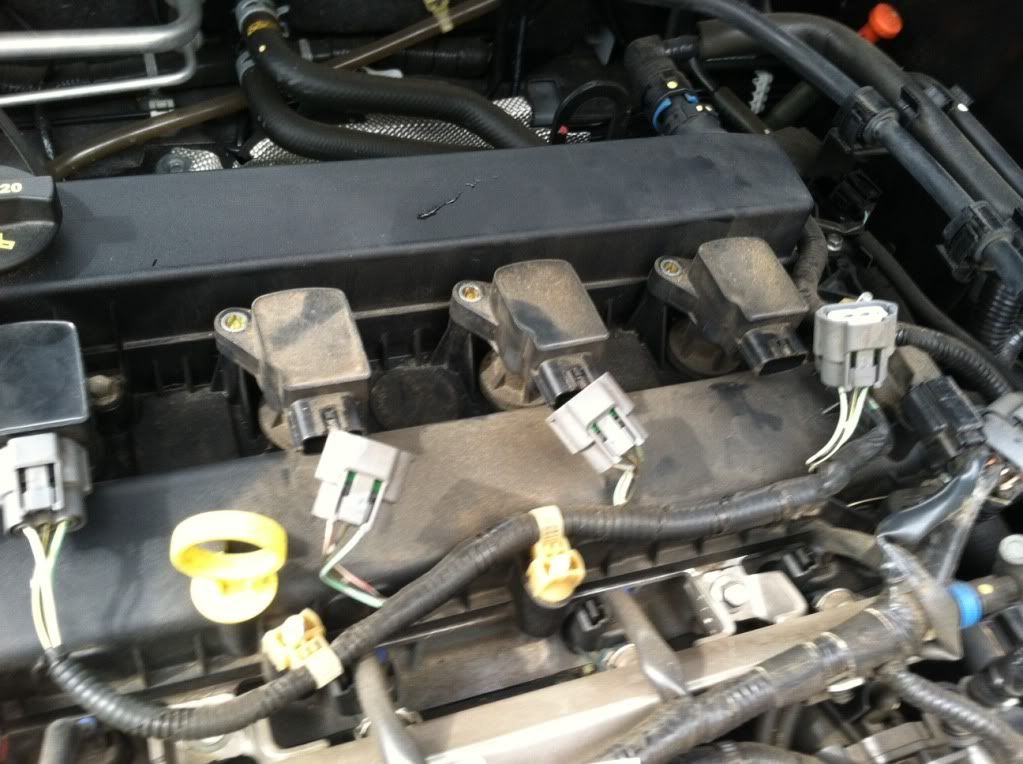
The coil packs look like this by the way. If you EVER have ignition problems on any modern car (I never have had any issues), it would be either one of these coil packs (90% of the time) or a spark plug. Regardless to troubleshoot replace ALL the plugs and then with an ODBII scanner (free to borrow at most auto parts stores) re-scan... Then you would use common sense and flip any two coil packs and see if the problem moves or stays with that cylinder... IF you ever remove a spark plug and there is arching down the insulator, you MUST replace that plug (should do them all) and that coil pack.
USE COMPRESSED AIR TO BLOW ALL DEBRIS BEFORE REMOVING A PLUG... DO NOT GET DIRT, DUST, DEBRIS INTO THE ENGINE:
Most cars like this one use a 5/8th Inch Spark Plug socket, which has a rubber gripper at the top to retain the plug, so you can lift it out. Otherwise it would be hard to remove a plug like this because it is kind of buried like you see above.
USE ONLY HANDTOOLS... NEVER USE AIR TOOLS WHEN WORKING WITH DELICATE THREADS. If you damage the threads, you WILL need a new engine head!

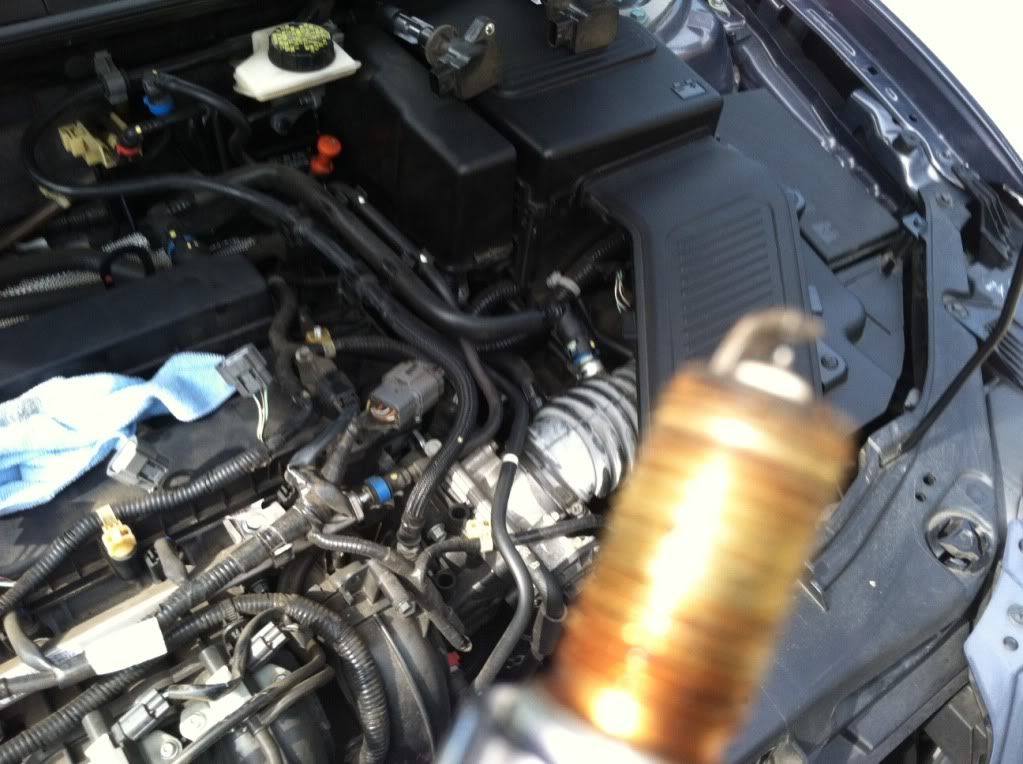
These plugs actually look pretty good. They are NOT fouled, covered in carbon, no arching marks on the insulator, no chipped insulator cone, no metal missing from the iridium electrode (i.e. detonation)... they actually look like they could take two to three times the wear they have before failing, BUT I replaced them anyway. It is GOOD to see the engine is healthy.
Start your new Plugs by HAND... WITHOUT any tools... Just use an extension only! Start by turning Counter-Clockwise until the threads drop into place ... DO NOT CROSSTHREAD!!!
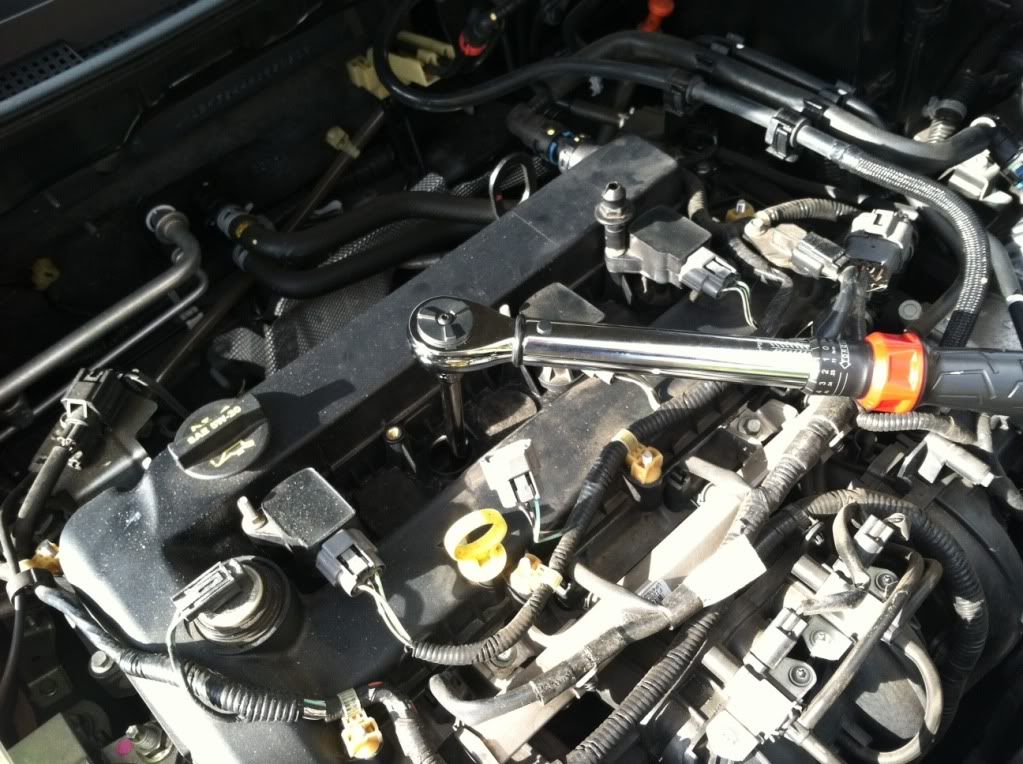
USE a torque-wrench! NEVER trust yourself. These call for 9 foot-pounds ONLY. In contrast Lug Nuts, which you are used to call for around 80 foot pounds! Without a torquewrench, you WILL overtighten AND DAMAGE. 9 Foot Pounds == 108 Inchpounds. Make SURE to use a wrench where your torque values are roughly half way up the scale for most accuracy.[/B]
Reconnect CoilPacks and check if you should use di-eletric grease. With some cars you should... some you shouldn't. Mine did NOT have a note either way but the factory did not use di-eletric grease, so I didn't use it.
Test the engine... It should run the same or smoother. Mine ran exactly the same (as far as I could tell). I did, however, pick up an additional 2 miles per gallon though it could just as easily be different driving habits. Unless you have a problem, this is preventative only... but it should prevent problems down the road.
Obviously, I replaced those 15mm plastic clips and the cover. My savings were roughly $150 to $160, and this seriously took me only 40 minutes. Not only that I got the satisfaction of doing it myself and the satisfaction of knowing the job was done right to factory specs, with factory parts, as clean as possible with care not to get debris into the engine, that gaps were checked, proper torque was applied etc. <==That peace of mind is worth the 40 minutes!
If you want a job that you KNOW is done right, do it yourself.
The Dealership quoted $196 for doing the spark plugs!
Personally, I figured that is WAY to much, so I purchased the EXACT right plugs. I have a theory that you should ALWAYS stick with the factory plug... especially, DON'T change type or heat ratings. If you have a regular plug, stick with a regular, if you have a platinum stick with it, if you have an iridium you had better use the same type. If you have a German car probably buy Bosch, if Japaneese probably NGK or Denso, if American probably Champion or Autolite... regardless => this is NOT the place to save $12
This car came with FordMoCo ILTR5A-13G Laser Irridium (by NGK re-branded for FordMoCo and used in Mazda & Fords)..
My replacements were NGK ILTR5A-13G Laser Iridium... they ARE the EXACT same plug only $12.73each vs $28.99 each
******************************
I personally put anti-seize (of the same type of metal) on the threads, but I do it VERY light... I dab it and then use a dry brush to wipe it all off just leaving the threads tinted. I.e. If you don't have copper threads, don't use a copper anti-seize.
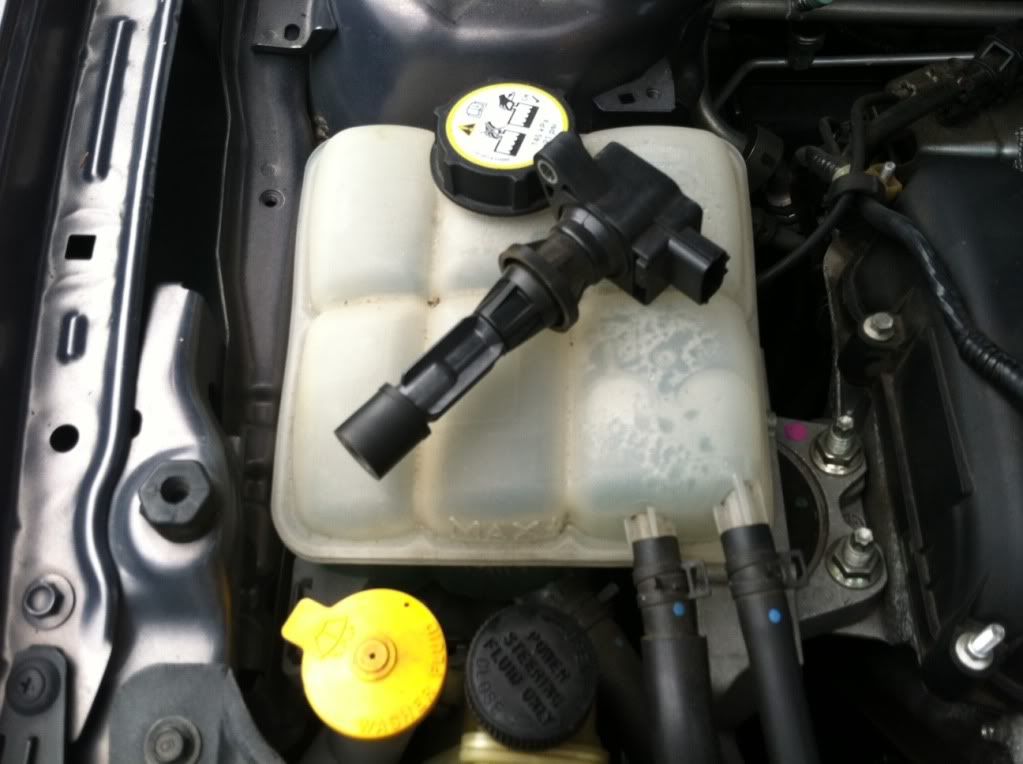
First I removed the plastic cover:
I then used a 15mm wrench to remove the plastic clips that serve to hold the plastic cover in place:
Next, I removed the coil pack bolts... These are NOT nuts but bolts with their heads very low, so you need a deep socket... I think they are 9mm but cannot remember. Regardless if you have a metric deep socket set, you should be all set.
I then removed the wires that feed the coil packs. On this particular car you cannot get them mixed up:
The coil packs look like this by the way. If you EVER have ignition problems on any modern car (I never have had any issues), it would be either one of these coil packs (90% of the time) or a spark plug. Regardless to troubleshoot replace ALL the plugs and then with an ODBII scanner (free to borrow at most auto parts stores) re-scan... Then you would use common sense and flip any two coil packs and see if the problem moves or stays with that cylinder... IF you ever remove a spark plug and there is arching down the insulator, you MUST replace that plug (should do them all) and that coil pack.
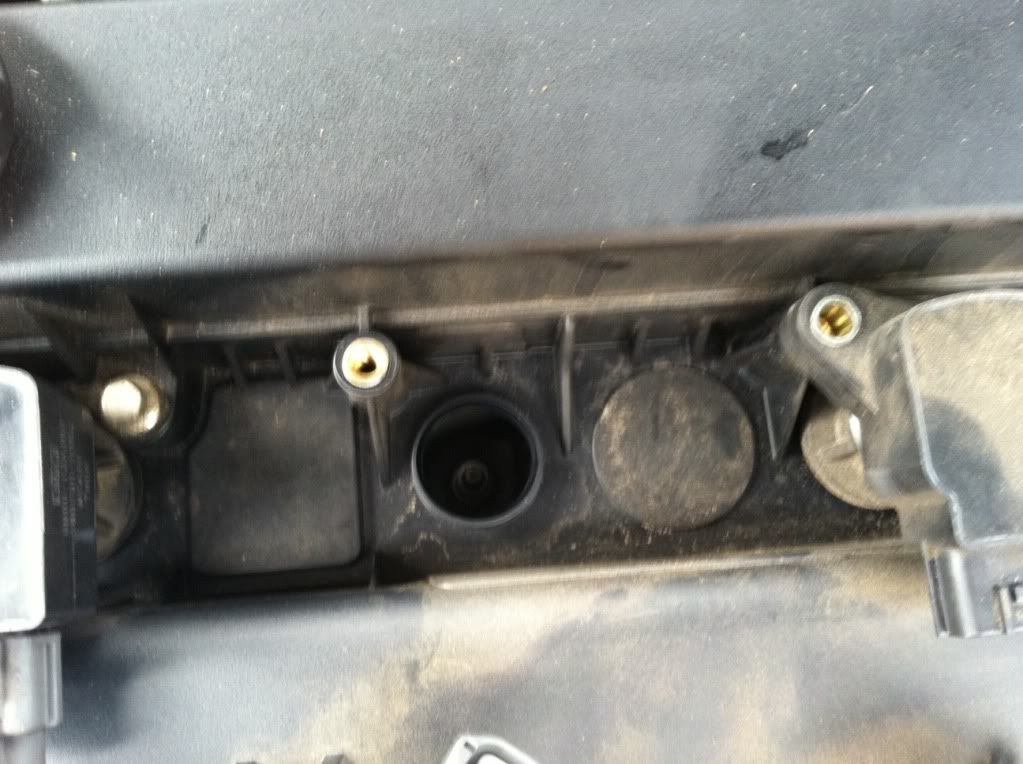
USE COMPRESSED AIR TO BLOW ALL DEBRIS BEFORE REMOVING A PLUG... DO NOT GET DIRT, DUST, DEBRIS INTO THE ENGINE:
Most cars like this one use a 5/8th Inch Spark Plug socket, which has a rubber gripper at the top to retain the plug, so you can lift it out. Otherwise it would be hard to remove a plug like this because it is kind of buried like you see above.
USE ONLY HANDTOOLS... NEVER USE AIR TOOLS WHEN WORKING WITH DELICATE THREADS. If you damage the threads, you WILL need a new engine head!
These plugs actually look pretty good. They are NOT fouled, covered in carbon, no arching marks on the insulator, no chipped insulator cone, no metal missing from the iridium electrode (i.e. detonation)... they actually look like they could take two to three times the wear they have before failing, BUT I replaced them anyway. It is GOOD to see the engine is healthy.
Start your new Plugs by HAND... WITHOUT any tools... Just use an extension only! Start by turning Counter-Clockwise until the threads drop into place ... DO NOT CROSSTHREAD!!!
USE a torque-wrench! NEVER trust yourself. These call for 9 foot-pounds ONLY. In contrast Lug Nuts, which you are used to call for around 80 foot pounds! Without a torquewrench, you WILL overtighten AND DAMAGE. 9 Foot Pounds == 108 Inchpounds. Make SURE to use a wrench where your torque values are roughly half way up the scale for most accuracy.[/B]
Reconnect CoilPacks and check if you should use di-eletric grease. With some cars you should... some you shouldn't. Mine did NOT have a note either way but the factory did not use di-eletric grease, so I didn't use it.
Test the engine... It should run the same or smoother. Mine ran exactly the same (as far as I could tell). I did, however, pick up an additional 2 miles per gallon though it could just as easily be different driving habits. Unless you have a problem, this is preventative only... but it should prevent problems down the road.
Obviously, I replaced those 15mm plastic clips and the cover. My savings were roughly $150 to $160, and this seriously took me only 40 minutes. Not only that I got the satisfaction of doing it myself and the satisfaction of knowing the job was done right to factory specs, with factory parts, as clean as possible with care not to get debris into the engine, that gaps were checked, proper torque was applied etc. <==That peace of mind is worth the 40 minutes!


Comment