

 Tweet
Tweet
This is a write up I've been meaning to do for quite some time. This was as fun of a detail as it was filled with constant anxiety. U believe it was 2 years ago that this was completed.
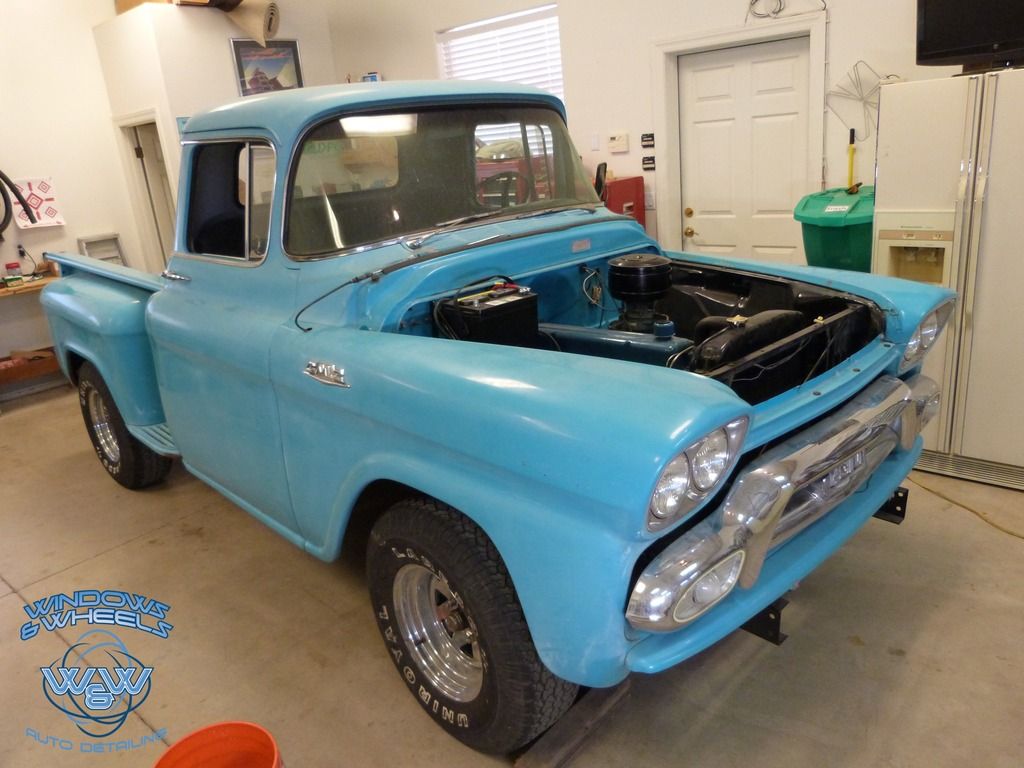
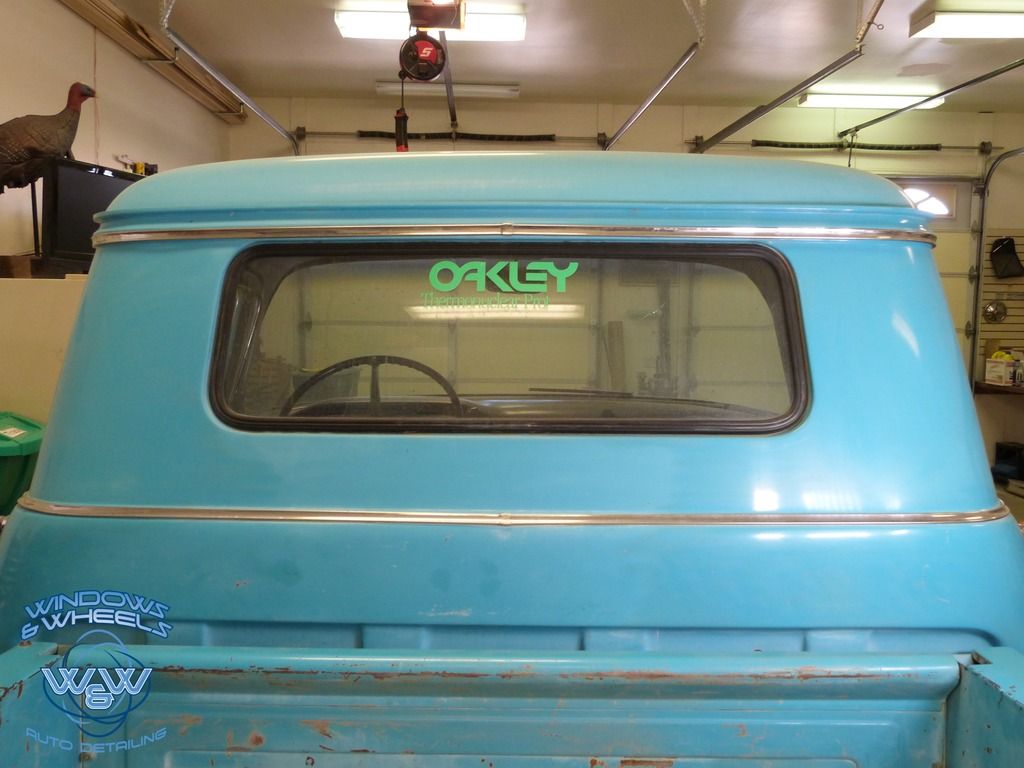
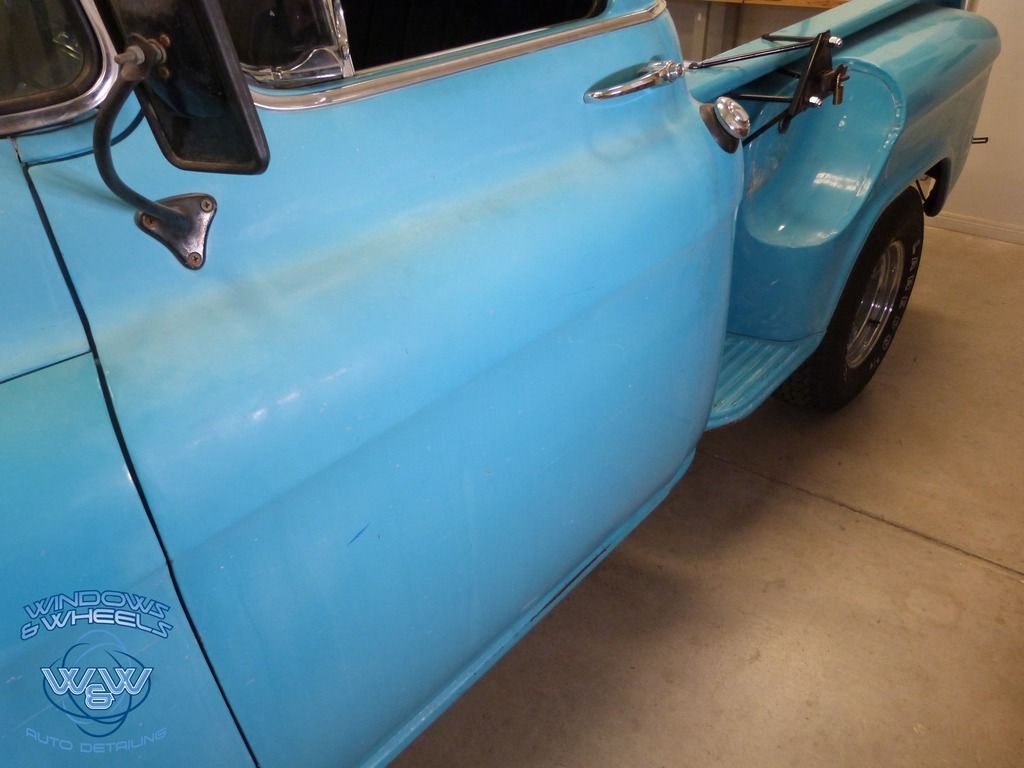
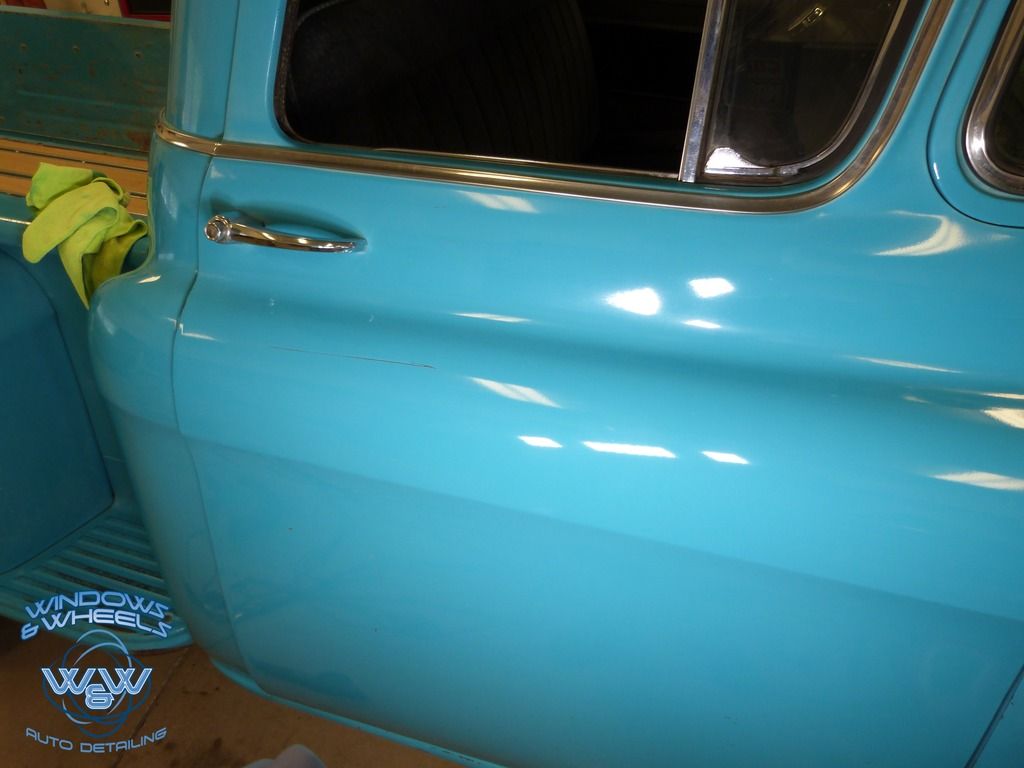
The title says it....original paint on this almost 60 year old GMC pick-up. Here she is:
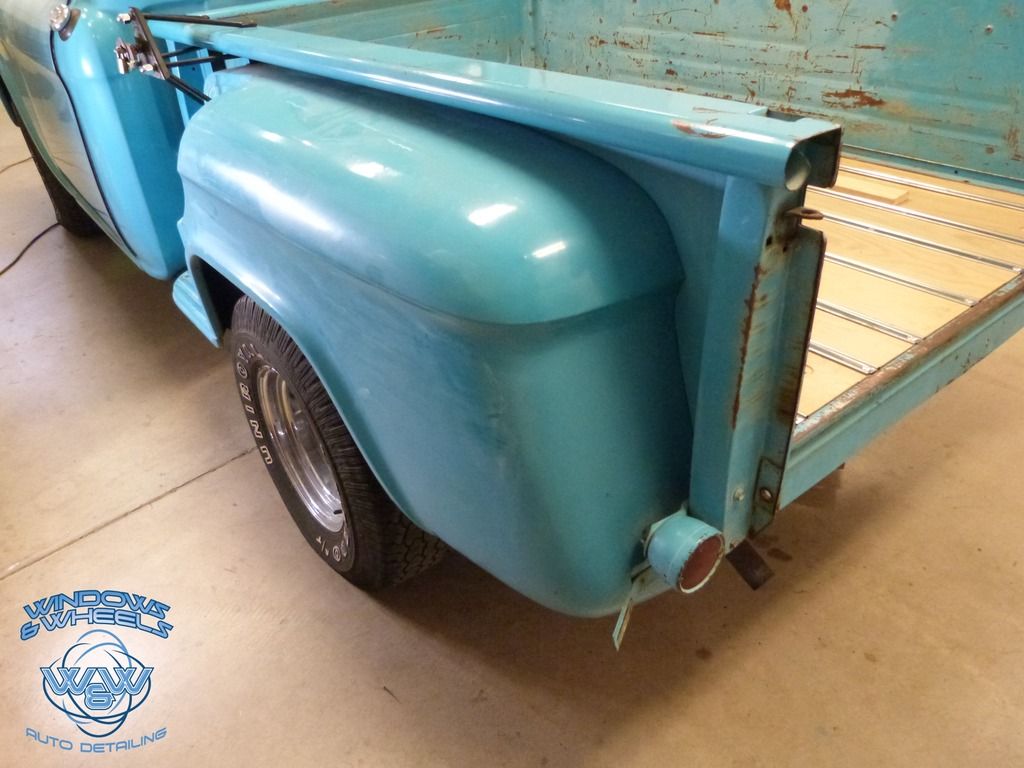
Oh yeah, forgot to mention this isn't a show truck, garage queen, pampered baby. No no, this truck had been in their family since it's origin.....and it was used as a farm truck! Yeahhhh, we're talking super thin spots, rust, oxidation...this truck had lived a true truck life!
The owner had called and spoken with several different detailers (including us) regarding what (if anything) could be done to restore his and his wifes classic 58' GMC. One said there was nothing that could be done, another said he would do it but was charging a pretty low ball price, which made the owner a bit skeptical...and then there was us. Our price was higher than any of the other quotes, but he opted to choose us because he felt we knew what we were talking about...and that we were passionate about what we do. Well...he was right....now lets begin
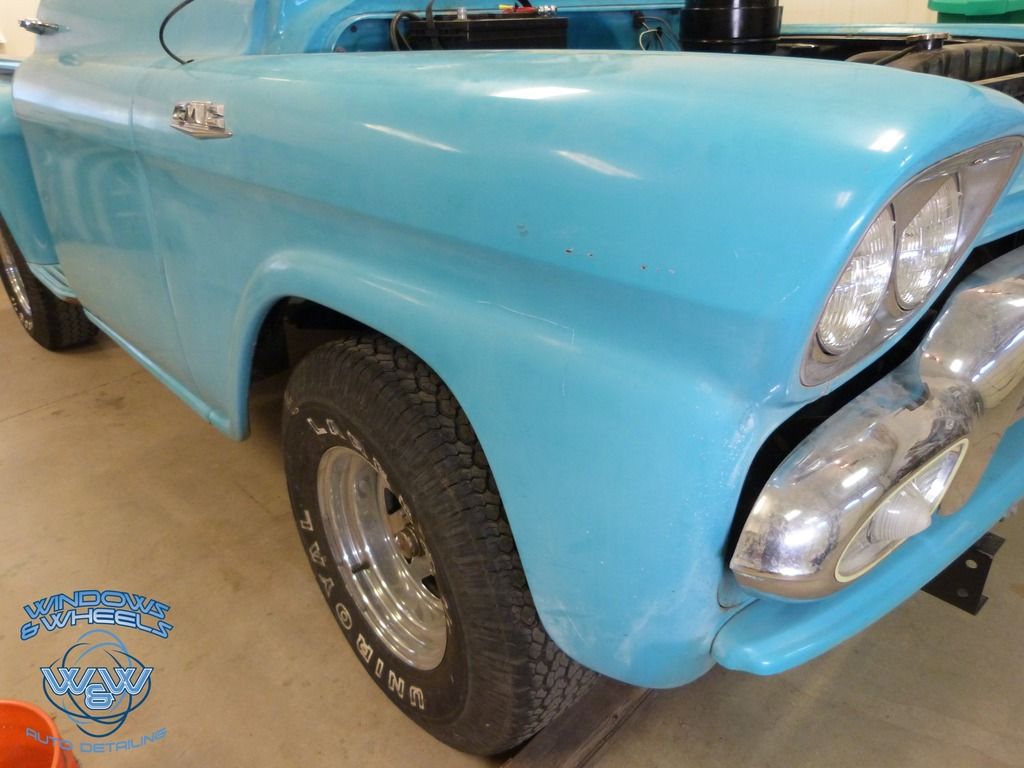
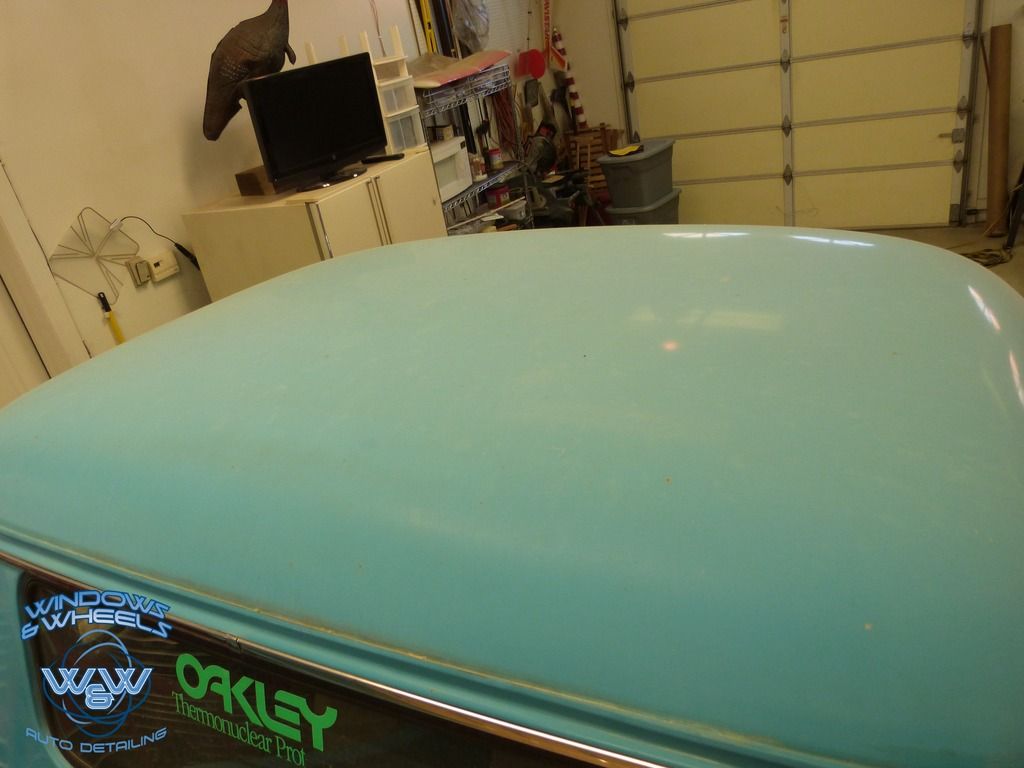
Lets take a closer look:
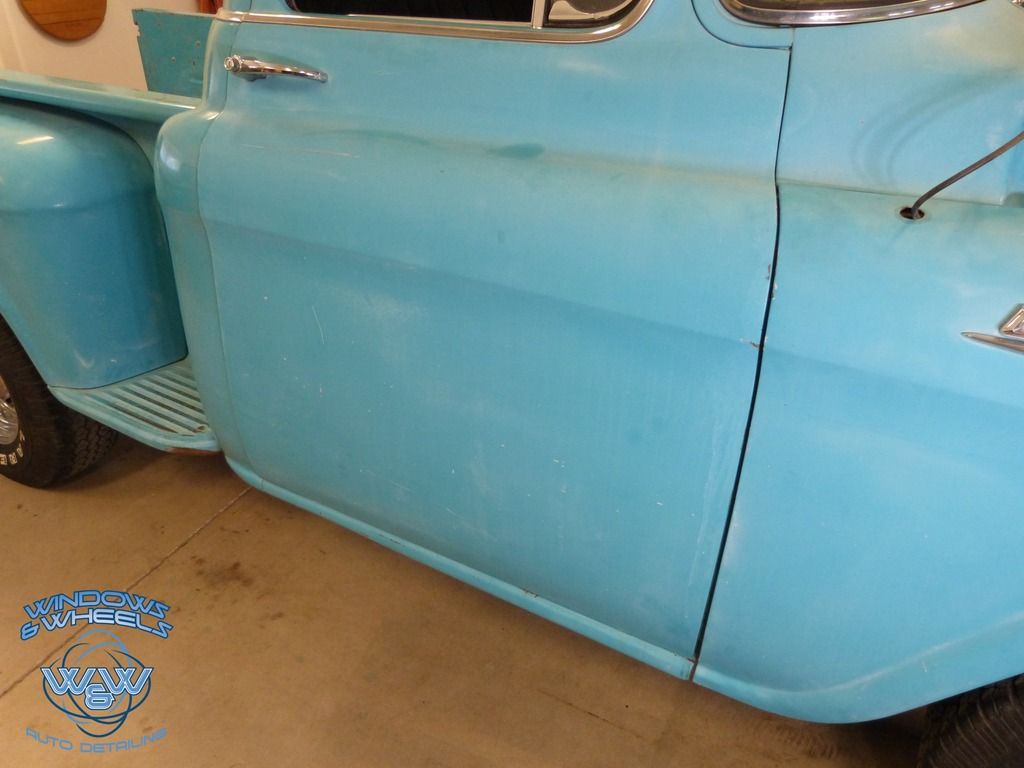
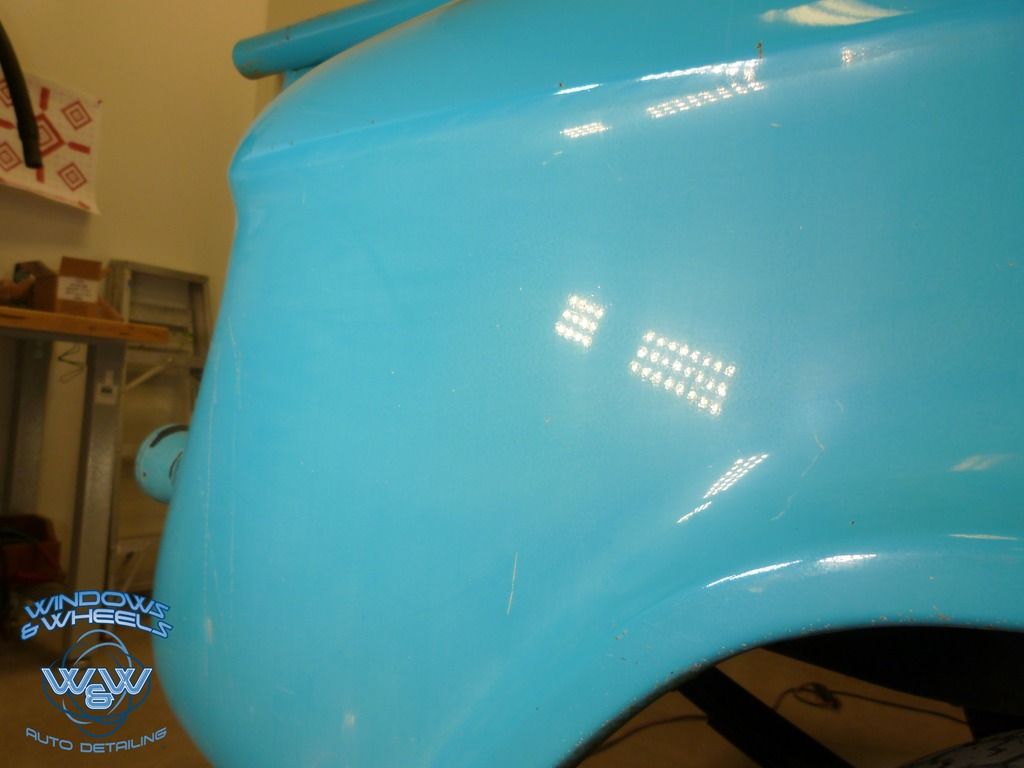
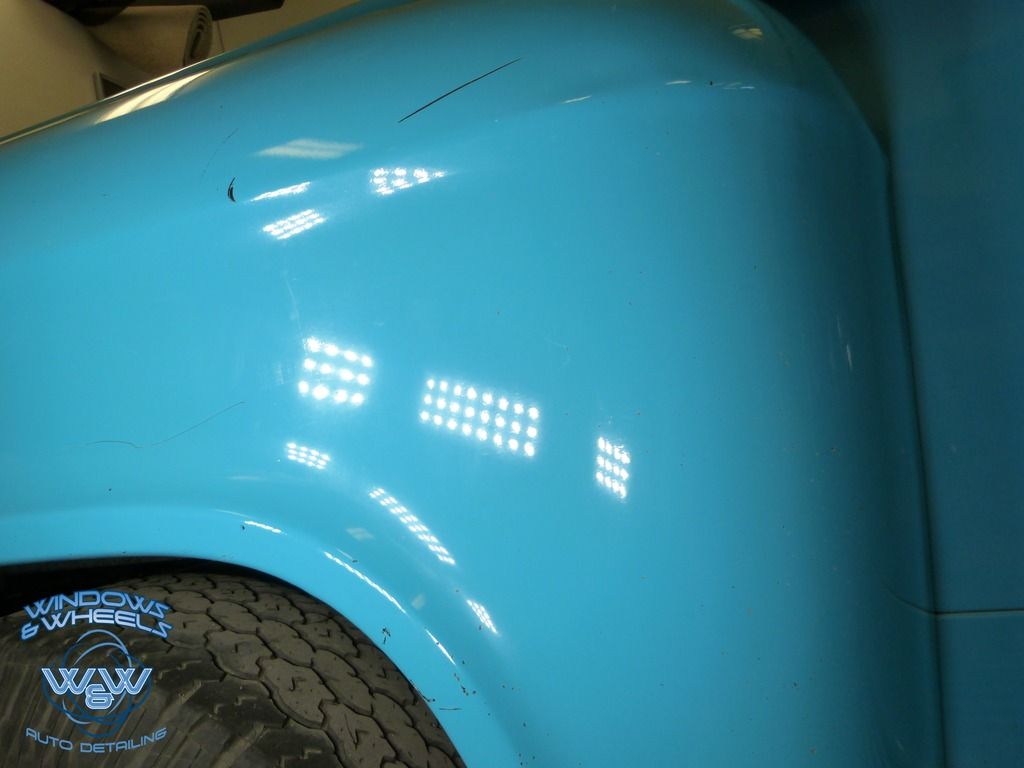
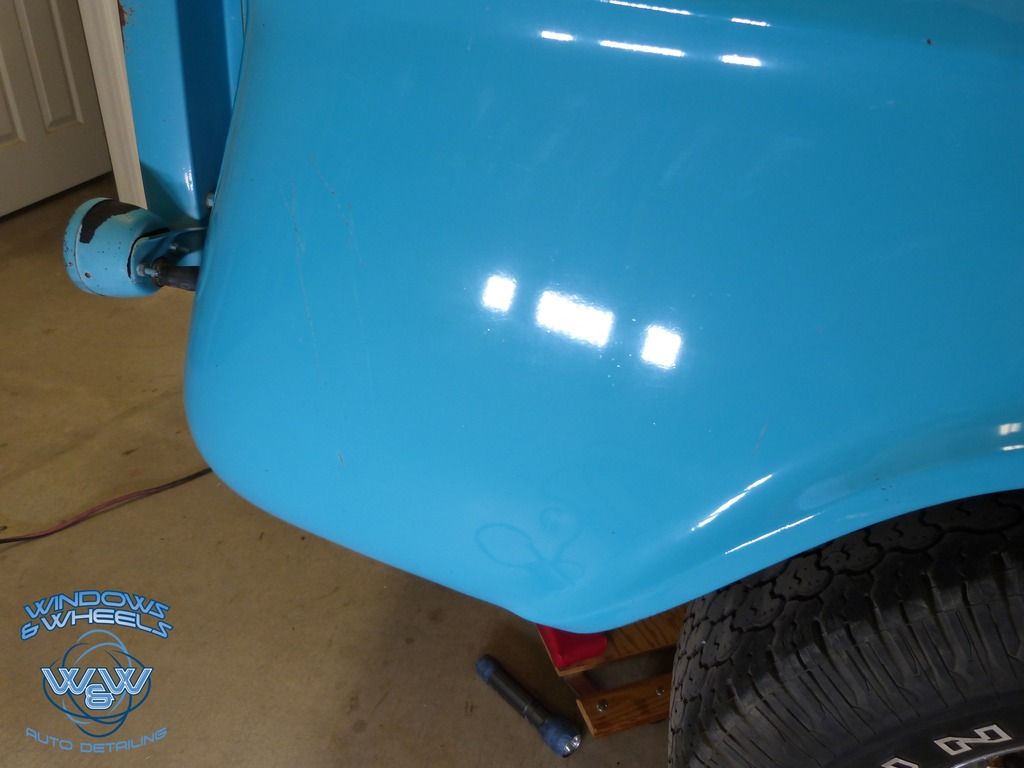
Shiny like a chalk board lol.
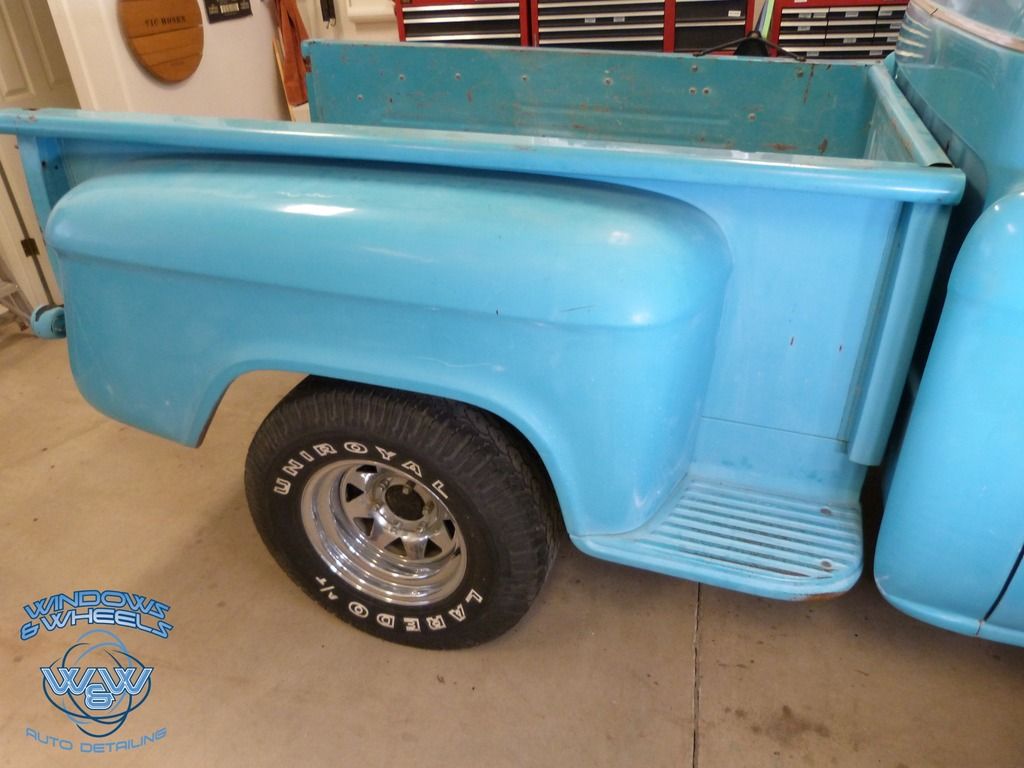
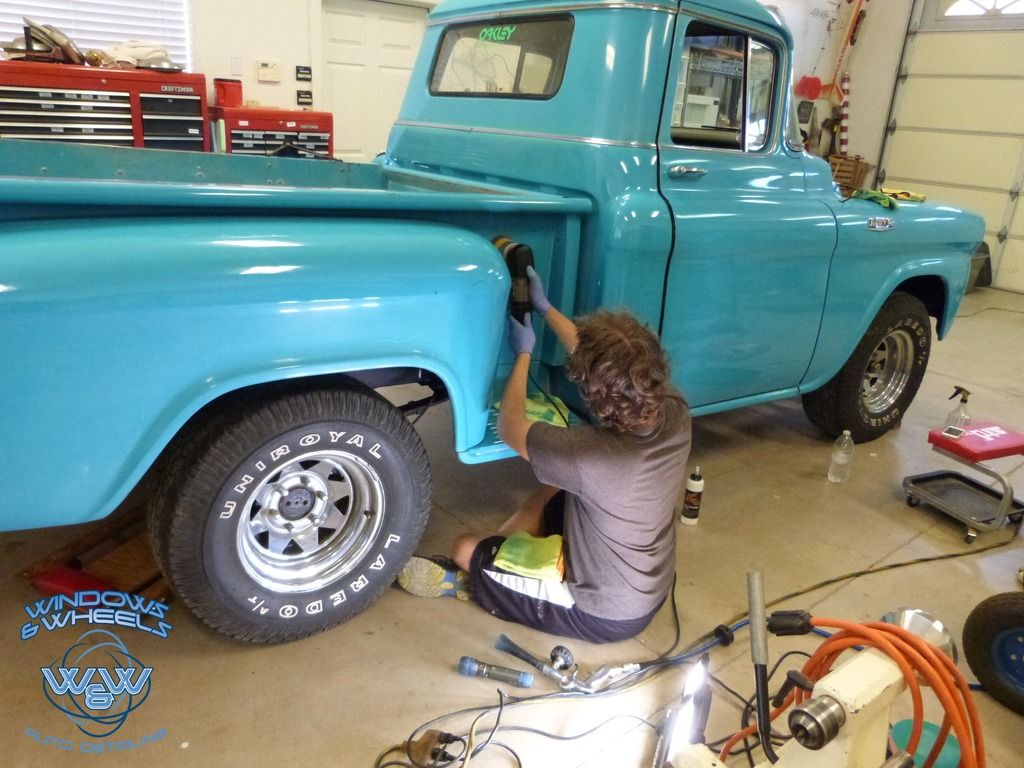
Now you may notice something here...a lot of these areas on the sides of the bed especially - are not "buffer accessible" ...that means a lot of by hand polishing, which we'll get to shortly.
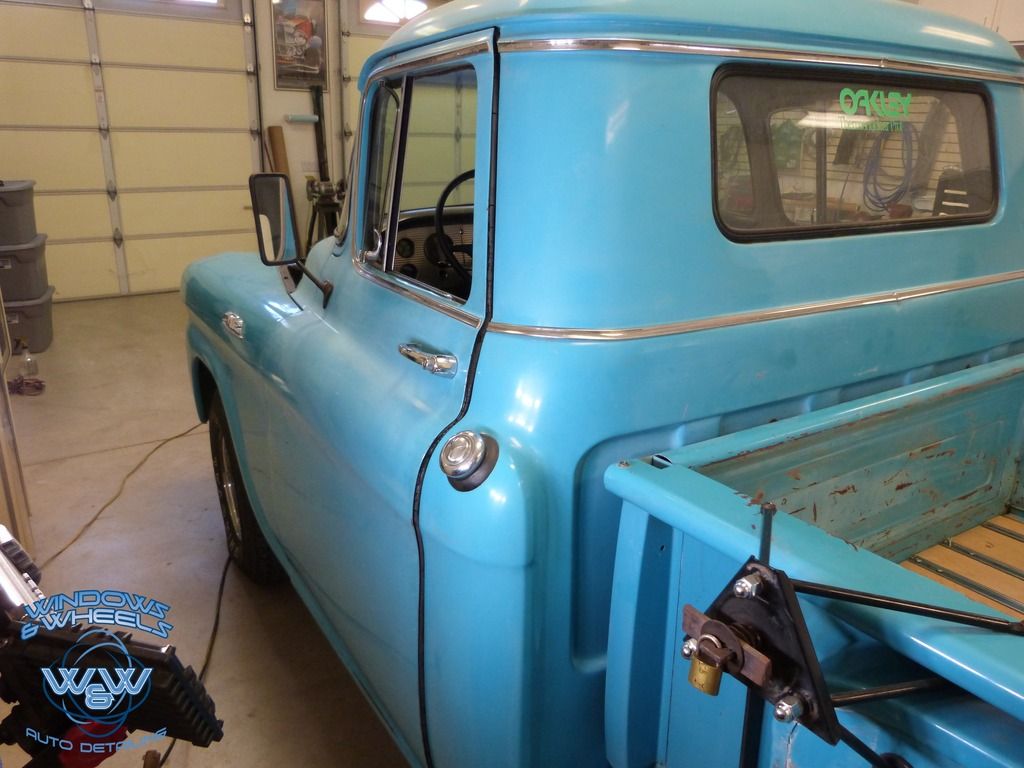
Lets continue the walk around!
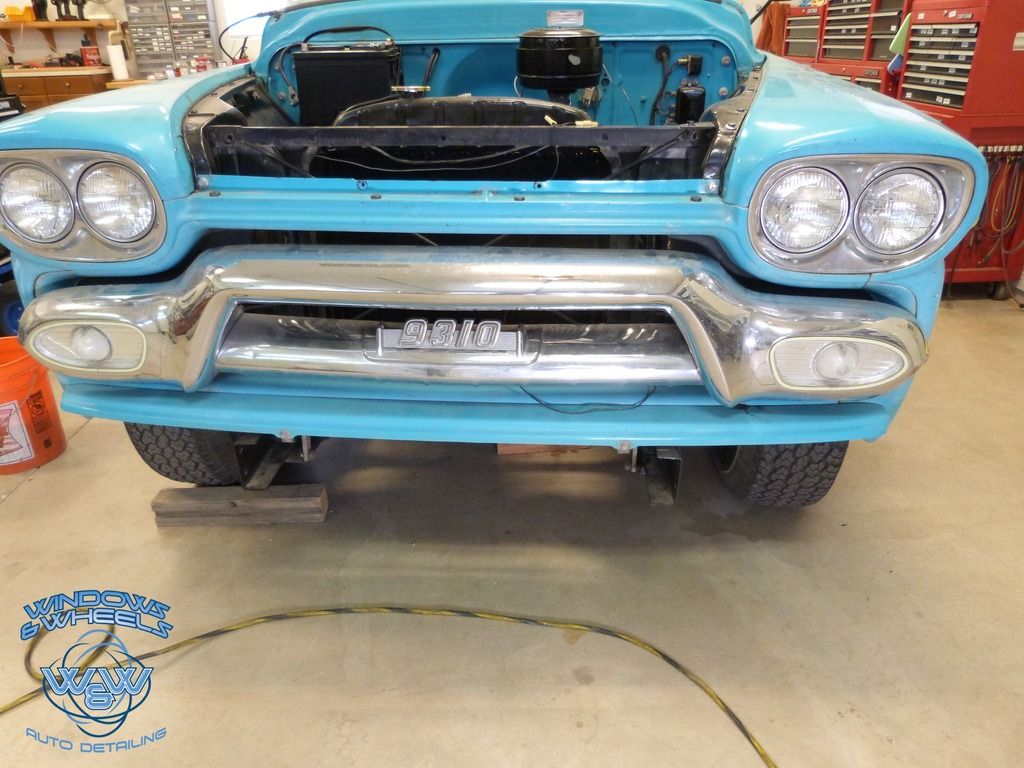
Oh yeah, theres lots of chrome too..yup, lots and lots of chrome!
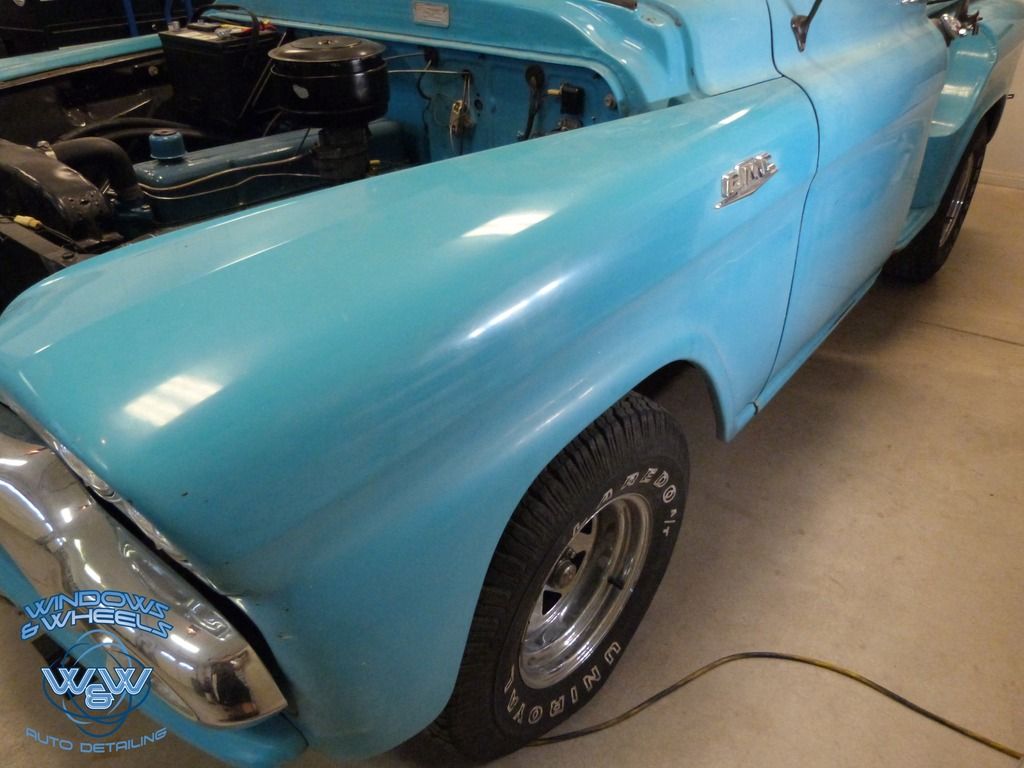
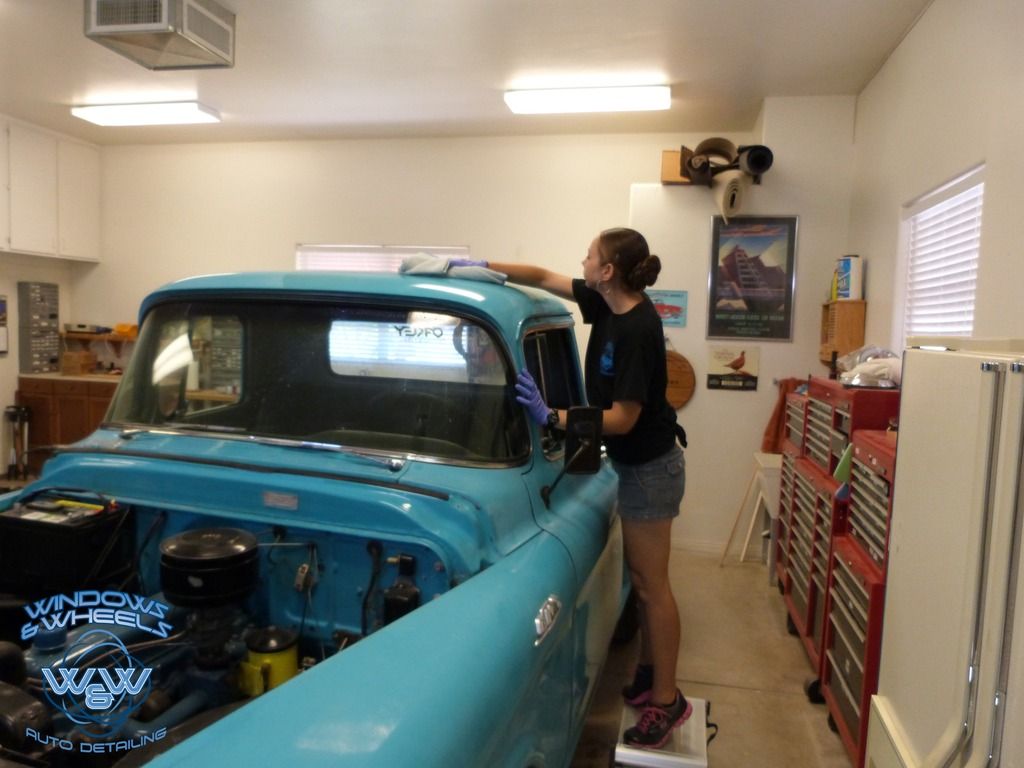
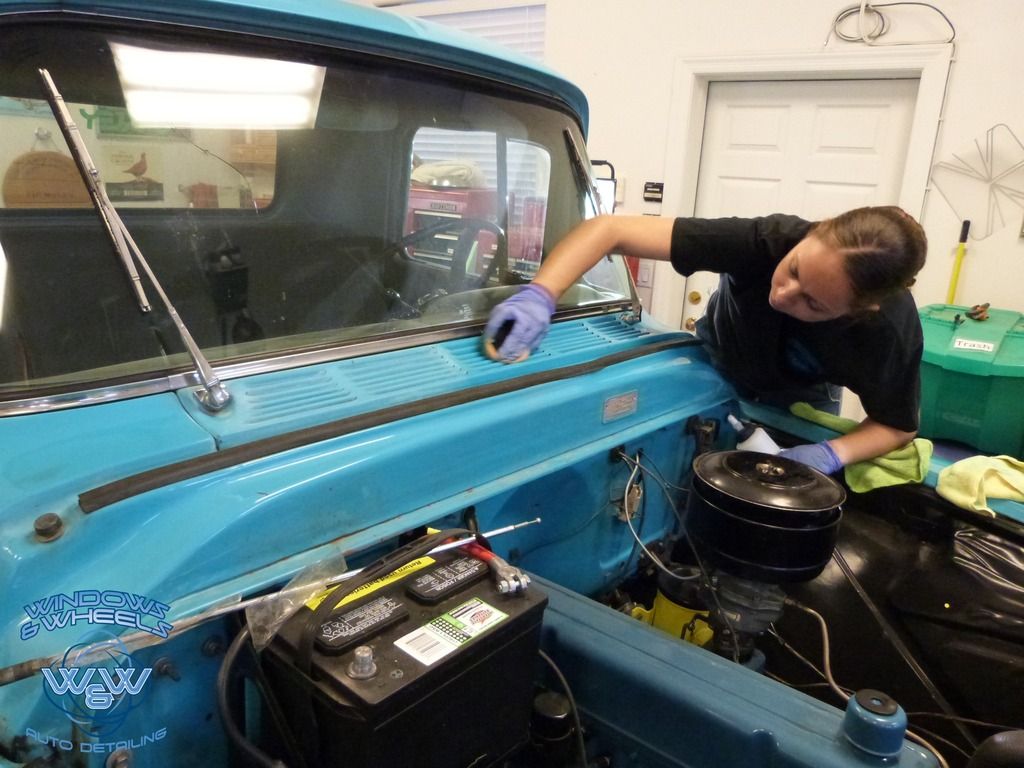
The owner had just completed some serious mechanical reconditioning (thus the hood being removed) and now it was time to make her shine again. First thing we were to deal with was...it wasn't yet running lol. So it was time for a rinseless wash.
Lets get at it!
After a thorough rinseless wash (and a LOT of towels) it was time to clay it because it didn't just look like a chalkboard, it felt like one as well.
After decontaminating the paint it definitely felt much smoother....kinda like a chalk board with lotion on it? Being that the decontamination process thinned some of the oxidation, the truck now also looked like it had chicken pox.
Now for the fun part, working on paint that was measuring UNDER 1 mil in thickness (for a comparison, most modern cars measure between 4-6 mils...this paint was THIN).
Our task, to squeeze as much oxidation removal and shine out of this beautiful classic as possible, with out compromising the extremely thin paint. This was a tricky one for sure.
My first step was to try Meguiars #7 Show Car Glaze. "Correction" was not what i was aiming for here...preservation was. While #7 did a decent job, it took several passes and was still leaving some "blotchy" spots in areas where it did not remove all of the oxidation. It looked 100x better - but i personally wasn't satisfied.
When in doubt - get some advice from someone who knows more than you do about the subject. Time to call Mr. Jason Kilmer - famous for his insane sanding skills and "If you're not burnin' you're not learnin'" mentality. Here's a guy who has more time with just sanding alone than i likely have in detailing in any aspect.
After a 10 min conversation about what we were dealing with, what we had tried and what we felt comfortable with proceeding, we decided to go with one of our most favorite stand by's...Meguiars M205 and a more aggressive polishing pad.
Per our conversation, Jason recommended 205 to help give a LITTLE bite to our process and thought a medium polishing pad would help pull some of the oxidation off without thinning out the paint too much. This made sense to me since 205 is a fairly "wet" polish but does in fact have abrasives.
I tested out an area using a medium cut pad and 205 - and the results were definitely better. But, being that the oxidation was so heavy..i decided to take it a step further and bump it up to a Meguiars 3" foam cutting pad for our small work and a Lake Country Orange cutting pad for the larger areas.
I felt the stiffer and porous pads would do a better job at collecting the oxidation and not cake up so quickly and that as long as i kept the pressure and speed low and did fairly quick arm passes, i'd get away with my surgical goals lol.
My intuition was right...and this old girl started coming back to life.
Now the challenge was on. If you've ever polished single stage paint, specifically oxidized single stage paint, you'll know one of the biggest issues is having your pad get caked up.
Fortunately the owner had a compressor (we had to do this job mobile for obvious reasons) for us to hook up our Tornador to and let me tell you, it is the BEST pad cleaning tool ive ever used (foam or microfiber)
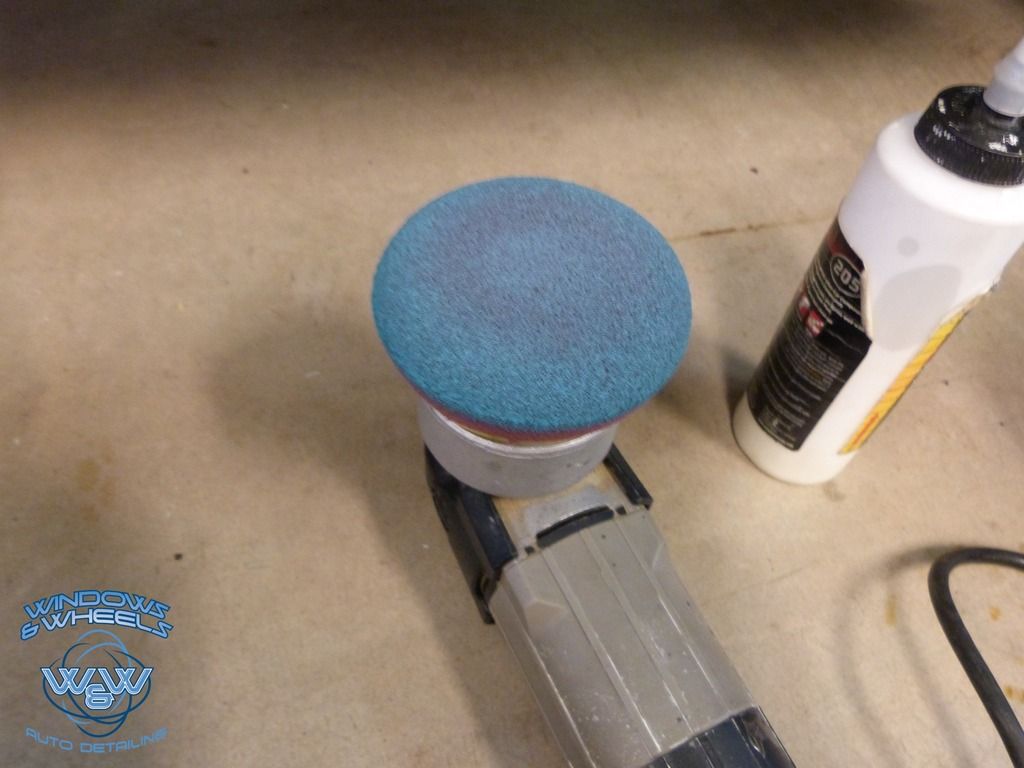
I know it looks like a blue pad, but its actually maroon! Just blue from paint.
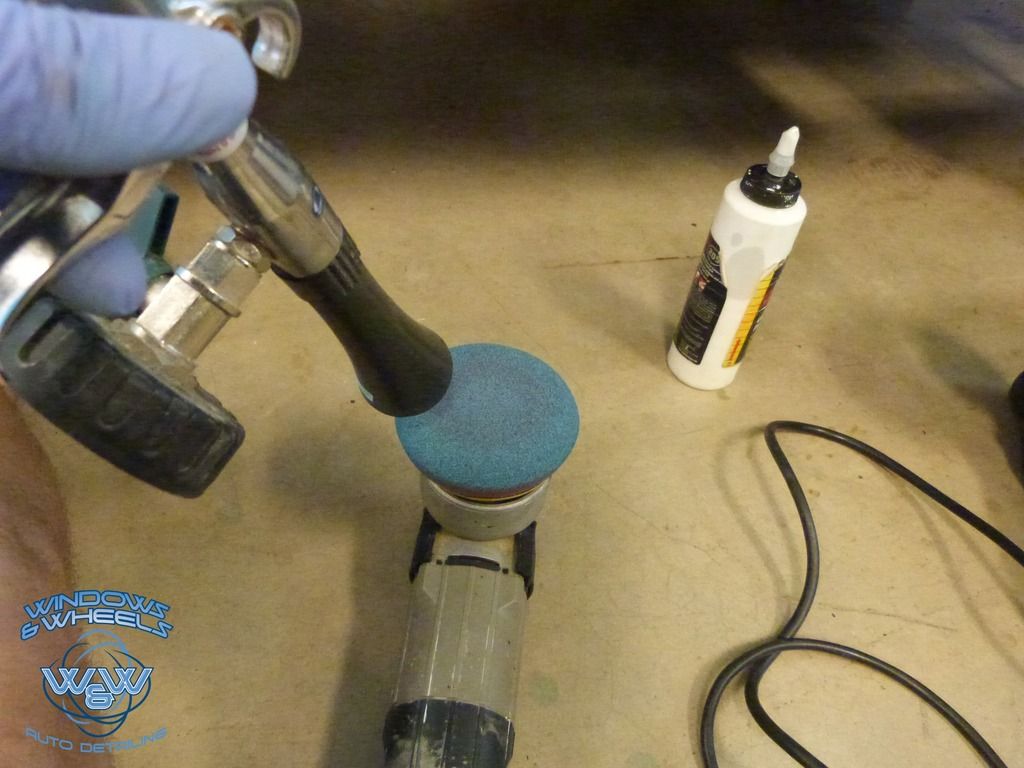
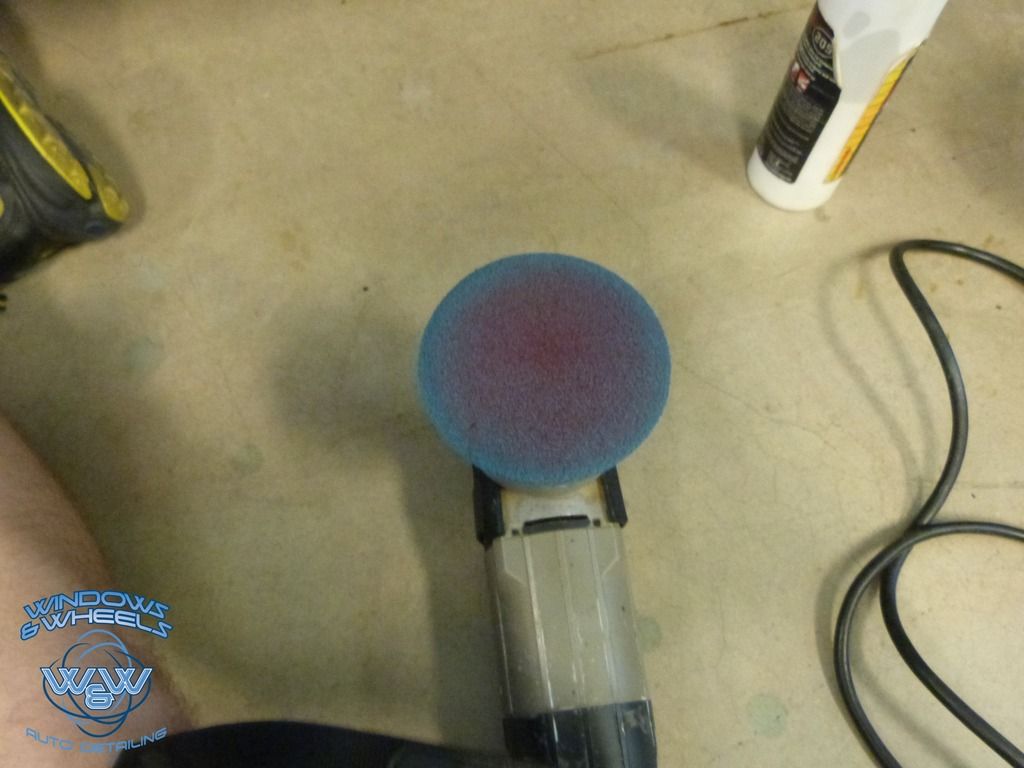
Bam...ready to go. This was something we were having to do after each section to maintain consistent results section by section...but hey, thats what we do.
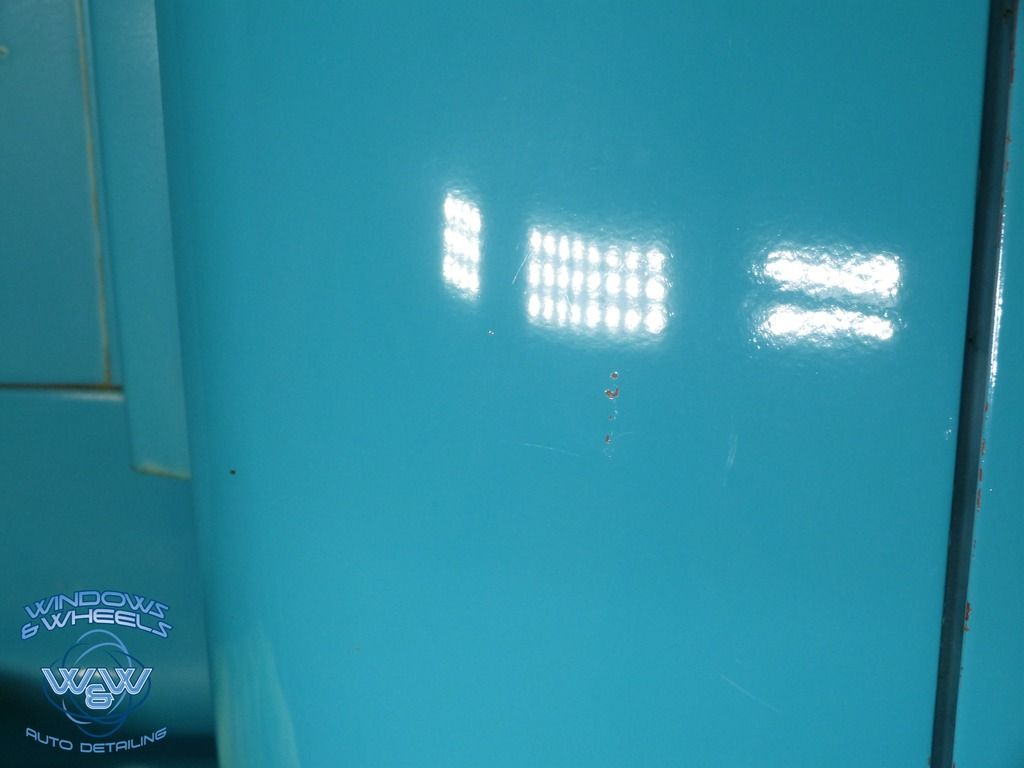
Shiny! Well except the rust...just ignore that part....
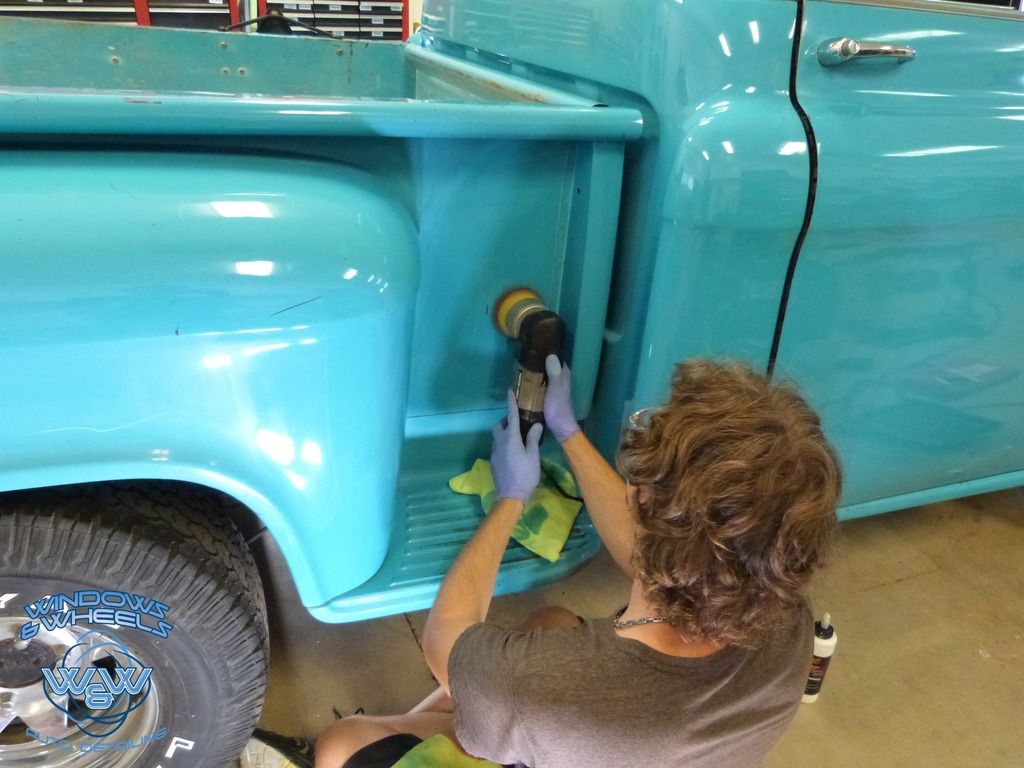
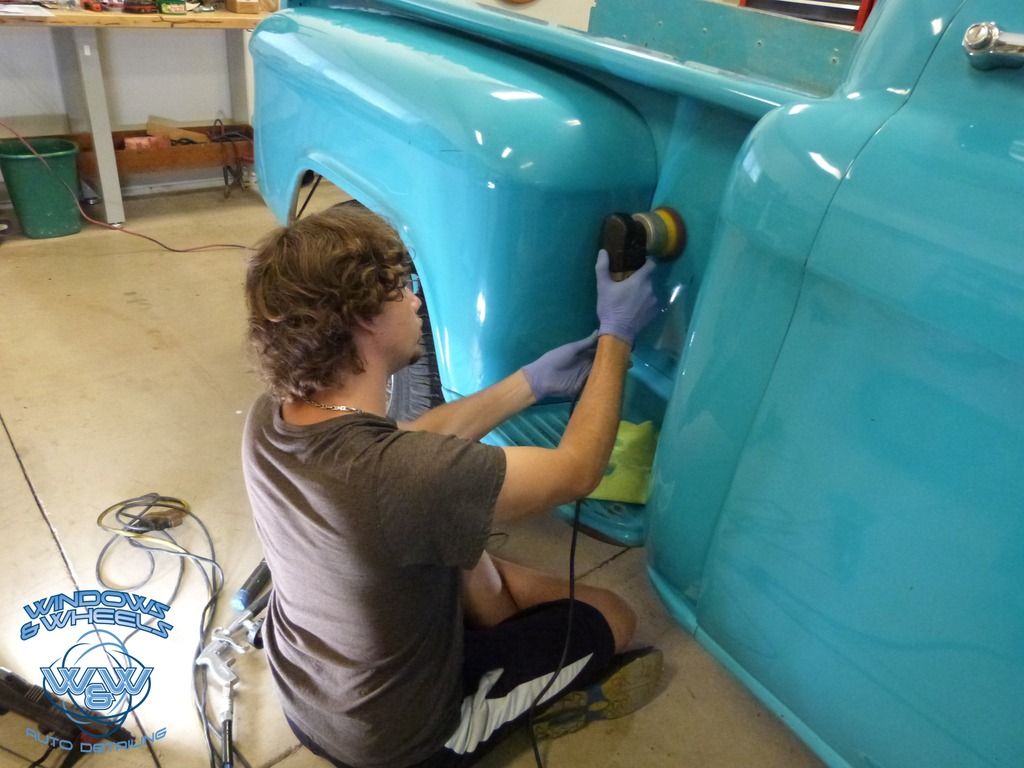
Panel by panel we CAREFULLY worked every section of this truck.
Oh yeah!
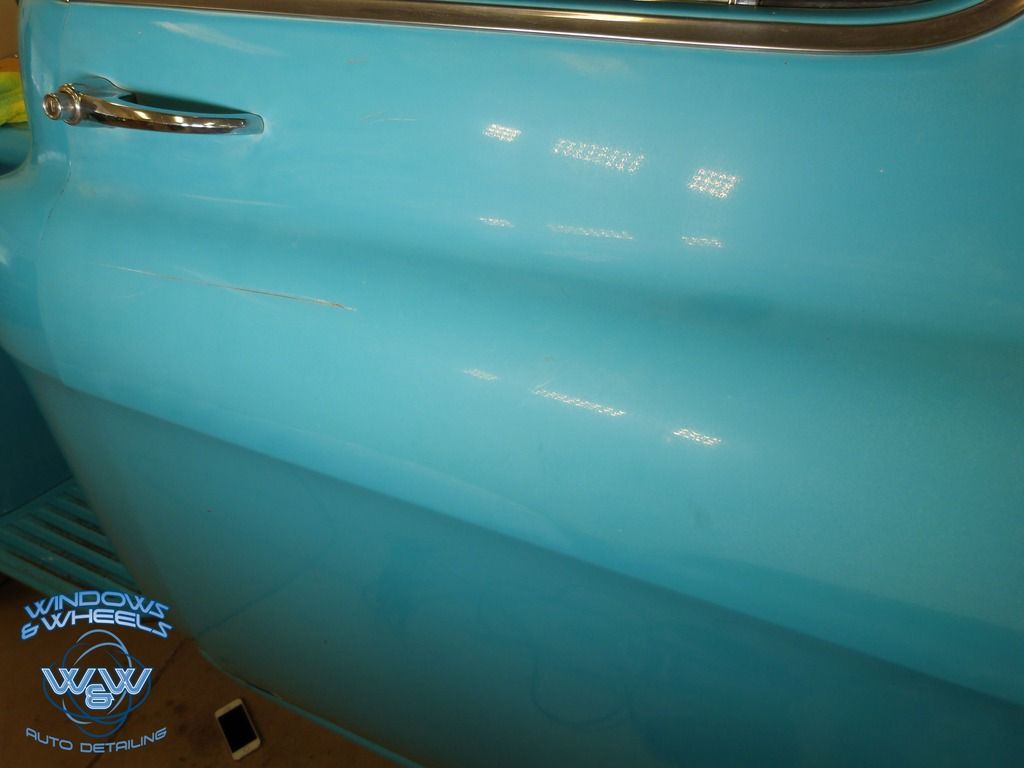
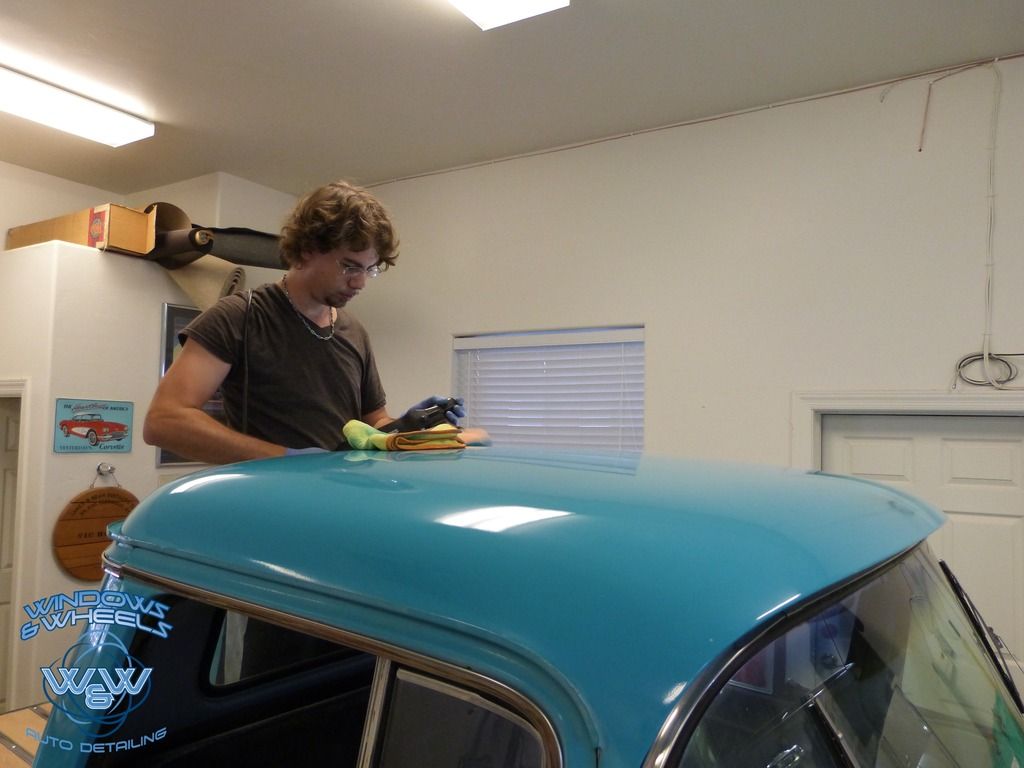
Another interesting point. They eye catcher is the big glowing door...however, note the thin strips of paint going up along the a-pillar and along the edge of the door. This was before we had an iBrid Rupes polisher...so once again, this was mostly done by hand. And who better to do that than...well...sure as hell not me! Daniela! *Que super hero music*
We thought out our process and decided I'd hit each tight area (such as this) as close as i could and get into as many deep pockets as i could. Then, whatever was left, Dani would attack by hand. This way she wasn't having to guess how far into those pockets i could get (and potentially missing spots) - also, she wasn't having to do any EXTRA work by hand by polishing these areas by hand and covering too large of a section that i could have hit with a machine. Makes sense right!
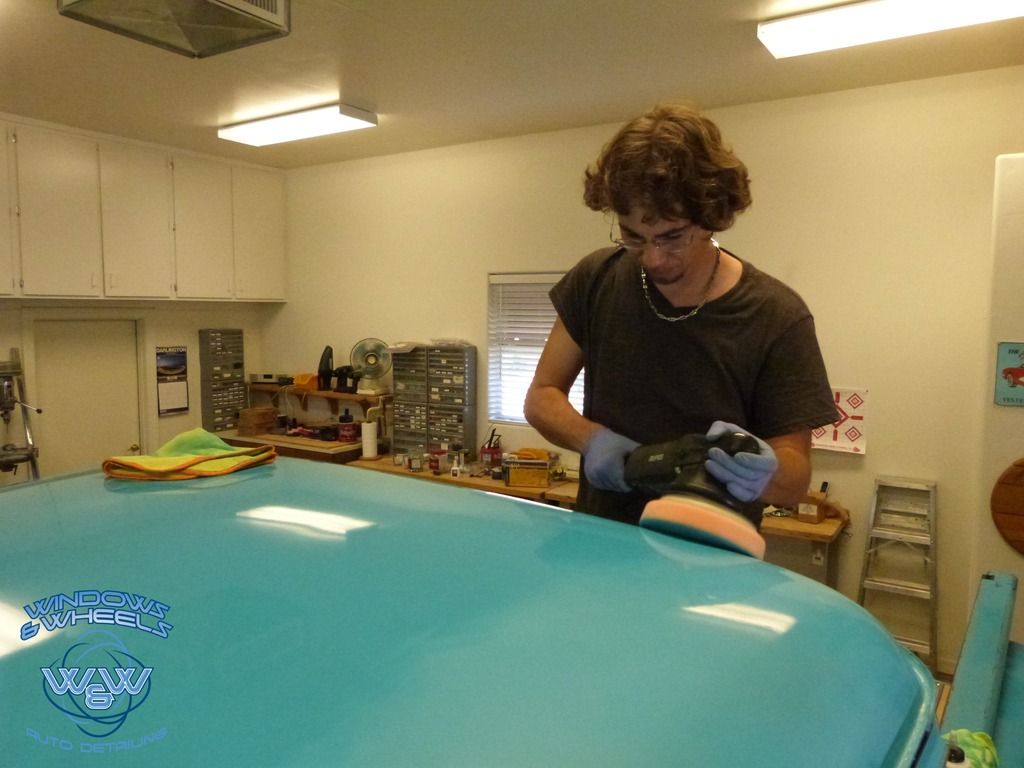
Hard to believe 2 years prior to this i was bald...lol. Our trusty dusty Porter Cable 7424 was a beast in the small areas. First machine we ever bought and still going strong today (well, it needs a new cord, but she still runs)
As you can tell from the above photo, we'd been working hard and making a lot of progress. This truck was coming back to life in a way we weren't even expecting.
Going from a chalky mess:
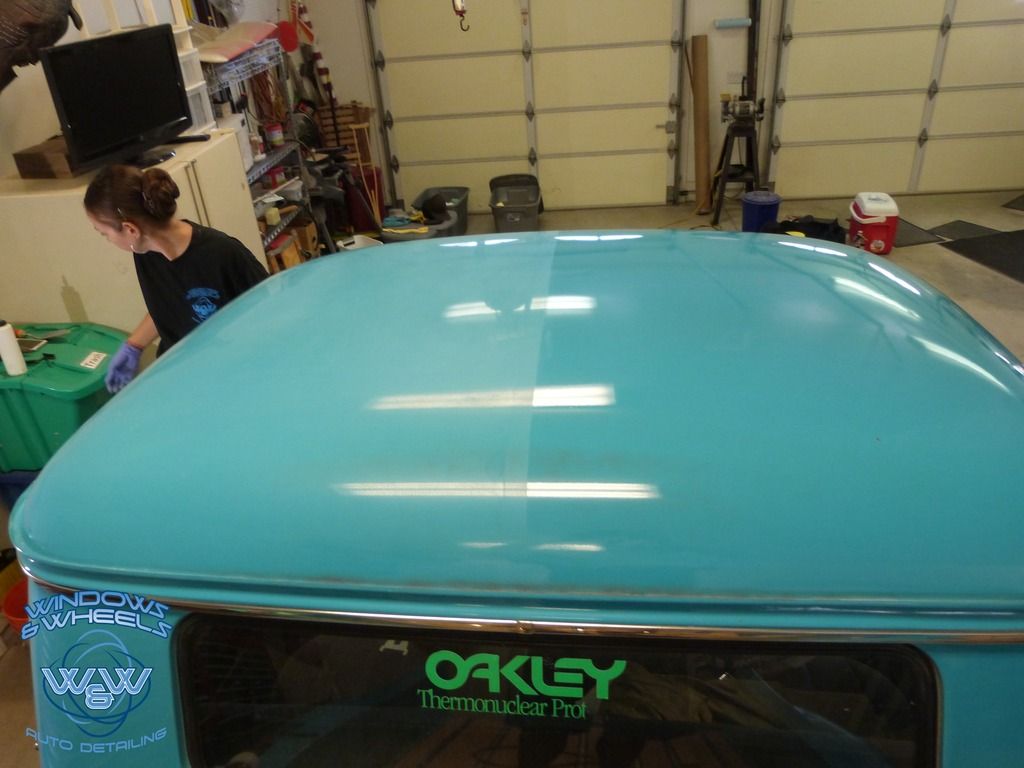
To as shiny as a blue M&M!
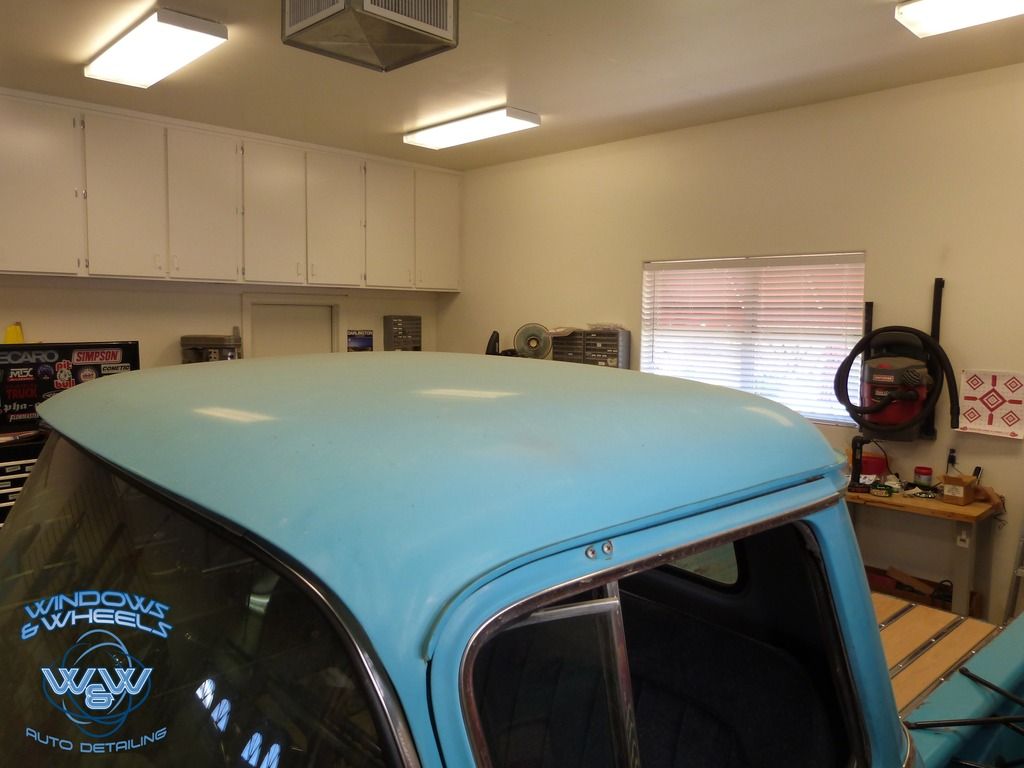
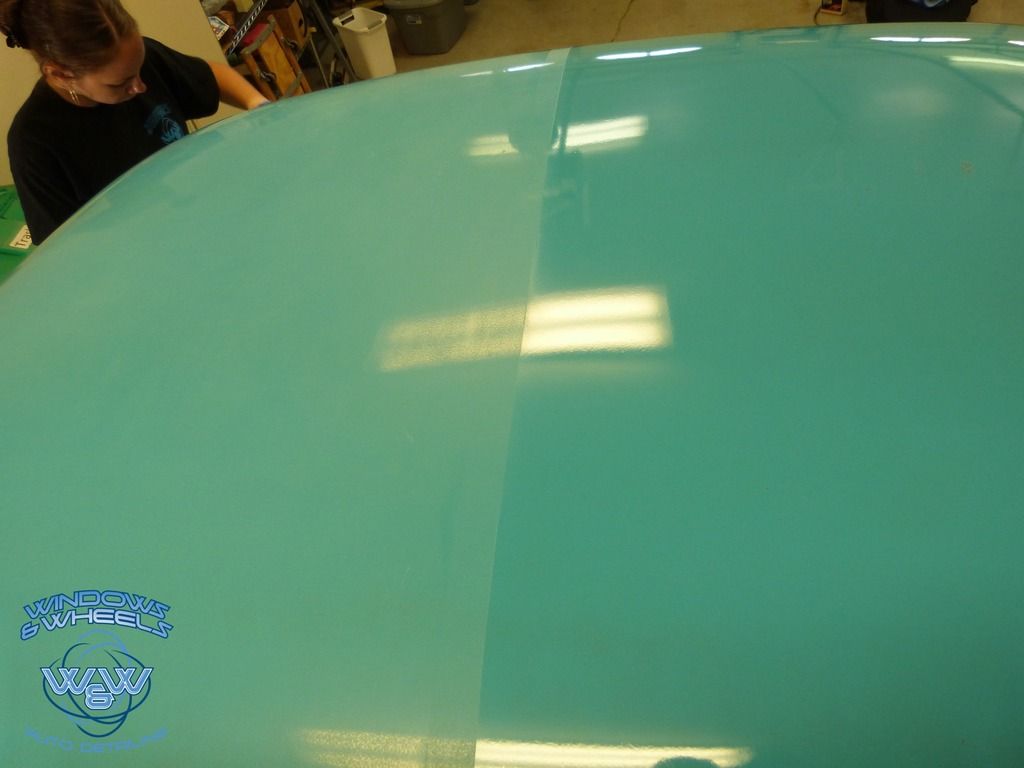
Again, attention to detail ....the bulk of the roof I was able to get, but around the trim and in the small concave below the lip of the roof, was not accessible by machine. Let me note i got ALMOST all of it by machine, but if you looked closely, you could see about a 1/2"-1/4" of a dull ring around areas like this...and Dani wasn't havin' it!

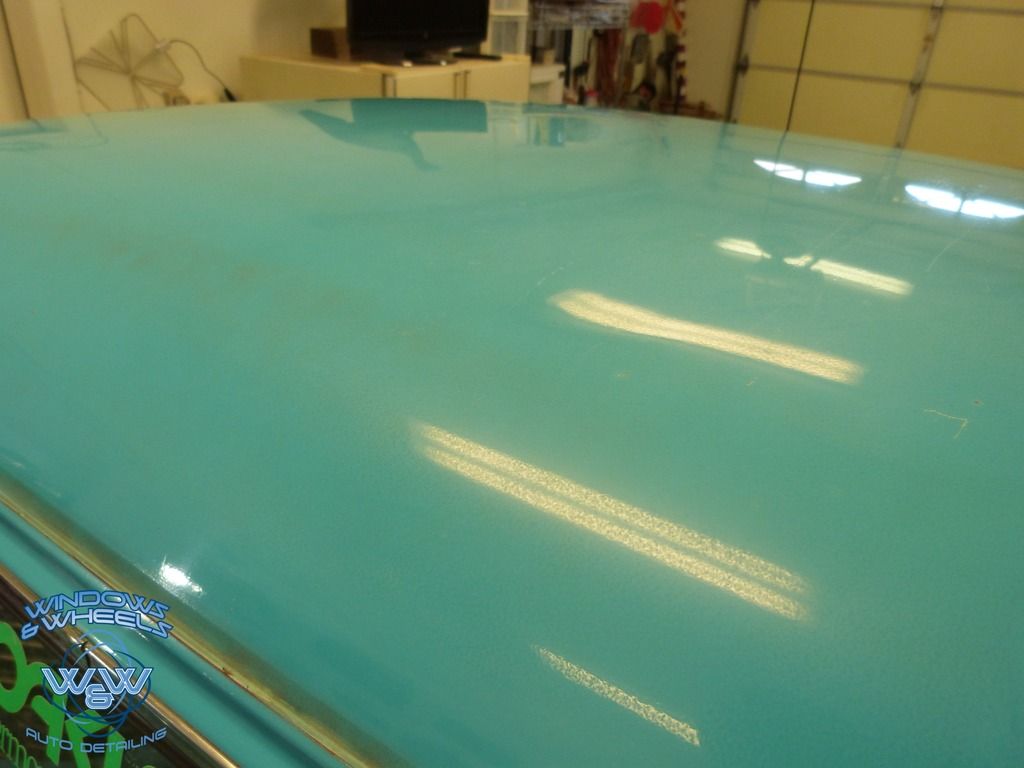
While the sides were progressing nicely - we all know top panels get beat on way worse than the sides and thats what I'd be squaring up against next.

See the brownish parts on the curved part? Yeah thats primer starting to peek through. Again, SERIOUS attention to every section had to be a key point in our minds to avoid completely going through an area.
Well, lets do it and see what happens
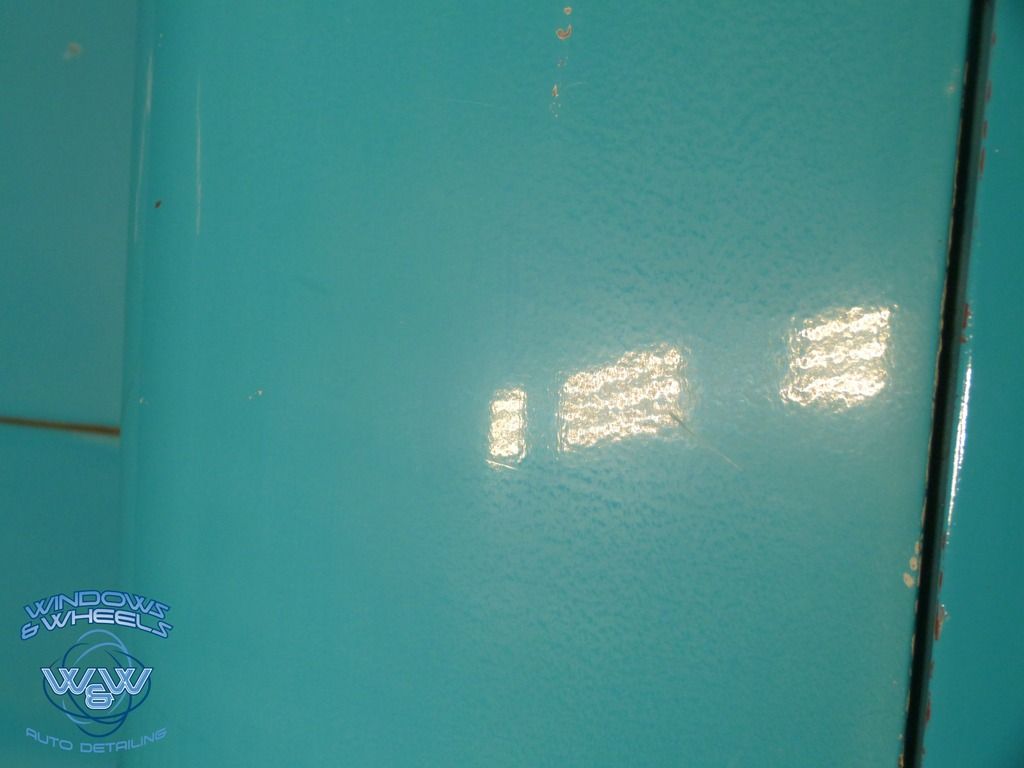
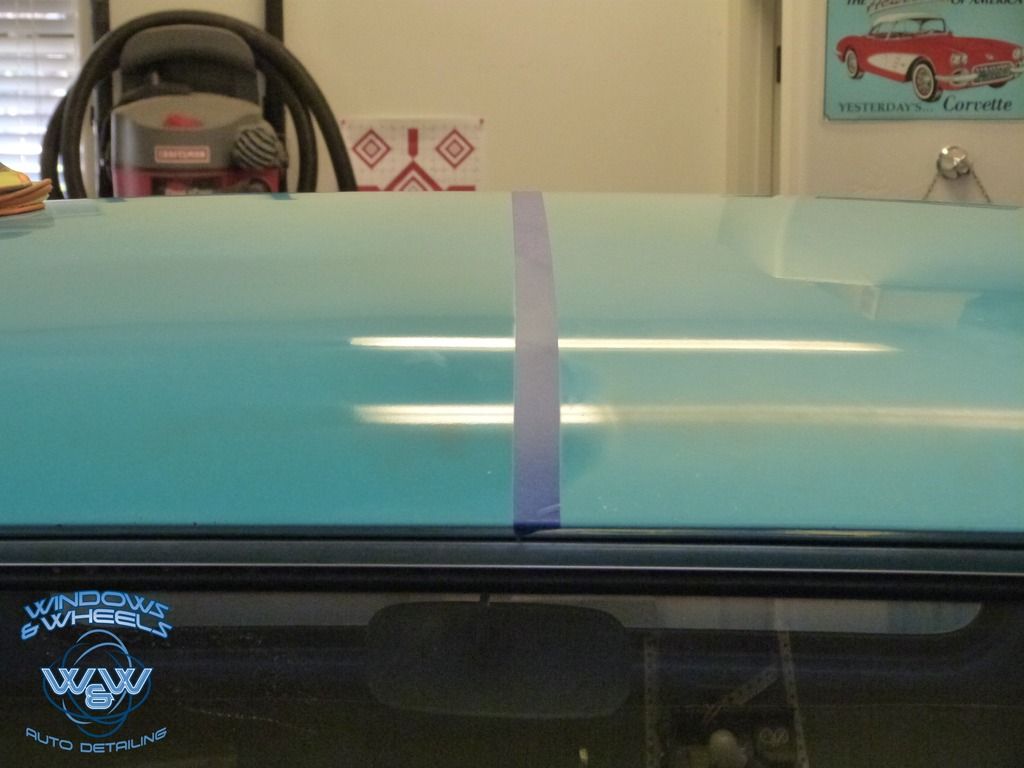
A little tape action so we can see a good before and after:
I think that qualifies as a win right there!
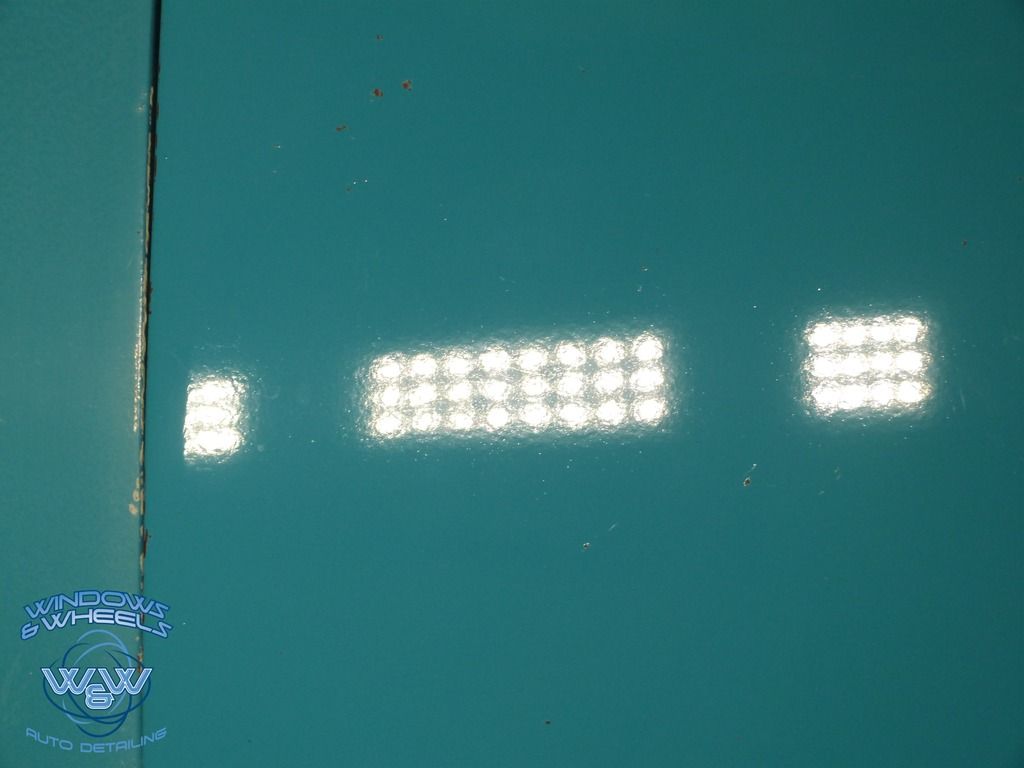
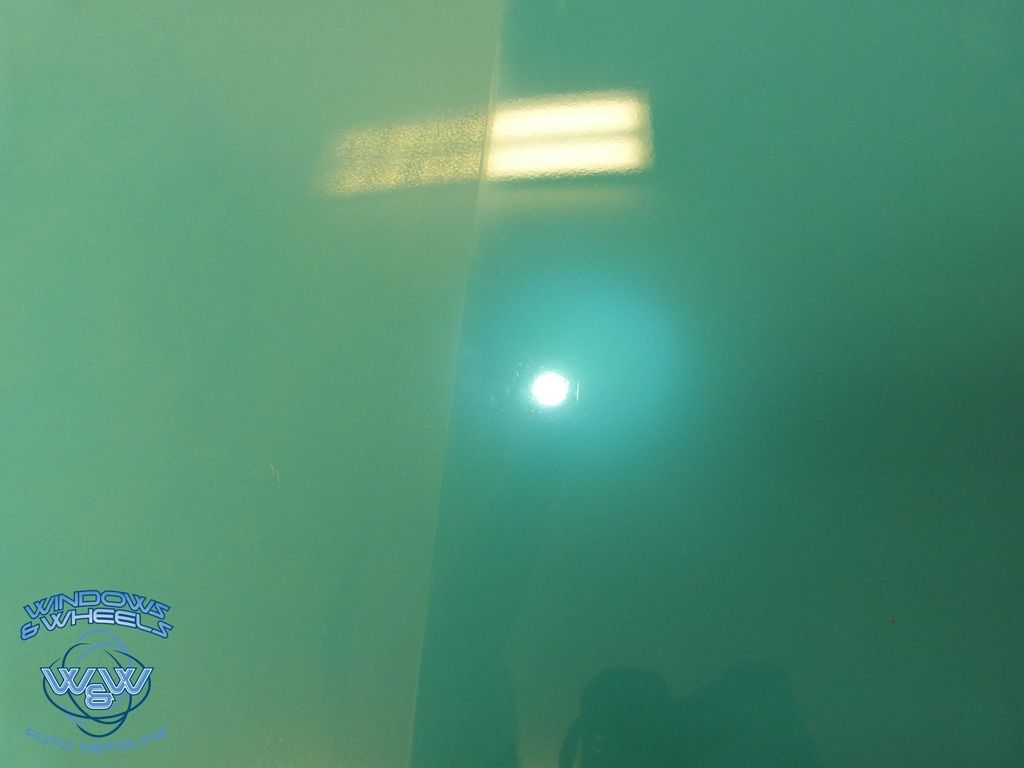
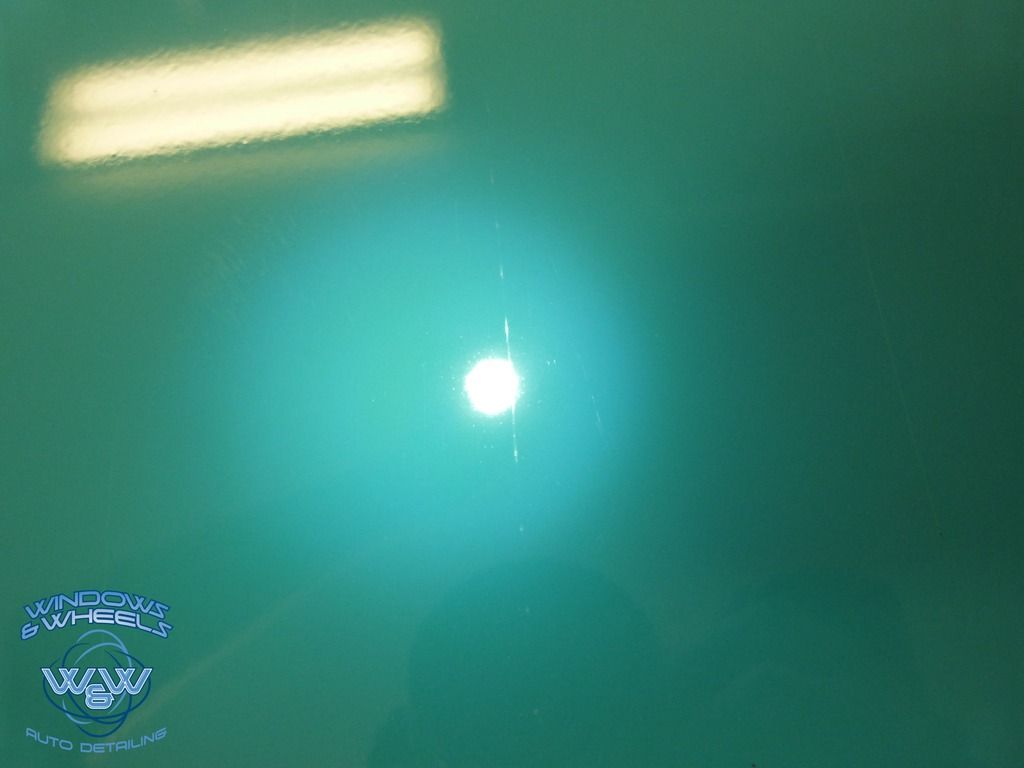
The really sweet part was, not only were we killing the oxidation, but there really were not a lot of swirls left either (and if there were, we did NOT go after them, just isn't worth the risk on a truck like this). Even under direct LED lighting...we were only finding
a deep scratch here n' there for the most part.

Dani was busy playing Peek-a-boo.
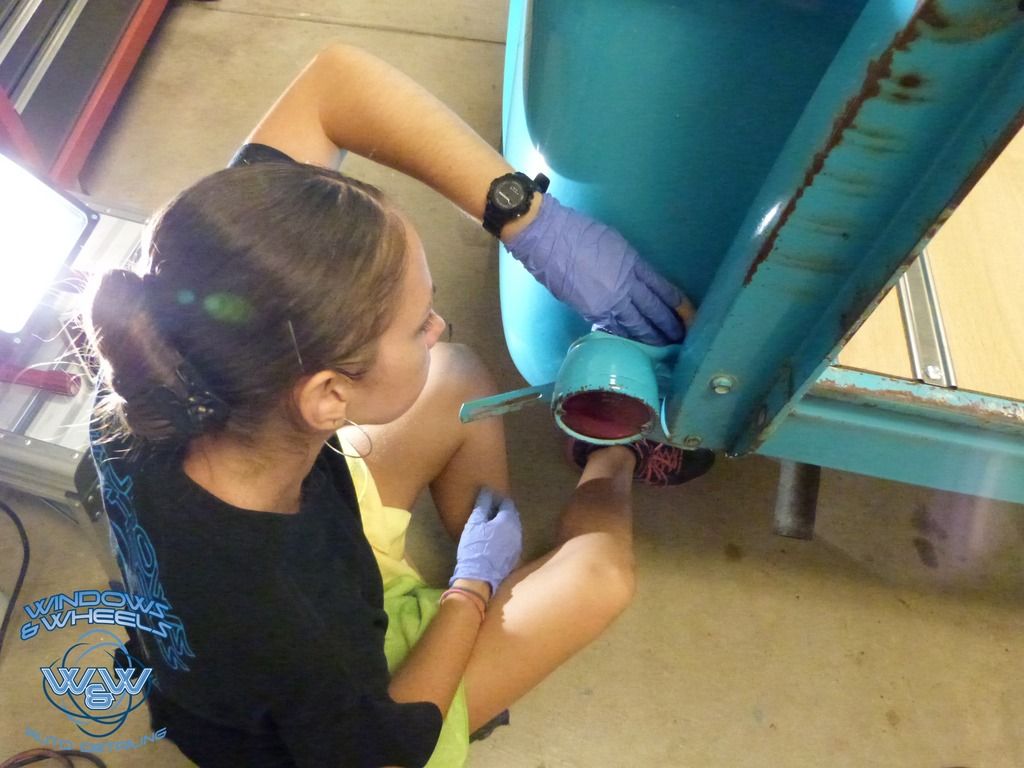
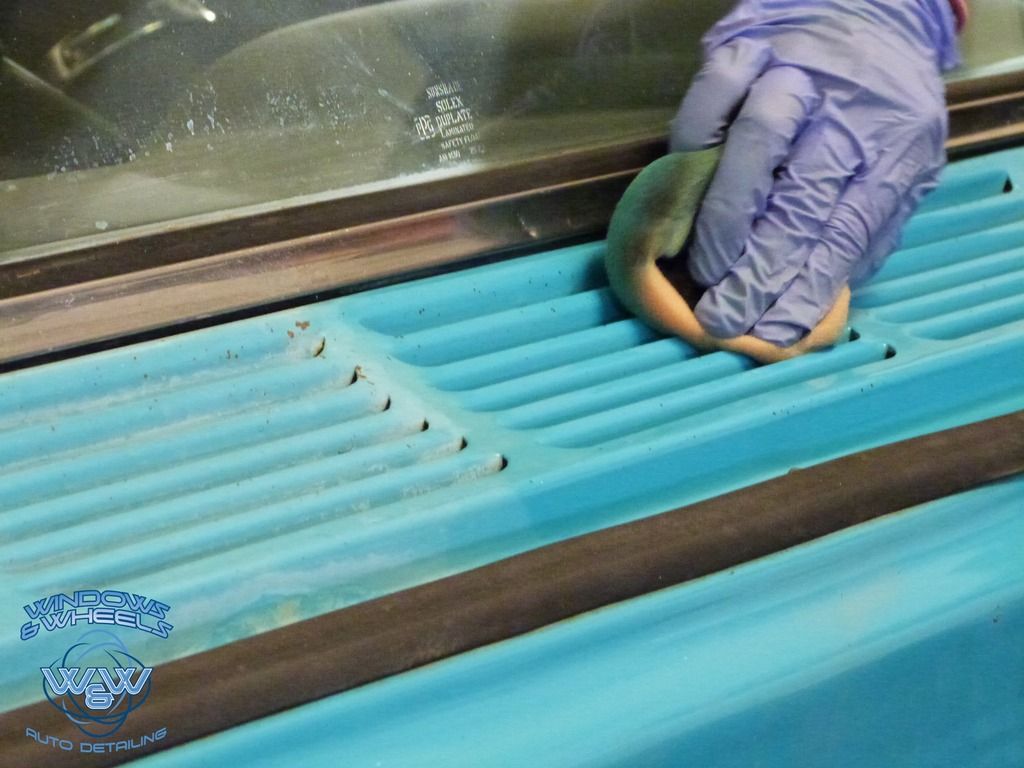
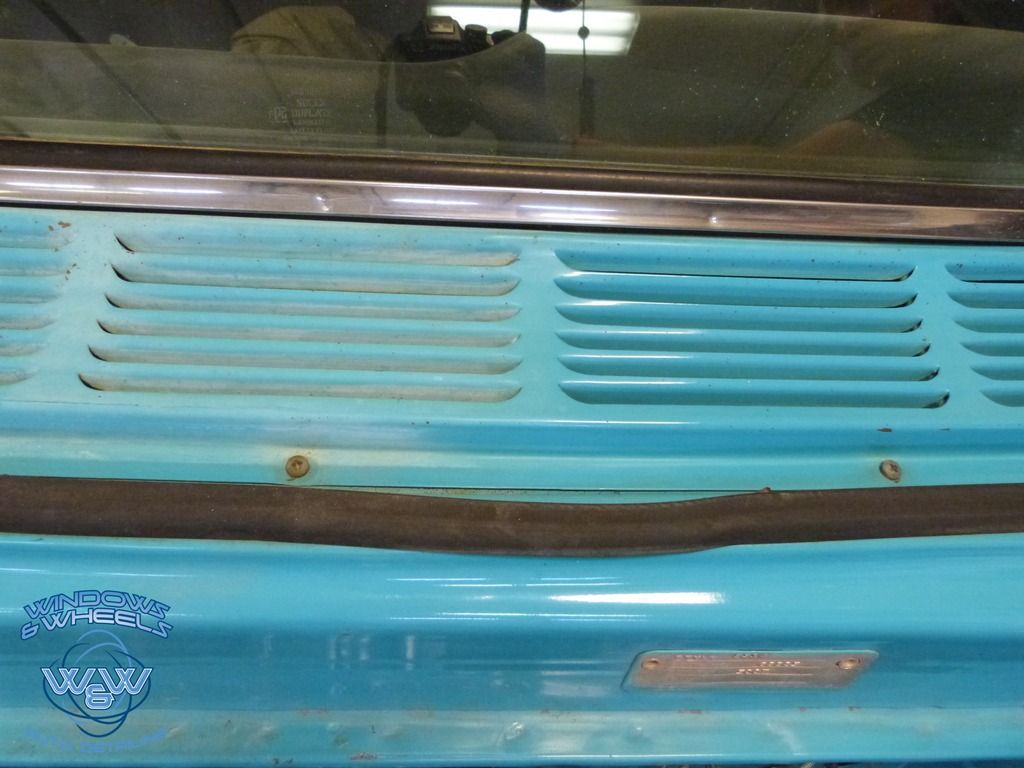
Actually...she was tackling an equally (if not more so) difficult task. Oxidized painted vents....
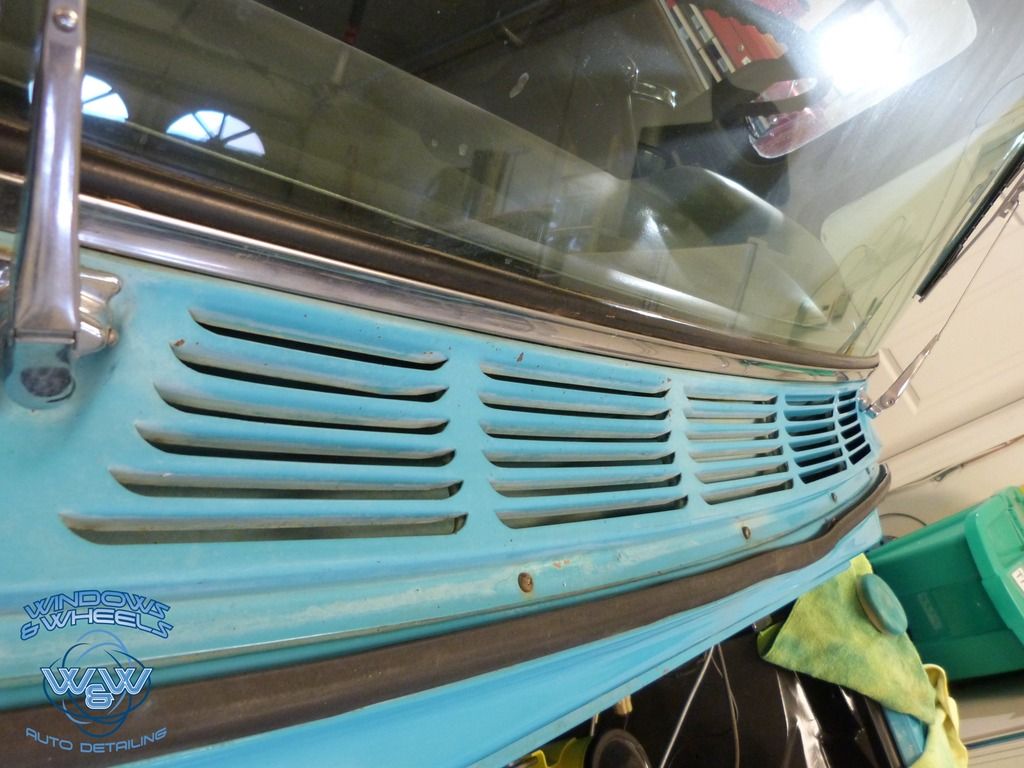
I personally said we should just plasti-dip them or just take them off and throw em' away and no one would notice, but Daniela insisted that i'd be killed so...to for my own well being she tackled this mess.
I thought her approach was pretty genius. Just hand rubbing wasn't cutting it...and machine polishing was out of the question. What did she do? She used a soft bristled tooth brush....yeah...a tooth brush. It, paired with just a bit of polish...and she went slat by slat...vent by vent...and essentially "broke down" the oxidation. THEN, after going through all that, she hand polished each slat. If you thought the roof before and after was impressive...you'll love this:

The title says it....original paint on this almost 60 year old GMC pick-up. Here she is:

Oh yeah, forgot to mention this isn't a show truck, garage queen, pampered baby. No no, this truck had been in their family since it's origin.....and it was used as a farm truck! Yeahhhh, we're talking super thin spots, rust, oxidation...this truck had lived a true truck life!
The owner had called and spoken with several different detailers (including us) regarding what (if anything) could be done to restore his and his wifes classic 58' GMC. One said there was nothing that could be done, another said he would do it but was charging a pretty low ball price, which made the owner a bit skeptical...and then there was us. Our price was higher than any of the other quotes, but he opted to choose us because he felt we knew what we were talking about...and that we were passionate about what we do. Well...he was right....now lets begin
Lets take a closer look:


Shiny like a chalk board lol.

Now you may notice something here...a lot of these areas on the sides of the bed especially - are not "buffer accessible" ...that means a lot of by hand polishing, which we'll get to shortly.
Lets continue the walk around!


Oh yeah, theres lots of chrome too..yup, lots and lots of chrome!
The owner had just completed some serious mechanical reconditioning (thus the hood being removed) and now it was time to make her shine again. First thing we were to deal with was...it wasn't yet running lol. So it was time for a rinseless wash.
Lets get at it!

After a thorough rinseless wash (and a LOT of towels) it was time to clay it because it didn't just look like a chalkboard, it felt like one as well.
After decontaminating the paint it definitely felt much smoother....kinda like a chalk board with lotion on it? Being that the decontamination process thinned some of the oxidation, the truck now also looked like it had chicken pox.

Now for the fun part, working on paint that was measuring UNDER 1 mil in thickness (for a comparison, most modern cars measure between 4-6 mils...this paint was THIN).
Our task, to squeeze as much oxidation removal and shine out of this beautiful classic as possible, with out compromising the extremely thin paint. This was a tricky one for sure.
My first step was to try Meguiars #7 Show Car Glaze. "Correction" was not what i was aiming for here...preservation was. While #7 did a decent job, it took several passes and was still leaving some "blotchy" spots in areas where it did not remove all of the oxidation. It looked 100x better - but i personally wasn't satisfied.
When in doubt - get some advice from someone who knows more than you do about the subject. Time to call Mr. Jason Kilmer - famous for his insane sanding skills and "If you're not burnin' you're not learnin'" mentality. Here's a guy who has more time with just sanding alone than i likely have in detailing in any aspect.
After a 10 min conversation about what we were dealing with, what we had tried and what we felt comfortable with proceeding, we decided to go with one of our most favorite stand by's...Meguiars M205 and a more aggressive polishing pad.
Per our conversation, Jason recommended 205 to help give a LITTLE bite to our process and thought a medium polishing pad would help pull some of the oxidation off without thinning out the paint too much. This made sense to me since 205 is a fairly "wet" polish but does in fact have abrasives.
I tested out an area using a medium cut pad and 205 - and the results were definitely better. But, being that the oxidation was so heavy..i decided to take it a step further and bump it up to a Meguiars 3" foam cutting pad for our small work and a Lake Country Orange cutting pad for the larger areas.
I felt the stiffer and porous pads would do a better job at collecting the oxidation and not cake up so quickly and that as long as i kept the pressure and speed low and did fairly quick arm passes, i'd get away with my surgical goals lol.
My intuition was right...and this old girl started coming back to life.

Now the challenge was on. If you've ever polished single stage paint, specifically oxidized single stage paint, you'll know one of the biggest issues is having your pad get caked up.
Fortunately the owner had a compressor (we had to do this job mobile for obvious reasons) for us to hook up our Tornador to and let me tell you, it is the BEST pad cleaning tool ive ever used (foam or microfiber)

I know it looks like a blue pad, but its actually maroon! Just blue from paint.


Bam...ready to go. This was something we were having to do after each section to maintain consistent results section by section...but hey, thats what we do.

Shiny! Well except the rust...just ignore that part....
Panel by panel we CAREFULLY worked every section of this truck.


Oh yeah!
Another interesting point. They eye catcher is the big glowing door...however, note the thin strips of paint going up along the a-pillar and along the edge of the door. This was before we had an iBrid Rupes polisher...so once again, this was mostly done by hand. And who better to do that than...well...sure as hell not me! Daniela! *Que super hero music*

We thought out our process and decided I'd hit each tight area (such as this) as close as i could and get into as many deep pockets as i could. Then, whatever was left, Dani would attack by hand. This way she wasn't having to guess how far into those pockets i could get (and potentially missing spots) - also, she wasn't having to do any EXTRA work by hand by polishing these areas by hand and covering too large of a section that i could have hit with a machine. Makes sense right!

Hard to believe 2 years prior to this i was bald...lol. Our trusty dusty Porter Cable 7424 was a beast in the small areas. First machine we ever bought and still going strong today (well, it needs a new cord, but she still runs)


As you can tell from the above photo, we'd been working hard and making a lot of progress. This truck was coming back to life in a way we weren't even expecting.
Going from a chalky mess:

To as shiny as a blue M&M!


Again, attention to detail ....the bulk of the roof I was able to get, but around the trim and in the small concave below the lip of the roof, was not accessible by machine. Let me note i got ALMOST all of it by machine, but if you looked closely, you could see about a 1/2"-1/4" of a dull ring around areas like this...and Dani wasn't havin' it!

While the sides were progressing nicely - we all know top panels get beat on way worse than the sides and thats what I'd be squaring up against next.


See the brownish parts on the curved part? Yeah thats primer starting to peek through. Again, SERIOUS attention to every section had to be a key point in our minds to avoid completely going through an area.
Well, lets do it and see what happens


A little tape action so we can see a good before and after:


I think that qualifies as a win right there!

The really sweet part was, not only were we killing the oxidation, but there really were not a lot of swirls left either (and if there were, we did NOT go after them, just isn't worth the risk on a truck like this). Even under direct LED lighting...we were only finding
a deep scratch here n' there for the most part.


Dani was busy playing Peek-a-boo.
Actually...she was tackling an equally (if not more so) difficult task. Oxidized painted vents....

I personally said we should just plasti-dip them or just take them off and throw em' away and no one would notice, but Daniela insisted that i'd be killed so...to for my own well being she tackled this mess.
I thought her approach was pretty genius. Just hand rubbing wasn't cutting it...and machine polishing was out of the question. What did she do? She used a soft bristled tooth brush....yeah...a tooth brush. It, paired with just a bit of polish...and she went slat by slat...vent by vent...and essentially "broke down" the oxidation. THEN, after going through all that, she hand polished each slat. If you thought the roof before and after was impressive...you'll love this:


Comment