

 Tweet
Tweet
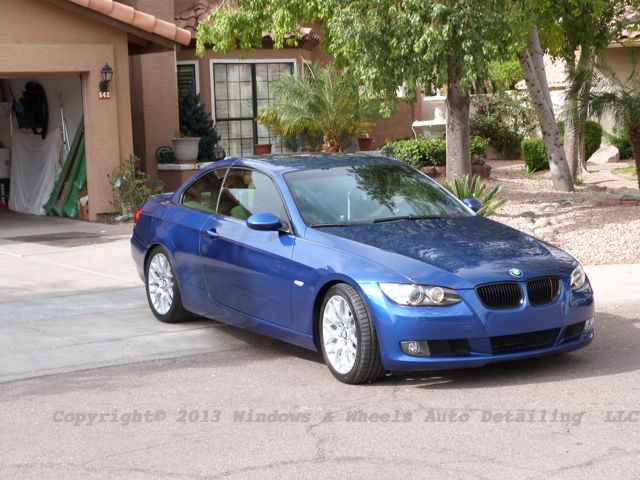
Tunnel washes are a bad, bad thing for paint. Brushes whipping around at mach3 speed coated in the grime they scrubbed off of the previous 1000 mud buckets that came through there does not agree well with your paint. Then add in the fact that those brushes run across your tires/wheels and then drag that brake dust/grime all along the lower sides of your car and well, you get this:
Yup, we had some work to do! The owner had come down two months ago for us to take a look at his car. He knew it needed help and was very honest about how it had been cared for. He wanted full correction and a long lasting protection - so some seriously polishing and CQ Finest was on the menu. We set the date for a couple of months later - he was driving over 150 miles to have us take care of it so we set it up for a time that would be as convenient for him as possible.
Upon arrival well, things were not a lot better thats for sure lol. The owner HAD however pulled the wheels a few days prior and cleaned them and that did help some!
But of course they had to be cleaned again after the long drive:

Im melting, melllllting…..oooooh what a world!!!!
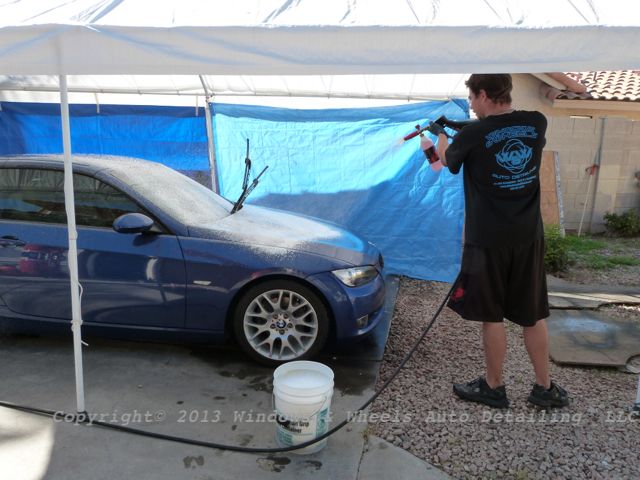
Ok so seriously after cleaning all that yumminess up it was onto the prep wash….foamin' her up!

Thickness….i likey!
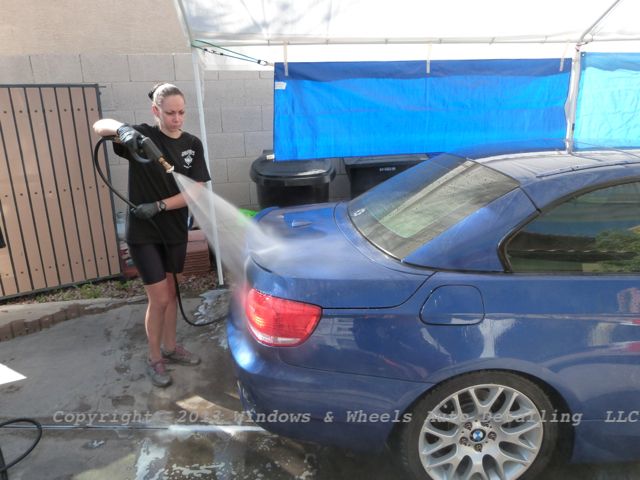
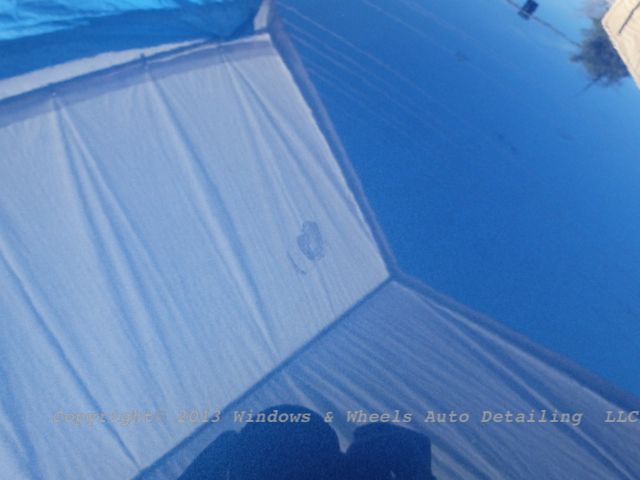
After a good wash it was time to rinse it down:
It's hard to tell because of the tarp reflection but, this is the roof..look closely and you can see how FLAT the water is setting. There was nada left on this paint.

Next up it was time for some "claying" (using a decontamination towel but you get the idea):

After that was done it was pretty clear to see some nice water spot etching on the flat panels. Gotta love Arizona water - especially when its well water!

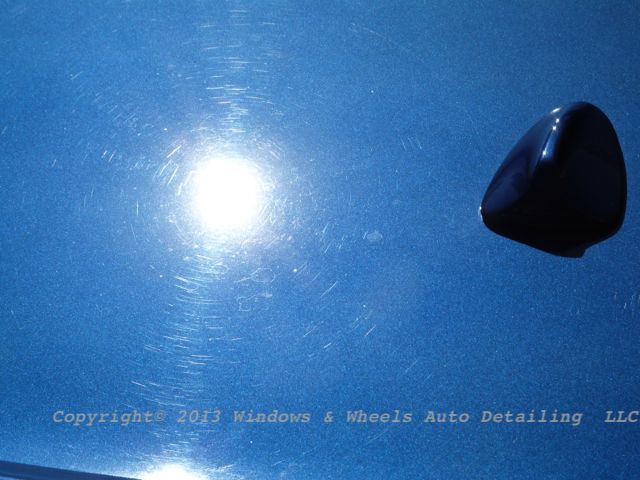
Once in the sun the real delightfulness was apparent:
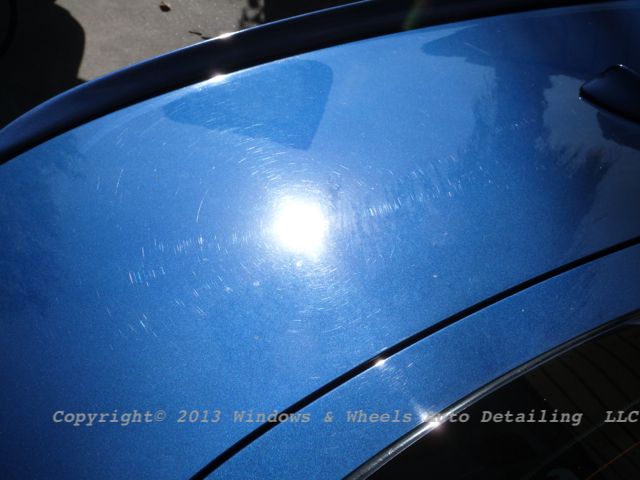
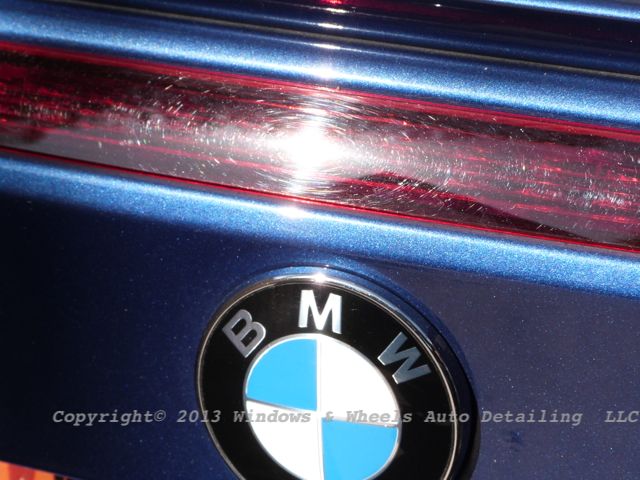
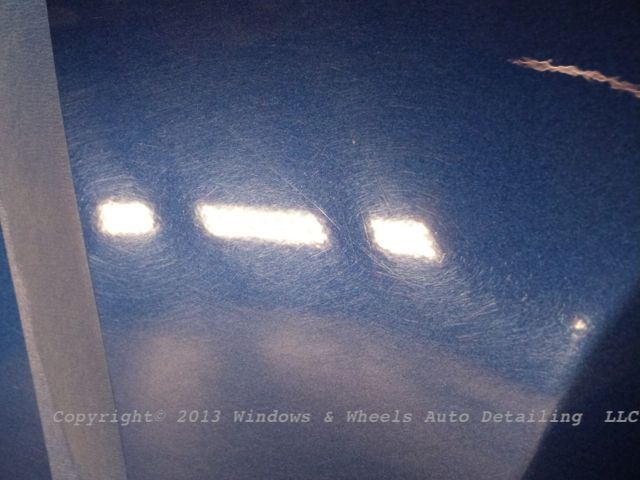
THIS was one of the "better" areas…yeah…remember what i said about low areas getting torn up from brushes being drug along the tires and then the paint…we'll get to that again in a moment…here is more of the "better" areas:

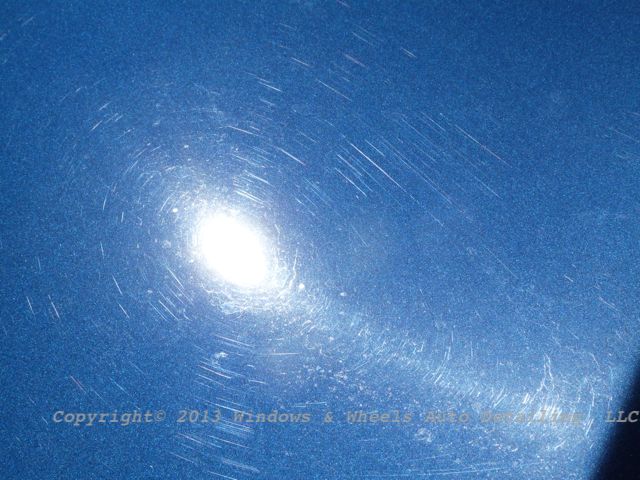
HOLY!
Those tunnel washes are thorough, they get every little inch!
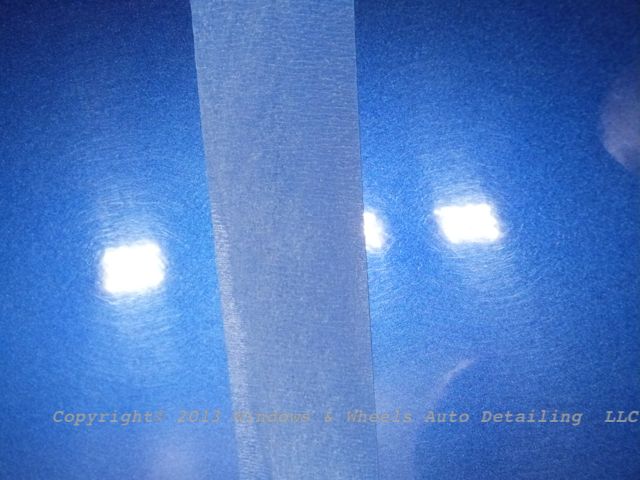
More swirls and water spot etching:

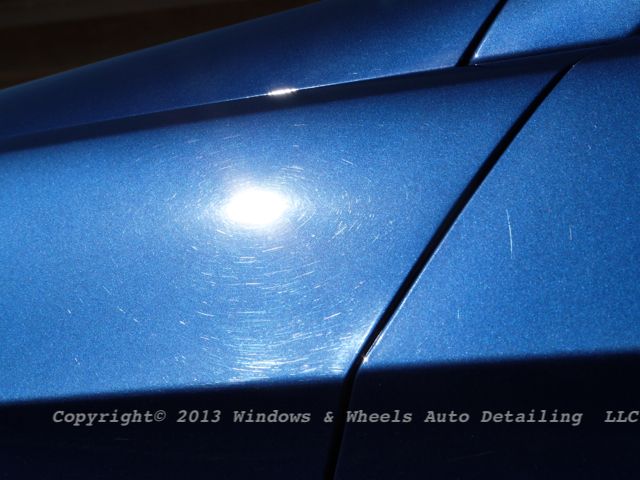
Got water spots? Why yes, yes we do….

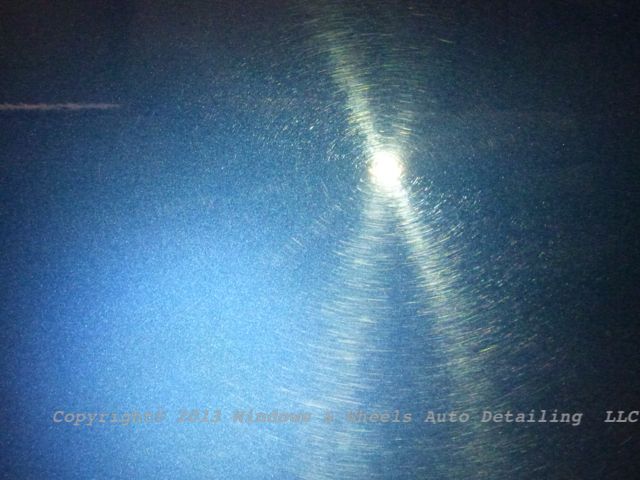
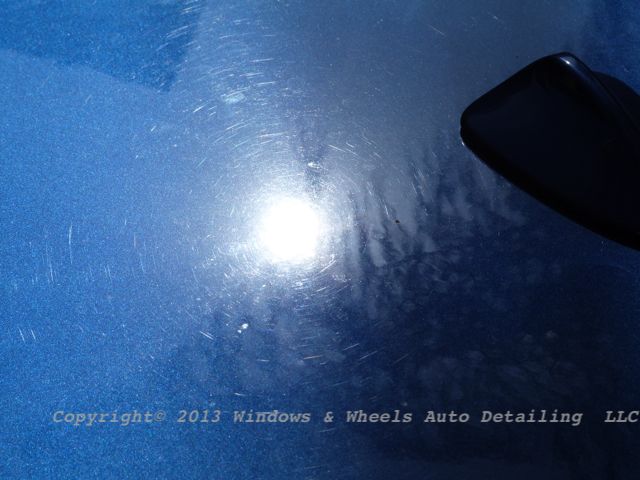
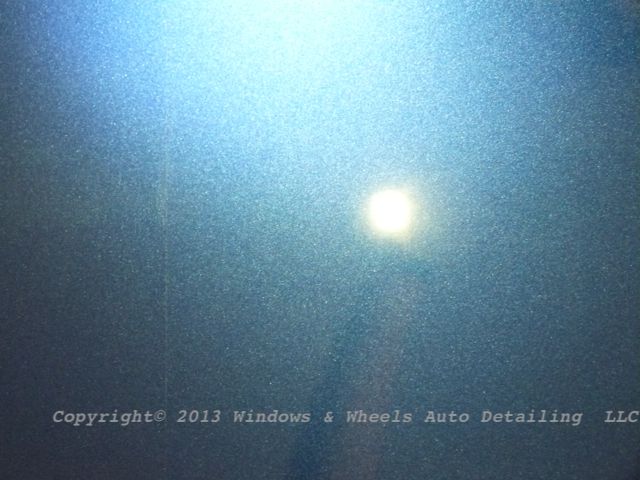
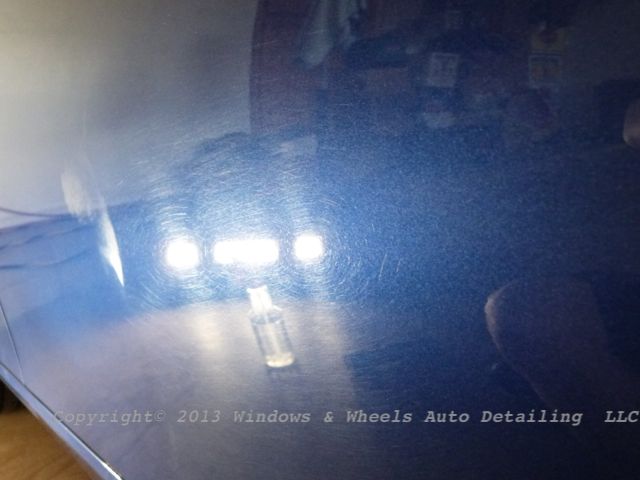
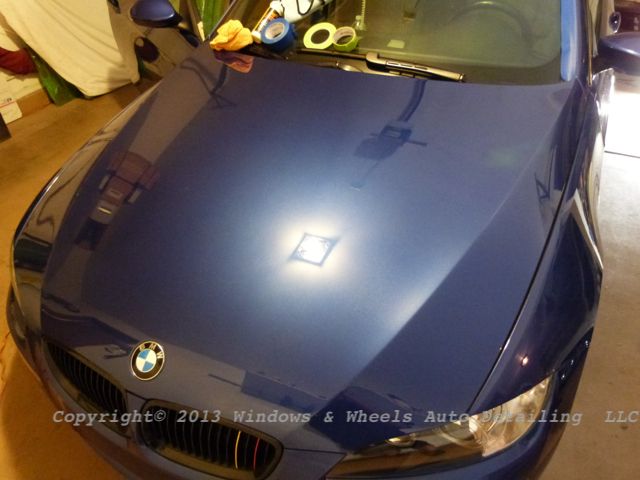
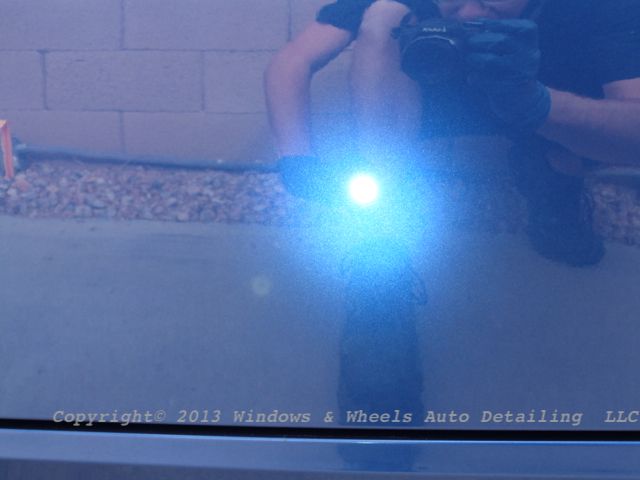
That was in the sun….next we pulled her on into the garage and gave it a looksie under the LED lights. For those who just use over head or even halogen lights - trust me, there are somethings that just don't show up unless you pull out a direct beam LED….its a scary world once you do but it sure helps you see things you never knew were there…even under direct sun some defects are difficult to see - but a darkened garage with one of these will make you cry…but will also make you better:
Oh yeah…LED's are not my friend during this portion of the detail….daym!
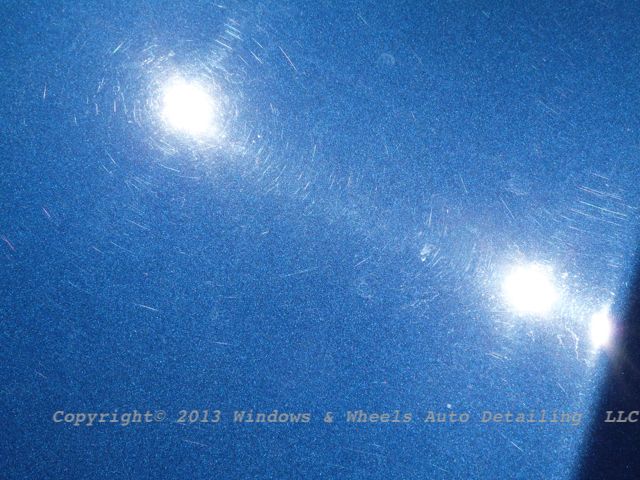
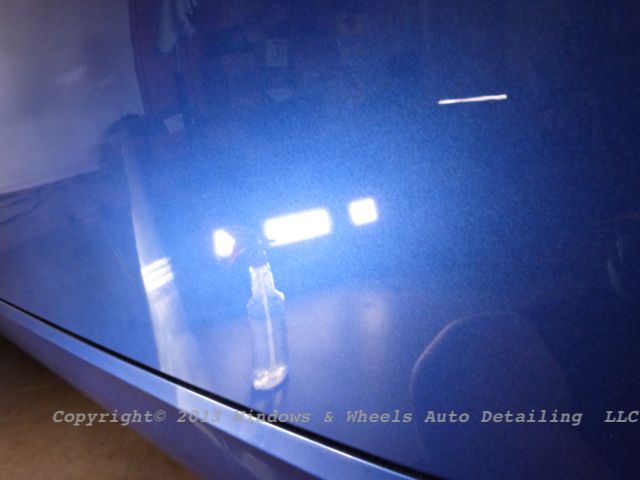
Tunnel wash whipped it, whipped it good.

Yeahhhh baby! Thats the good stuff right there!
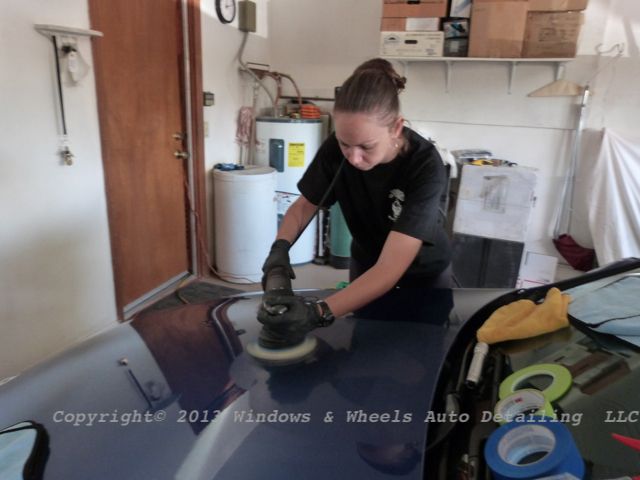
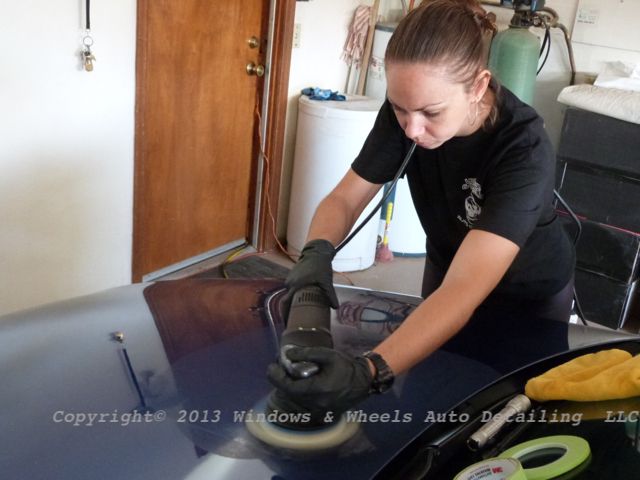
This sucker was NOT for the faint of heart thats for sure. So what were we gonna rock it with. 105? D300? Maybe the hard core 101? Nope….we were going to go at it the same as we did the black Vette we had earlier that week. Rupes 21, Megs MF Finishing pad and Megs 205…yes, 205, the finishing polish that can cut like mad.
Primed up the pad thoroughly, set the speed to about 4, taped off a test section on the hood and went at it. 205 allows for a longer work time, less dust, easier to wipe away and less scouring than its more aggressive counterparts. NOT to say those heavy cutters are not needed, but sometimes you can work smarter and not harder.
The result was beauuuutiful:
Not only did it cut the holy hell out of all the defects, but it left a great finish. We had seen this earlier that week on a black Vette as well. On black, if there is marring there is NO hiding it with an LED light - but we were getting nearly a polished looking finish after "cutting" with a microfiber pad and 205. On a blue metallic like this however, it was hard to tell the difference. We of course still used 205 with a finishing pad and slower speed to squeeze as much gloss out of this baby as possible, but it sure makes the "cleaning up" of the marring much easier than after using something like 105.
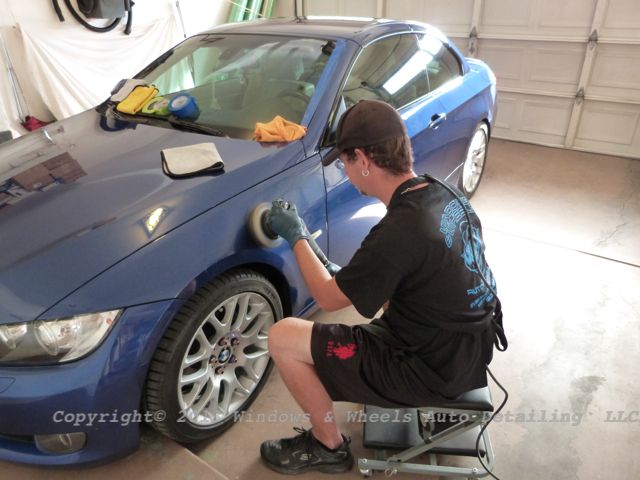
Now knowing what weapons to use to attack this mess, we proceeded by working all the top panels first and then dropping down to the sides:
Knockin' those suckers out - 20"x20" at a time!
The top panels were relatively….emphasis on RELATIVELY, painless. Not many areas needed additional passes as long as we consistently cleaned our pad after every section. Next we dropped down to the sides and all was good the first few sections…till we got below the height of the wheel. Oh yeah….this was the bundle of joy that awaited us:
Now in this case Dani and i differed a bit in how we proceeded. I was able to continue to get 205 to work where as with her side, she added a little M100 to her pad to up the bite of the cut. After the detail Dani posted some photos and such up on facebook and made a comment that 205 wasn't quite getting what she wanted on the realllly bad stuff - but guys like Bryan Burnworth and Kevin Brown were kind enough to comment leave some more info for us to go by (since they both have been using 205 in this method longer than we have). To quote Bryan "When in doubt, use more" lol. Thats perhaps why i was still getting the cut i wanted on my side.
That mess up above was my side…sooo i kinda laid the 205 on pretty heavily and went at it. One thing Dani and I did both notice is since most of the scratches were going east/west…we seemed to get better/quicker removal if we started our section out by going north/south.
So again, this:

Became this:


(In my best Hey Kool-aid voice) - Oooooh yeaaaaah.
Again, a bit further down the same door we had this:

Thats a nasty nasty mess! I swear sometimes when i go back through our pictures I'm like…wow! That was really really messed up!
And yet again - 205 to the rescue:

Im sure you see the spray bottle. Water is your friend. To extend the buffing cycle and help purge residue/build up free from the pad during the buffing cycles. To help loosen up that residue AFTER the buffing cycle so when you clean your pad with air or a mf towel MORE of that gunk will get removed. After every panel or so id hit my pad with some Final Inspection which seemed to really help break down that build up even more and really get my pad back into good shape. So that i could move onto more of this:

And turn it into this (50/50)


Yes, yes we do love 205…we do love Meguiars pads and damn sure love our Rupes 21. Note this was done using the 6" mf pad, not the 5". It really is quite amazing how well that Rupes 21 can swing those larger pads around. As Kevin told us, momentum = cutting power! I sent a couple of those pictures to him and he appropriately responded "Pa-dowww!" hahaha.
Now while i was workin' the 205 just fine, i did find myself using some M100 or 101 on the rear bumper, which was a lovely cluster of what the hell. All the cutting was completed on day 1 along with the polishing of all the top panels.
Day 2 rolled around and we were up and at it early in the a.m. We have eastern exposure so the sun was hitting nicely on the back side of the car:

Nice thing to see first thing when you open up the garage!


A-polishing we will go…a-polishing we will go...

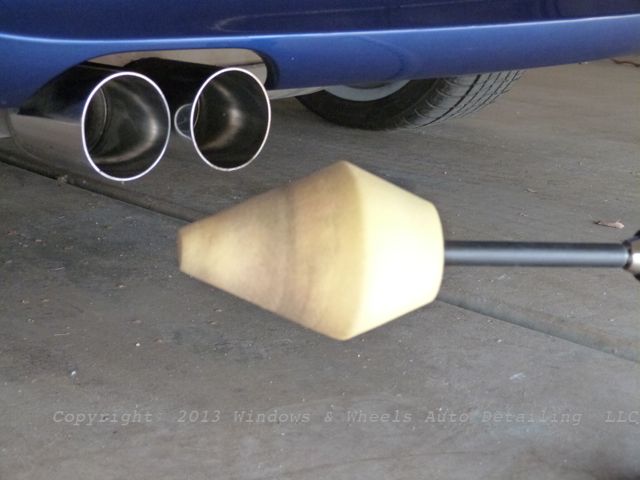
Of course the tips needed some love. Much of it was cleaned off during the wash but there was still some shine that needed to be pulled out of those tips…some more 205 to the rescue:
Panel after panel we knocked out. Finishing up by polishing the bumpers and then….time for what us Finest installers call…."The Boom Sauce"
Nothing like topping off a beautifully polished car with a hardcore but gleaming protective coating.
Here is the first coat curing…notice the strokes all end in the same direction. Maybe it does nothing at all, but in our mind it makes it even!
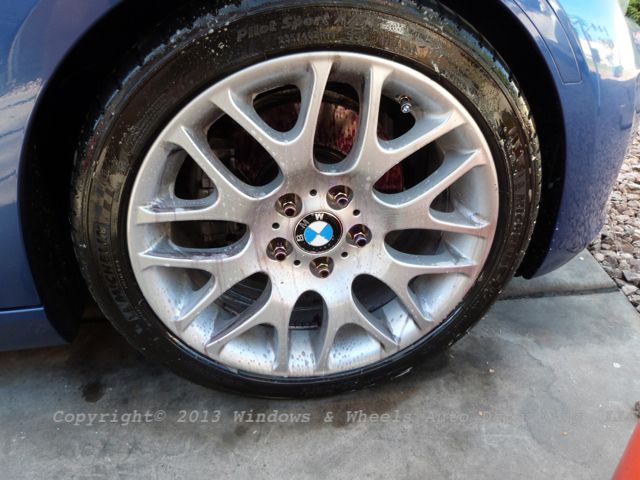
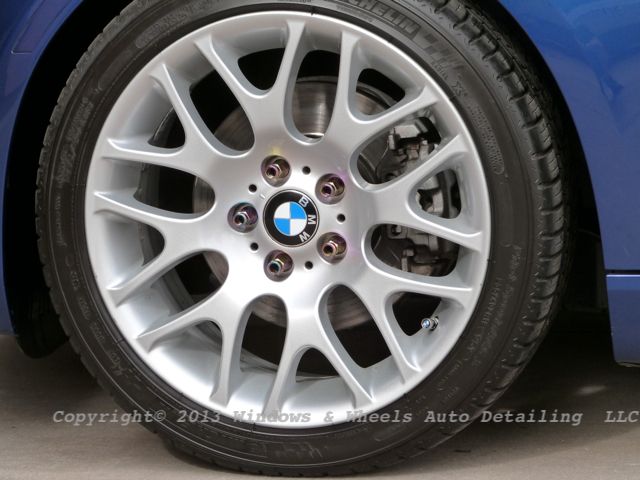
While the first coat set, Dani cleaned the rims, coated them, dressed the tires and the wheel wells:


I on the other hand was circling around the car applying FlyBy30 to all of the glass:

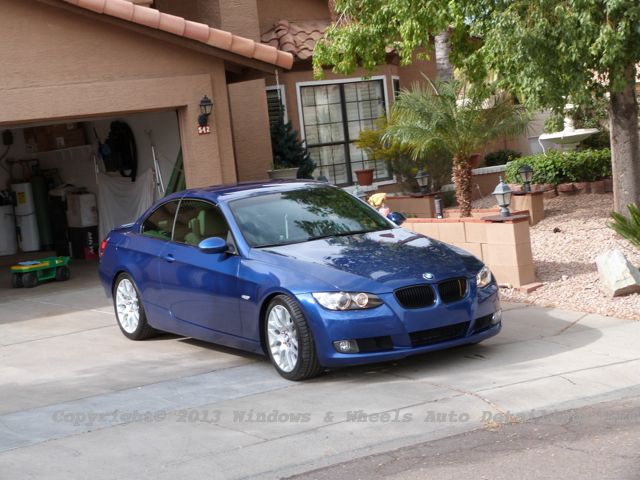
After applying the 2nd coat, letting it cure and then wiping it clean - it was time to pull this baby outside. Now we didn't have full sun that day (though it did peek out just enough for a couple of nice pictures!) - but we did have some amazing cloud reflection shots that seriously looked like you could just jump into them:

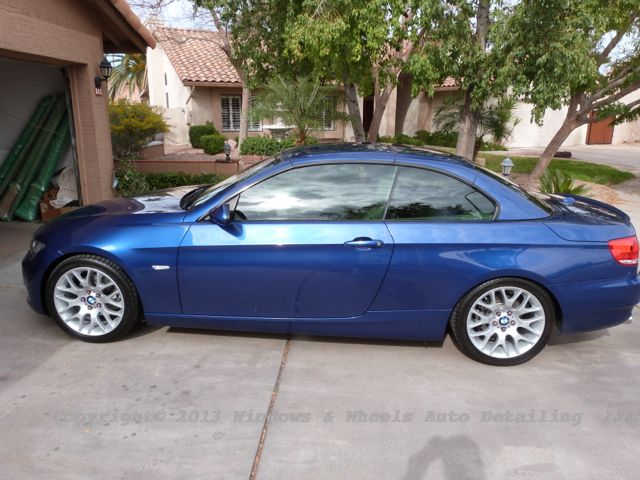
The Montego Blue like it should be:


Hello sun!

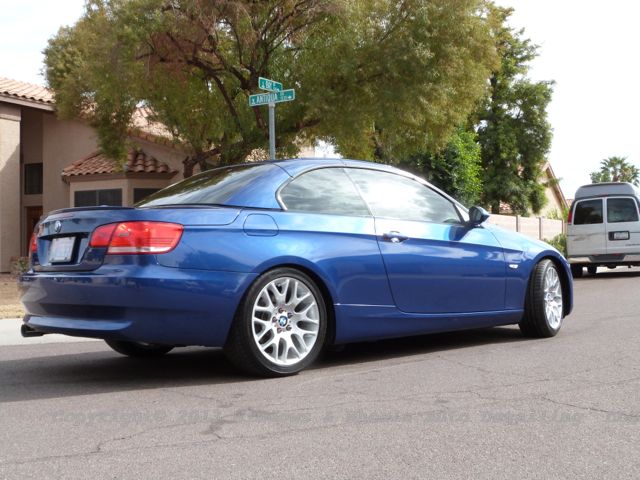
The roof looked like the entry way to heaven:

I love this picture…i just do:

Hell i love this one too lol:
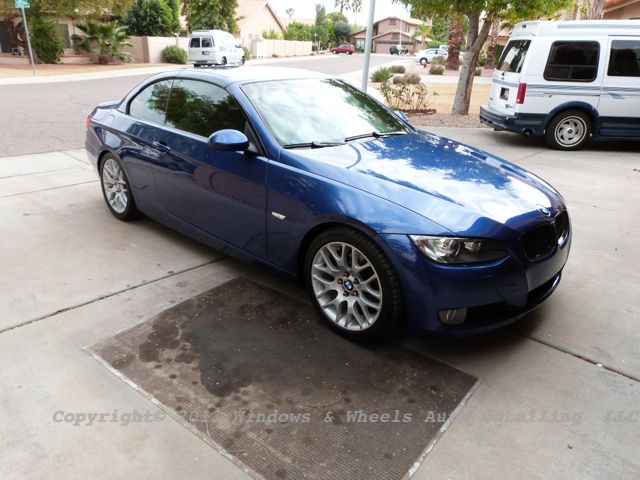


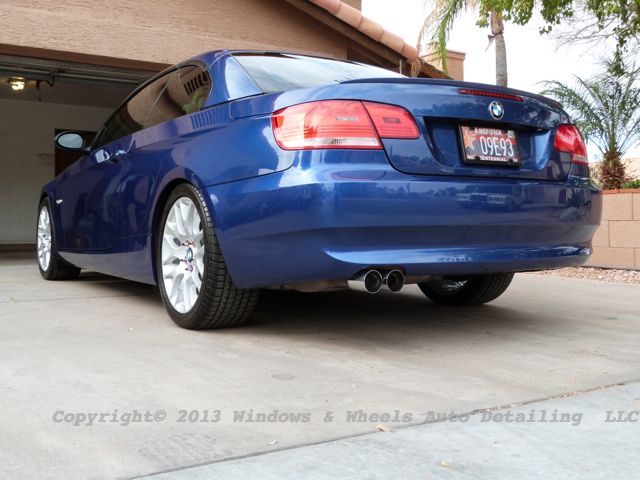
The E93 was looking mighty pretty!
Nice clean and coated wheels:
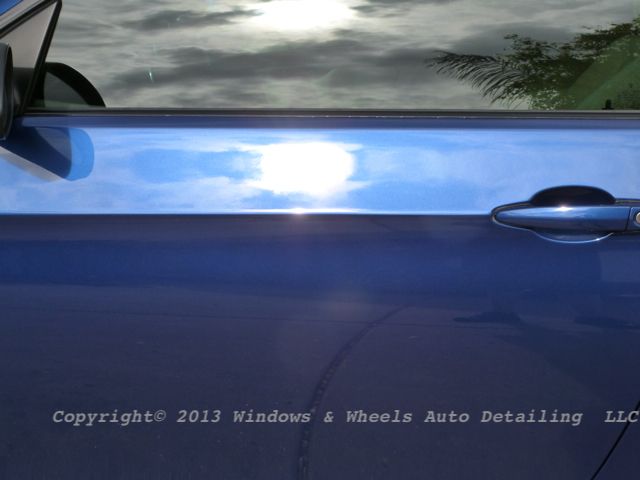
Those ugly swirls that were above the upper body line of the doors were a thing of the past:
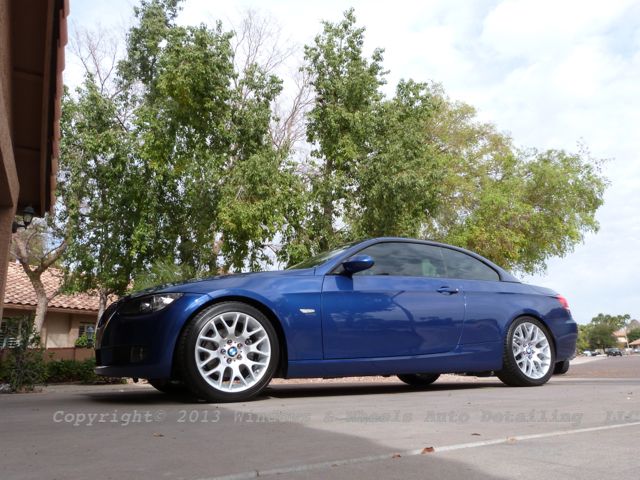
It was crazy to see how dark and liquid the paint looked while it was cloudy - but then how it transformed into a lighter and very bright color as the sun weaved in and out of the clouds:


NICE!


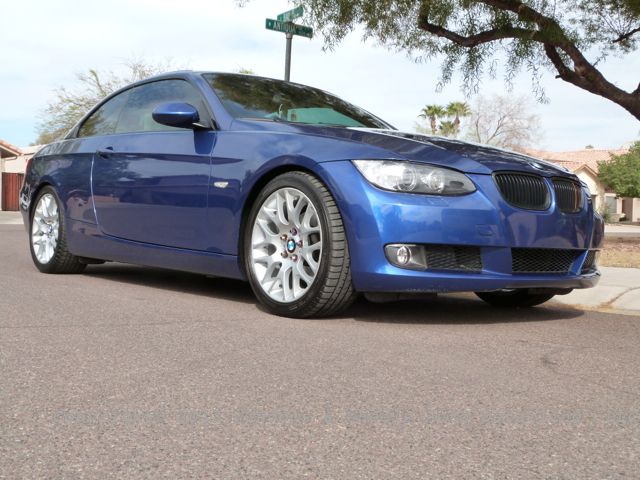
Good sun shot here:

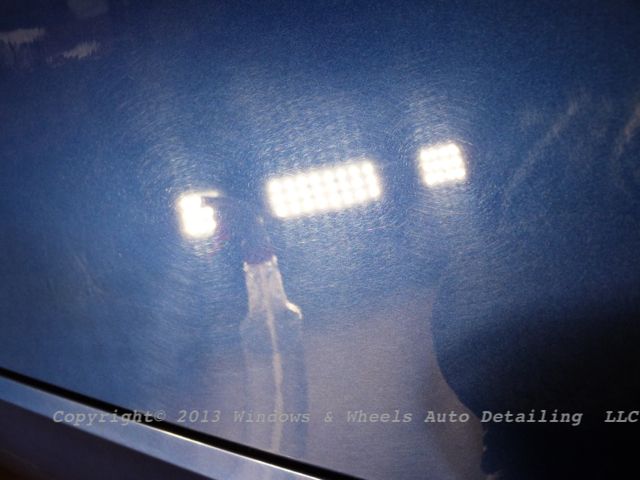
And of course under our wonderful LED lights, this baby was crystal clear and glowing!

Yes, even the low stuff...

Parked and awaiting her owner:
When the owner arrived he was very pleased and was also kind enough to leave us a very nice review:
" Great work by Wills and Dani on my 09 BMW last weekend. I was expecting quite a lot even though the car is a 2009 and hasn't been babied. It now looks better than it ever has and I promise to take better care of it.....lol. These two have FAR exceeded my expectations and I would highly recommend them to anyone wanting a First Class Detail for their vehicle. Thanks Again."
Love it!
Now that the detail was over - i was free to go enjoy my birthday! This was a good way to end my 27th year - bringing out a diamond in the rough. Had a great b-day the following day and then…yup, right back at it the day after lol. No complaints!
Thanks all for reading, hope you enjoyed the eye candy and were able to see just a little more of the potential M205 has.

Yup, we had some work to do! The owner had come down two months ago for us to take a look at his car. He knew it needed help and was very honest about how it had been cared for. He wanted full correction and a long lasting protection - so some seriously polishing and CQ Finest was on the menu. We set the date for a couple of months later - he was driving over 150 miles to have us take care of it so we set it up for a time that would be as convenient for him as possible.
Upon arrival well, things were not a lot better thats for sure lol. The owner HAD however pulled the wheels a few days prior and cleaned them and that did help some!
But of course they had to be cleaned again after the long drive:


Im melting, melllllting…..oooooh what a world!!!!
Ok so seriously after cleaning all that yumminess up it was onto the prep wash….foamin' her up!


Thickness….i likey!
After a good wash it was time to rinse it down:

It's hard to tell because of the tarp reflection but, this is the roof..look closely and you can see how FLAT the water is setting. There was nada left on this paint.

Next up it was time for some "claying" (using a decontamination towel but you get the idea):

After that was done it was pretty clear to see some nice water spot etching on the flat panels. Gotta love Arizona water - especially when its well water!


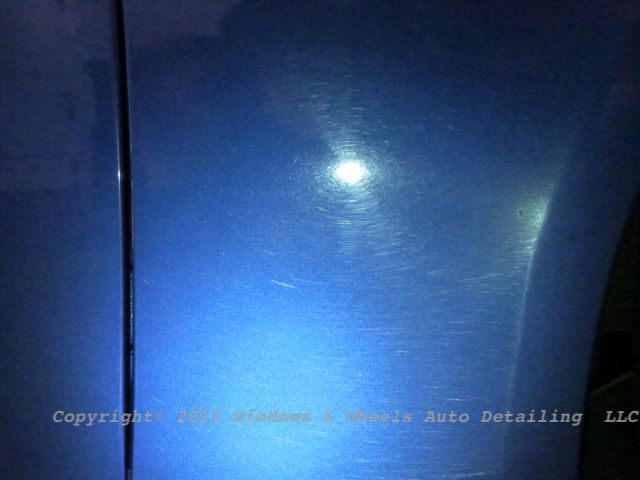
Once in the sun the real delightfulness was apparent:

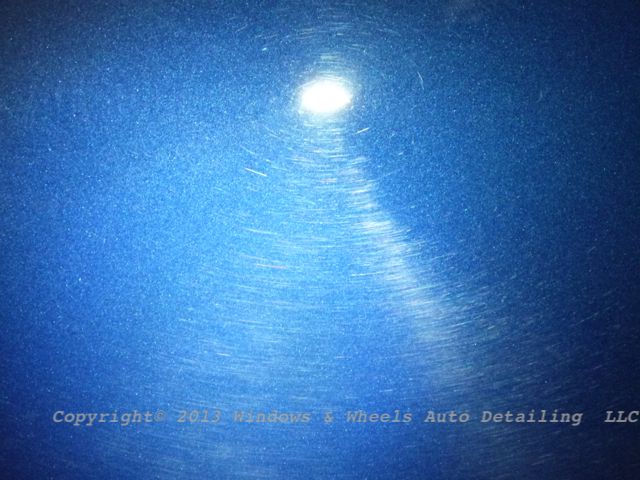
THIS was one of the "better" areas…yeah…remember what i said about low areas getting torn up from brushes being drug along the tires and then the paint…we'll get to that again in a moment…here is more of the "better" areas:


HOLY!
Those tunnel washes are thorough, they get every little inch!

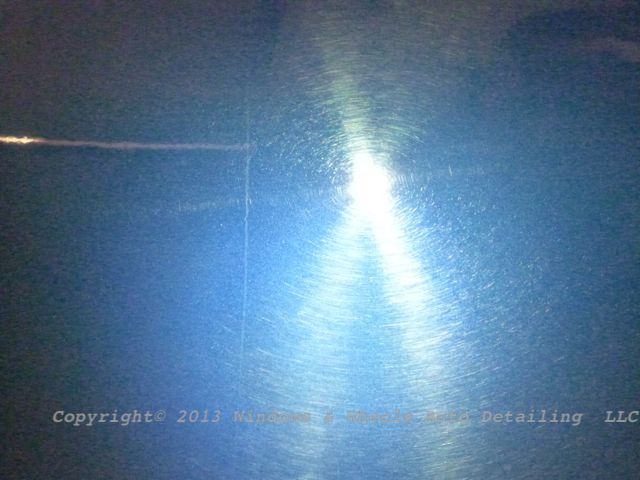
More swirls and water spot etching:


Got water spots? Why yes, yes we do….

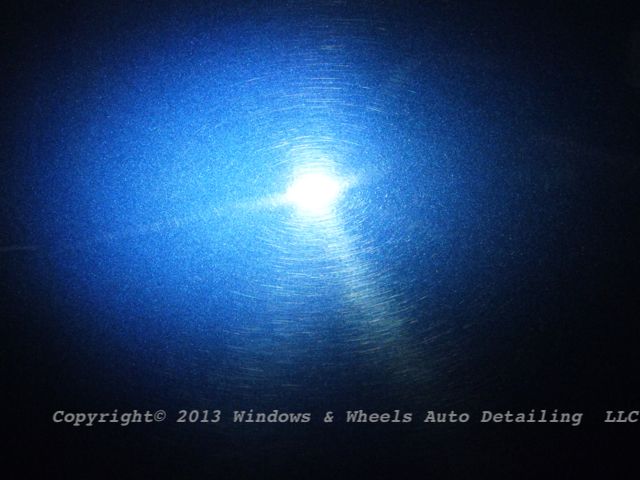
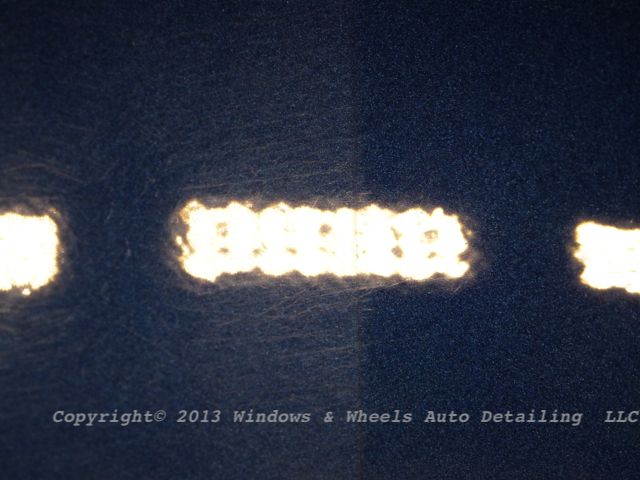
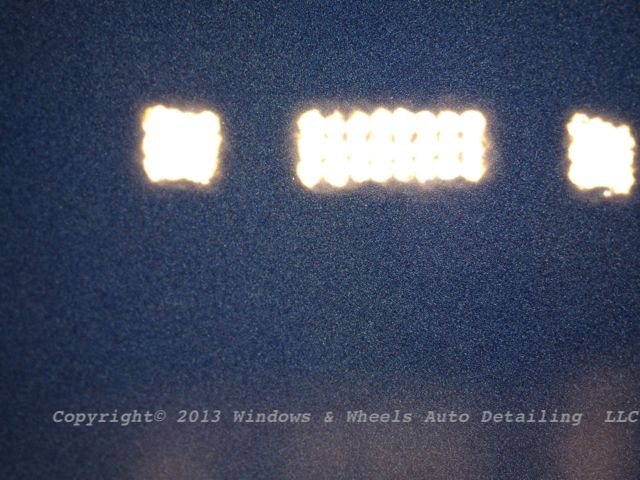
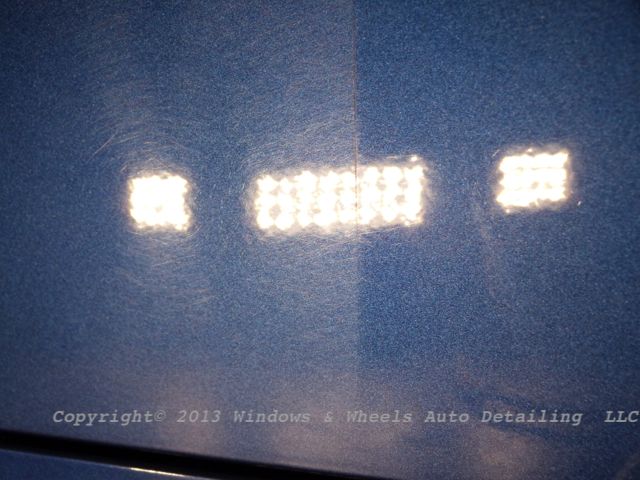
That was in the sun….next we pulled her on into the garage and gave it a looksie under the LED lights. For those who just use over head or even halogen lights - trust me, there are somethings that just don't show up unless you pull out a direct beam LED….its a scary world once you do but it sure helps you see things you never knew were there…even under direct sun some defects are difficult to see - but a darkened garage with one of these will make you cry…but will also make you better:

Oh yeah…LED's are not my friend during this portion of the detail….daym!

Tunnel wash whipped it, whipped it good.


Yeahhhh baby! Thats the good stuff right there!
This sucker was NOT for the faint of heart thats for sure. So what were we gonna rock it with. 105? D300? Maybe the hard core 101? Nope….we were going to go at it the same as we did the black Vette we had earlier that week. Rupes 21, Megs MF Finishing pad and Megs 205…yes, 205, the finishing polish that can cut like mad.
Primed up the pad thoroughly, set the speed to about 4, taped off a test section on the hood and went at it. 205 allows for a longer work time, less dust, easier to wipe away and less scouring than its more aggressive counterparts. NOT to say those heavy cutters are not needed, but sometimes you can work smarter and not harder.
The result was beauuuutiful:

Not only did it cut the holy hell out of all the defects, but it left a great finish. We had seen this earlier that week on a black Vette as well. On black, if there is marring there is NO hiding it with an LED light - but we were getting nearly a polished looking finish after "cutting" with a microfiber pad and 205. On a blue metallic like this however, it was hard to tell the difference. We of course still used 205 with a finishing pad and slower speed to squeeze as much gloss out of this baby as possible, but it sure makes the "cleaning up" of the marring much easier than after using something like 105.
Now knowing what weapons to use to attack this mess, we proceeded by working all the top panels first and then dropping down to the sides:


Knockin' those suckers out - 20"x20" at a time!
The top panels were relatively….emphasis on RELATIVELY, painless. Not many areas needed additional passes as long as we consistently cleaned our pad after every section. Next we dropped down to the sides and all was good the first few sections…till we got below the height of the wheel. Oh yeah….this was the bundle of joy that awaited us:

Now in this case Dani and i differed a bit in how we proceeded. I was able to continue to get 205 to work where as with her side, she added a little M100 to her pad to up the bite of the cut. After the detail Dani posted some photos and such up on facebook and made a comment that 205 wasn't quite getting what she wanted on the realllly bad stuff - but guys like Bryan Burnworth and Kevin Brown were kind enough to comment leave some more info for us to go by (since they both have been using 205 in this method longer than we have). To quote Bryan "When in doubt, use more" lol. Thats perhaps why i was still getting the cut i wanted on my side.
That mess up above was my side…sooo i kinda laid the 205 on pretty heavily and went at it. One thing Dani and I did both notice is since most of the scratches were going east/west…we seemed to get better/quicker removal if we started our section out by going north/south.
So again, this:

Became this:


(In my best Hey Kool-aid voice) - Oooooh yeaaaaah.
Again, a bit further down the same door we had this:


Thats a nasty nasty mess! I swear sometimes when i go back through our pictures I'm like…wow! That was really really messed up!
And yet again - 205 to the rescue:


Im sure you see the spray bottle. Water is your friend. To extend the buffing cycle and help purge residue/build up free from the pad during the buffing cycles. To help loosen up that residue AFTER the buffing cycle so when you clean your pad with air or a mf towel MORE of that gunk will get removed. After every panel or so id hit my pad with some Final Inspection which seemed to really help break down that build up even more and really get my pad back into good shape. So that i could move onto more of this:


And turn it into this (50/50)


Yes, yes we do love 205…we do love Meguiars pads and damn sure love our Rupes 21. Note this was done using the 6" mf pad, not the 5". It really is quite amazing how well that Rupes 21 can swing those larger pads around. As Kevin told us, momentum = cutting power! I sent a couple of those pictures to him and he appropriately responded "Pa-dowww!" hahaha.
Now while i was workin' the 205 just fine, i did find myself using some M100 or 101 on the rear bumper, which was a lovely cluster of what the hell. All the cutting was completed on day 1 along with the polishing of all the top panels.

Day 2 rolled around and we were up and at it early in the a.m. We have eastern exposure so the sun was hitting nicely on the back side of the car:

Nice thing to see first thing when you open up the garage!


A-polishing we will go…a-polishing we will go...


Of course the tips needed some love. Much of it was cleaned off during the wash but there was still some shine that needed to be pulled out of those tips…some more 205 to the rescue:

Panel after panel we knocked out. Finishing up by polishing the bumpers and then….time for what us Finest installers call…."The Boom Sauce"

Nothing like topping off a beautifully polished car with a hardcore but gleaming protective coating.
Here is the first coat curing…notice the strokes all end in the same direction. Maybe it does nothing at all, but in our mind it makes it even!

While the first coat set, Dani cleaned the rims, coated them, dressed the tires and the wheel wells:


I on the other hand was circling around the car applying FlyBy30 to all of the glass:

After applying the 2nd coat, letting it cure and then wiping it clean - it was time to pull this baby outside. Now we didn't have full sun that day (though it did peek out just enough for a couple of nice pictures!) - but we did have some amazing cloud reflection shots that seriously looked like you could just jump into them:

The Montego Blue like it should be:


Hello sun!

The roof looked like the entry way to heaven:

I love this picture…i just do:

Hell i love this one too lol:


The E93 was looking mighty pretty!

Nice clean and coated wheels:

Those ugly swirls that were above the upper body line of the doors were a thing of the past:


It was crazy to see how dark and liquid the paint looked while it was cloudy - but then how it transformed into a lighter and very bright color as the sun weaved in and out of the clouds:


NICE!


Good sun shot here:


And of course under our wonderful LED lights, this baby was crystal clear and glowing!


Yes, even the low stuff...

Parked and awaiting her owner:

When the owner arrived he was very pleased and was also kind enough to leave us a very nice review:
" Great work by Wills and Dani on my 09 BMW last weekend. I was expecting quite a lot even though the car is a 2009 and hasn't been babied. It now looks better than it ever has and I promise to take better care of it.....lol. These two have FAR exceeded my expectations and I would highly recommend them to anyone wanting a First Class Detail for their vehicle. Thanks Again."
Love it!
Now that the detail was over - i was free to go enjoy my birthday! This was a good way to end my 27th year - bringing out a diamond in the rough. Had a great b-day the following day and then…yup, right back at it the day after lol. No complaints!
Thanks all for reading, hope you enjoyed the eye candy and were able to see just a little more of the potential M205 has.
 !
!
Comment