

- If this is your first visit, be sure to check out the FAQ by clicking the link above. You may have to register before you can post: click the register link above to proceed. To start viewing messages, select the forum that you want to visit from the selection below.
-
Re: Detailed: 2007 Toyota FJ Cruiser - Black Cherry Pearl (Trashed Off-Road Revival)
That's........crazy! The image you sent my way via SMS looked great but this takes the cake! The owner must have been shocked even the next morning, thinking the day before had been a dream or something.Leave a comment:
-
Re: Detailed: 2007 Toyota FJ Cruiser - Black Cherry Pearl (Trashed Off-Road Revival)
Could this qualify as an extreme makeover?
Thanks so much for the compliments, Charles!!!Originally posted by civicferio View Post
We can tackle your Land Cruiser when I move to SoCal!!!
Thank you so much for the compliments, Davey!!! I really appreciate it.Originally posted by davey g-force View Post
Thank you, Swun! It's definitely hot out here.Originally posted by SwunMurrieta View Post
Thanks a lot, Meticulous-Detail!!Originally posted by Meticulous-Detail View Post
Yes Meguiar's products rock and this is proof that the Meguiar's Microfiber Correction System works!!! Thanks Meguiar's for bringing us such innovative products that produce amazing results!Leave a comment:
-
Re: Detailed: 2007 Toyota FJ Cruiser - Black Cherry Pearl (Trashed Off-Road Revival)
Ridiculous! Awesome job!
You know what I love about this detail, all megs products, not a 65 step detail, no fancy tools, no boutique products and that thing looks awesome!Leave a comment:
-
Re: Detailed: 2007 Toyota FJ Cruiser - Black Cherry Pearl (Trashed Off-Road Revival)
That is amazing. I couldn't believe my eyes. Especially out here in this heat in AZ. I live in Avondale and I can feel my feet burning through my shoes if I stand on the street. It's crazy hot here. The vehicle looks great.Leave a comment:
-
Re: Detailed: 2007 Toyota FJ Cruiser - Black Cherry Pearl (Trashed Off-Road Revival)
Marc, that is some of the best work I've seen you do! Absolutely outstanding. My jaw literally dropped looking at those afters.
Well done man!
Leave a comment:
-
Re: Detailed: 2007 Toyota FJ Cruiser - Black Cherry Pearl (Trashed Off-Road Revival)
Marc,
I nearly fell off my chair!!! that is amazing!!! I'm glad to see the pin stripping from the brushes came off because I have some of those on my land cruiser. Now I know they can be corrected! Keep up the awesome work!Leave a comment:
-
Detailed: 2007 Toyota FJ Cruiser - Black Cherry Pearl (Trashed Off-Road Revival)
Quick Detail:
Duragloss Quick Detailer
Meguiar's Supreme Shine Microfiber
Paint Correction:
Meguair's G110v2 / 5" W67DA Backing Plate
Meguiar's M101 / D300 / Meguiar's 5" Microfiber Cutting Discs
Pad Conditioning Brush
Craftsman 500W Halogen Lights
Brinkmann Dual Xenon Lights
LSP:
Meguiar's D301 Finishing Wax
Plastic Trim:
Meguiar's Ultimate Black
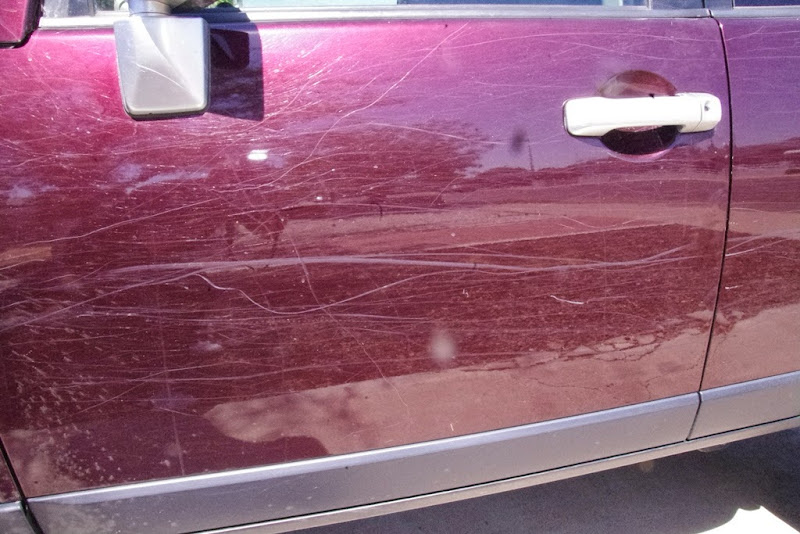
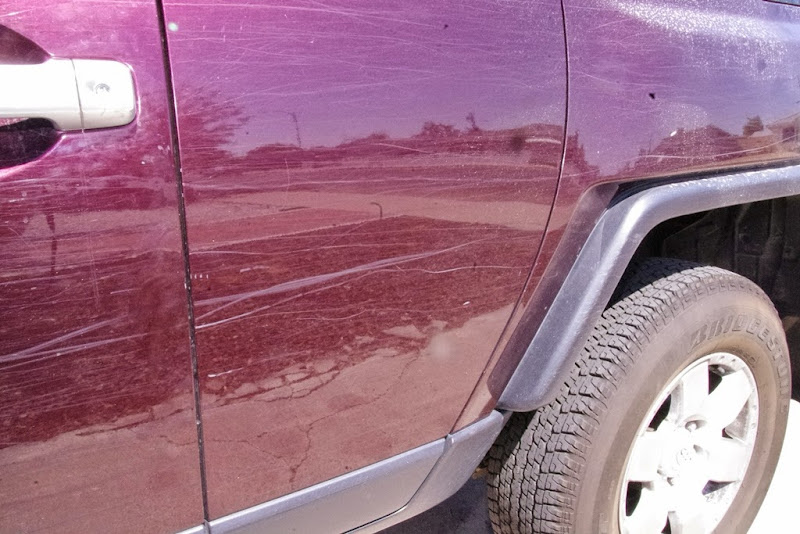
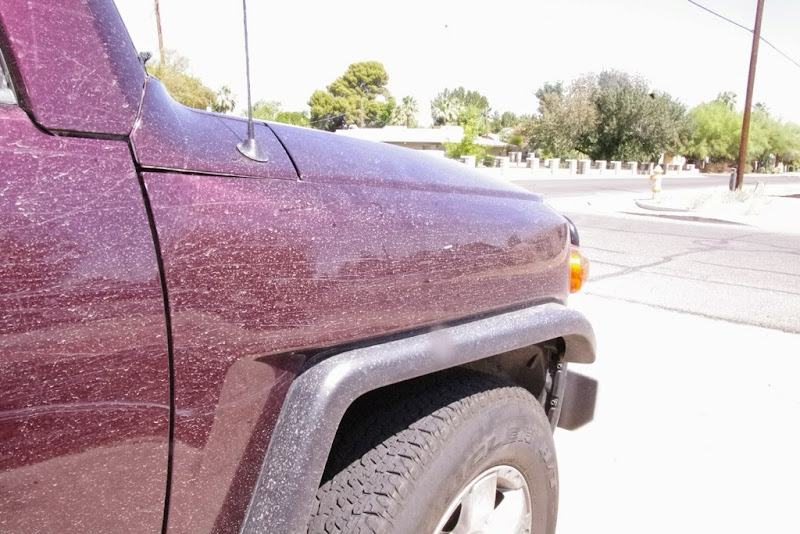
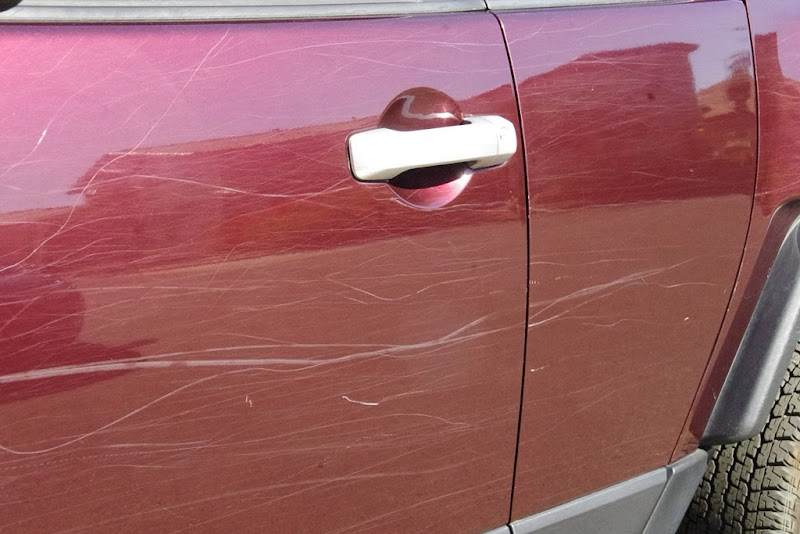
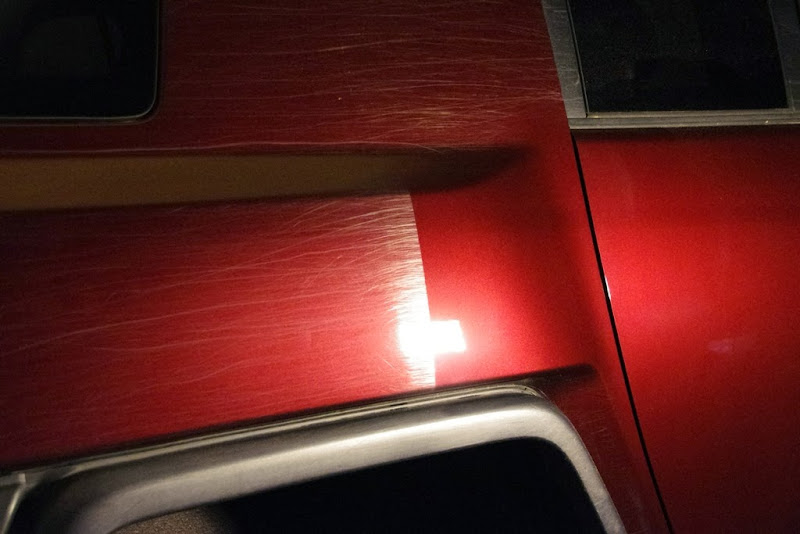
The owner of this vehicle is a co-worker. He wanted to trade this truck in but dealerships were low balling him and giving his truck below poor trade in value. All of them were saying that the truck needed a new paint job to re-sell. I sent him a few of my previous detail jobs and he asked me if I could do anything about his paint. I said that I would like to try and see what I can do and hopefully he could gain a few grand in his trade-in. The owner took this vehicle for the main purpose it was built - off roading. Not only did he go off roading but he went at it HARD. He didn't mind the battle scars obtained from it because he thinks that the truck was built for it so he's just serving its purpose. CHALLENGE ACCEPTED but I really had my doubts on it. I still thought it was worth a shot and it's not like I can make it worse.
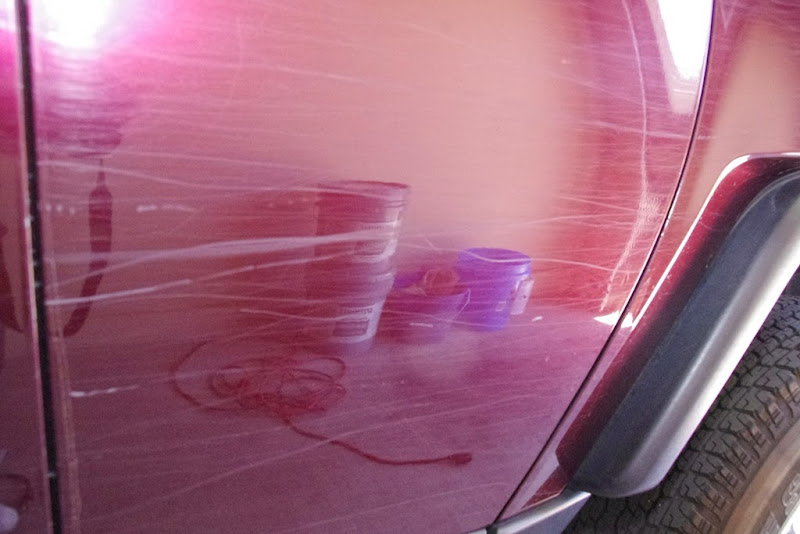
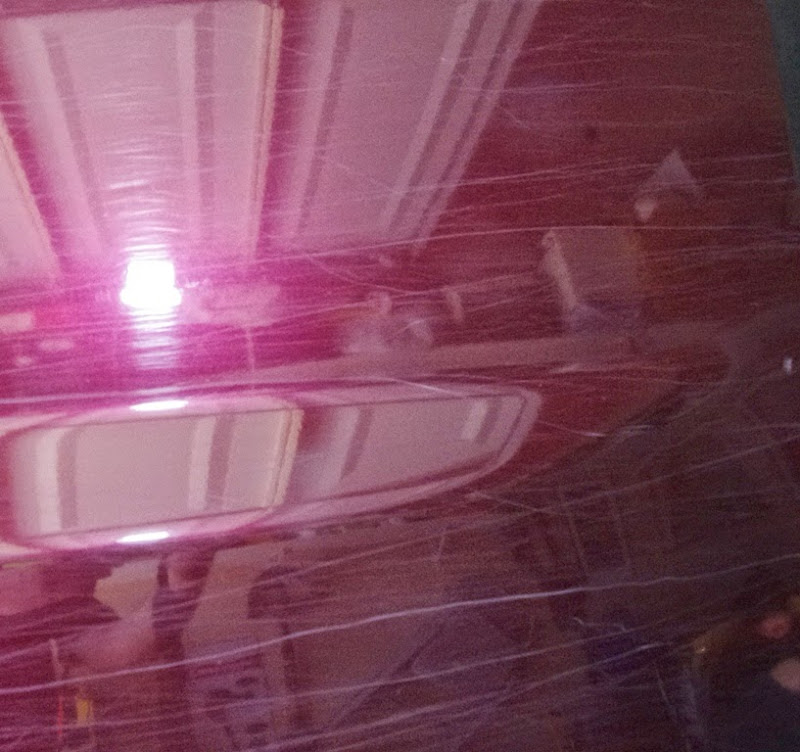
Brace yourselves.. This is not pretty..
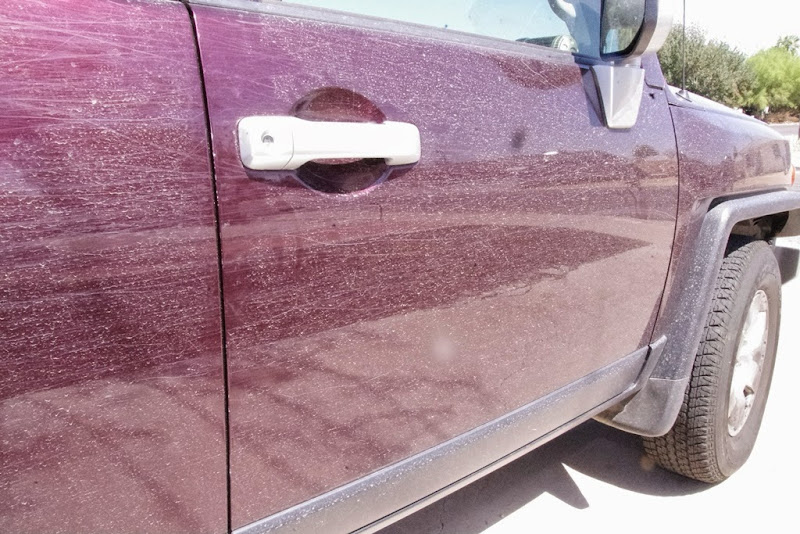
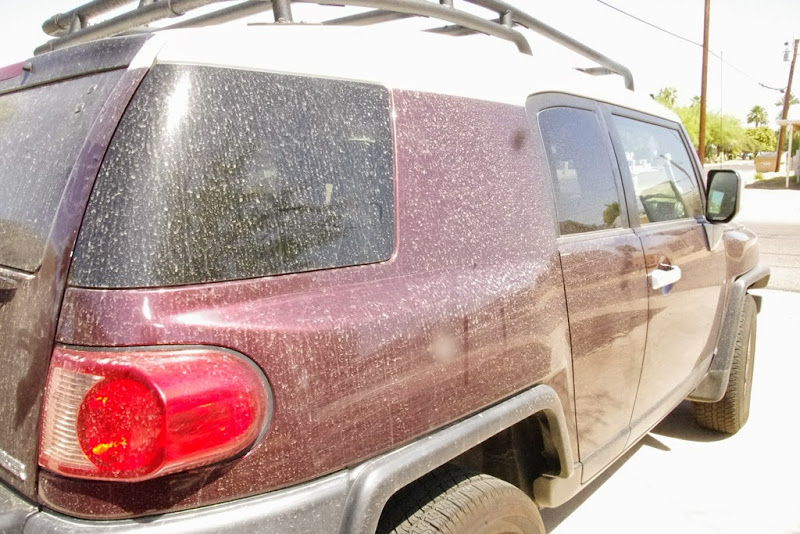
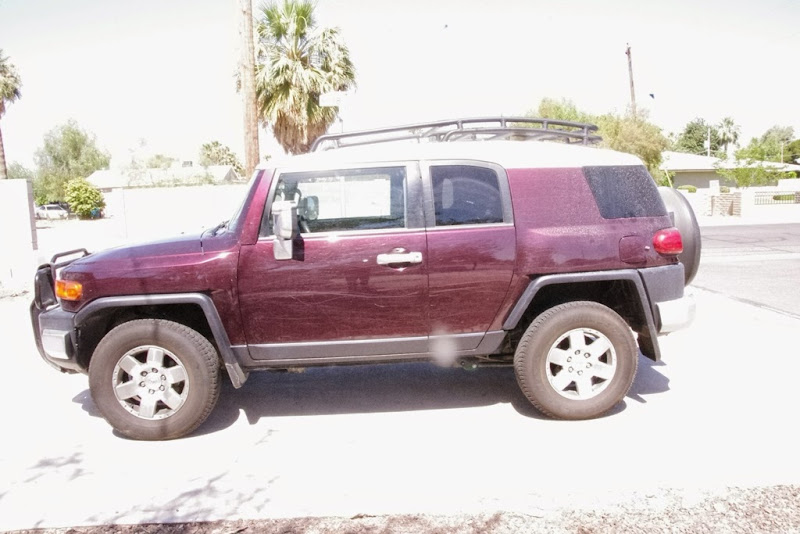
Here are pictures the owner took before he brought over the vehicle to the detail location:
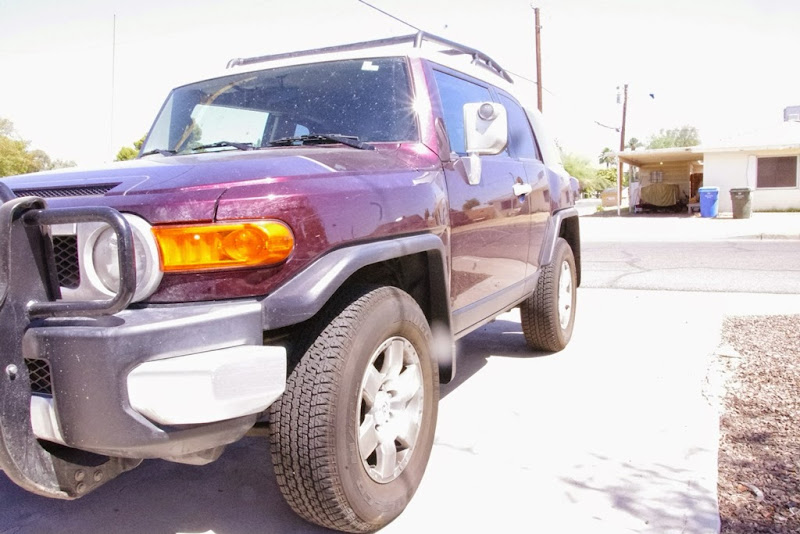


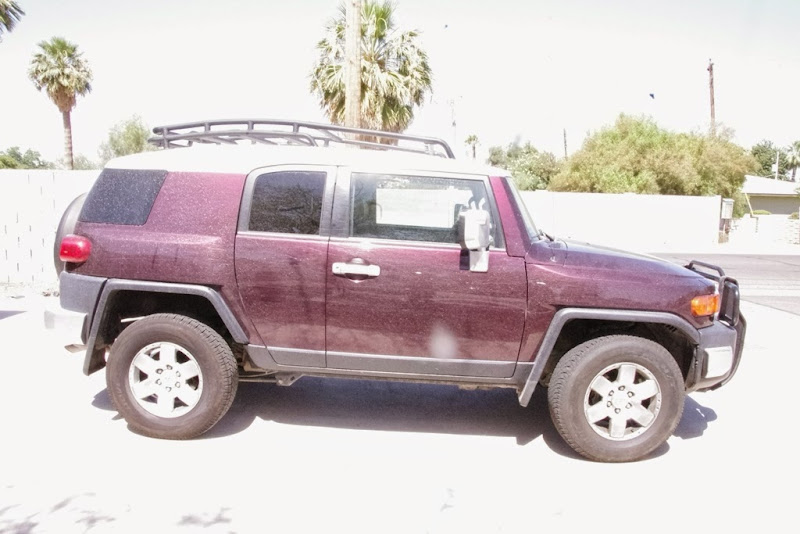
The owner was kind enough to run the truck through the car wash before bringing it in for the detail. I didn't mind the car going through the car wash because the damage is a lot worse than what can be obtained from a car wash. Upon the vehicle's arrival, I waited a little to let the car cool down. It's very hot here in Phoenix right now so the surface temp is through the roof. After waiting, I wiped down the entire vehicle to remove any dust. Here are pictures of the vehicle after the car has been wiped down:


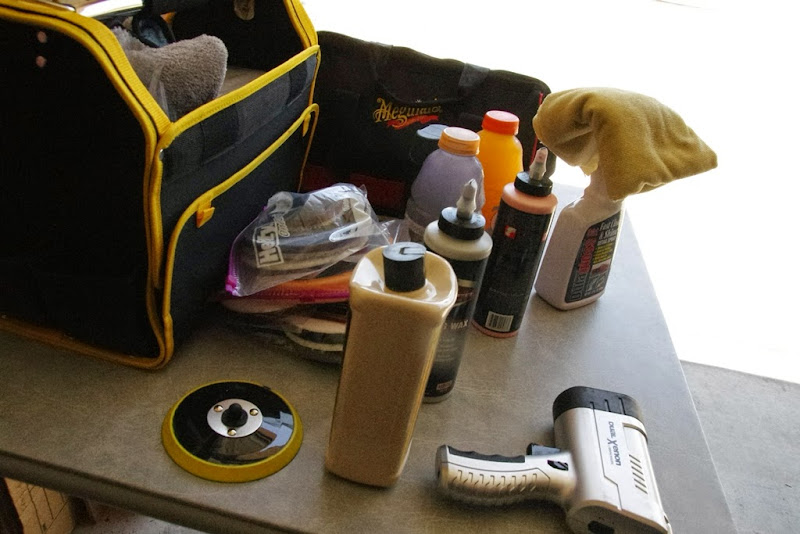
Here's a picture of the table where I laid out my detailing stuff. Being mobile is a little hard LOL!
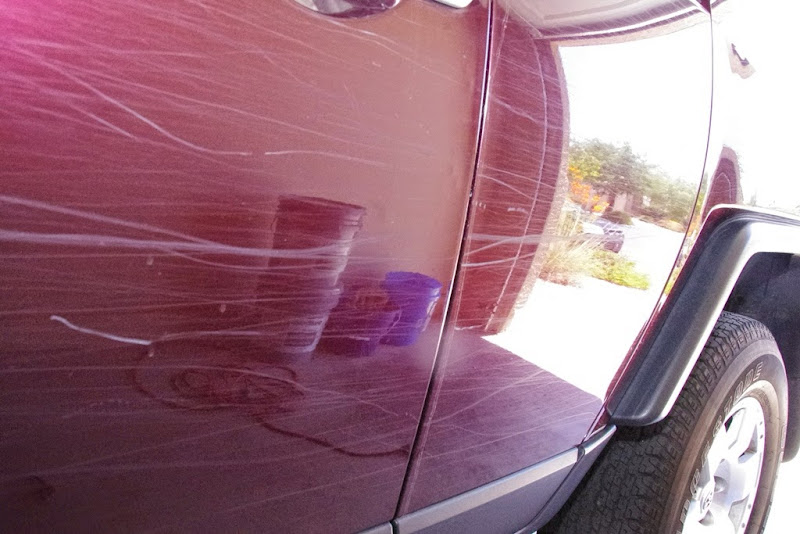
The owner was planning to trade the vehicle in so I didn't really try to perfect the polishing process. I planned on using the Meguiar's DA Microfiber Correction System for this with an additional reinforcement - M101. I wanted to use the big guns because the scratches just look very deep and awful. So the plan was to mix M101 with D300 for the initial compounding step using the MF cutting discs. I wish i had my Rupes for this job but it wasn't with me at the time. The following pics are taken from the correction process:
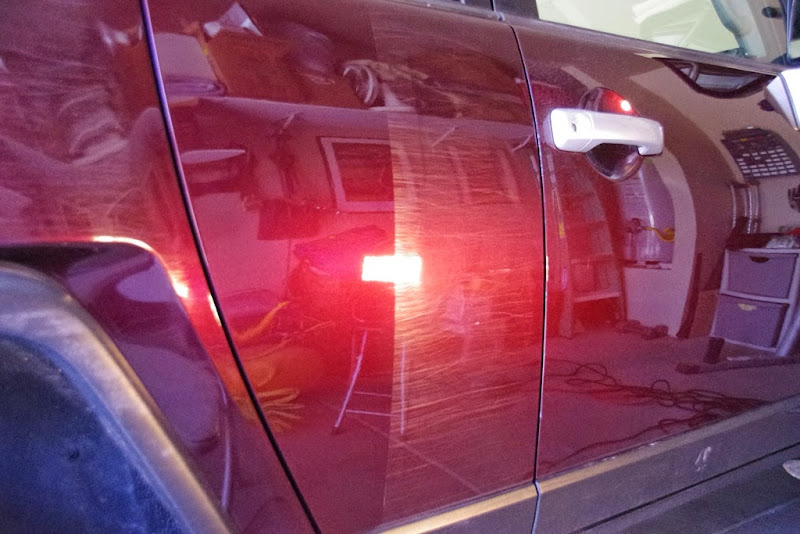
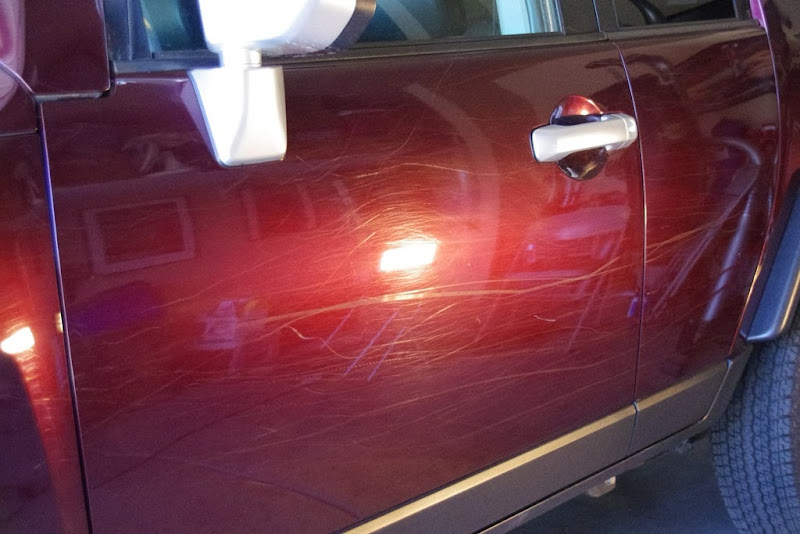
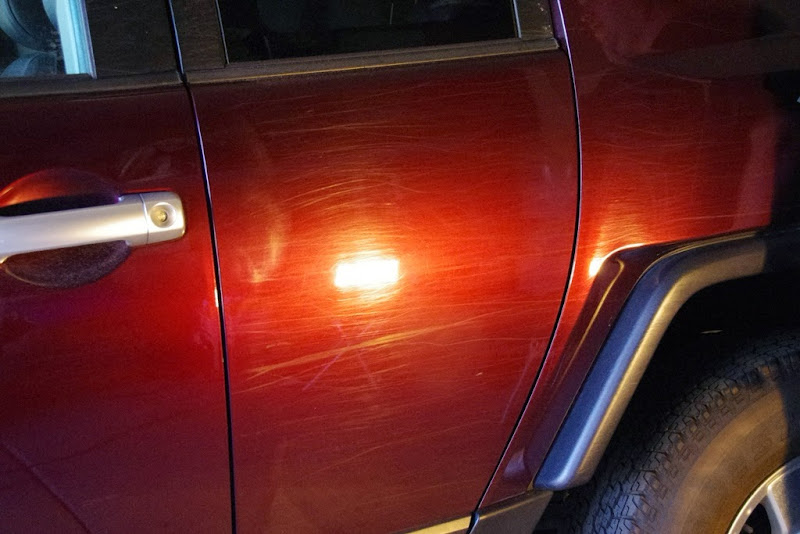
Passenger Side Front Door Before:
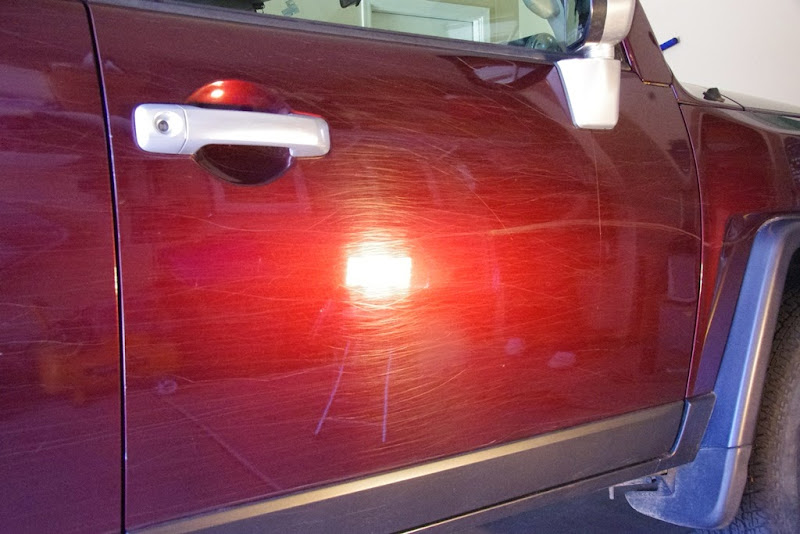
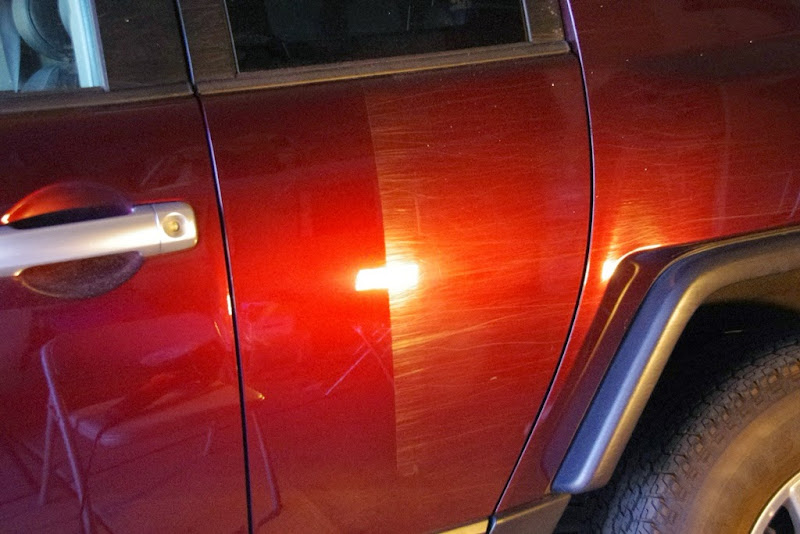
Passenger Side Front Door 50/50:
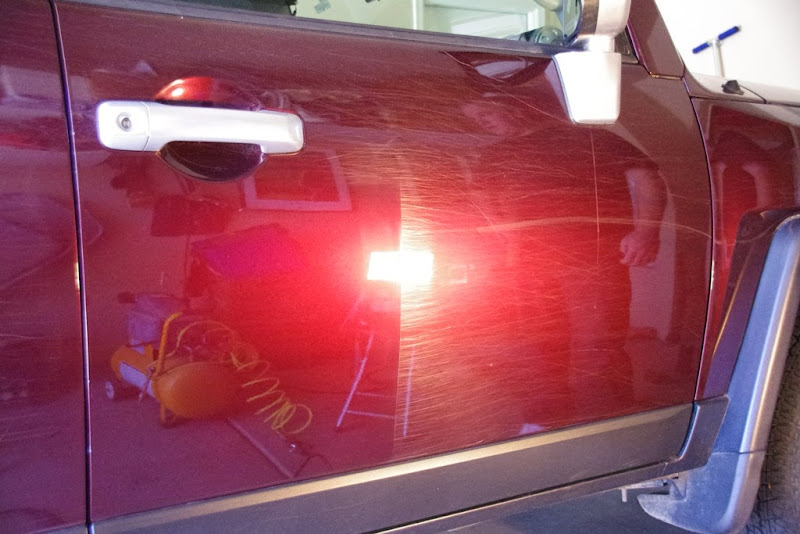
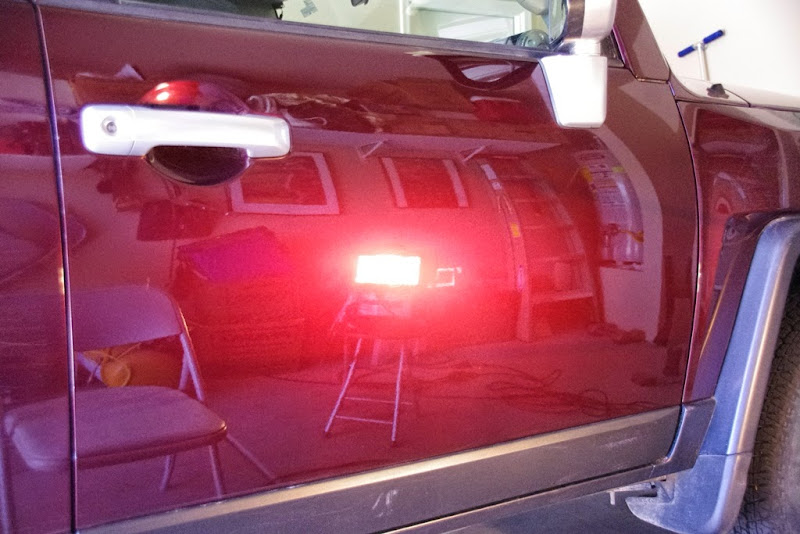
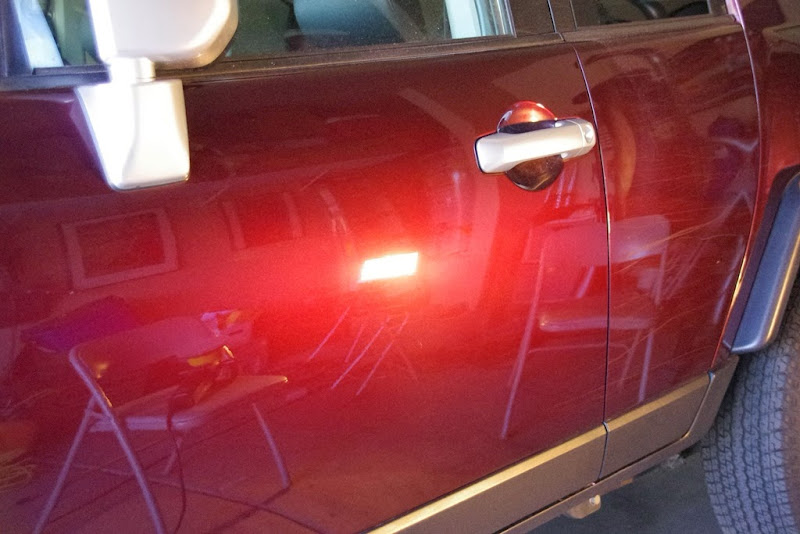
Passenger Side Front Door After:
Here's a picture of the microfiber cutting disc after 1 pass. As you can see, it turned a little brown because it was pulling embedded dirt from the paint.

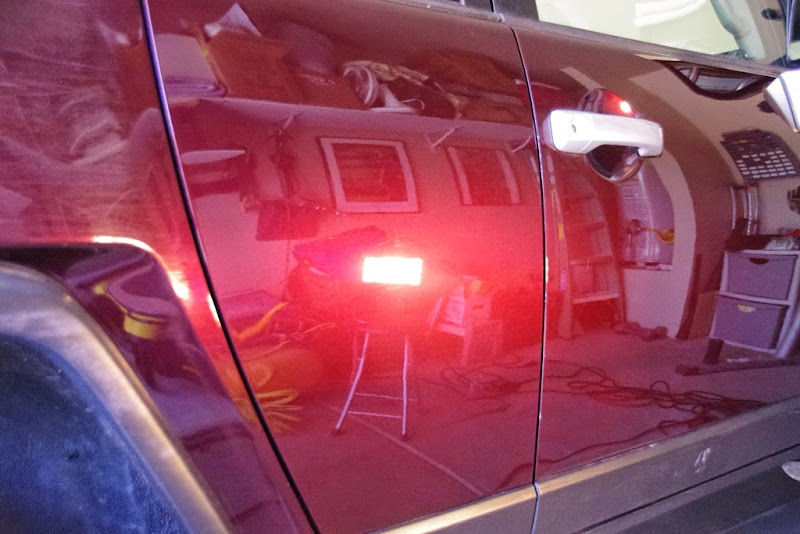
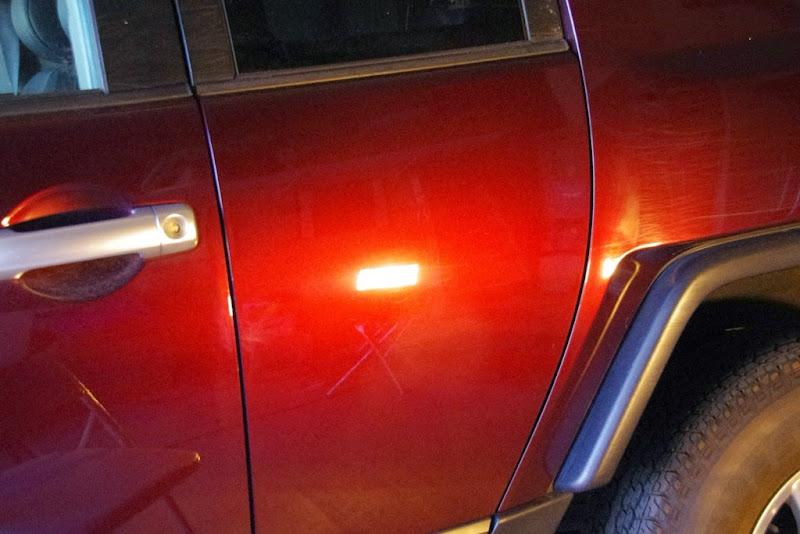
Passenger Side Rear Door Before:
Passenger Side Rear Door 50/50:
Passenger Side Rear Door After:
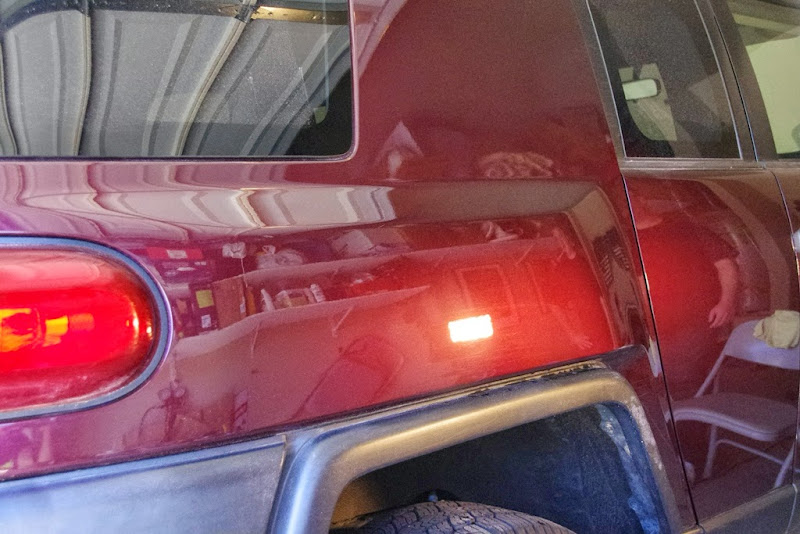
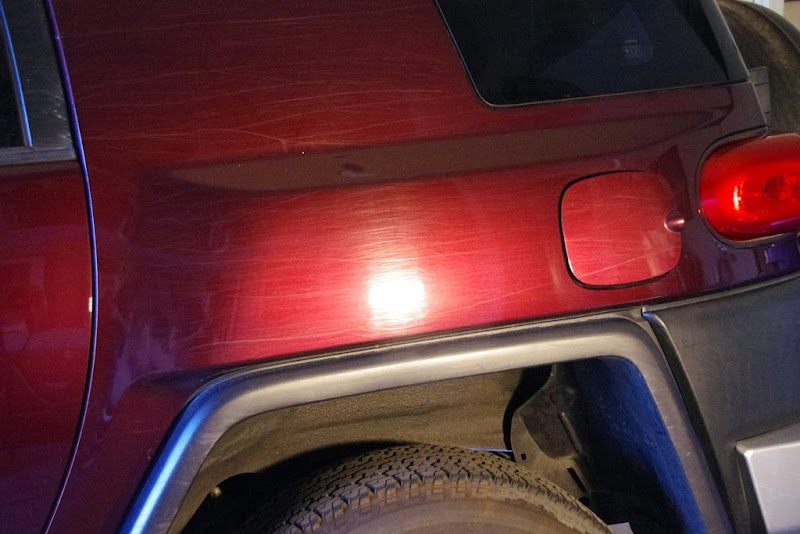
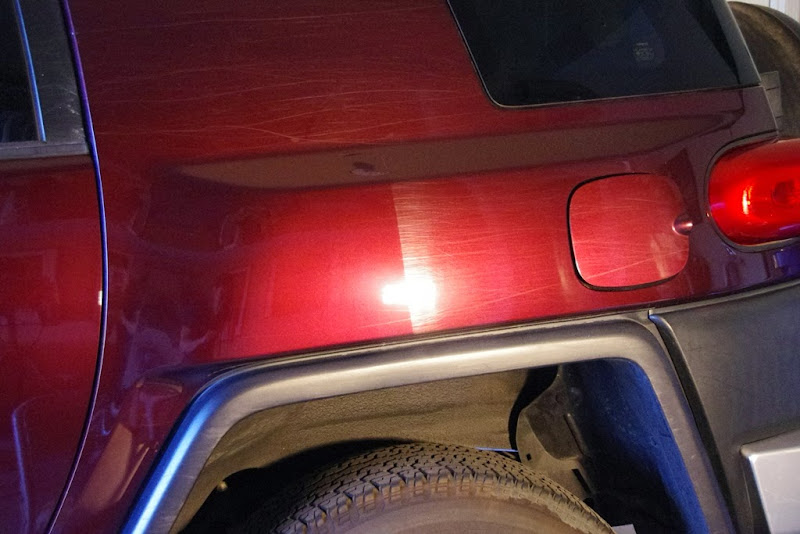
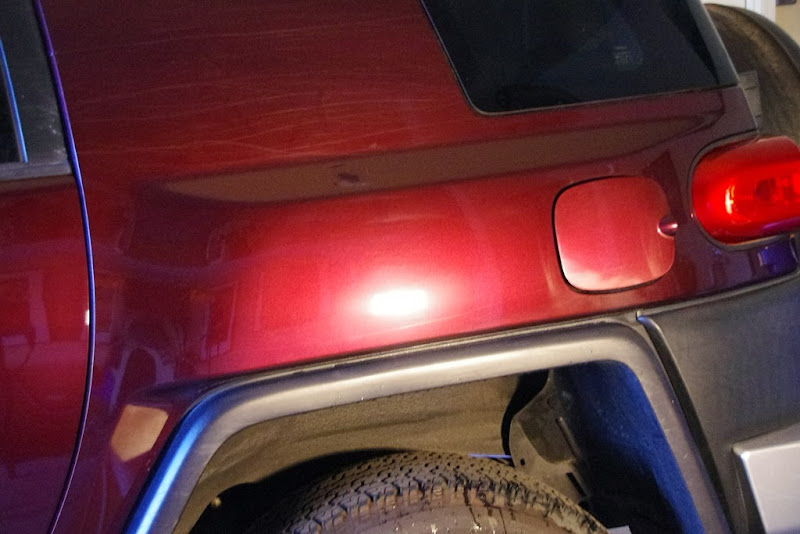
Passenger Side Rear Quarter Before:
Passenger Side Rear Quarter 50/50:

Passenger Side Rear Quarter 50/50 (Garage Door Closed):
Passenger Side Rear Quarter After:
Passenger Side Front Fender Before:
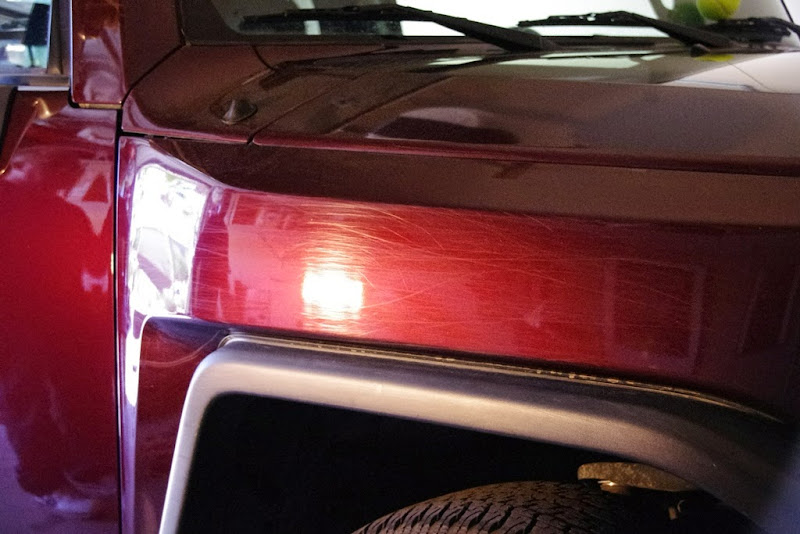
Passenger Side Front Fender 50/50:

Driver Side Front Door Before:
Driver Side Front Door 50/50:

Driver Side Front Door After:
Driver Side Rear Door Before:
Driver Side Rear Door 50/50:
Driver Side Rear Door After:
Driver Side Rear Quarter Before:
Driver Side Rear Quarter 50/50:
Driver Side Rear Quarter After:
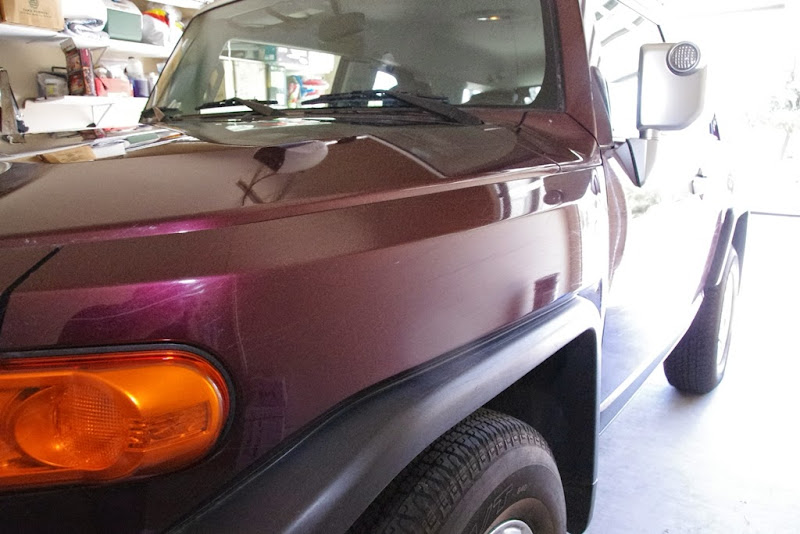
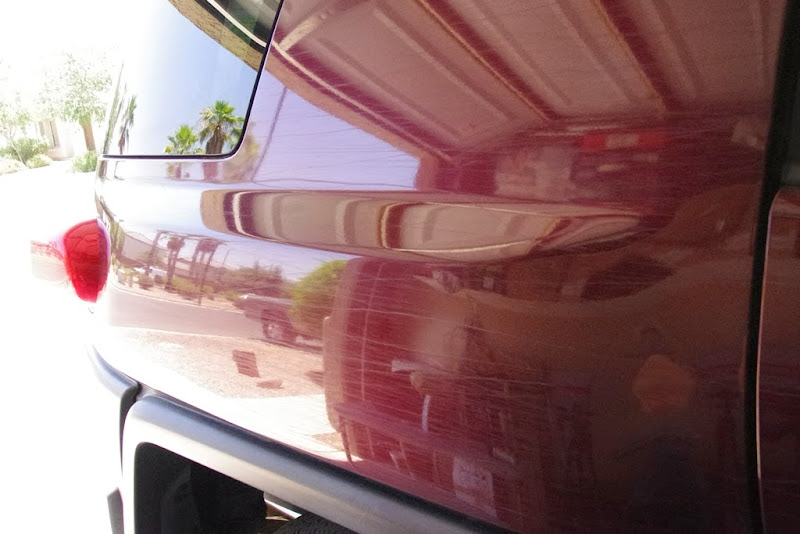
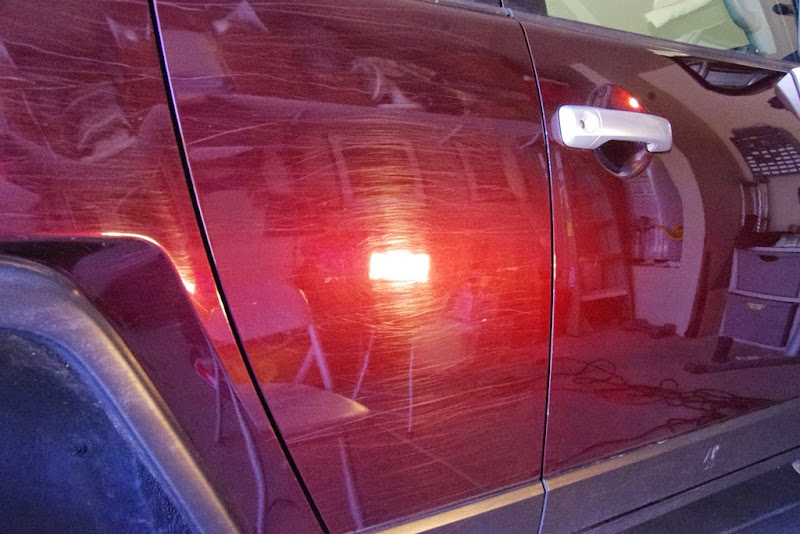
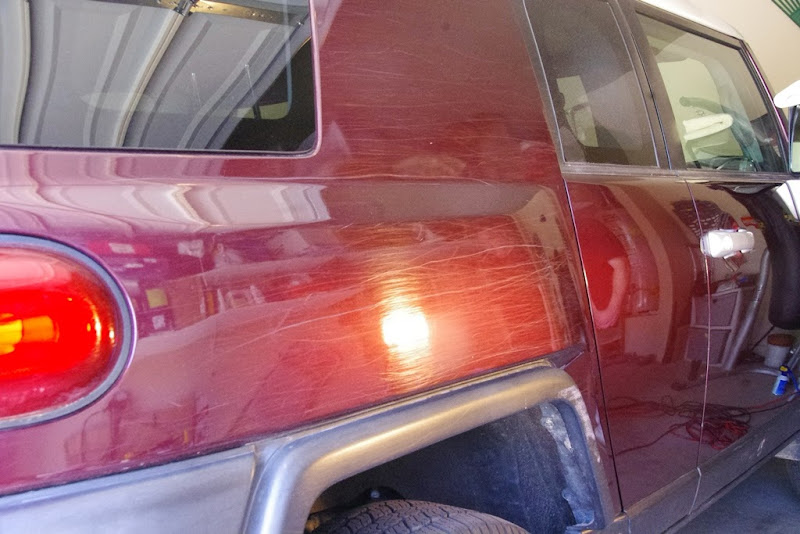
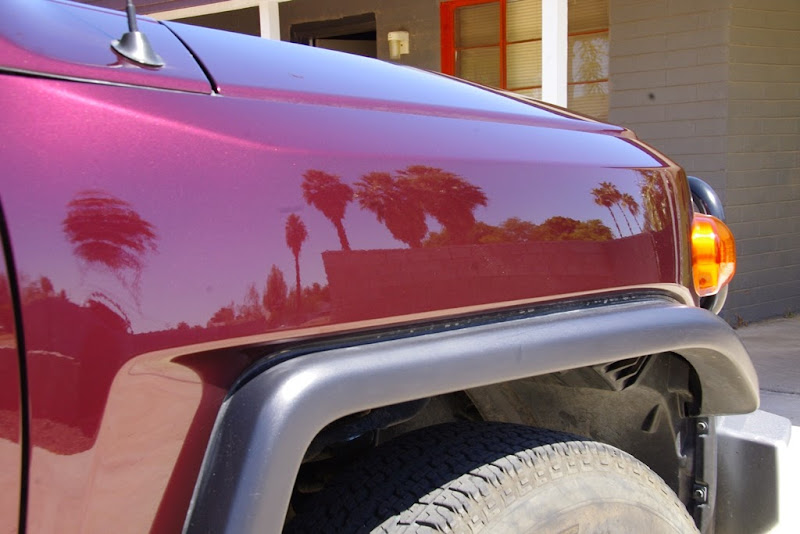
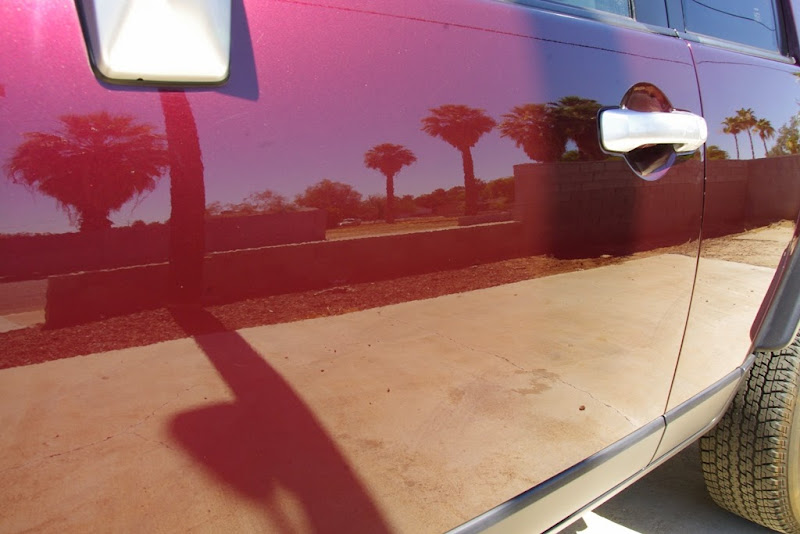
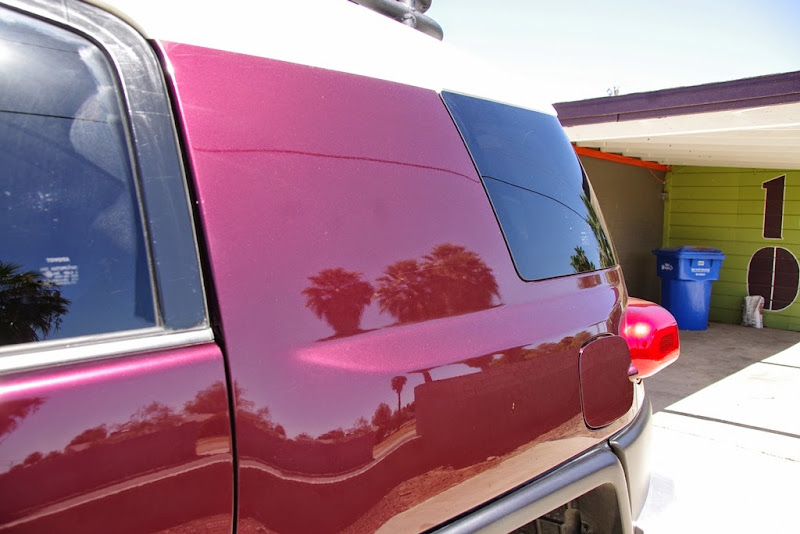
The correction was not 100% by all means. I think I achieved 90-95% correction which was a big improvement. There were just too much RIDS and it's pretty much expected given how the scratches were obtained from tree branches or bushes rubbing against the paint. The following 2 pictures are take post polishing but pre LSP. Please excuse the faint white dot in the following pictures. There was a foreign particle on the lens and I failed to see it while taking the pictures.
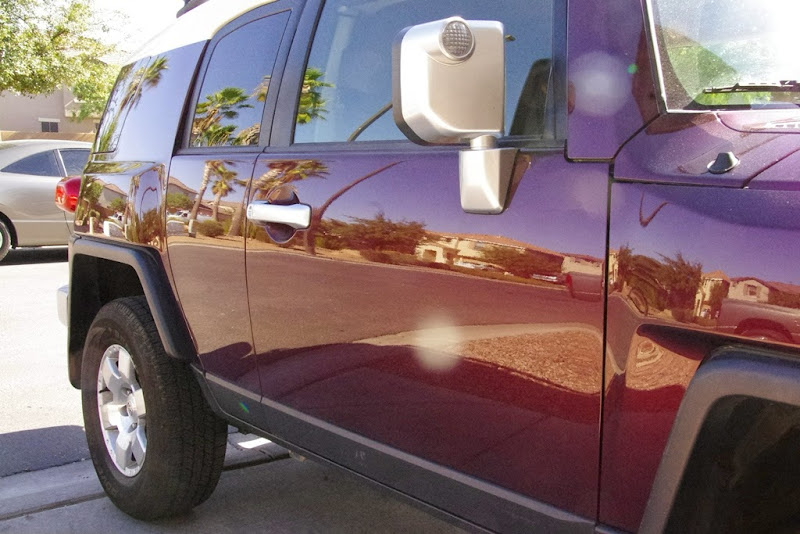

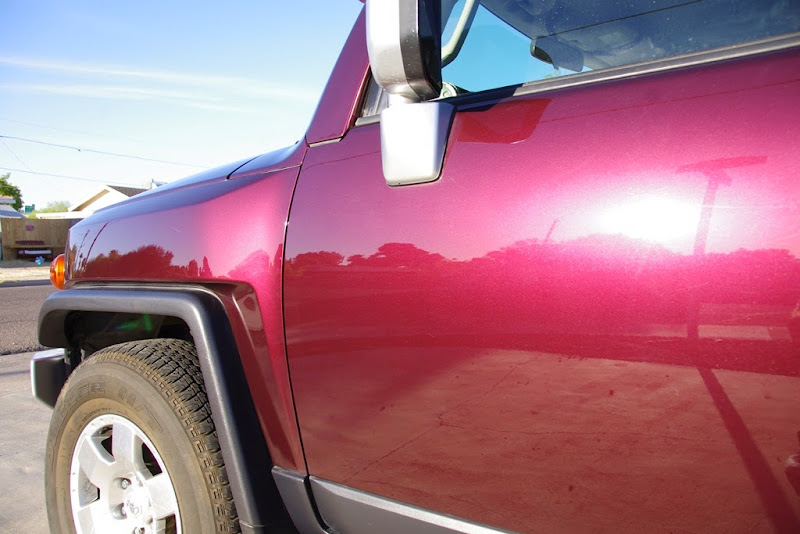
For reference, the picture below is taken before polishing the front driver side fender. Comparing it to the reflections above, you can see that the reflection below is less sharp and more blurry.

After polishing the car, I applied D301 Finishing Wax with the MF finishing disc. Here's a picture of the LSP curing.

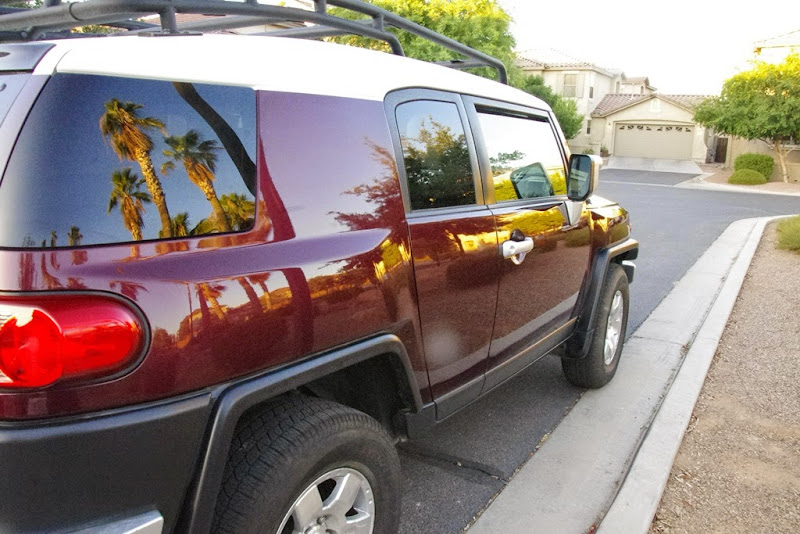
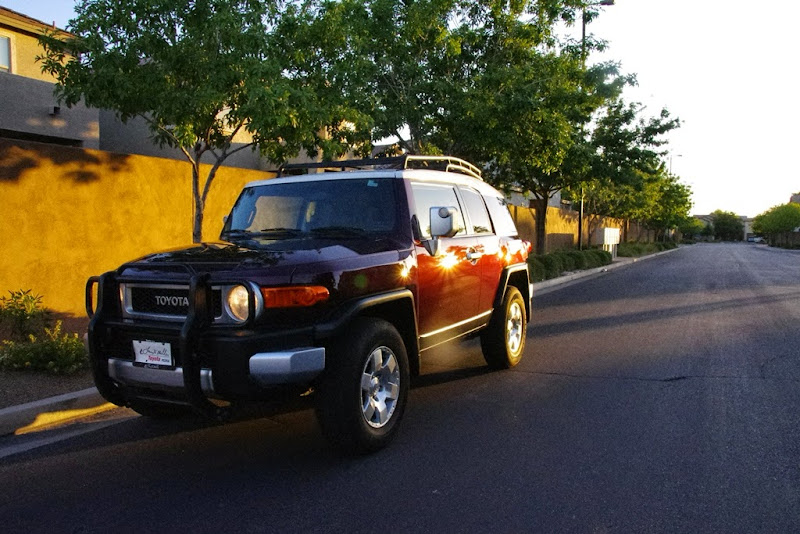
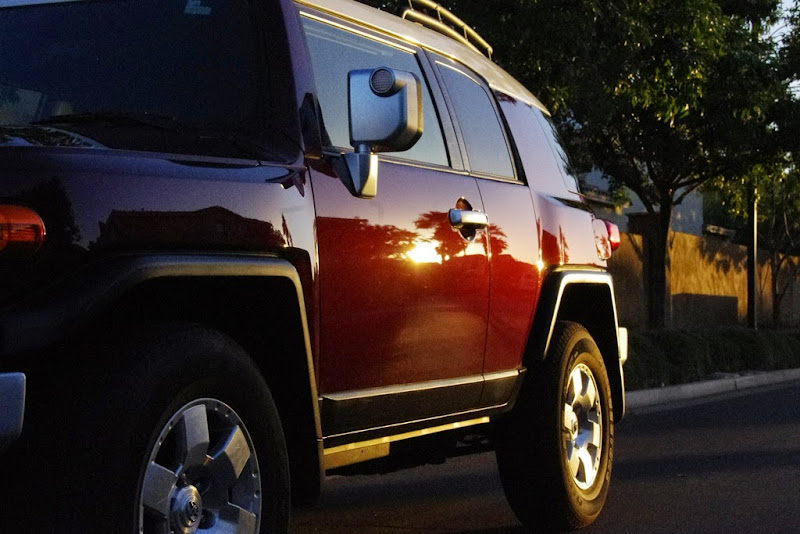
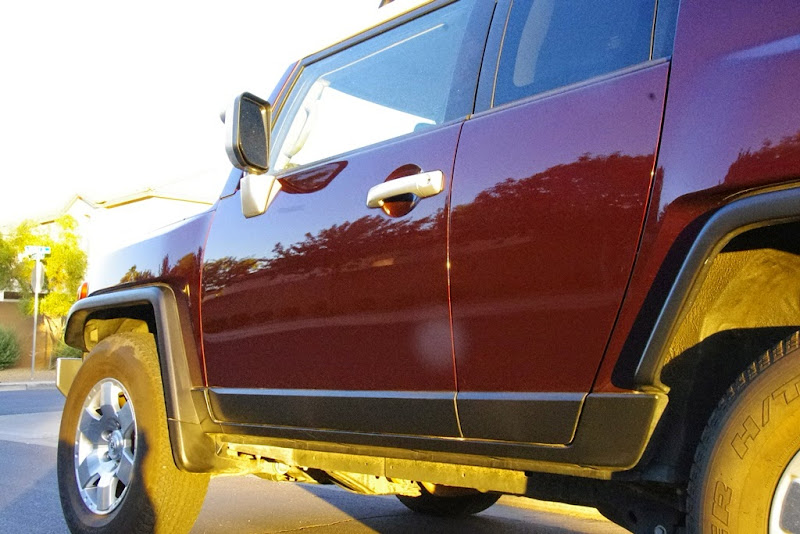
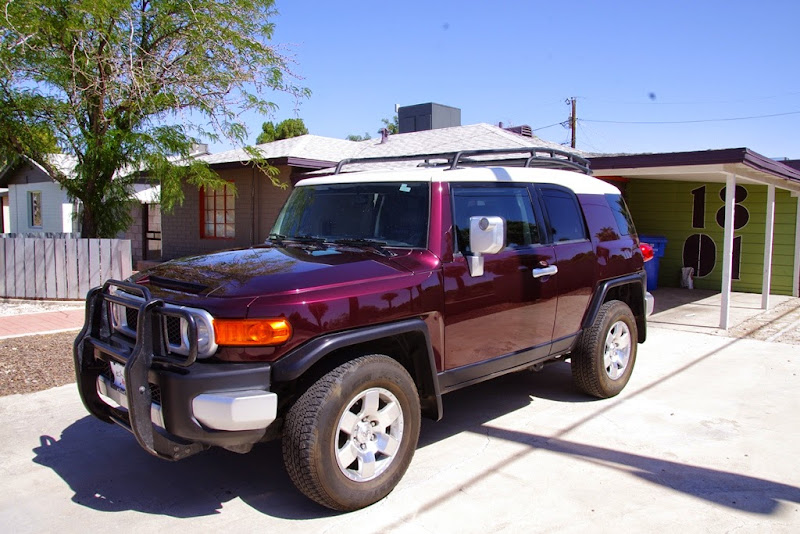
The sun was setting when I finished the car. I rushed to take some after pictures outside before the sun sets completely. I still haven't dressed all plastic surfaces with Ultimate Black on the following pics so please excuse me for that. Again, please excuse the white dot in the pictures.
After:

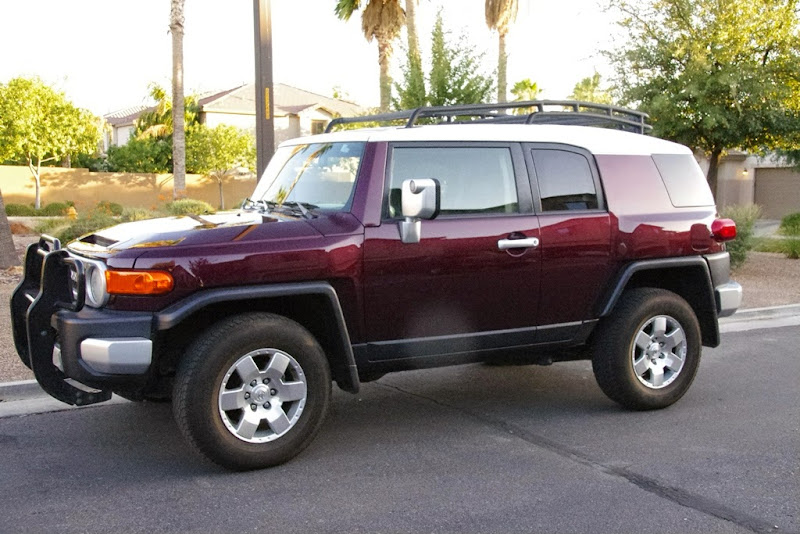
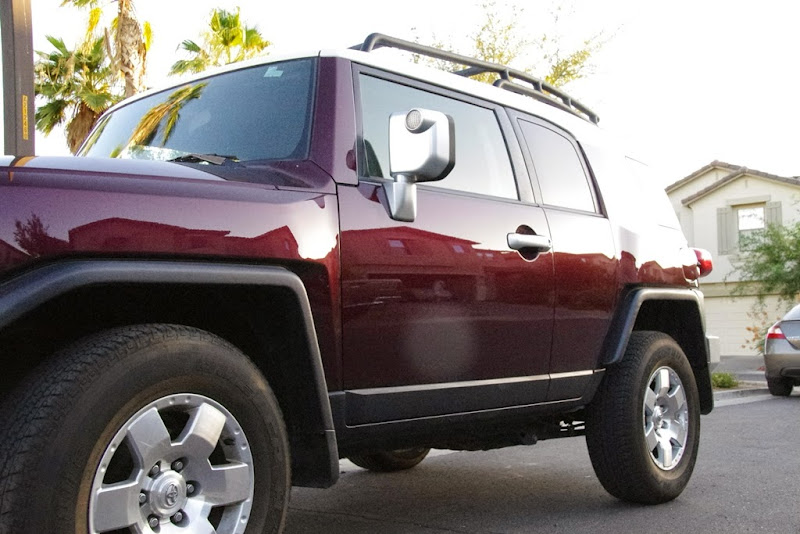
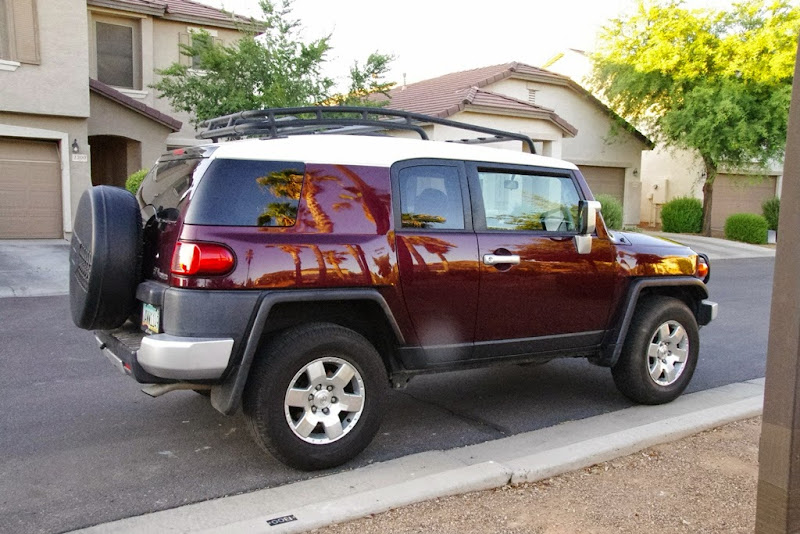
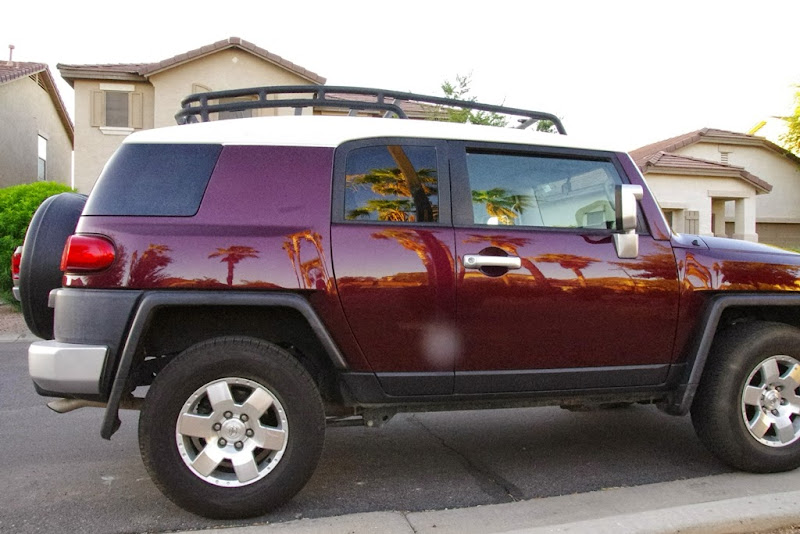
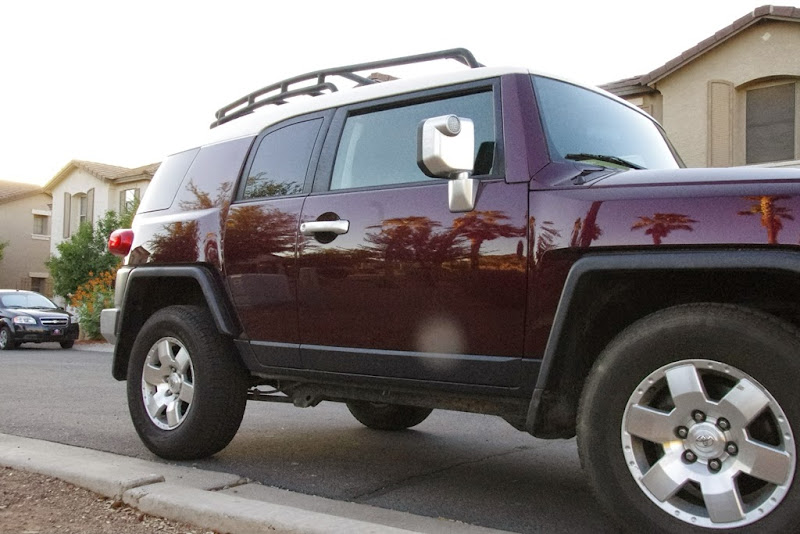

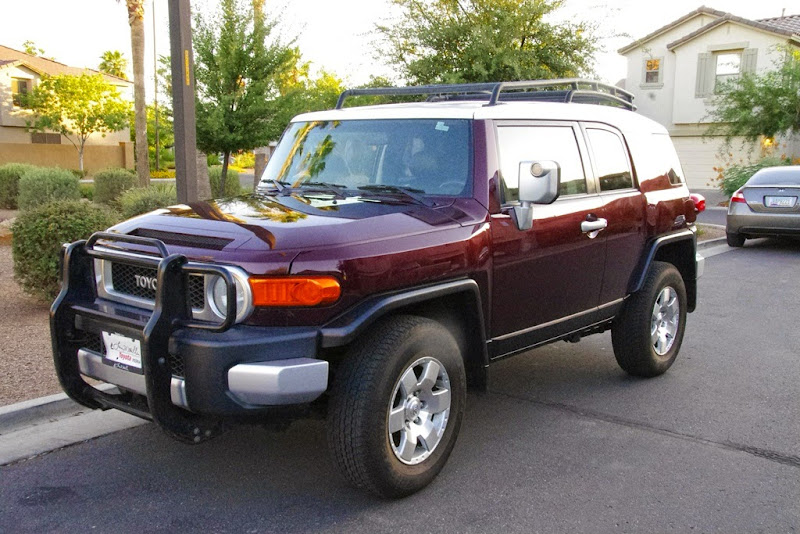

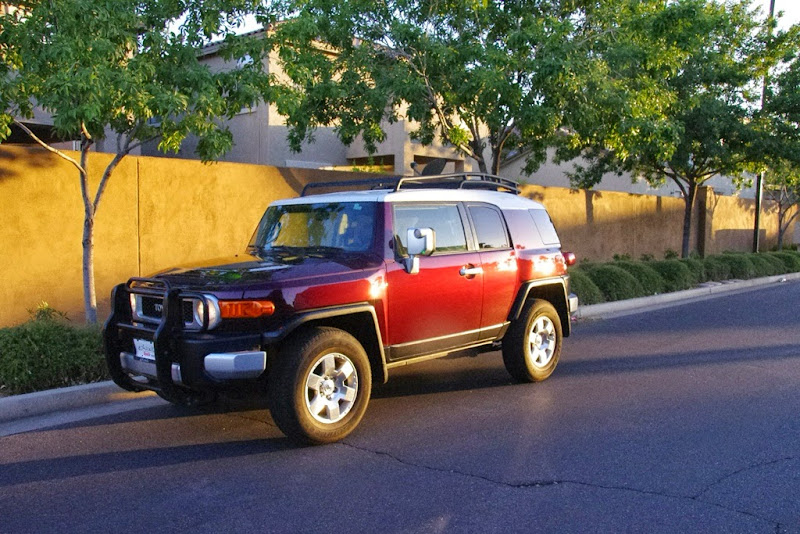

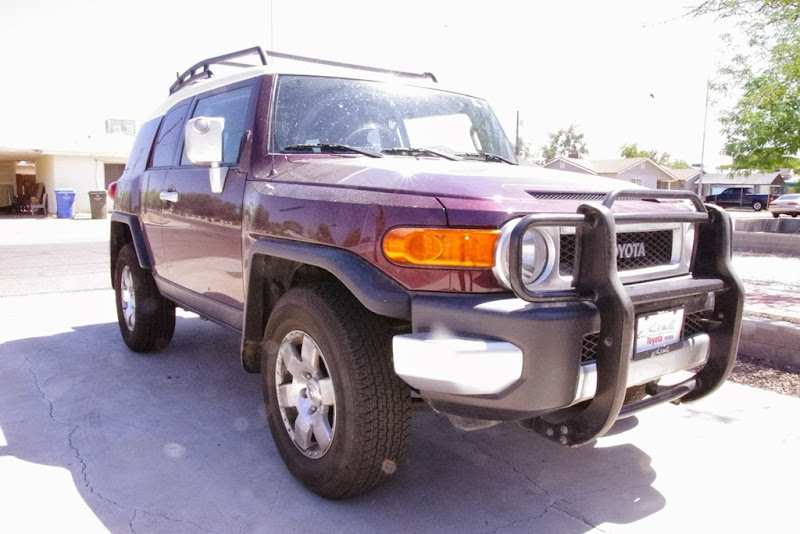
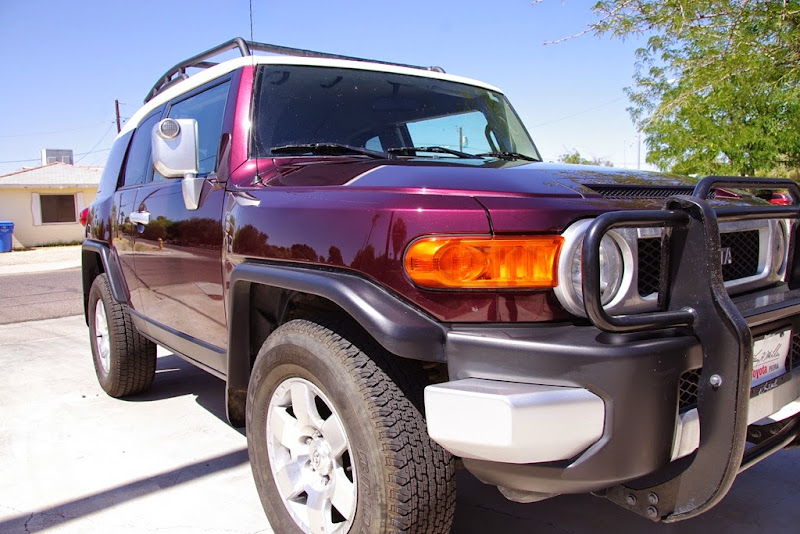
I didn't get a chance to take pictures of the car under full sun. So after 2 days, I asked the owner to take some pictures for me outside and here they are:
(Ultimate Black applied and white dot removed)


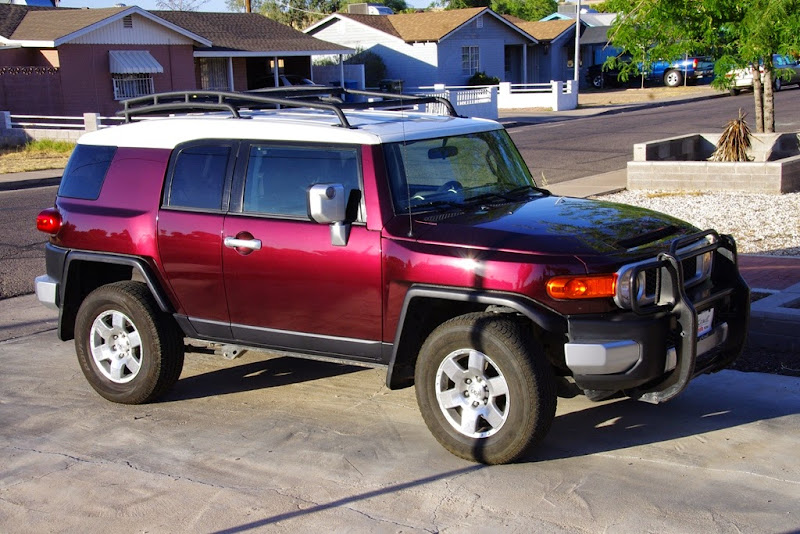


The owner was ecstatic of the results!!! For me, that's the best thing I could hear. I was getting annoyed because I couldn't remove all the RIDS but if the owner is happy, so am I.
What do you guys think?
Approximate time: 7 hours
Location: Phoenix, AZ

Leave a comment: