

 Tweet
Tweet
Quick “health warning” for this write up – I have included a lot of pictures, in the hope that it tells the story of the detail and shows the defects, processes (inside and out), and end results!
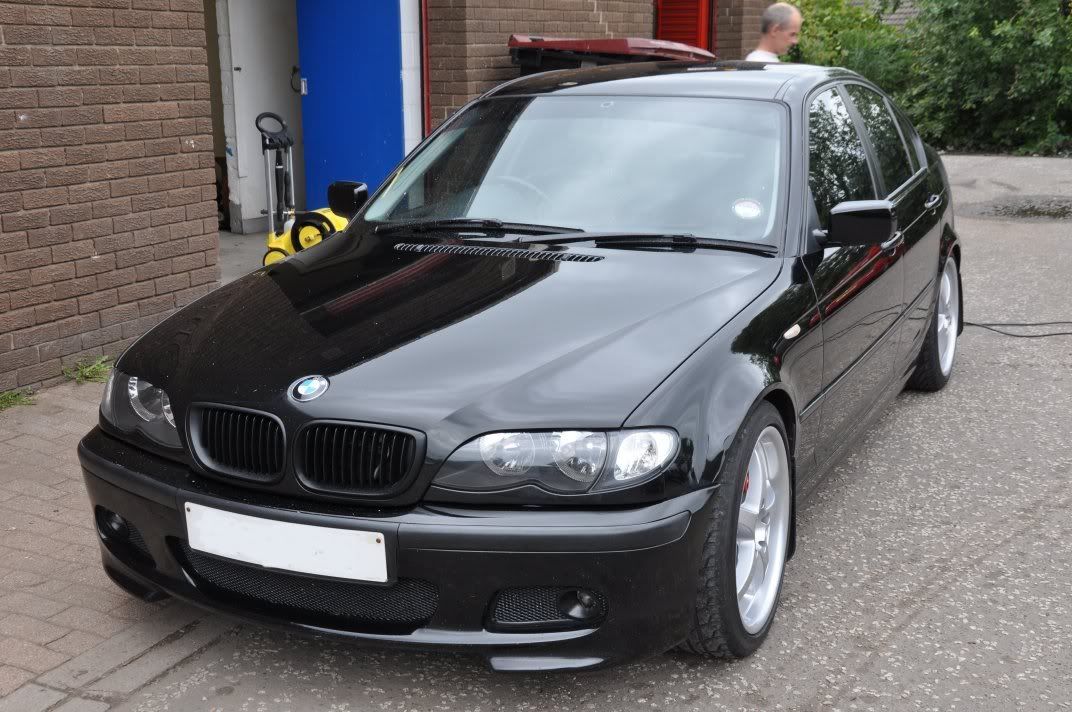
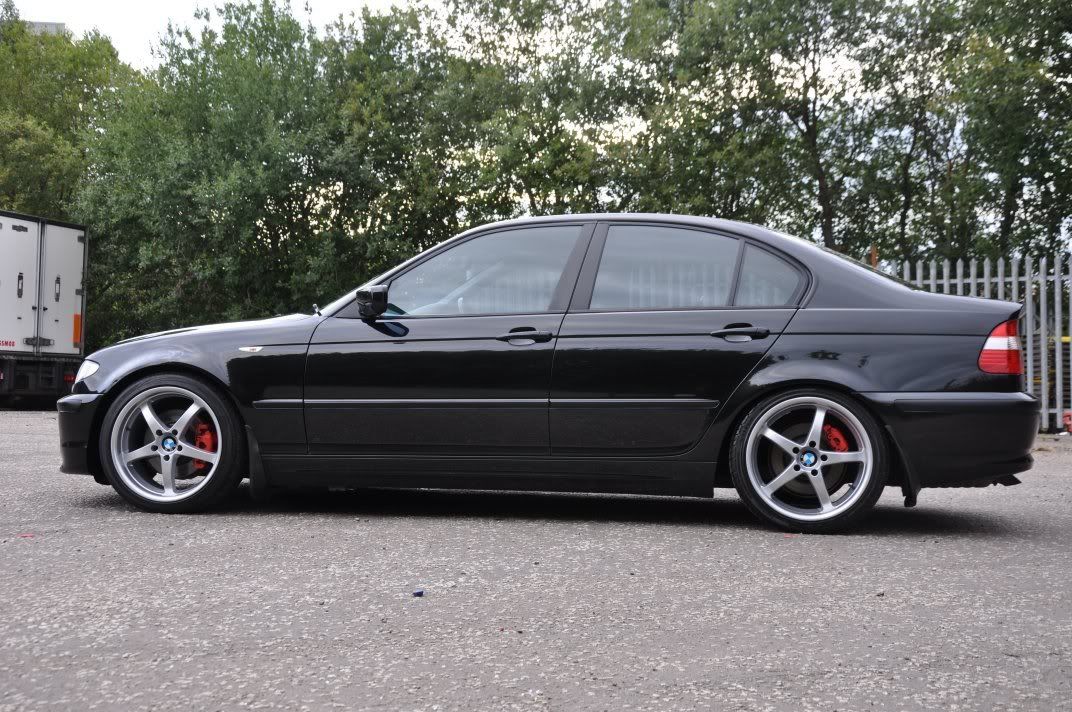
I really enjoy details like this one! A “real-world” car that has lived its life, not necessarily been well cared for, and is in the need of a good detail to make it look its best. A car that challenges you! It is easy to make a nearly new sports or supercar look shiny – but the fun in detailing for me really lies in making an every-day car stand out from the crowd and that was the challenge with this BMW E46 320d.
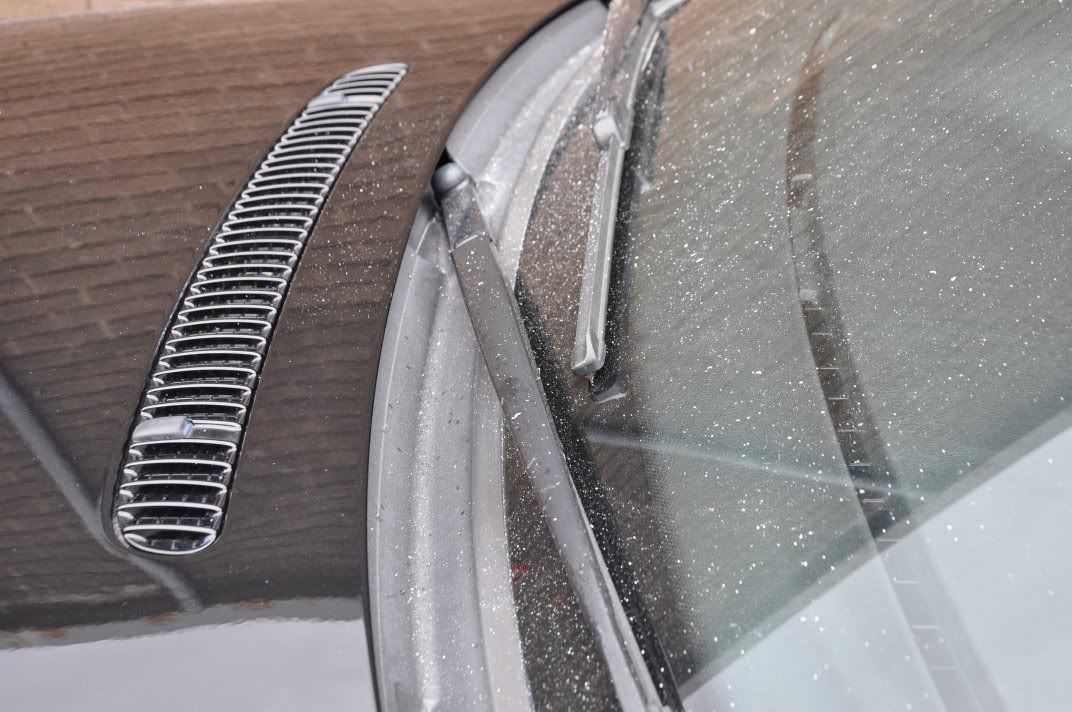
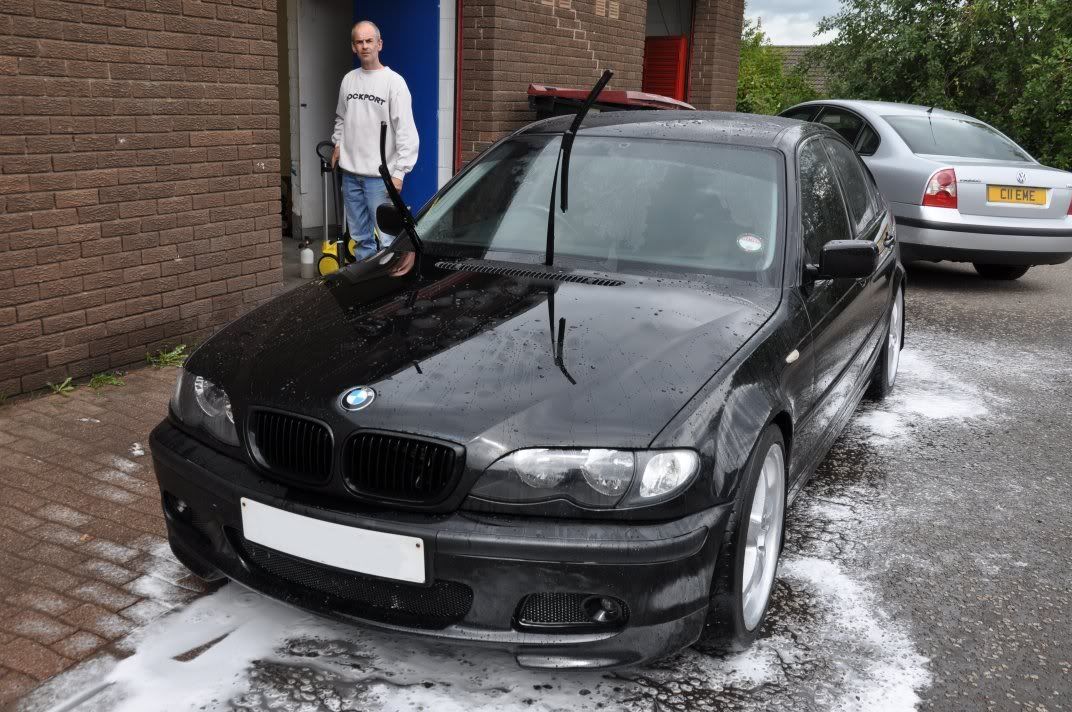
It was raining rather heavily when the car arrived...
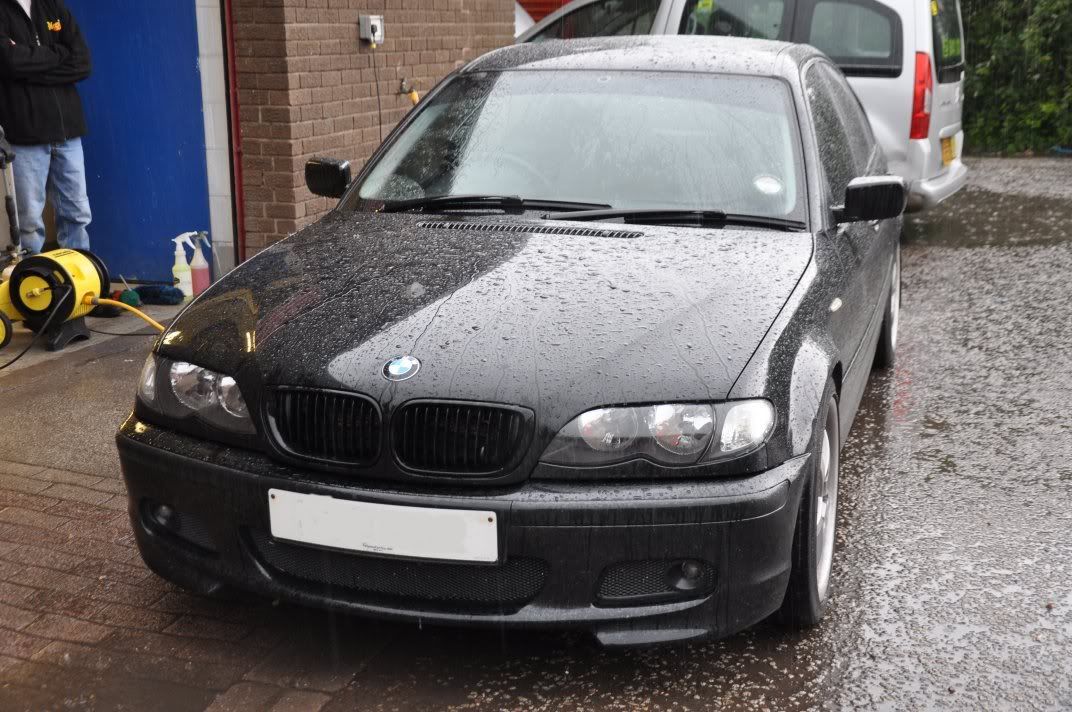
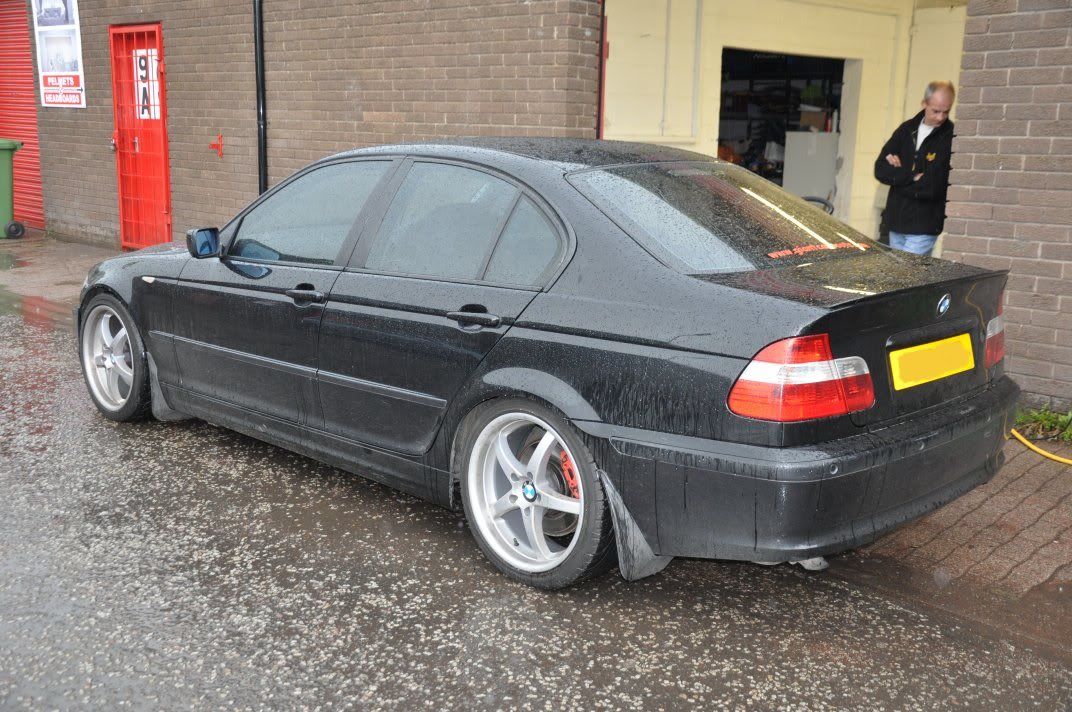
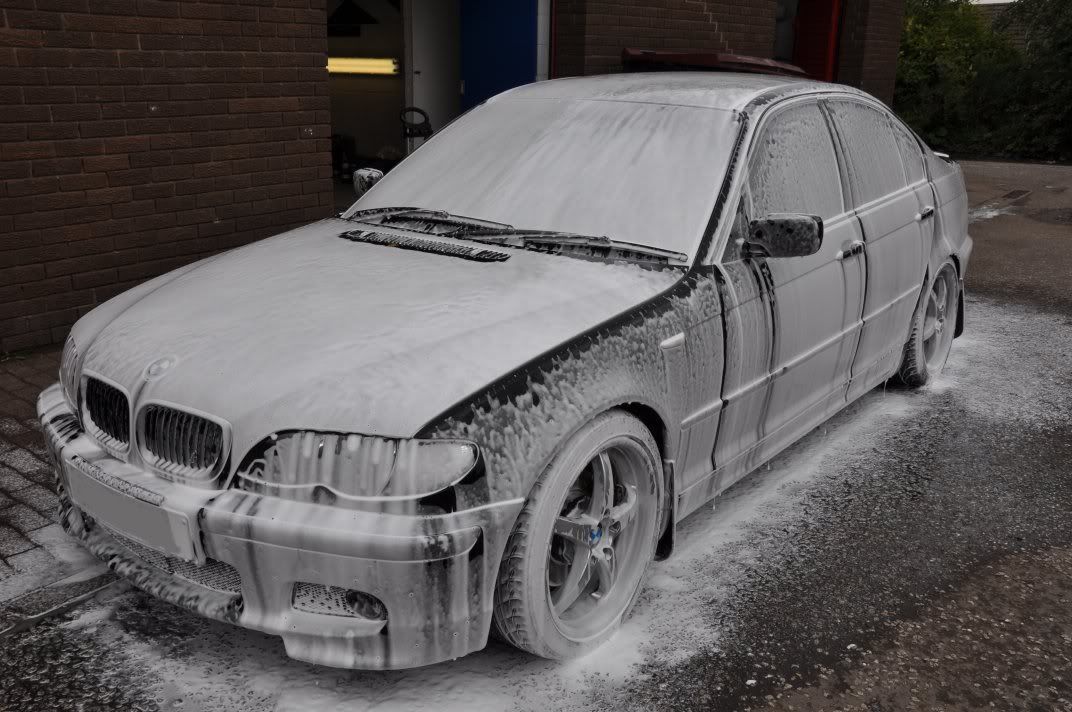
So it would be fair to say that Gordon and I got just slightly drenched during the wash process where the wheels and arches were cleaned first (using Automart G101 on the tyres and arches, and Autosmart Smart Wheels on the wheels); then the car was foamed and rinsed using Meguiars Hyper Wash, washed using the same shampoo. Autosmart Tardis was used for detarring prior to claying, and the claying stage was carried out using Autosmart clay with Autosmart Reglaze as the claybar lubricant.
Following our standard wash and decontamination procedure the car was ready for the big part of the exterior detail – the paintwork correction. Now, I’m going to write this up in quite a bit of detail, the idea being to show some panels of the car and the severity of the marks and how they are assessed using a couple of light sources that we use regularly. I will also show here the difference between working to fully correct the paint and simply running over with a middle of the road polish to achieve simply an enhancement of the finish but not full correction, and the limitations to machine polishing and the marks that we left behind on this detail and why we left them. I think its important to see paint correction from this angle – to see the effort that goes in to getting the finishes you see in the after shots, as well as an honest demonstration of what was achieved and the marks we had to leave behind as the paint thickness would not allow us to fully remove them.
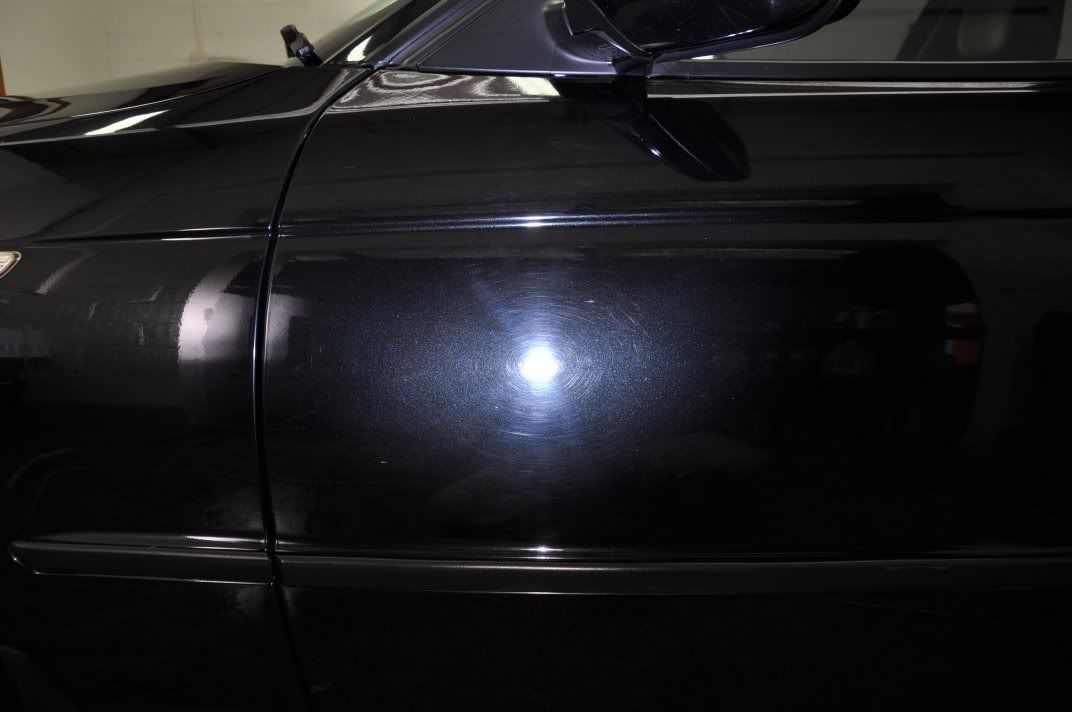
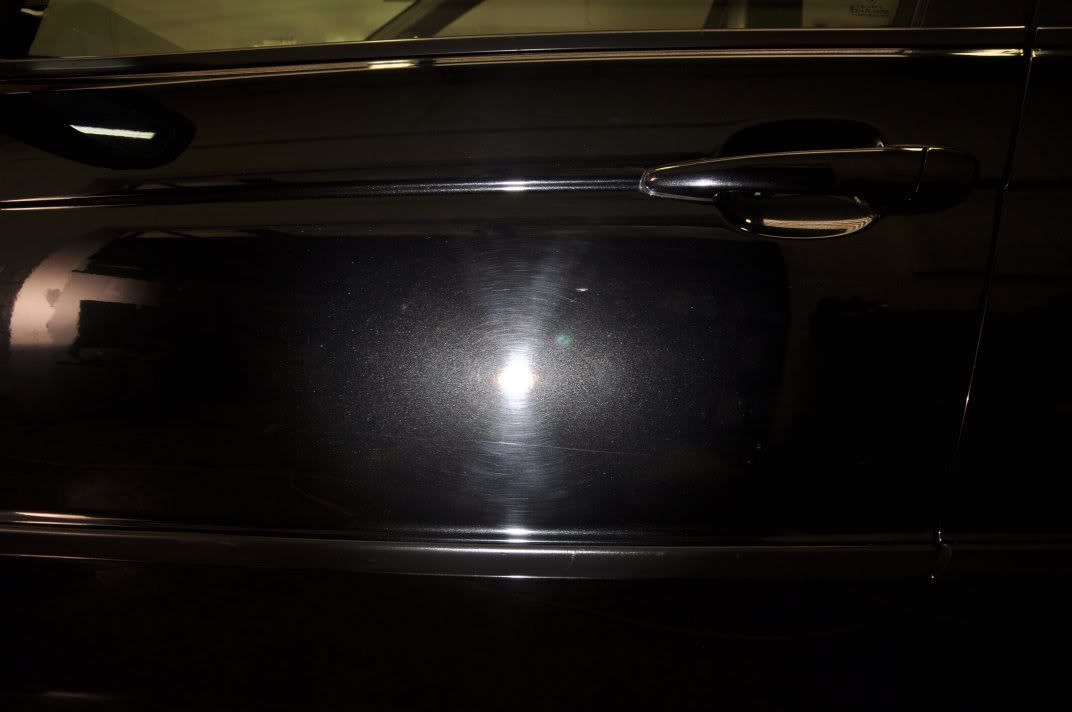
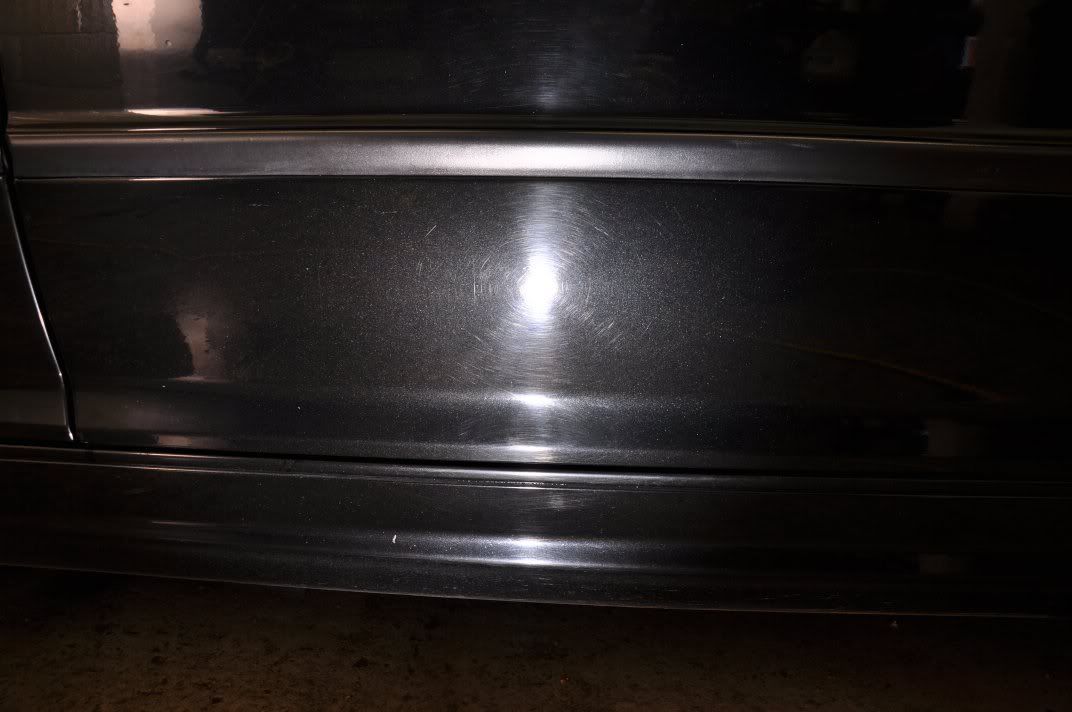
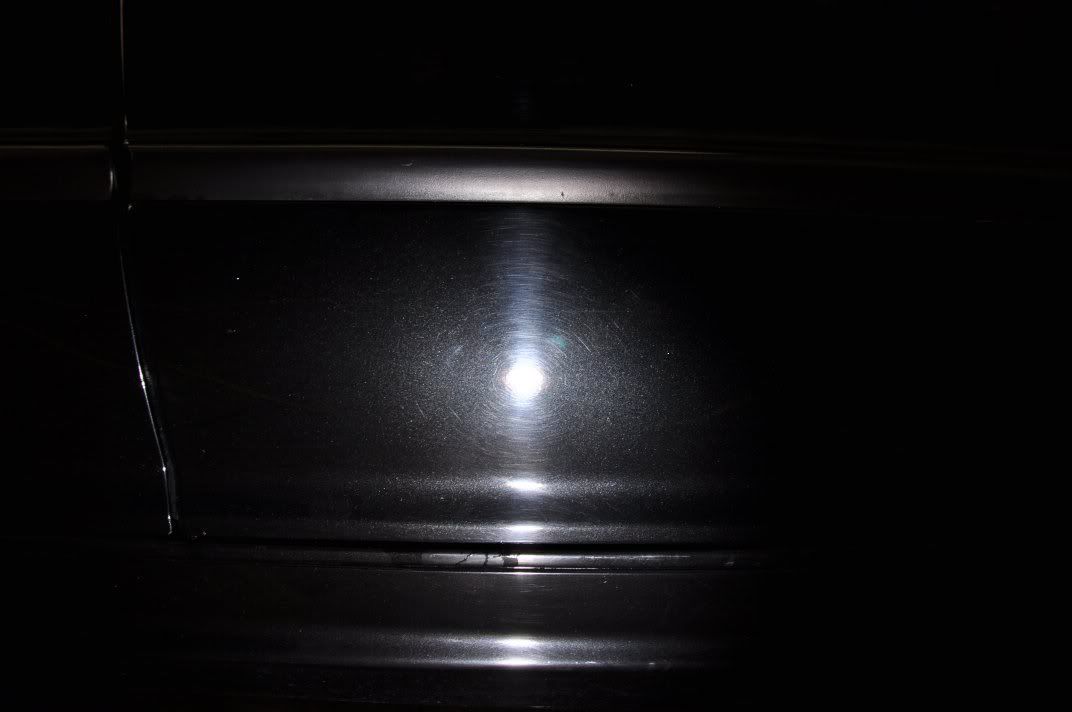
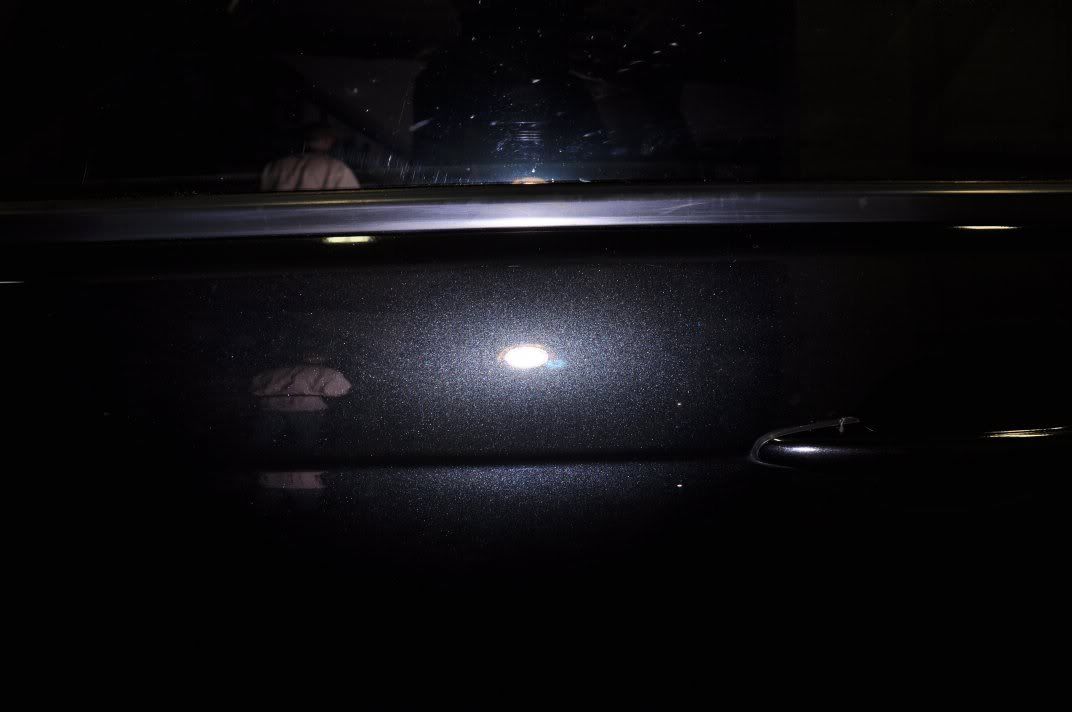
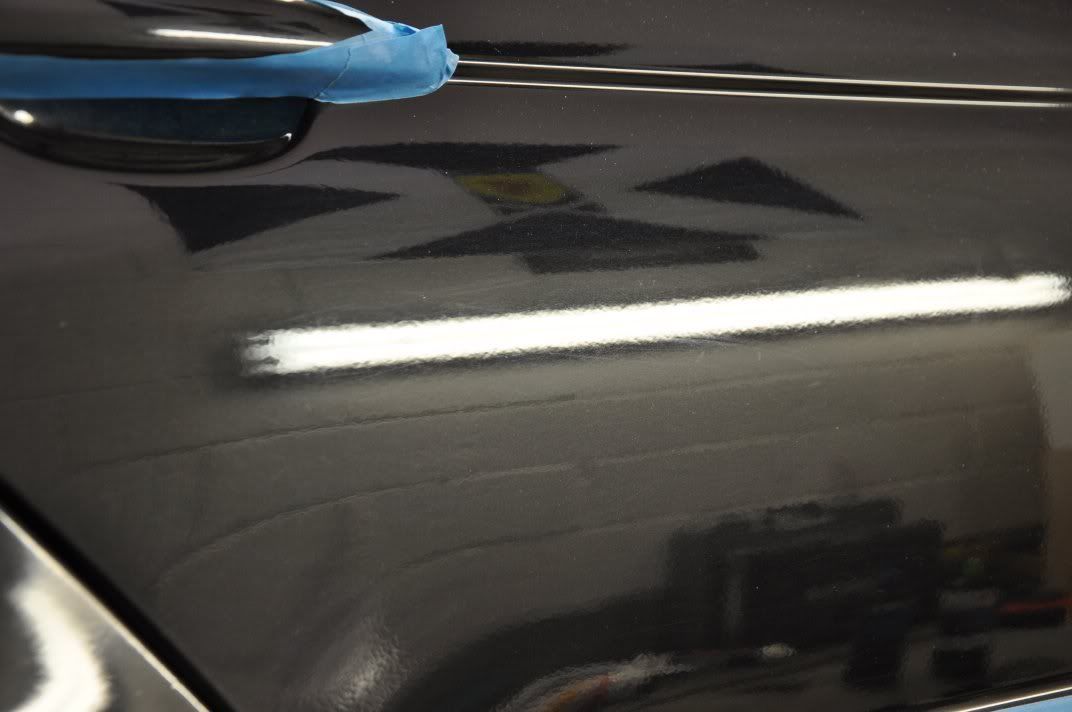
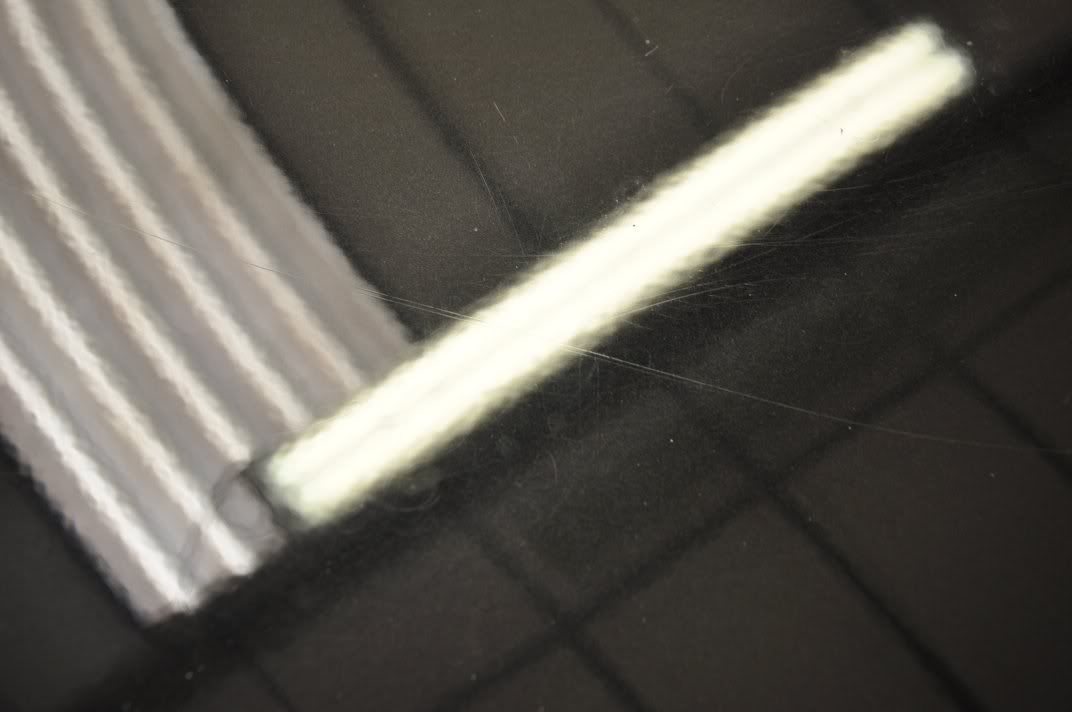
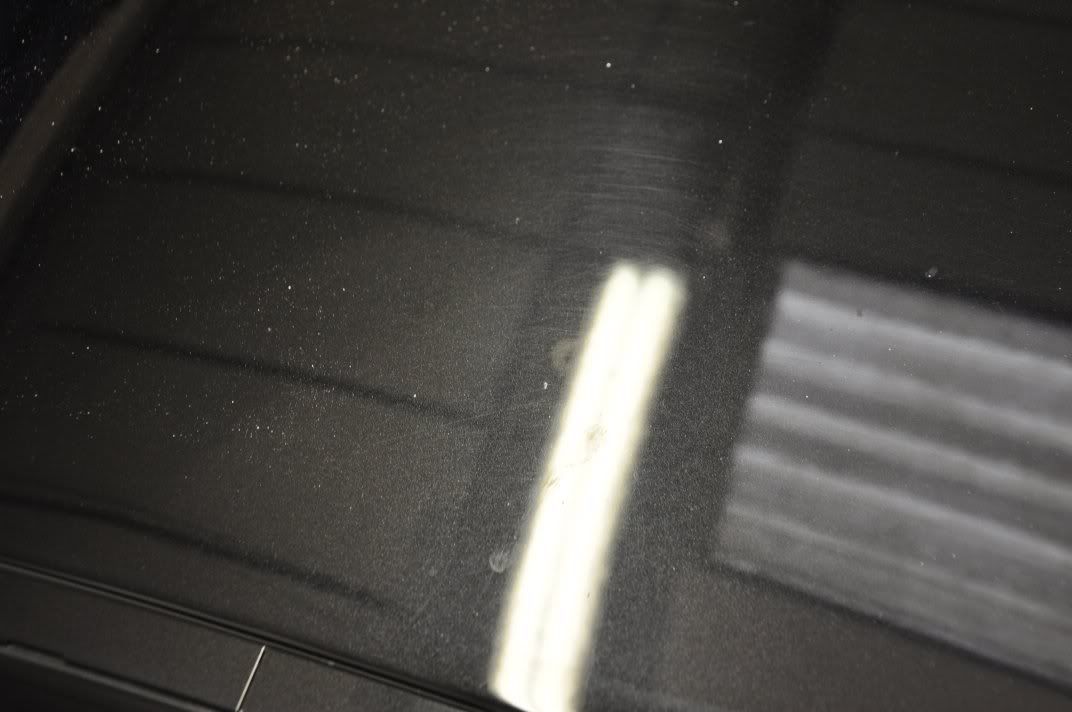
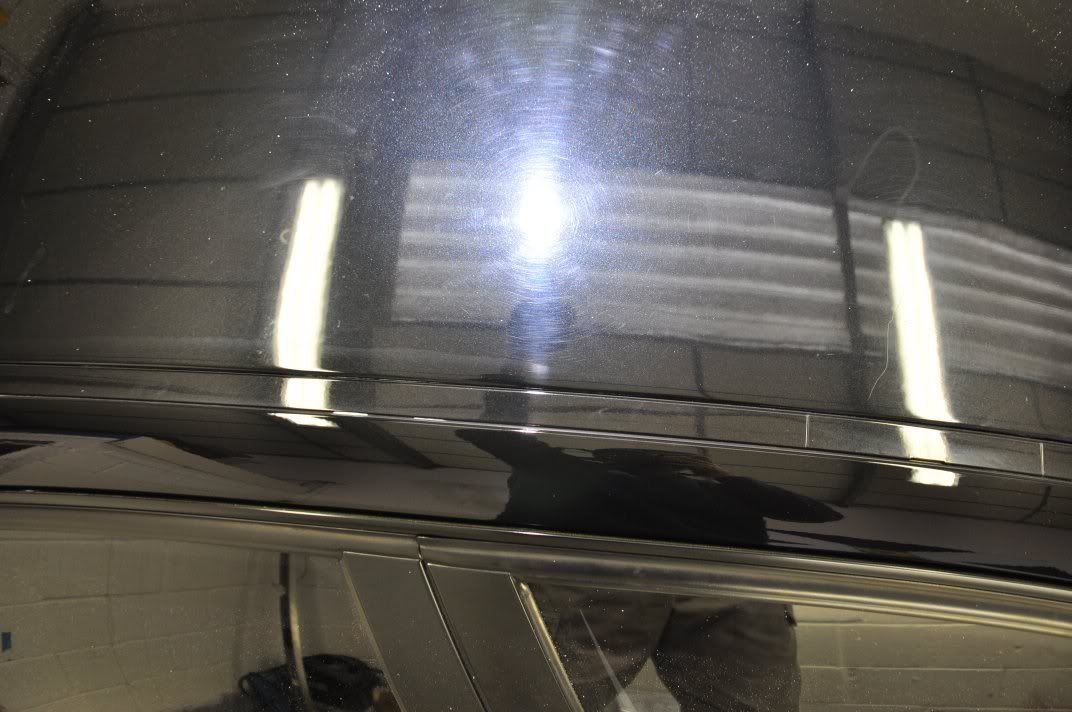
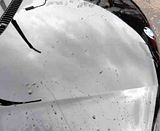
Starting out on the bonnet, and the finish under the 3M Sun Gun shows a lot of heavy swirling...
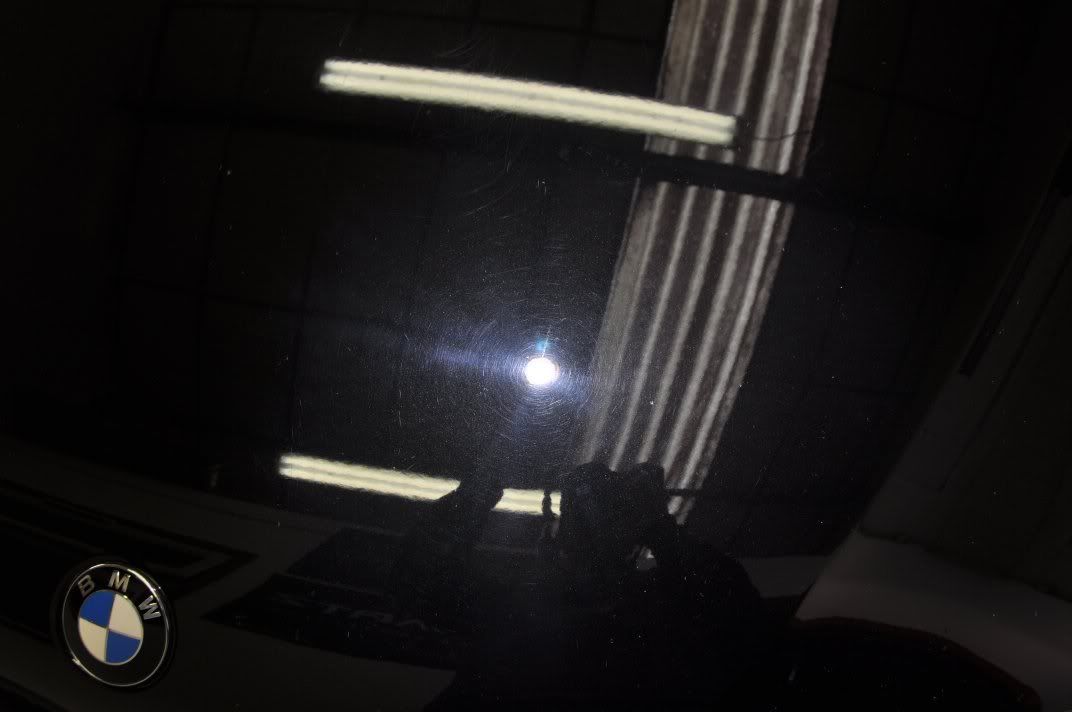
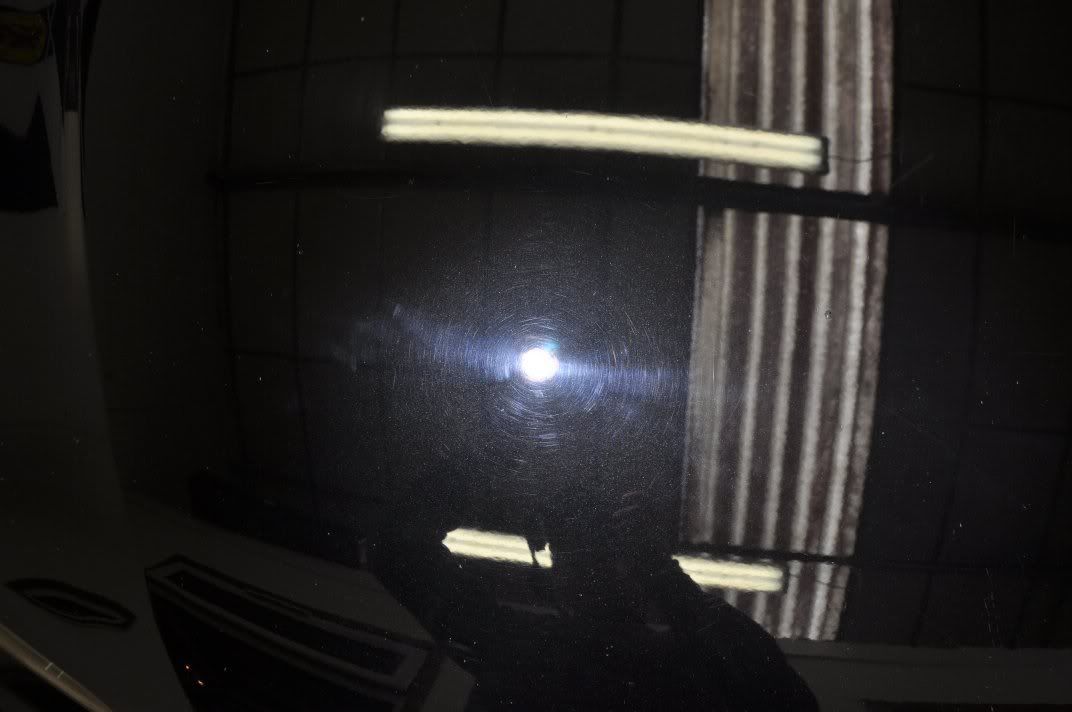
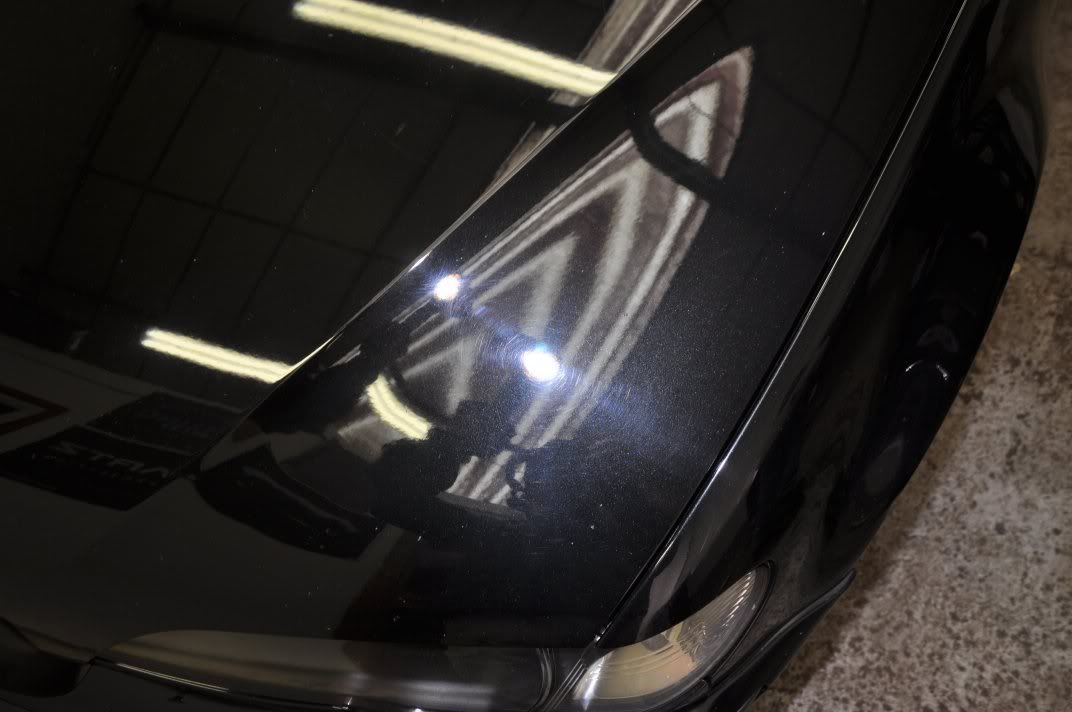
Some hologramming...
More swirls

And some deeper RDS in the finish too...

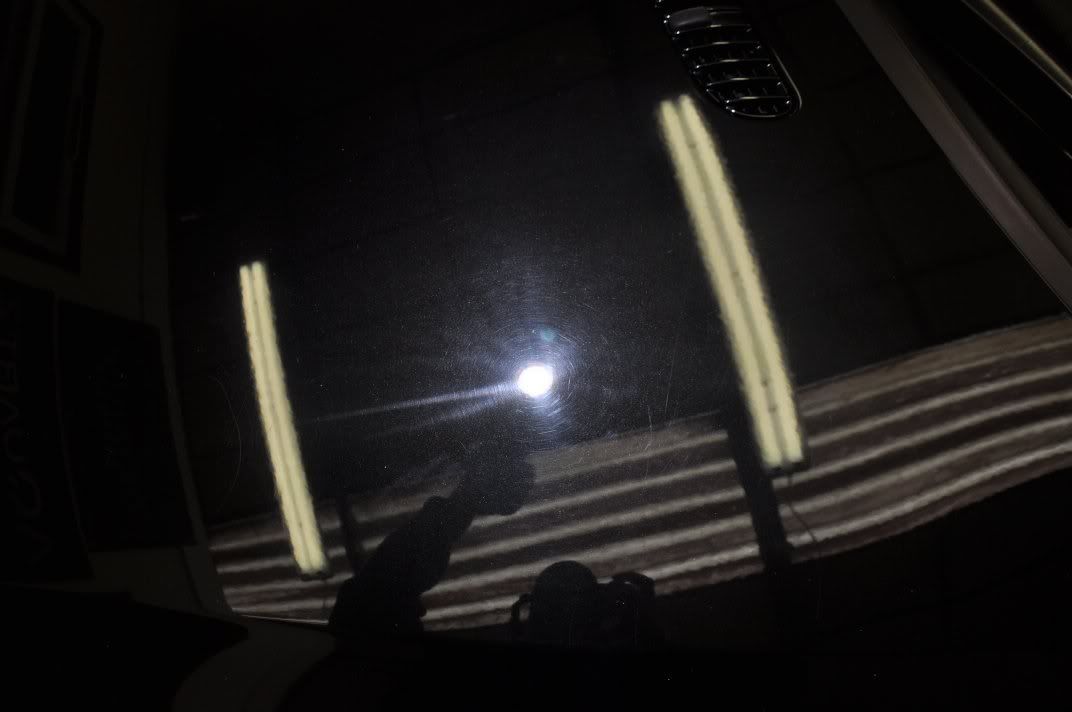
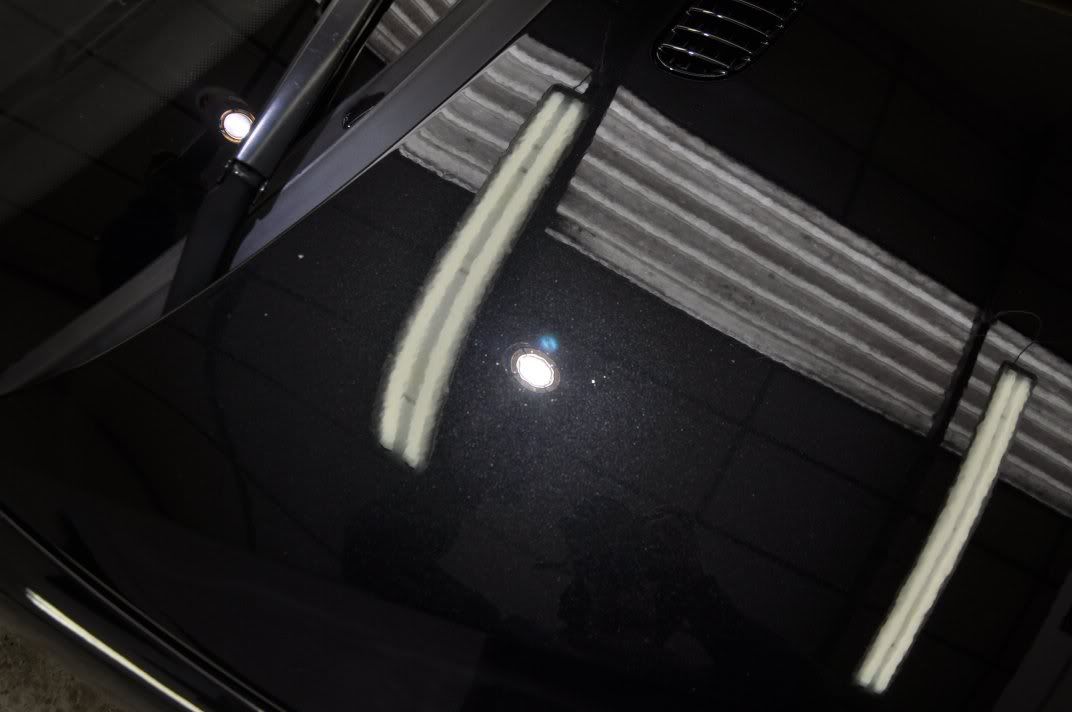
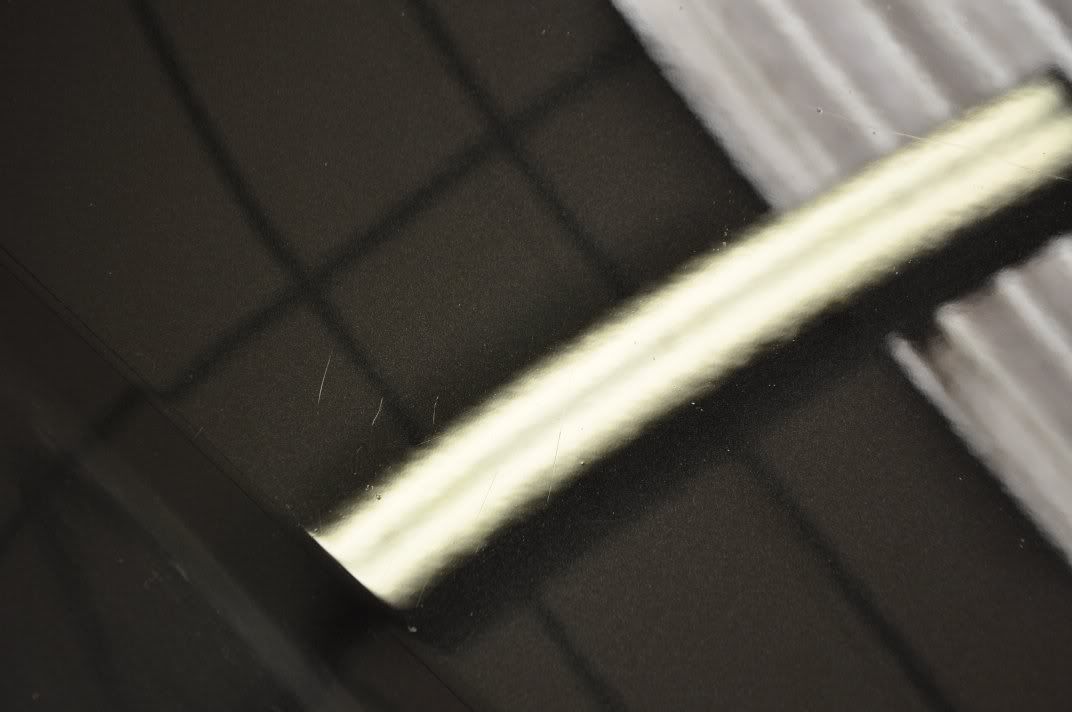
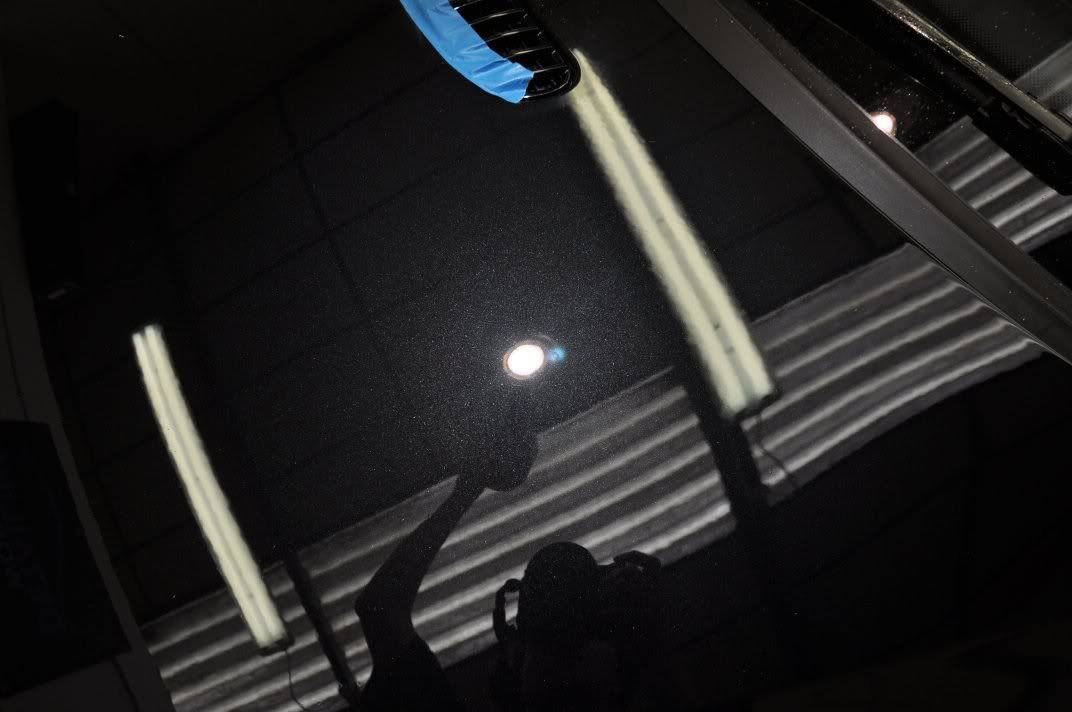
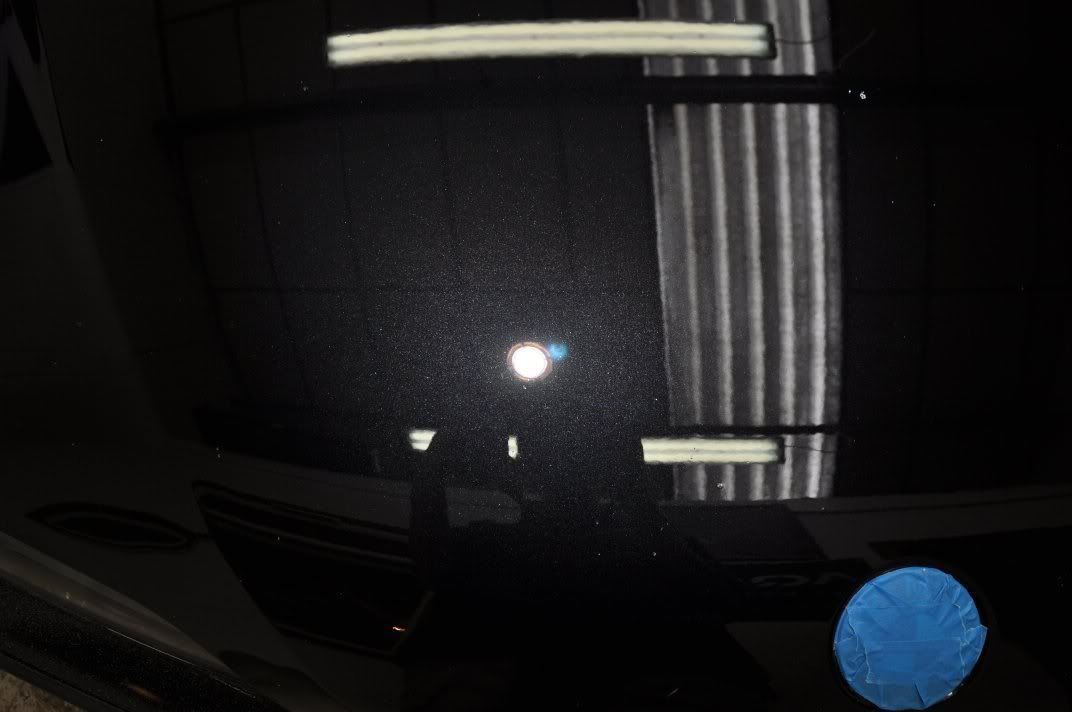
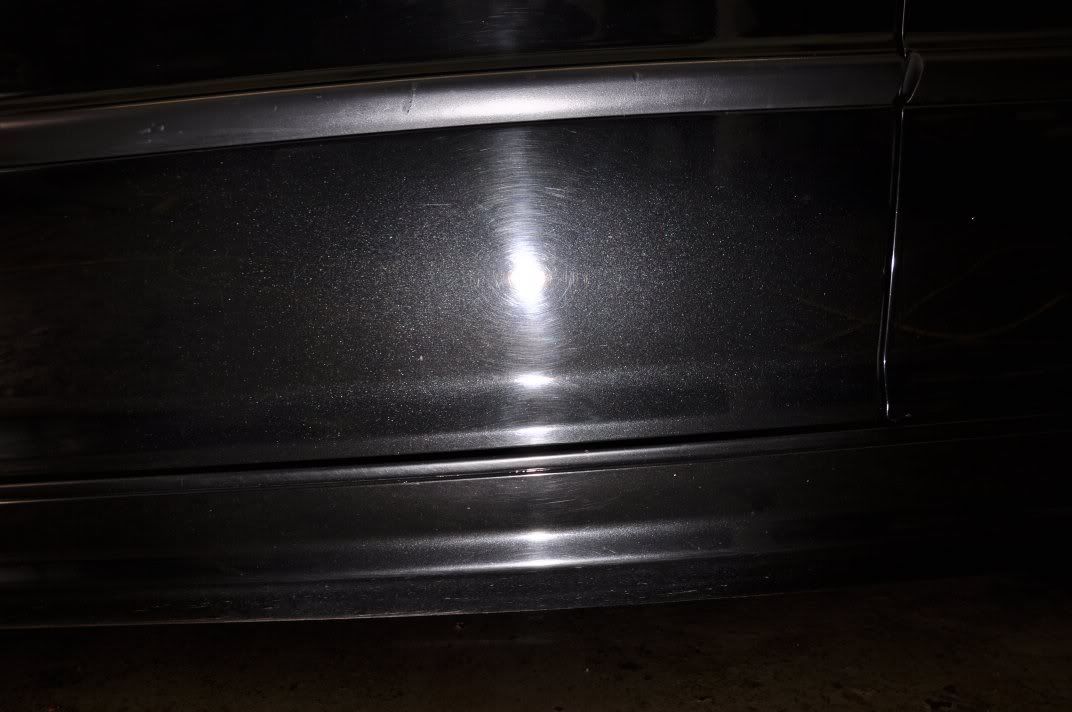
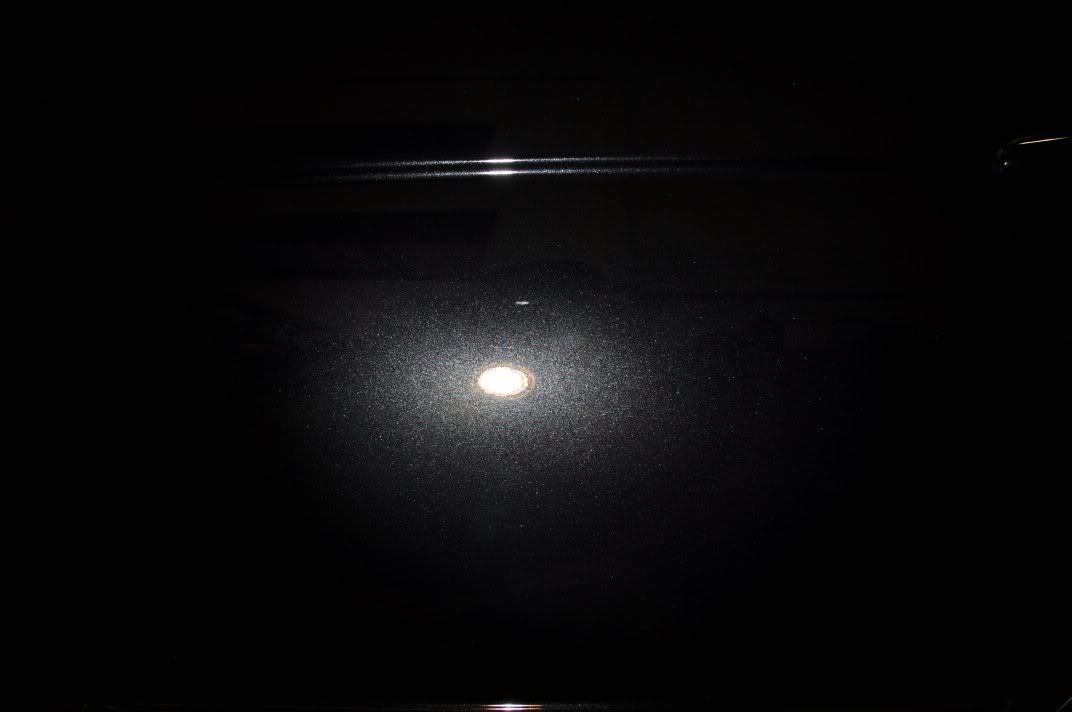
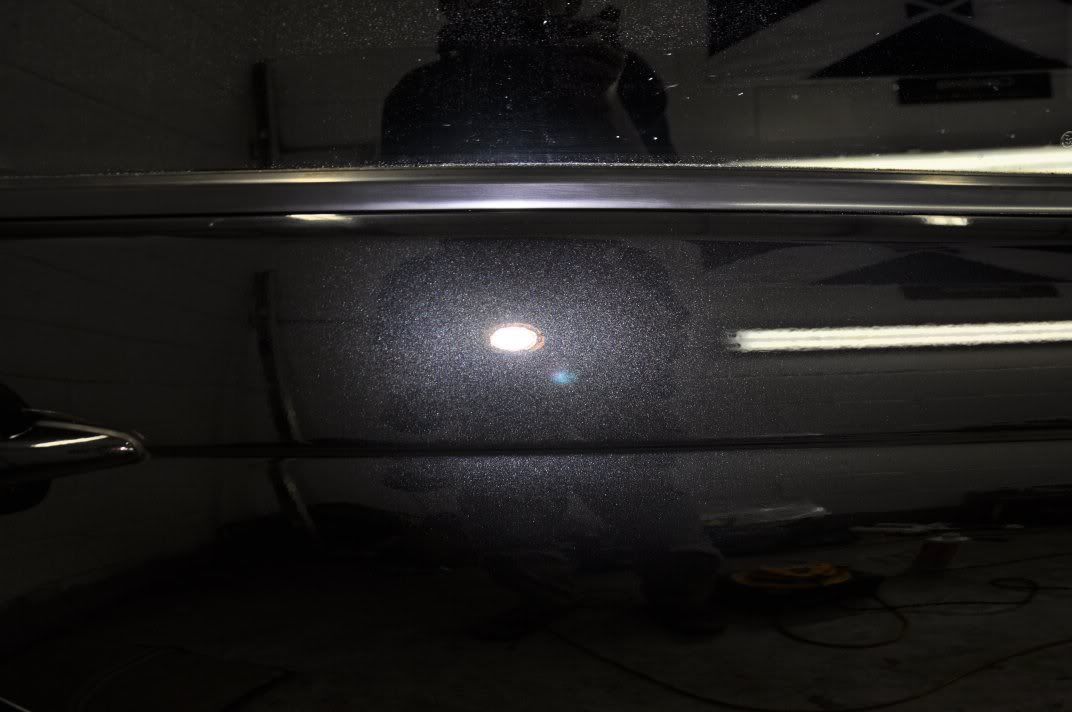
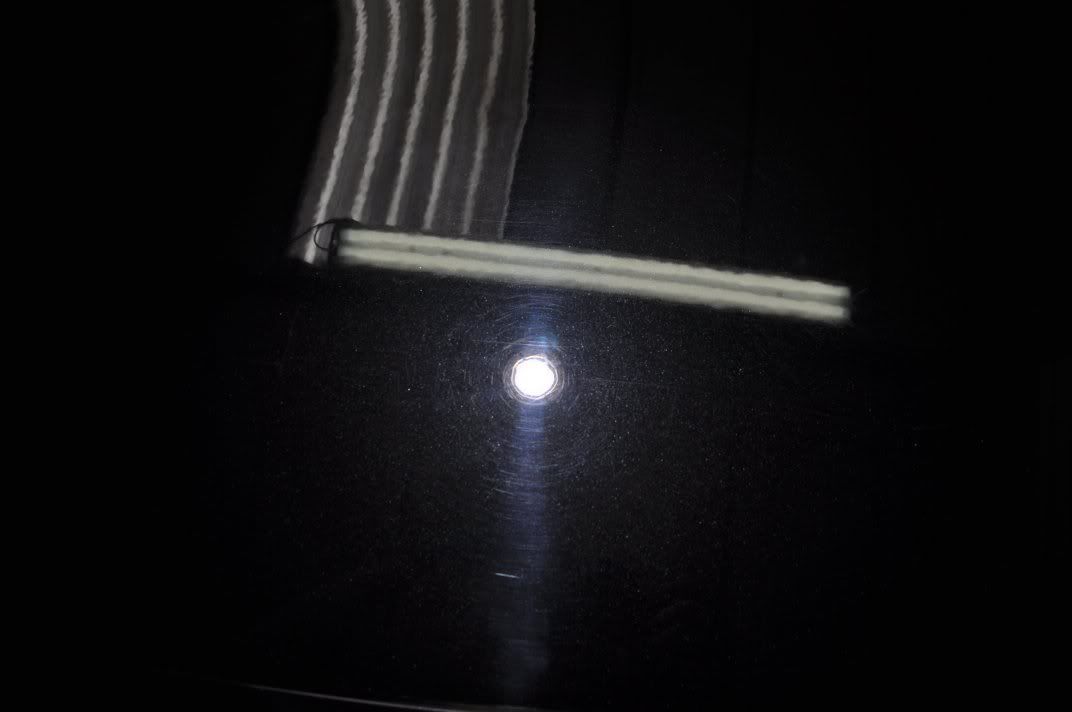
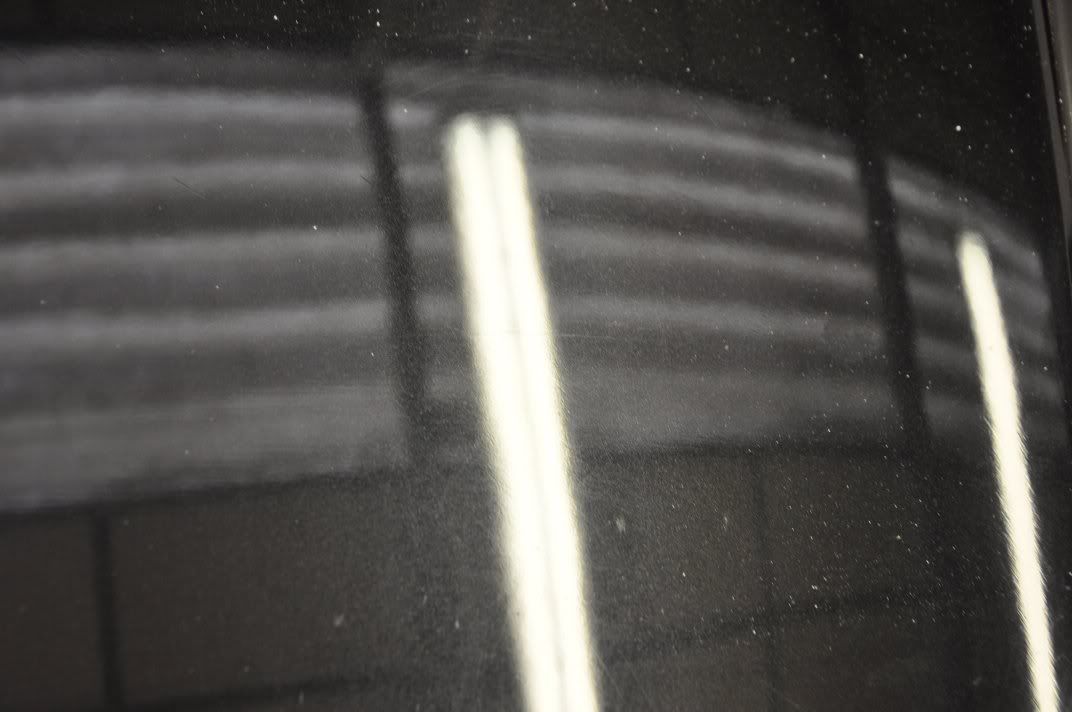
As is always the case, the deeper marks in the finish always show up much better using the strip lighting in the unit, and ensuring the camera is set into manual focus so as to focus on the surface of the paint for a true assessment of the finish – as you can see, the deeper marks and the state of the bonnet becomes a lot more apparent!:
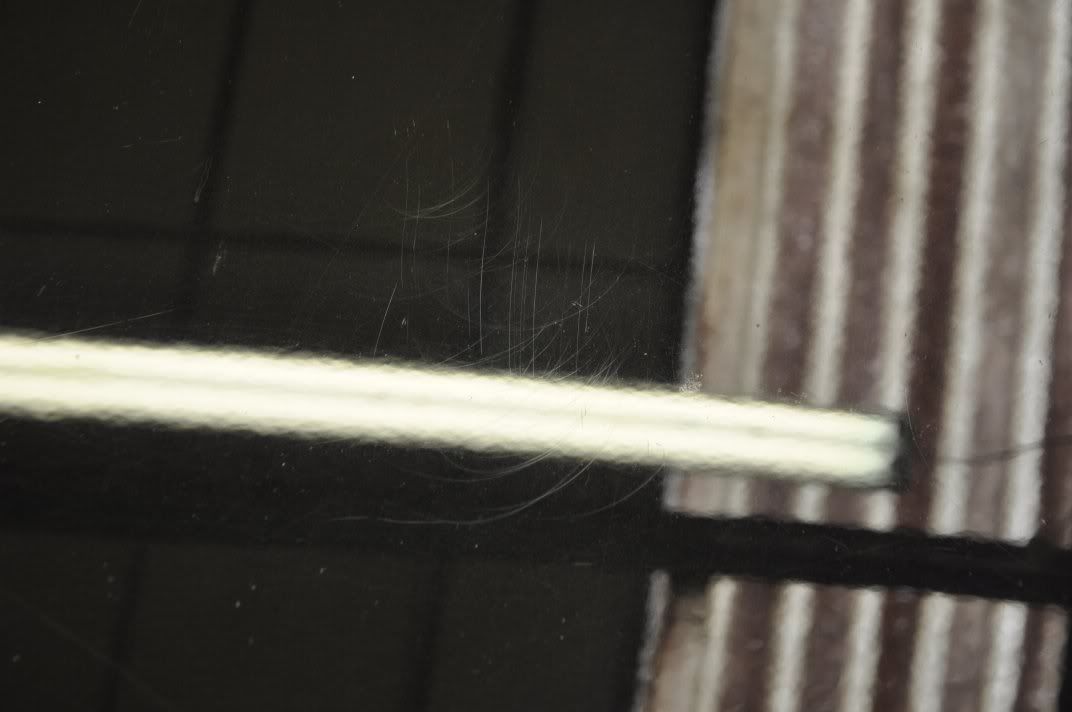


It would be fair to say, I think, that the bonnet was in severe need of paint correction ad a serious effort to make the finish look as defect free as possible. Obviously, looking at the above photos, there are some marks that just will not fully remove in the scope of the detail as the paint simply will not allow it, but for this car, it was a case of achieving the best possible with what we had to work with.
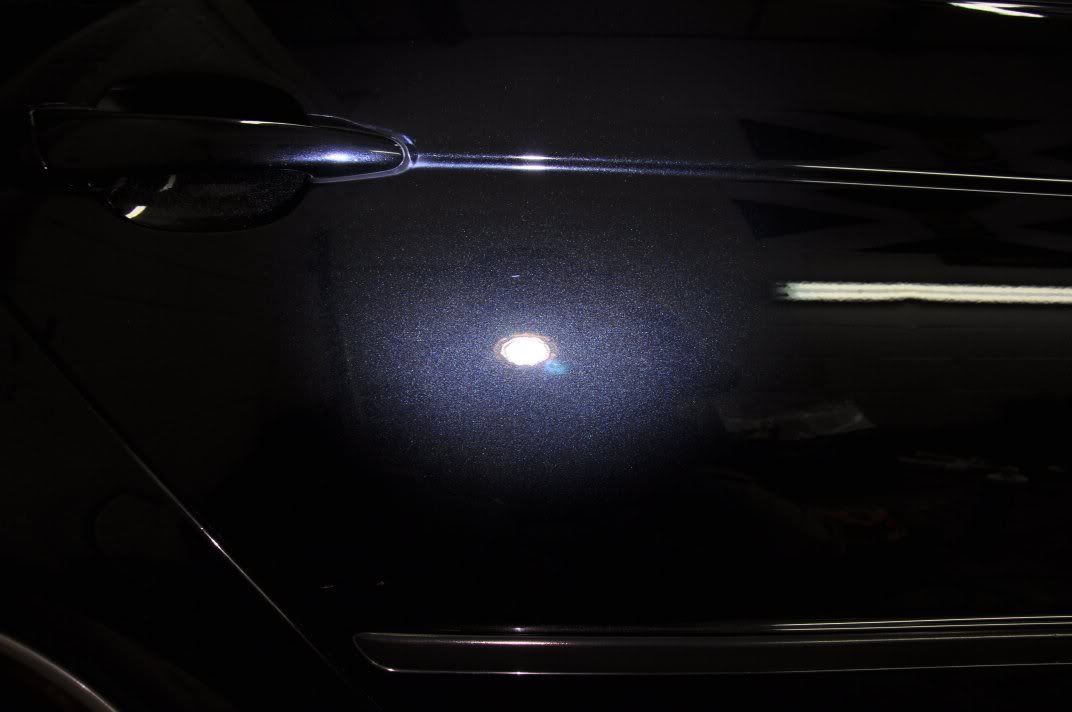
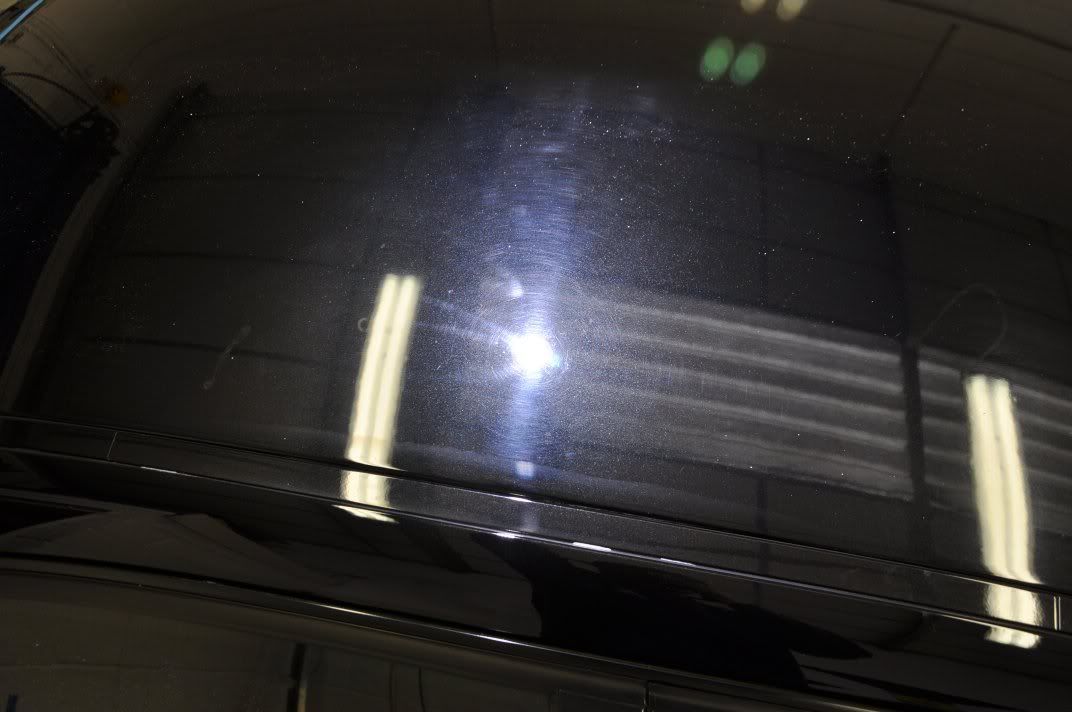
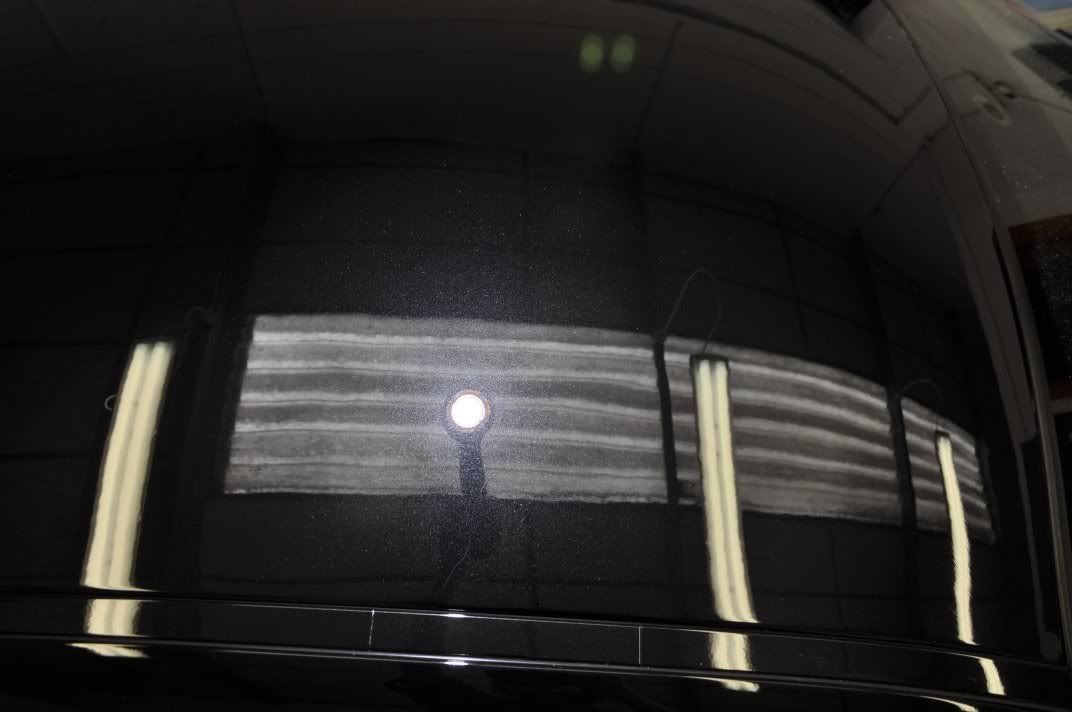
As part of the testing on this bonnet, I trialled Menzerna PO85RD 3.02 Intensive Polish on a 3M yellow polishing pad – a standard set, of spreading the polish at low speed and working at 1800rpm until the residue was clear (no refining stages). This delivered a notable amount of correction, and under the Sun Gun you could convince yourself the finish was perfect and defect free on the test spot...
There is no denying the significant difference made – the video also shows it, moving from an untouched region to a “corrected” region assessed by the Sun Gun;

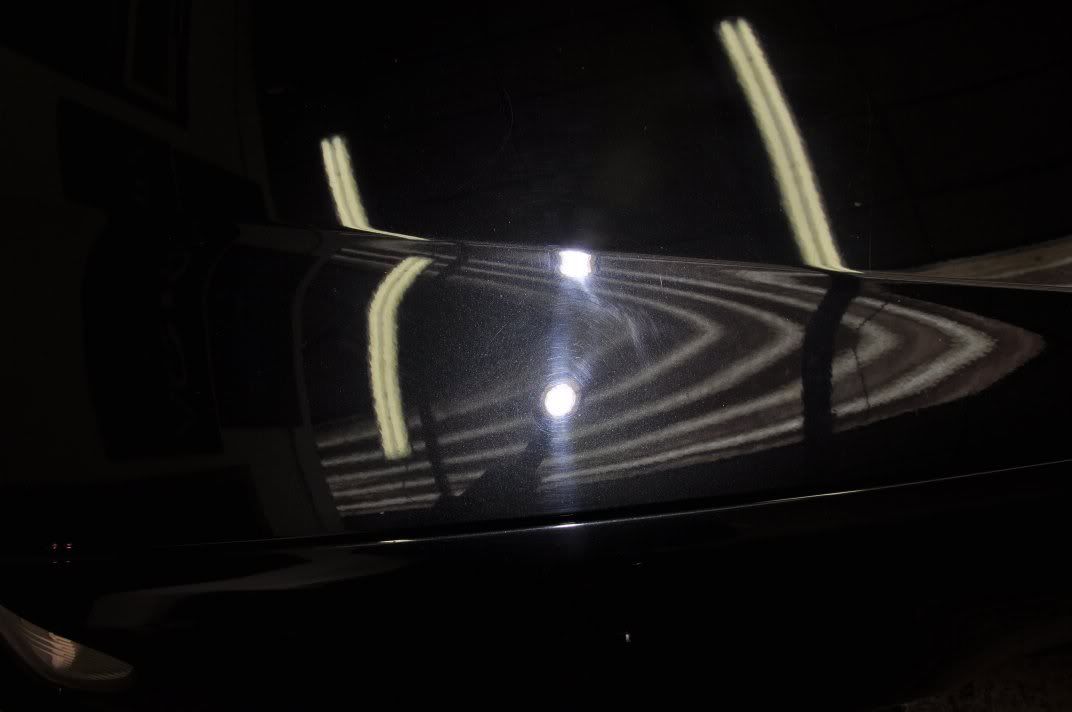
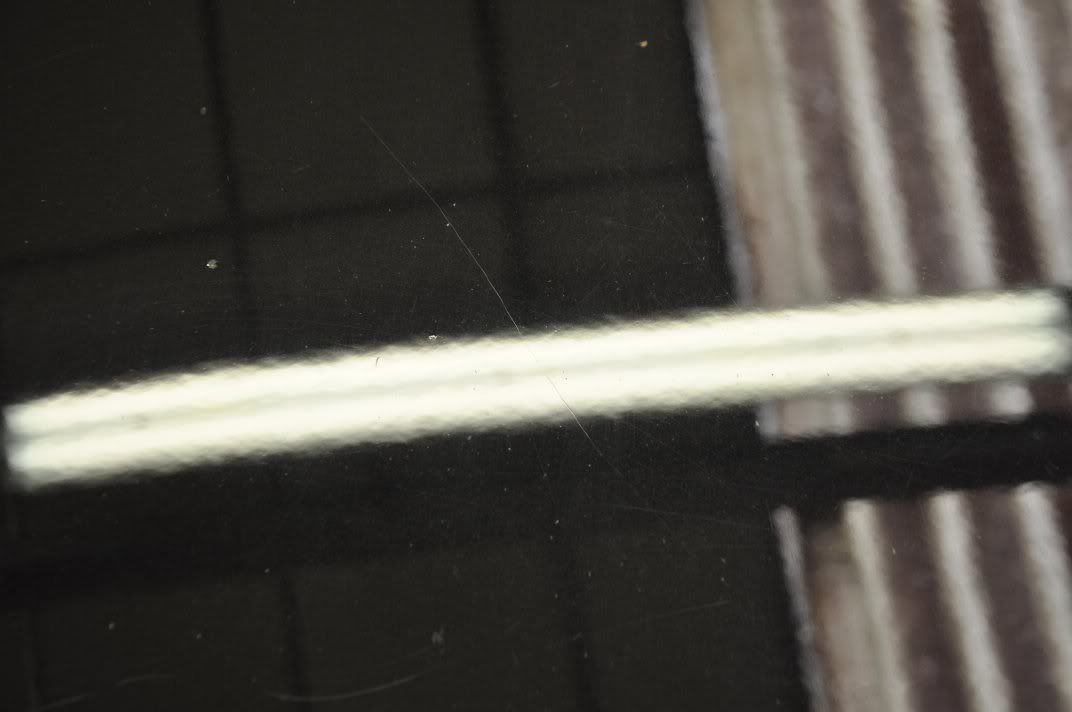
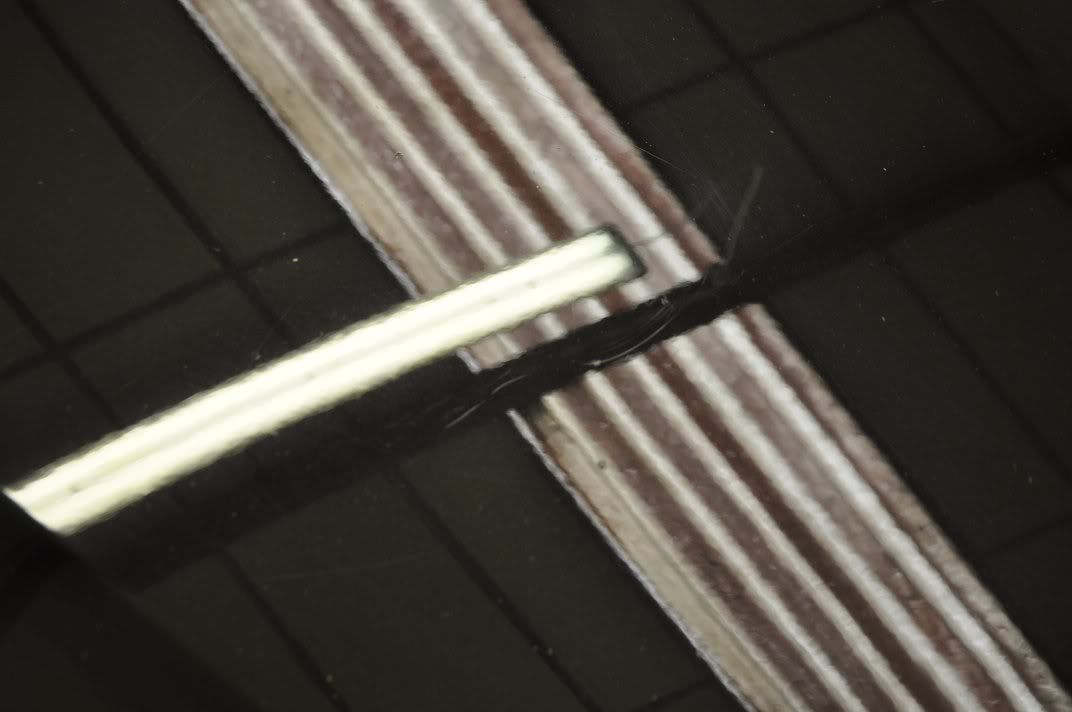
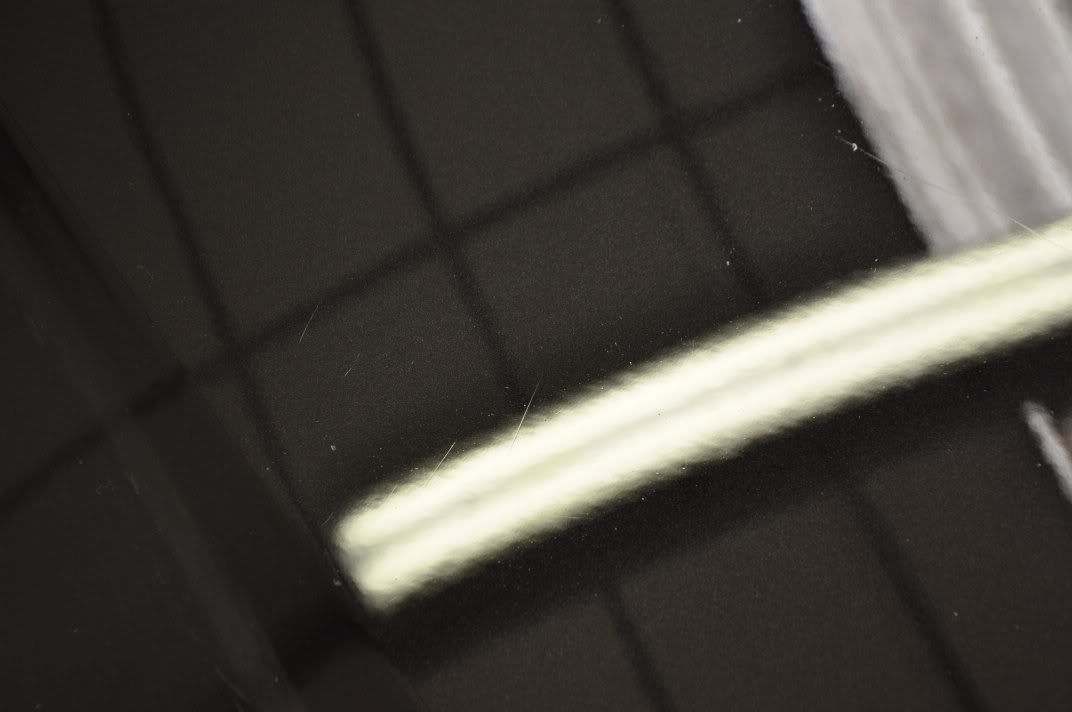
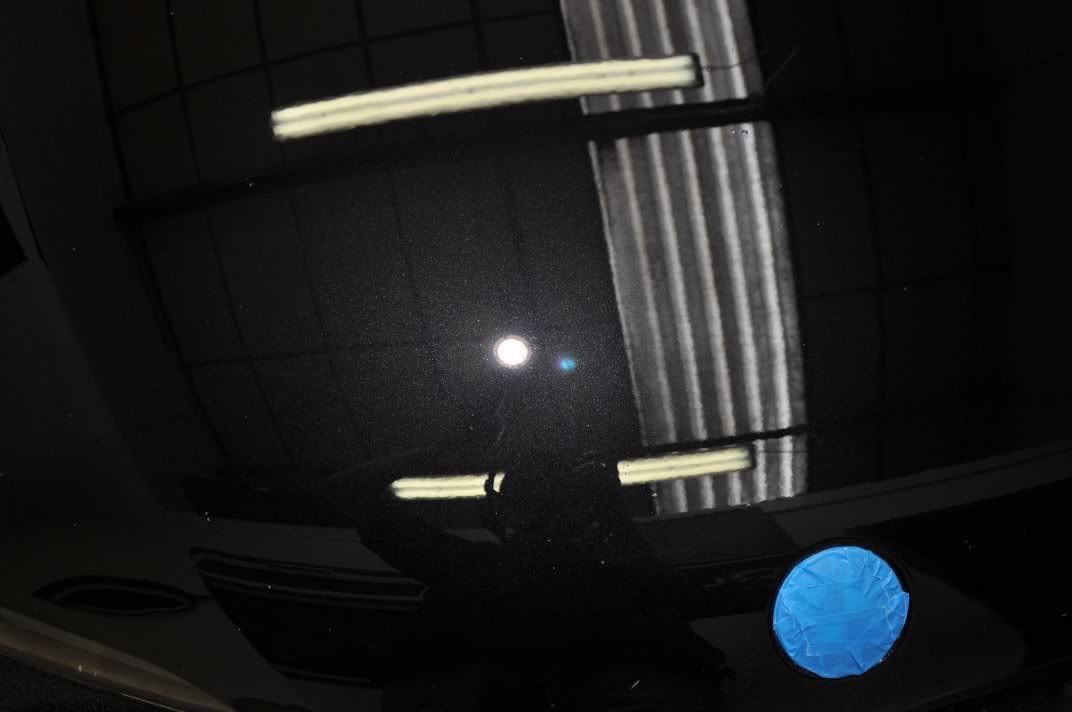
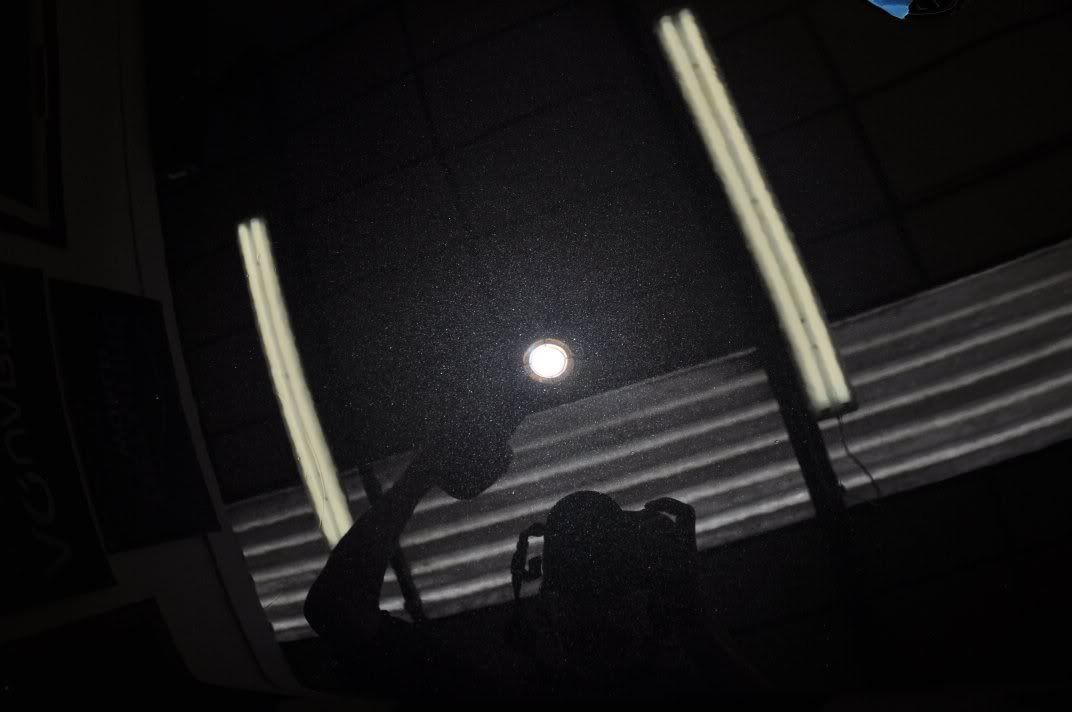
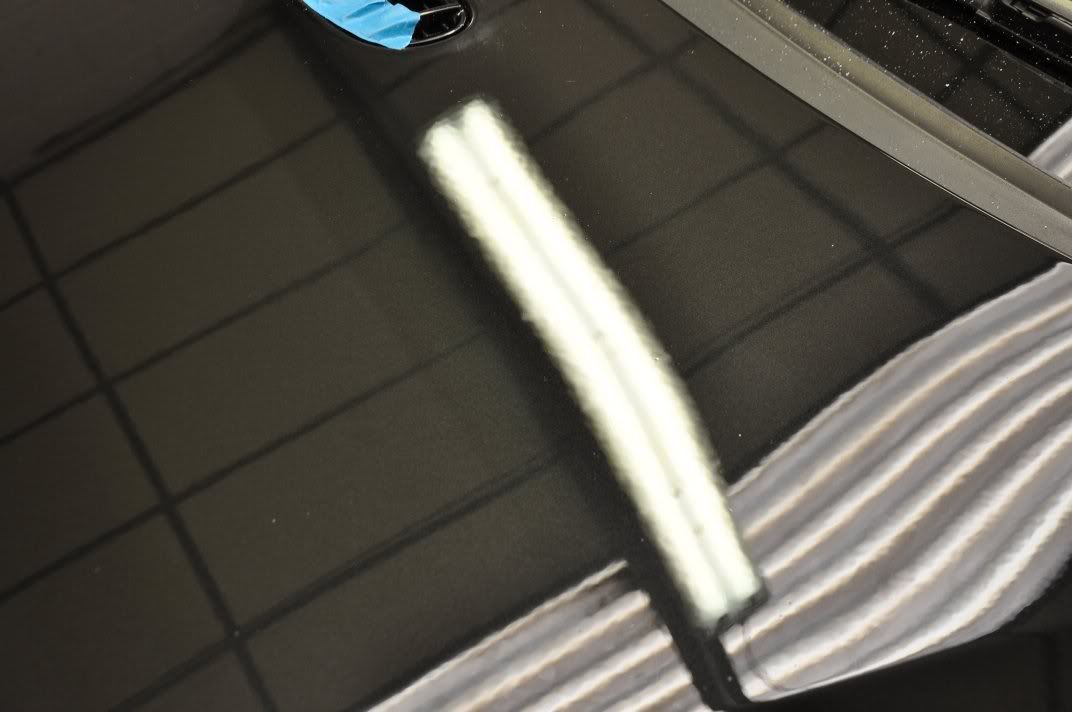
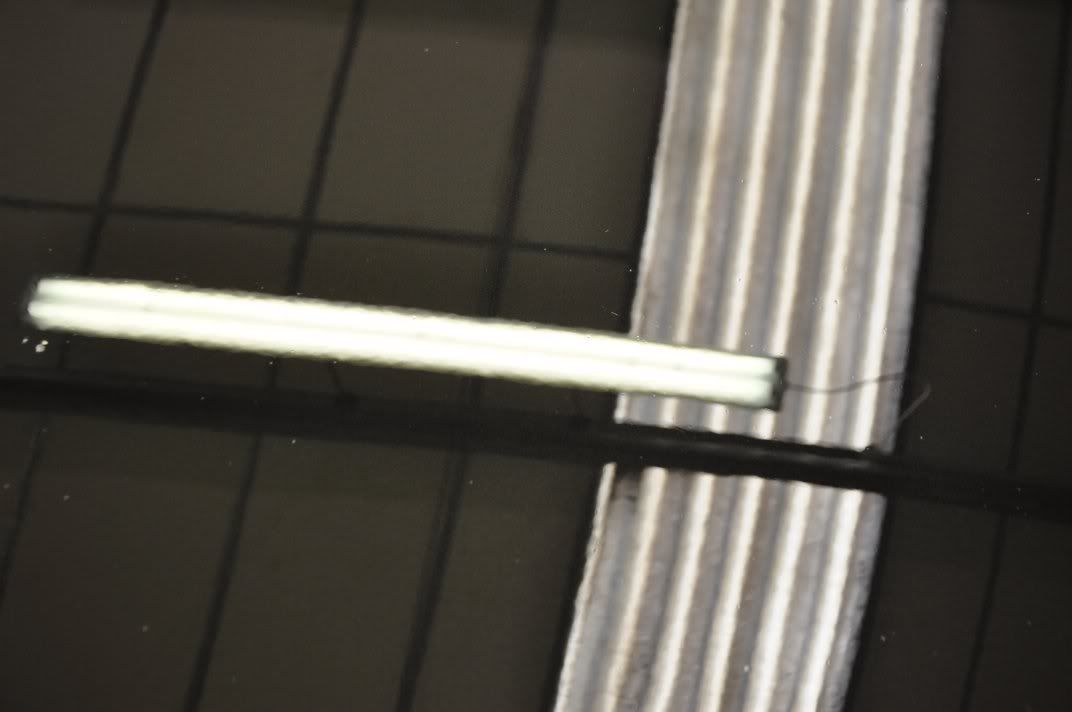
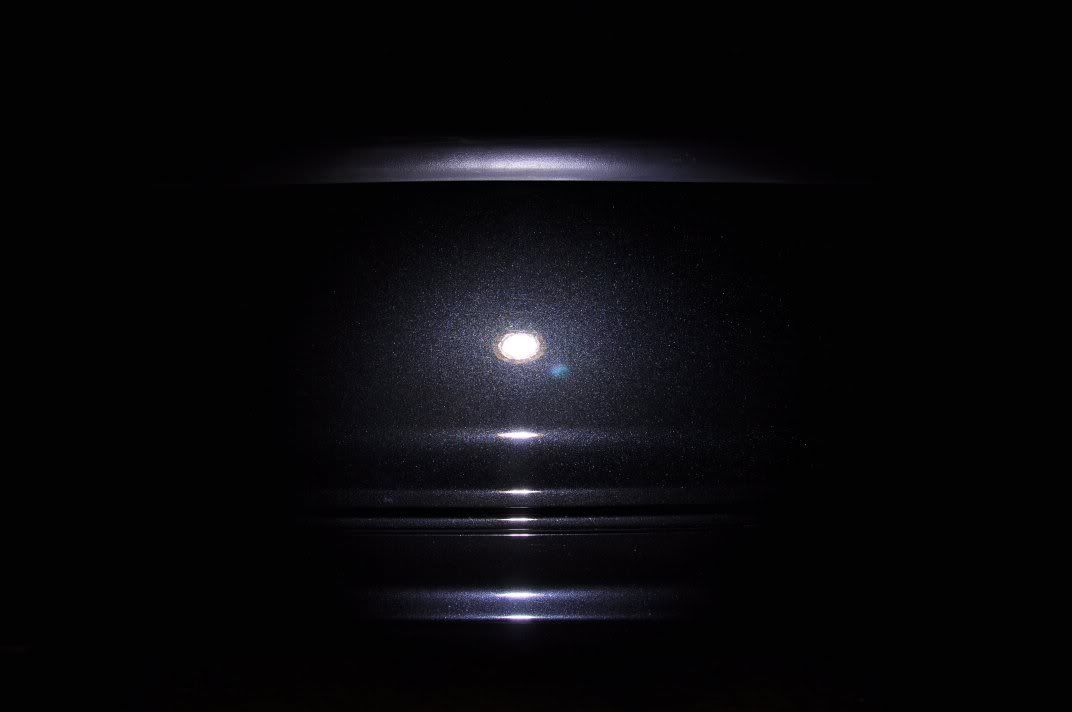
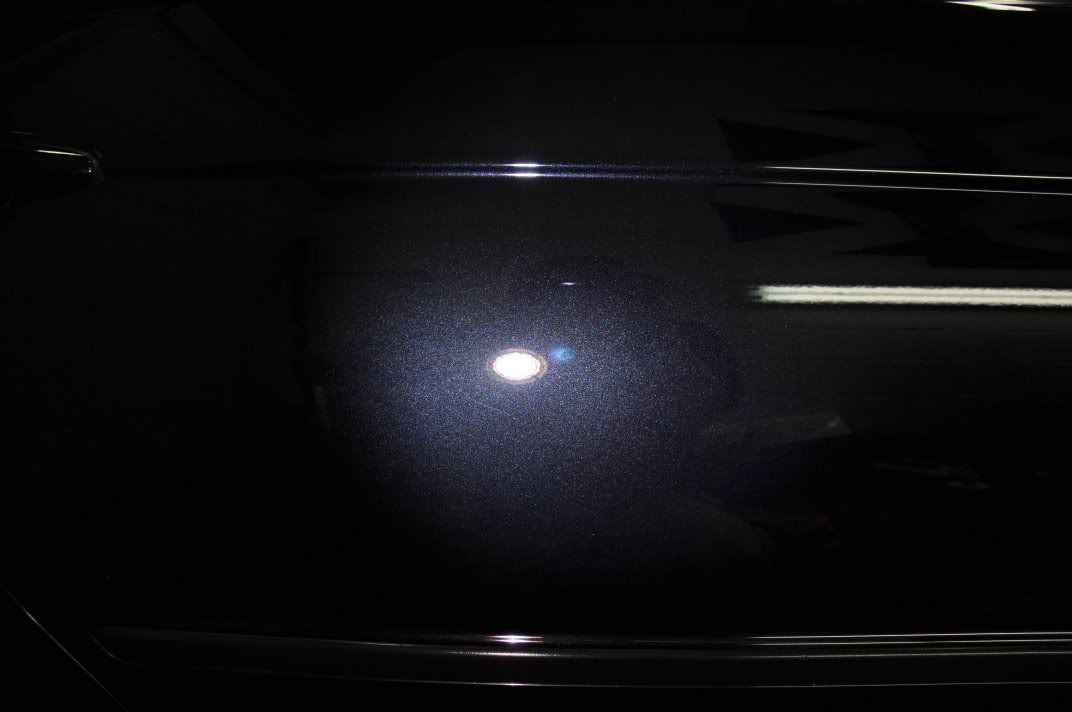
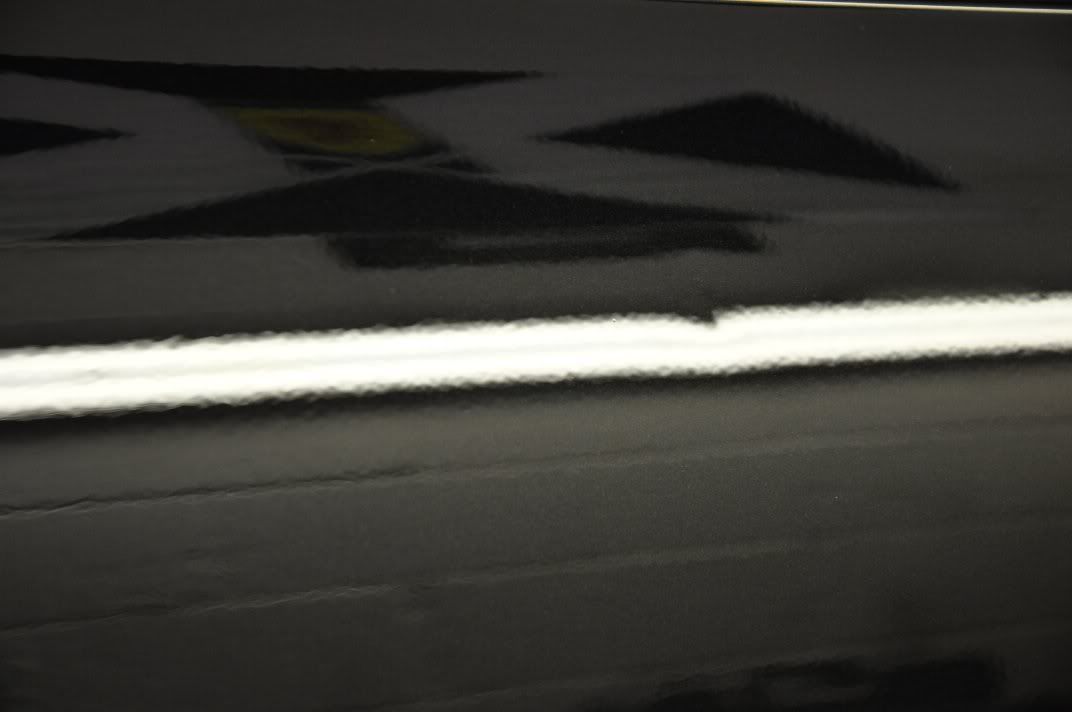
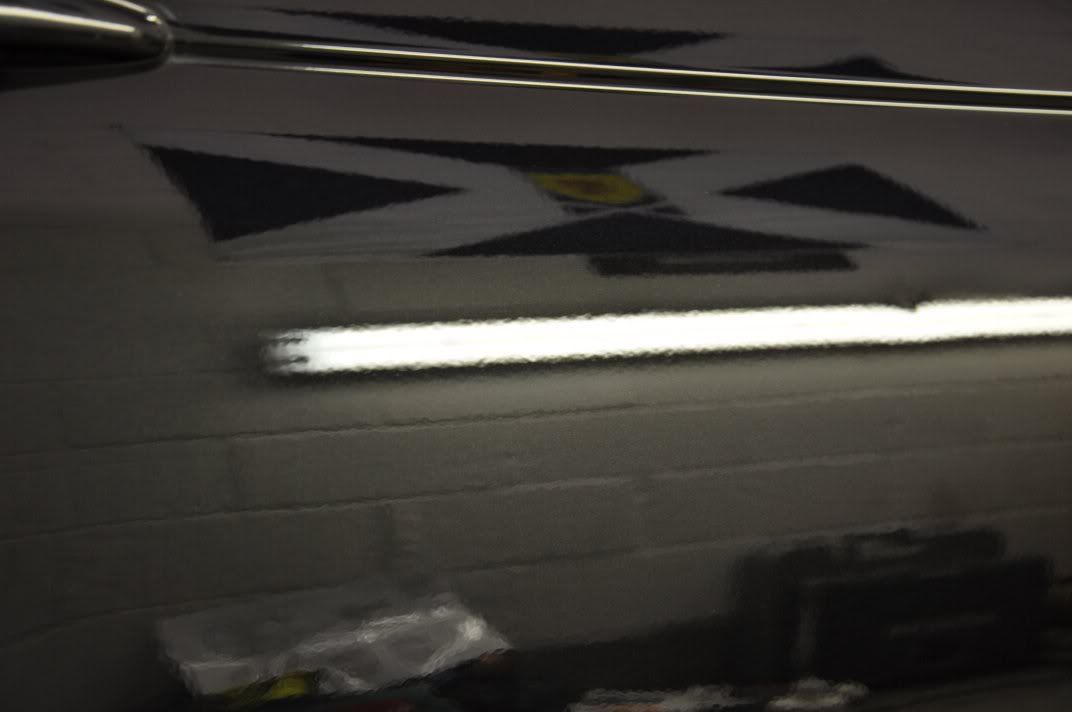
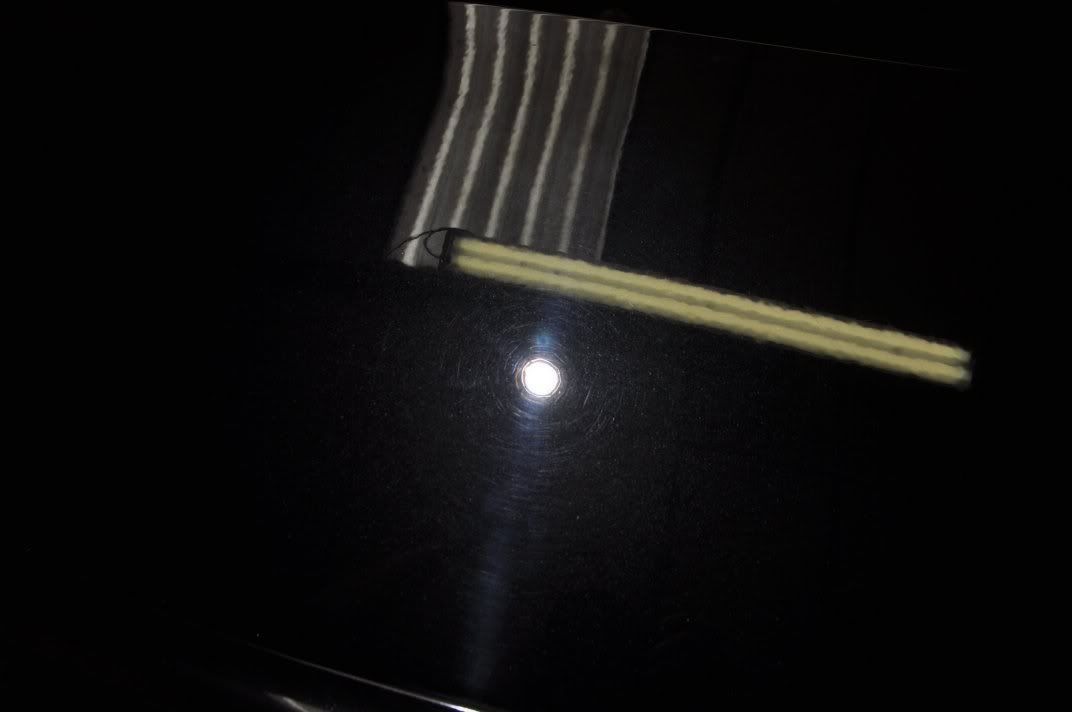
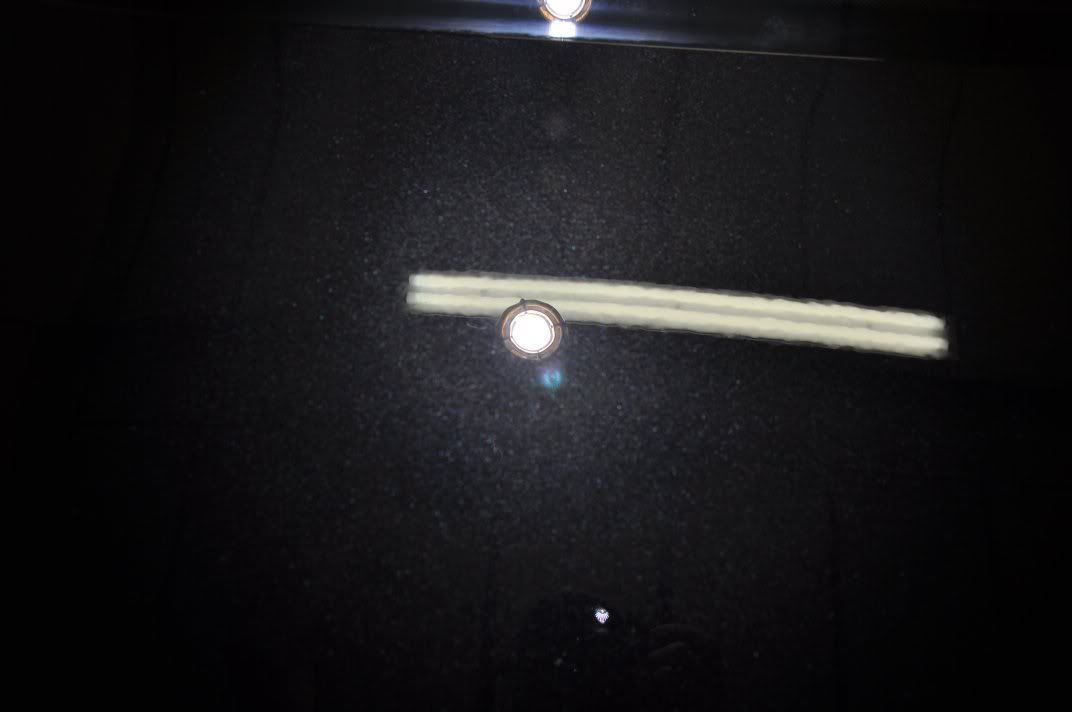
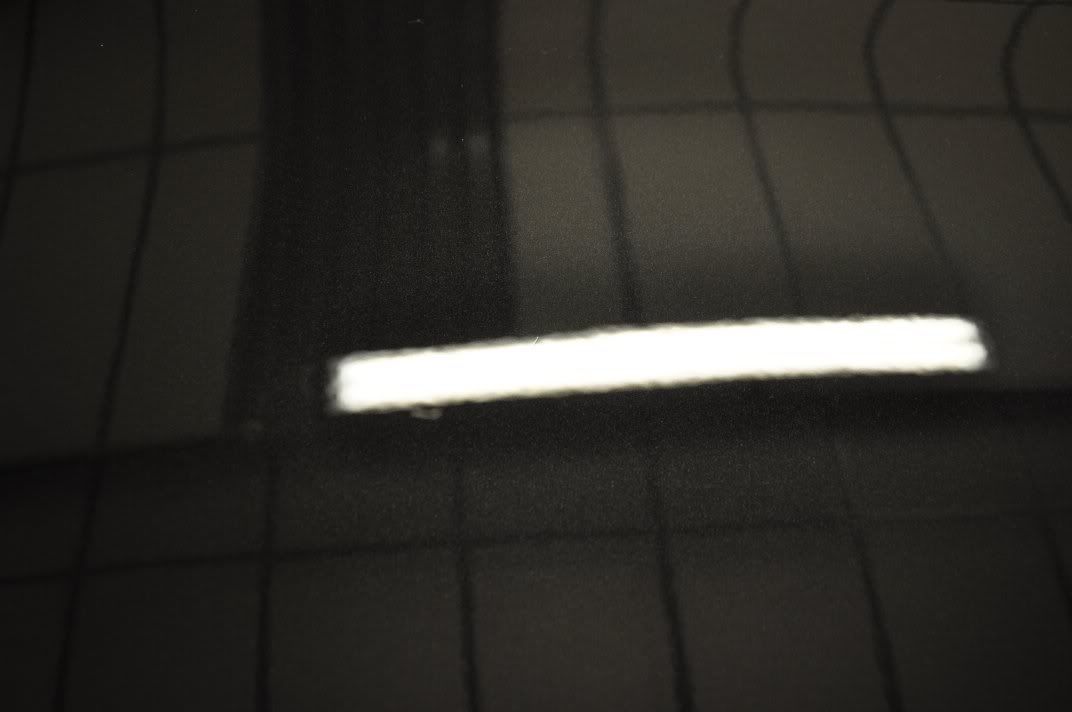
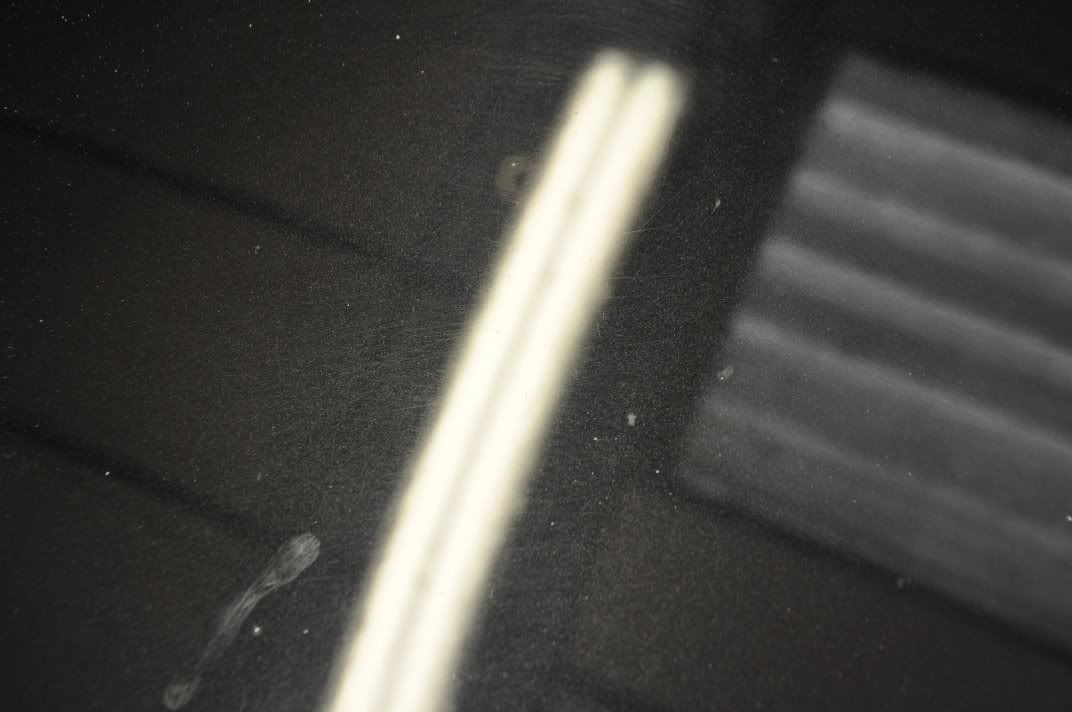
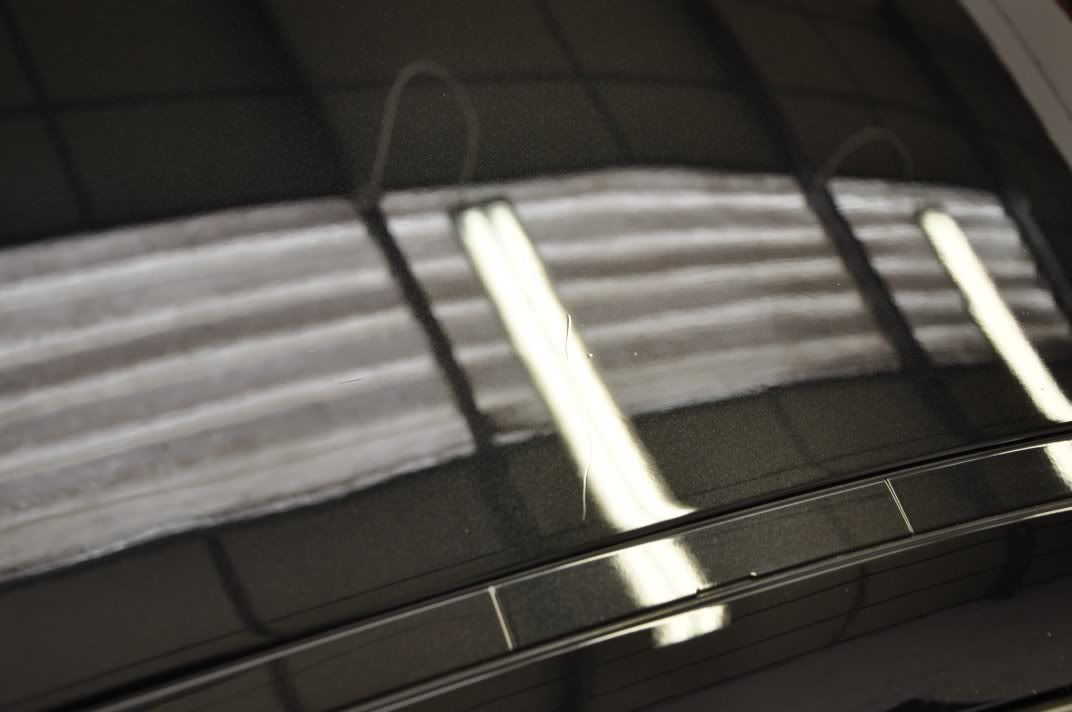
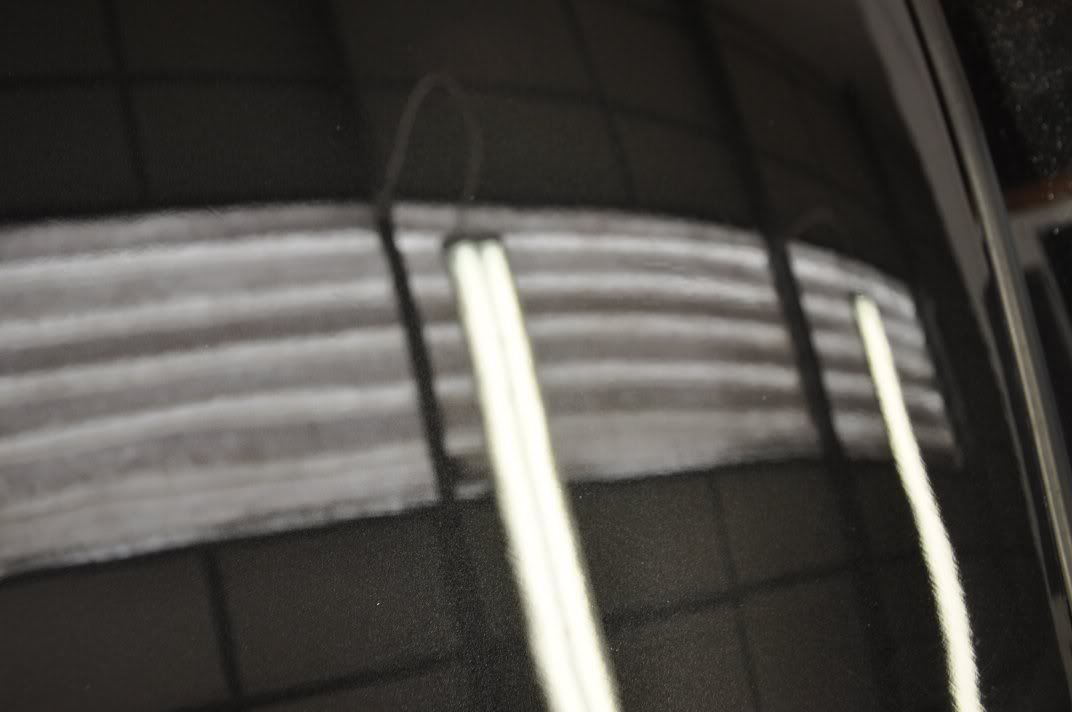
However, as I always try to stress, it is important to assess the finish by all possible means... and this means using the strip lights in the unit and analysing what is in the surface of the paint. The strip light alone shows the corrected region, a darker are where the paint looks “deeper” as the haze and general marring has been removed...
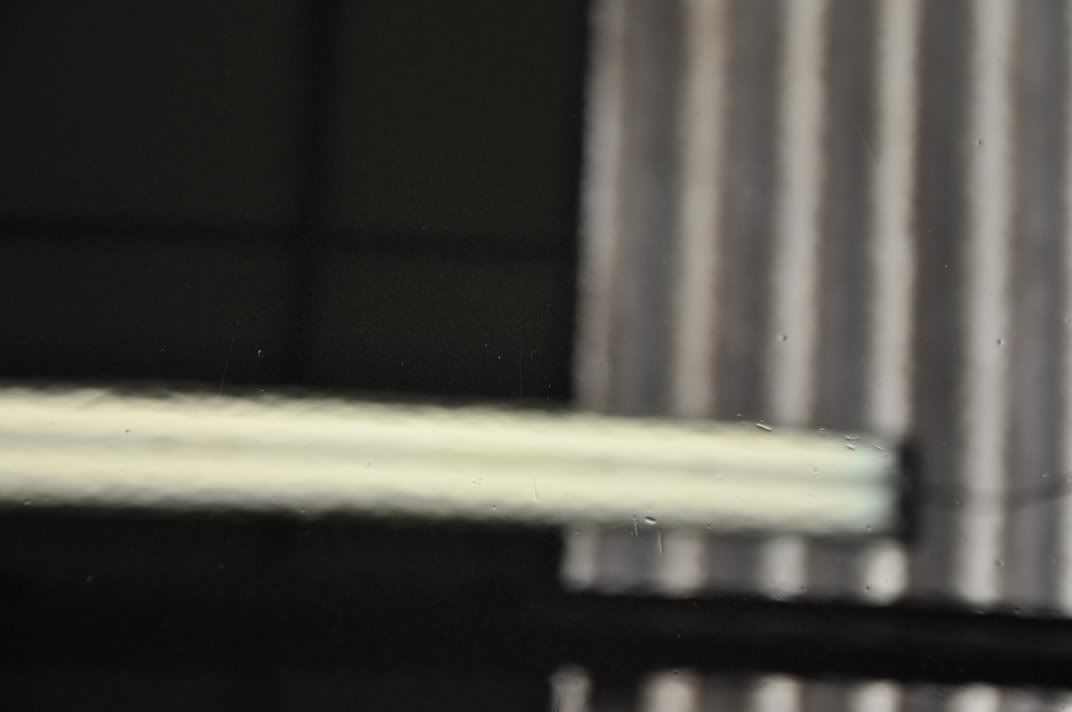
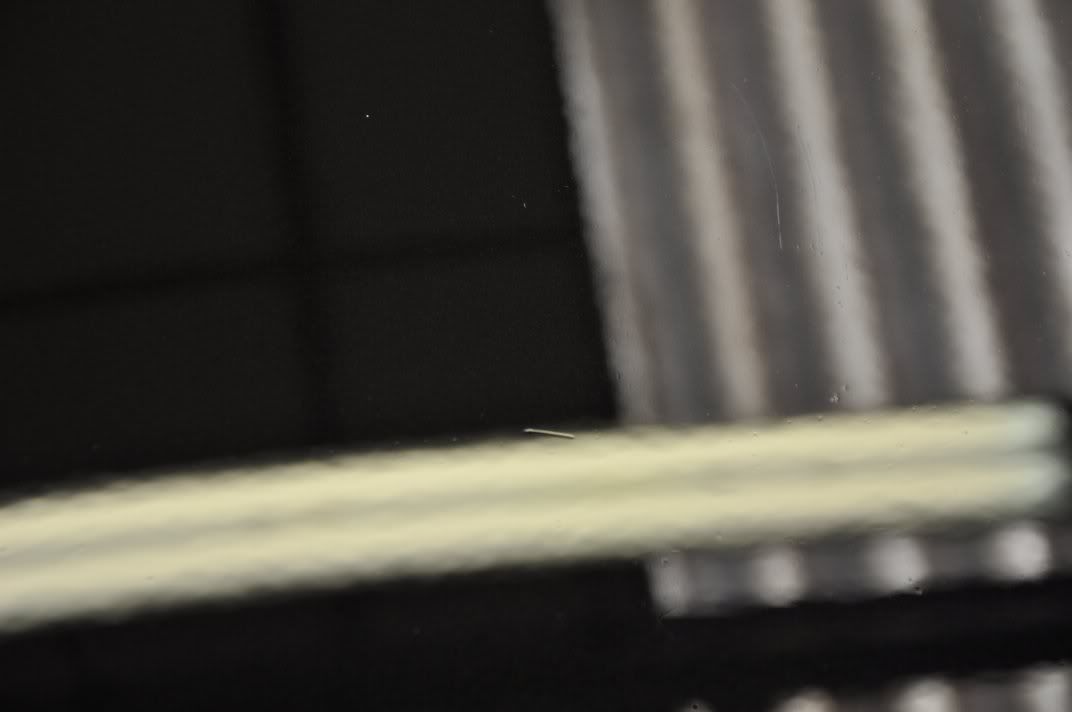
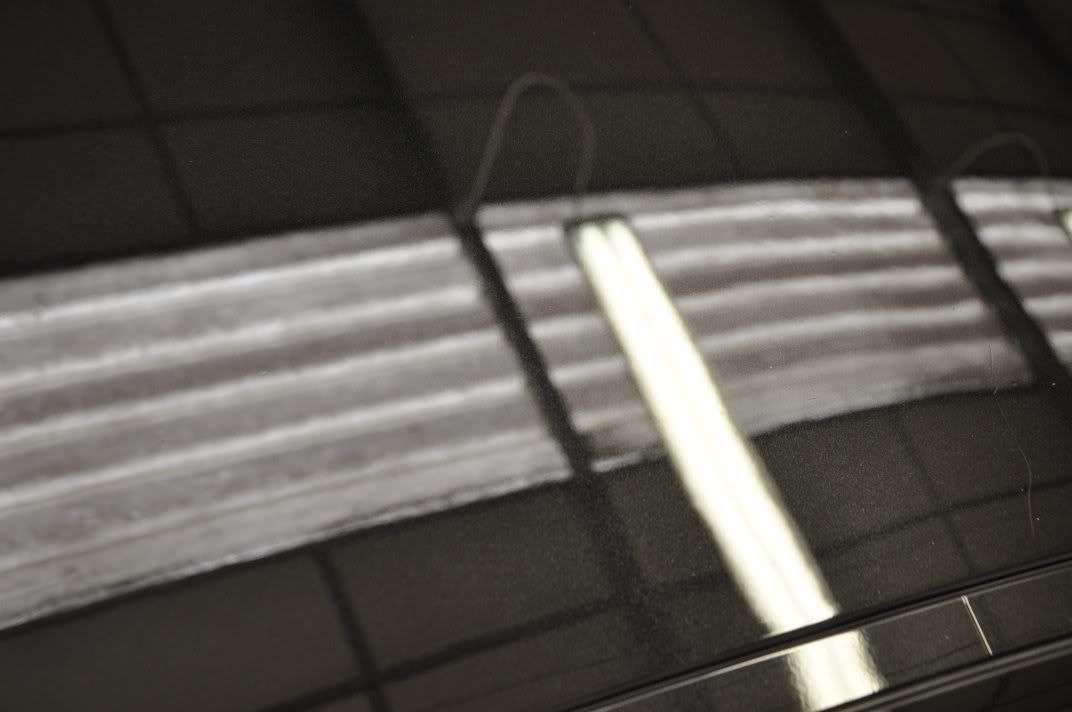
However, using the SLR camera’s ability to focus on the paint surface and by not “bleeching out” the subtle deep marks using the bright Sun Gun, we can start to see that the finish is still bearing quite a few deeper marks and is far from perfect...

In order to achieve what we would consider to be true paint correction on this car, rather than an enhancement and gloss restoration as achieved above, I used a wool mop and 3M Fast Cut plus on this car bonnet! The process for the bonnet took my approximately six hours to complete – one or two hits of 3M Fast Cut Plus with wool, followed by one hit of FC+ with a cutting foam pad, spot correction of deeper marks locally to get the best possible results using a 3” compounding foam, then a first stage refinement with Menzerna PO85RD3.02 Intensive Polish and then full refinement and jewelling with Menzerna PO85RD Final Finish.
The process with Fast Cut on the wool mop:
> Apply the polish in a line directly to the panel
> Spread the polish over a 2’ square area at 600rpm
> Begin working the polish at 1200rpm, with light to moderate pressure
> Work the polish at 2000rpm, moderate to heavy pressure until residue goes clear
The process with Fast Cut on a foam pad:
> Spread the polish at 600rpm
> Begin working at 1200rpm, light to medium pressure to build a little heat in the panel
> Work at 1800 – 2000rpm with moderate pressure until the residue goes clear, taking care not to overheat the panel
The process with Intensive Polish on a foam pad:
> Spread the polish at 600rpm
> Begin working the polish at 1200rpm with light pressure
> Work the polish at 1800rpm with moderate pressure until the residue goes clear
The process for Final Fiish with a finishing foam pad:
> Spread the polish at 600rpm
> Begin working the polish at 1200rom with light pressure
> Work the polish at 1500rpm with light to moderate pressure until the residue goes clear, pressure getting lighter towards the end of the set
> Refine the finish at 1200rpm with light pressure for a couple of passes
> Jewel the finish at 900rpm, slow passes with very light pressure
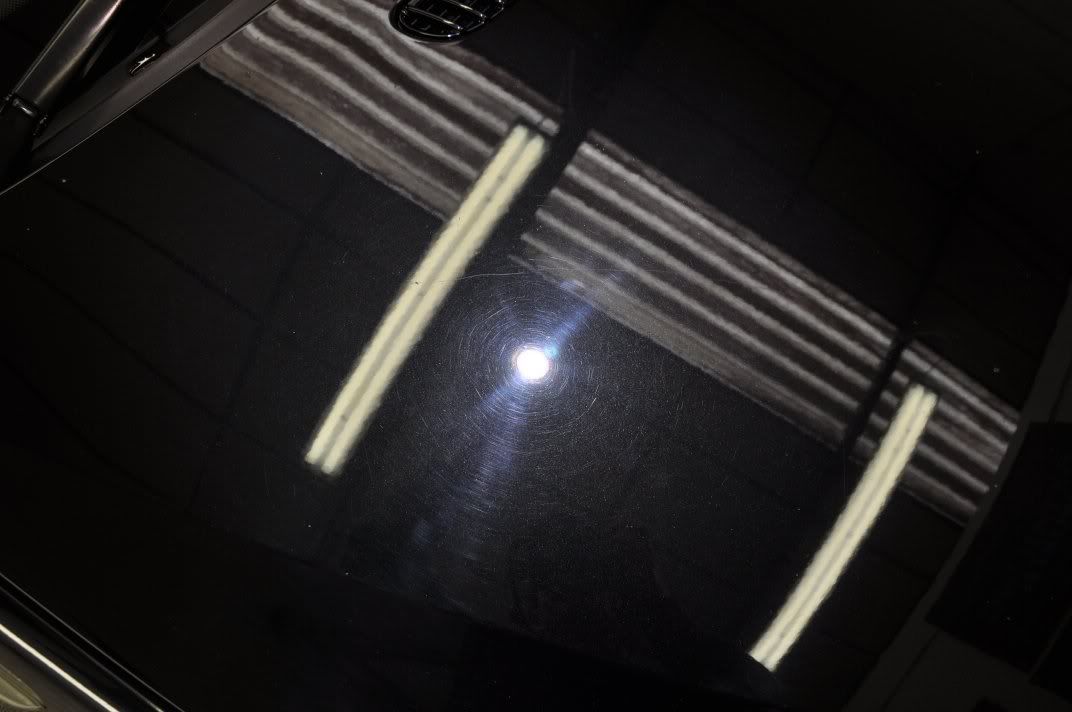
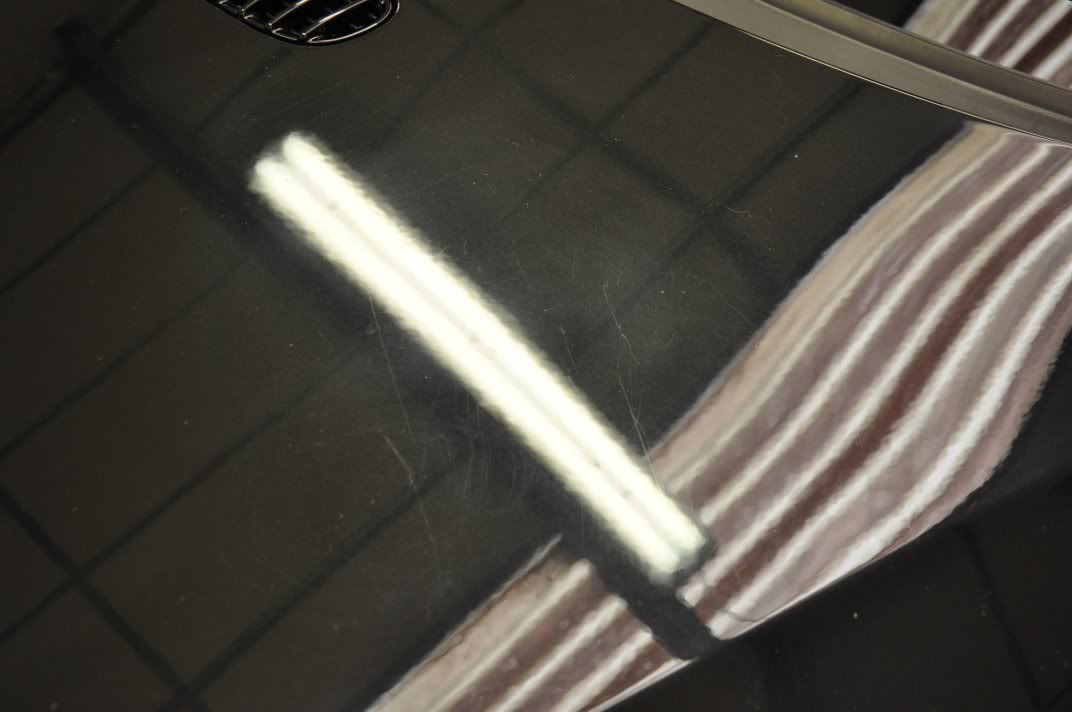
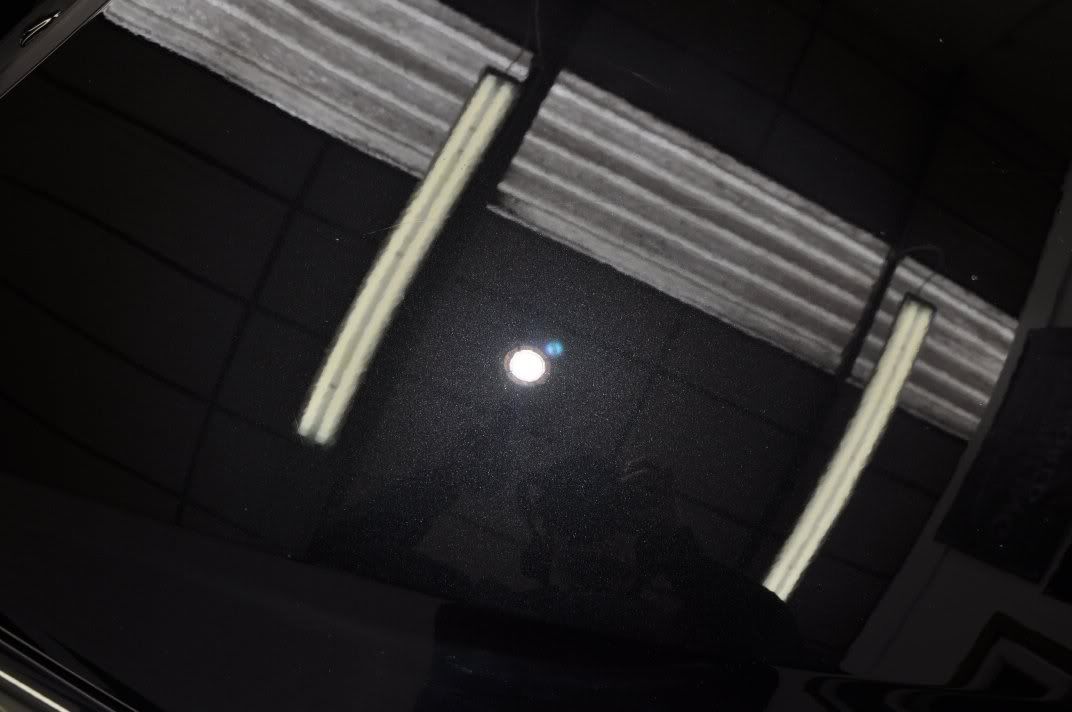
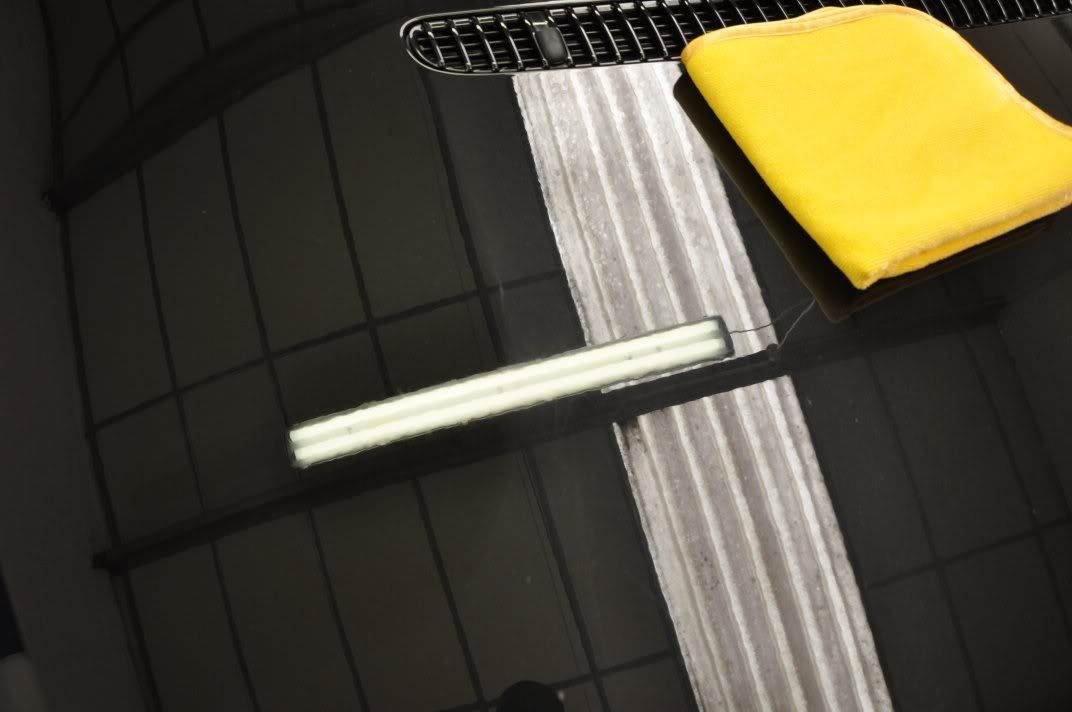
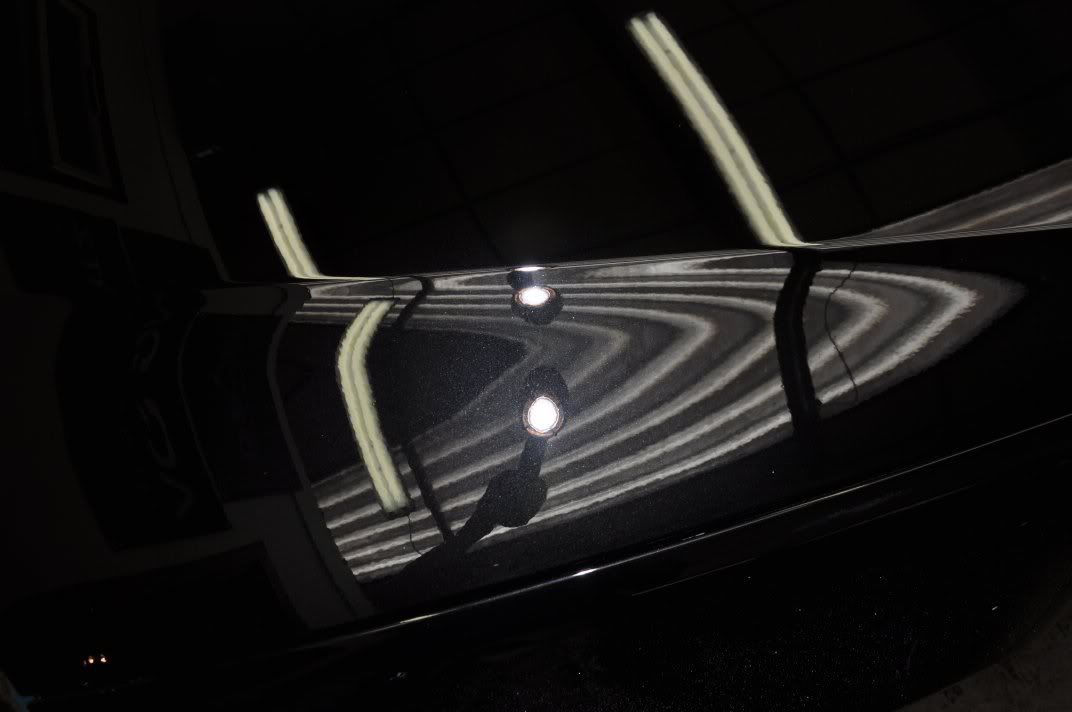
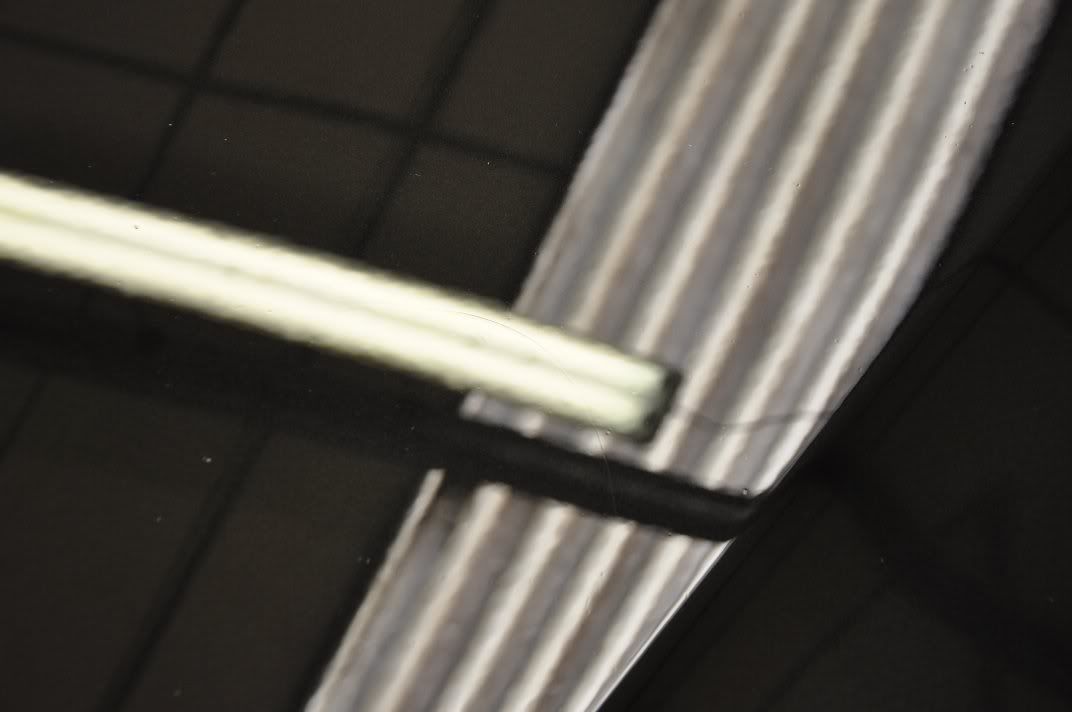
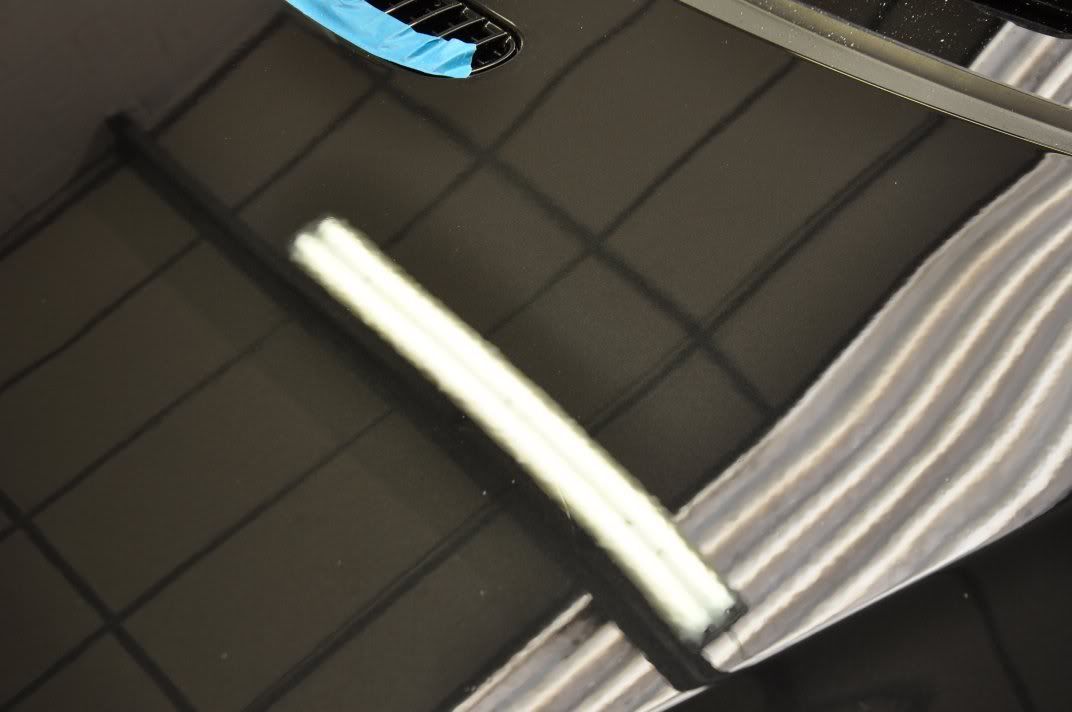
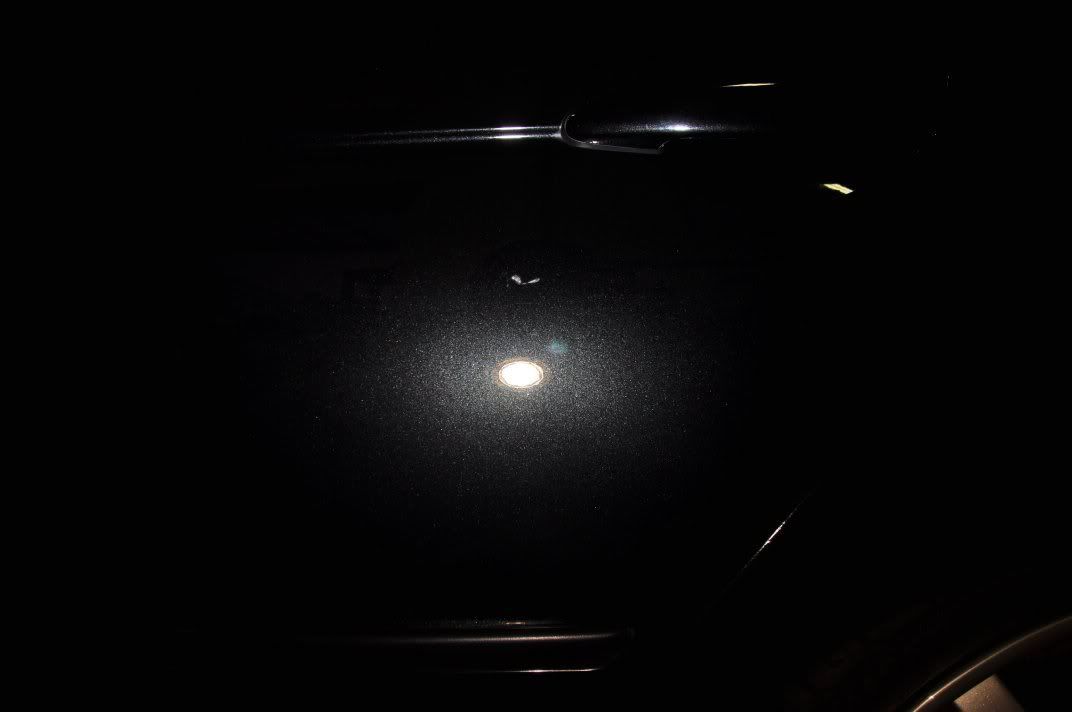
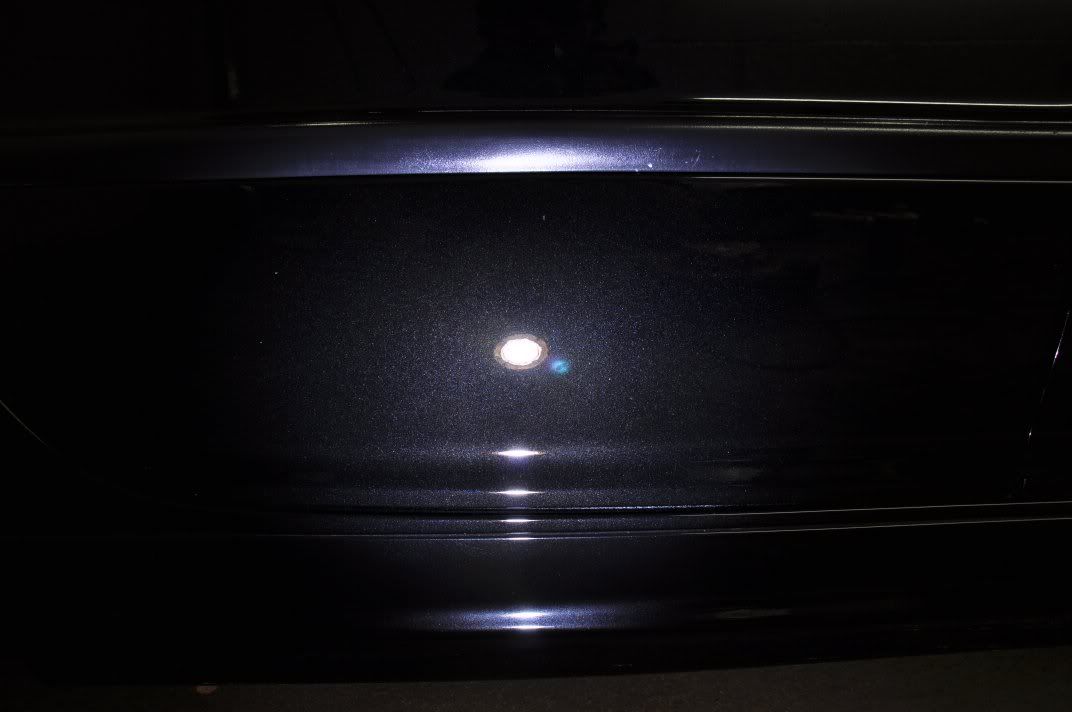
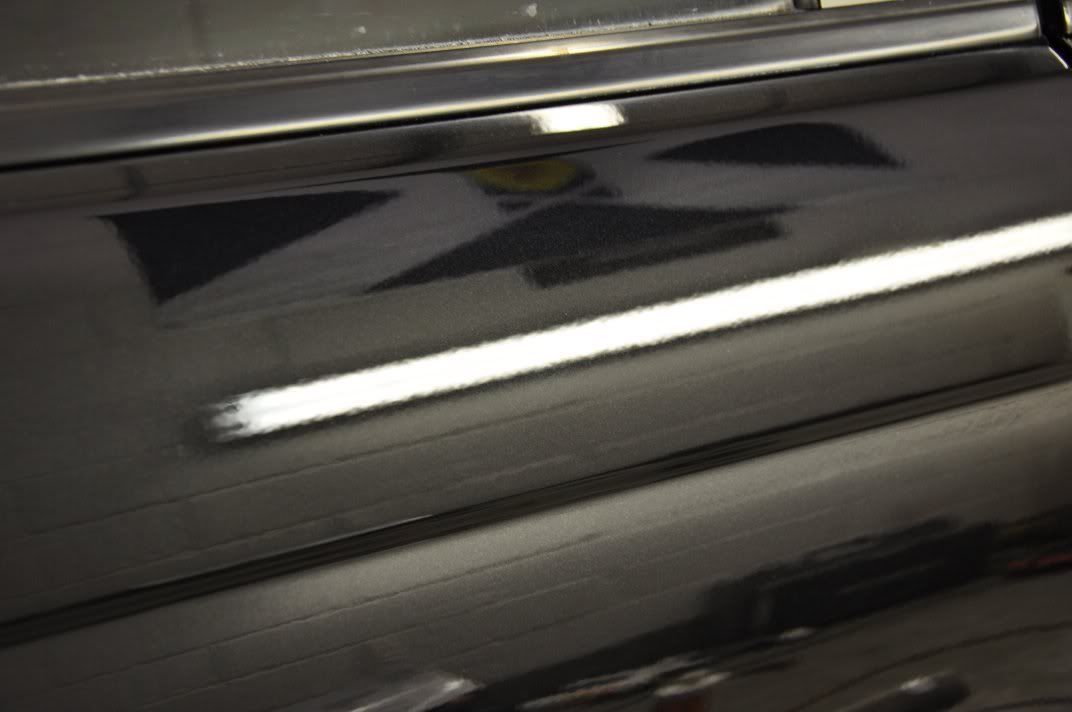
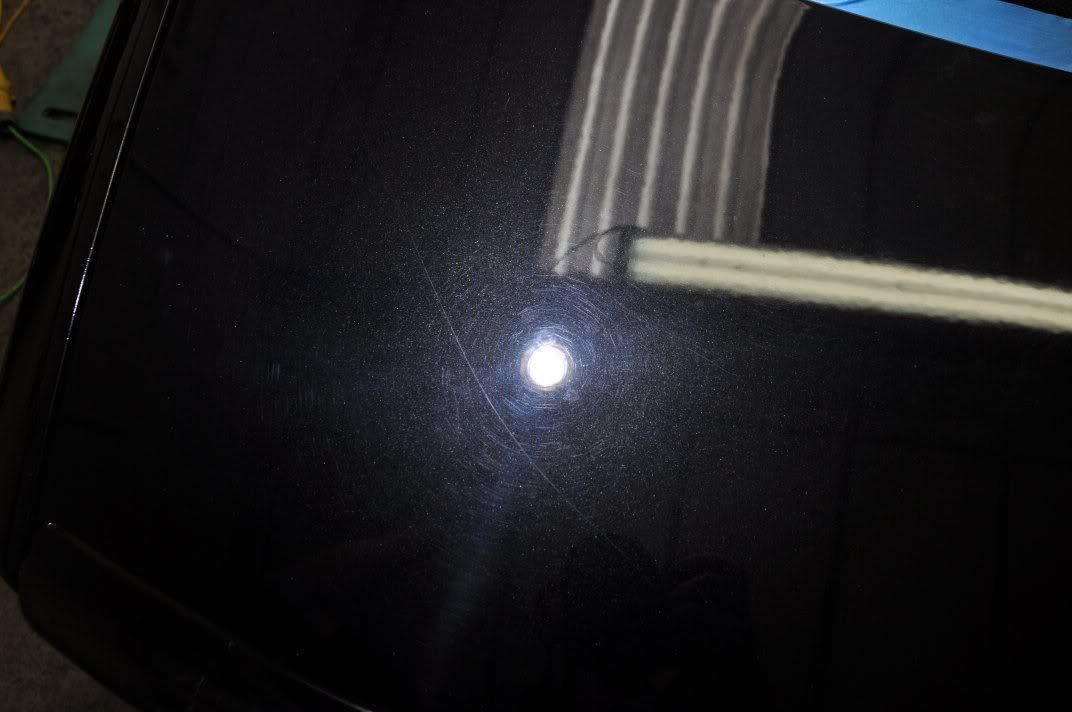
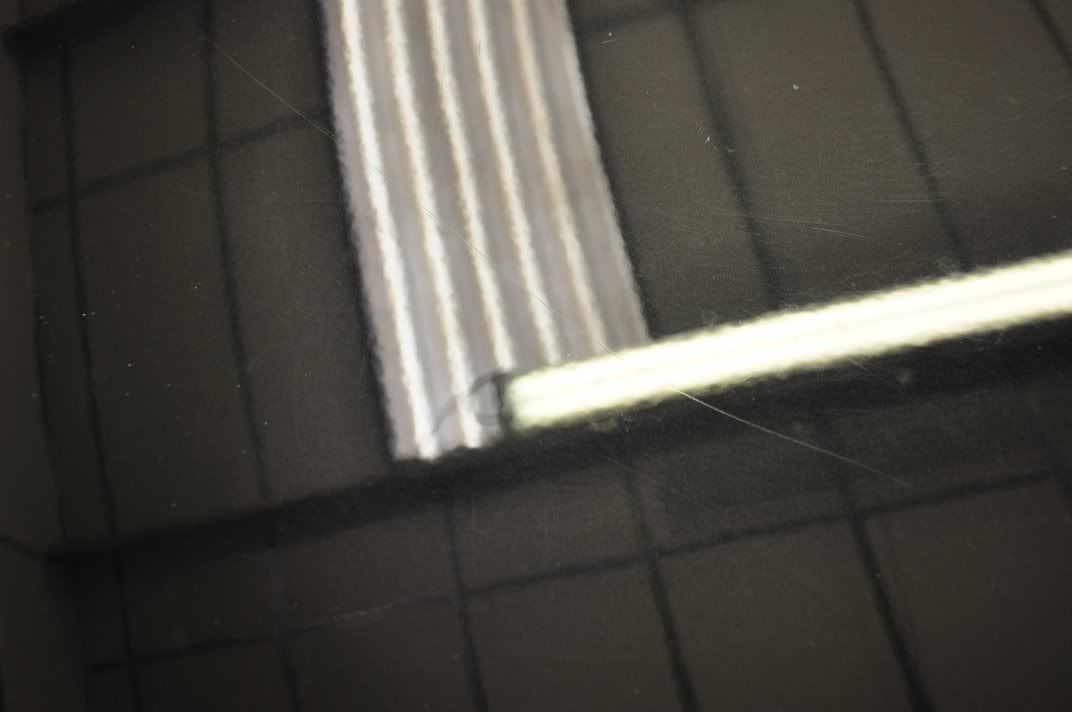
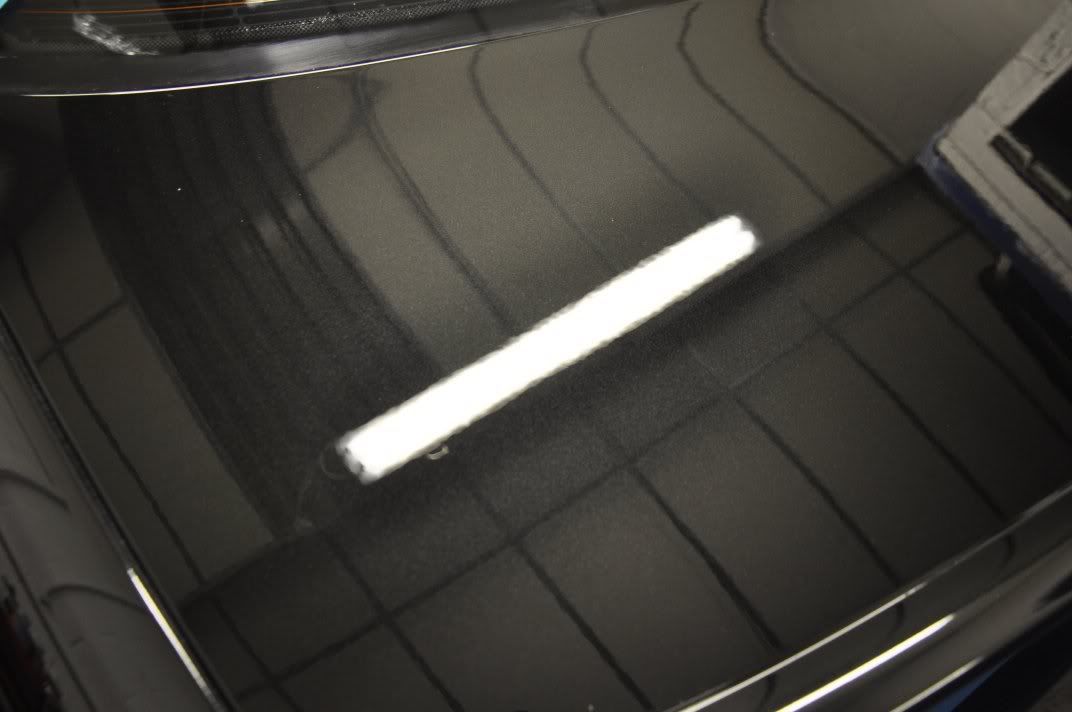
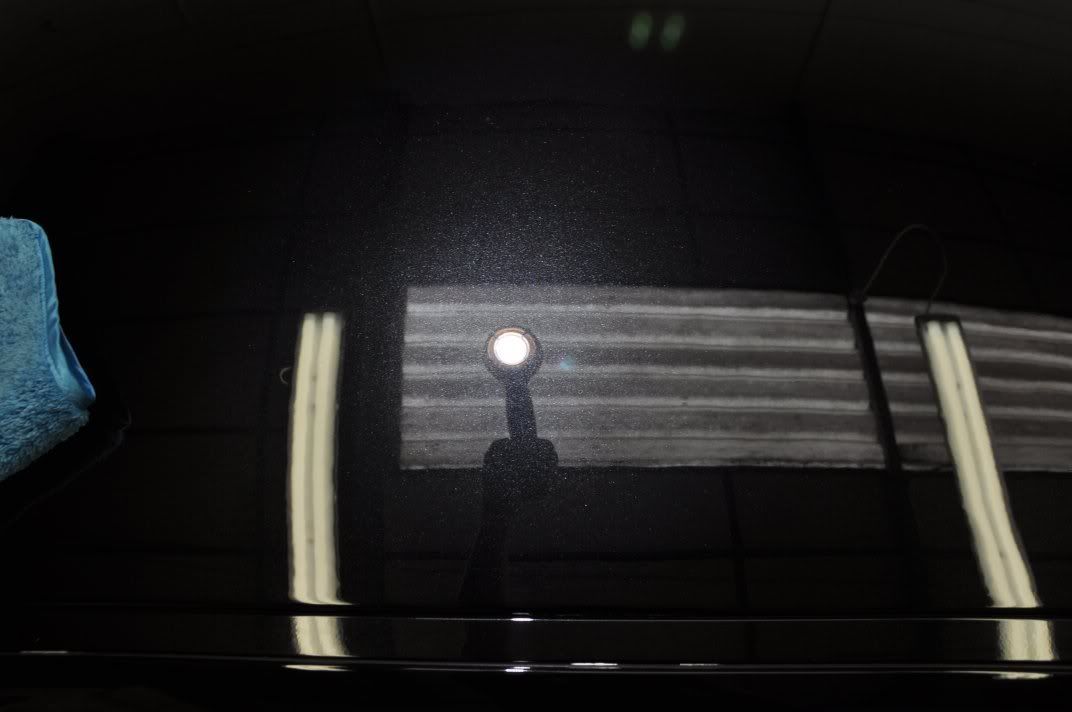
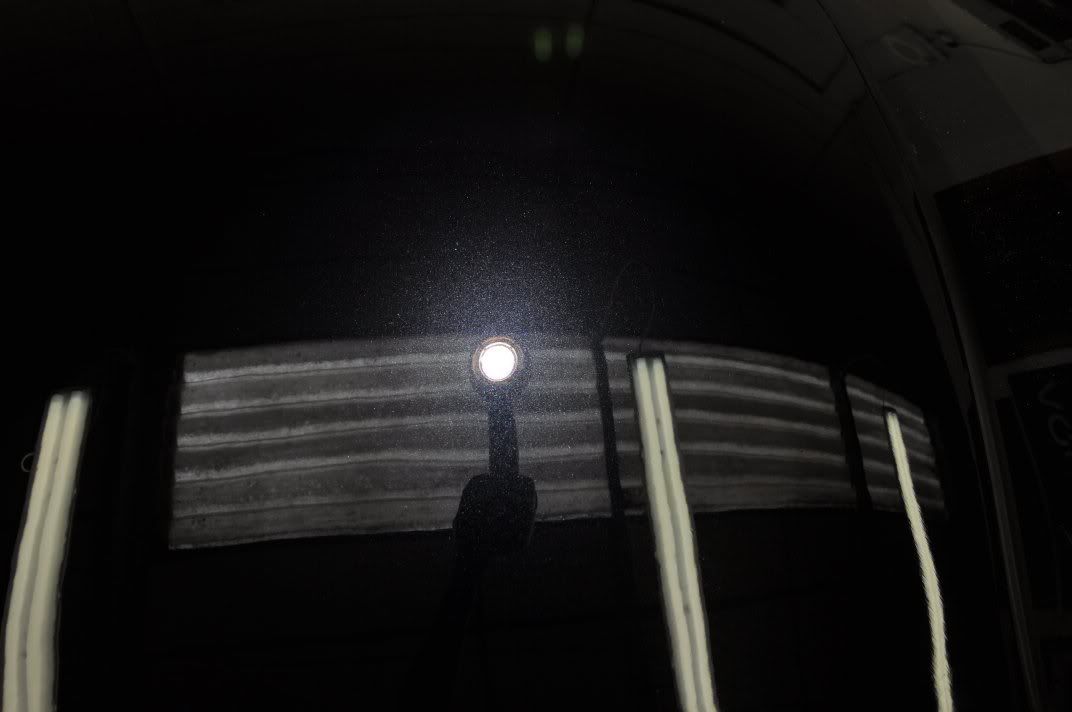
The end results now of the paint correction and refining, assessed first of all under the Sun Gun to check the quality of the machine finishing and refinement:


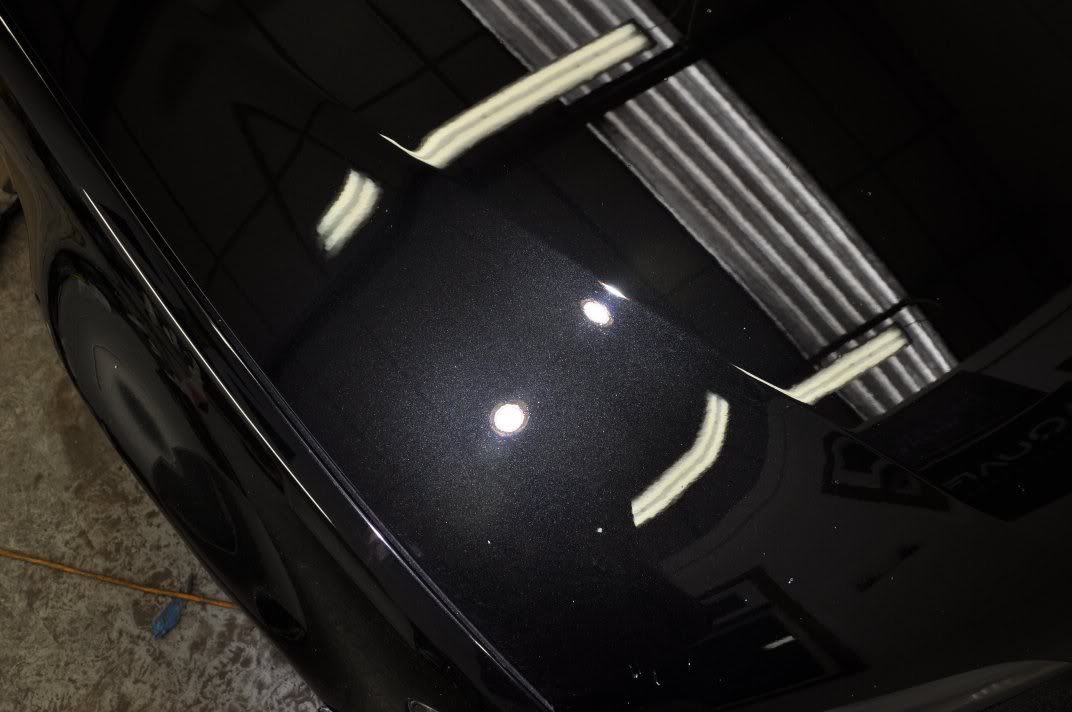
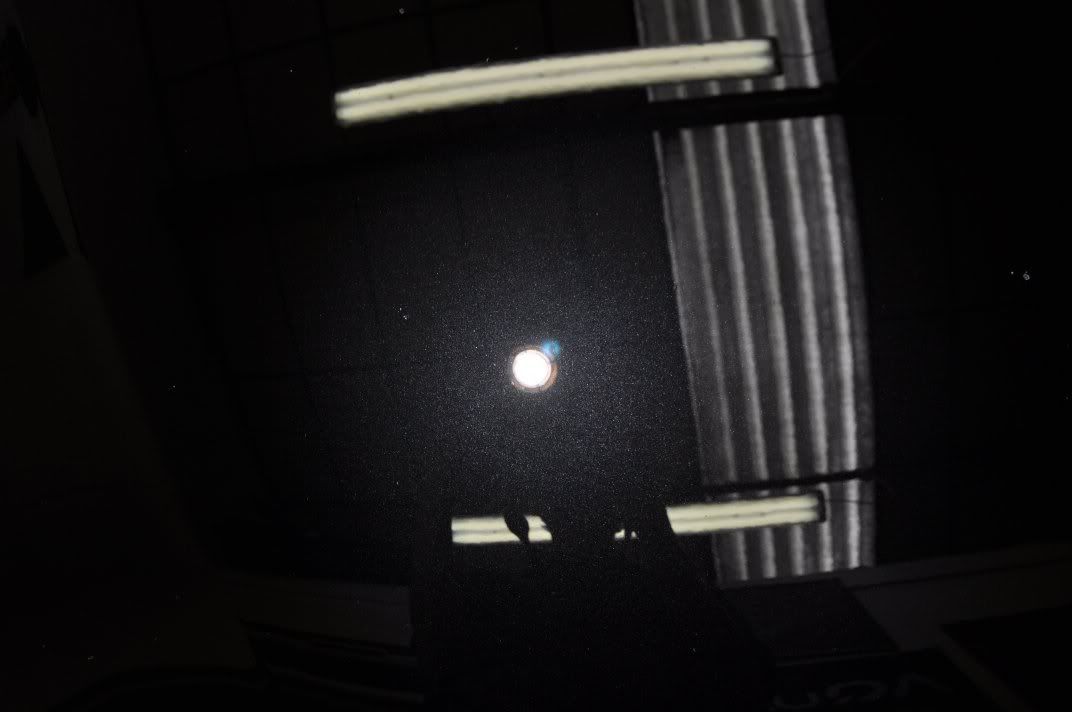

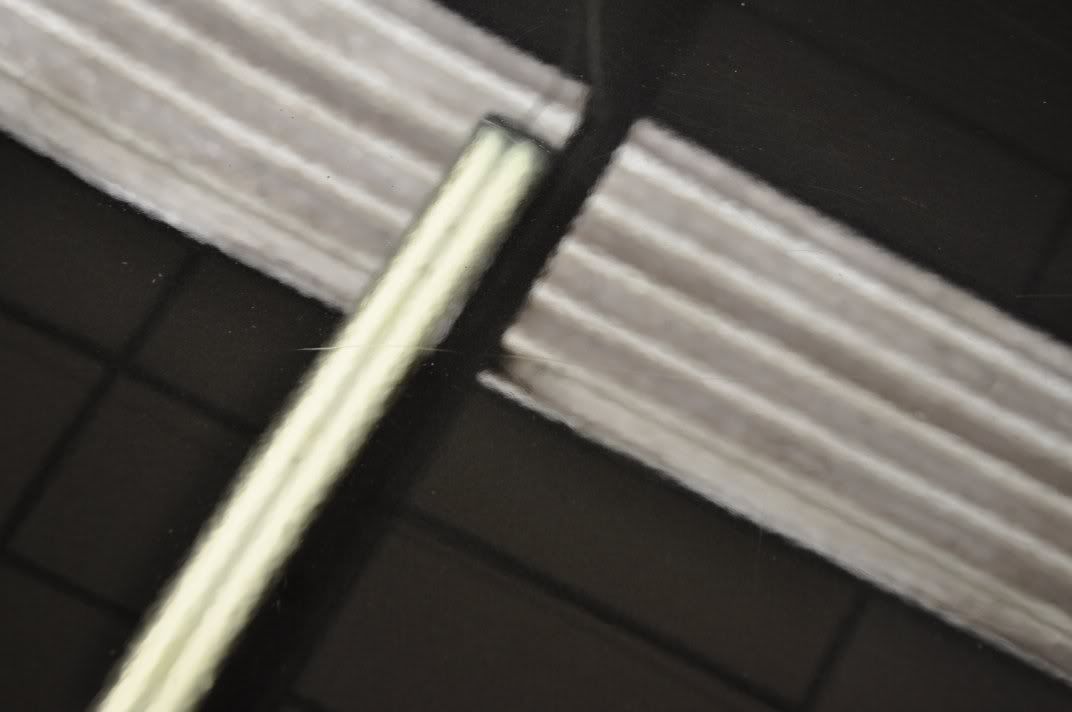
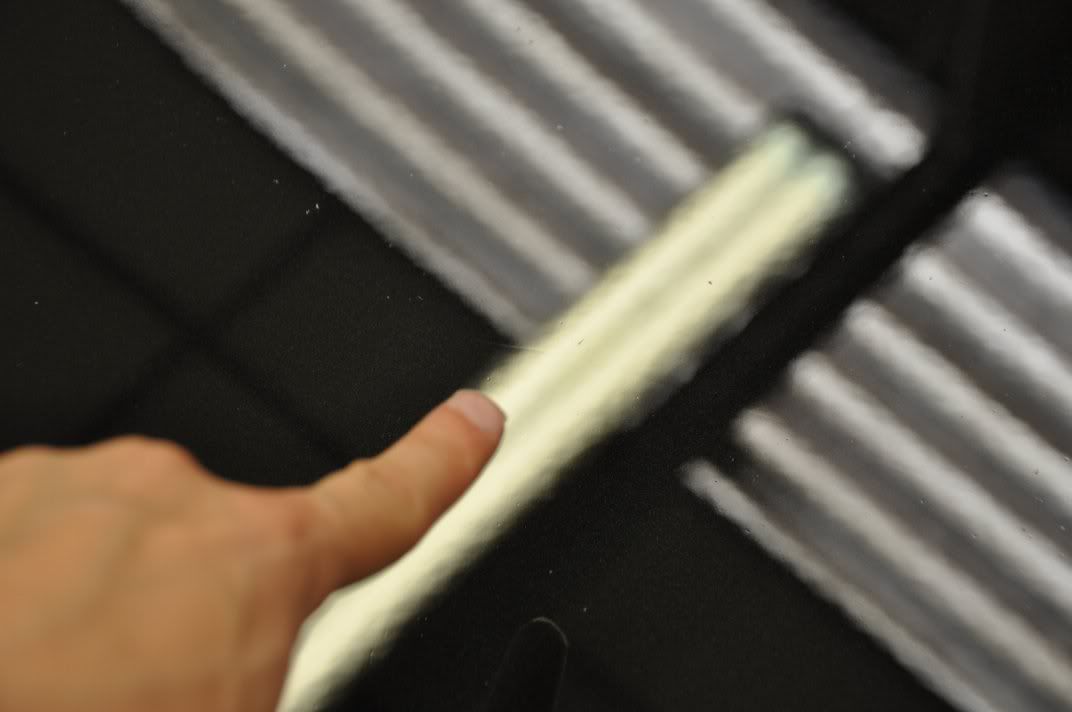
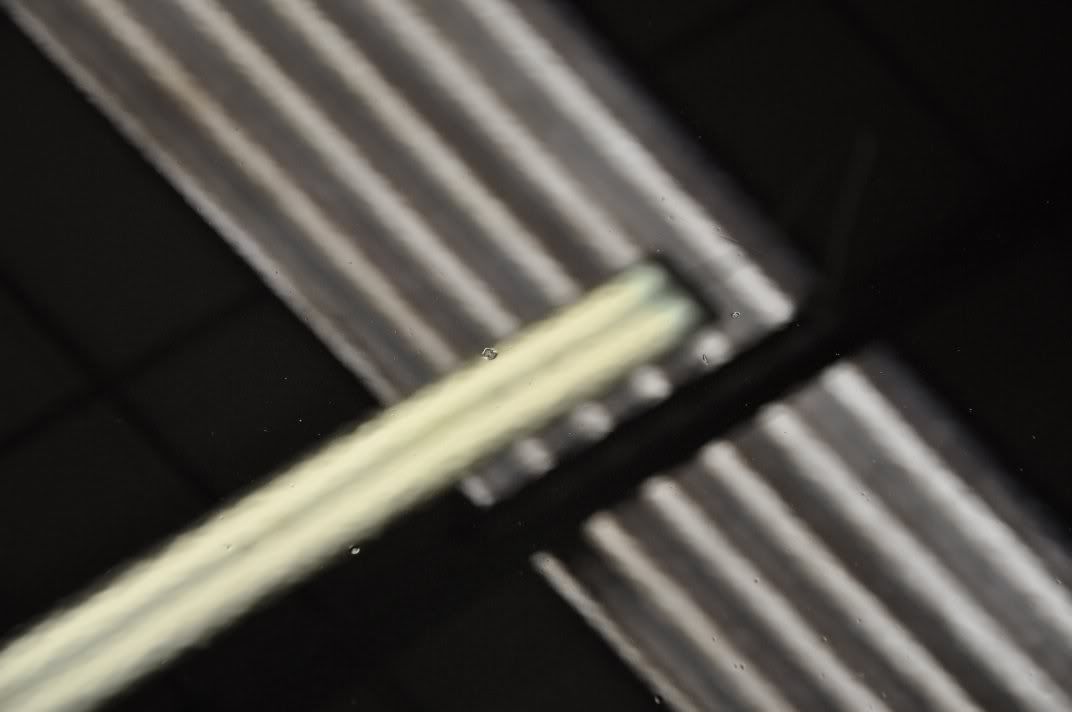
To give a fair indication of the level of correction of the deeper marks, we use the strip light and focus the camera on the paint surface – I know there’s a lot of pictures here, but hopefully this is giving an insight into the actual work behind the paint correction process and assessment of the finish and what to be looking for when you are assessing a paint finish yourself – there’s more to paint correction than just a shiny car in artistic after shots! The correction level achieved, note that there are still the odd deep mark around (end of my finger tip in one image) that we could not remove owing to the paint thicknesses, but this highlights the scope of paint correction and what was honestly achieved by the process:


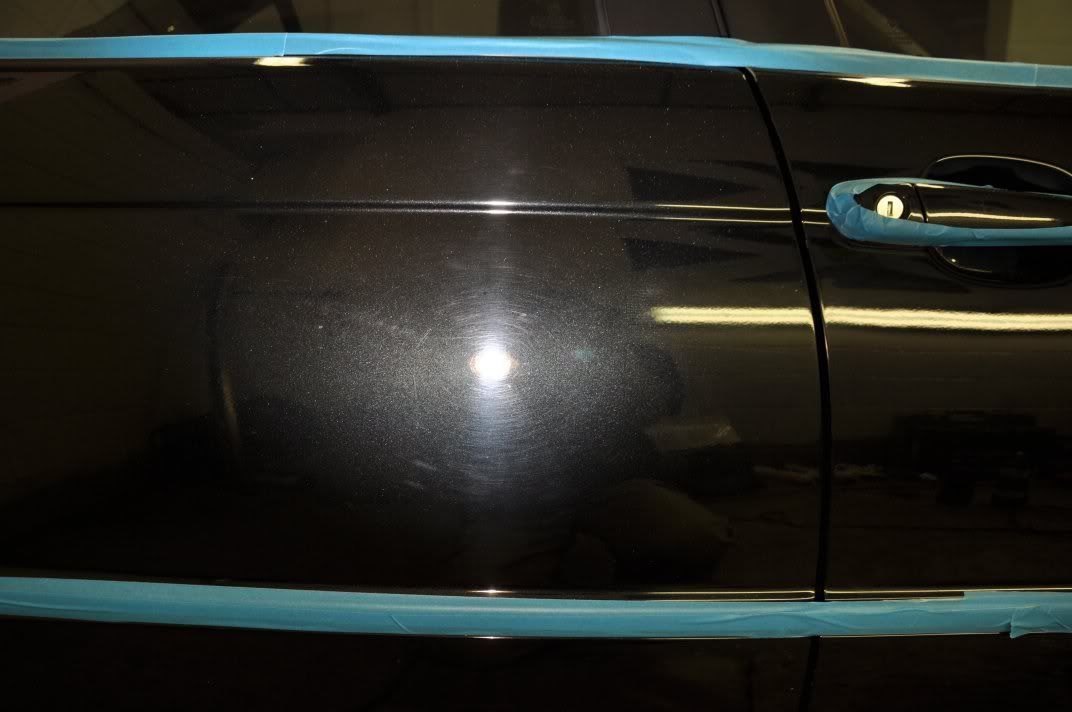
Moving on to the passenger side of the car and I’m going to focus this writeup on the two doors that Gordon was working on – the front of which was showing readings to represent a respray while the back door was showing readings in the 80um and 90um level to suggest thing paint and previous heavy polishing. Looking at the condition of both of these doors before:


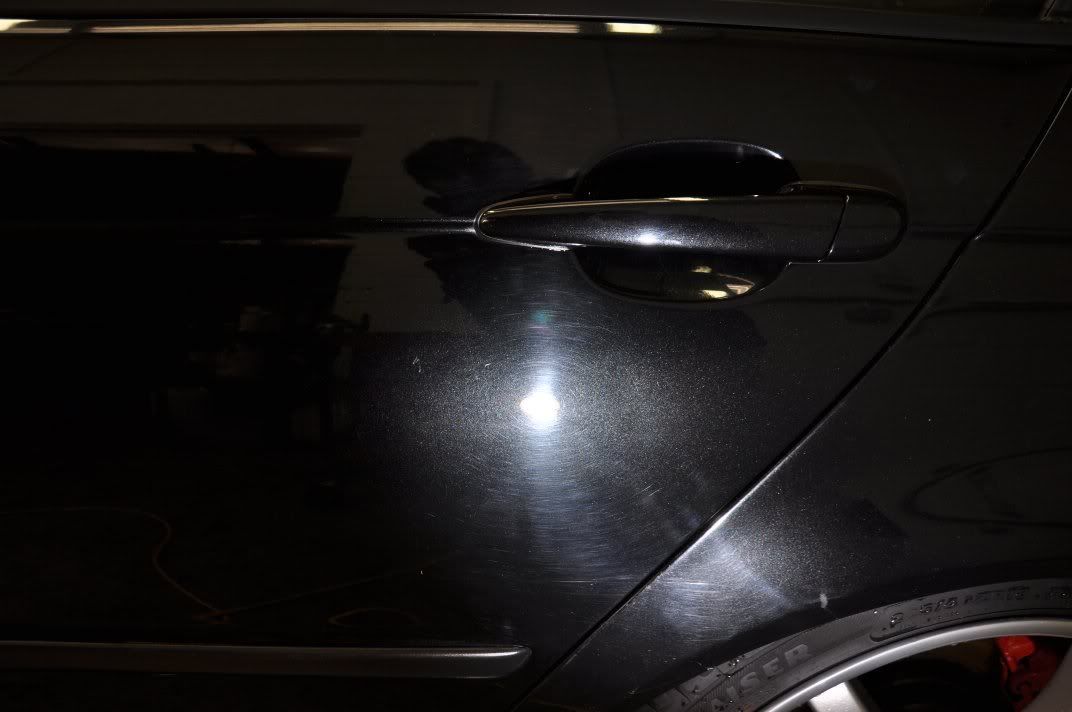
The severity of the marks are clear to see, on the front door with some deeper marks and a lot of swirls while on the back door we also see hologramming which supports the evidence of the paint thickness gauge to their having been some form of previous machine polishing to make the paint thinner. The front of the doors you could describe as the “easiest” – thicker paint, giving a bit more scope for correction but one has to be very careful on resprayed panels as to how the paint behaves, and removal rates as it is likely to not be the same as standard parts or other resprayed parts of the car!
Gordon used Fast Cut for correction on this door, and then refined the finish to get the following results...


On the back door however, a more gentle approach was adopted owing to the paint thickness readings, and Menzerna Intensive Polish was used for the correction stages, and then the finish refined. You can still see the odd mark left, but when the paint thickness readings and removal rates were taken into account this was the maximum correction we felt was safe to achieve without risk of short or long-term damage to the finish... sometimes you just have to know when to stop...
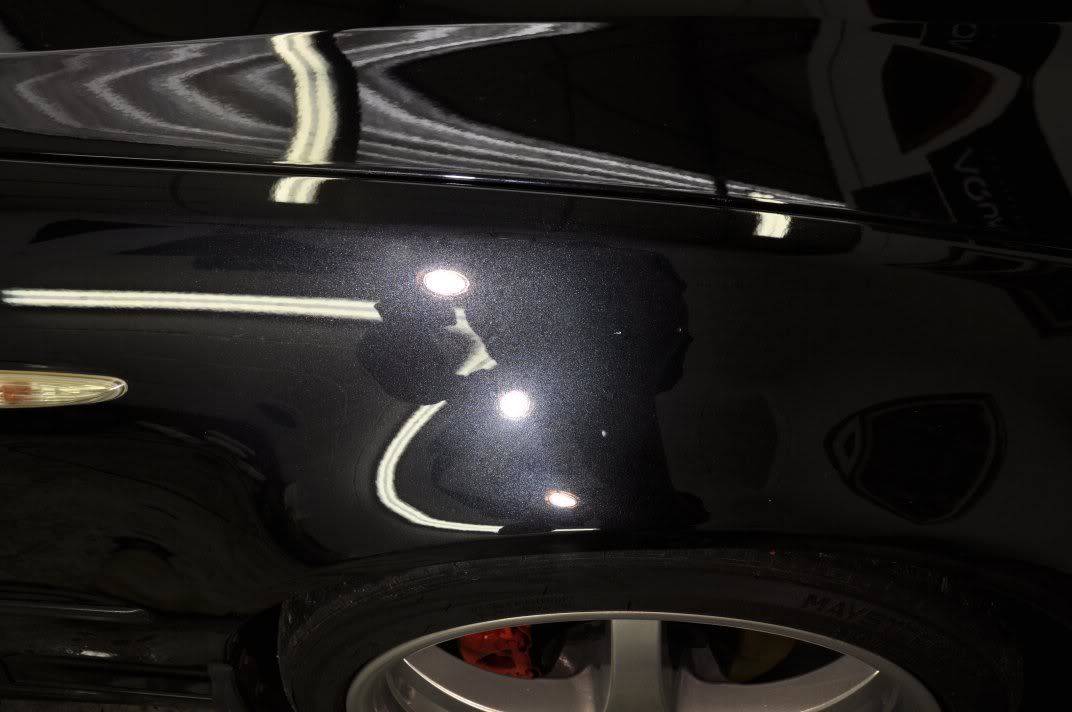
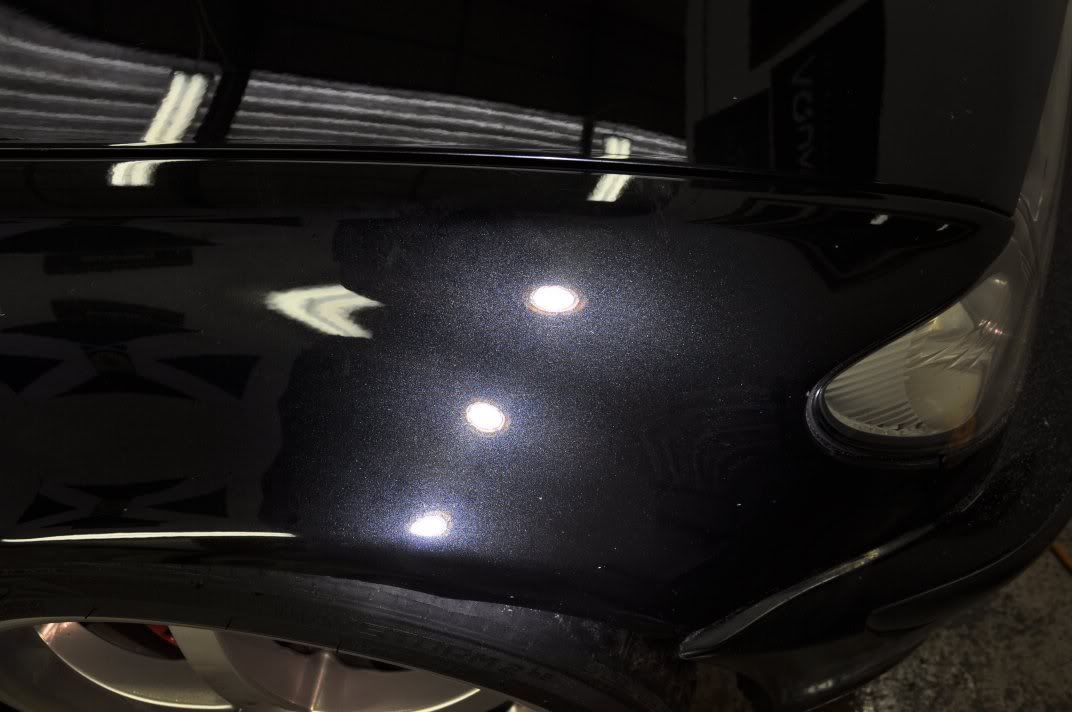
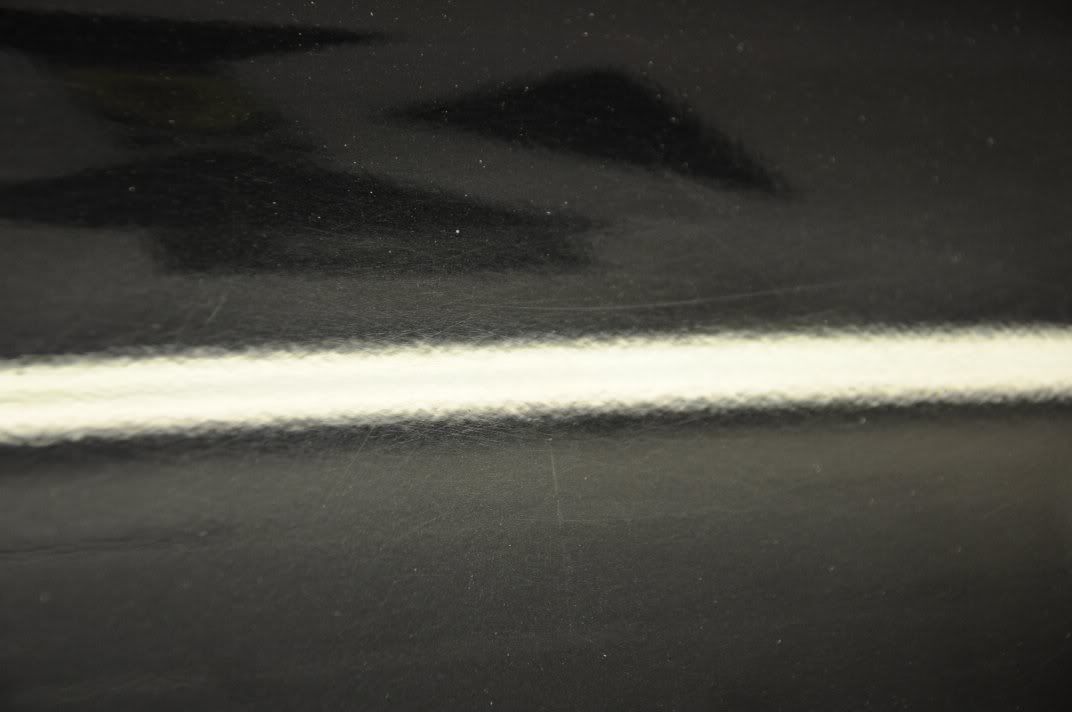
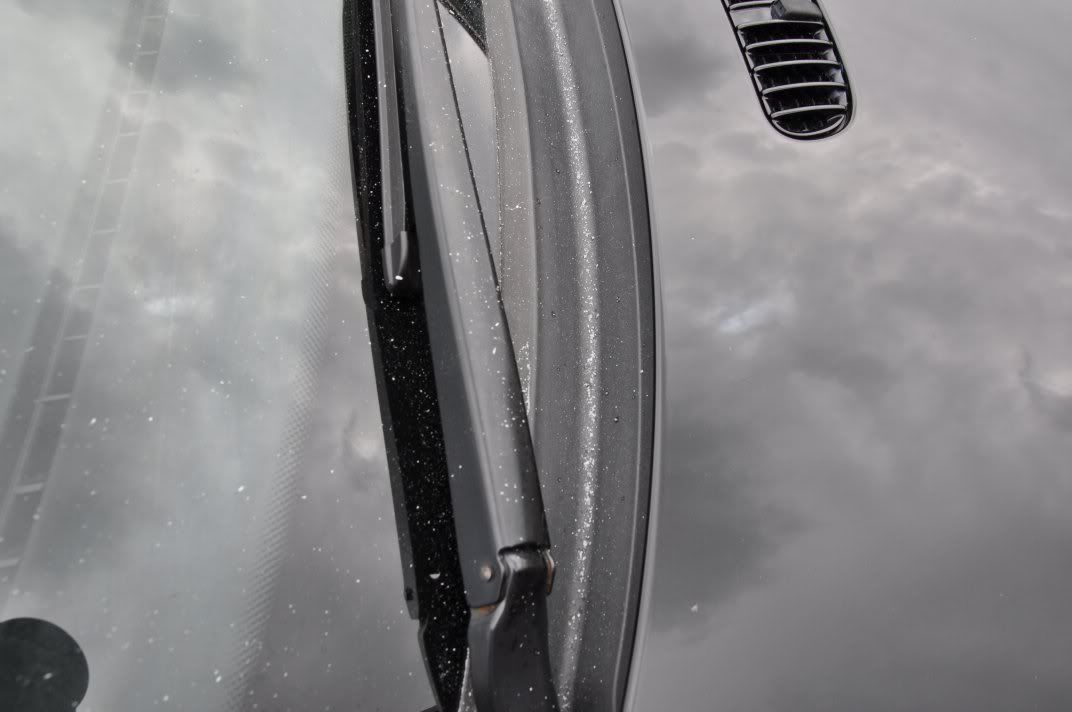
Meanwhile, round on the driver’s side of the car, there were different issues to be dealing with – most notably on this front wing. The before shots show deep scratches, and general swirling, while the paint gauge read thinly on the panel...
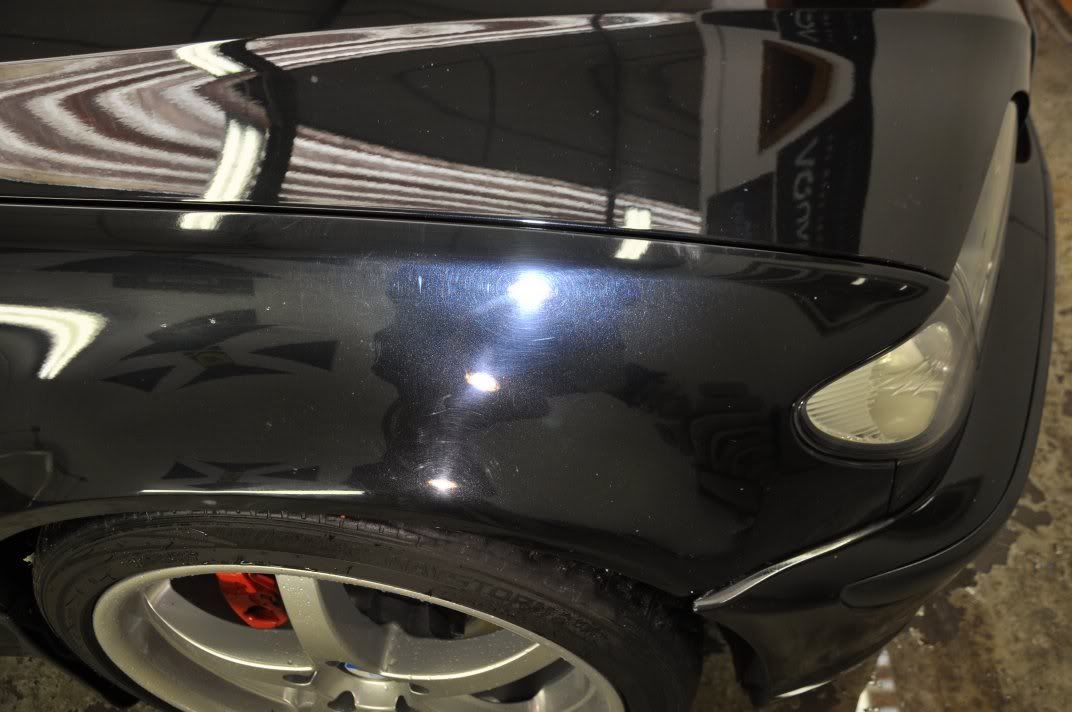
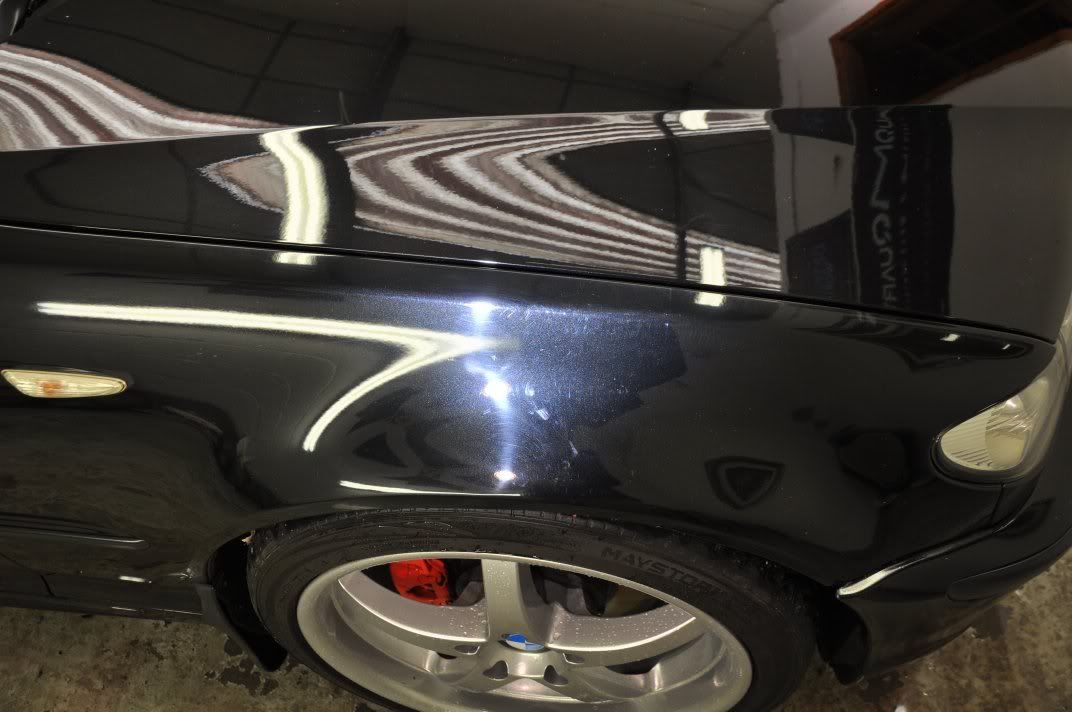
There was clear evidence of a respray, which you can see more clearly once the swirls are removed in the after shots – note the sweeping lines in the flake of the paintwork, which the bodyshop next door reckon was probably caused by water in the paint or poor prep before the lacquer was applied... alas not a lot to be done with that, but at least the surface defects largely corrected and a nice gloss and clarity returned...
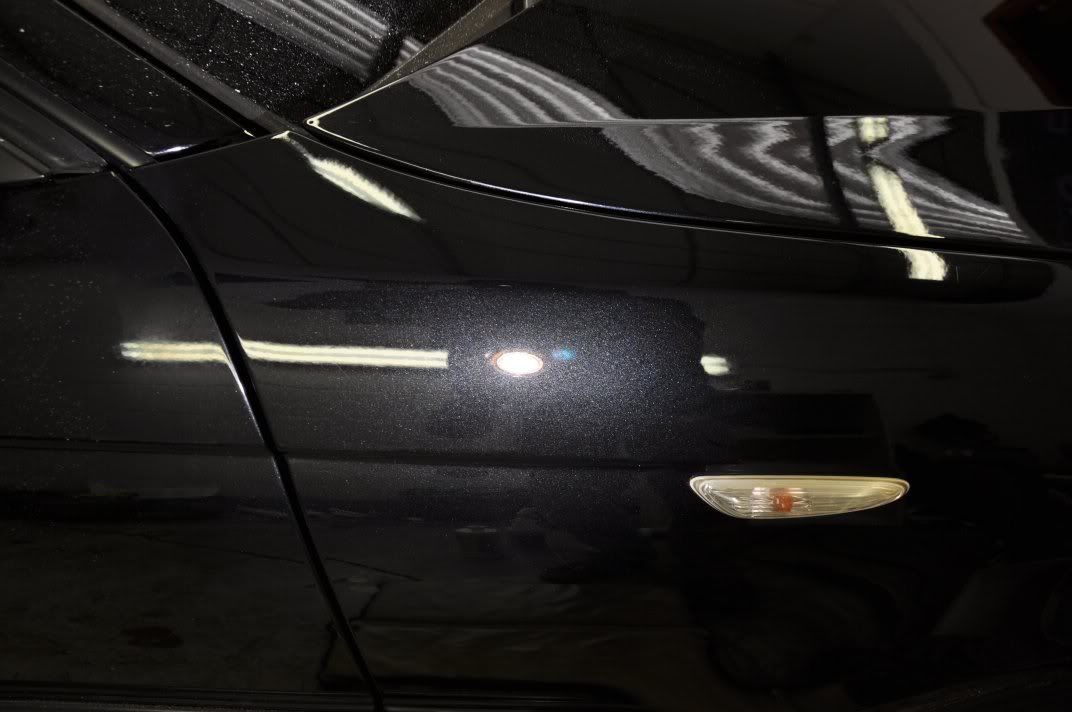

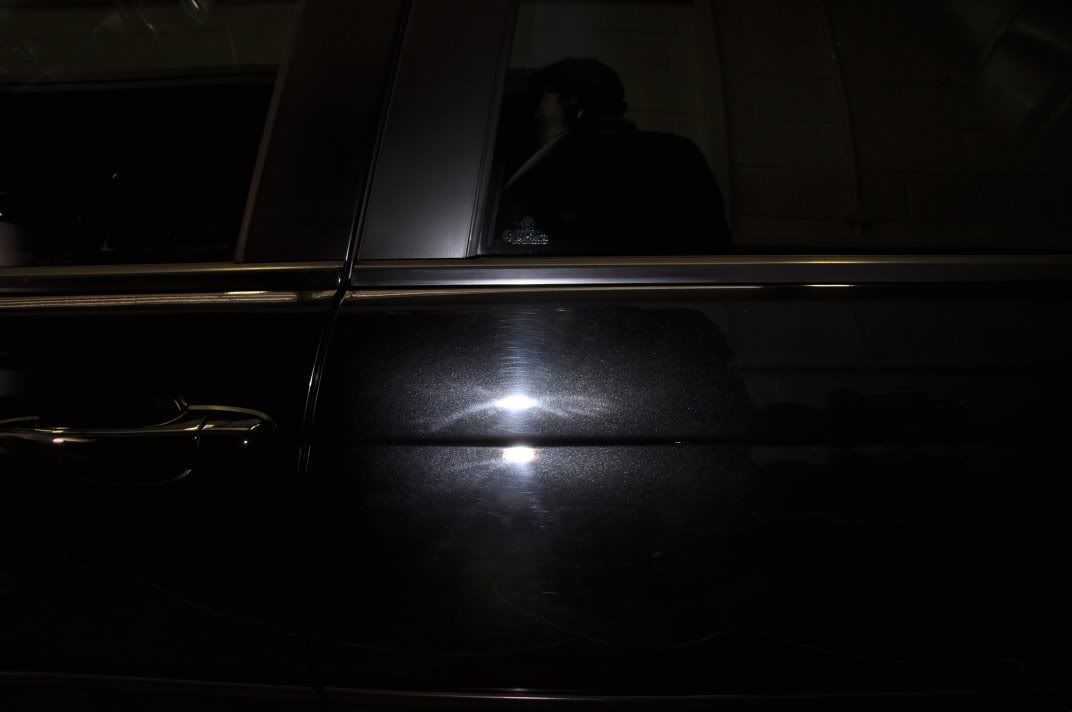
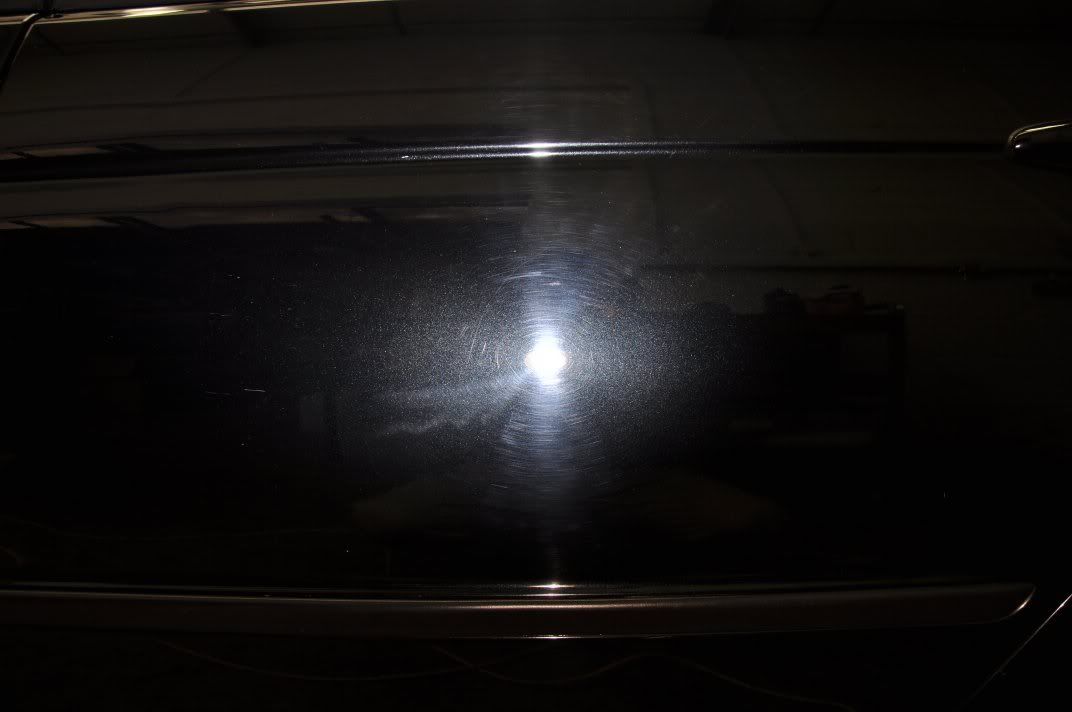
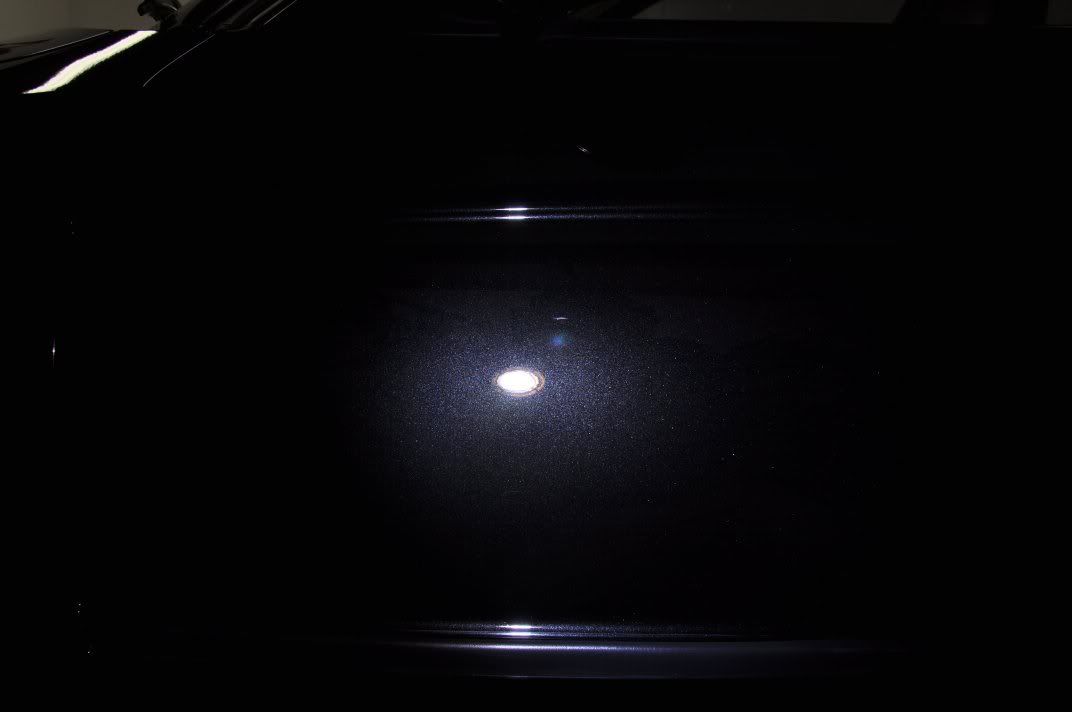
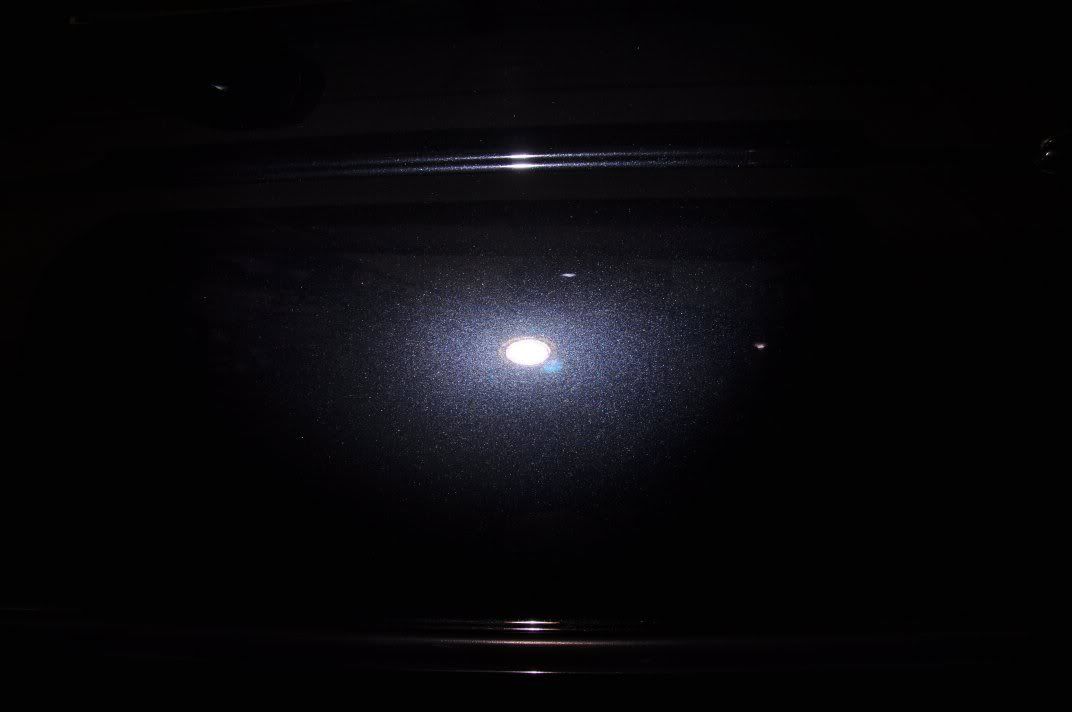
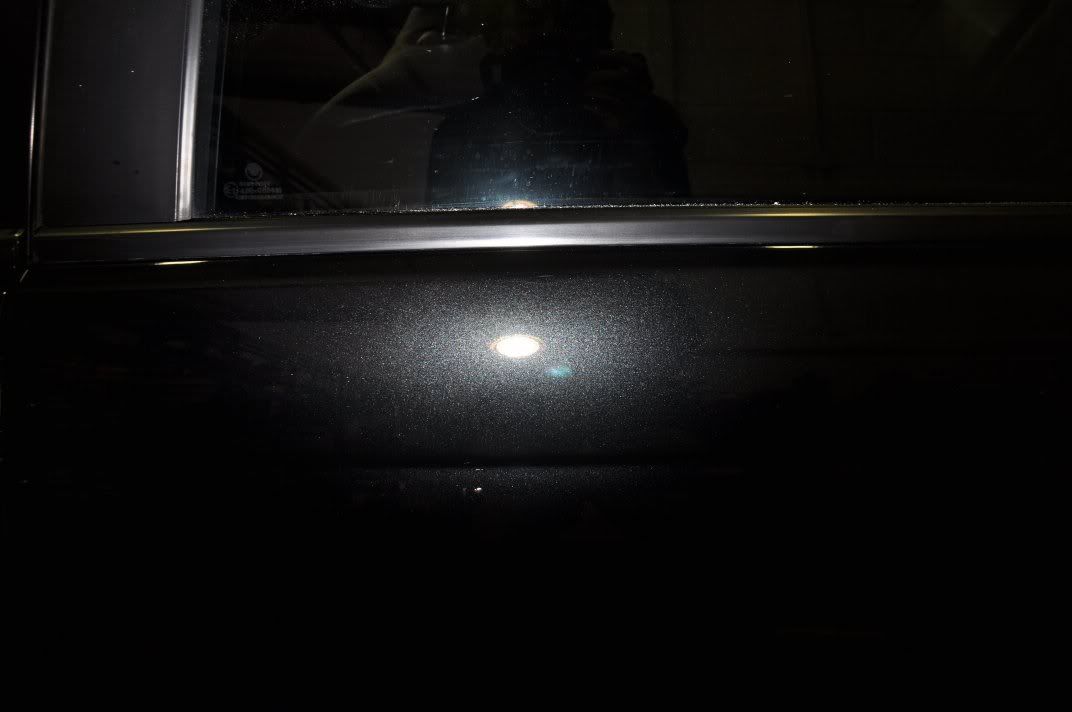
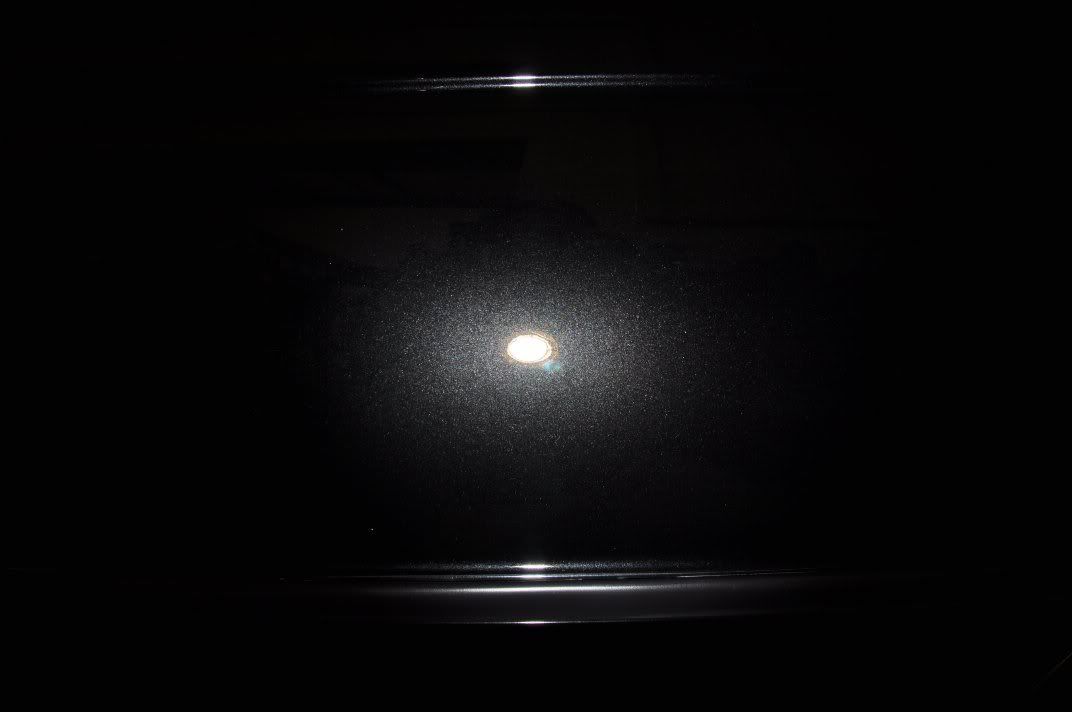
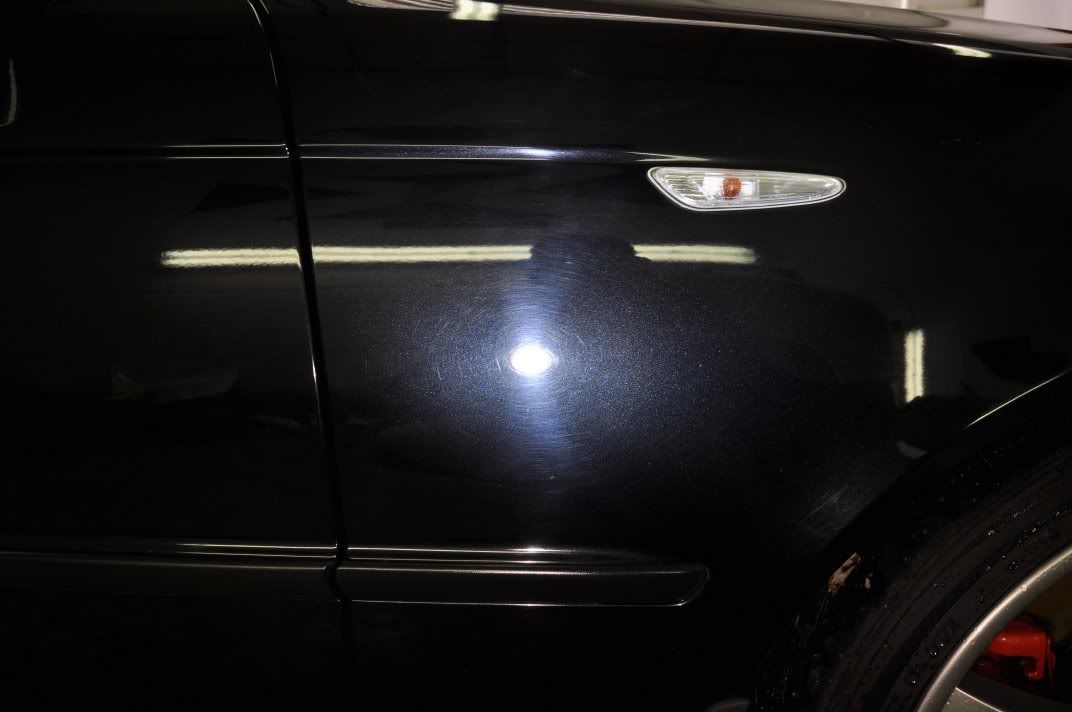
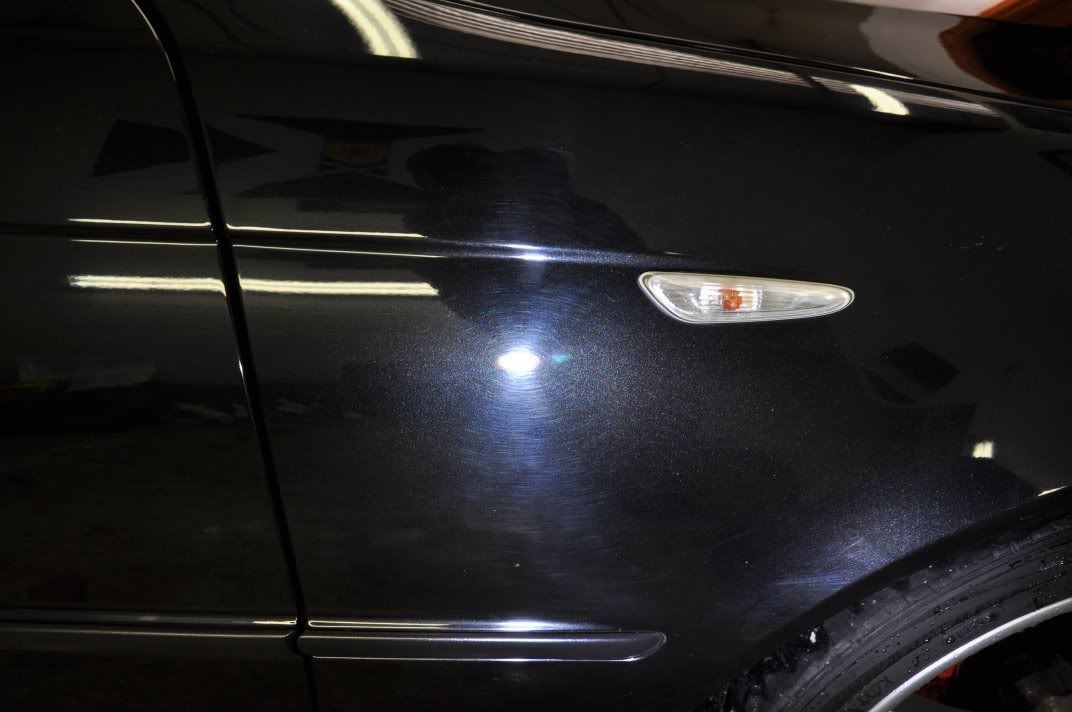
Moving down the side, it was pretty consistent on doors and rear three quarter, so I’ve chosen the rear door to show the work being achieved... First of all, assessing the swirls in the finish using the Sun Gun:

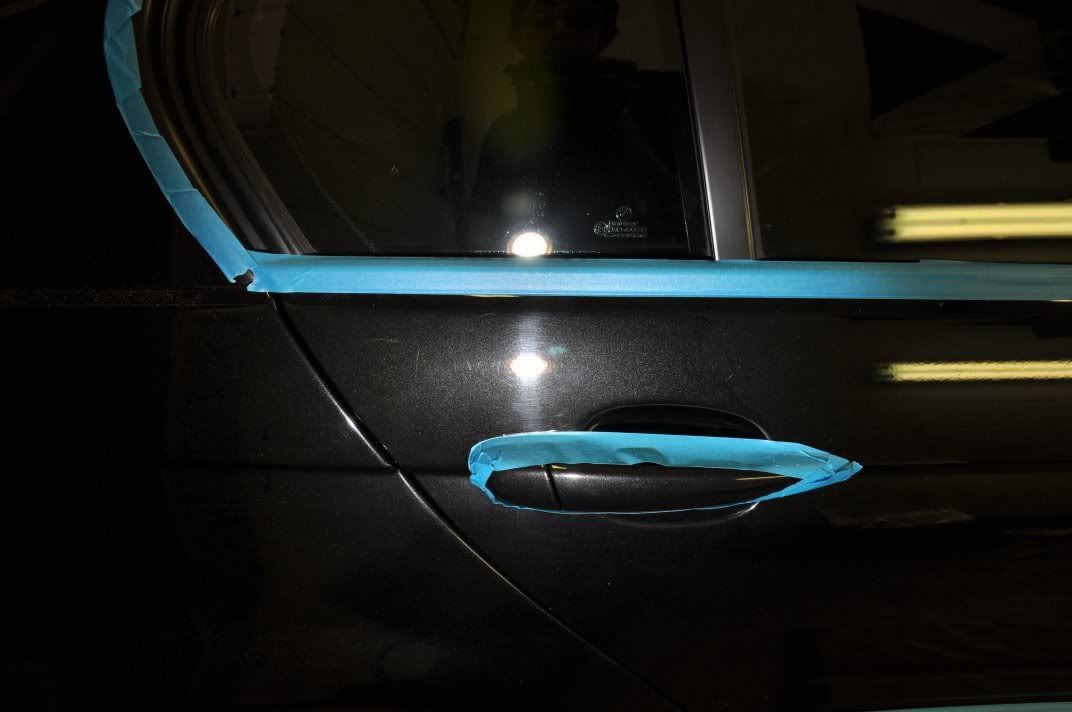
And also, looking at the level of deeper marks using a wall mounted strip light – unsighted with the Sun Gun, but you can see the deep marks all over the finish under the strip light:

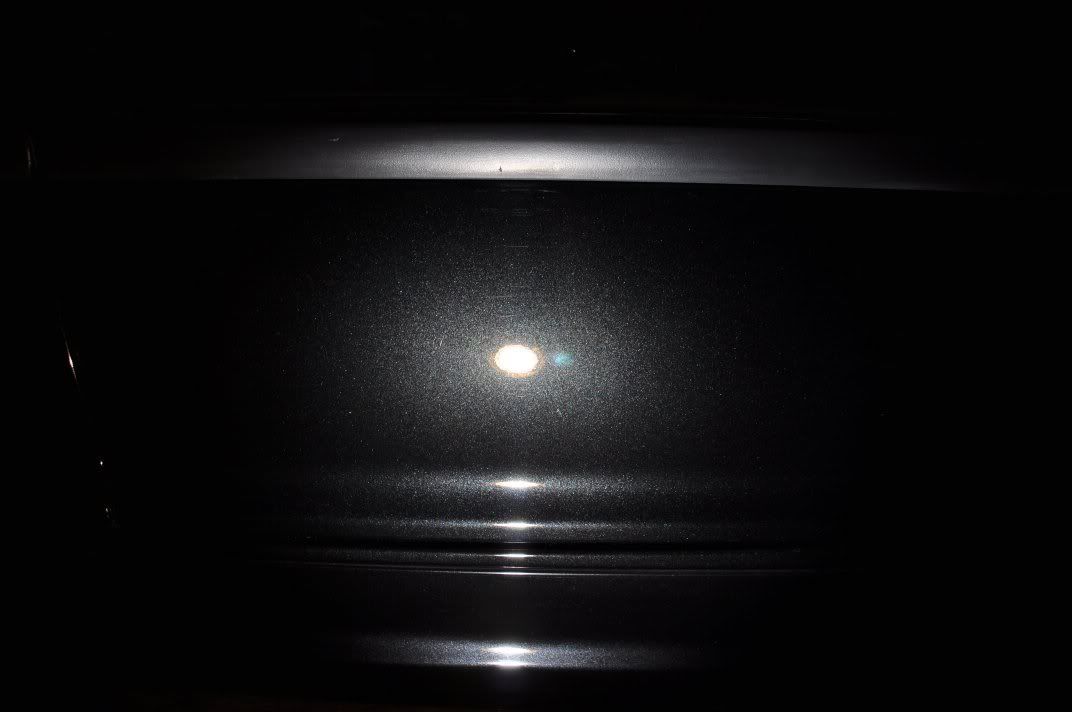
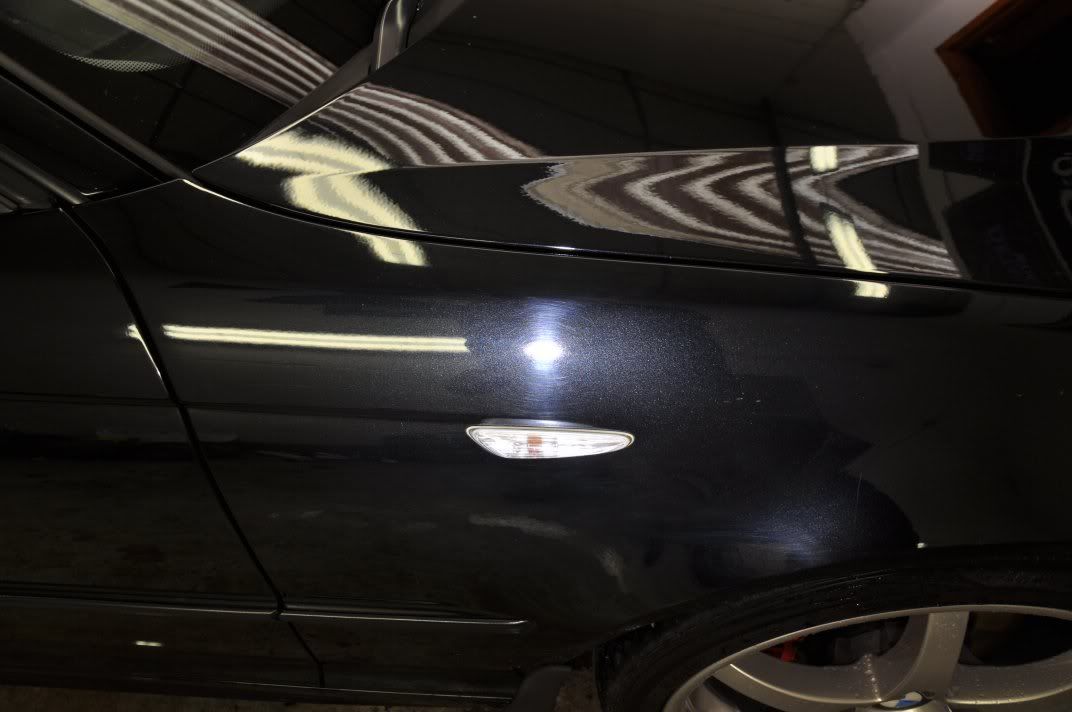
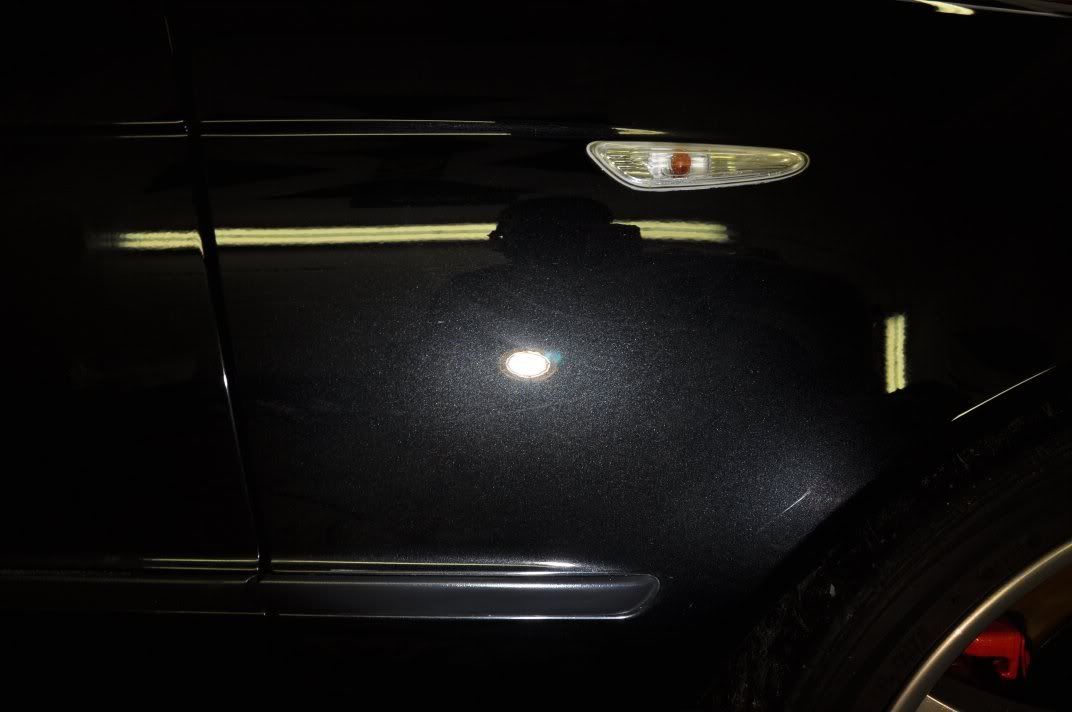
Correction was carried out using 3M Fast Cut on a Chemical Guys Hexlogic cutting pad, a favourite combination of mine where heavy correction is required and where the paint can take the high removal rates of the combo. Refinement was with Menzerna PO106FA Super Finish on a 3M Blue Finishing pad – I chose the higher cutting of the Menzerna finishing polishes here as I find it has a good level of cut for removing any hologramming from Fast Cut, even when it is used with heavy pressure, and it is still capable of finishing down to a beautifully crystal clear finish – easily one of my favourite finishing combinations. End results of correction and refinement, assessed firstly by the Sun Gun to look at the quality of the machine finish...


And then under the strip light to assess fairly the level of correction achieved, focussing on the surface of the paintwork to give an indication of the marks removed and anything that may be remaining:

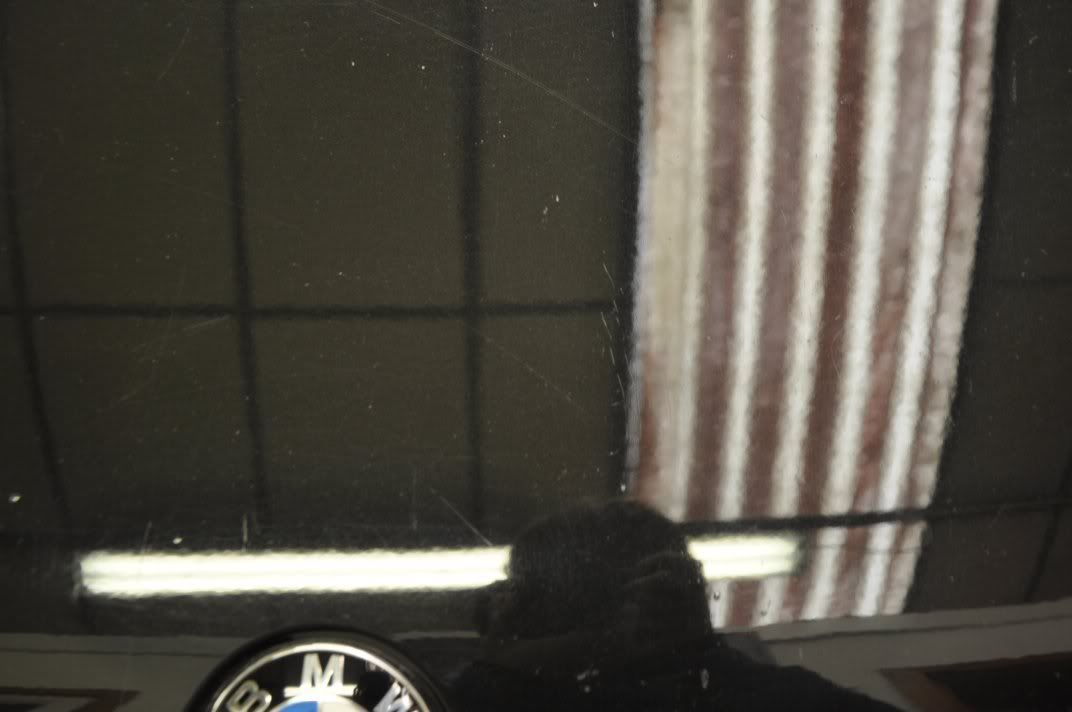
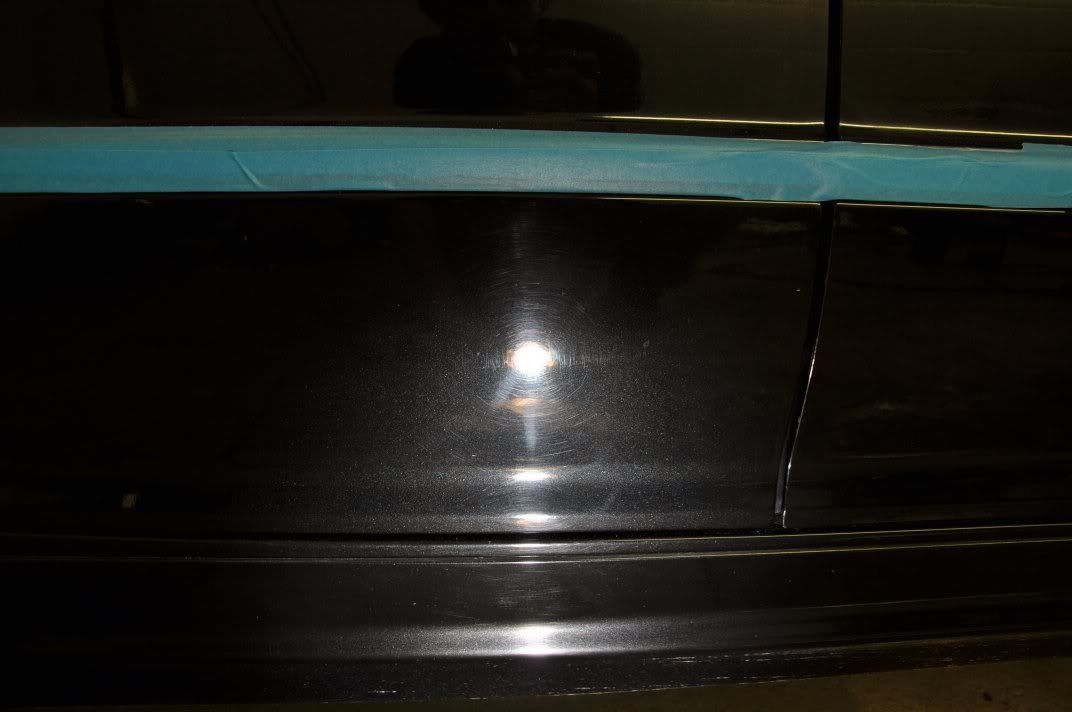
The bootlid on this car was showing signs of some severe marks, both under the Sun Gun and under the striplight!:

Deep scratch...

Gordon spent time correcting and refining the bootlid to as much as the paintwork would allow, achieving the following results:


Up on the roof was entertaining – paint readings of nearly 300um meant there must have been respray work, but there were some very severe defects seen using the strip lighting:
This mark was particularly severe and caught the finger nail...

Under the Sun Gun, you could see as expected a lot of swirls...
And a little video...

Following correction with Fast Cut and refinement with Menzerna Super Finish... a big improvement, note the very deep mark still remaining...

Following extensive use of Fast Cut during the correction phases, the car had a light covering of compound dust...

The car was therefore foamed...
And rinsed focussing on the panel gaps and shuts to ensure removal of the dust...
Just for fun, a couple of videos of the sheeting of the water from clean paint, with no protection applied

Once the exterior was washed down and dried off, ready for protection, it was time to focus on the interior of the car. Not a regular feature in my write-ups, we don’t do as many interiors as we do full paint corrections but it was a nice change to be getting some time to work inside the car as well! On this car, the interior was vacuumed, the mats removed and steam cleaned, the leather cleaned and protected, the plastics cleaned and protected and the glass cleaned. A few photos of the work in progress here.
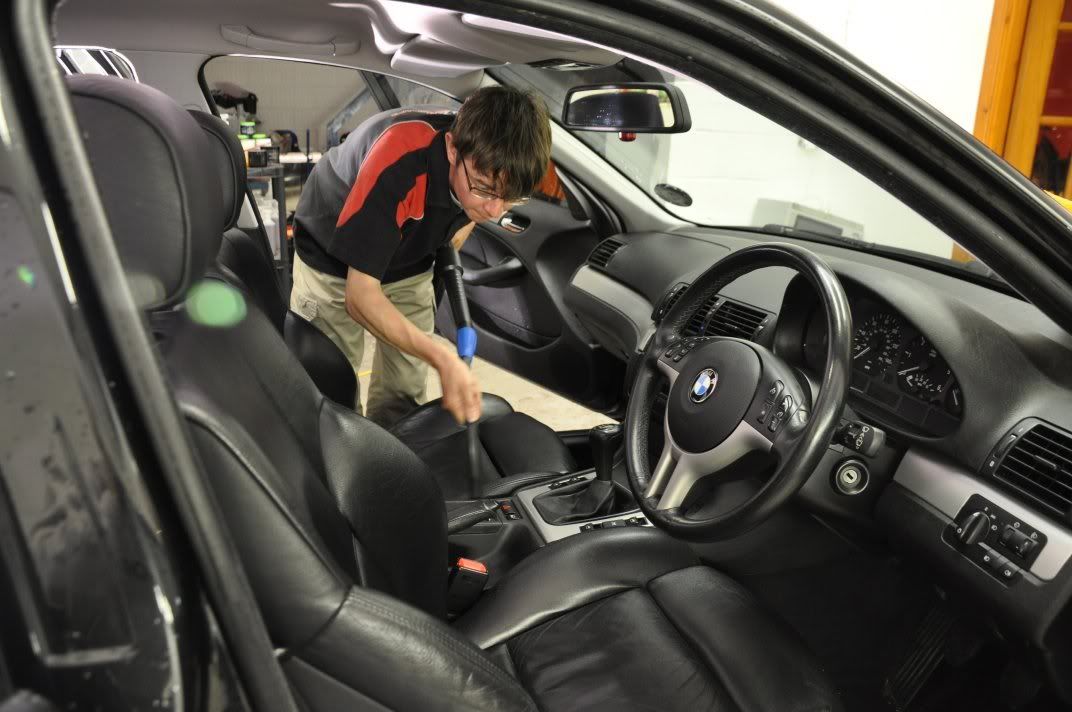
Me, with a vacuum – rare sight in detailing! :lol:

Using a little extension hose here, allowing me to get right down the sides of the seats an inside all the little nooks and crannies...
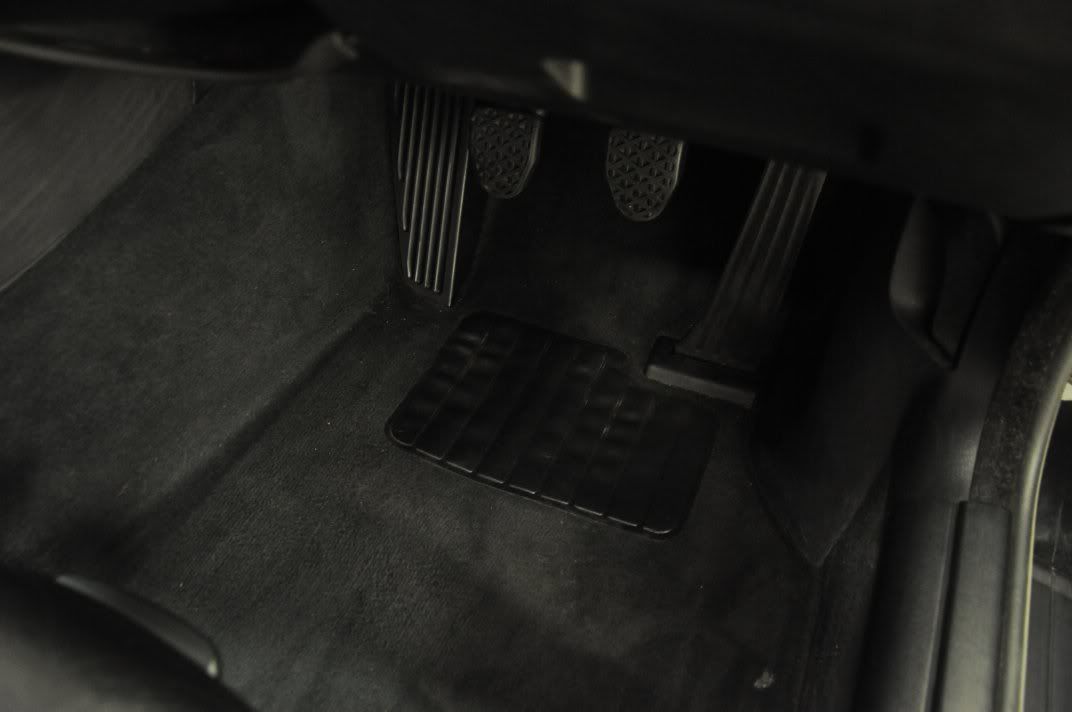
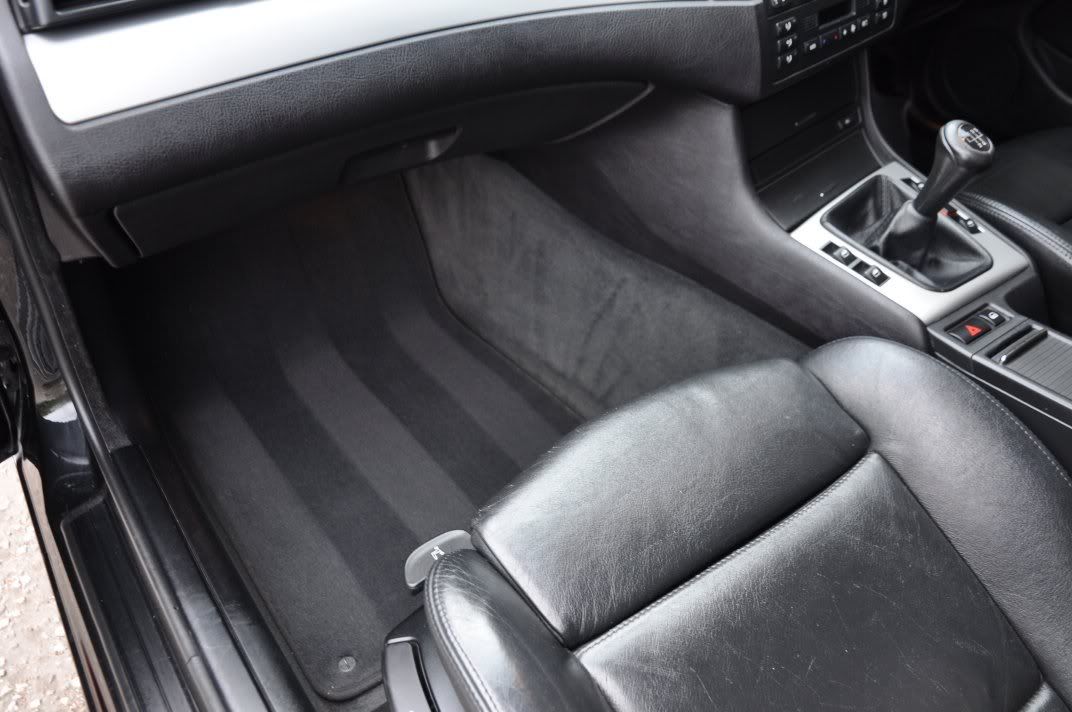
Driver’s footwell before:
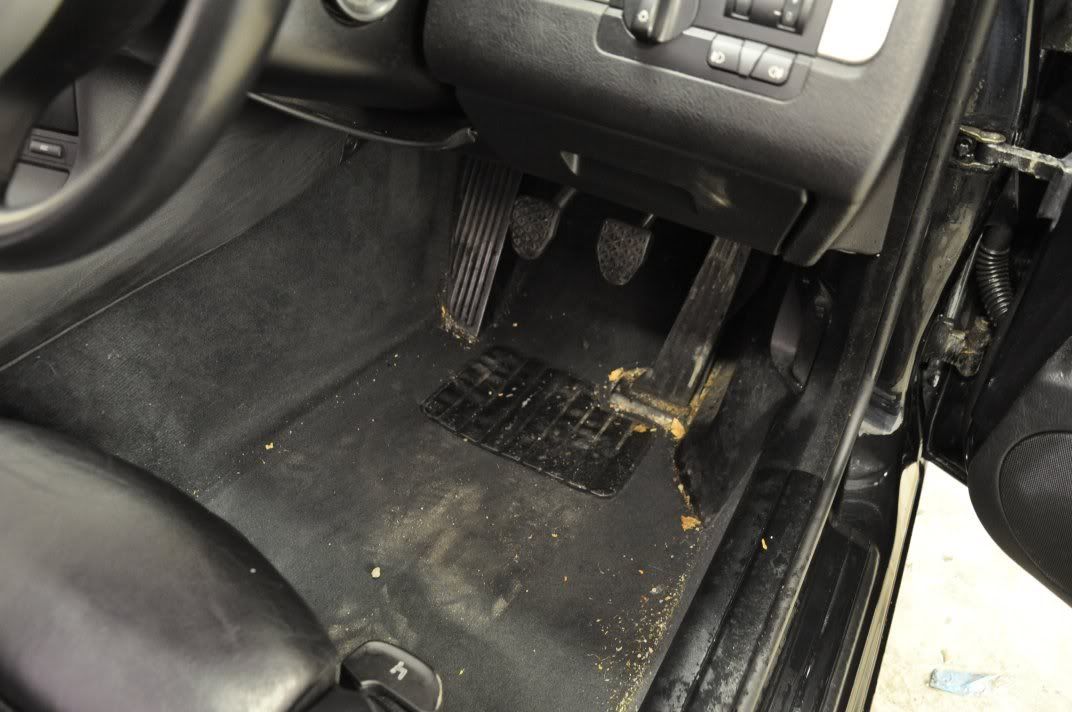
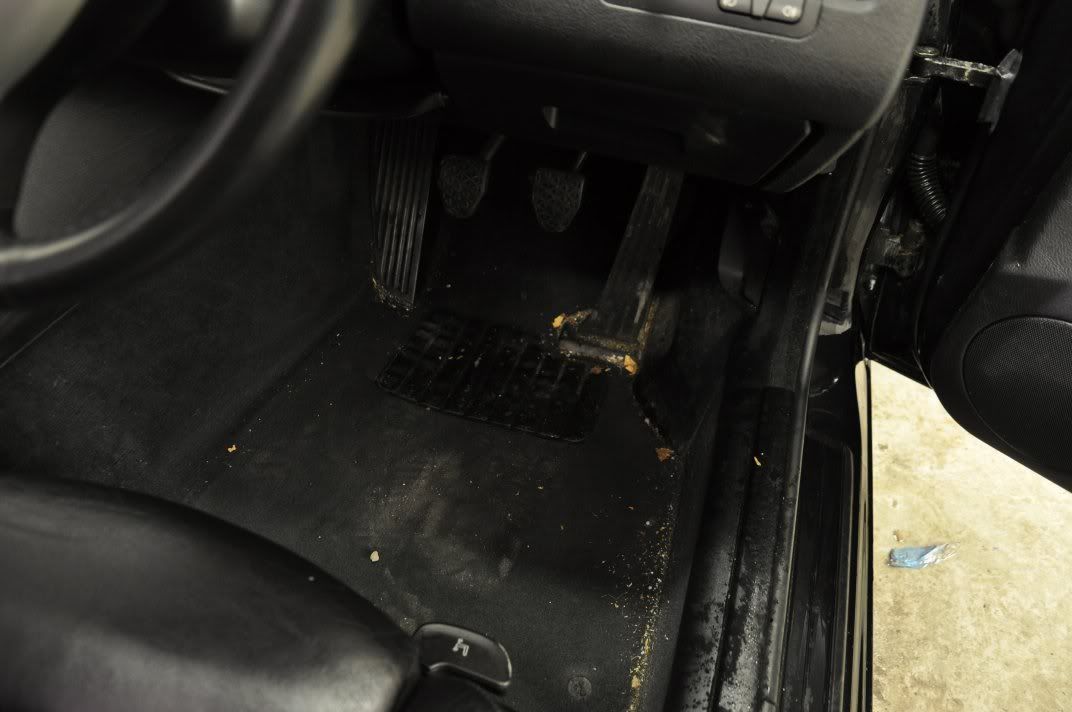
Mats were removed for cleaning (see later), footwell region vacuumed and the pedals and plastics cleaned with Autosmart G101. Clearly the pedals were not dressed here to avoid any issues with feet slipping when driving!:
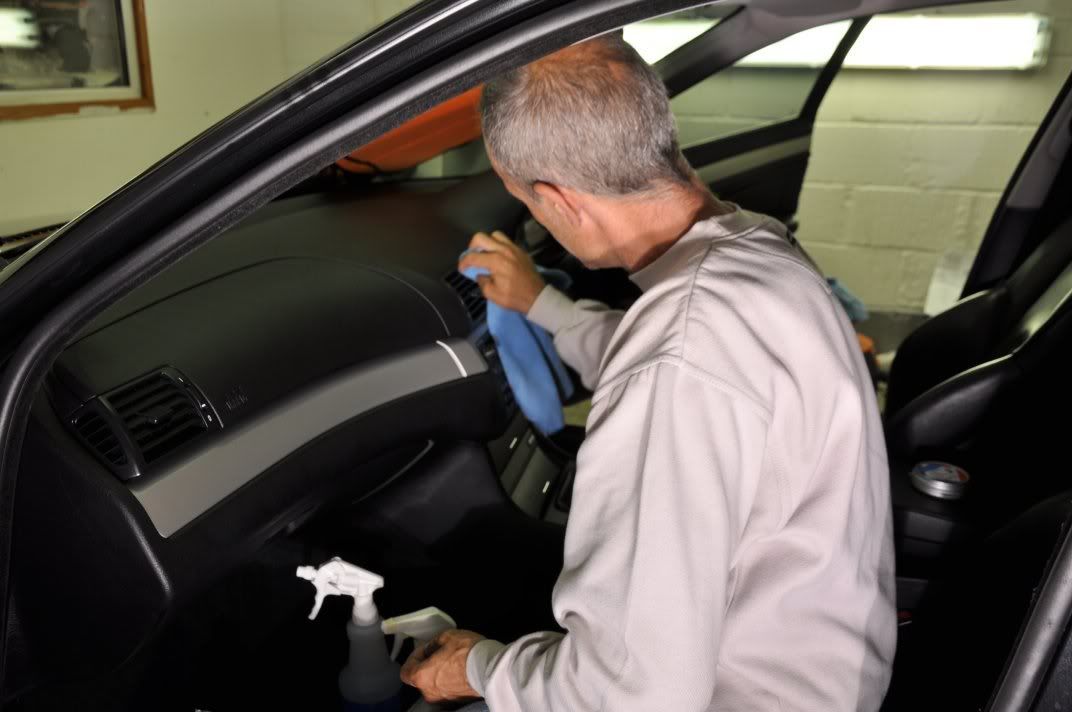
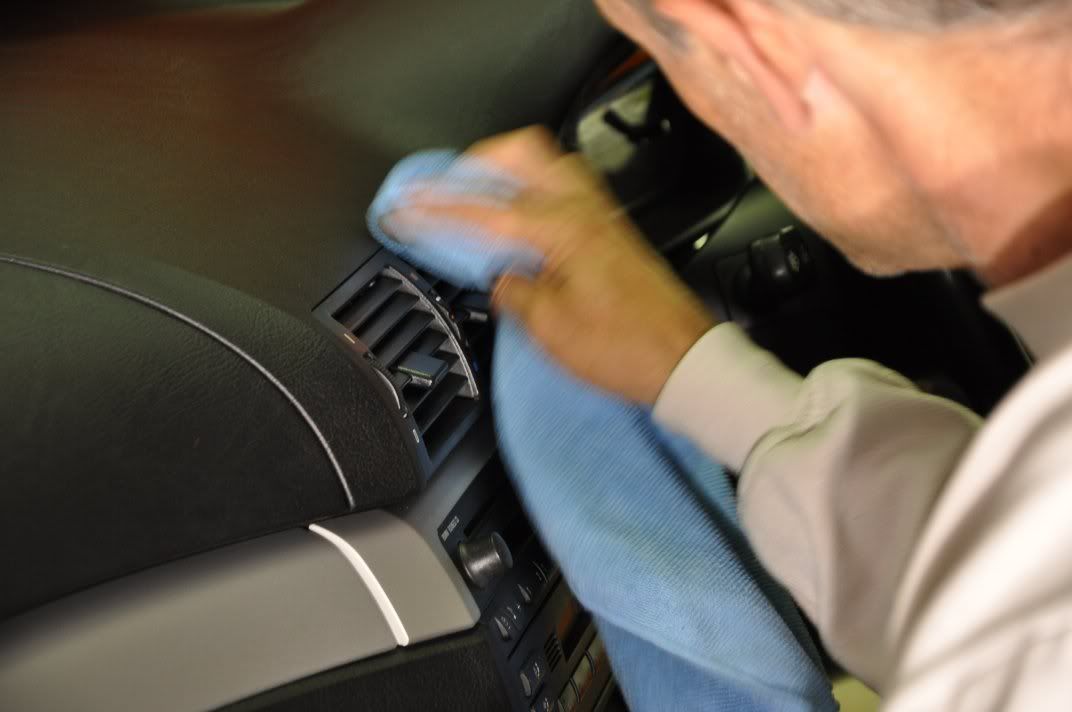
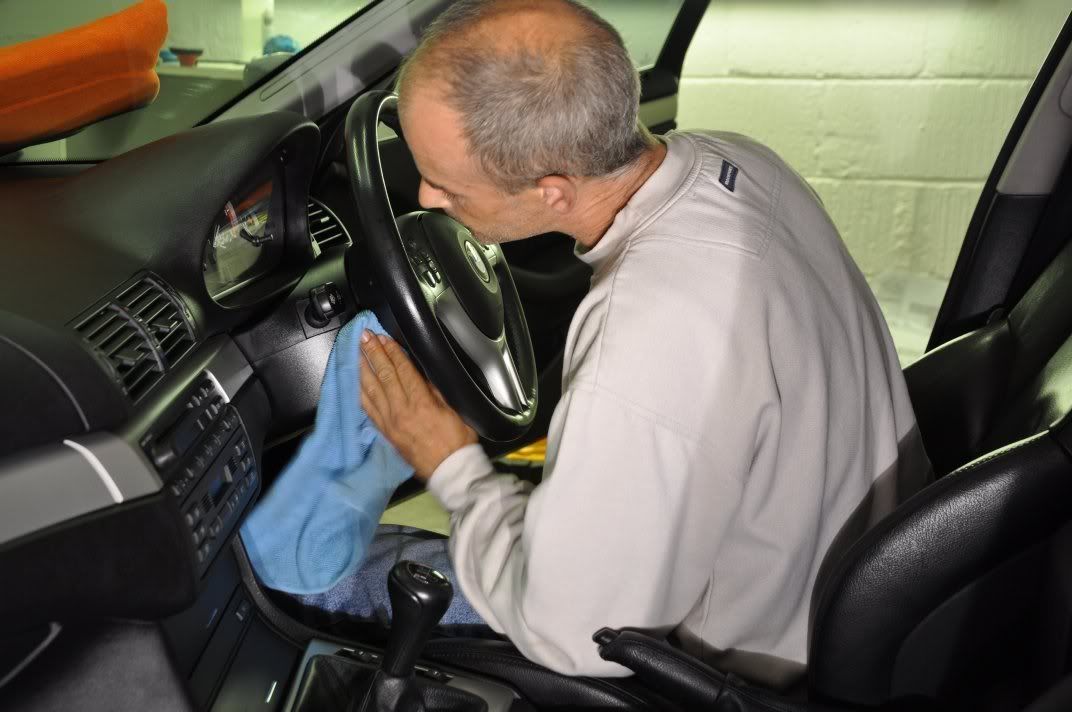
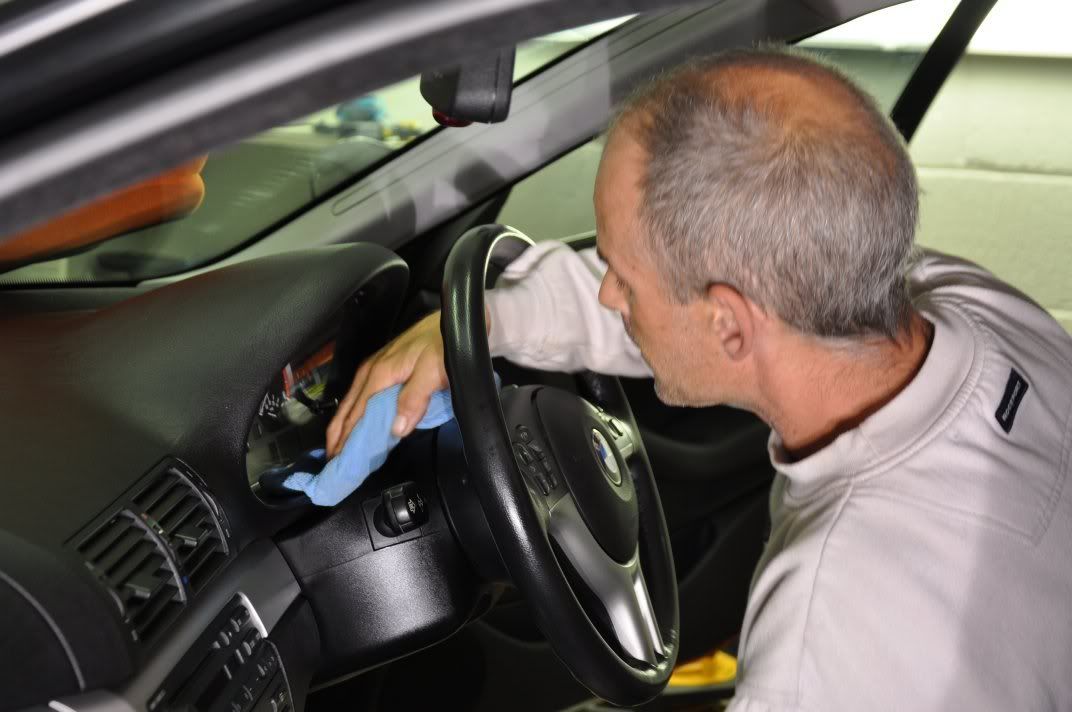
The interior plastics were cleaned with G101 with a high dilution for a mild clean which was what was required and then dressed using Poorboys Natural Look, a product I have long been a fan of for my own car for its matt and clean looking finish. I cannot stand shiny interior plastics!!... Work in progress...
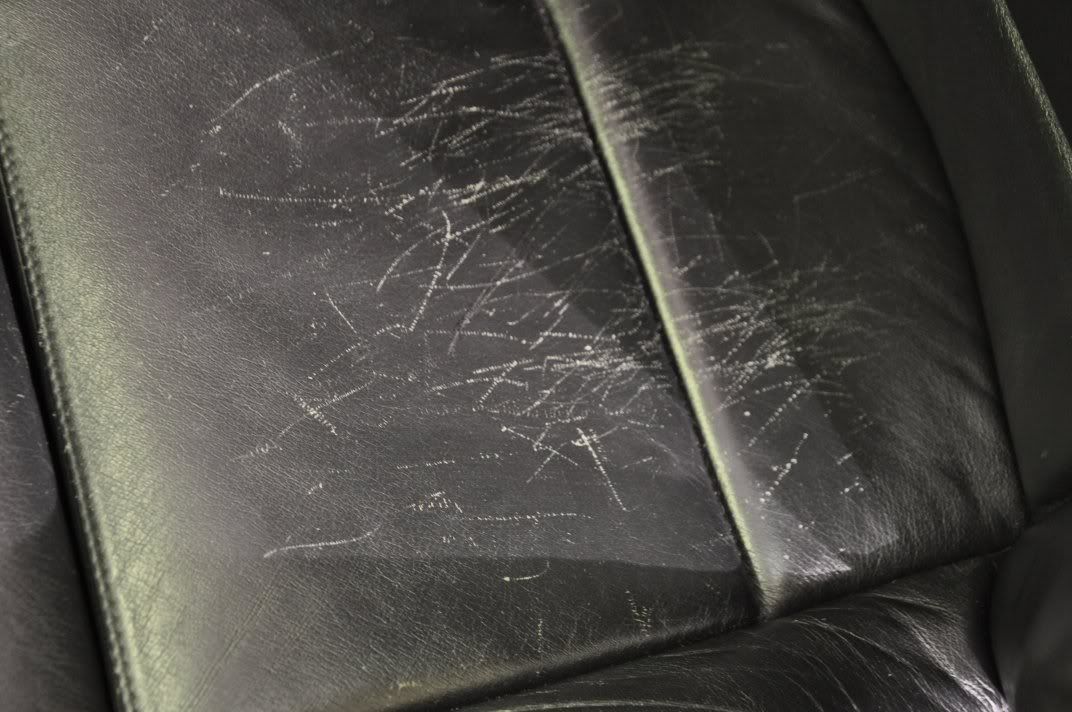
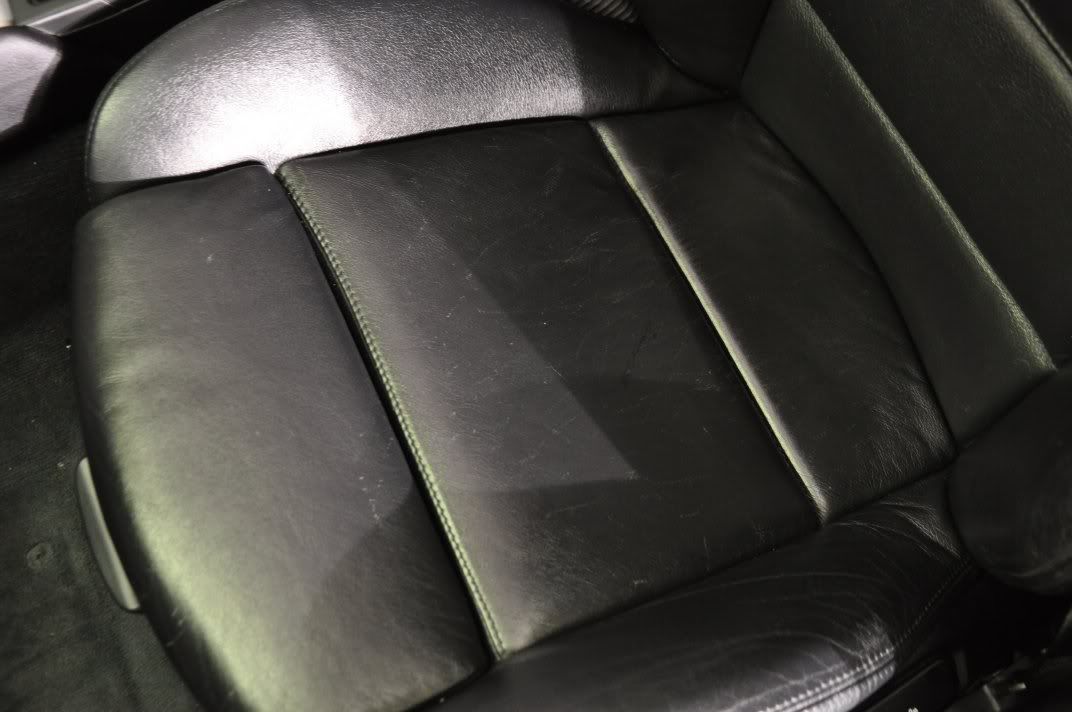
Not sure what had been going on, but the leather on the passenger seat was badly damaged!

Gordon worked with a leather polish here that had been acquired from BMW for light repairs of leather, and then as with all of the rest of the leather it was cleaned and then protected:

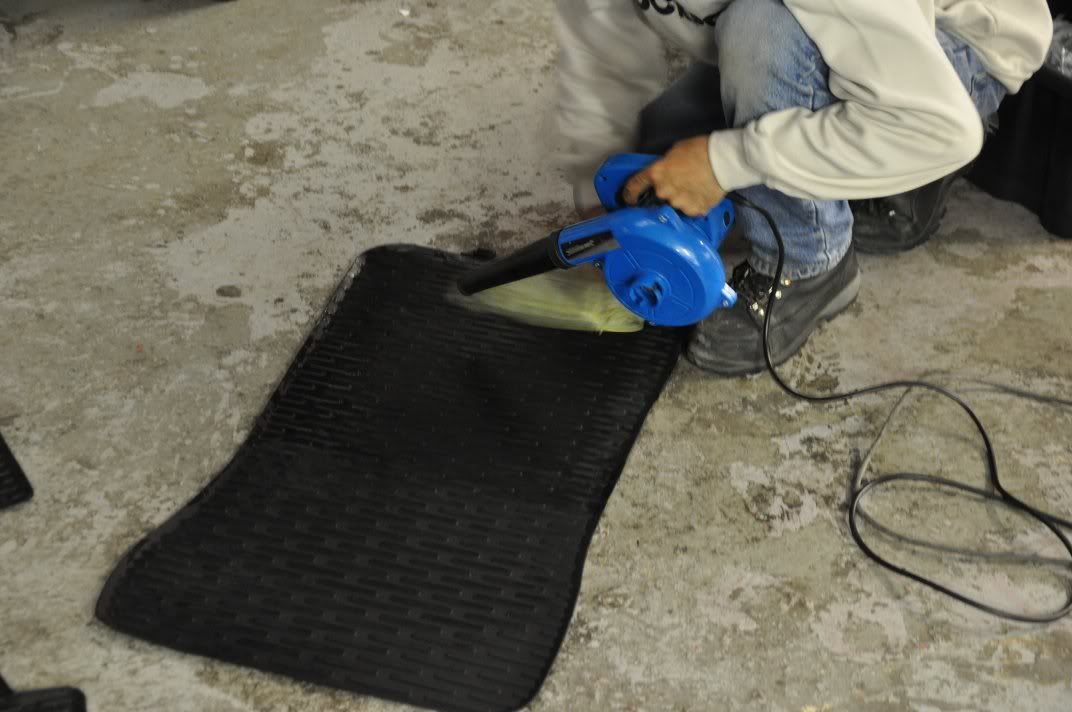
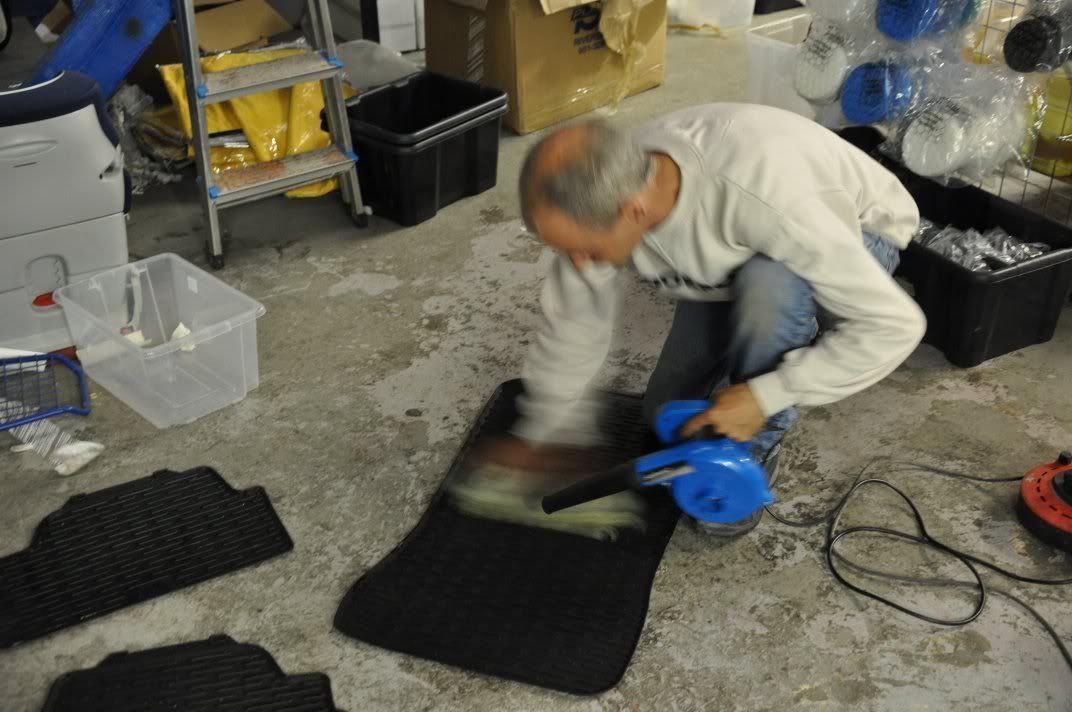
The rubber mats were cleaned with G101, and rinsed with a hose...

Then dried off...
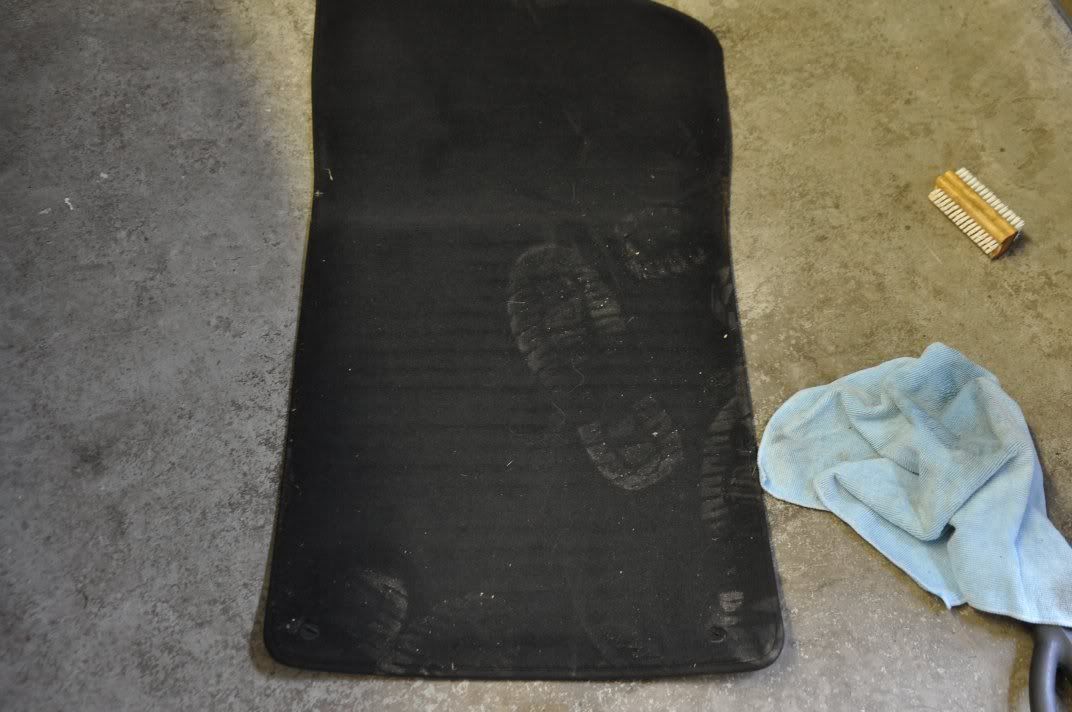
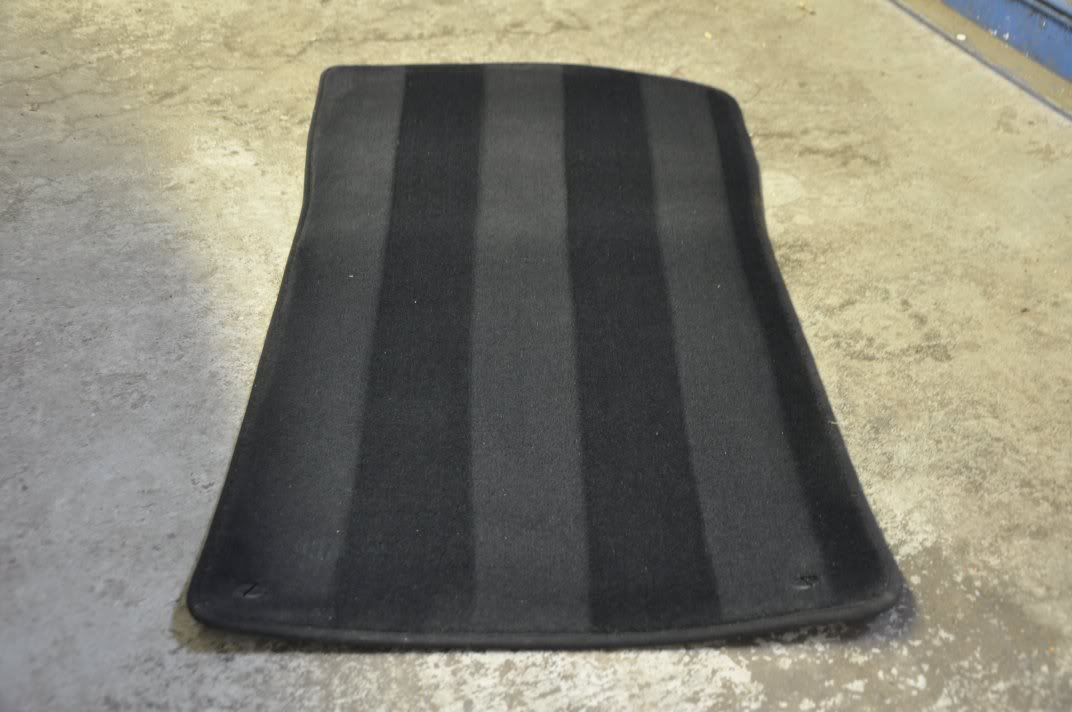
The carpet mats were reasonable grubby...
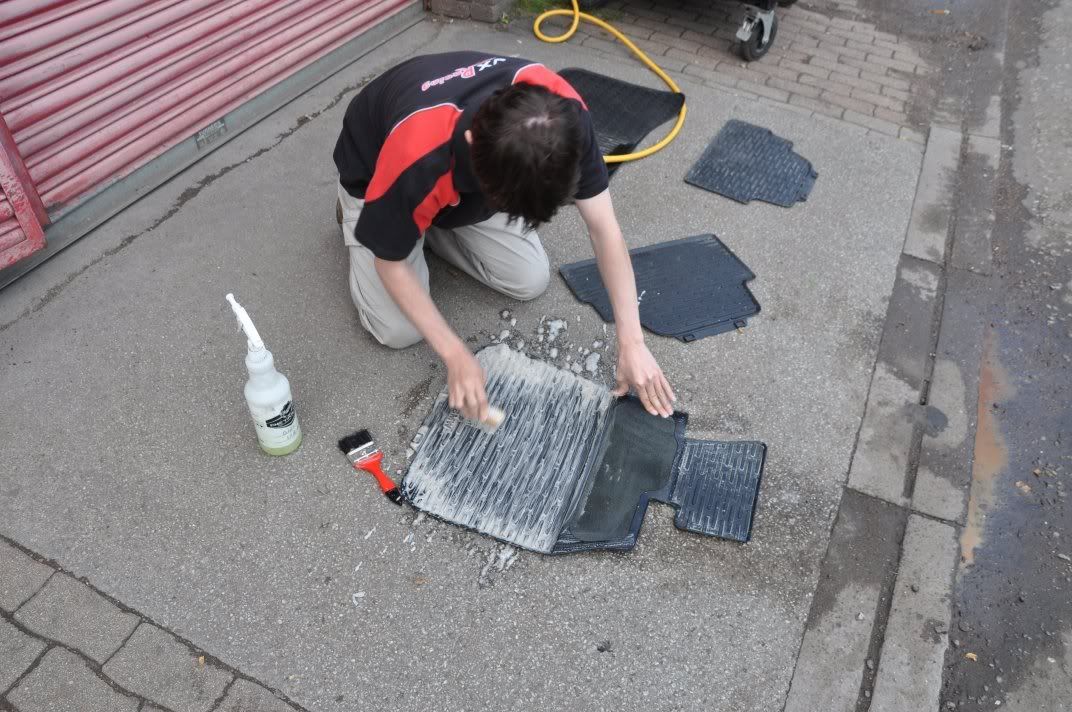
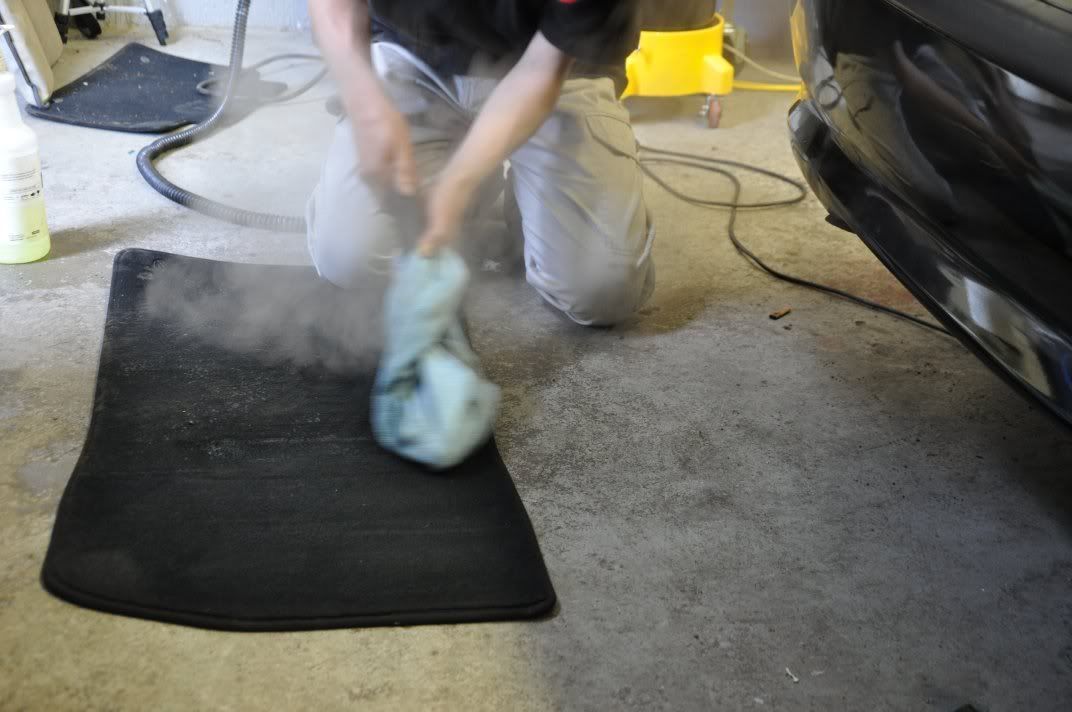
Sprayed lightly with G101 (mild), and then cleaned using the Steam Cleaner – slowly moving the cleaner across the matt to pull the dirt into the microfiber then going over the area with a second microfiber to remove excess grime and dampness...

And then stripped to look pretty...
The exterior was then protected – Meguiars #16 wax (durable, great performer) for paint, Migliore Trim Protectant for trim and rubbers, Espuma RD-50 for tyres, Finish Kare 1000P for wheels, 3D Ultra for arches, Autosmart Glass Clear on the glass.
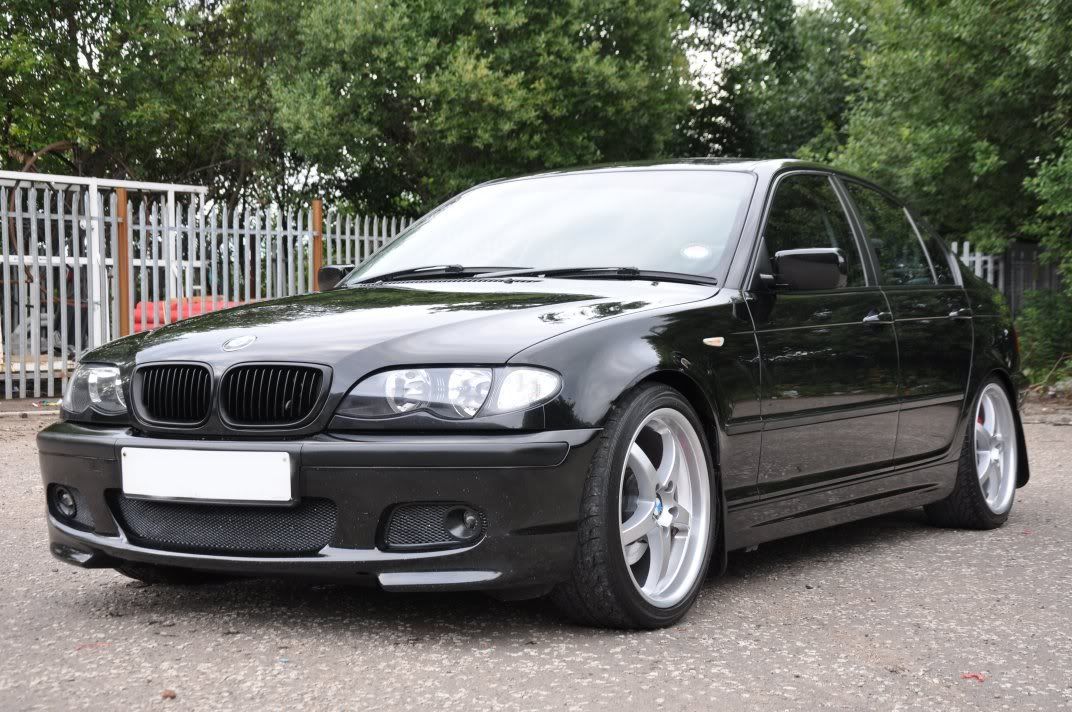
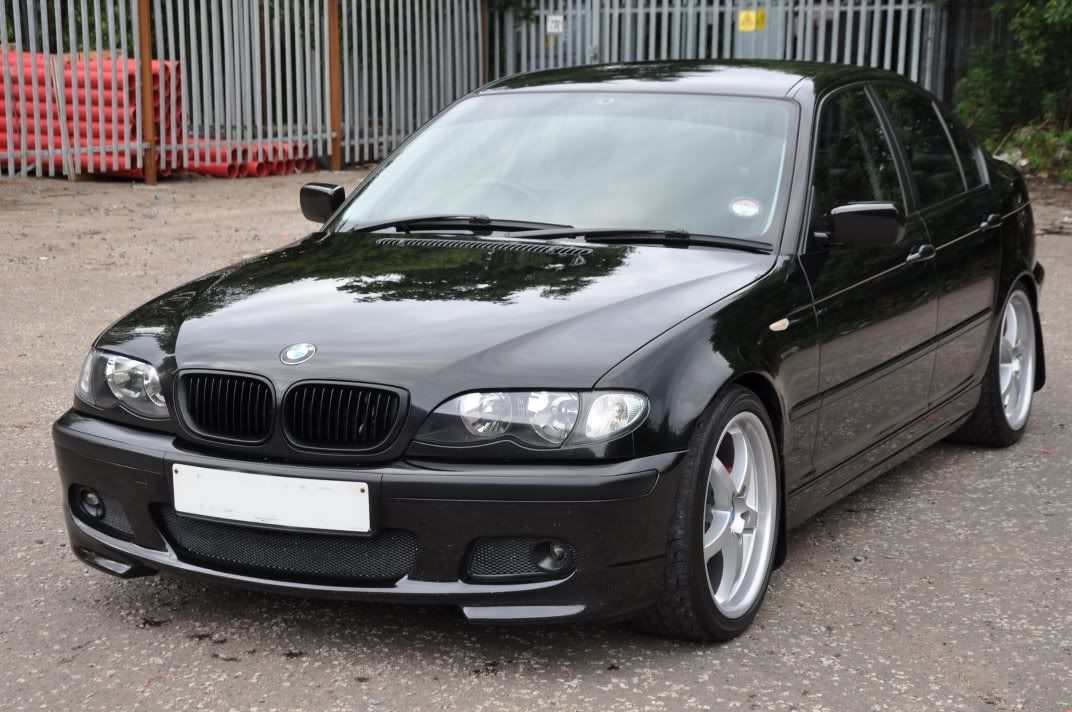
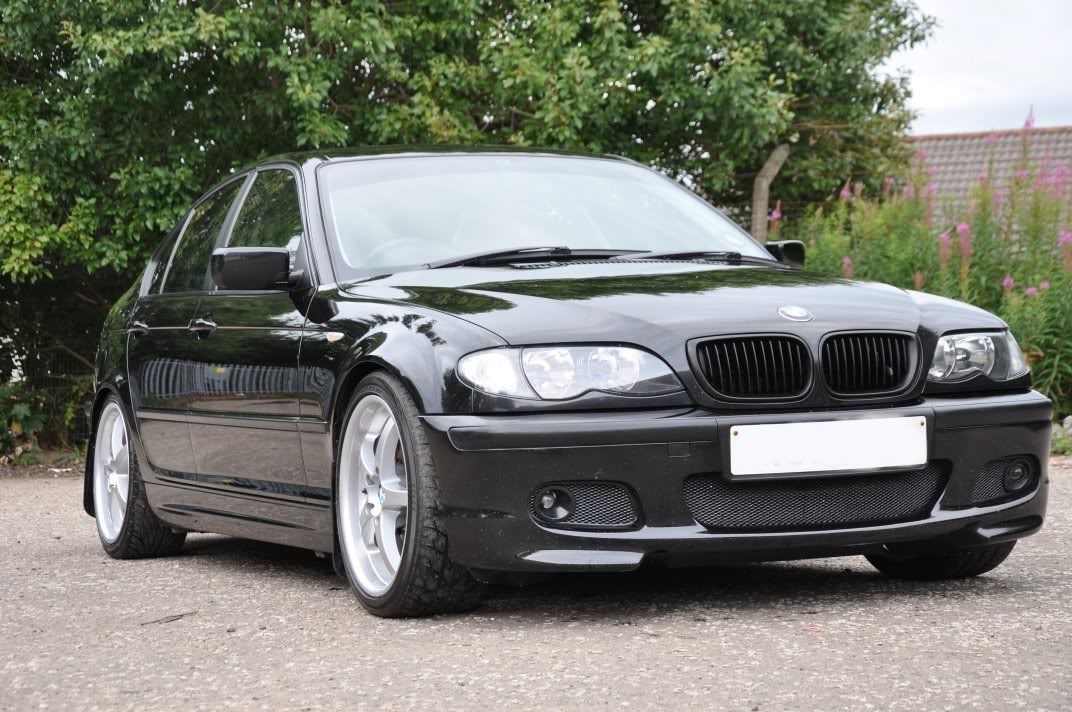
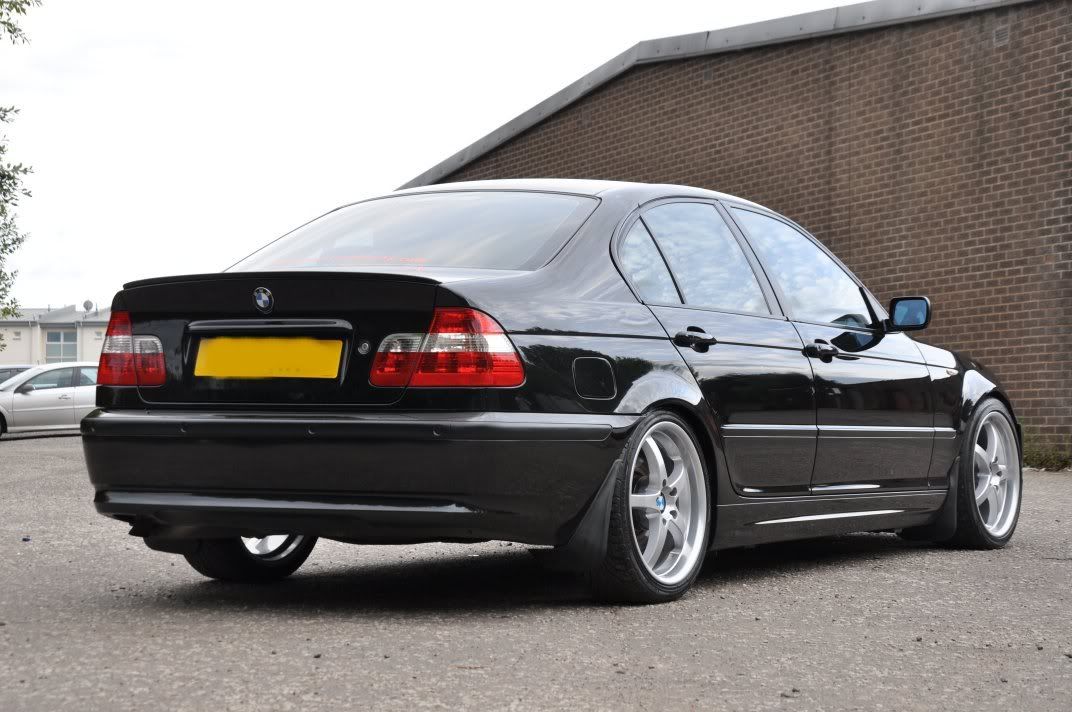
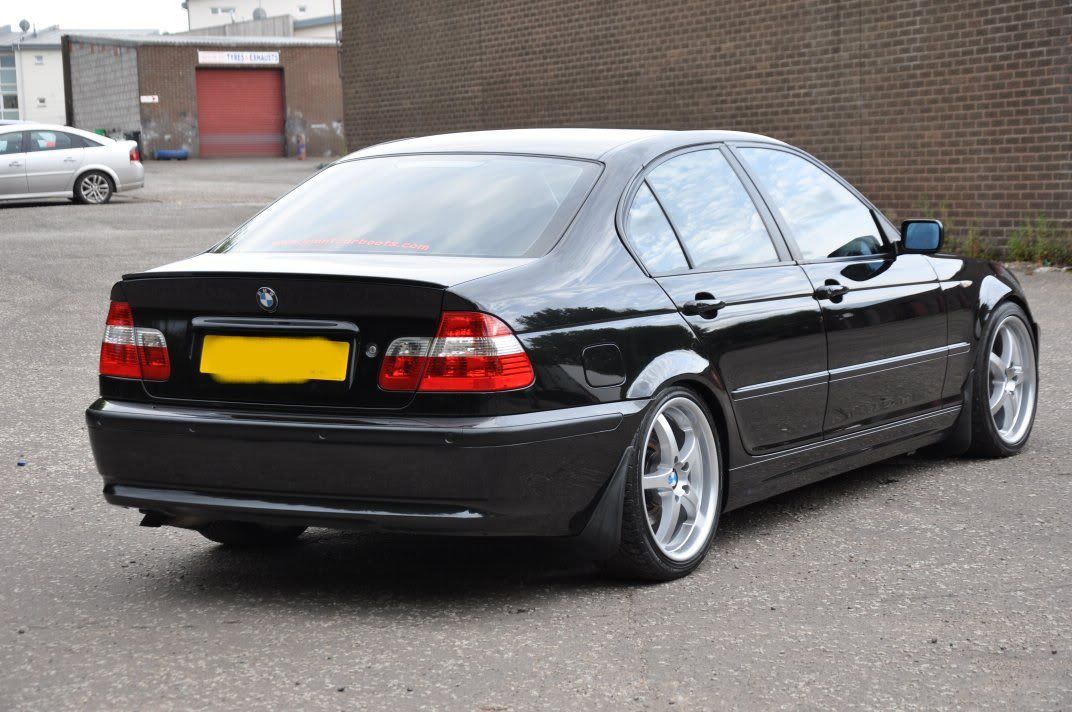
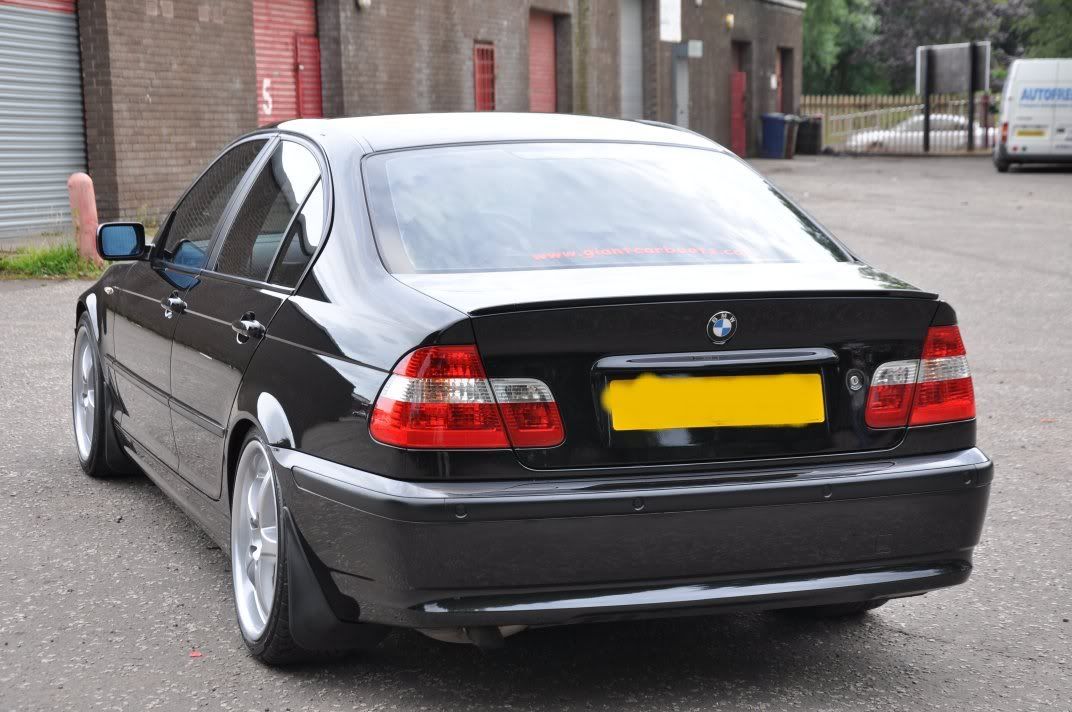
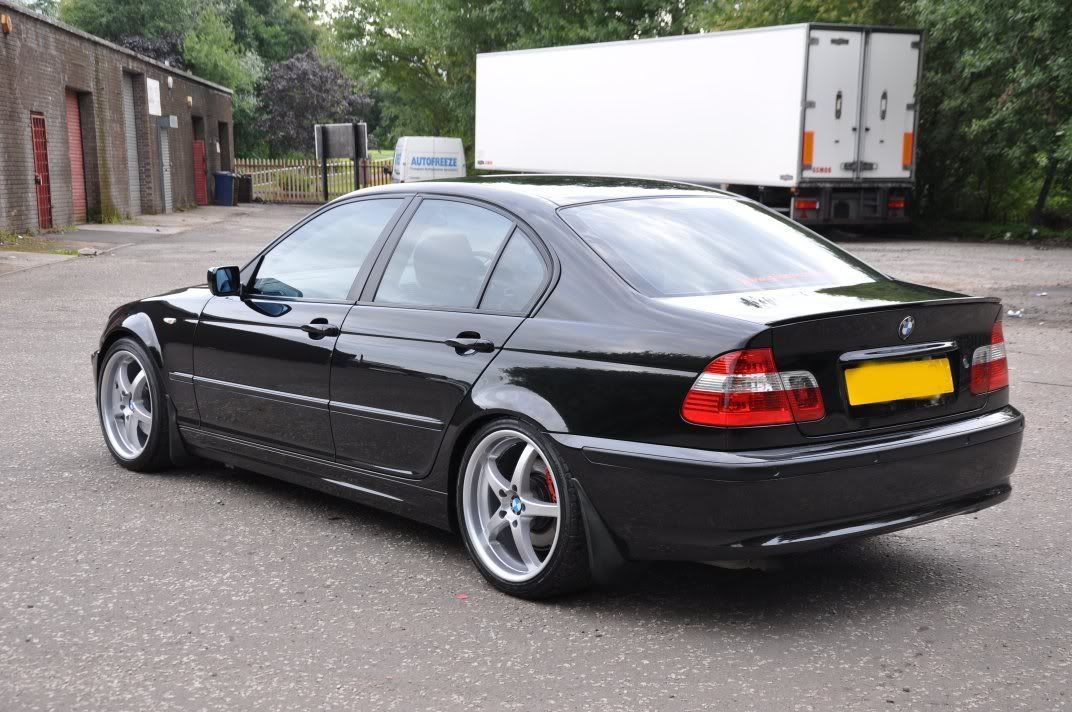
On to the after shots, exterior first:


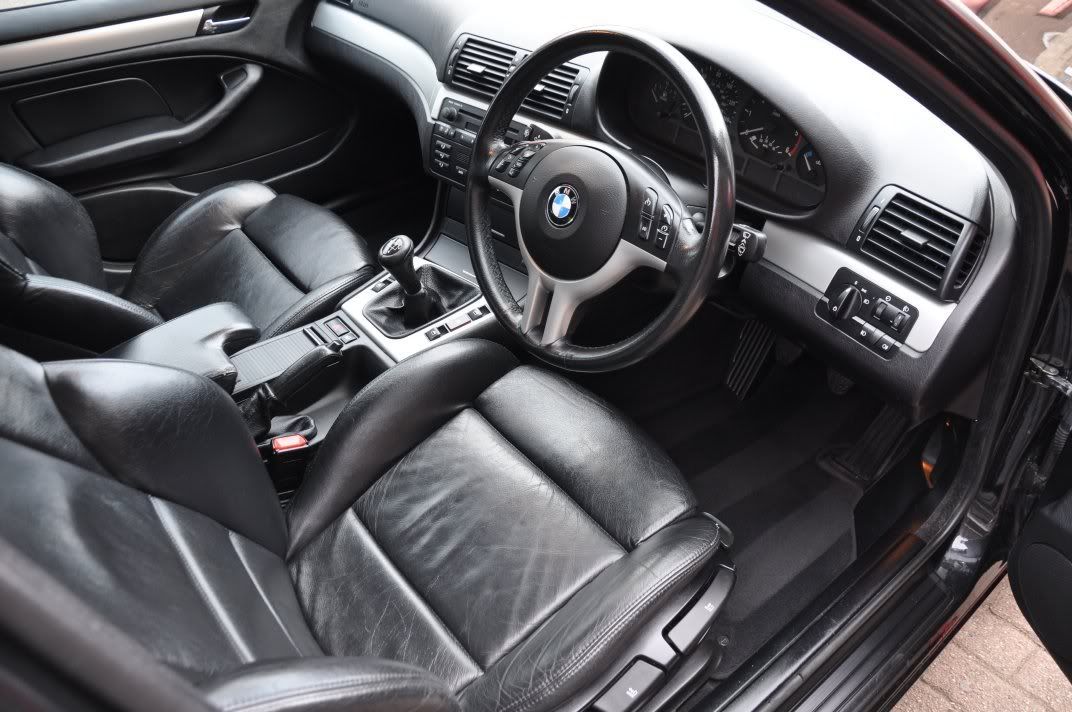
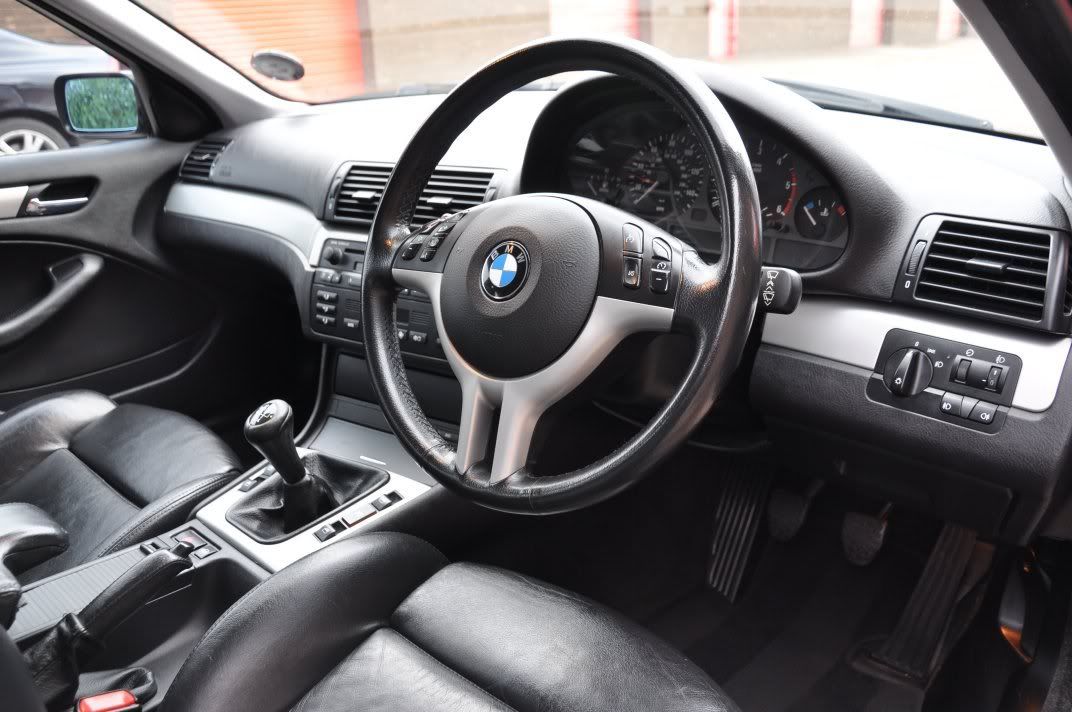
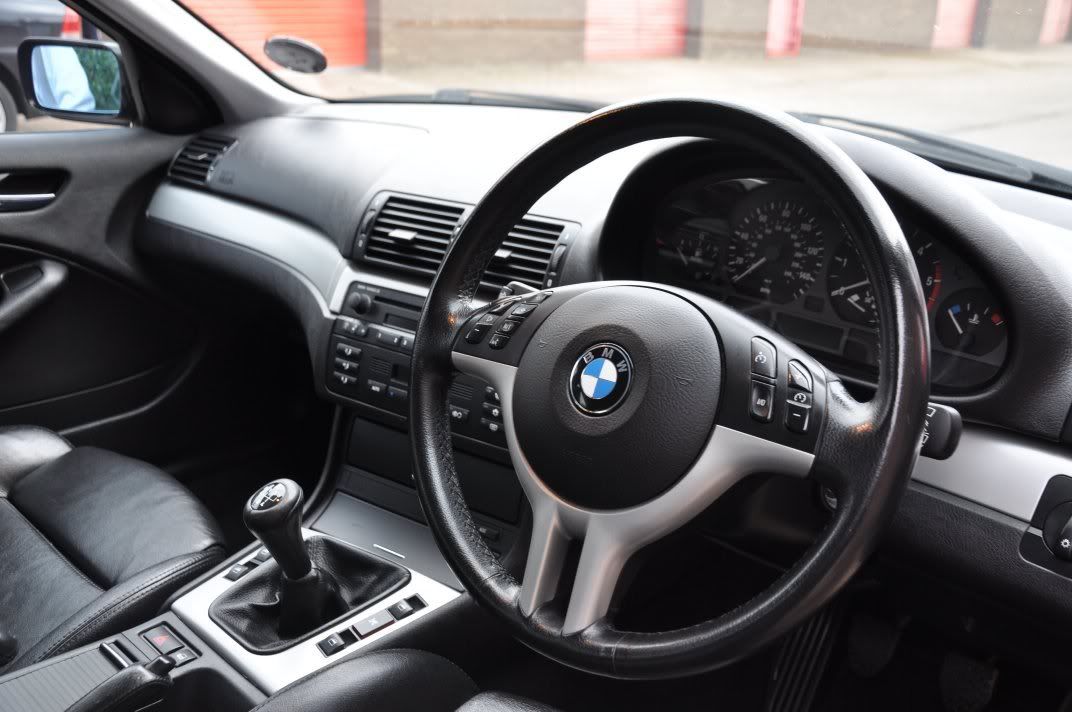
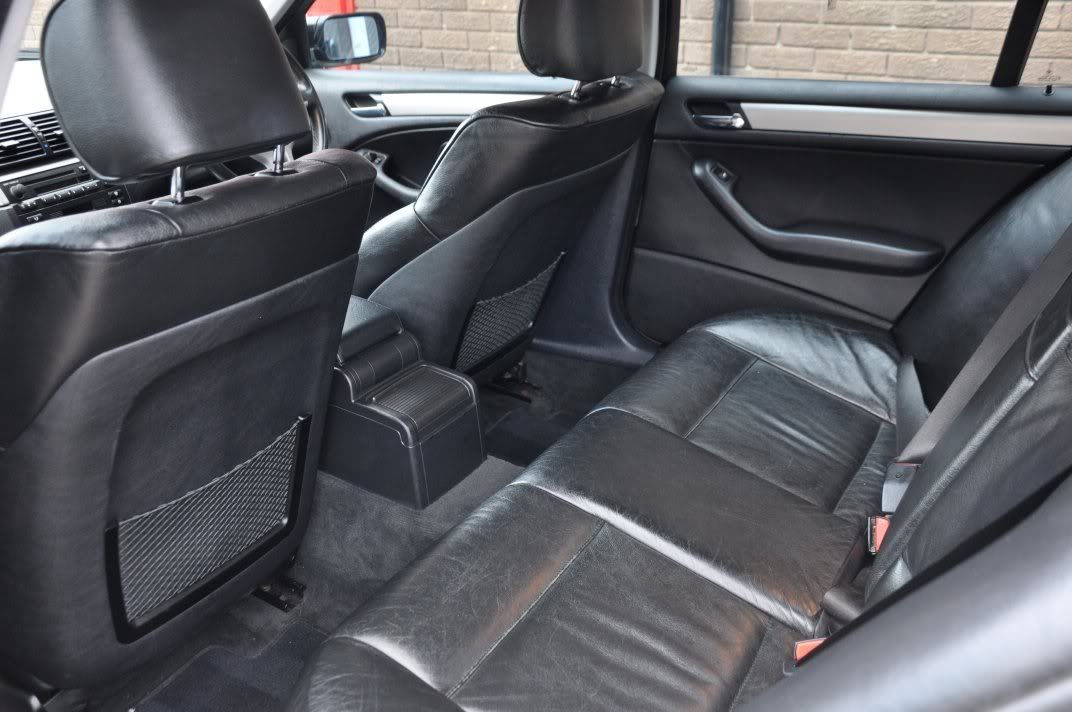
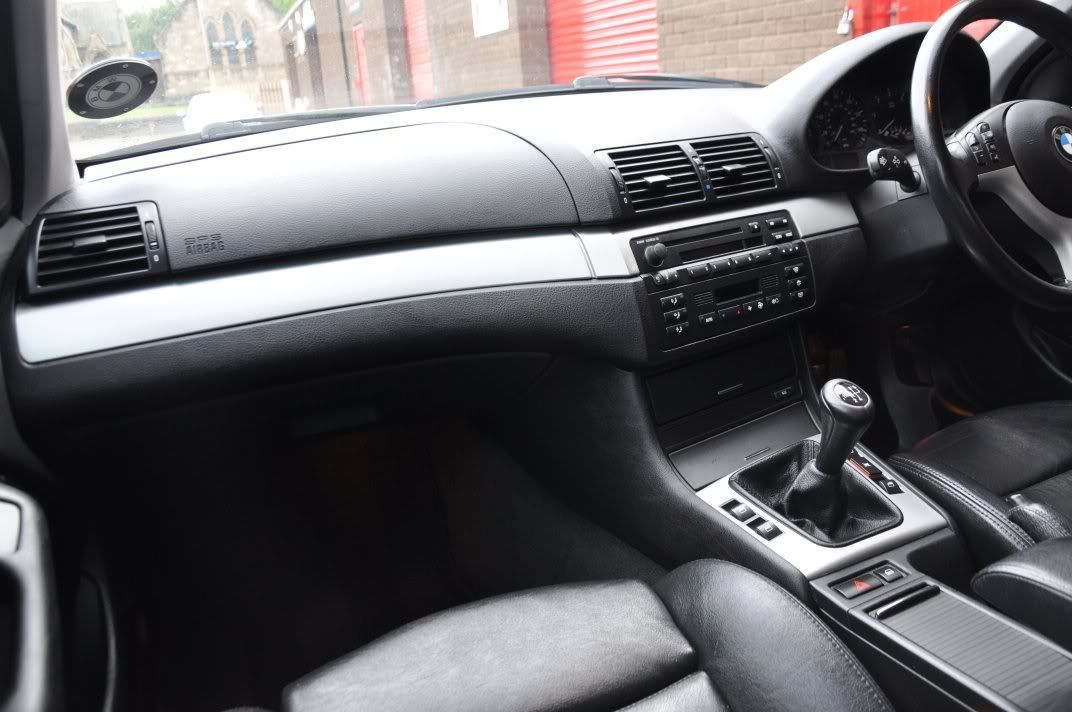
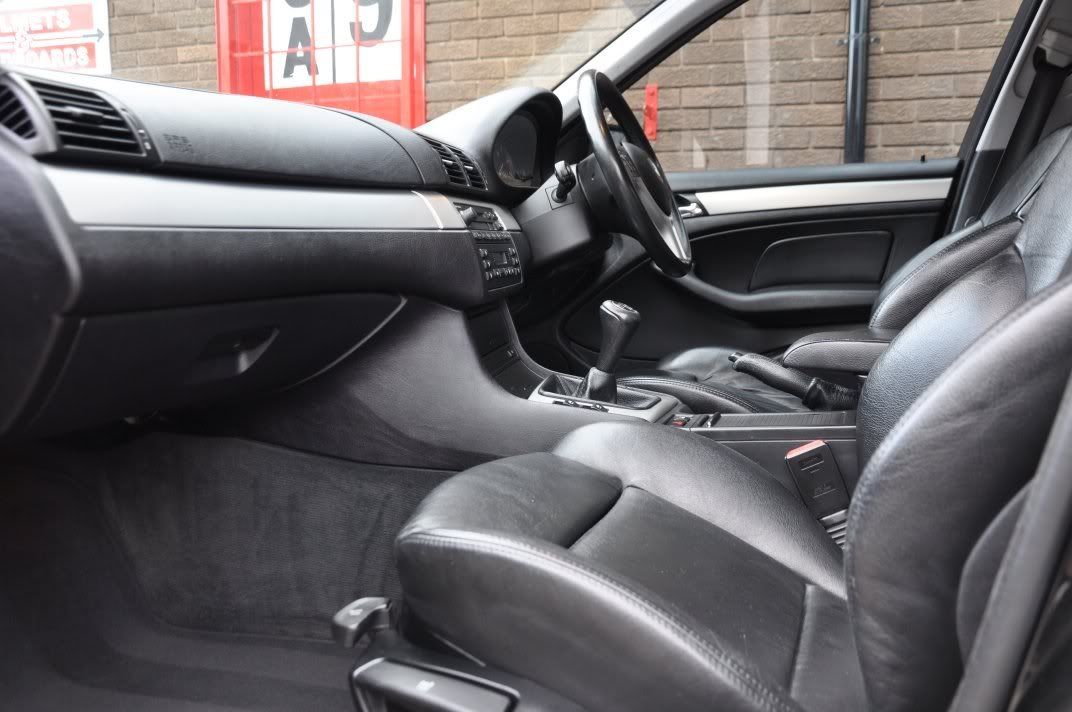
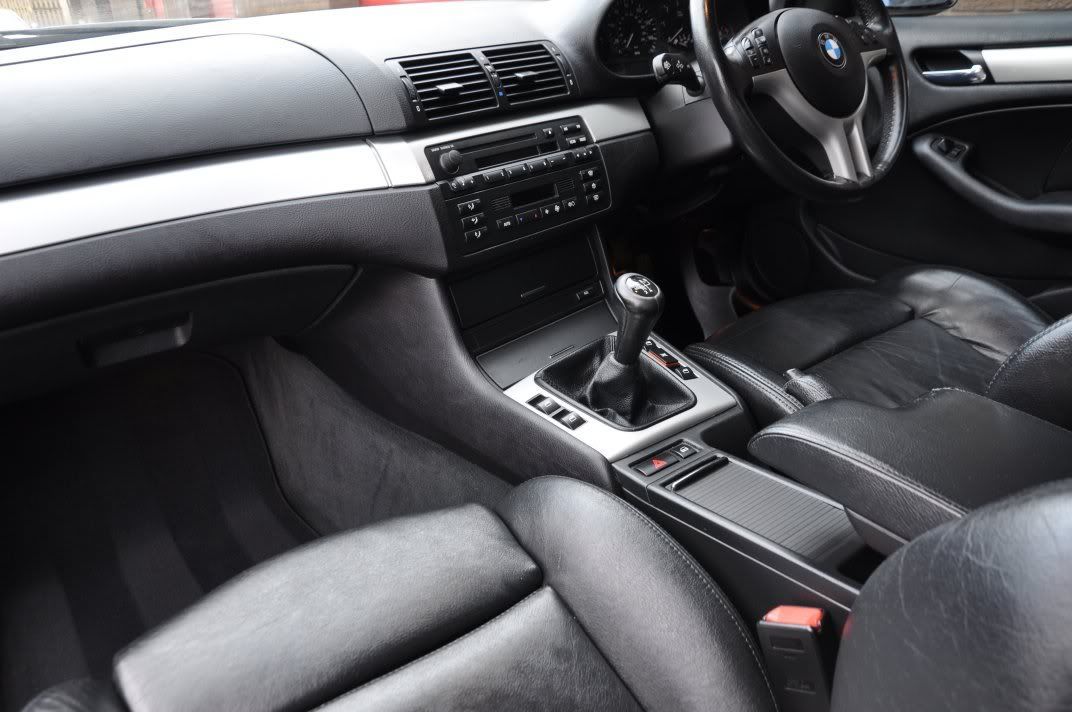
And the interior...


Thanks for looking, well done if you made it this far, and I hope the writeup has proved useful and insightful. This was certainly a challenging detail but fun from the perspective of being able to make a difference – cars like this always appeal to me, a 150k mile BMW with its defects, turning it around to make it look as good as we could.
I really enjoy details like this one! A “real-world” car that has lived its life, not necessarily been well cared for, and is in the need of a good detail to make it look its best. A car that challenges you! It is easy to make a nearly new sports or supercar look shiny – but the fun in detailing for me really lies in making an every-day car stand out from the crowd and that was the challenge with this BMW E46 320d.
It was raining rather heavily when the car arrived...
So it would be fair to say that Gordon and I got just slightly drenched during the wash process where the wheels and arches were cleaned first (using Automart G101 on the tyres and arches, and Autosmart Smart Wheels on the wheels); then the car was foamed and rinsed using Meguiars Hyper Wash, washed using the same shampoo. Autosmart Tardis was used for detarring prior to claying, and the claying stage was carried out using Autosmart clay with Autosmart Reglaze as the claybar lubricant.
Following our standard wash and decontamination procedure the car was ready for the big part of the exterior detail – the paintwork correction. Now, I’m going to write this up in quite a bit of detail, the idea being to show some panels of the car and the severity of the marks and how they are assessed using a couple of light sources that we use regularly. I will also show here the difference between working to fully correct the paint and simply running over with a middle of the road polish to achieve simply an enhancement of the finish but not full correction, and the limitations to machine polishing and the marks that we left behind on this detail and why we left them. I think its important to see paint correction from this angle – to see the effort that goes in to getting the finishes you see in the after shots, as well as an honest demonstration of what was achieved and the marks we had to leave behind as the paint thickness would not allow us to fully remove them.
Starting out on the bonnet, and the finish under the 3M Sun Gun shows a lot of heavy swirling...
Some hologramming...
More swirls
And some deeper RDS in the finish too...
As is always the case, the deeper marks in the finish always show up much better using the strip lighting in the unit, and ensuring the camera is set into manual focus so as to focus on the surface of the paint for a true assessment of the finish – as you can see, the deeper marks and the state of the bonnet becomes a lot more apparent!:
It would be fair to say, I think, that the bonnet was in severe need of paint correction ad a serious effort to make the finish look as defect free as possible. Obviously, looking at the above photos, there are some marks that just will not fully remove in the scope of the detail as the paint simply will not allow it, but for this car, it was a case of achieving the best possible with what we had to work with.
As part of the testing on this bonnet, I trialled Menzerna PO85RD 3.02 Intensive Polish on a 3M yellow polishing pad – a standard set, of spreading the polish at low speed and working at 1800rpm until the residue was clear (no refining stages). This delivered a notable amount of correction, and under the Sun Gun you could convince yourself the finish was perfect and defect free on the test spot...
There is no denying the significant difference made – the video also shows it, moving from an untouched region to a “corrected” region assessed by the Sun Gun;
However, as I always try to stress, it is important to assess the finish by all possible means... and this means using the strip lights in the unit and analysing what is in the surface of the paint. The strip light alone shows the corrected region, a darker are where the paint looks “deeper” as the haze and general marring has been removed...
However, using the SLR camera’s ability to focus on the paint surface and by not “bleeching out” the subtle deep marks using the bright Sun Gun, we can start to see that the finish is still bearing quite a few deeper marks and is far from perfect...
In order to achieve what we would consider to be true paint correction on this car, rather than an enhancement and gloss restoration as achieved above, I used a wool mop and 3M Fast Cut plus on this car bonnet! The process for the bonnet took my approximately six hours to complete – one or two hits of 3M Fast Cut Plus with wool, followed by one hit of FC+ with a cutting foam pad, spot correction of deeper marks locally to get the best possible results using a 3” compounding foam, then a first stage refinement with Menzerna PO85RD3.02 Intensive Polish and then full refinement and jewelling with Menzerna PO85RD Final Finish.
The process with Fast Cut on the wool mop:
> Apply the polish in a line directly to the panel
> Spread the polish over a 2’ square area at 600rpm
> Begin working the polish at 1200rpm, with light to moderate pressure
> Work the polish at 2000rpm, moderate to heavy pressure until residue goes clear
The process with Fast Cut on a foam pad:
> Spread the polish at 600rpm
> Begin working at 1200rpm, light to medium pressure to build a little heat in the panel
> Work at 1800 – 2000rpm with moderate pressure until the residue goes clear, taking care not to overheat the panel
The process with Intensive Polish on a foam pad:
> Spread the polish at 600rpm
> Begin working the polish at 1200rpm with light pressure
> Work the polish at 1800rpm with moderate pressure until the residue goes clear
The process for Final Fiish with a finishing foam pad:
> Spread the polish at 600rpm
> Begin working the polish at 1200rom with light pressure
> Work the polish at 1500rpm with light to moderate pressure until the residue goes clear, pressure getting lighter towards the end of the set
> Refine the finish at 1200rpm with light pressure for a couple of passes
> Jewel the finish at 900rpm, slow passes with very light pressure
The end results now of the paint correction and refining, assessed first of all under the Sun Gun to check the quality of the machine finishing and refinement:
To give a fair indication of the level of correction of the deeper marks, we use the strip light and focus the camera on the paint surface – I know there’s a lot of pictures here, but hopefully this is giving an insight into the actual work behind the paint correction process and assessment of the finish and what to be looking for when you are assessing a paint finish yourself – there’s more to paint correction than just a shiny car in artistic after shots! The correction level achieved, note that there are still the odd deep mark around (end of my finger tip in one image) that we could not remove owing to the paint thicknesses, but this highlights the scope of paint correction and what was honestly achieved by the process:
Moving on to the passenger side of the car and I’m going to focus this writeup on the two doors that Gordon was working on – the front of which was showing readings to represent a respray while the back door was showing readings in the 80um and 90um level to suggest thing paint and previous heavy polishing. Looking at the condition of both of these doors before:
The severity of the marks are clear to see, on the front door with some deeper marks and a lot of swirls while on the back door we also see hologramming which supports the evidence of the paint thickness gauge to their having been some form of previous machine polishing to make the paint thinner. The front of the doors you could describe as the “easiest” – thicker paint, giving a bit more scope for correction but one has to be very careful on resprayed panels as to how the paint behaves, and removal rates as it is likely to not be the same as standard parts or other resprayed parts of the car!
Gordon used Fast Cut for correction on this door, and then refined the finish to get the following results...
On the back door however, a more gentle approach was adopted owing to the paint thickness readings, and Menzerna Intensive Polish was used for the correction stages, and then the finish refined. You can still see the odd mark left, but when the paint thickness readings and removal rates were taken into account this was the maximum correction we felt was safe to achieve without risk of short or long-term damage to the finish... sometimes you just have to know when to stop...
Meanwhile, round on the driver’s side of the car, there were different issues to be dealing with – most notably on this front wing. The before shots show deep scratches, and general swirling, while the paint gauge read thinly on the panel...
There was clear evidence of a respray, which you can see more clearly once the swirls are removed in the after shots – note the sweeping lines in the flake of the paintwork, which the bodyshop next door reckon was probably caused by water in the paint or poor prep before the lacquer was applied... alas not a lot to be done with that, but at least the surface defects largely corrected and a nice gloss and clarity returned...
Moving down the side, it was pretty consistent on doors and rear three quarter, so I’ve chosen the rear door to show the work being achieved... First of all, assessing the swirls in the finish using the Sun Gun:
And also, looking at the level of deeper marks using a wall mounted strip light – unsighted with the Sun Gun, but you can see the deep marks all over the finish under the strip light:
Correction was carried out using 3M Fast Cut on a Chemical Guys Hexlogic cutting pad, a favourite combination of mine where heavy correction is required and where the paint can take the high removal rates of the combo. Refinement was with Menzerna PO106FA Super Finish on a 3M Blue Finishing pad – I chose the higher cutting of the Menzerna finishing polishes here as I find it has a good level of cut for removing any hologramming from Fast Cut, even when it is used with heavy pressure, and it is still capable of finishing down to a beautifully crystal clear finish – easily one of my favourite finishing combinations. End results of correction and refinement, assessed firstly by the Sun Gun to look at the quality of the machine finish...
And then under the strip light to assess fairly the level of correction achieved, focussing on the surface of the paintwork to give an indication of the marks removed and anything that may be remaining:
The bootlid on this car was showing signs of some severe marks, both under the Sun Gun and under the striplight!:
Deep scratch...
Gordon spent time correcting and refining the bootlid to as much as the paintwork would allow, achieving the following results:
Up on the roof was entertaining – paint readings of nearly 300um meant there must have been respray work, but there were some very severe defects seen using the strip lighting:
This mark was particularly severe and caught the finger nail...
Under the Sun Gun, you could see as expected a lot of swirls...
And a little video...
Following correction with Fast Cut and refinement with Menzerna Super Finish... a big improvement, note the very deep mark still remaining...
Following extensive use of Fast Cut during the correction phases, the car had a light covering of compound dust...
The car was therefore foamed...
And rinsed focussing on the panel gaps and shuts to ensure removal of the dust...
Just for fun, a couple of videos of the sheeting of the water from clean paint, with no protection applied
Once the exterior was washed down and dried off, ready for protection, it was time to focus on the interior of the car. Not a regular feature in my write-ups, we don’t do as many interiors as we do full paint corrections but it was a nice change to be getting some time to work inside the car as well! On this car, the interior was vacuumed, the mats removed and steam cleaned, the leather cleaned and protected, the plastics cleaned and protected and the glass cleaned. A few photos of the work in progress here.
Me, with a vacuum – rare sight in detailing! :lol:
Using a little extension hose here, allowing me to get right down the sides of the seats an inside all the little nooks and crannies...
Driver’s footwell before:
Mats were removed for cleaning (see later), footwell region vacuumed and the pedals and plastics cleaned with Autosmart G101. Clearly the pedals were not dressed here to avoid any issues with feet slipping when driving!:
The interior plastics were cleaned with G101 with a high dilution for a mild clean which was what was required and then dressed using Poorboys Natural Look, a product I have long been a fan of for my own car for its matt and clean looking finish. I cannot stand shiny interior plastics!!... Work in progress...
Not sure what had been going on, but the leather on the passenger seat was badly damaged!
Gordon worked with a leather polish here that had been acquired from BMW for light repairs of leather, and then as with all of the rest of the leather it was cleaned and then protected:
The rubber mats were cleaned with G101, and rinsed with a hose...
Then dried off...
The carpet mats were reasonable grubby...
Sprayed lightly with G101 (mild), and then cleaned using the Steam Cleaner – slowly moving the cleaner across the matt to pull the dirt into the microfiber then going over the area with a second microfiber to remove excess grime and dampness...
And then stripped to look pretty...
The exterior was then protected – Meguiars #16 wax (durable, great performer) for paint, Migliore Trim Protectant for trim and rubbers, Espuma RD-50 for tyres, Finish Kare 1000P for wheels, 3D Ultra for arches, Autosmart Glass Clear on the glass.
On to the after shots, exterior first:
And the interior...
Thanks for looking, well done if you made it this far, and I hope the writeup has proved useful and insightful. This was certainly a challenging detail but fun from the perspective of being able to make a difference – cars like this always appeal to me, a 150k mile BMW with its defects, turning it around to make it look as good as we could.


Comment