• If this is your first visit, be sure to check out the FAQ by clicking the link above. You may have to register before you can post: click the register link above to proceed. To start viewing messages, select the forum that you want to visit from the selection below.

Announcement

Collapse
No announcement yet.

Lexus IS220 - From Minging to Blinging Mega Turnaround - Ending 2009 In Style!

Collapse
X
 
  • Filter
  • Time
  • Show
Clear All
new posts

  • Lexus IS220 - From Minging to Blinging Mega Turnaround - Ending 2009 In Style!

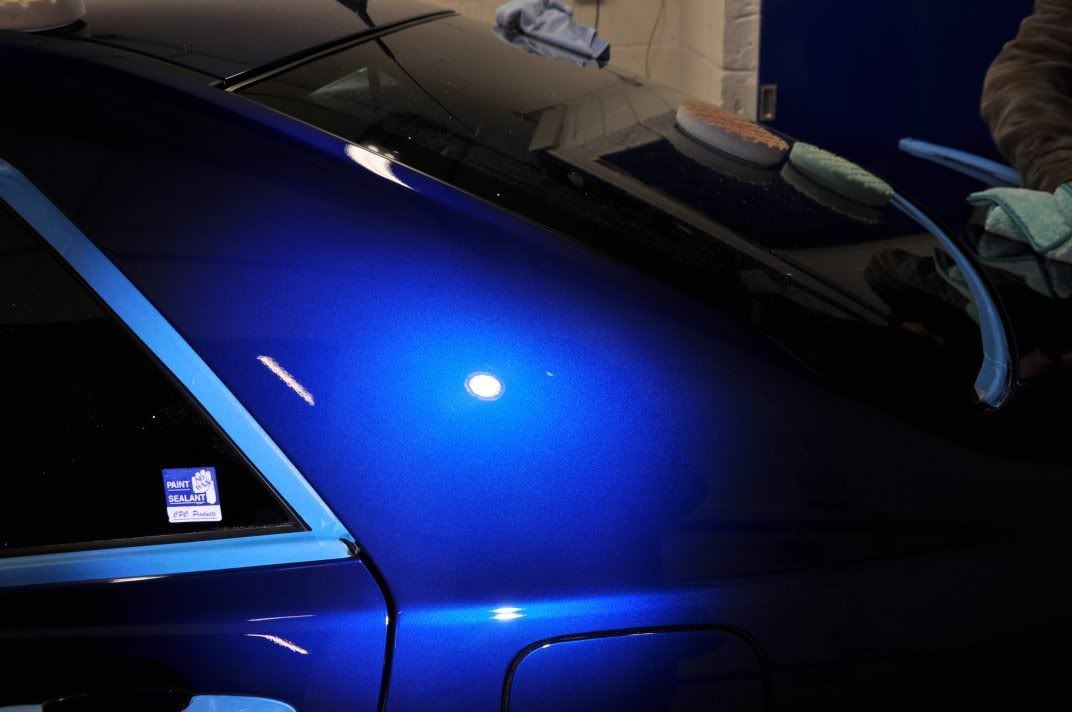
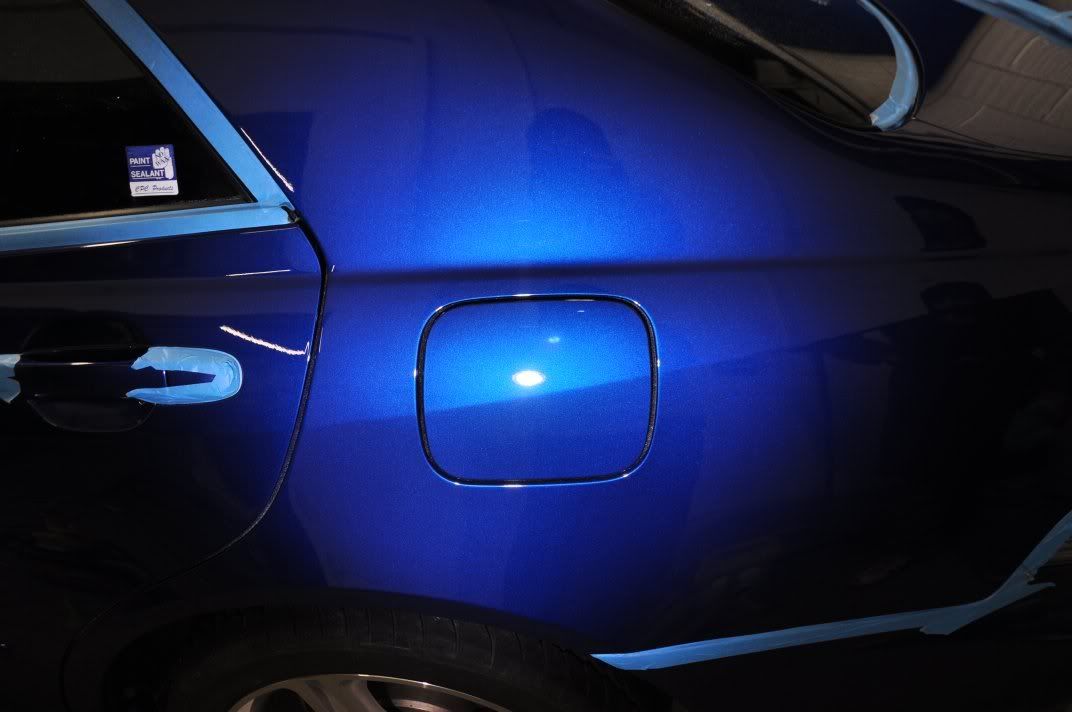
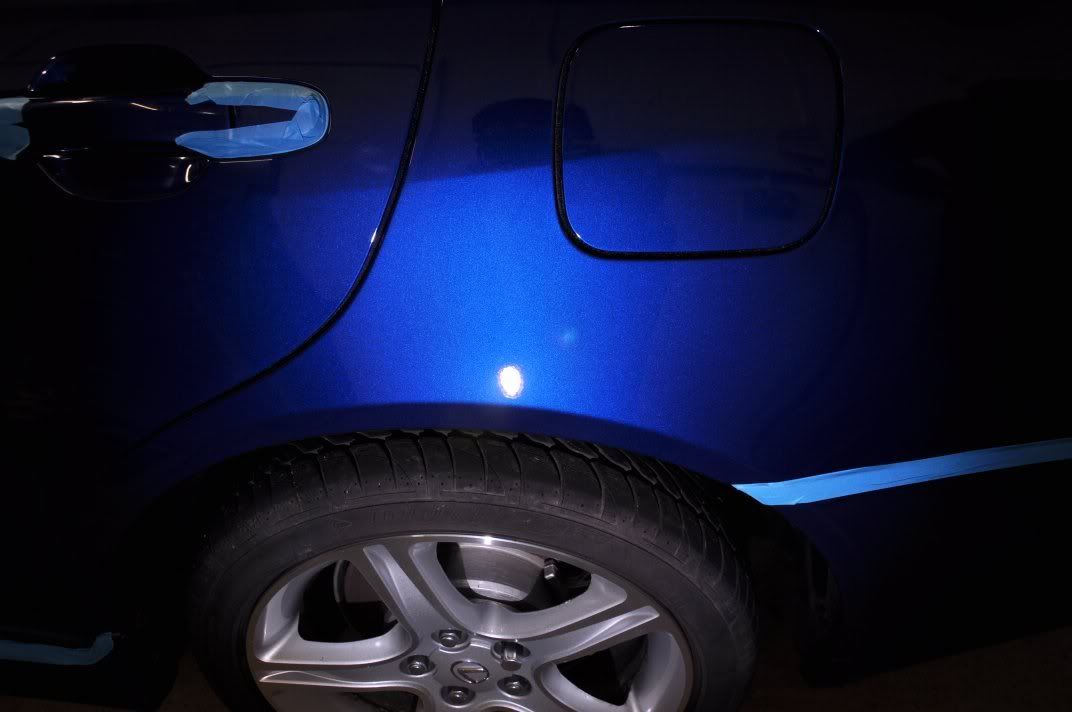
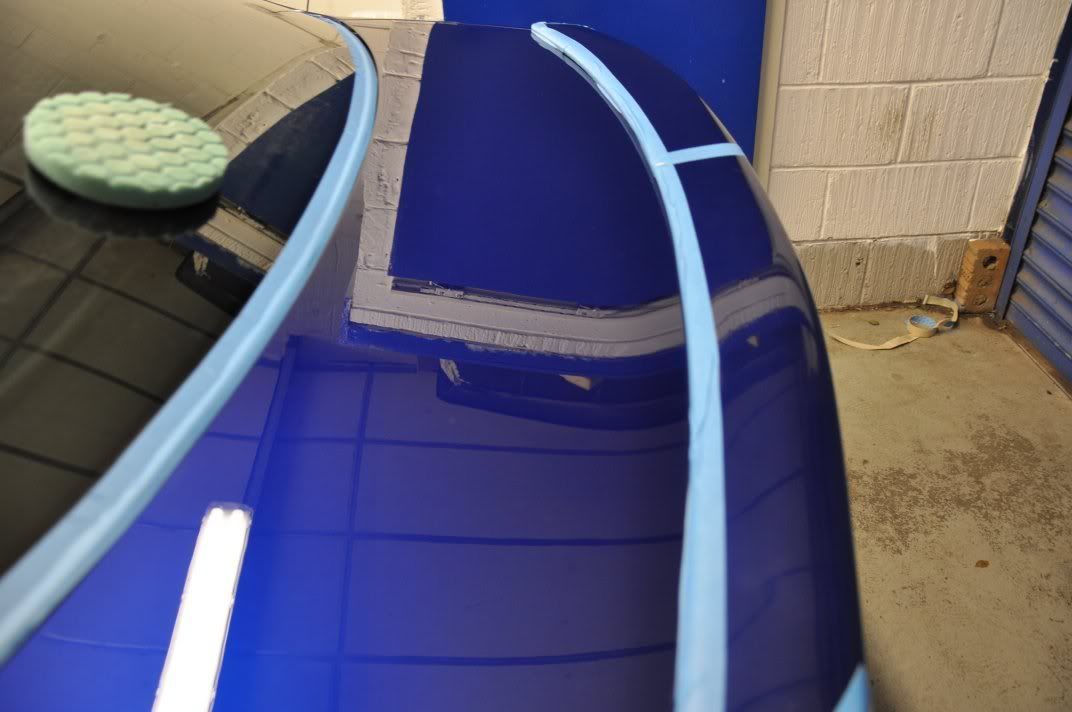
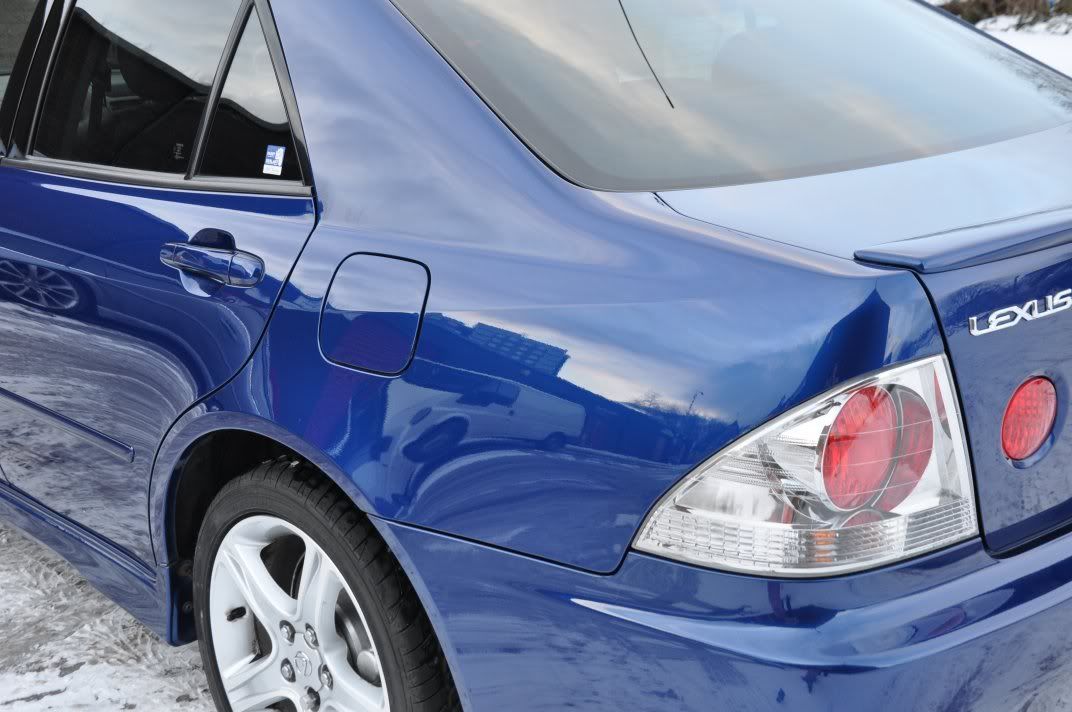
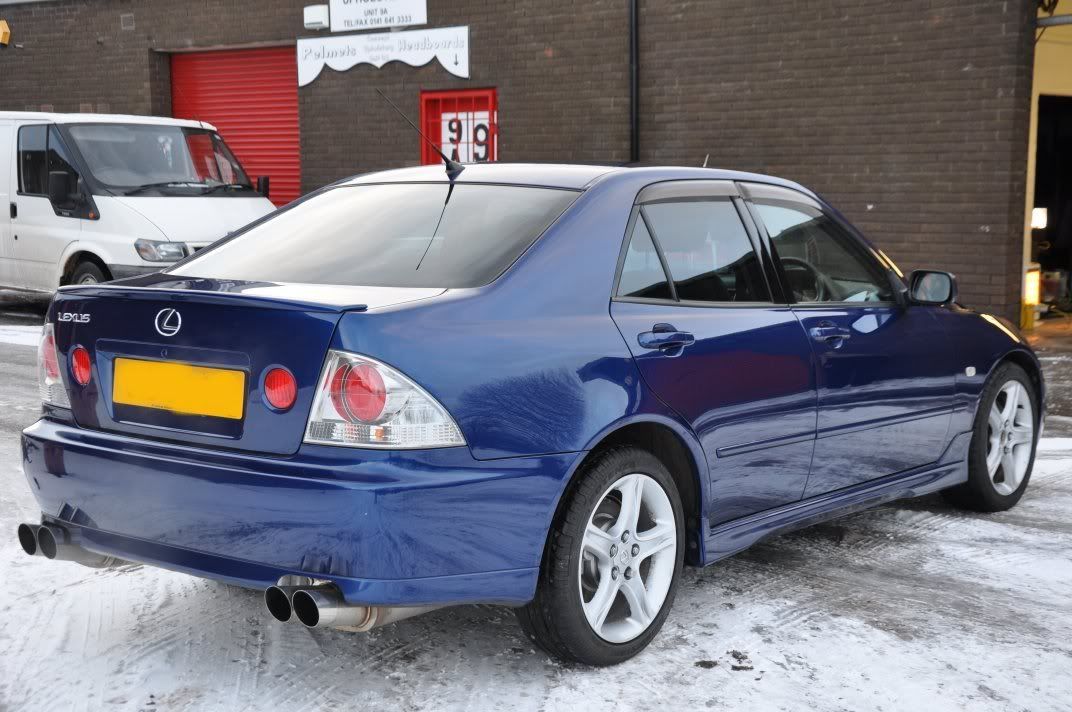
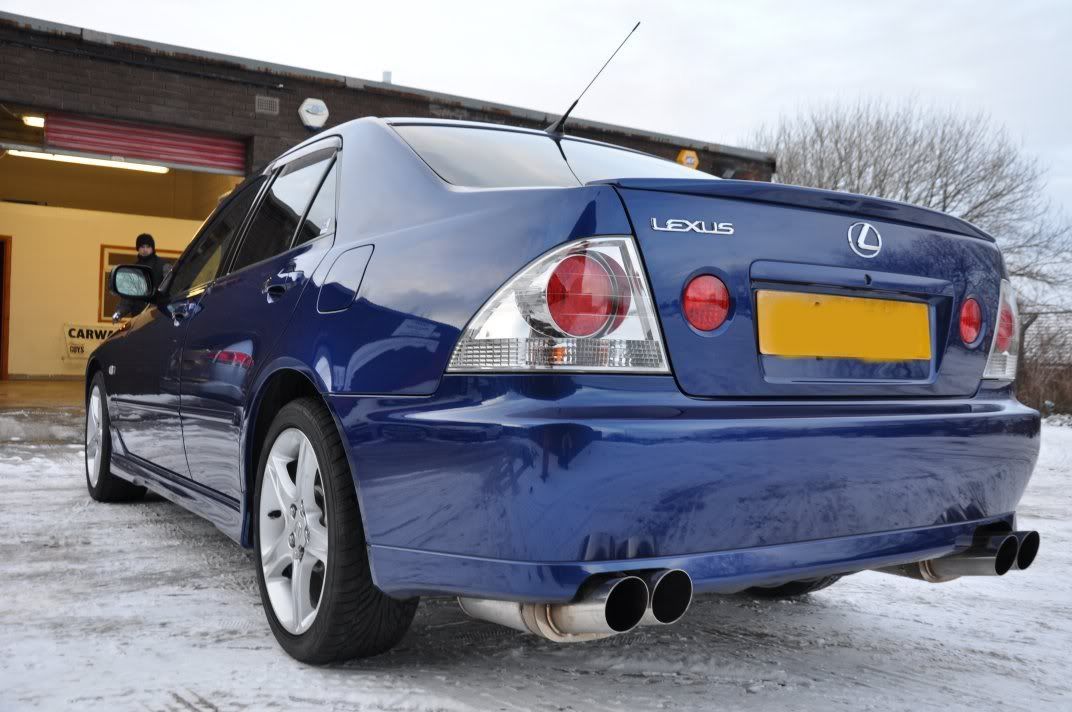
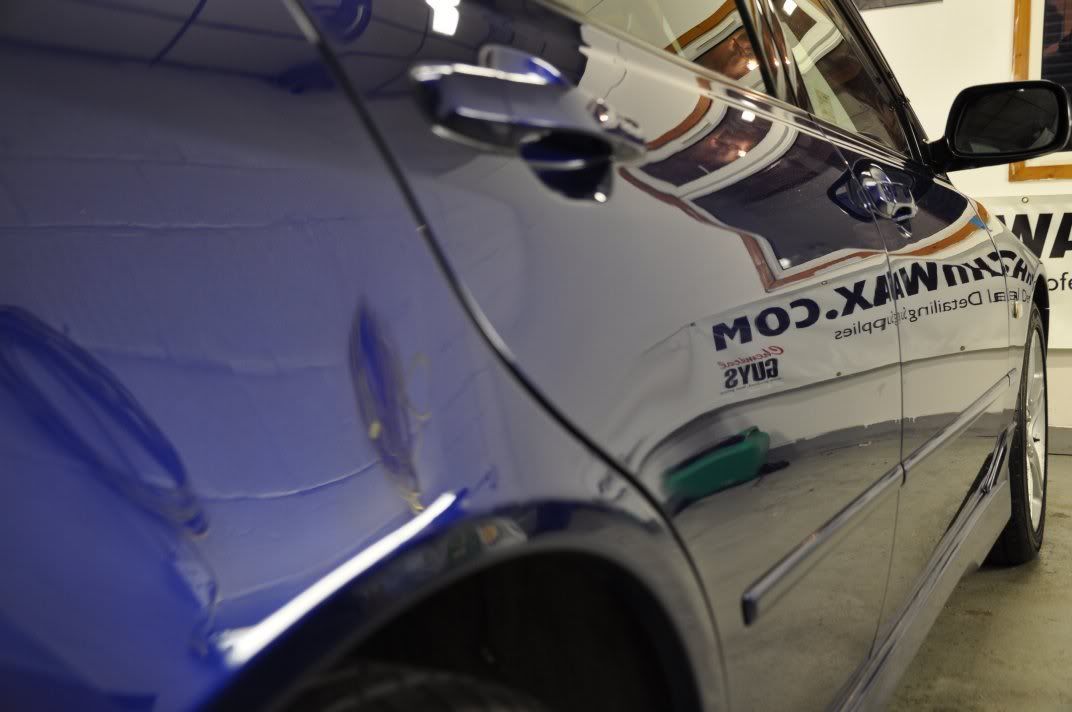
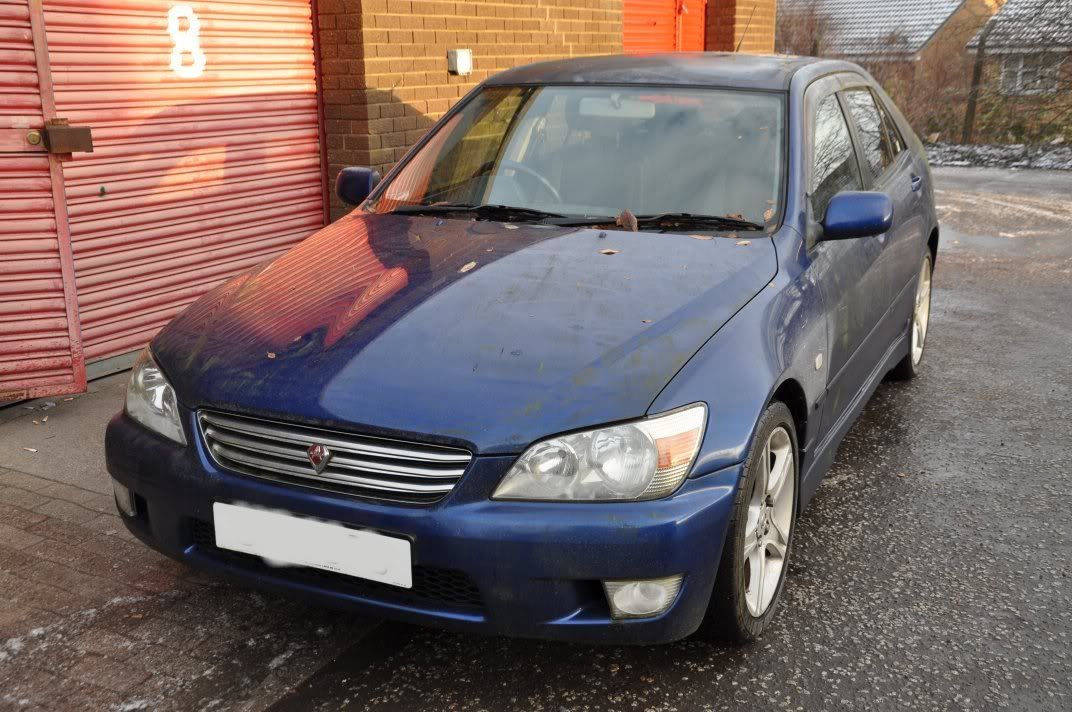
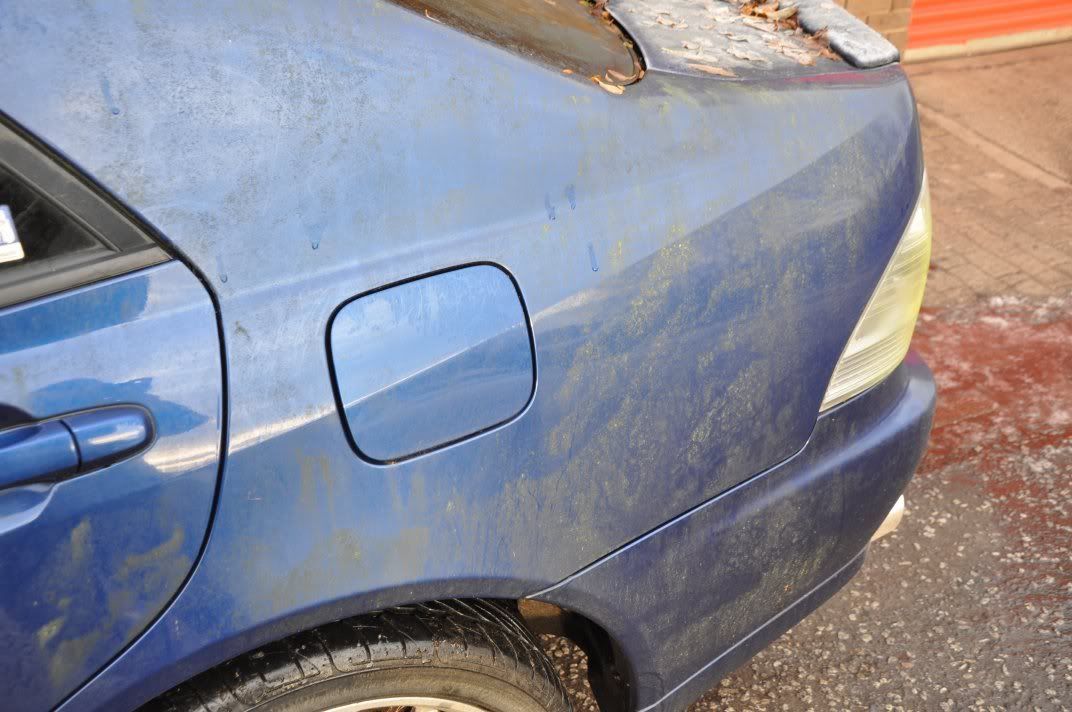
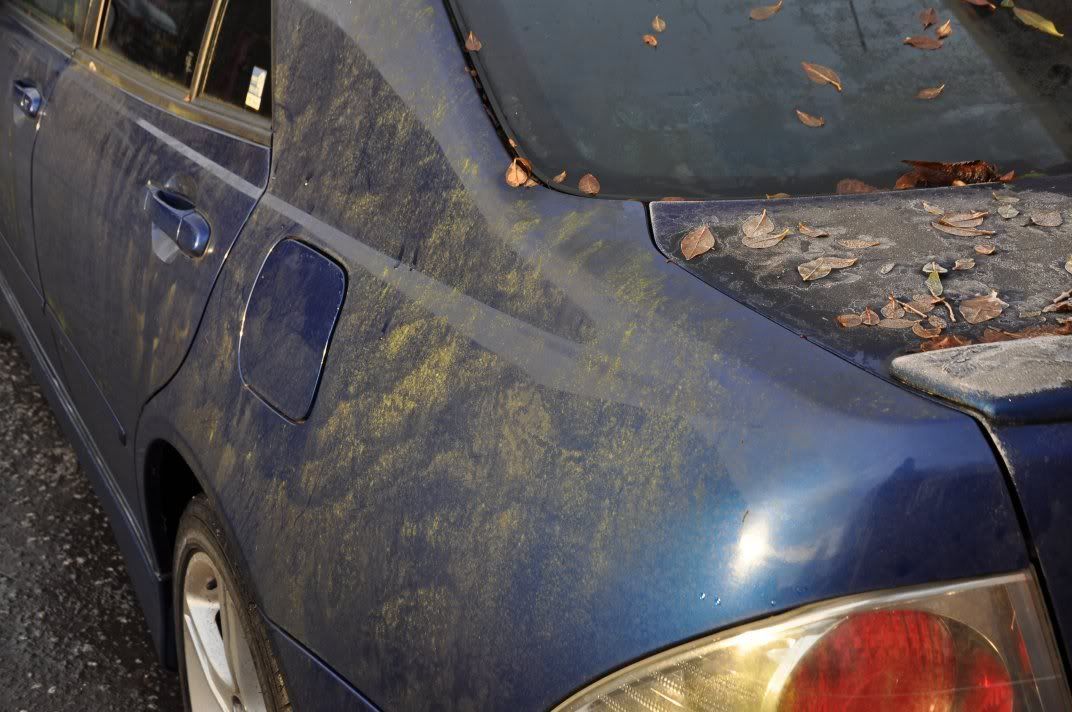
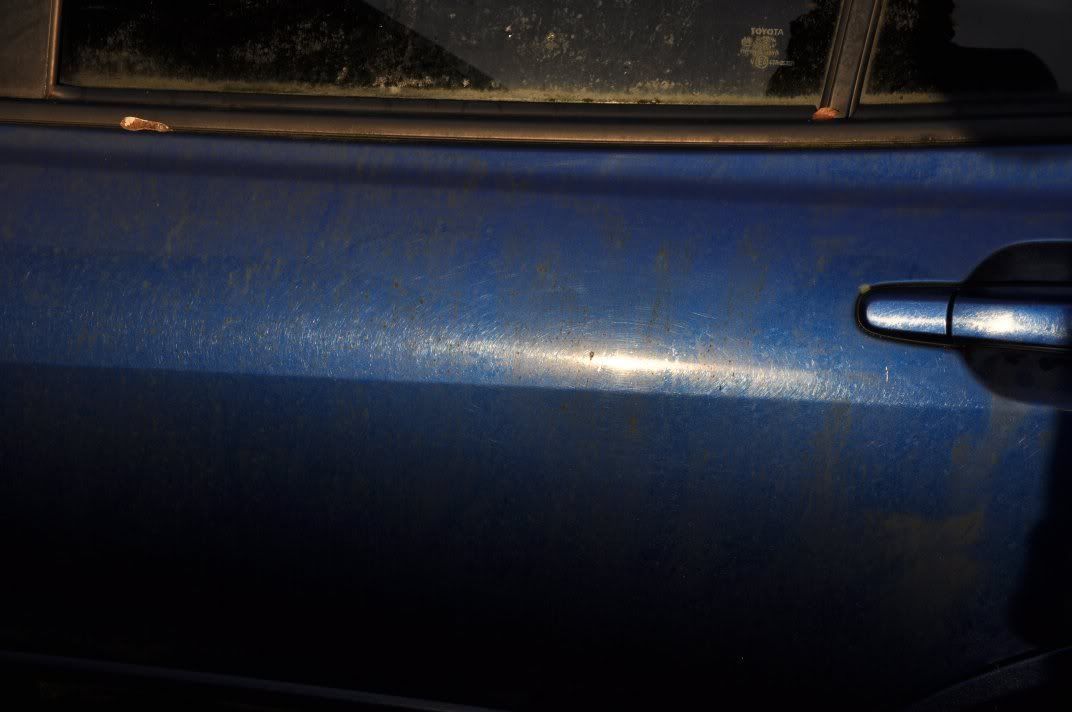
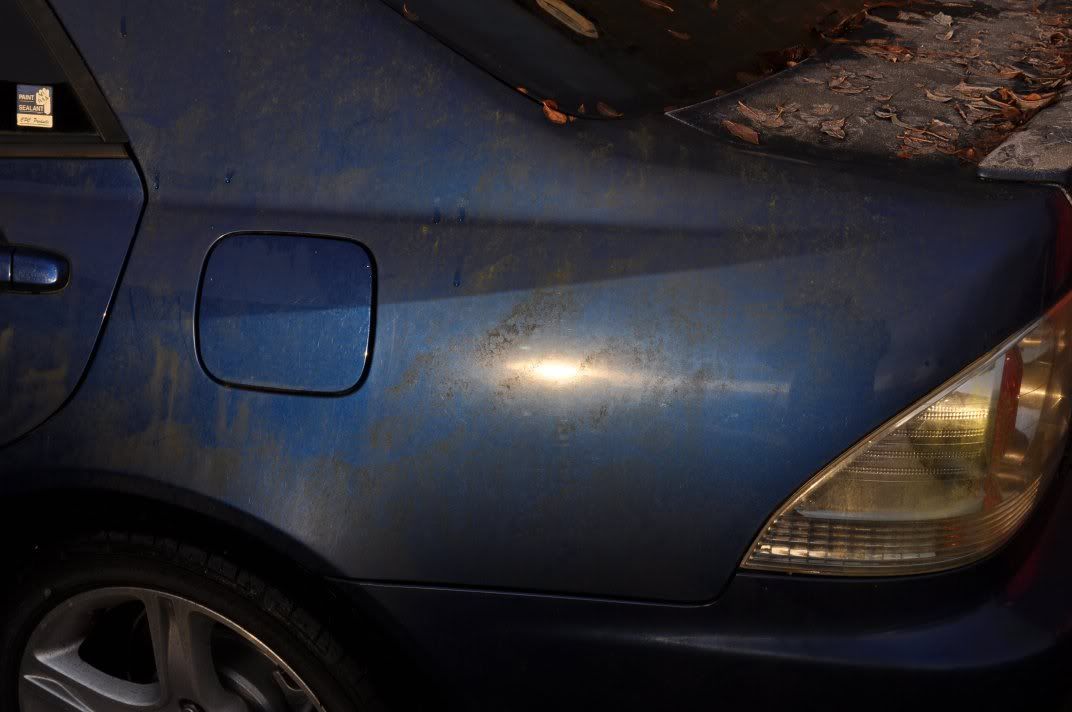
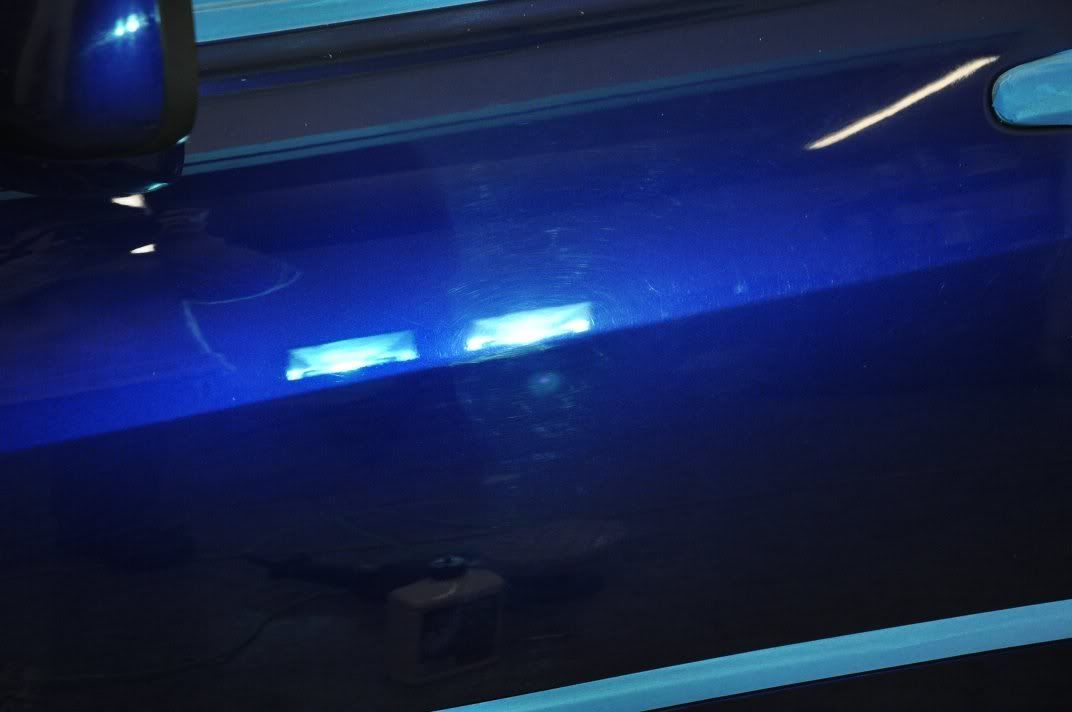
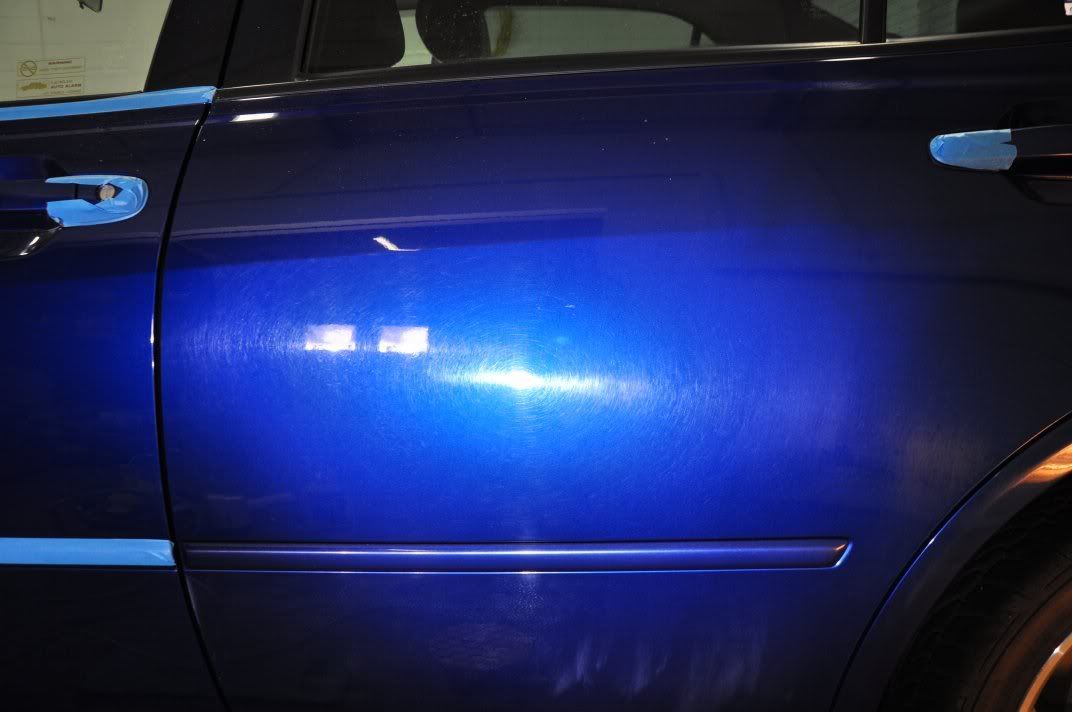
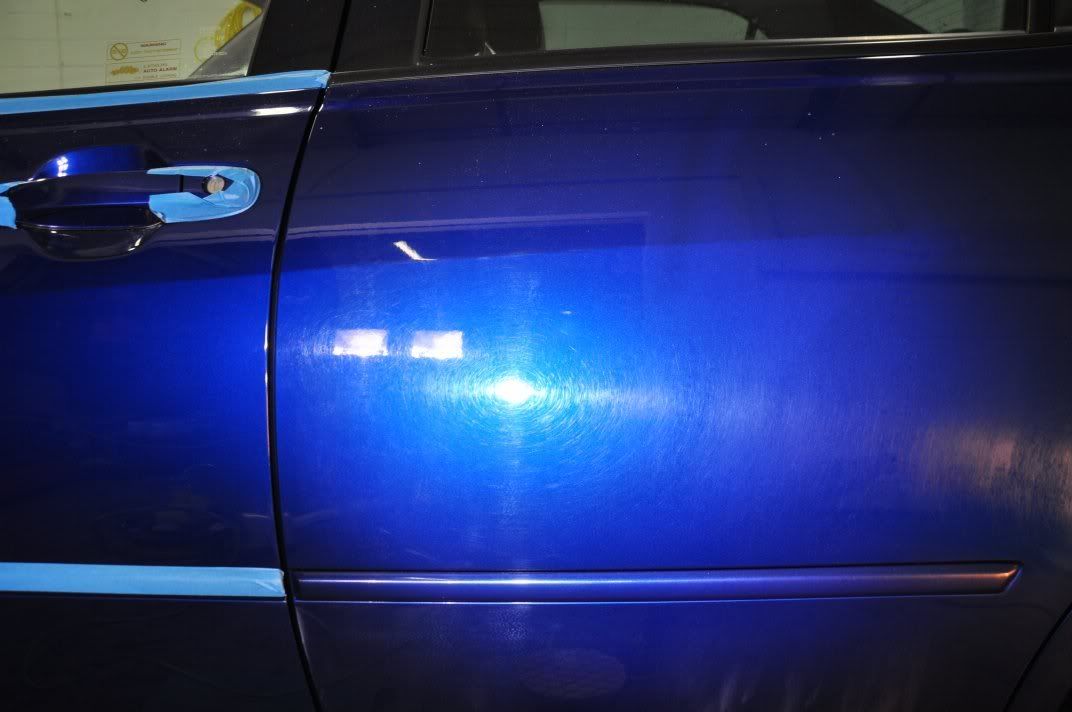
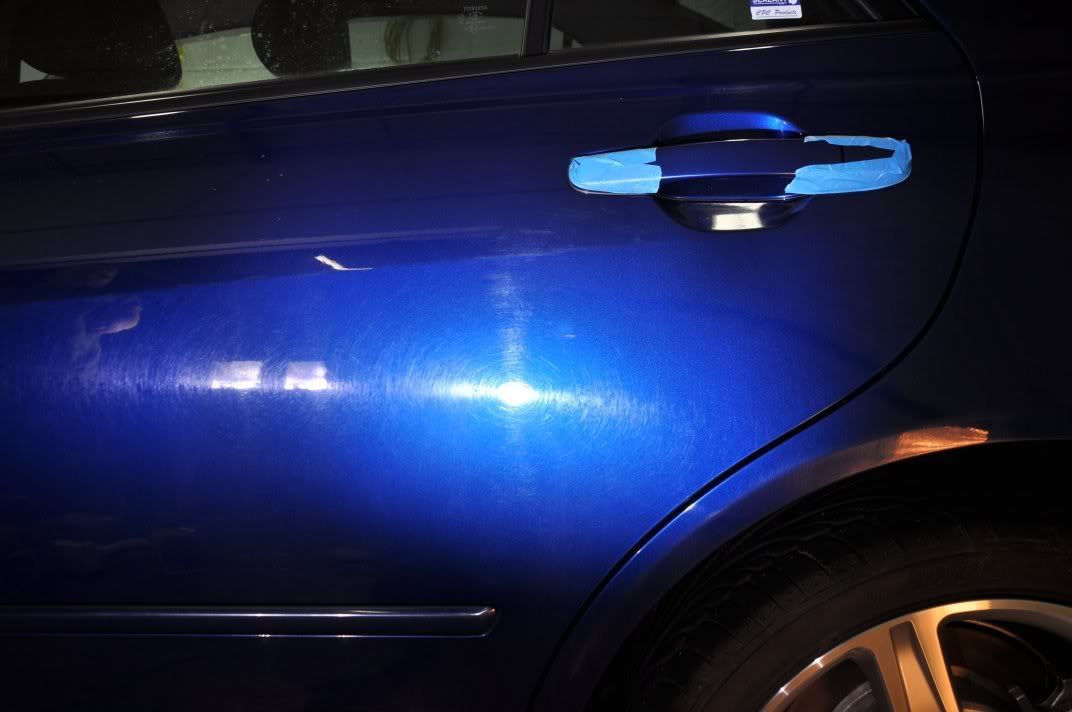
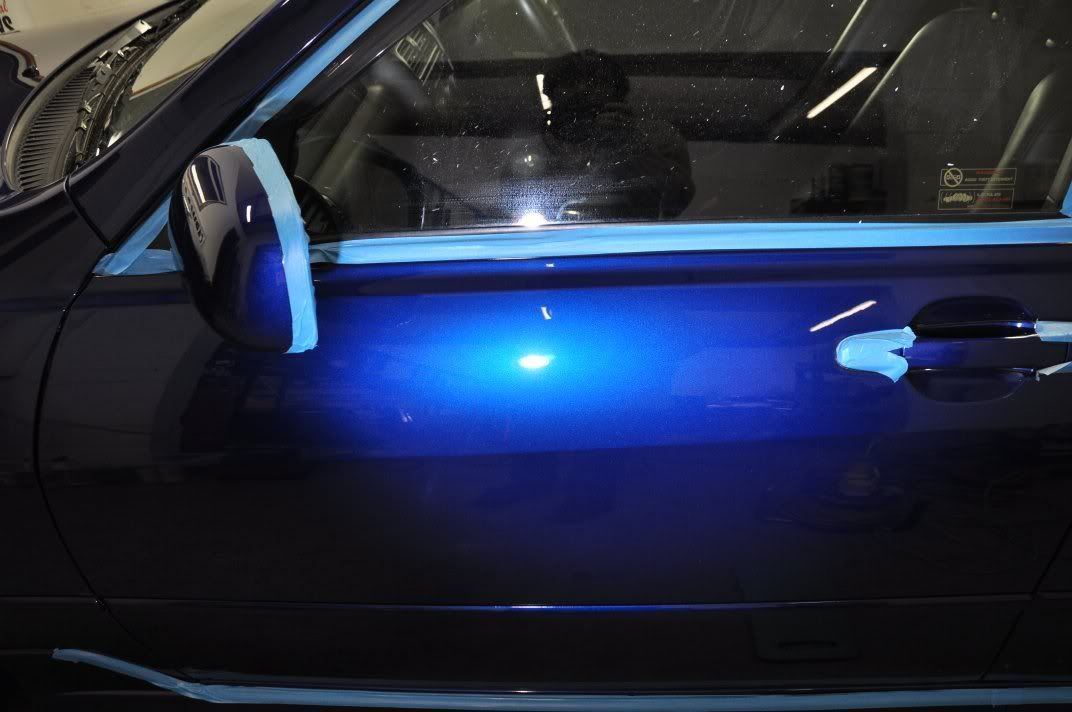
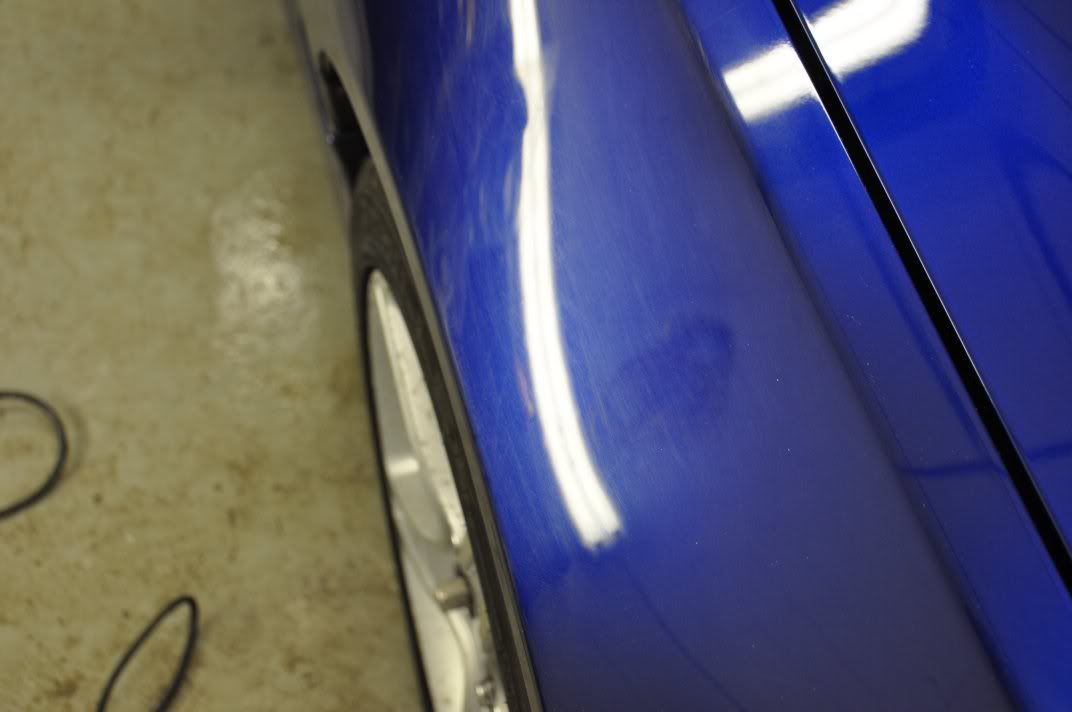
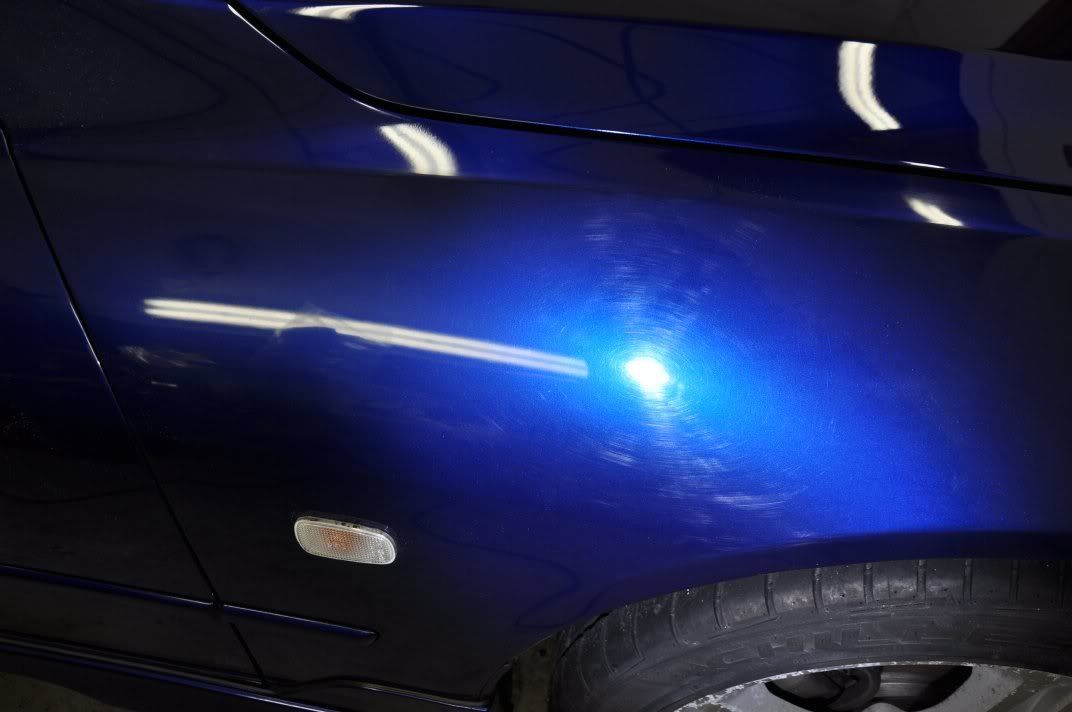
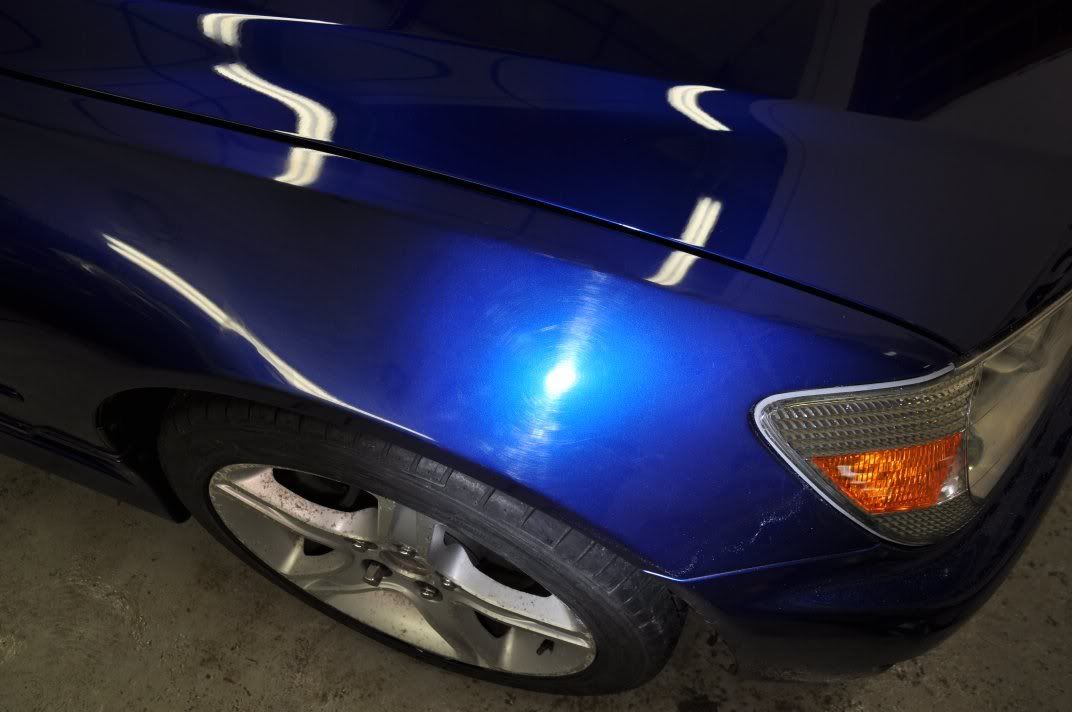
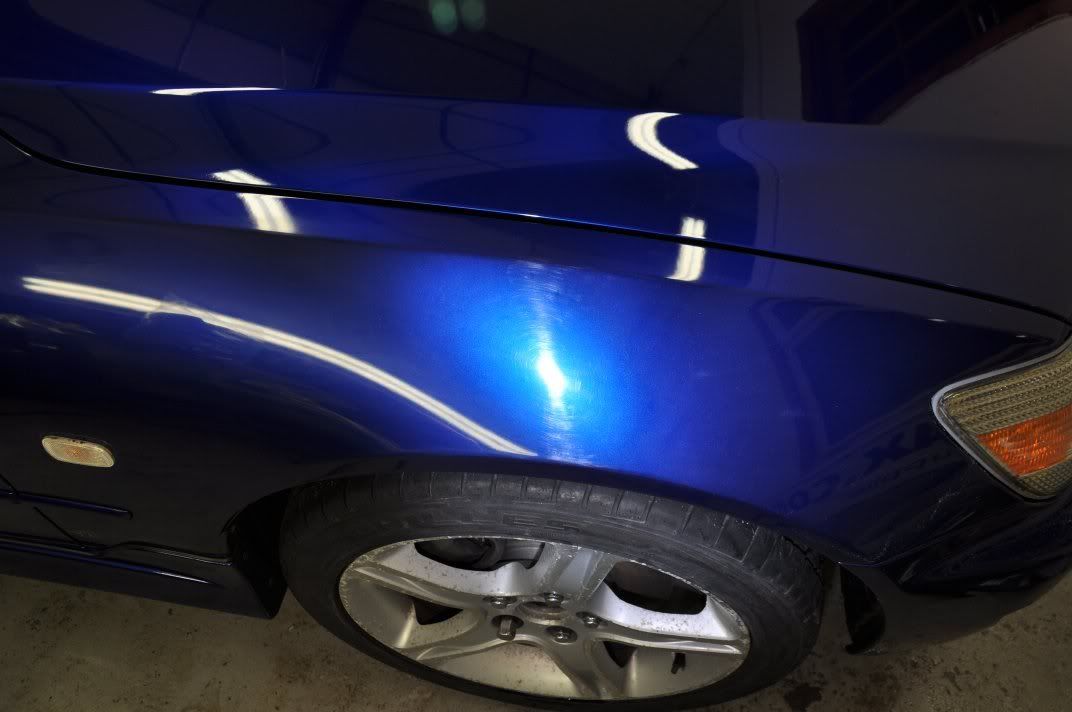
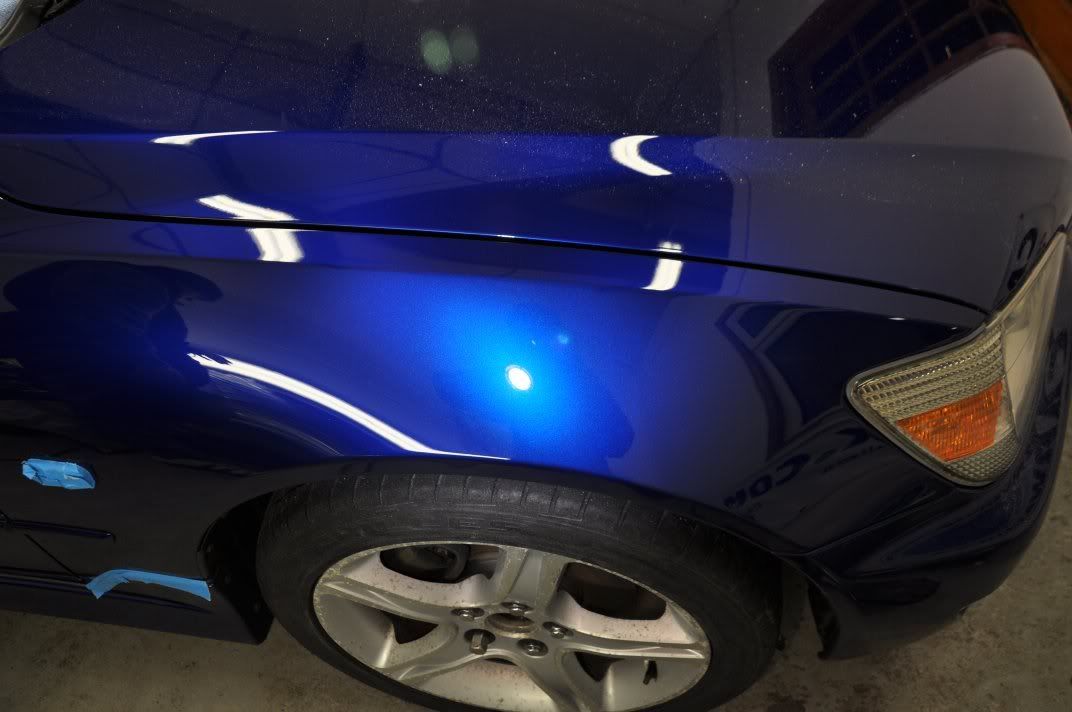
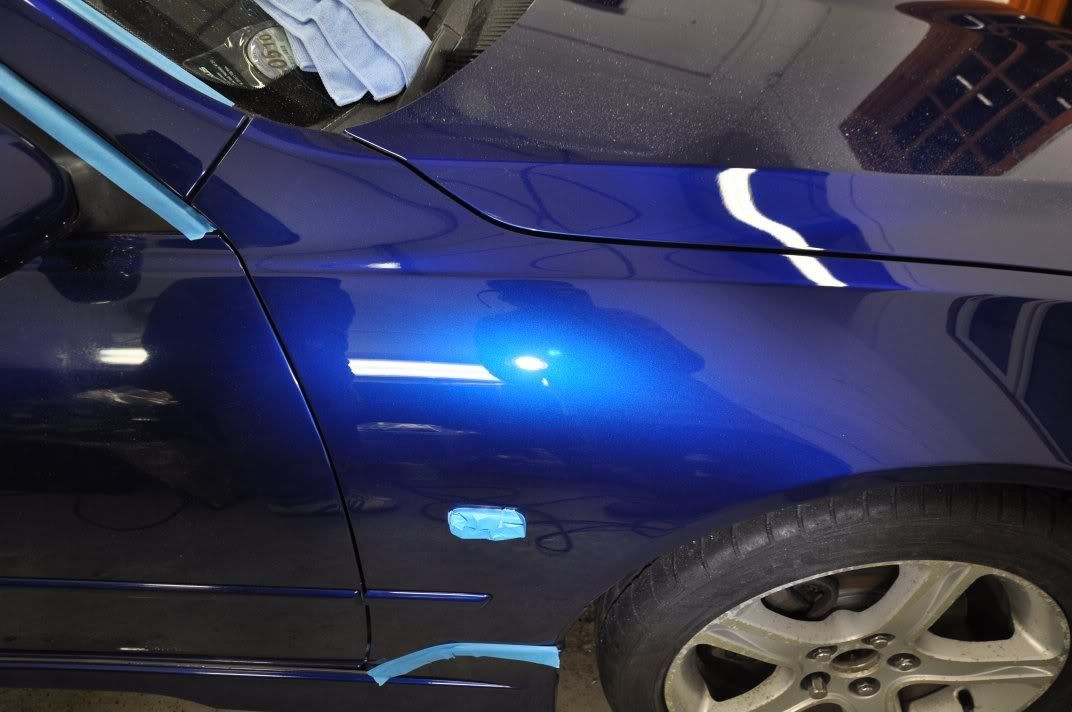
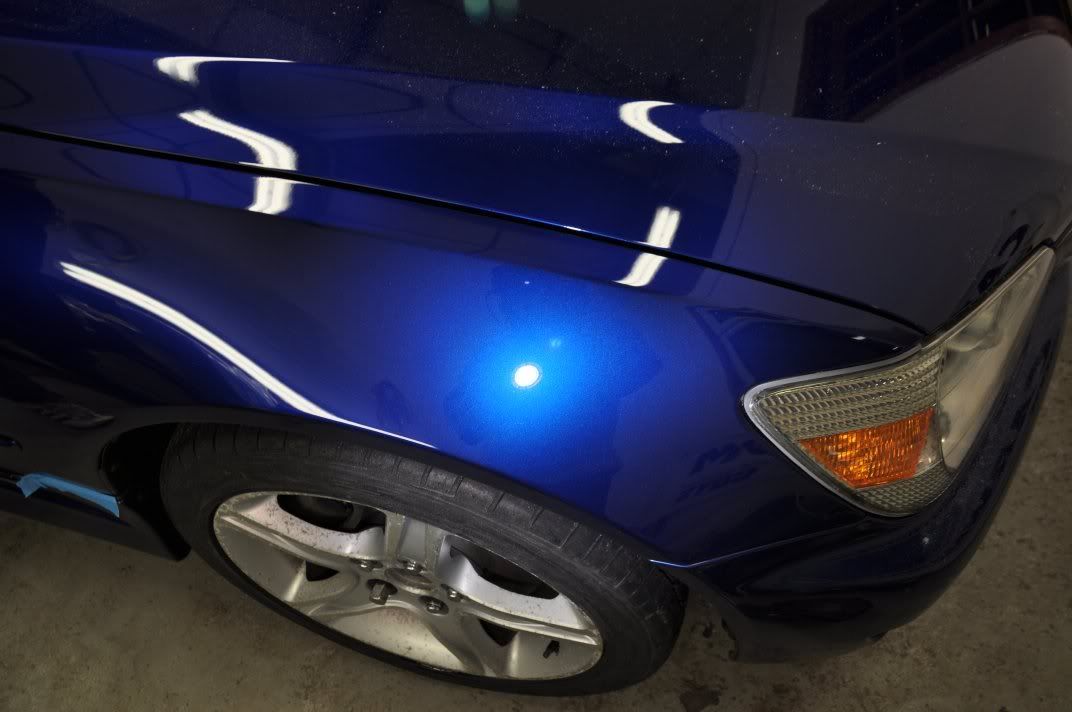
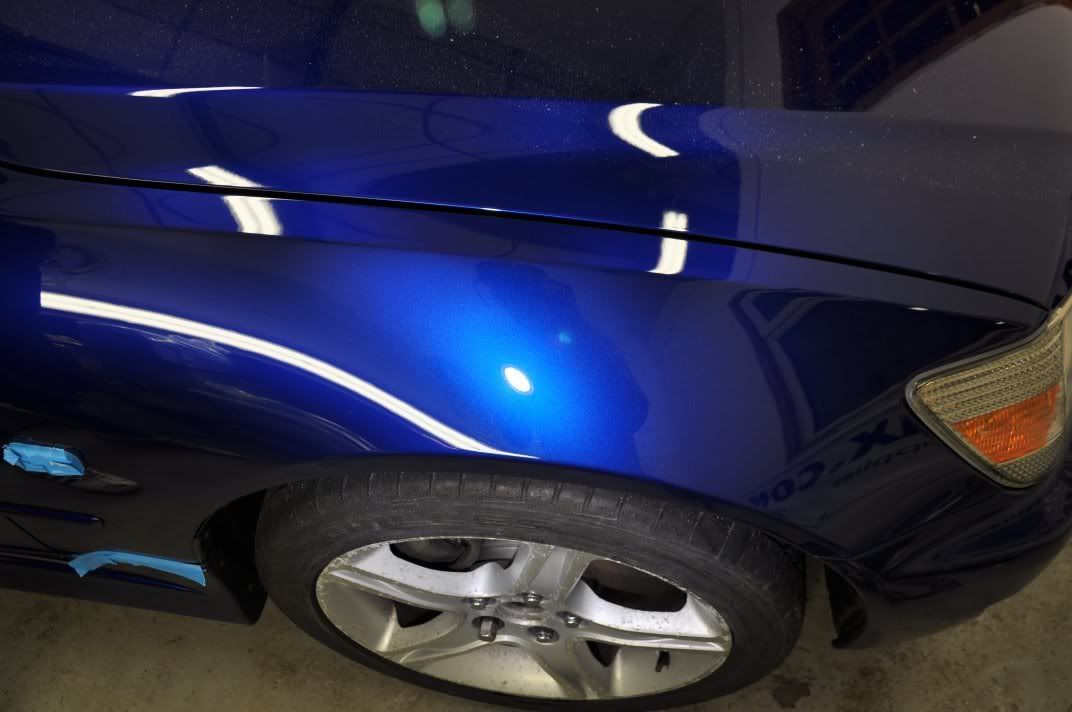
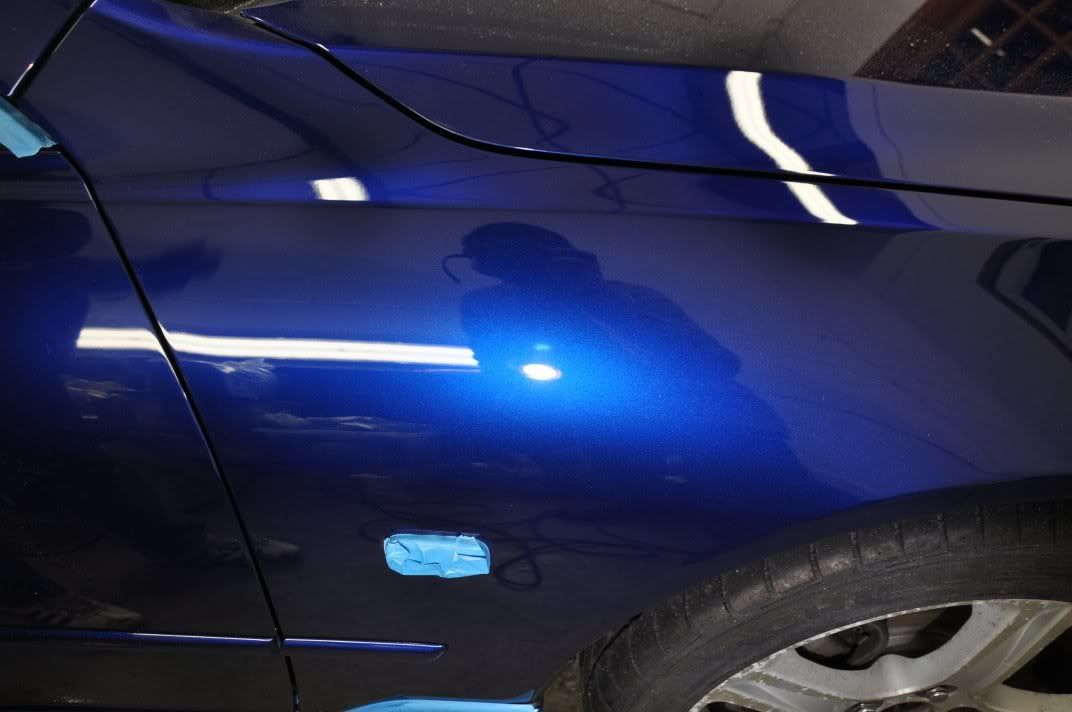
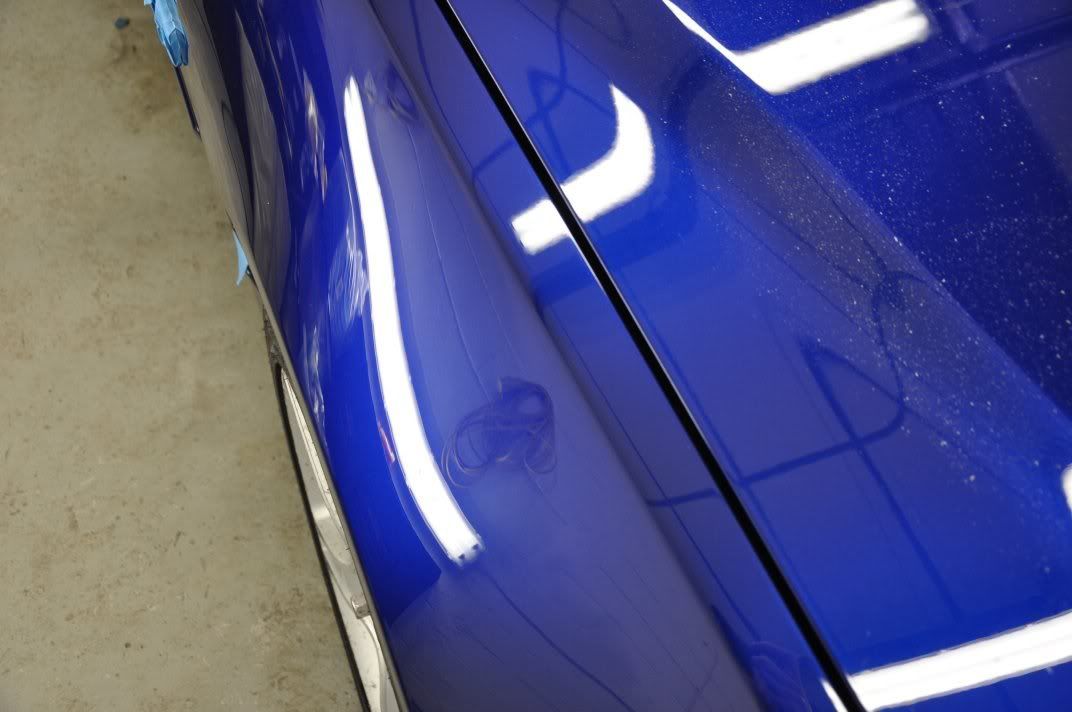
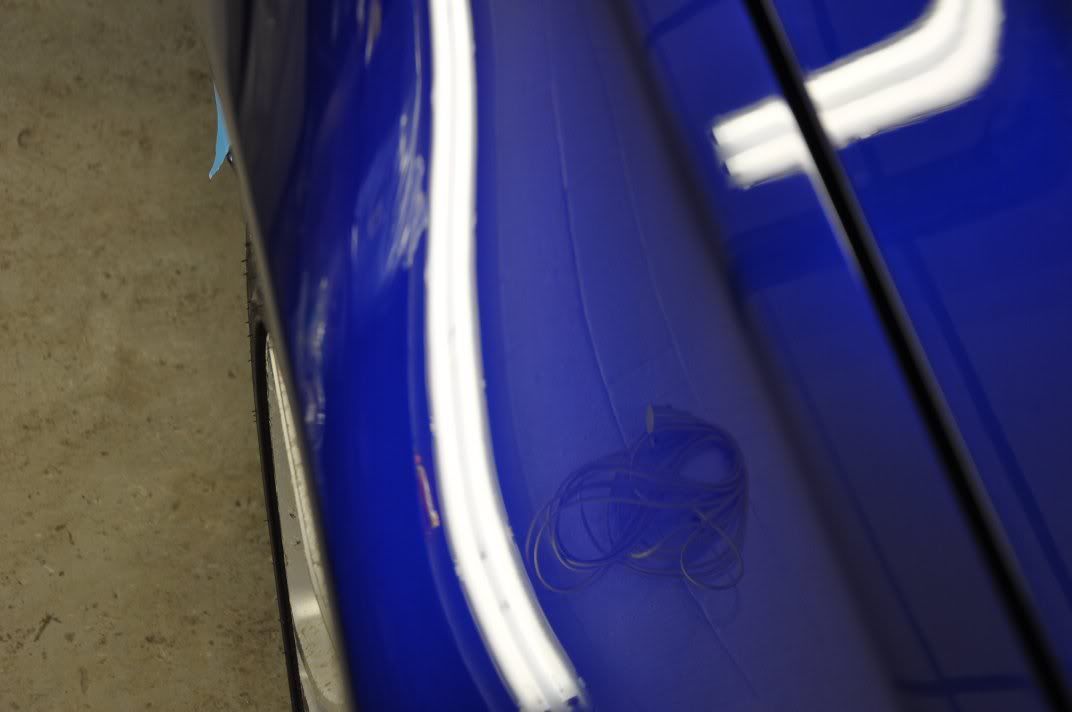
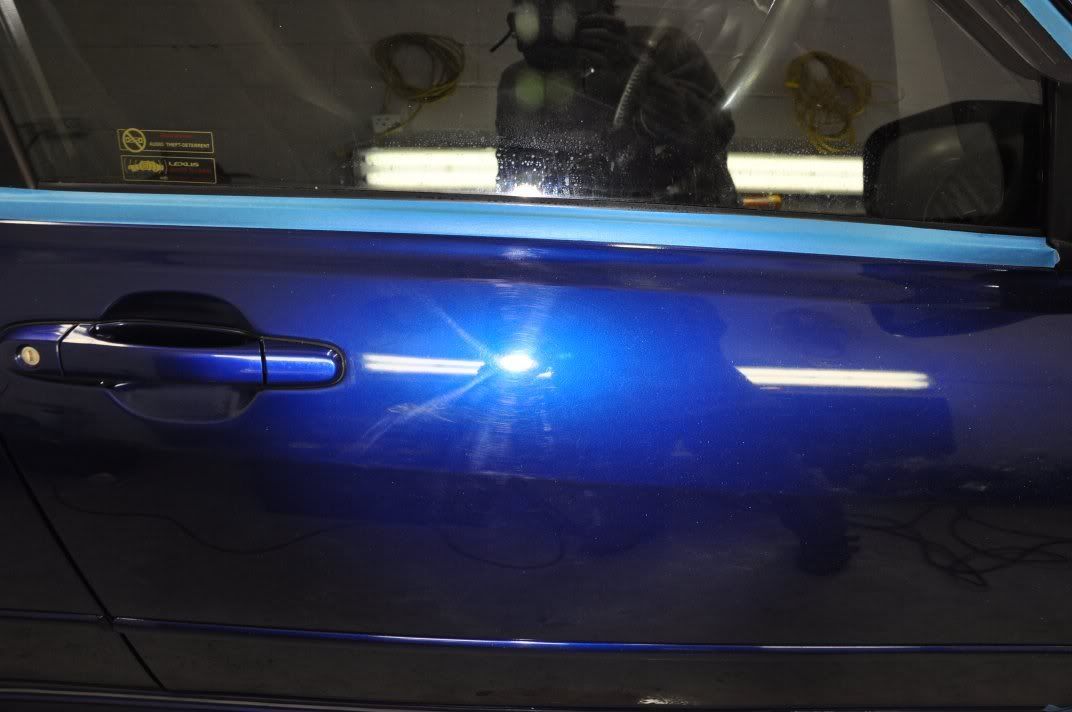
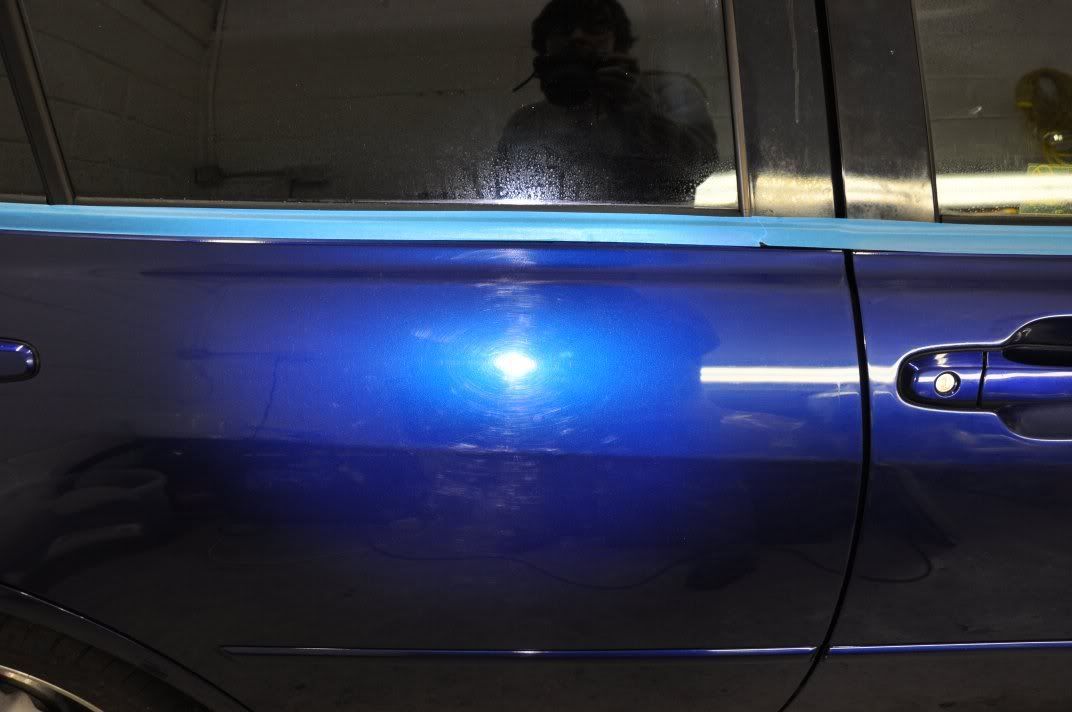
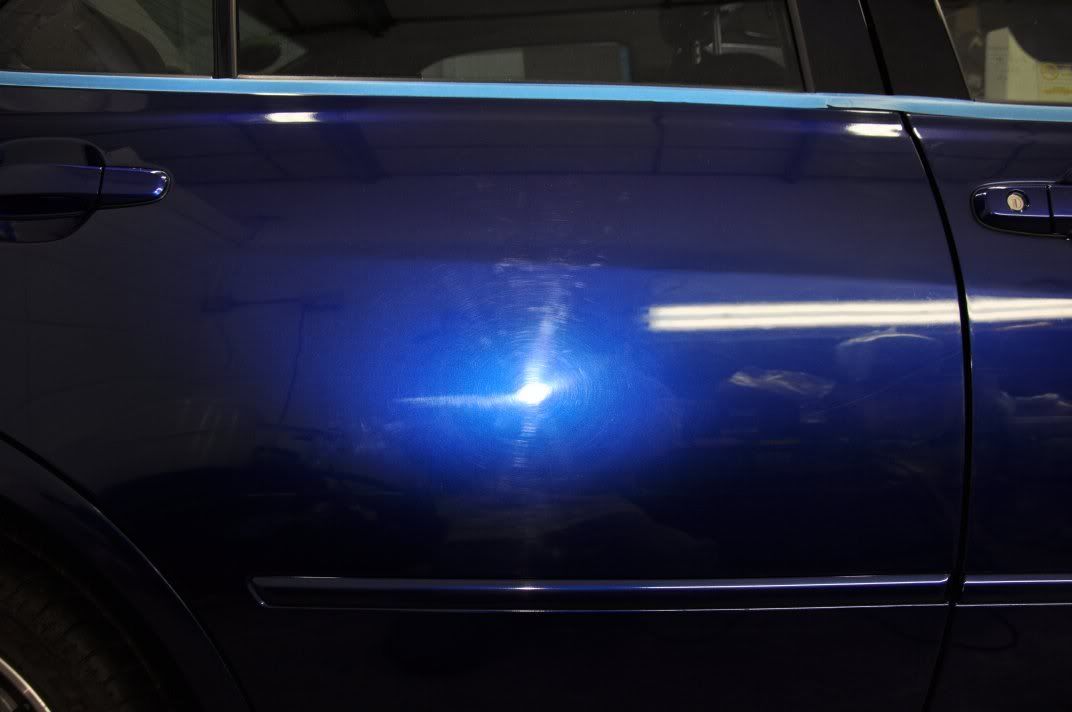
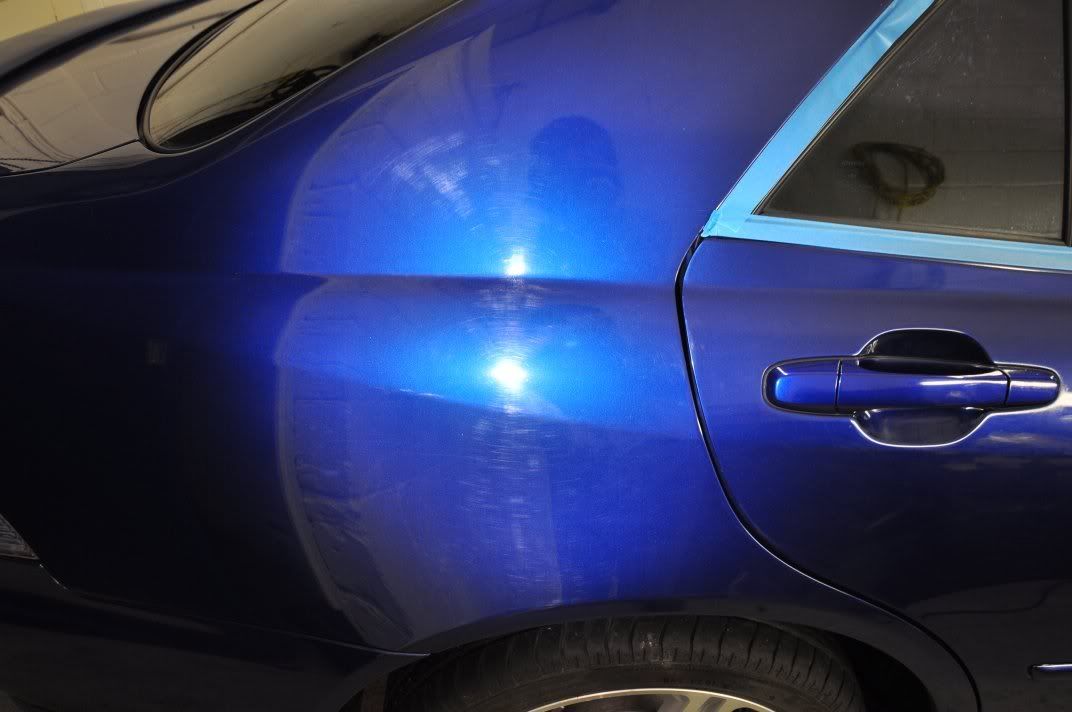
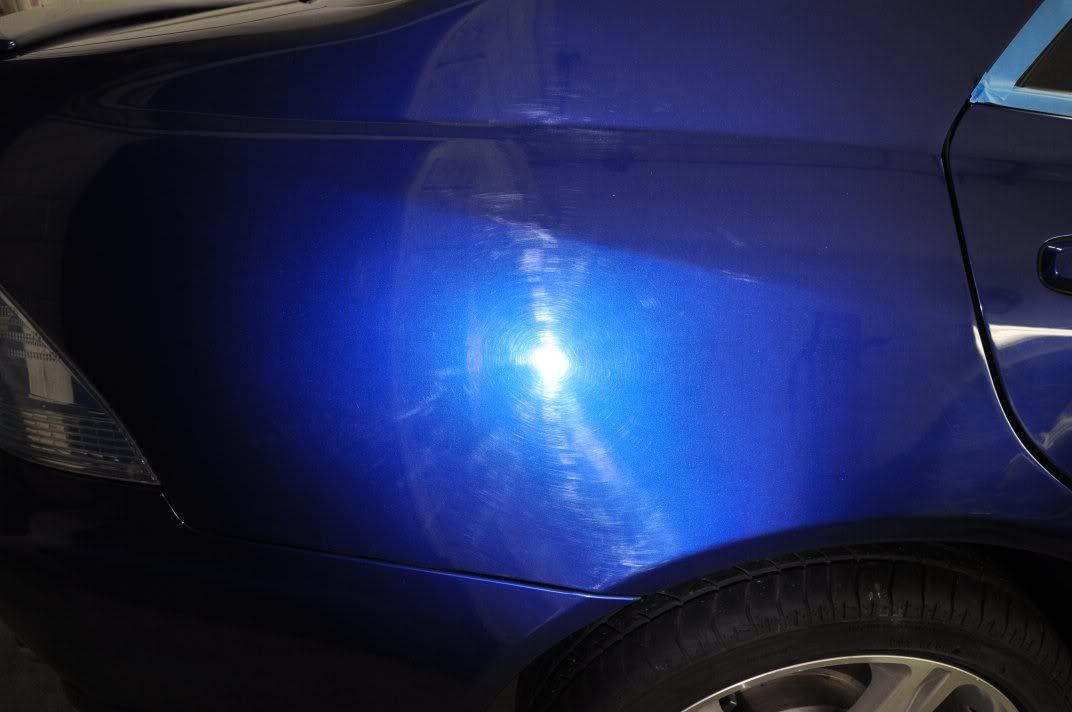
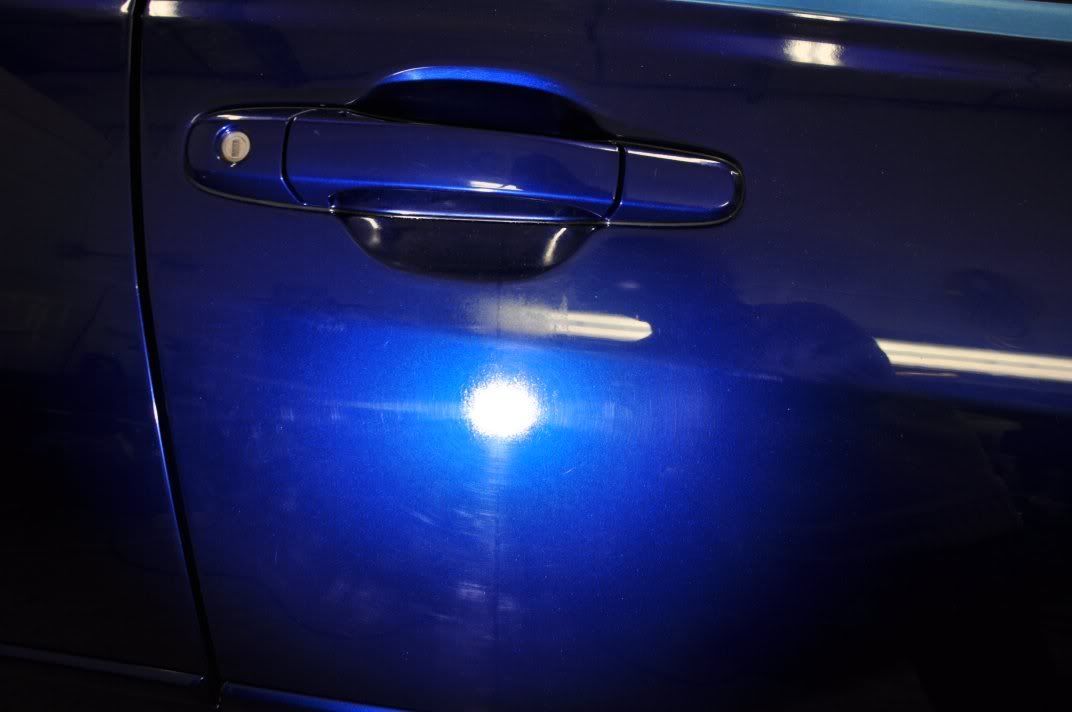
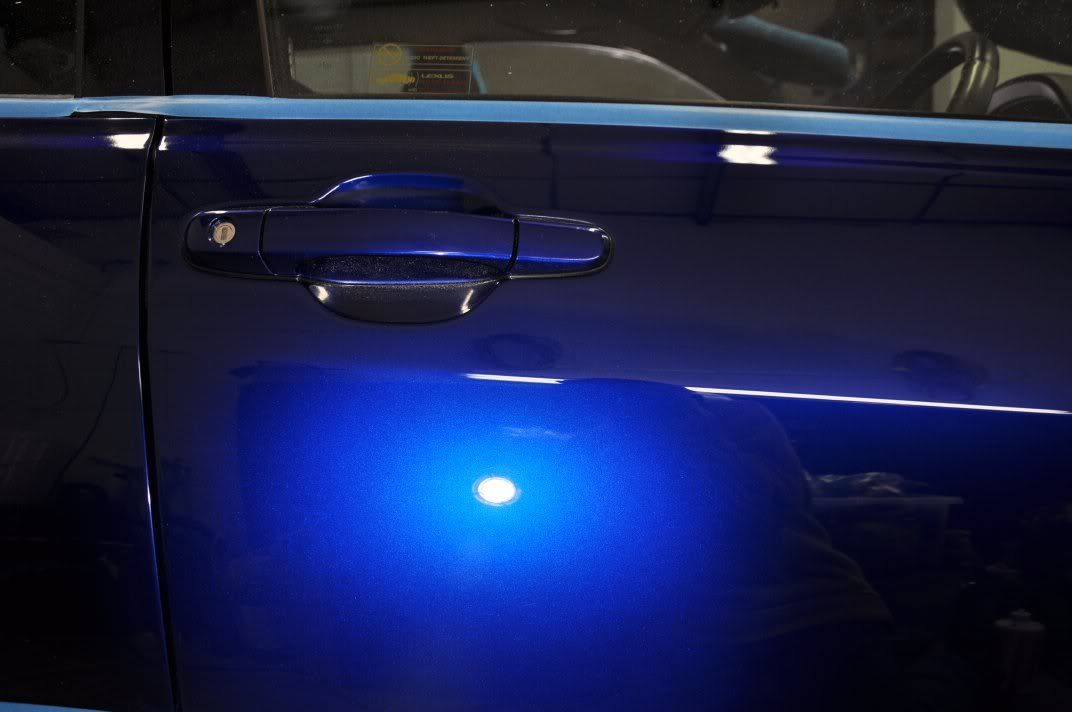
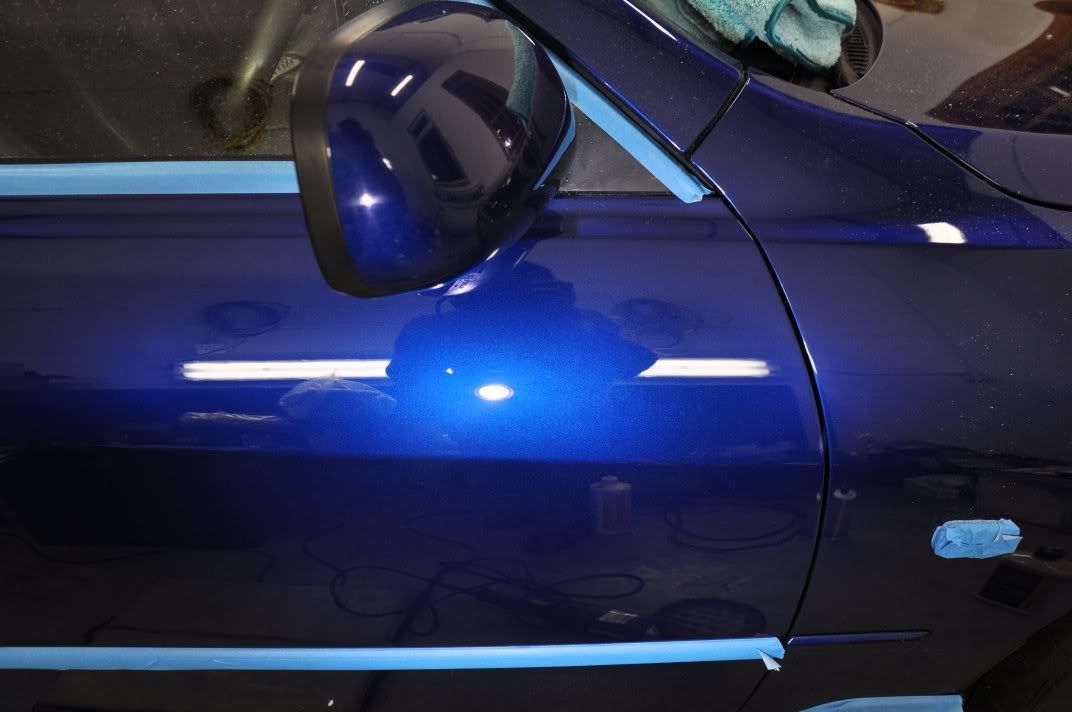
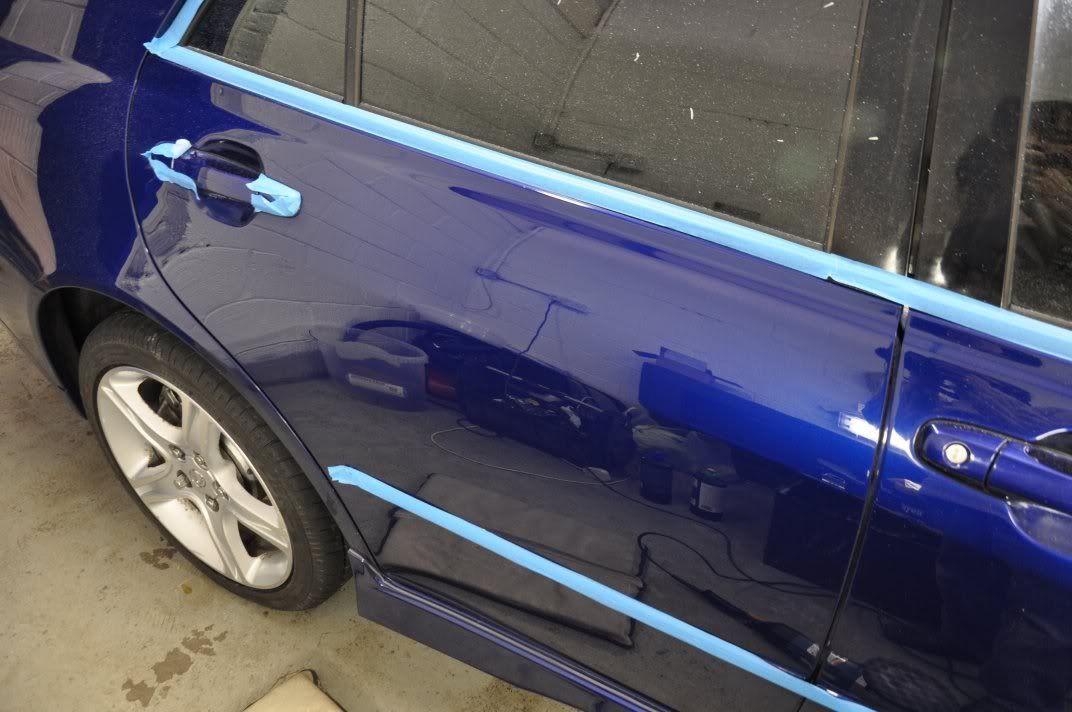
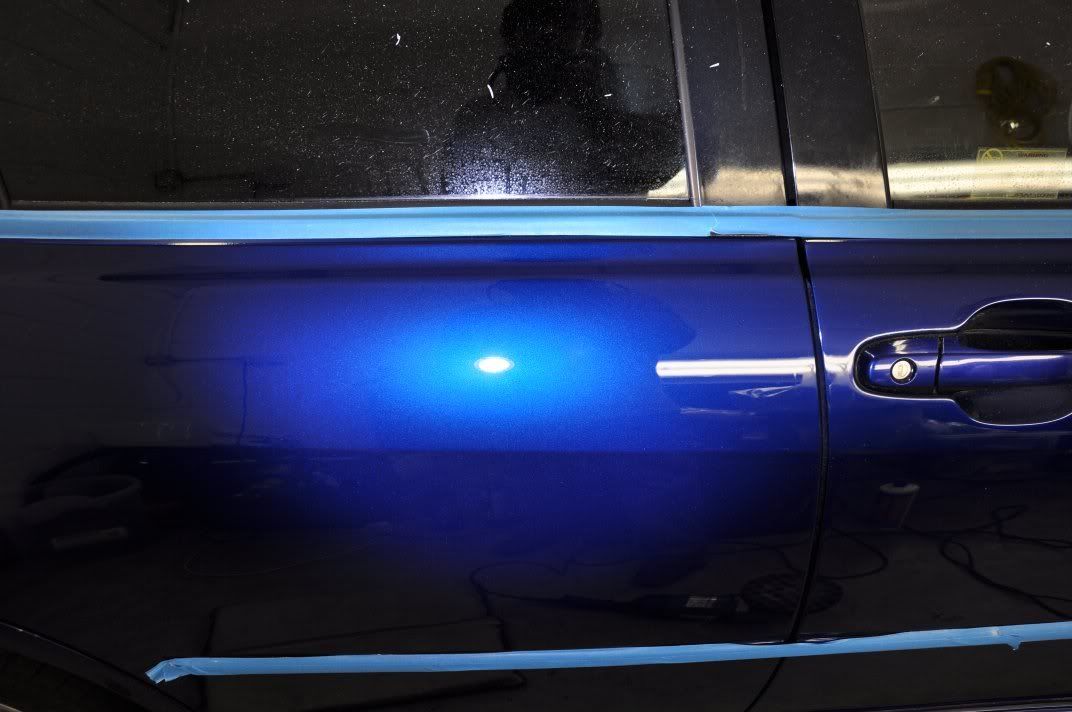
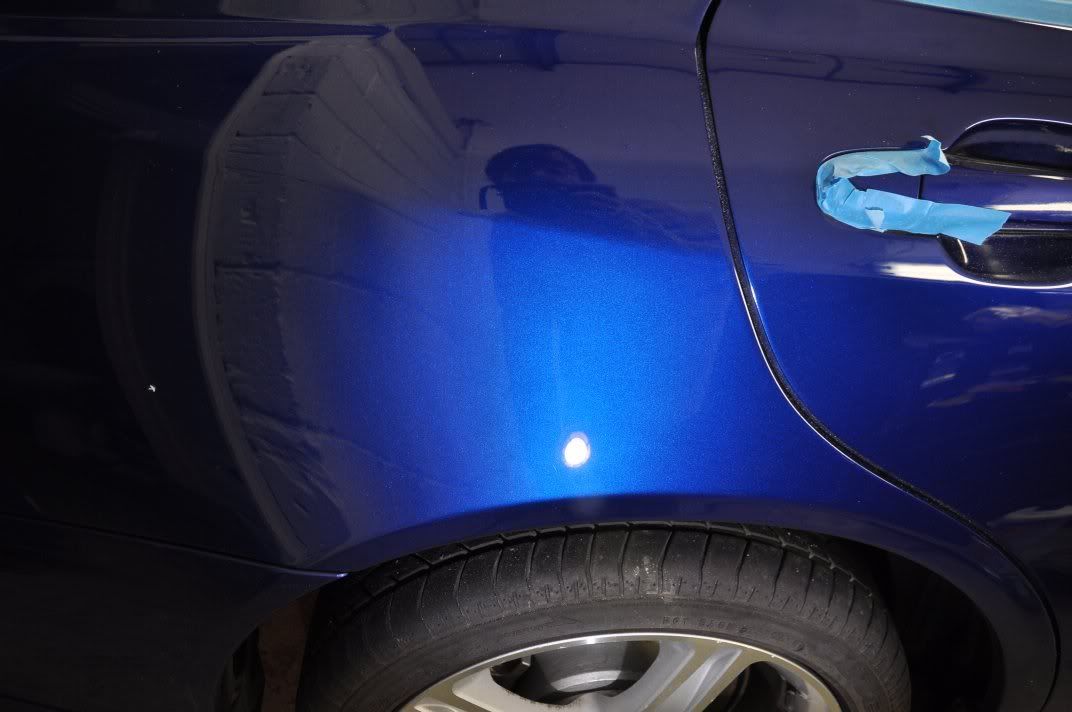
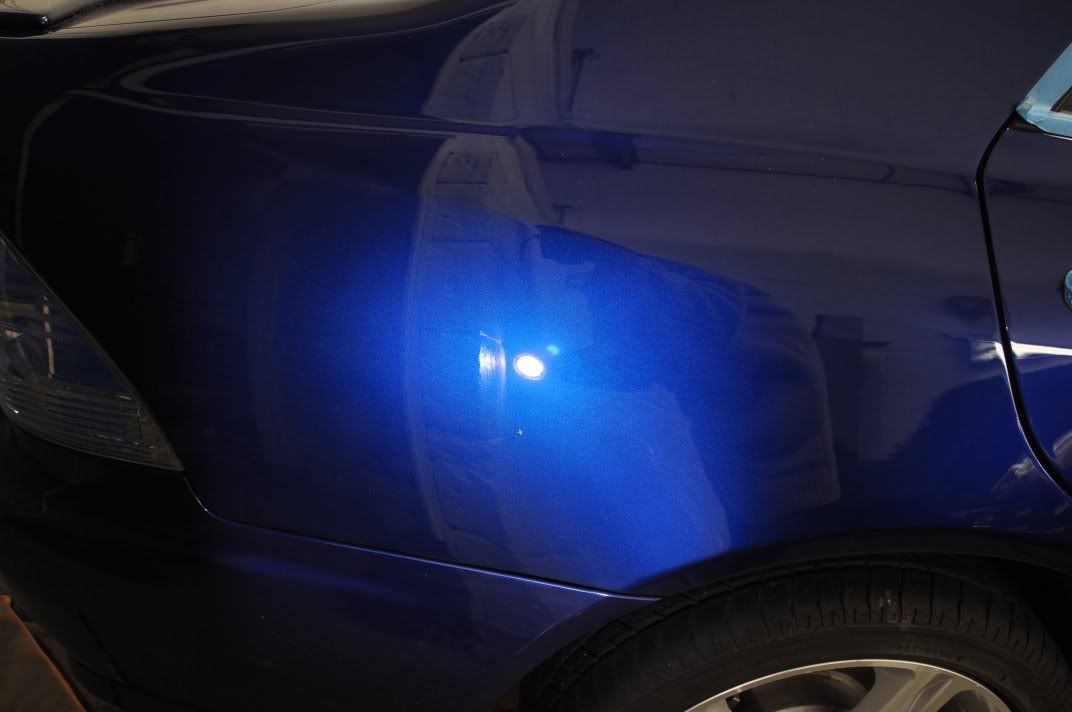
    The rear three quarter presented little problems for Gordon. The befores:
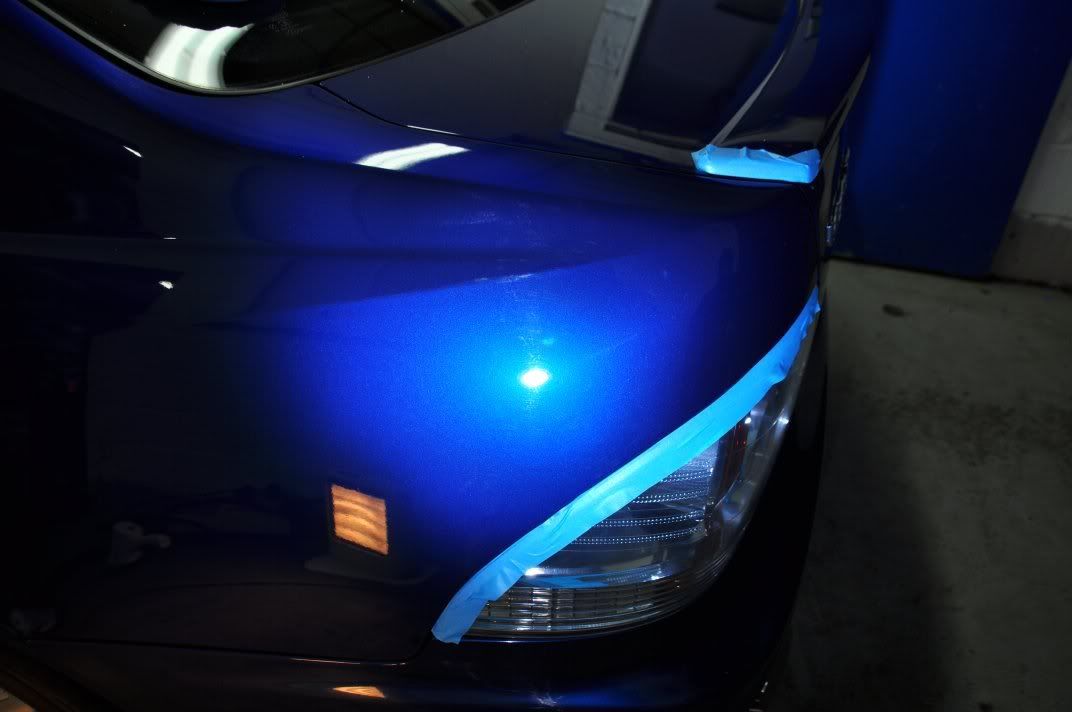
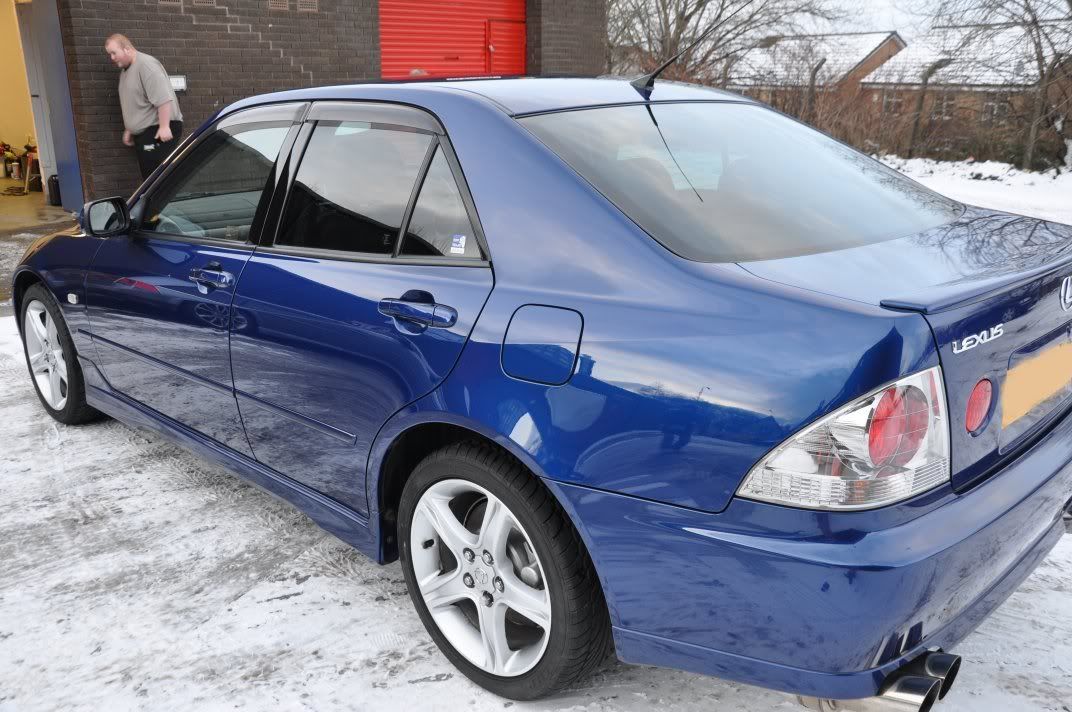
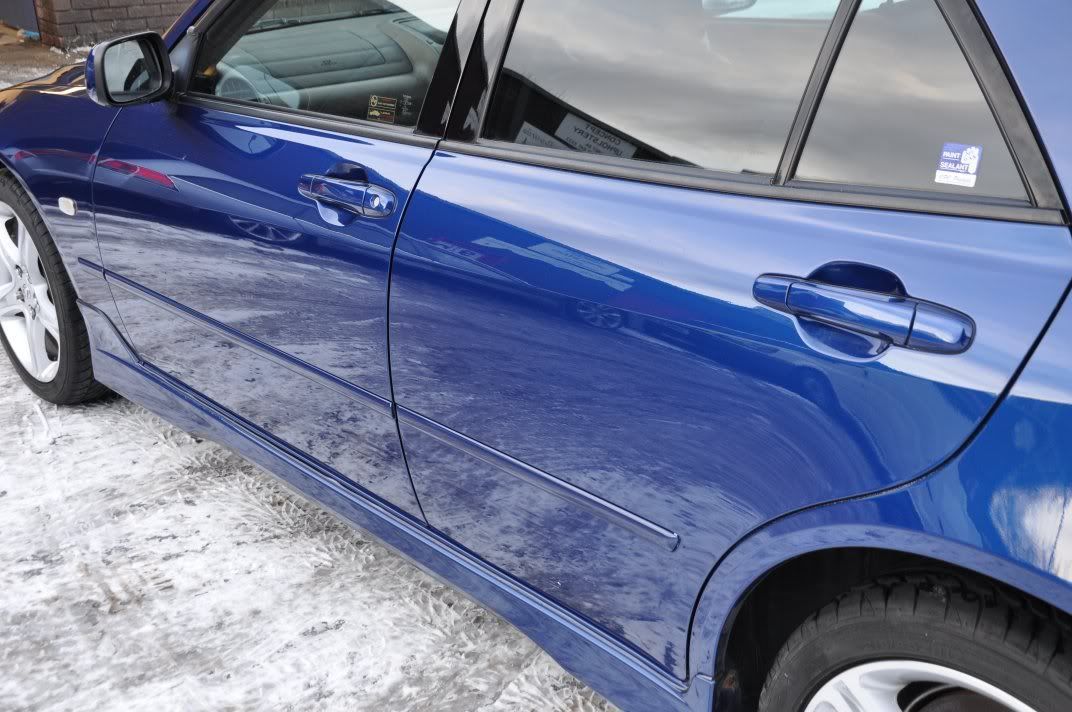
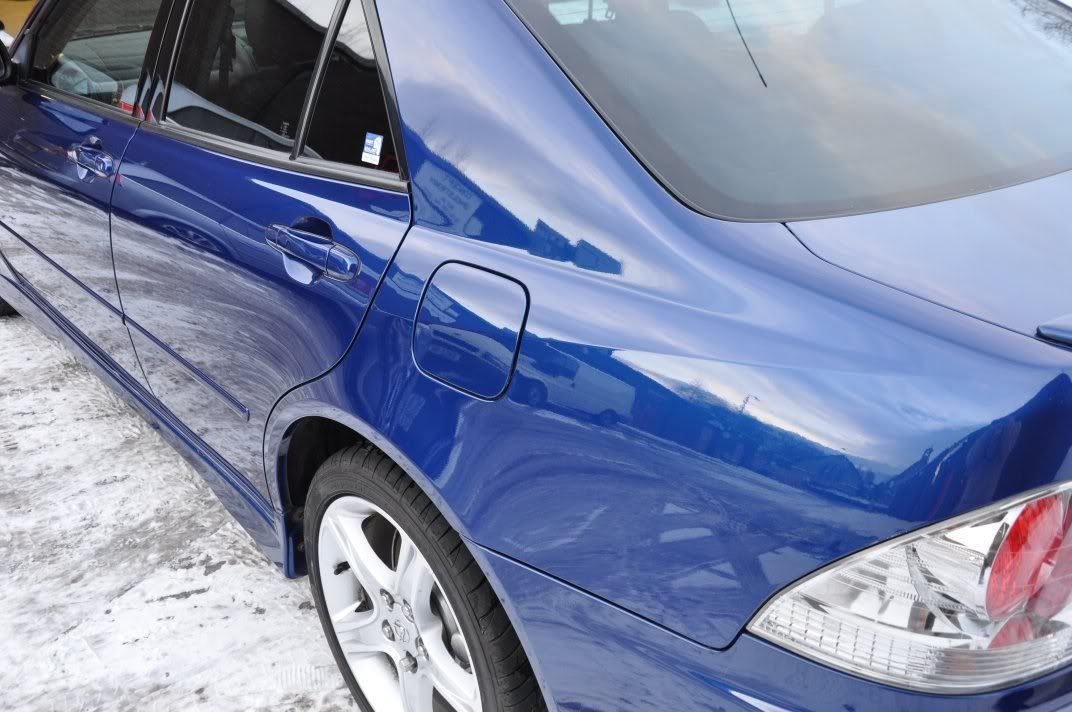
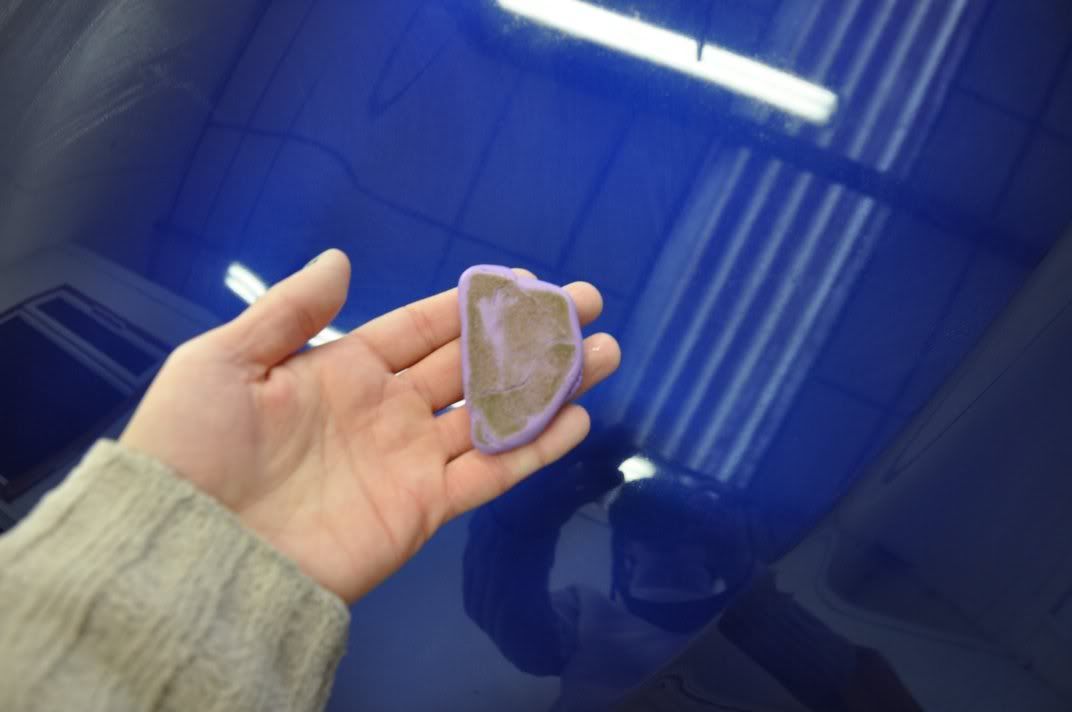
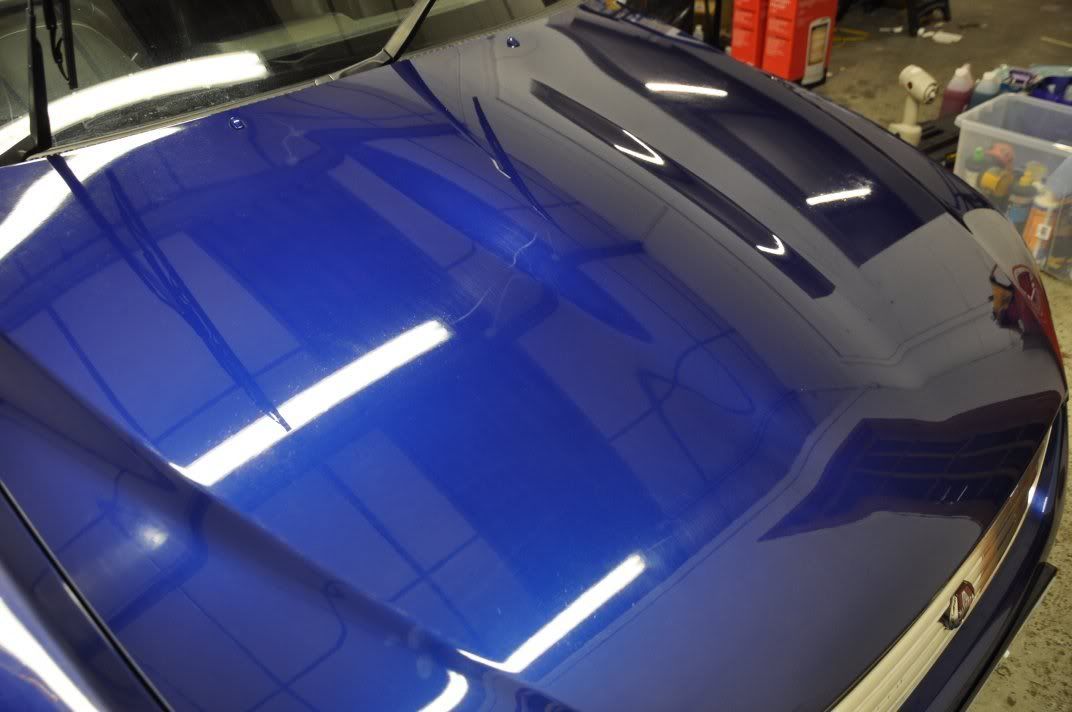
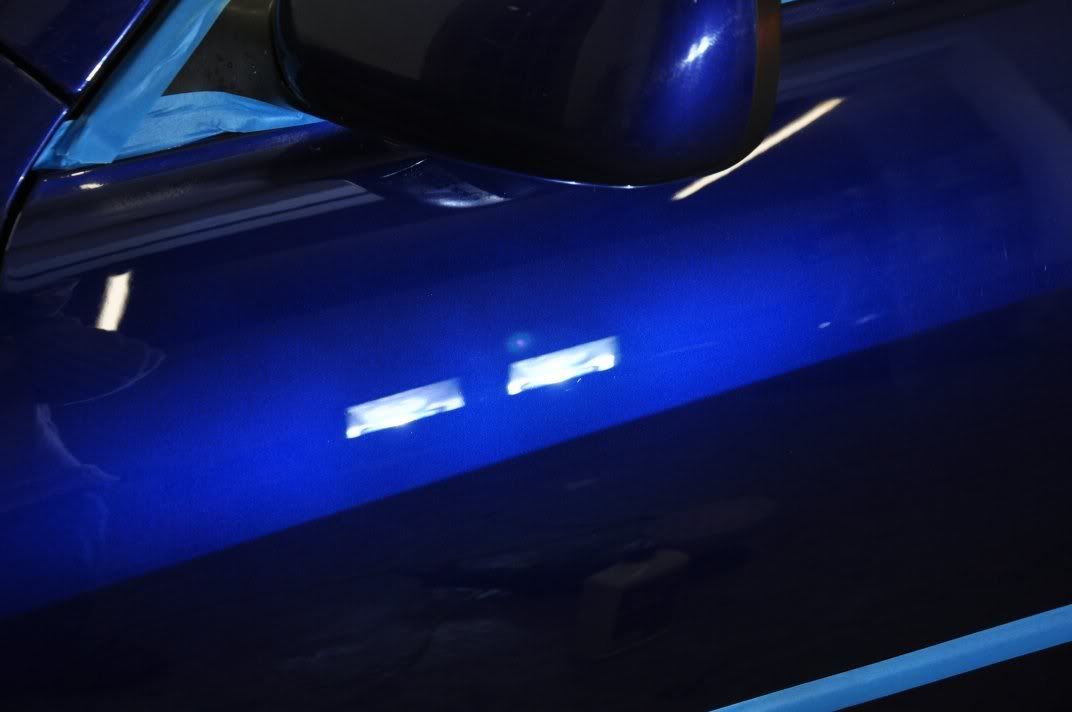
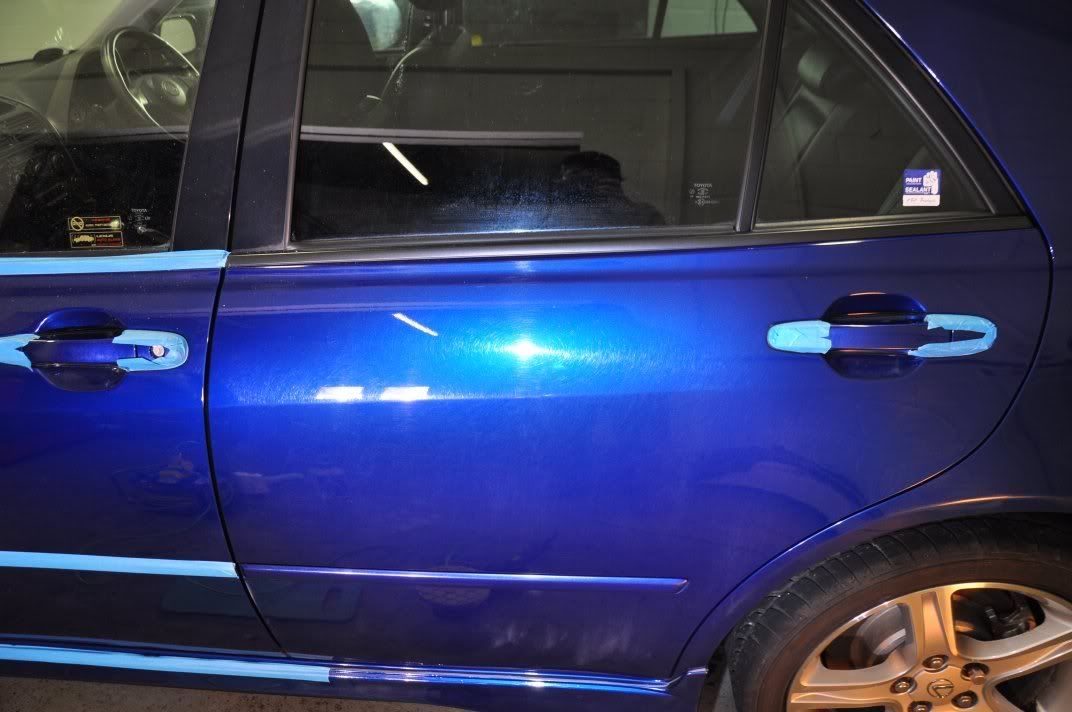
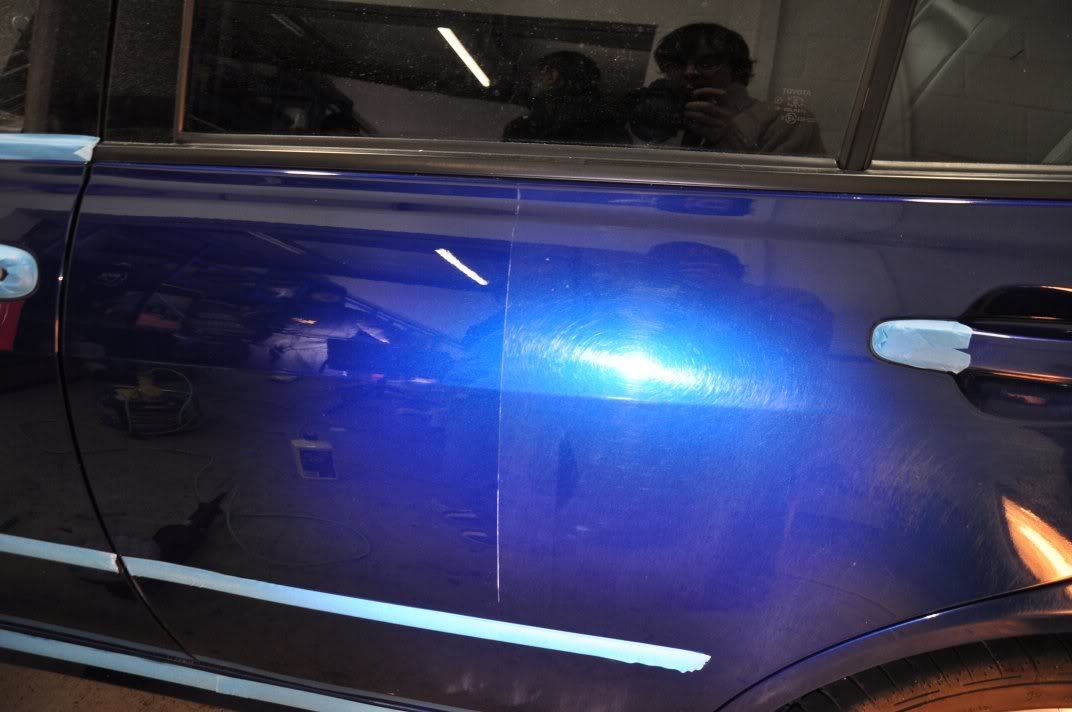
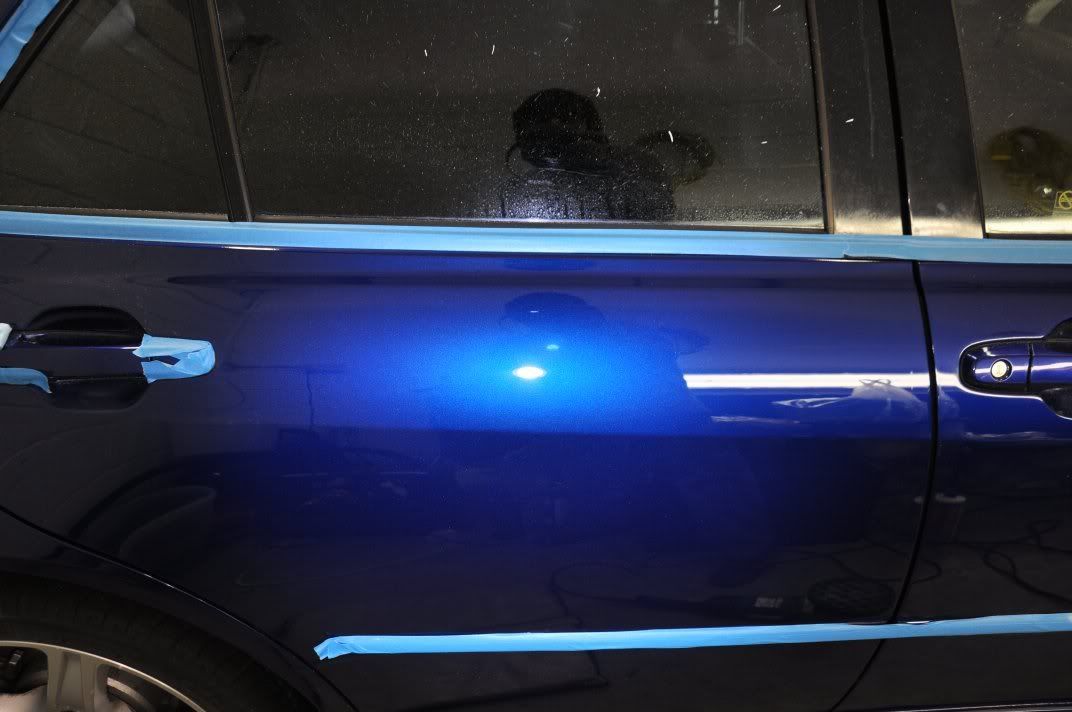
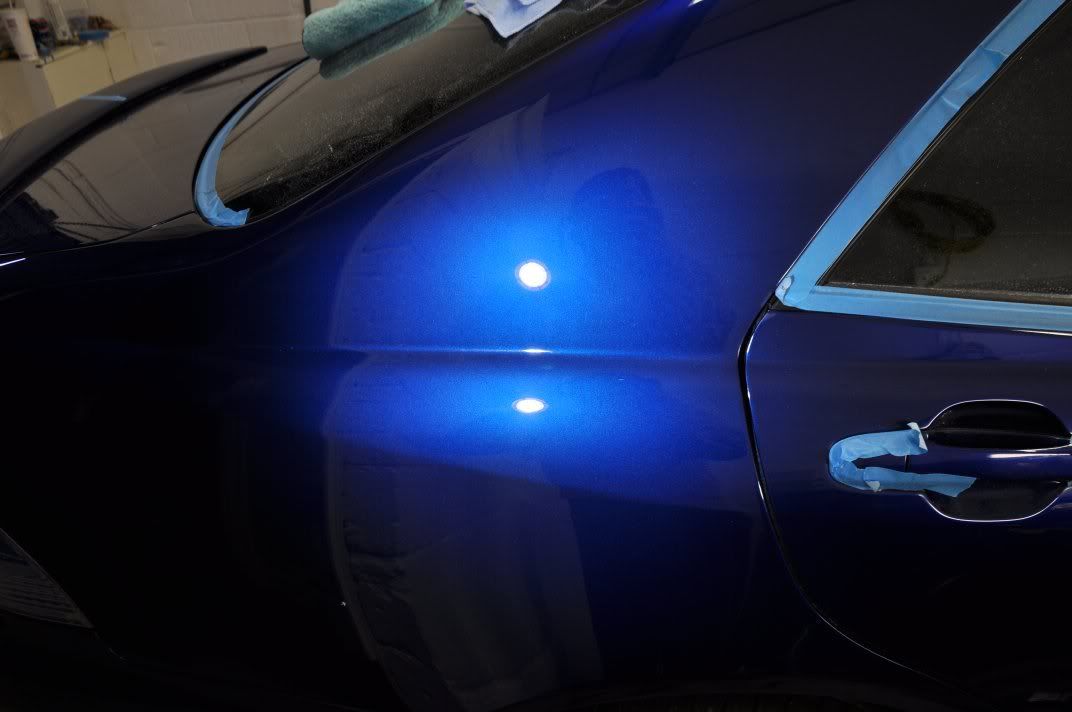


    And the afters...


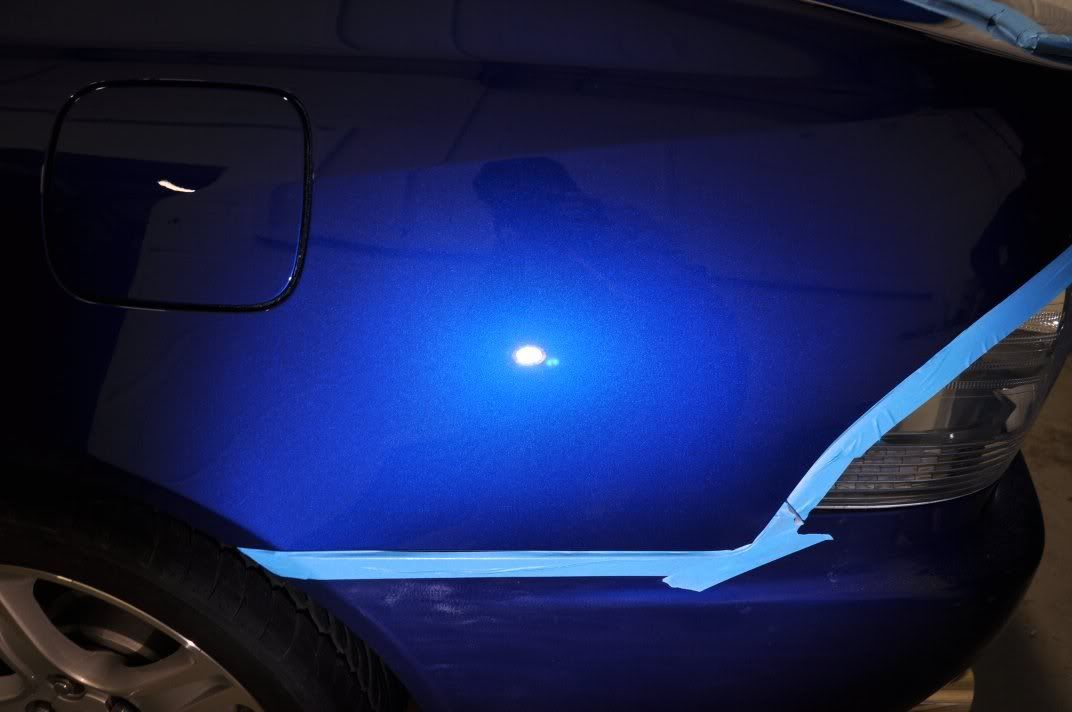
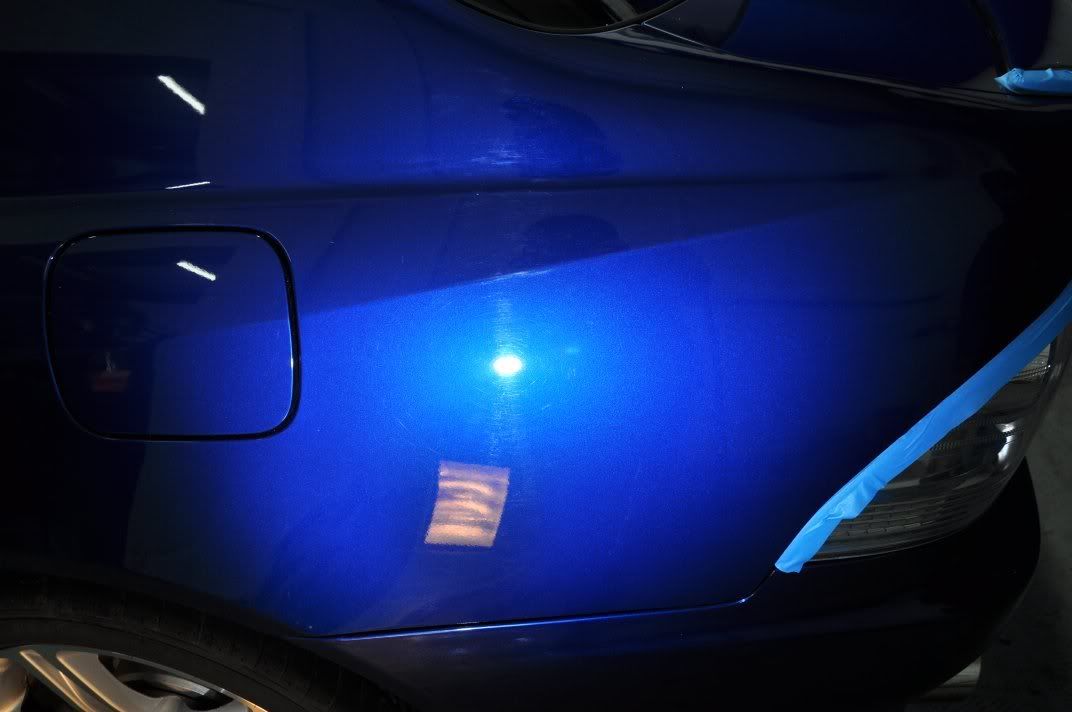
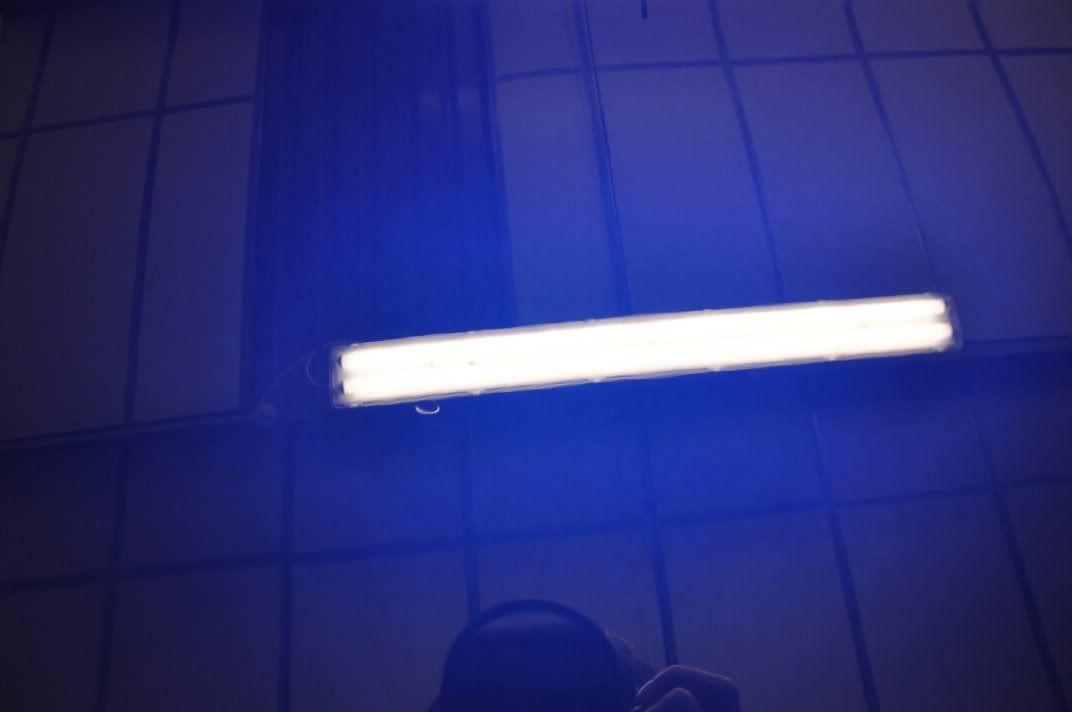
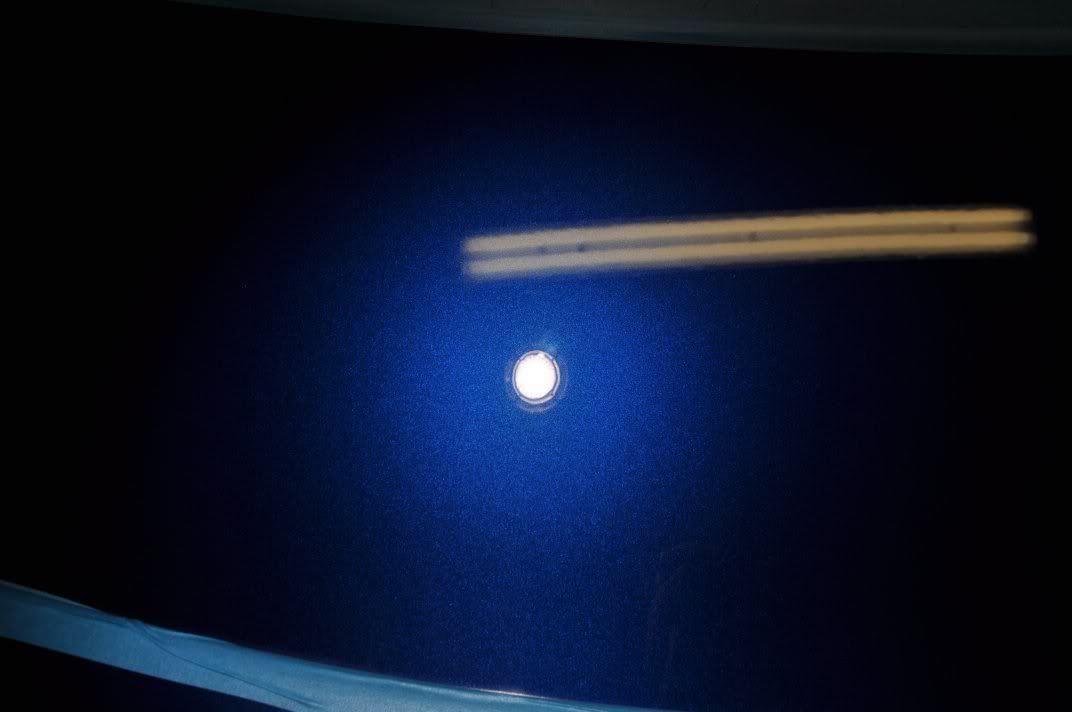
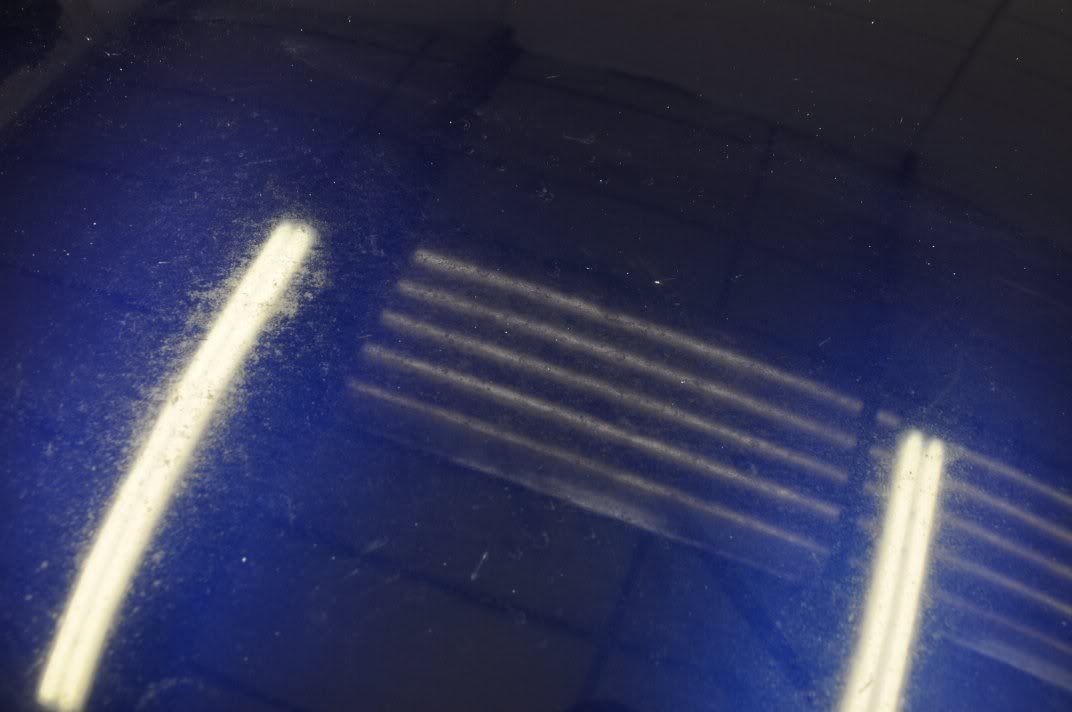
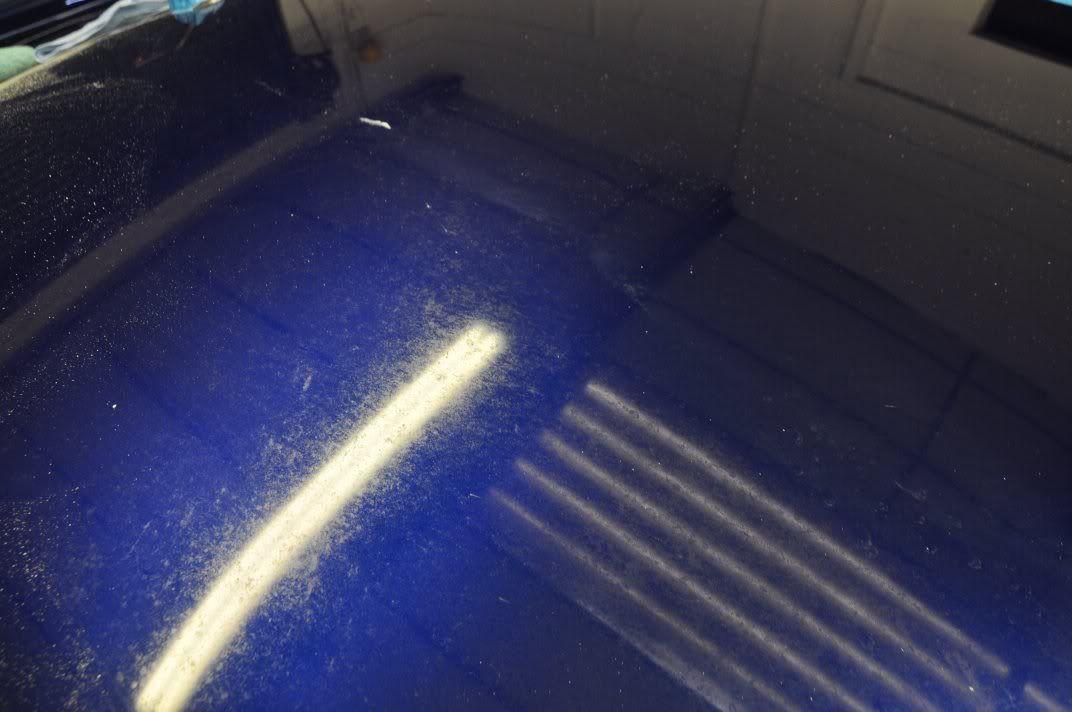
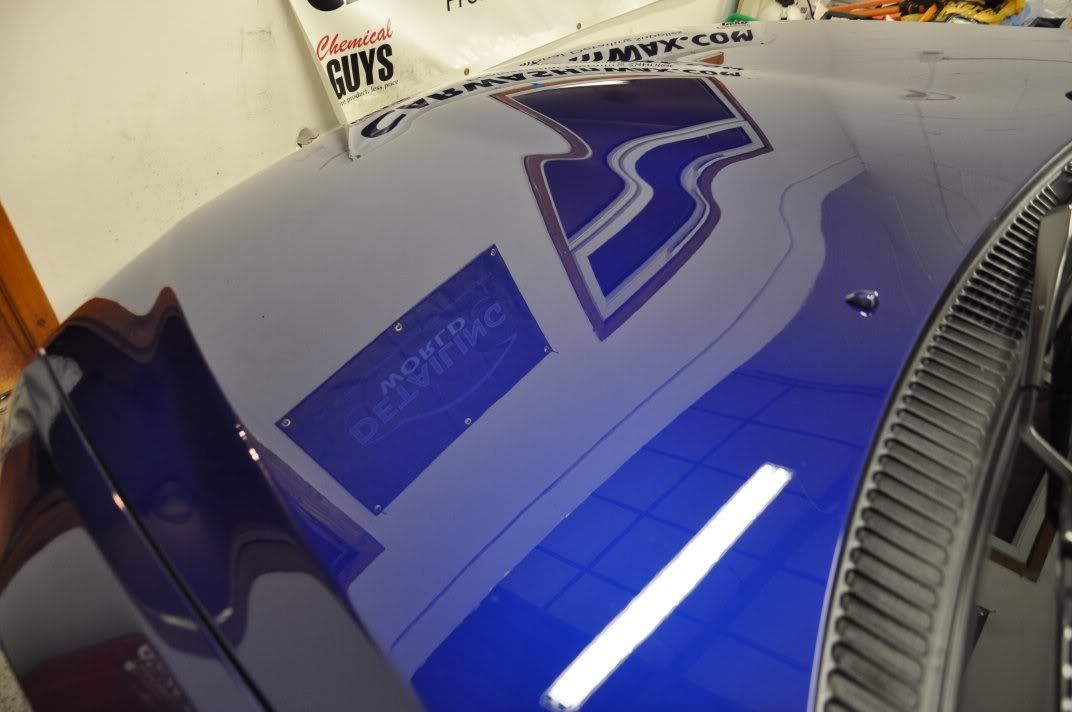
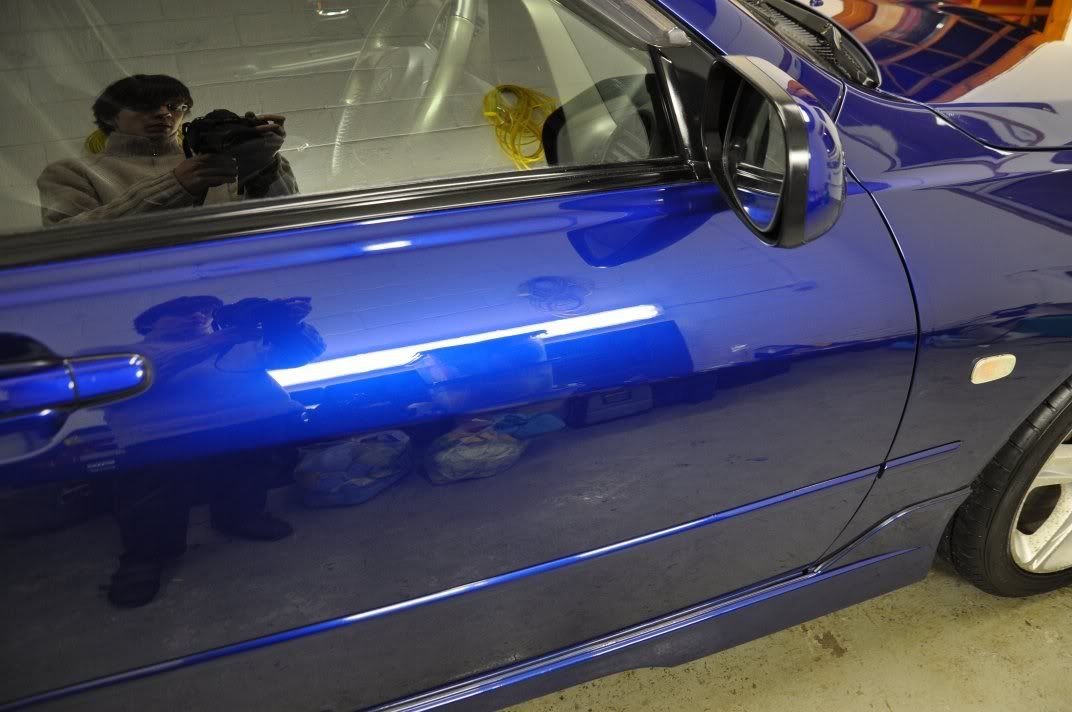
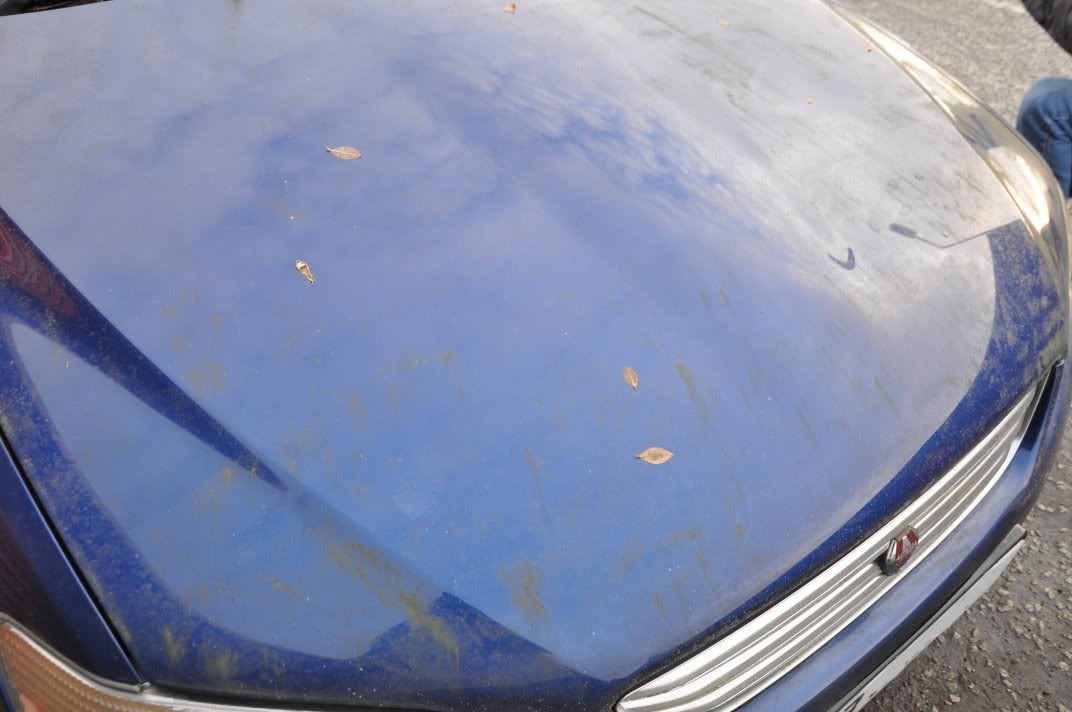
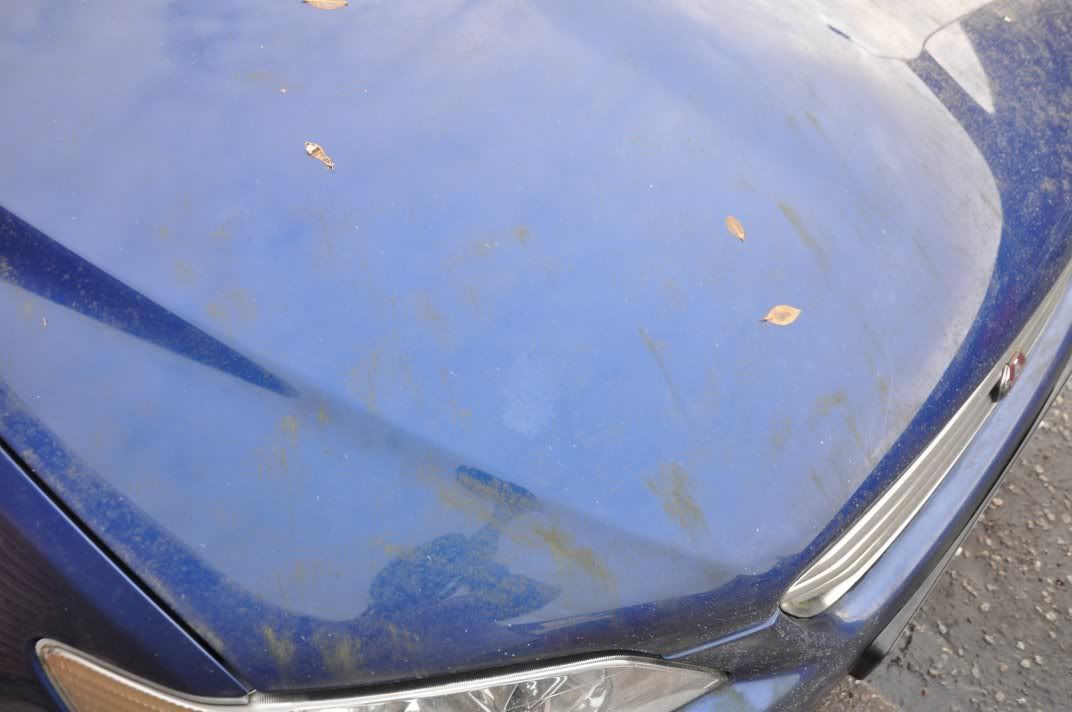
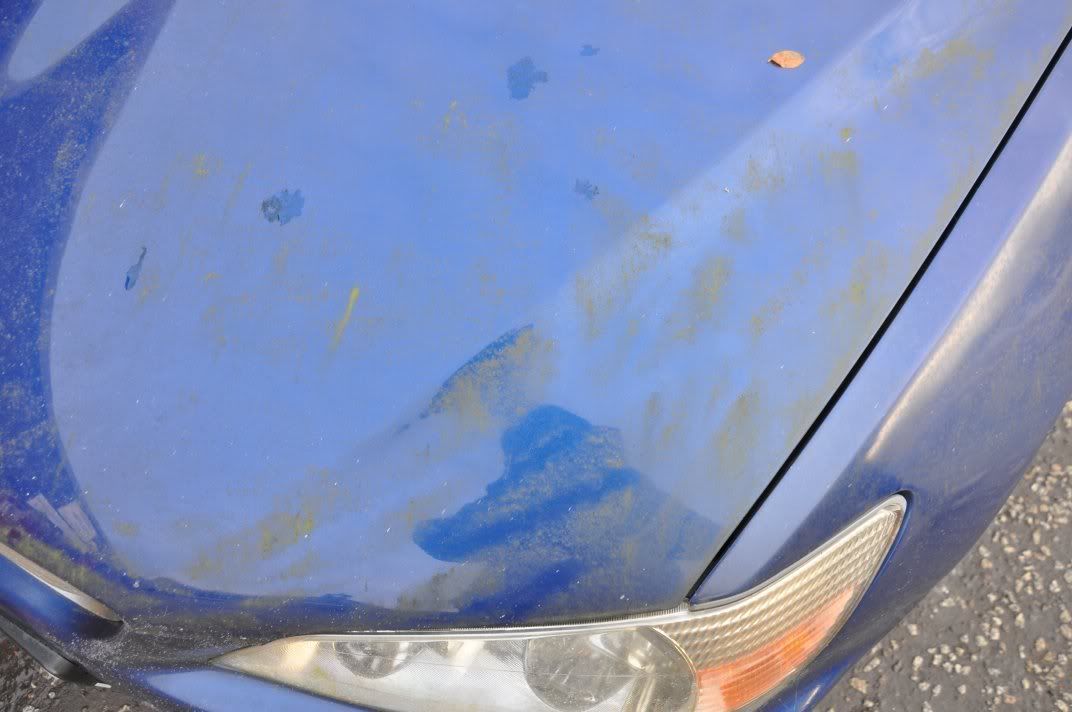
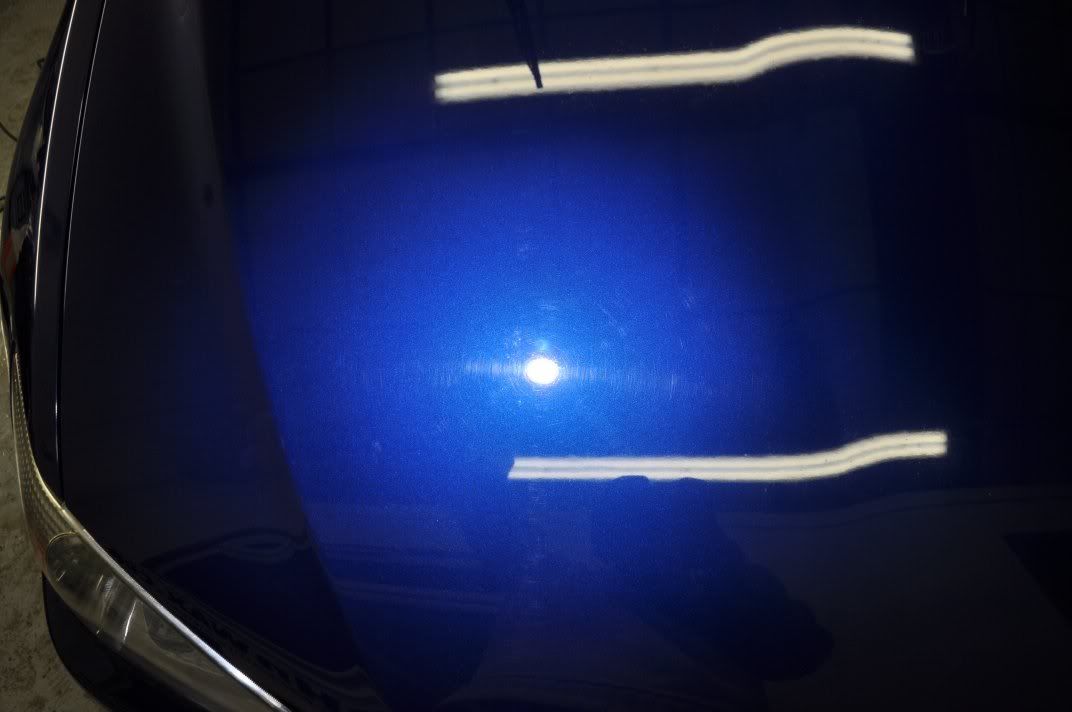
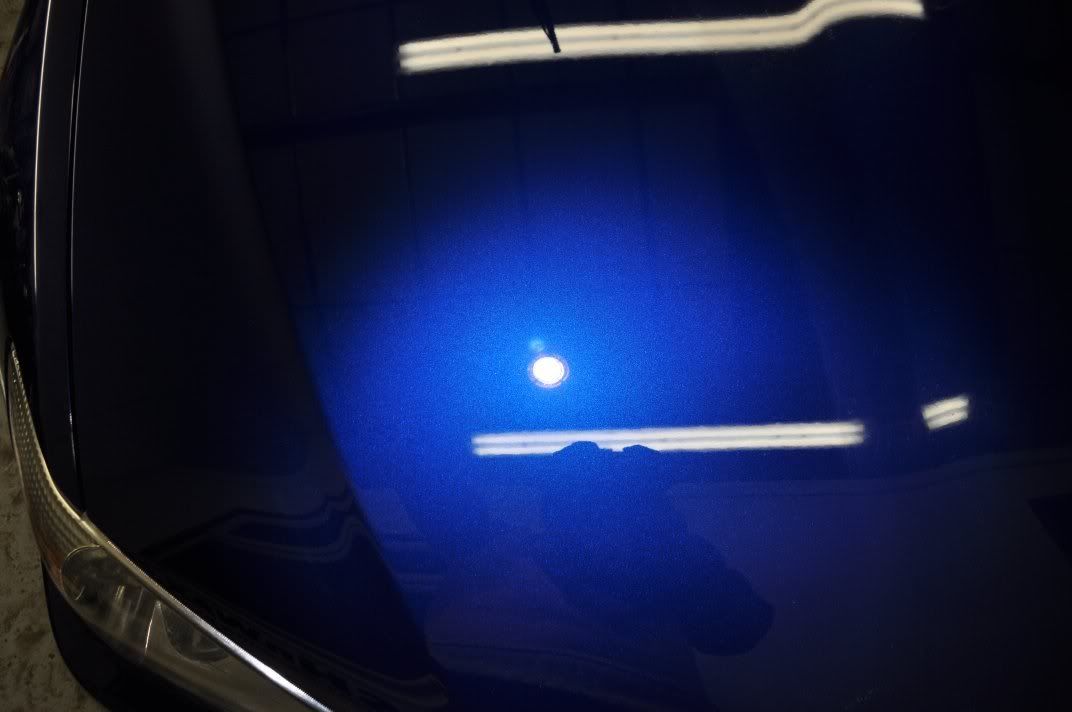
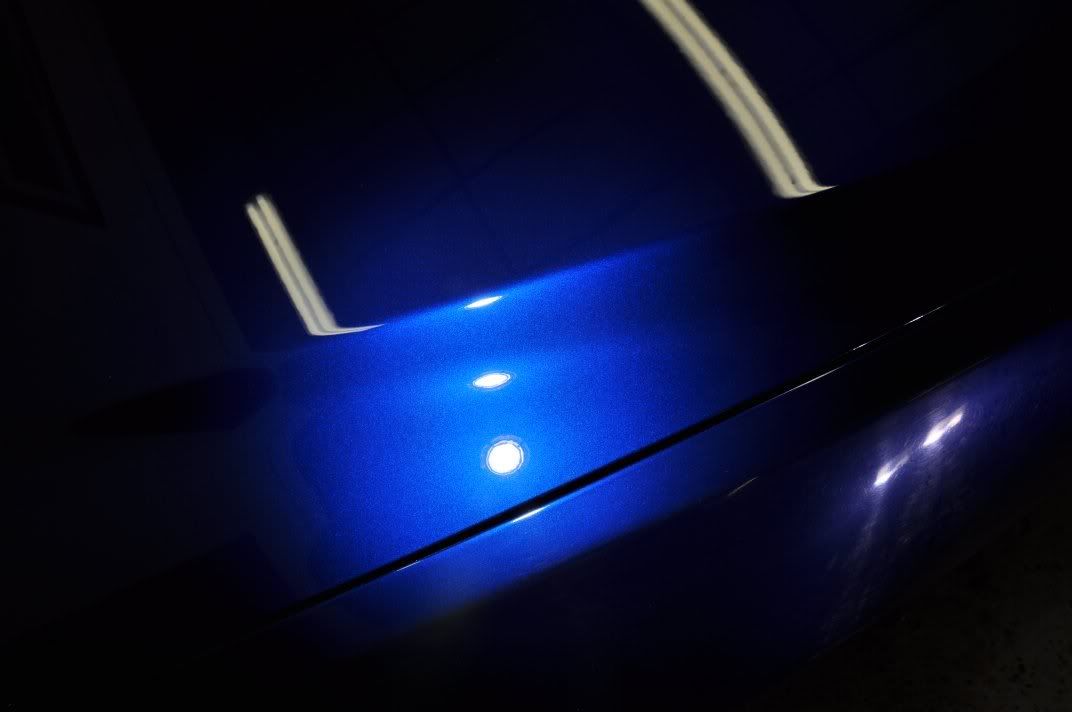
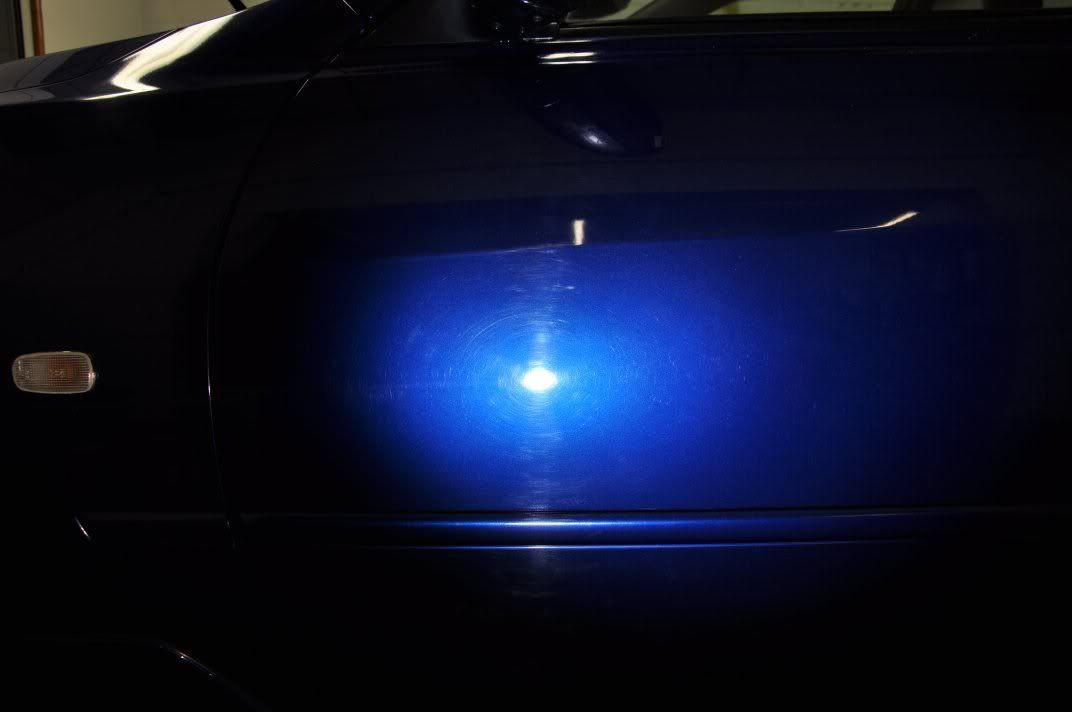
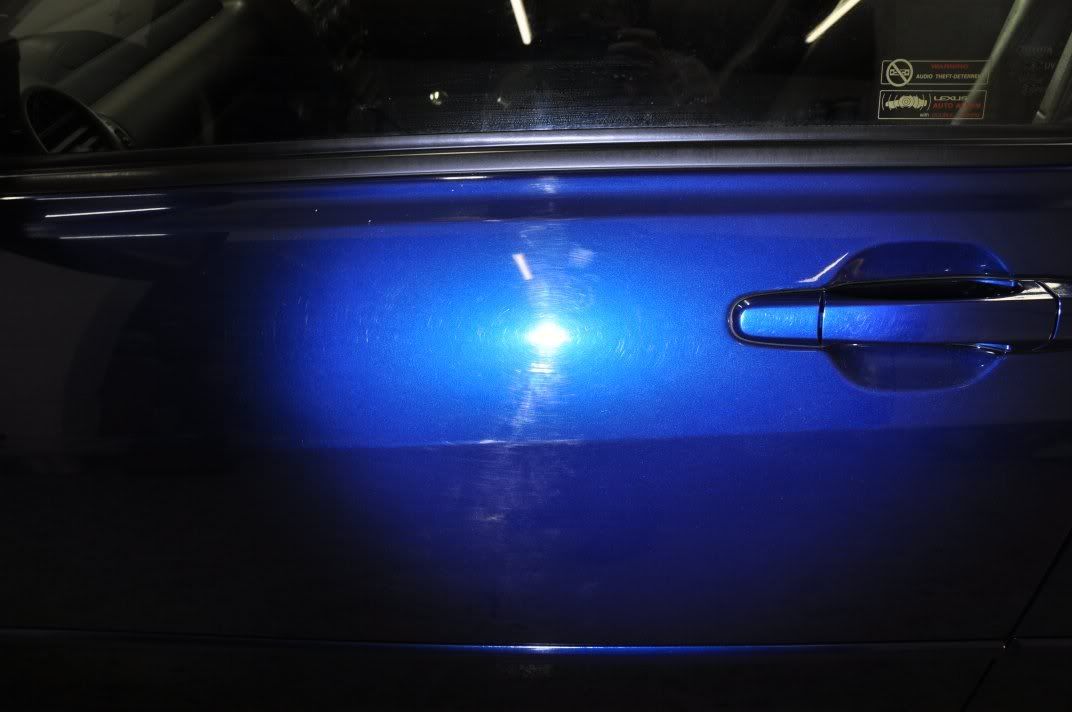
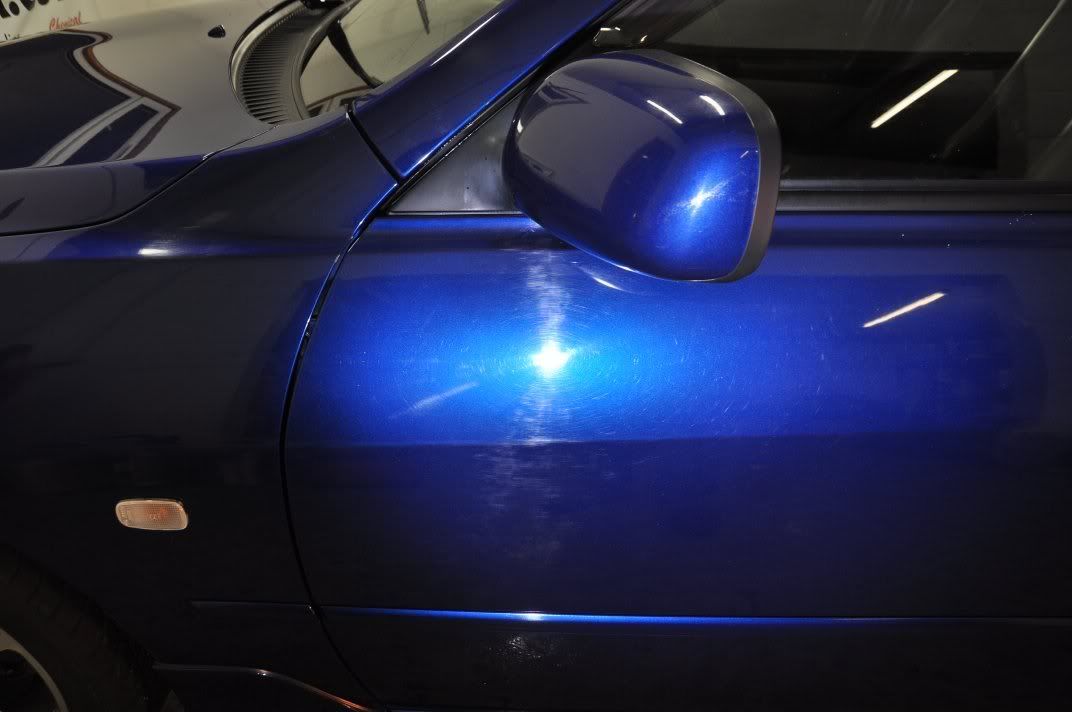
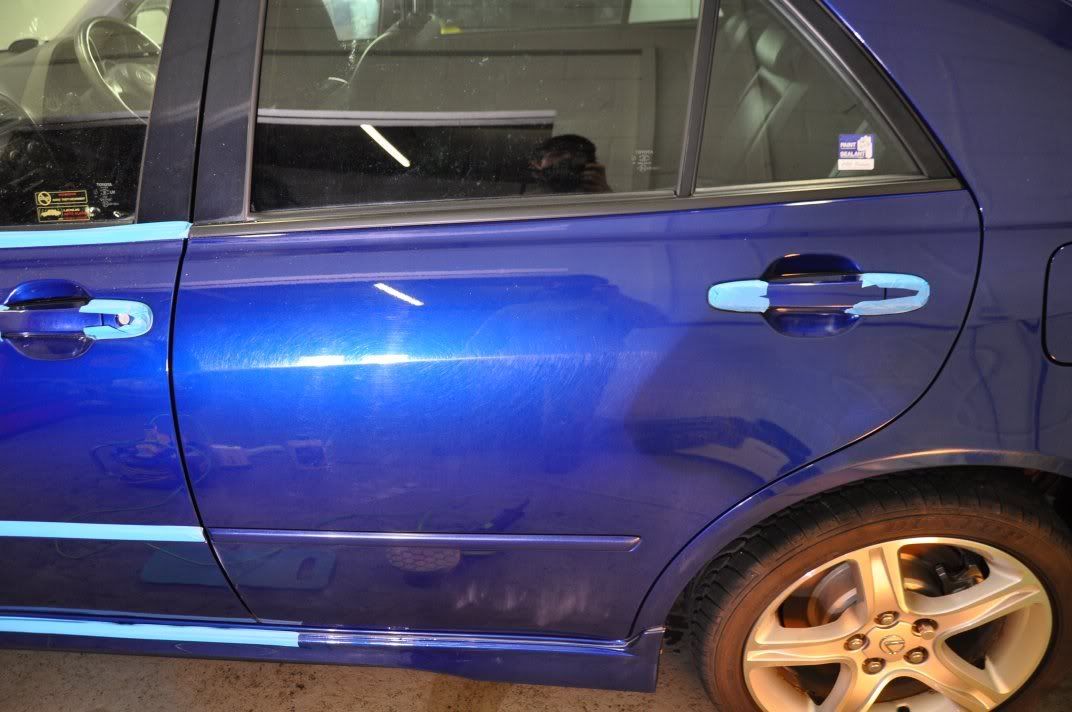
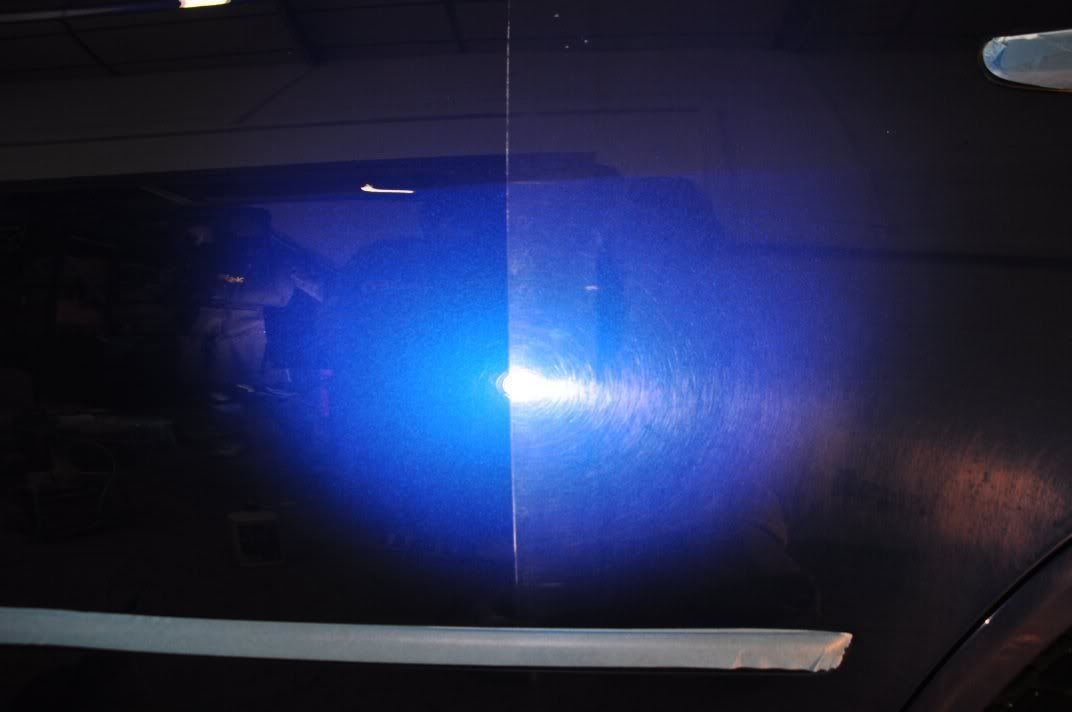
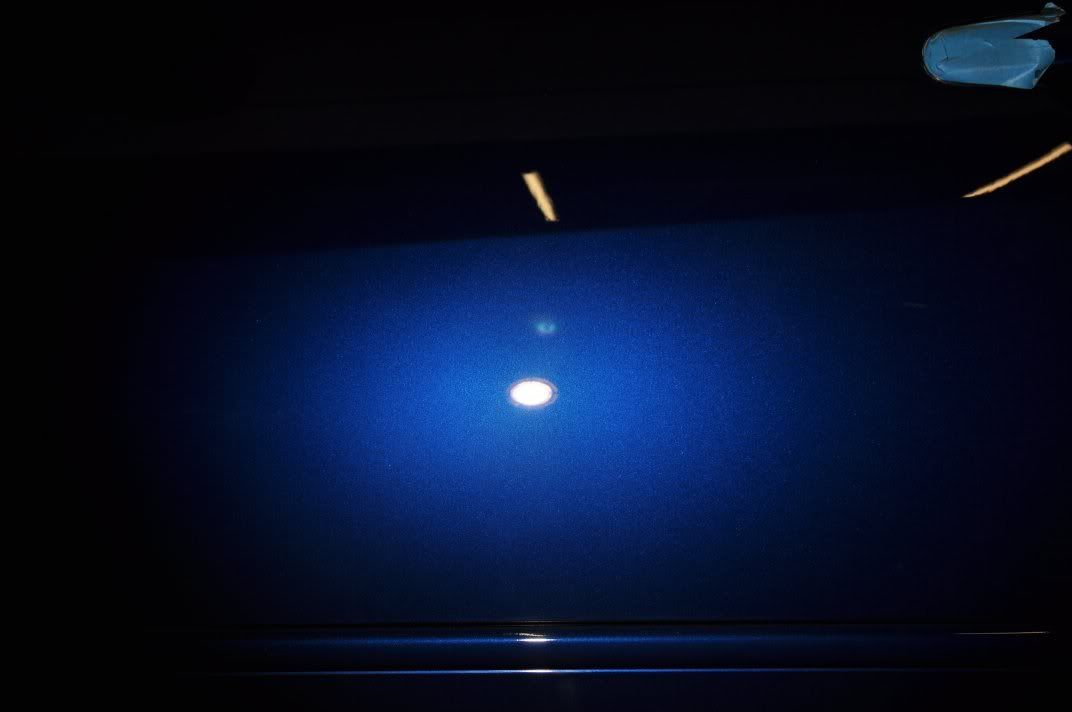
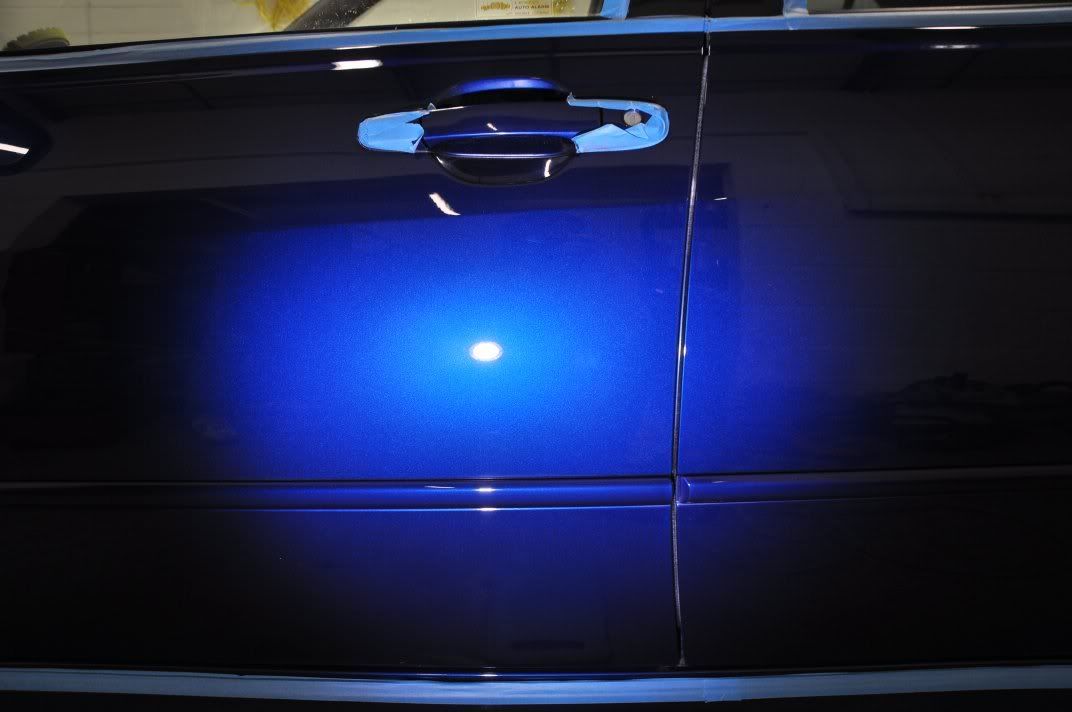
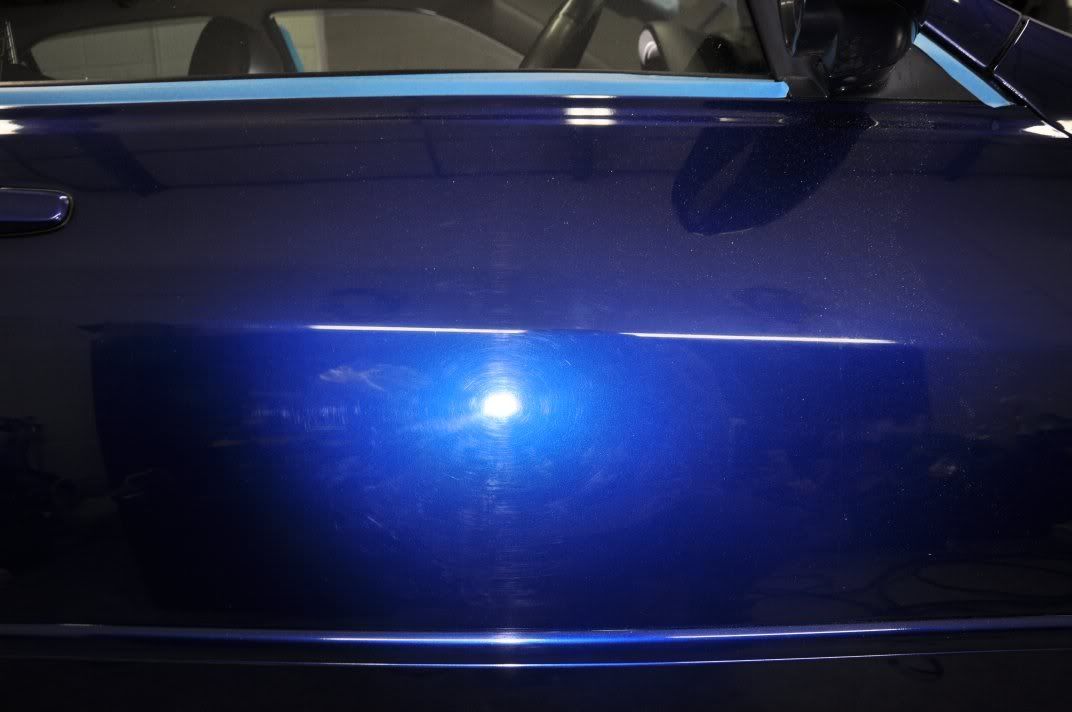
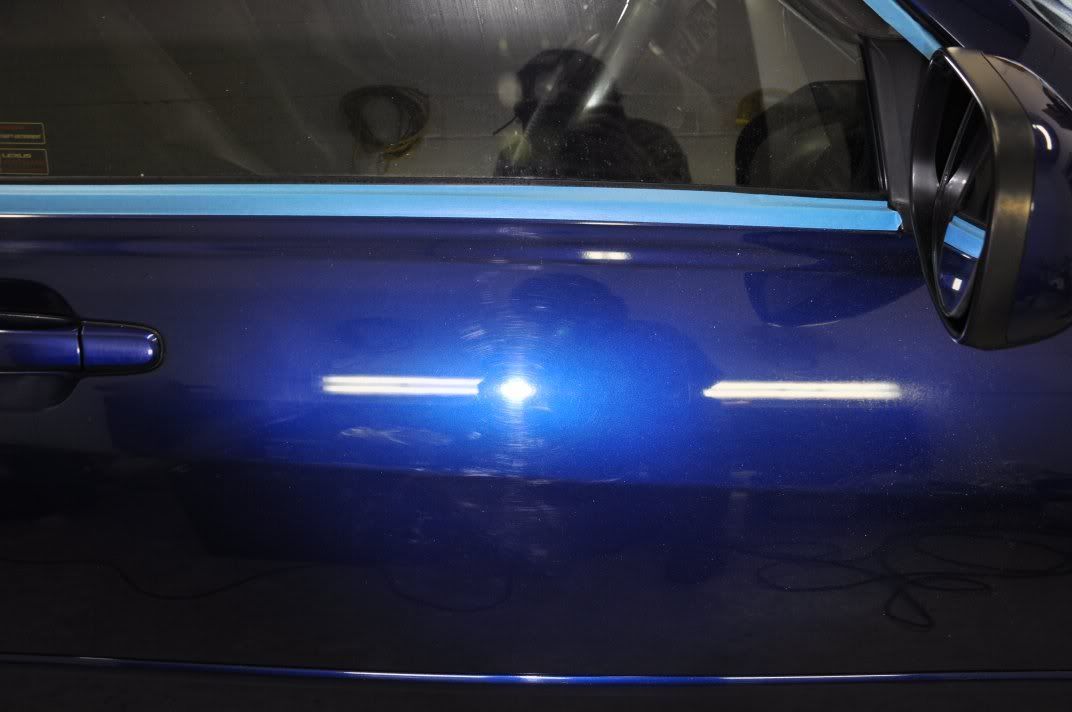
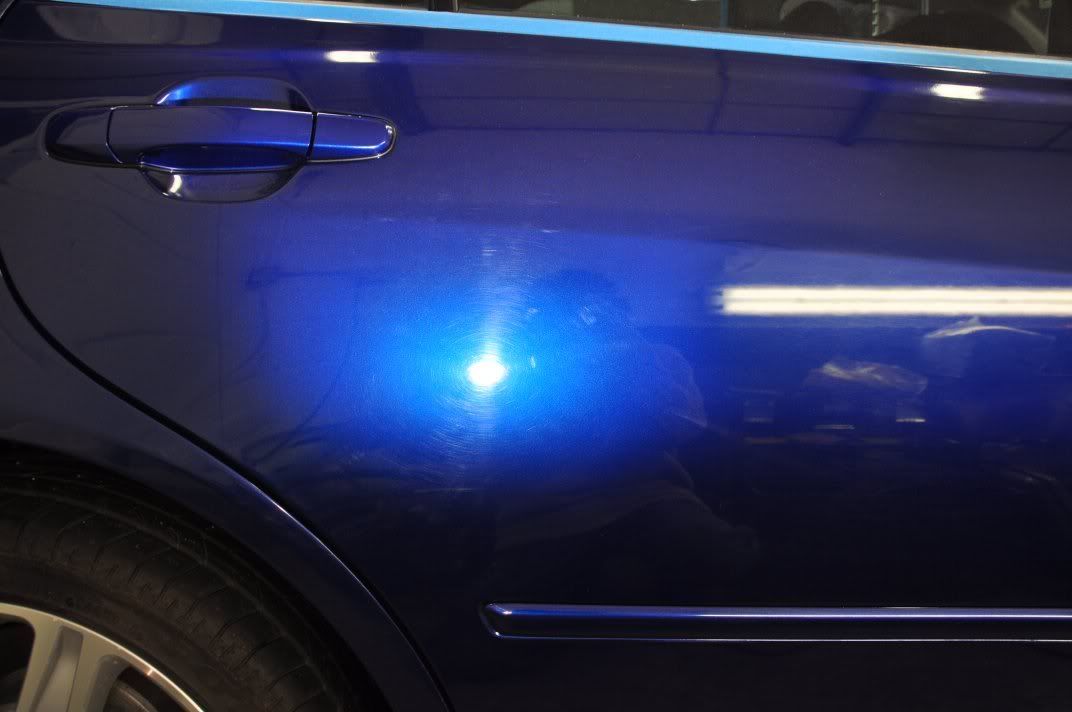
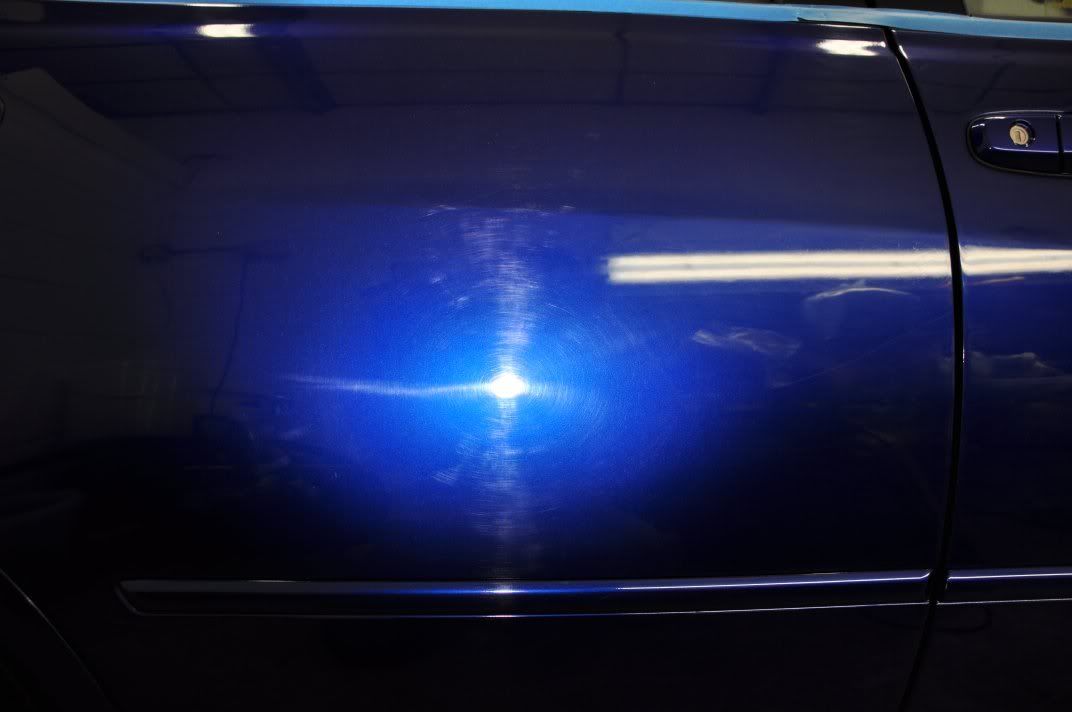
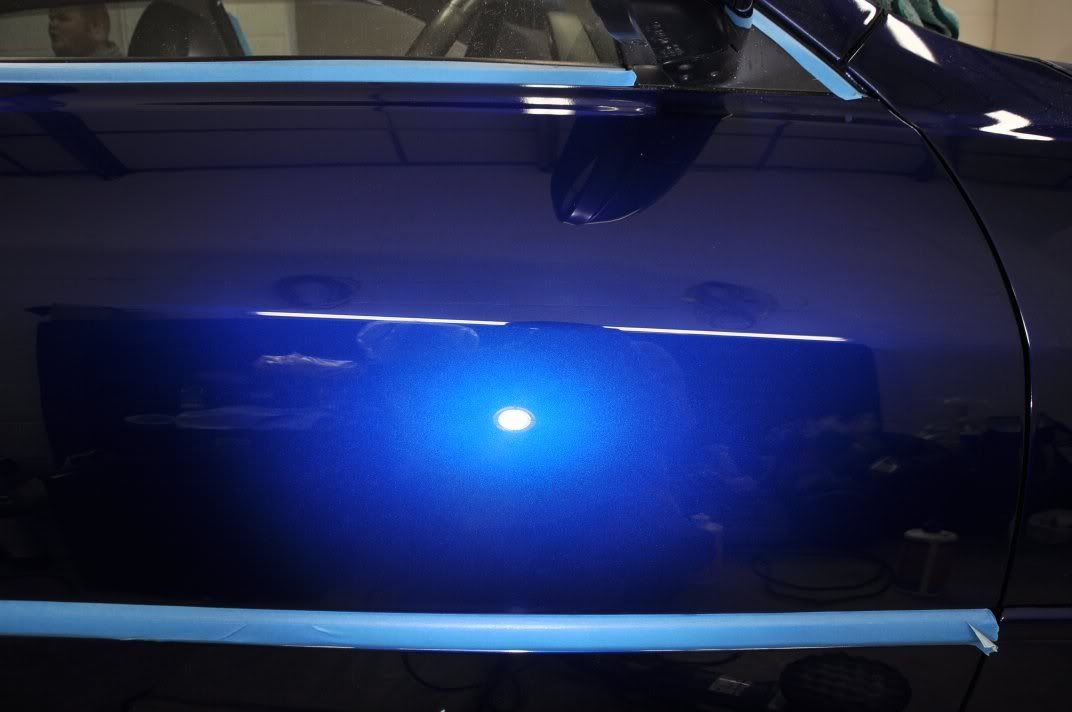
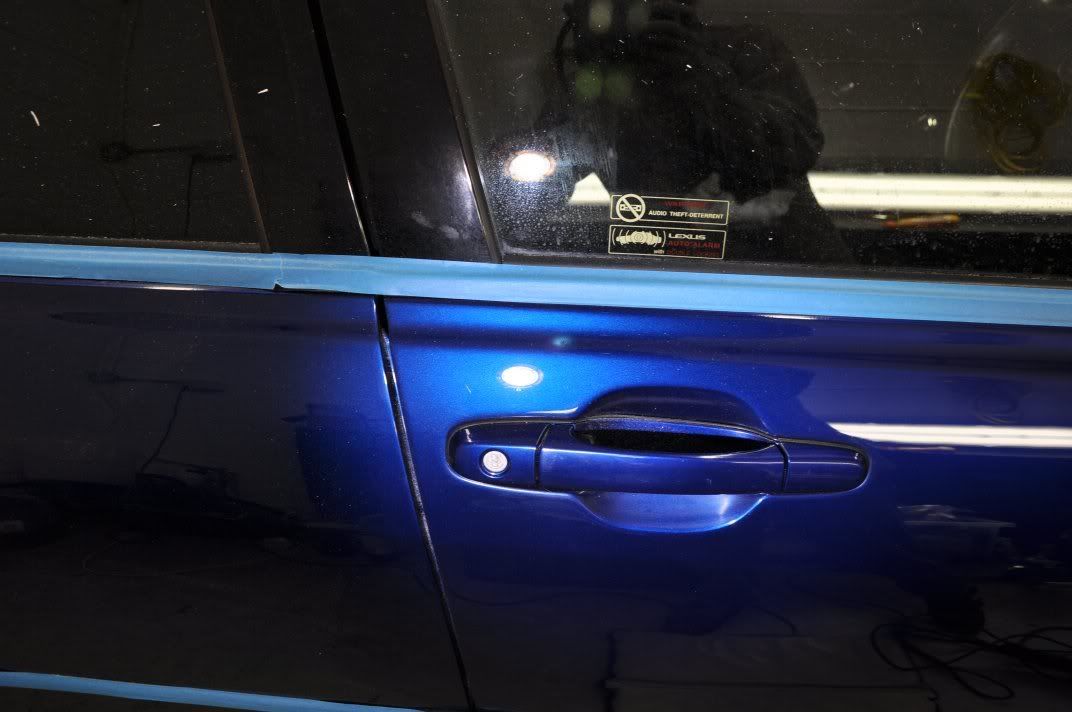
    The bootlid was the last panel of a long Saturday... befores showing etching, some deeper RDS and general swirls:


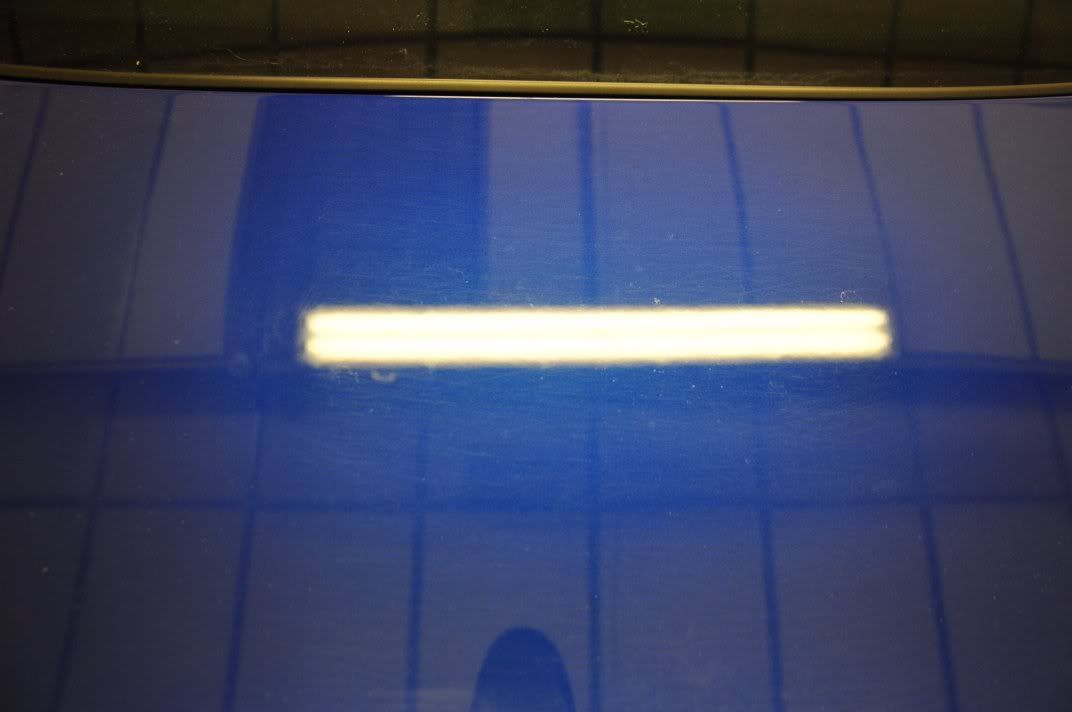
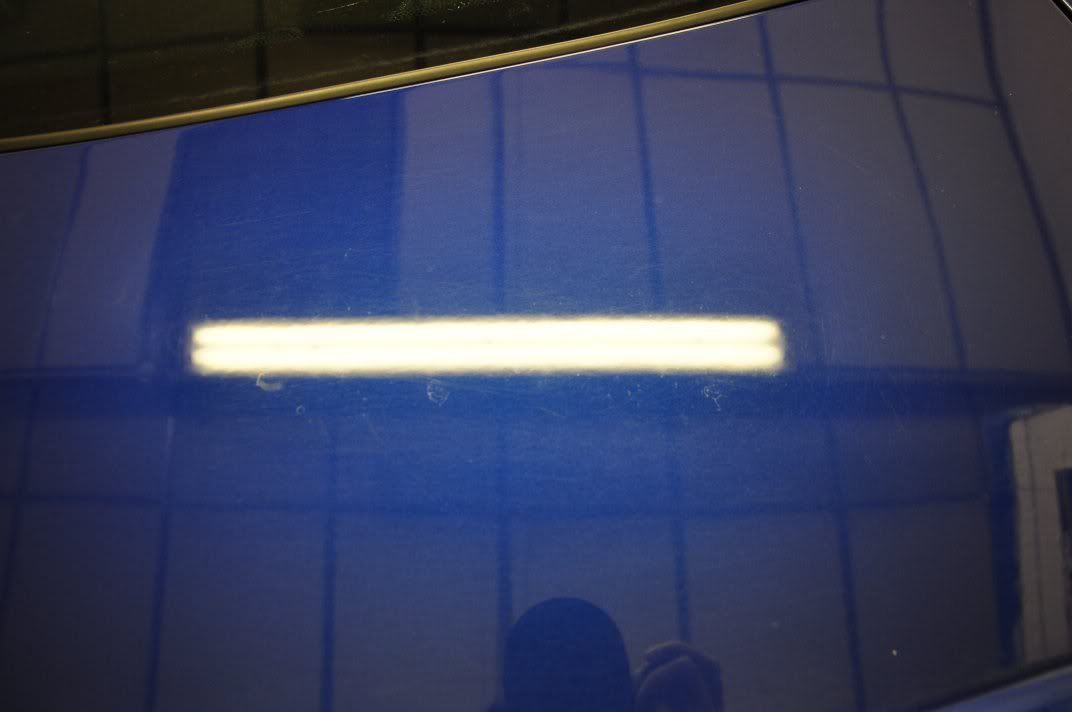
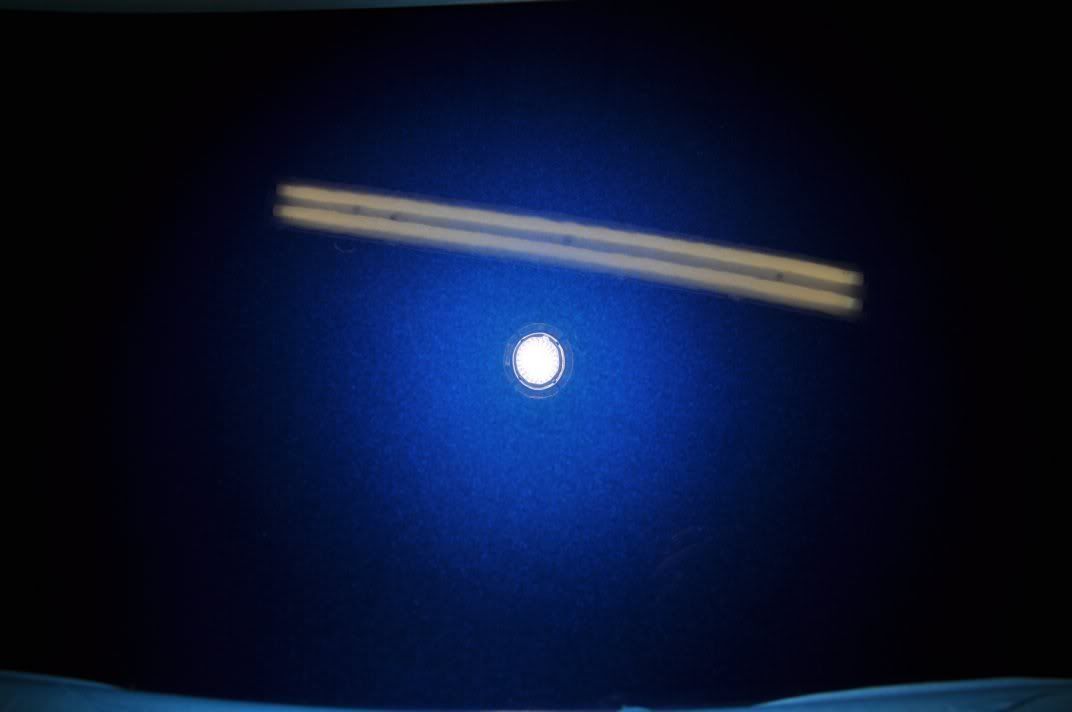
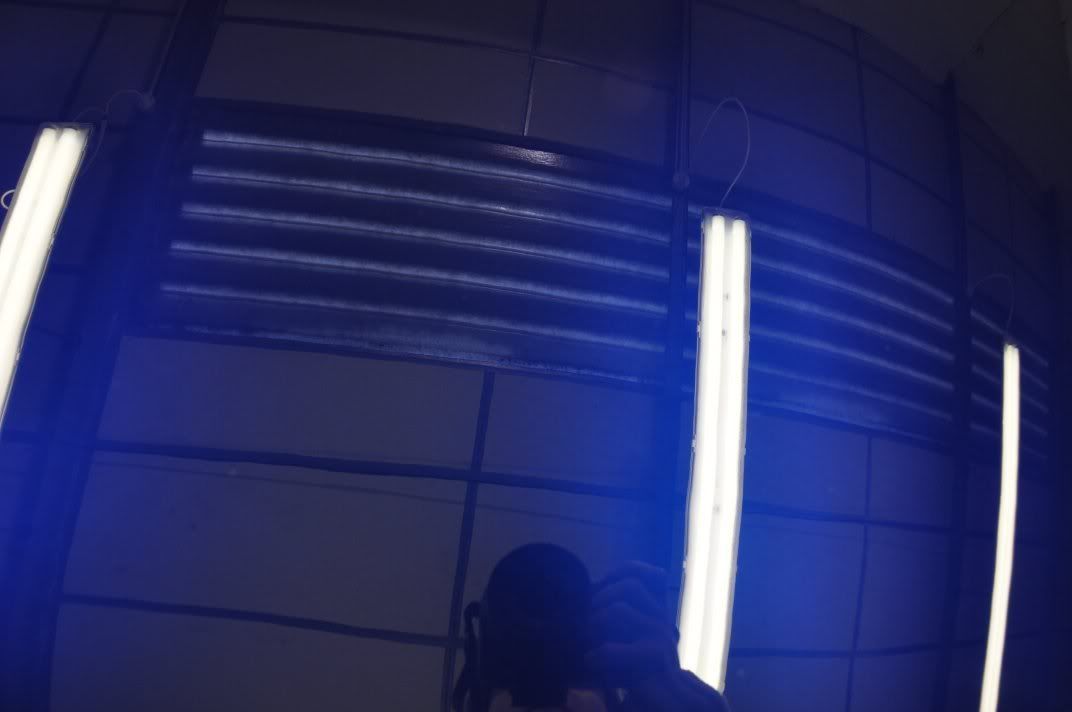
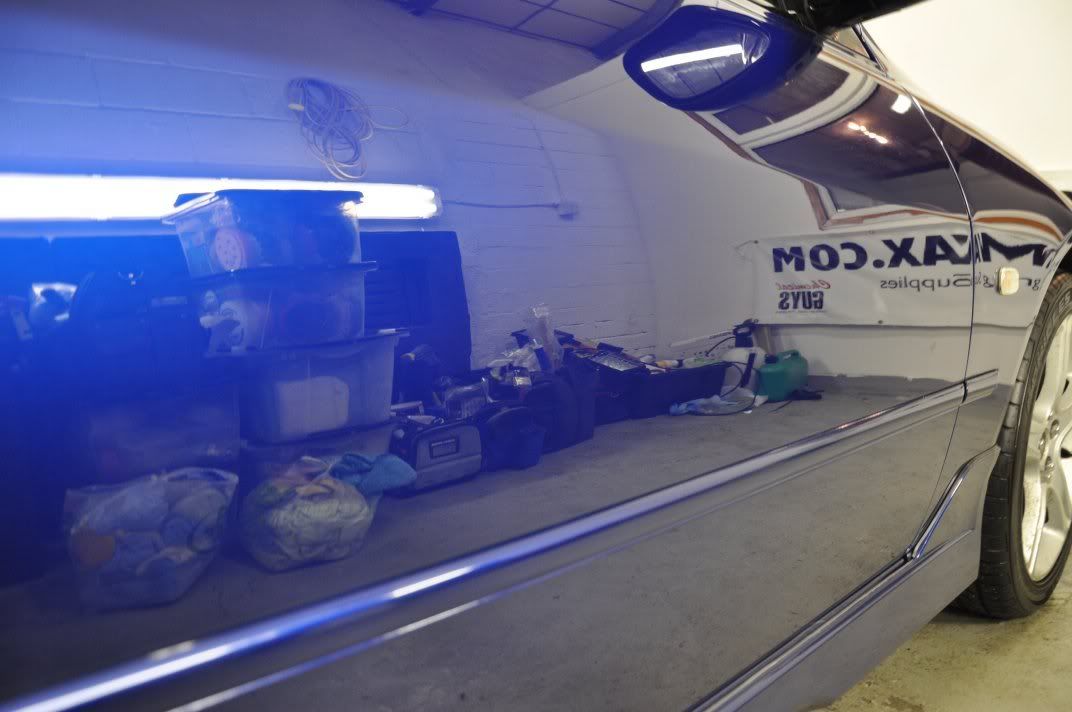
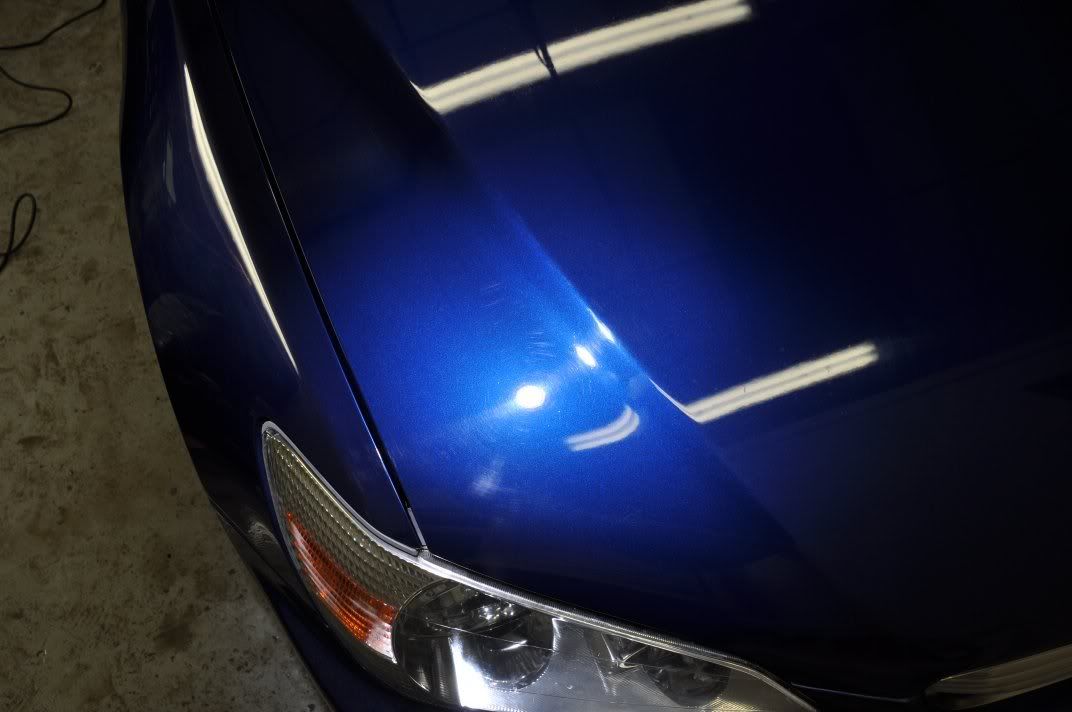
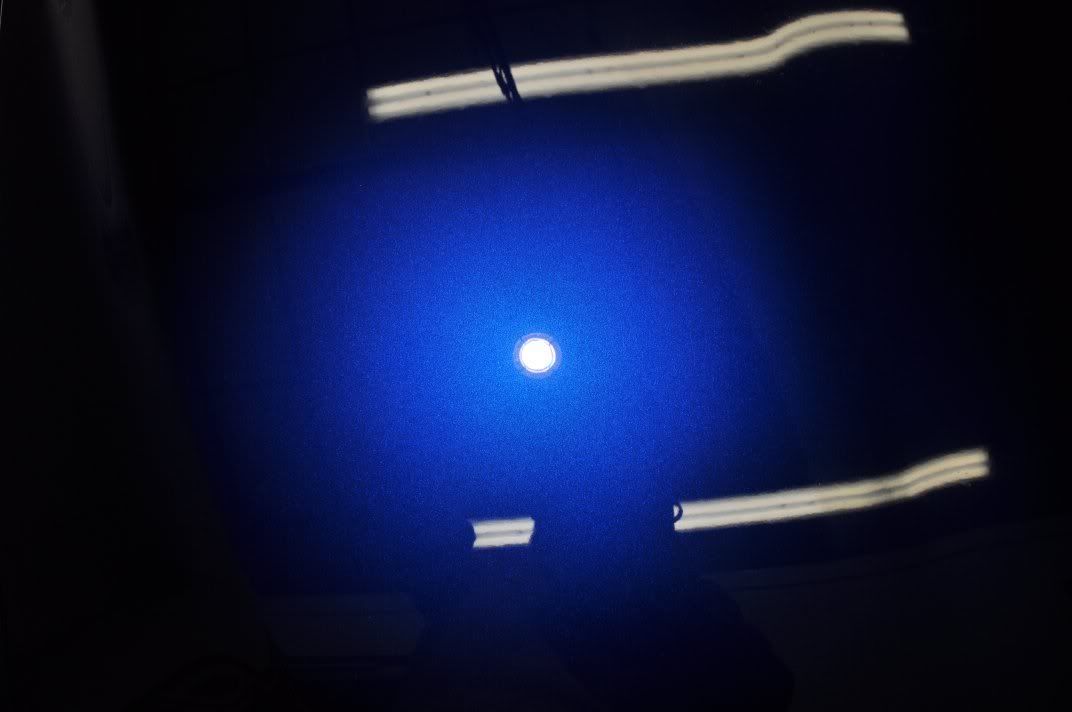
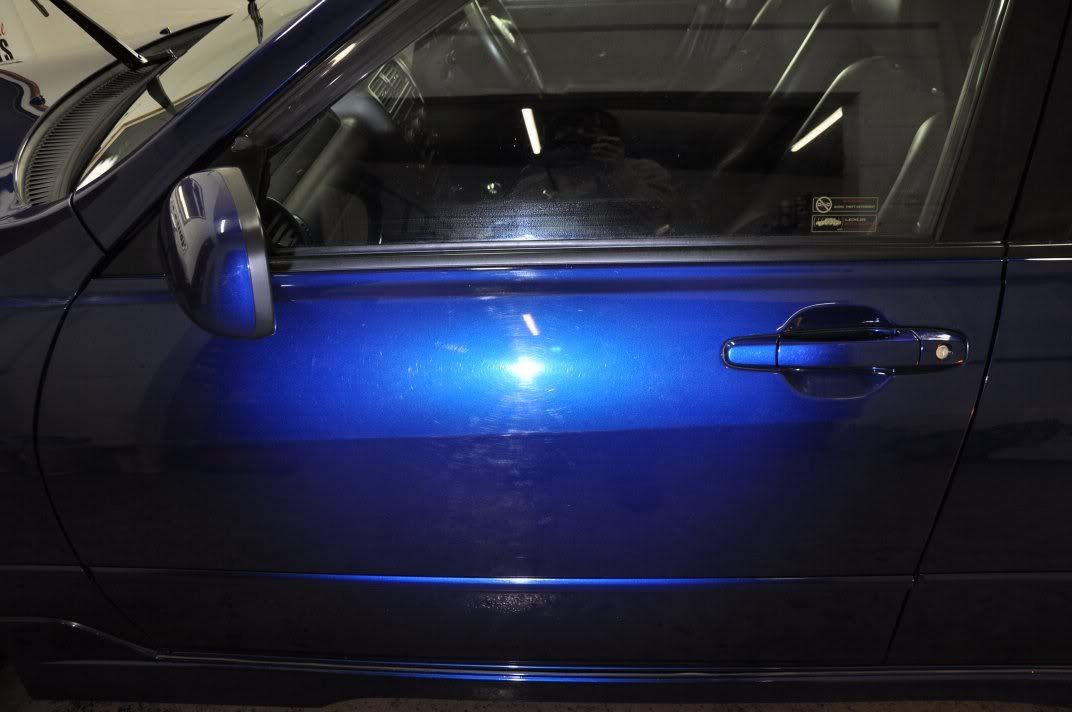
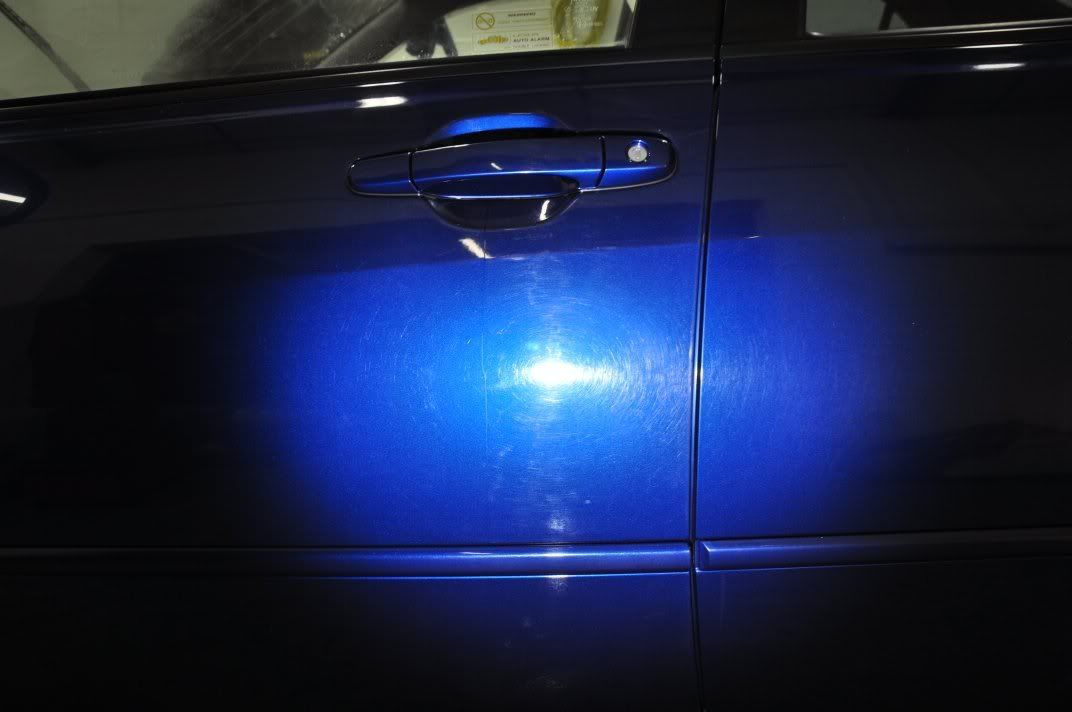
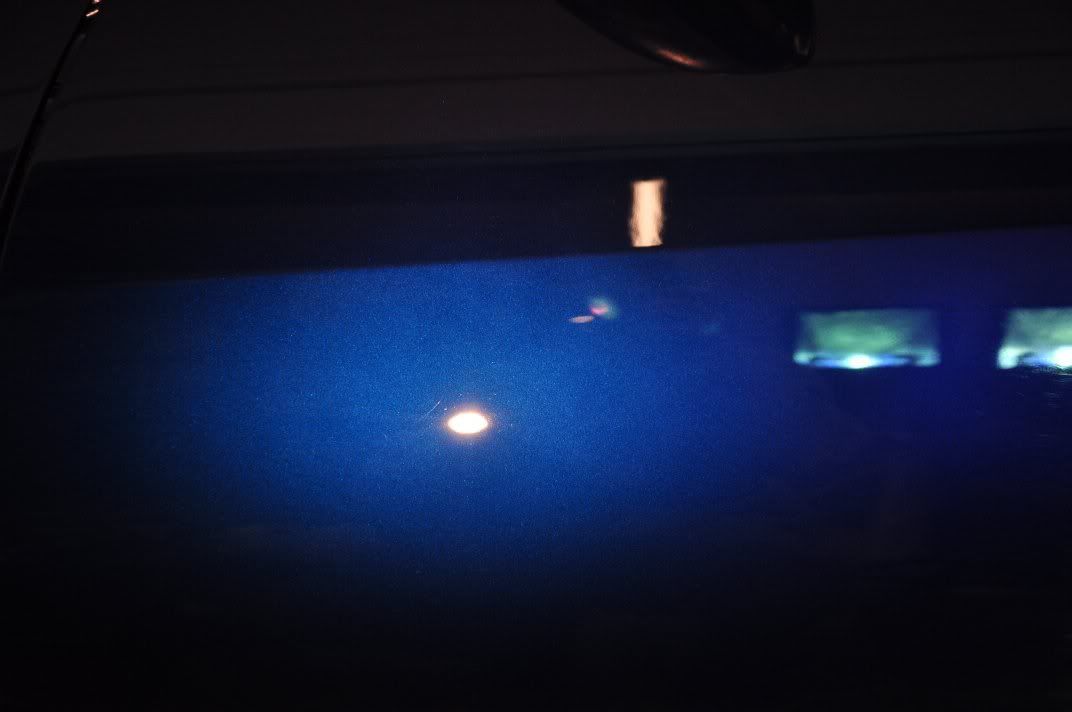
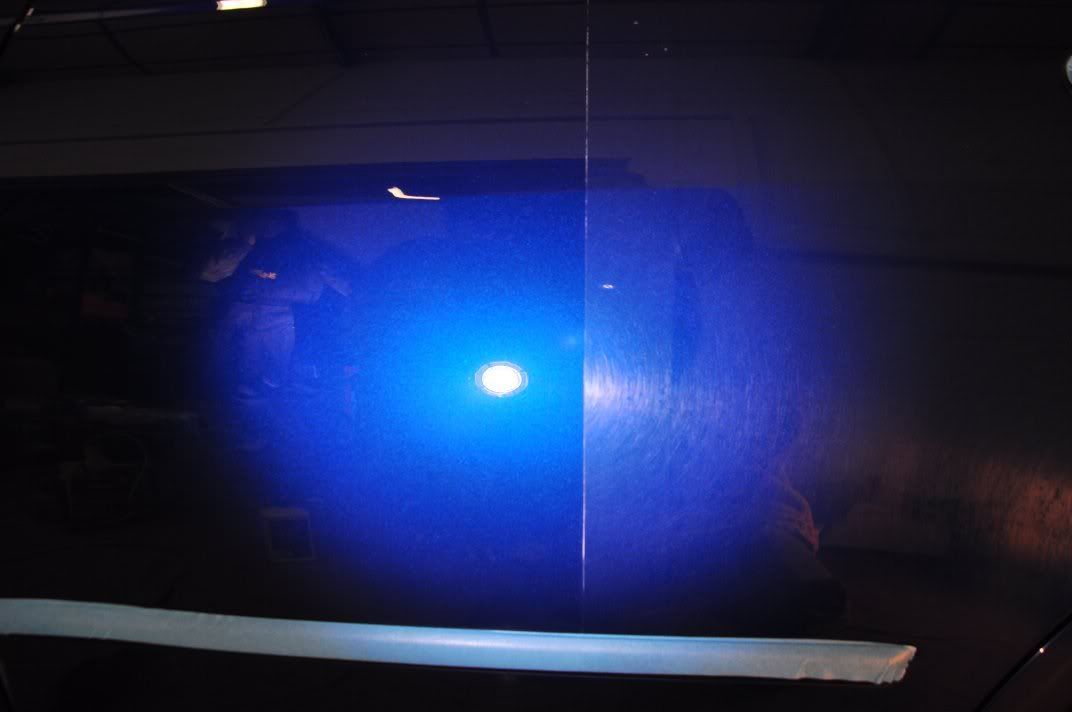
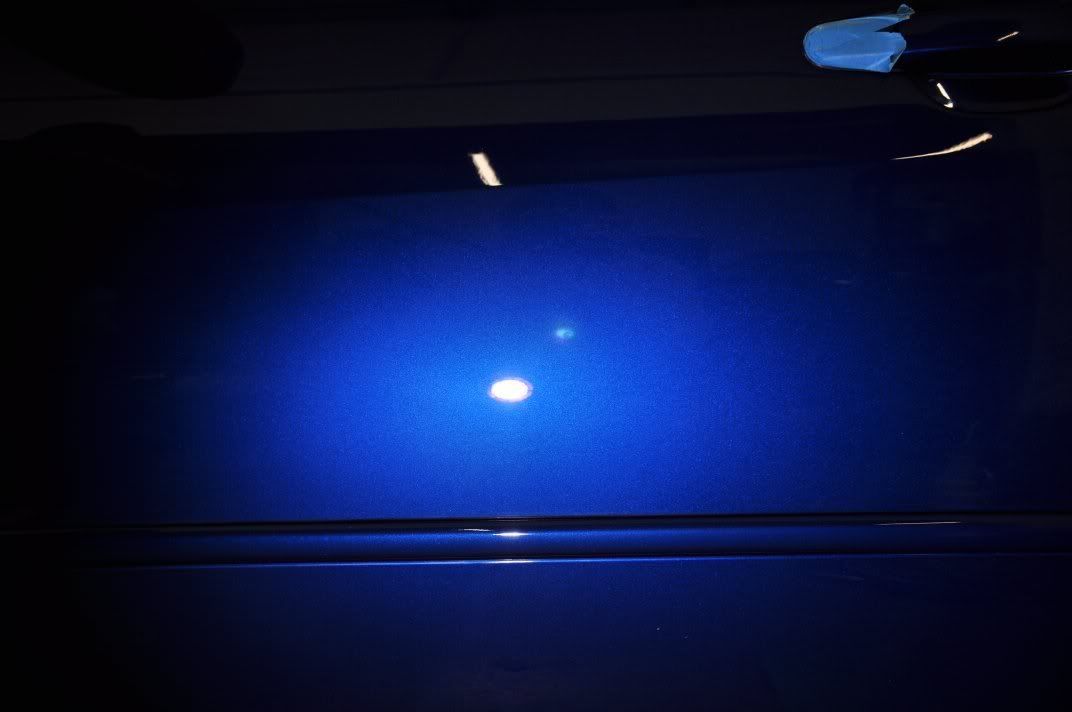
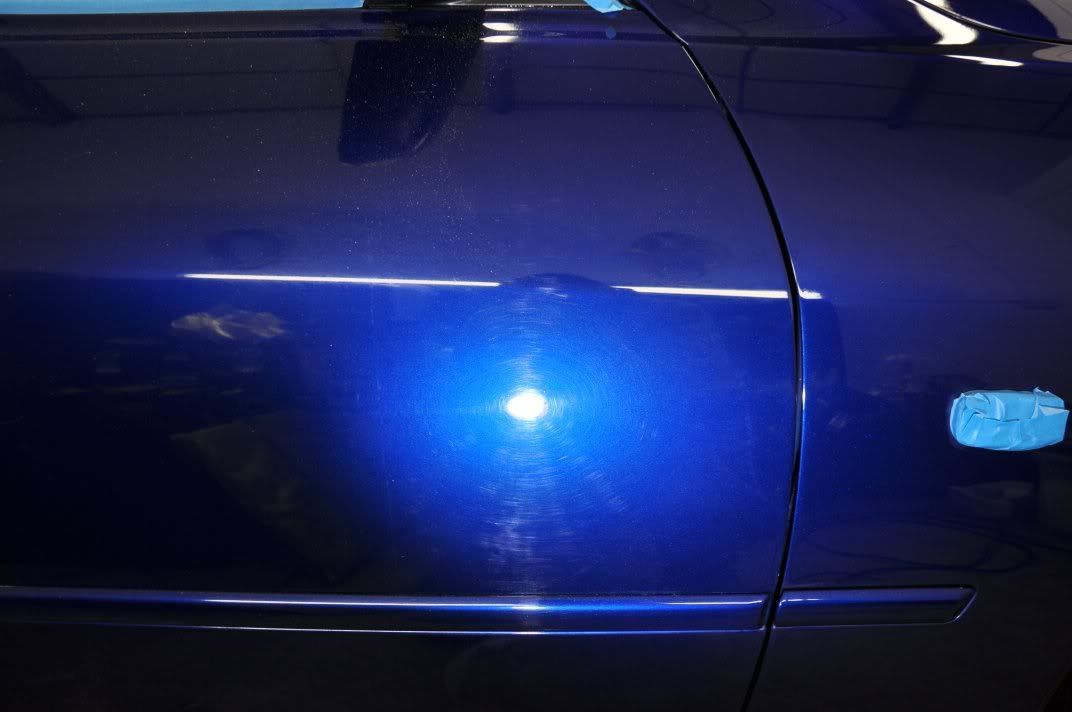
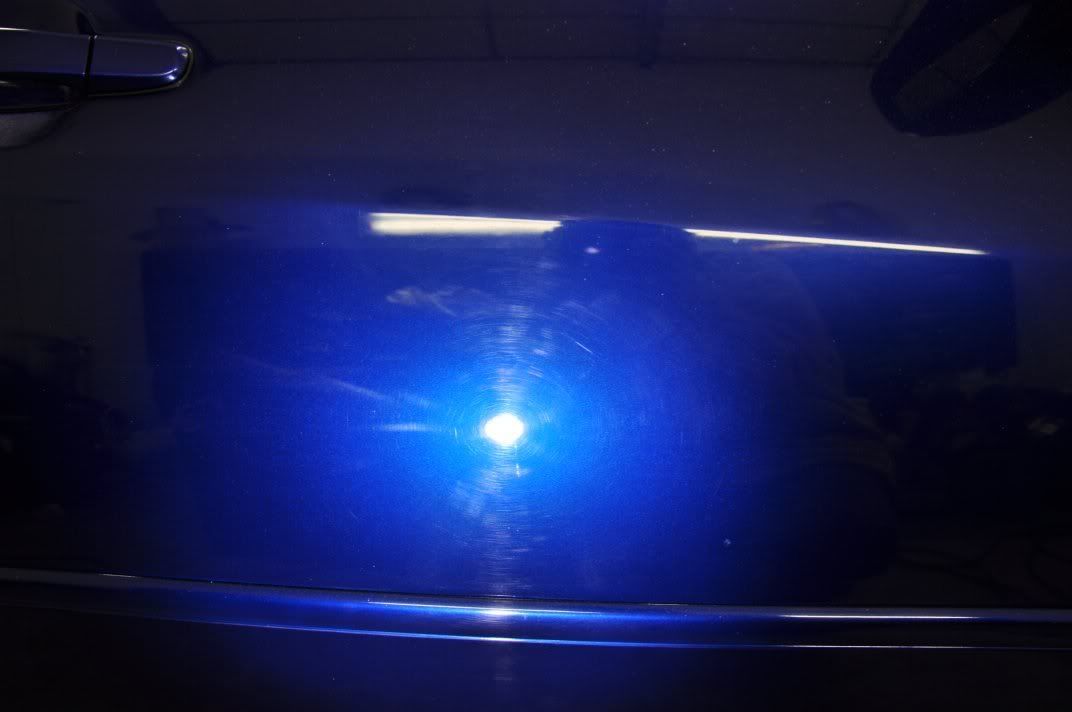
    Owing to thinner paint on this panel, a more controlled correction approach was used rather than Fast Cut, with multiple hits of Menzerna Intensive Polish on a green Hexlogic pad being chosen – with less paint removed per set, correction takes longer but ensures that you remove paint in a more controlled way so you can maximise the correction without taking the paint to being too thin. After correction and refining:


    At 2am, with the temperature outside down to -11degC, we decided to call it and night and slither home back to Gordon’s – the roof and bumpers and tailgate would be Sunday’s task...

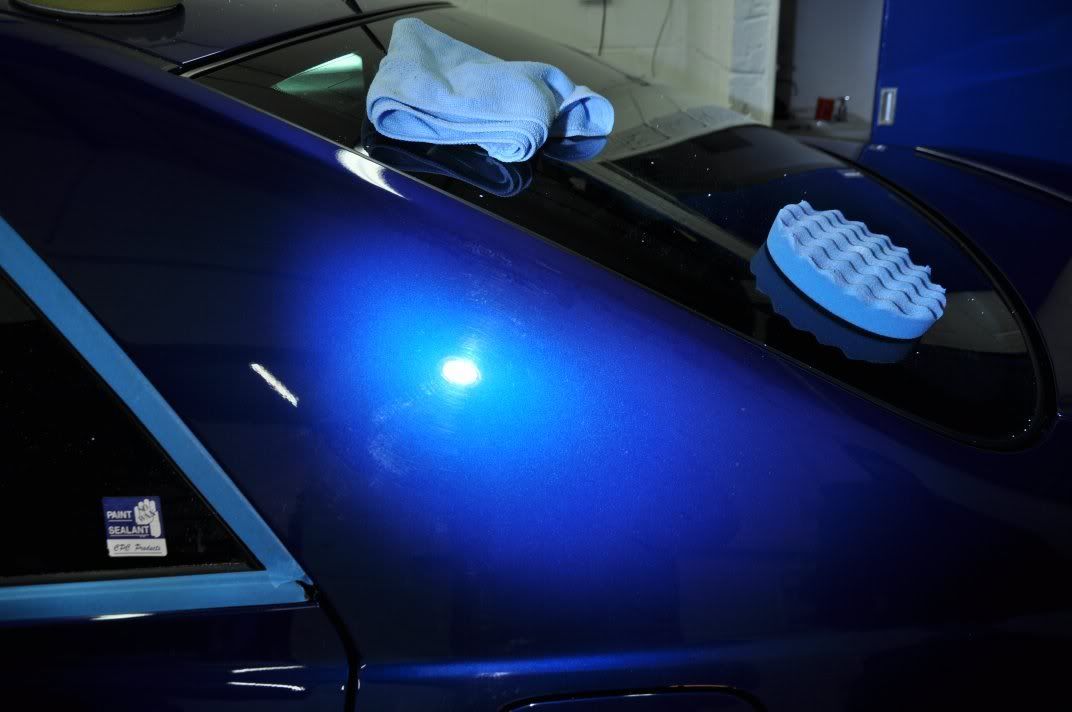
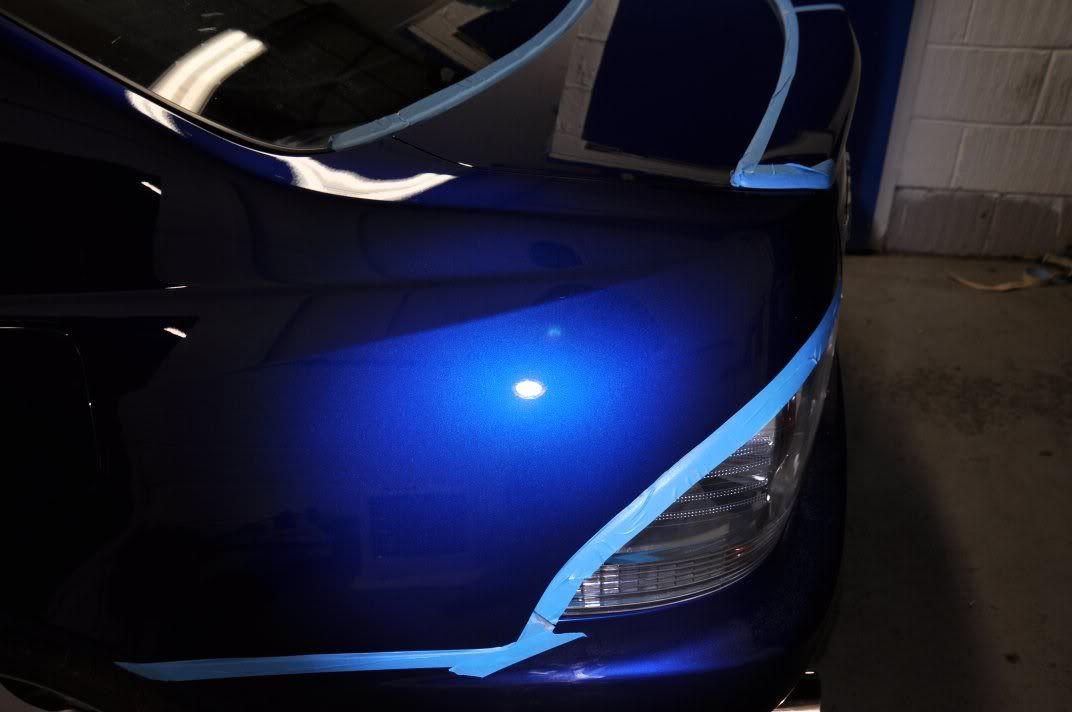
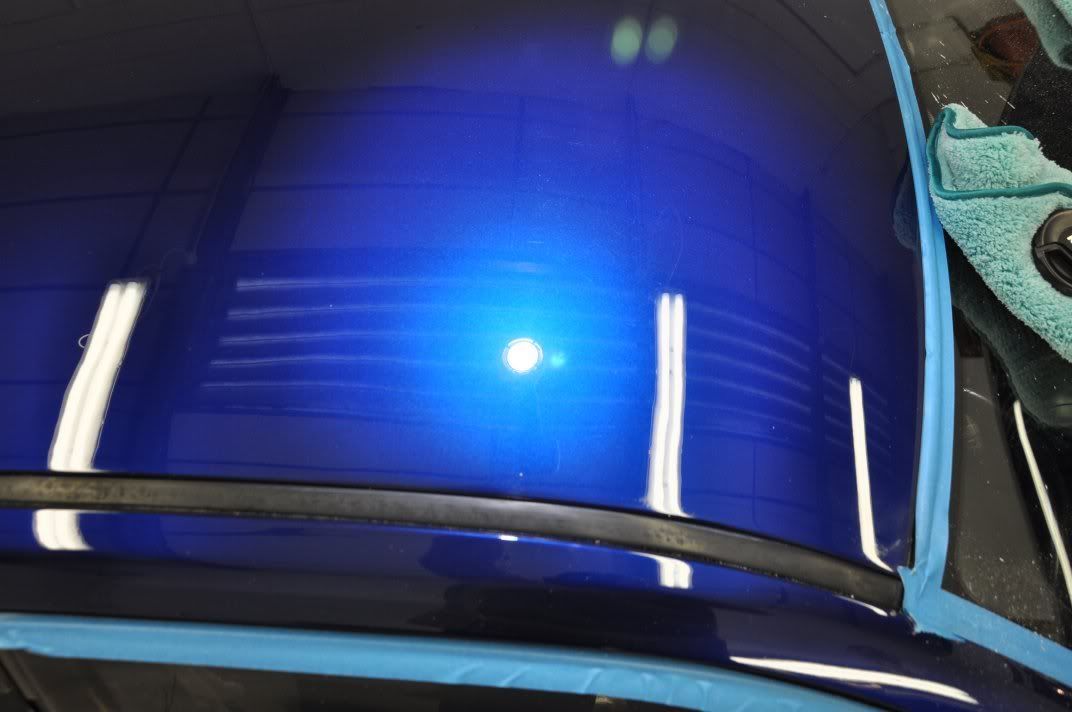
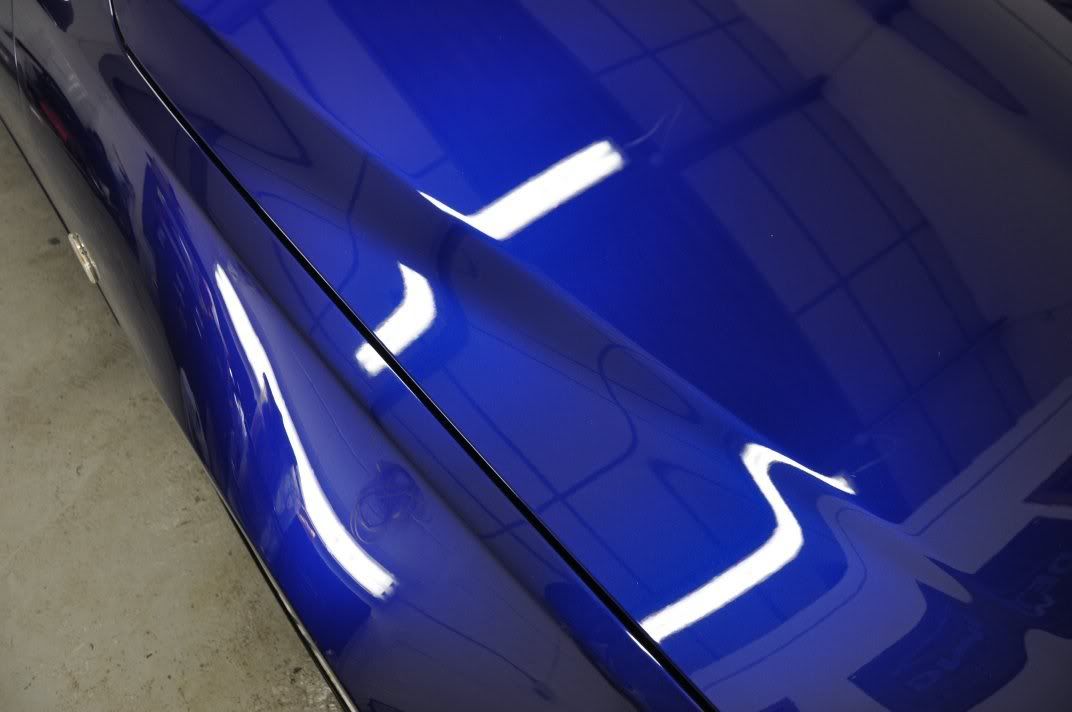
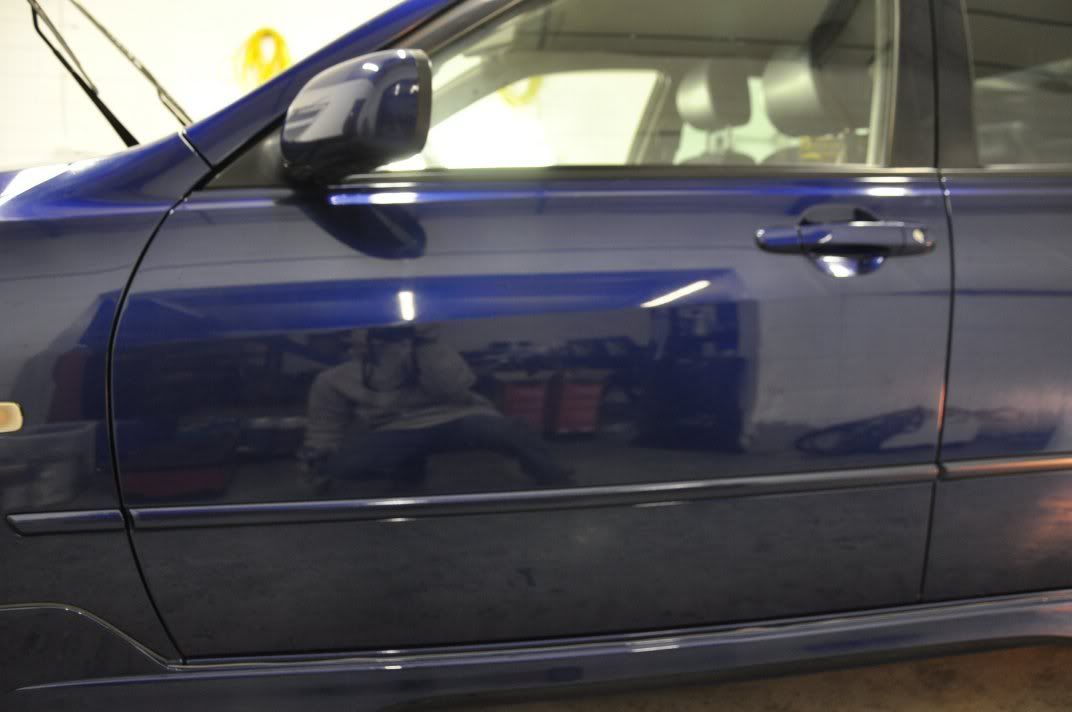
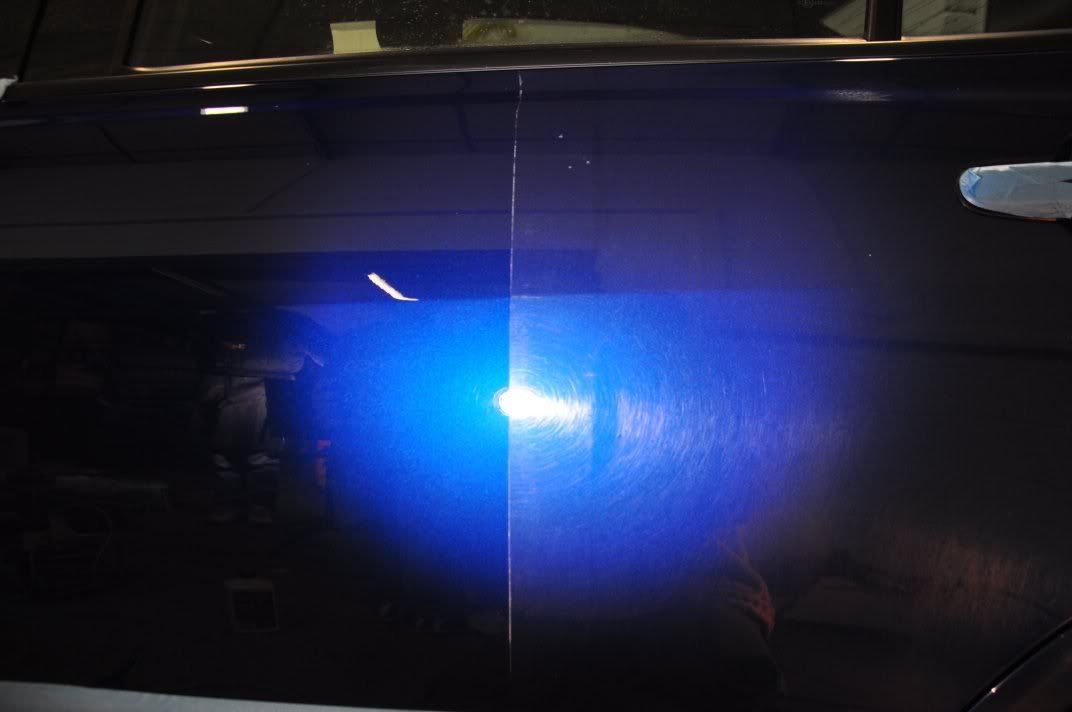
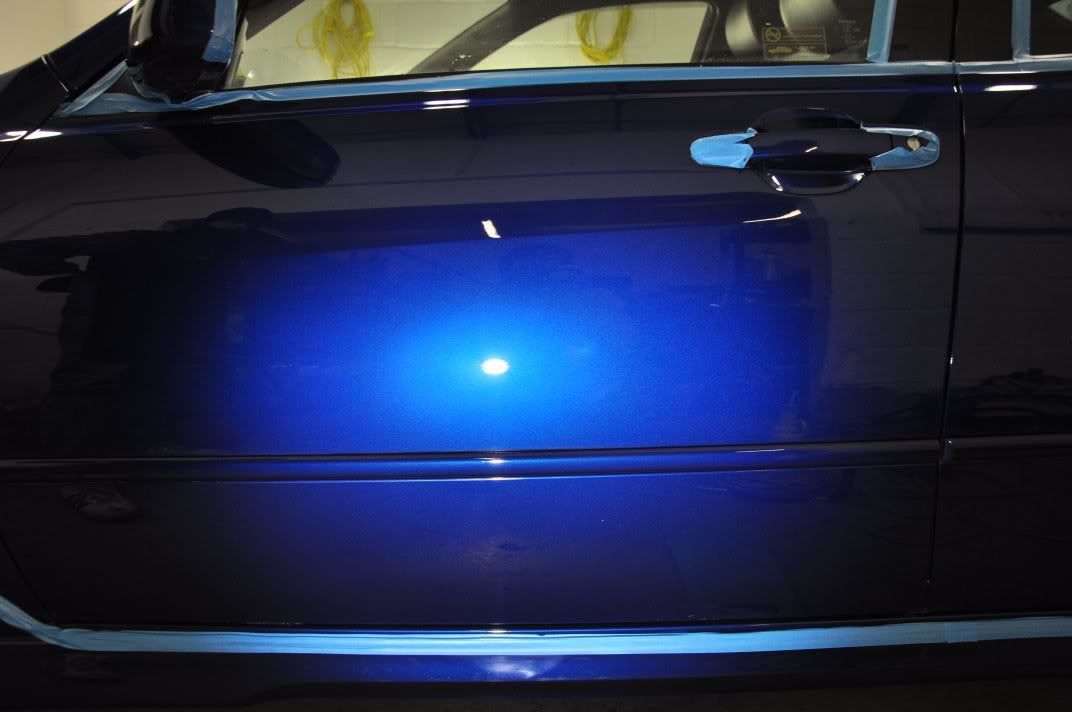
    ... and what a task they would prove to be on Sunday!! The bootlid and bumpers were actually relatively easy going, corrected using Menzerna Intensive Polish and refined with Meguiars #205 Ultra Finishing Polish. The bootlid before as an example...
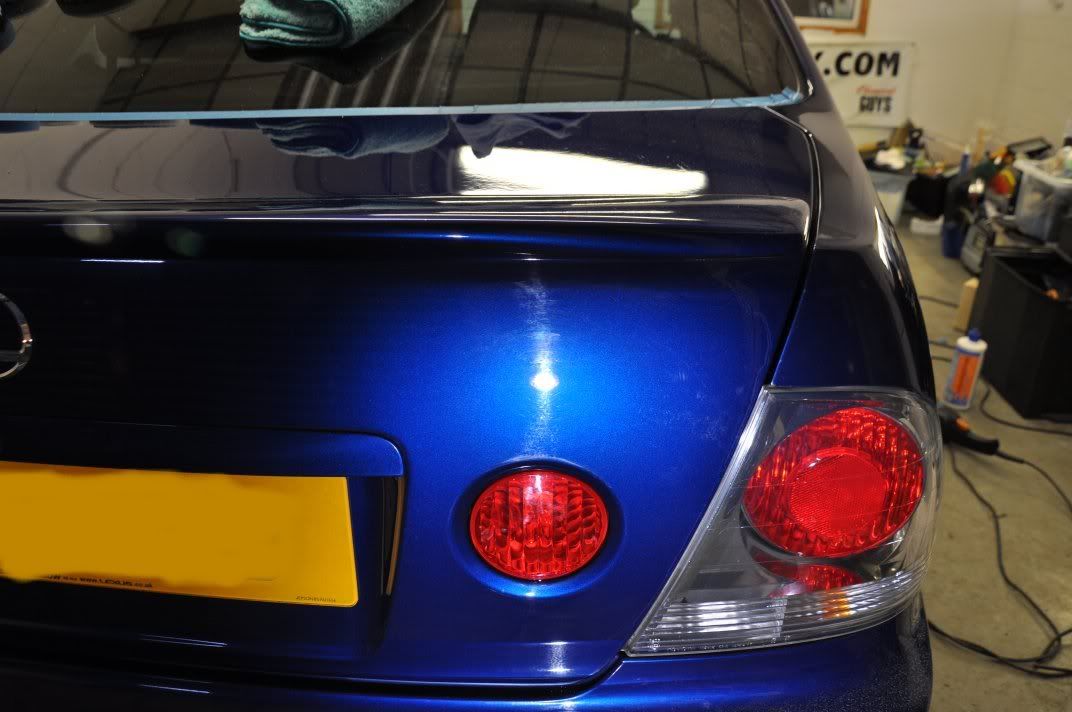


    And after...


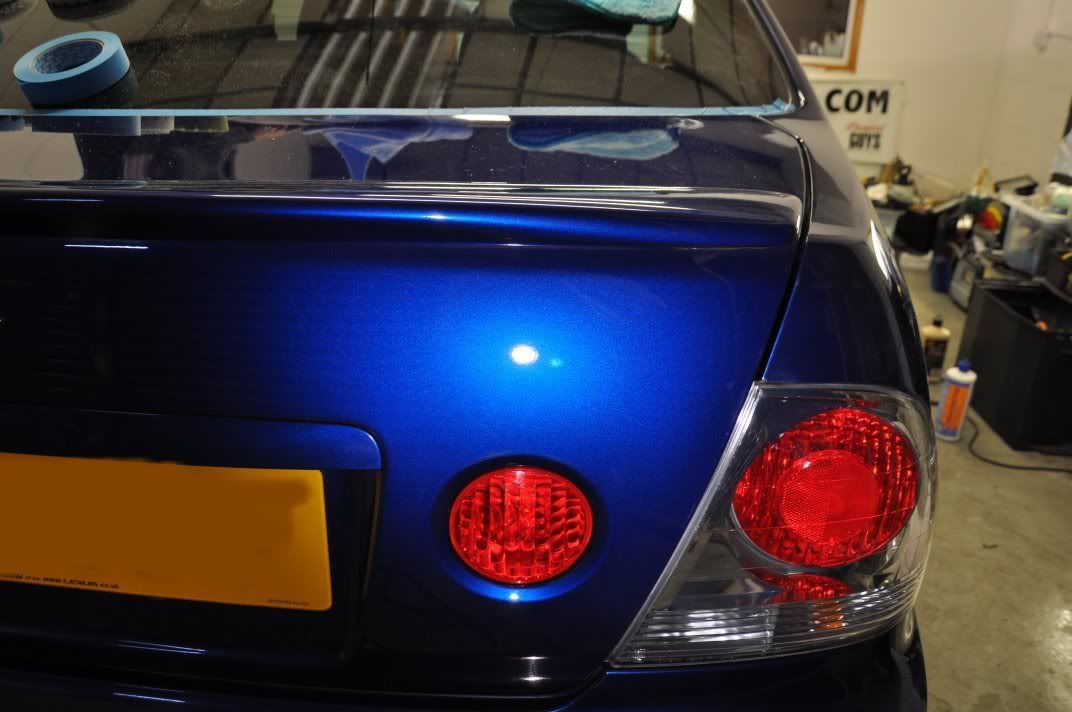
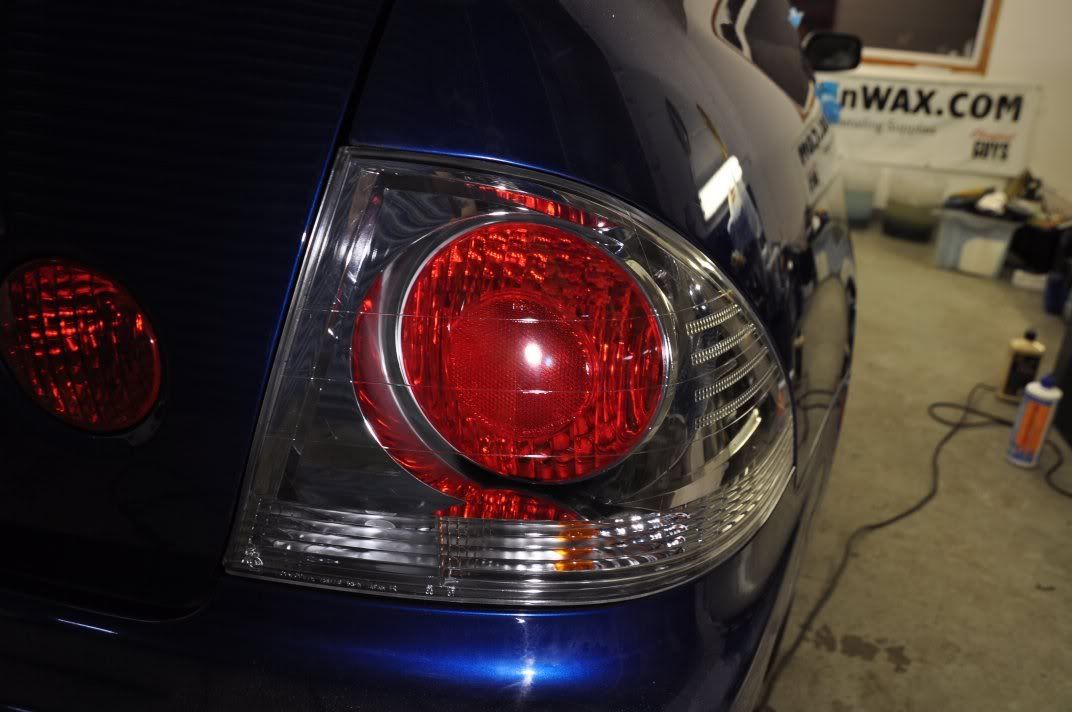
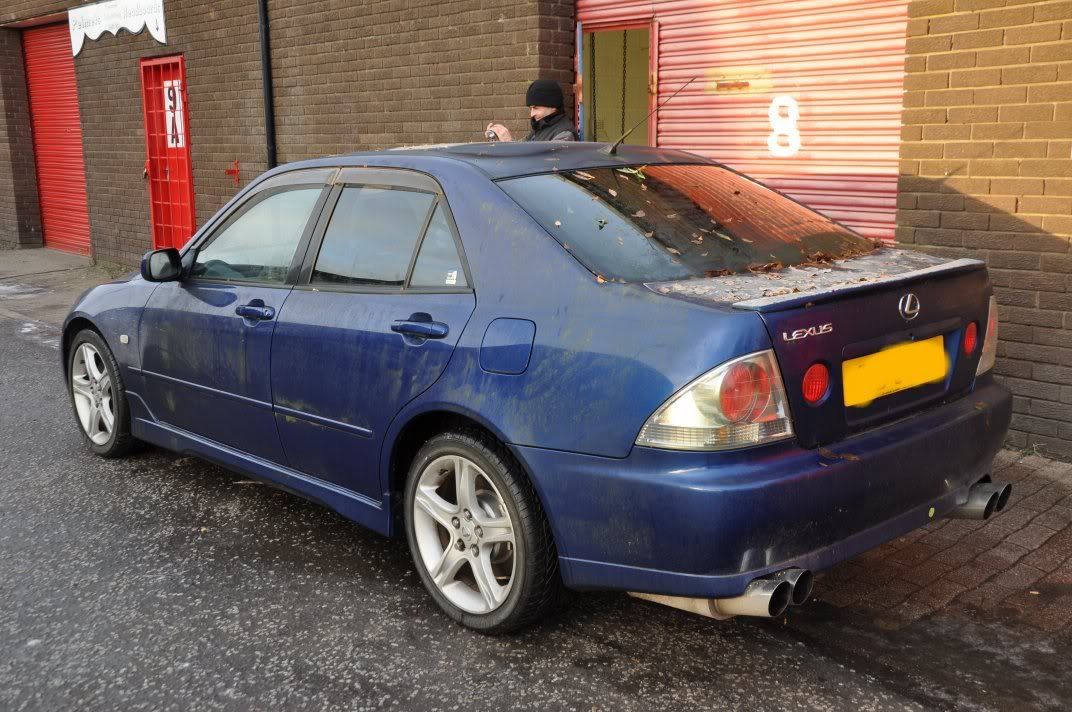
    The rear lights before...
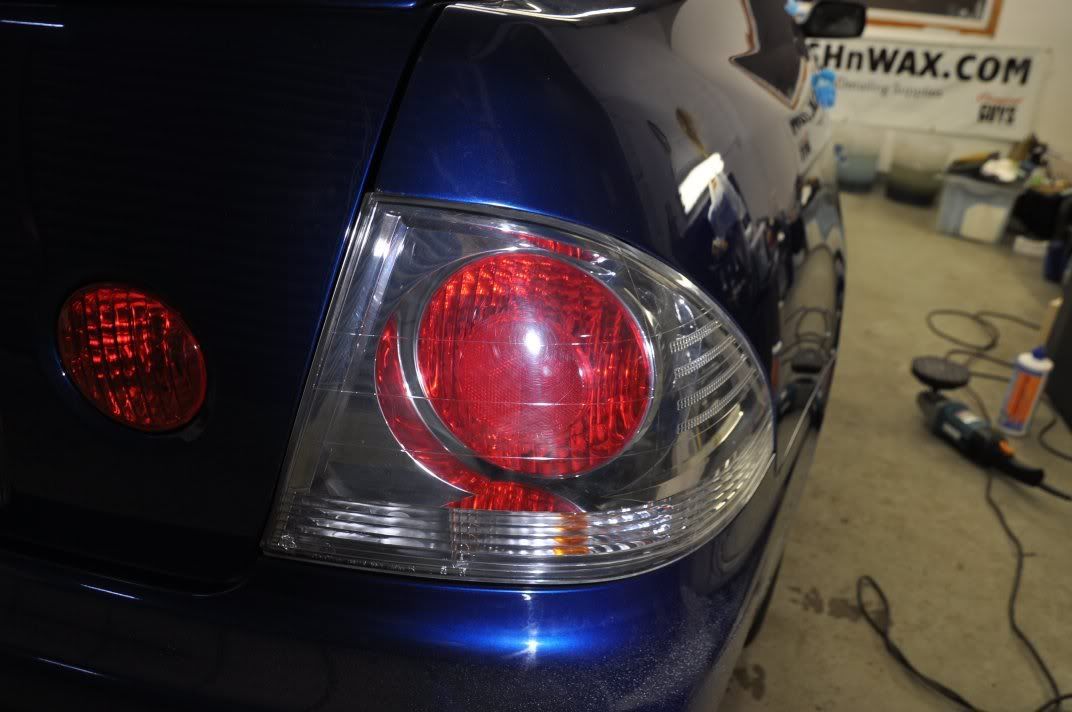


    And after...


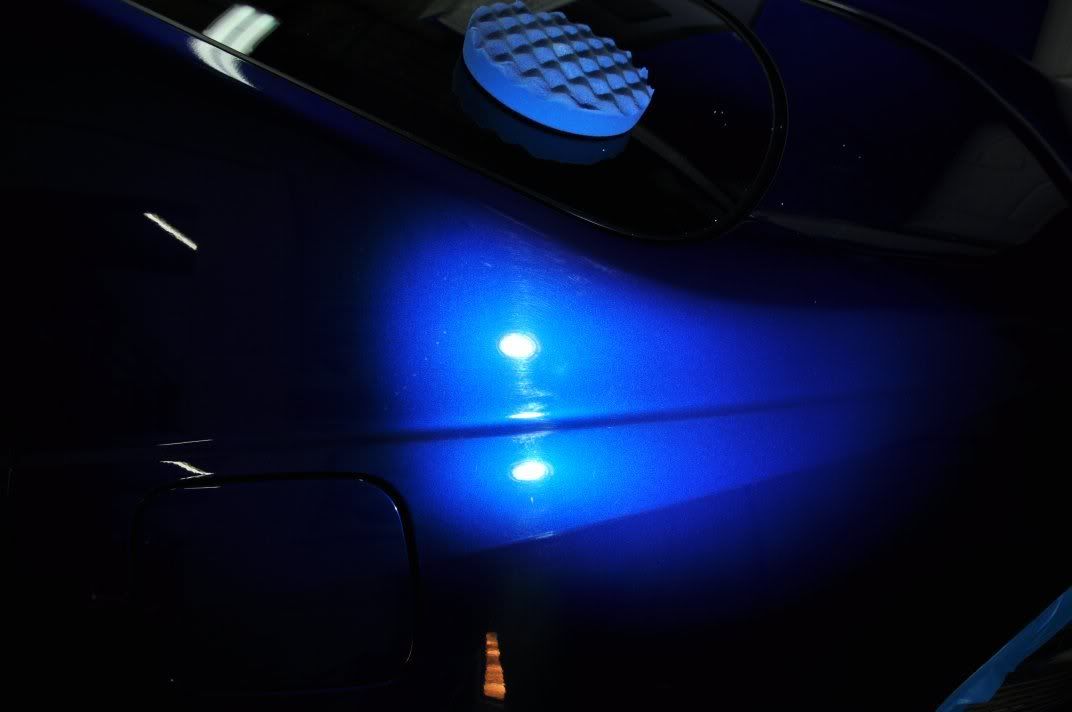
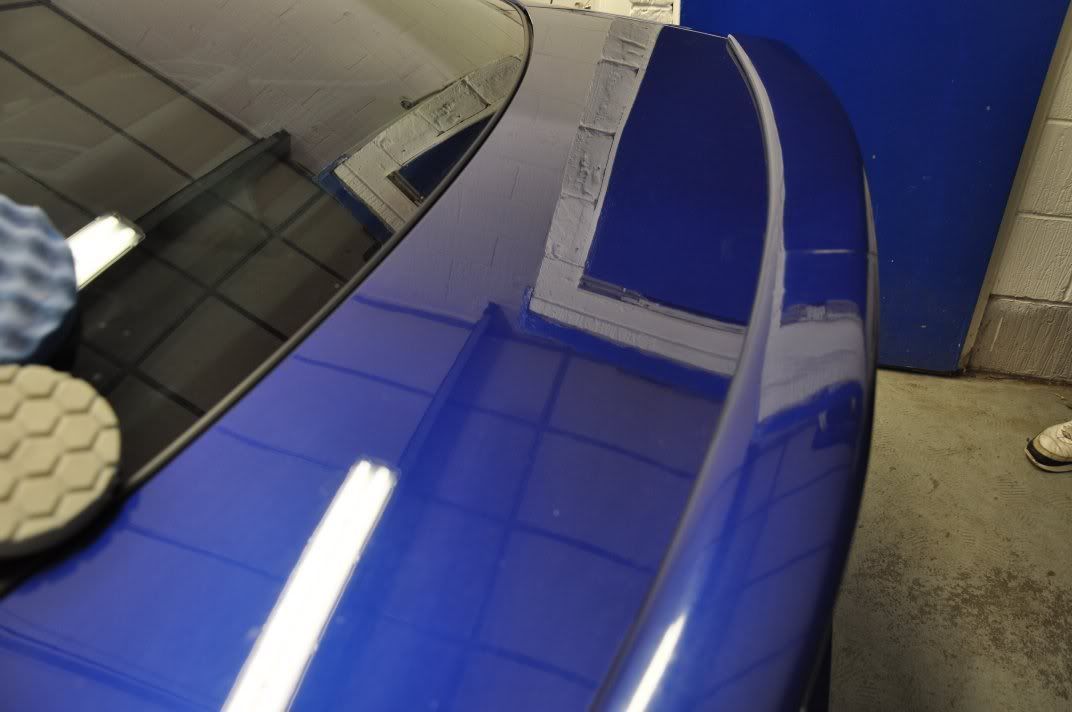
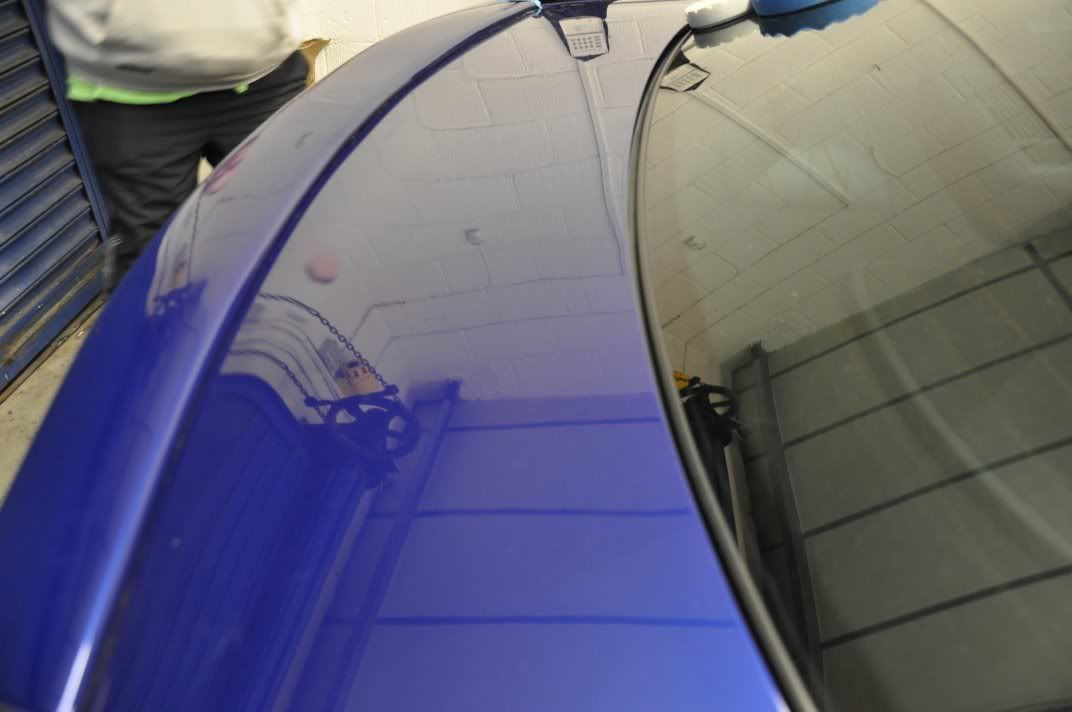
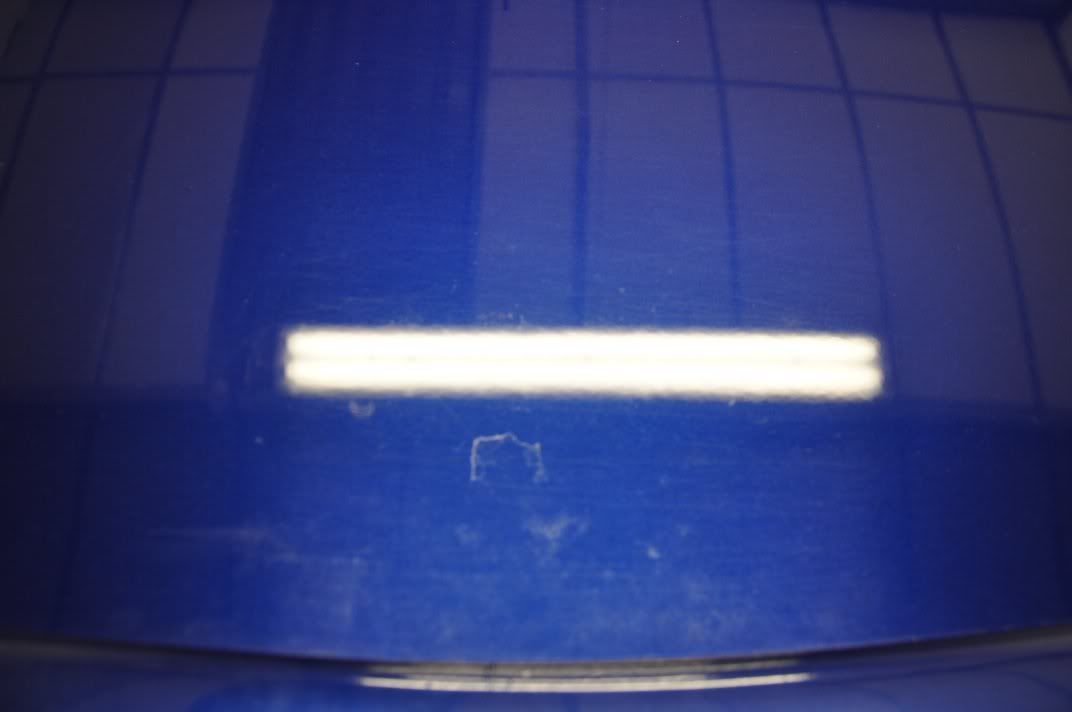
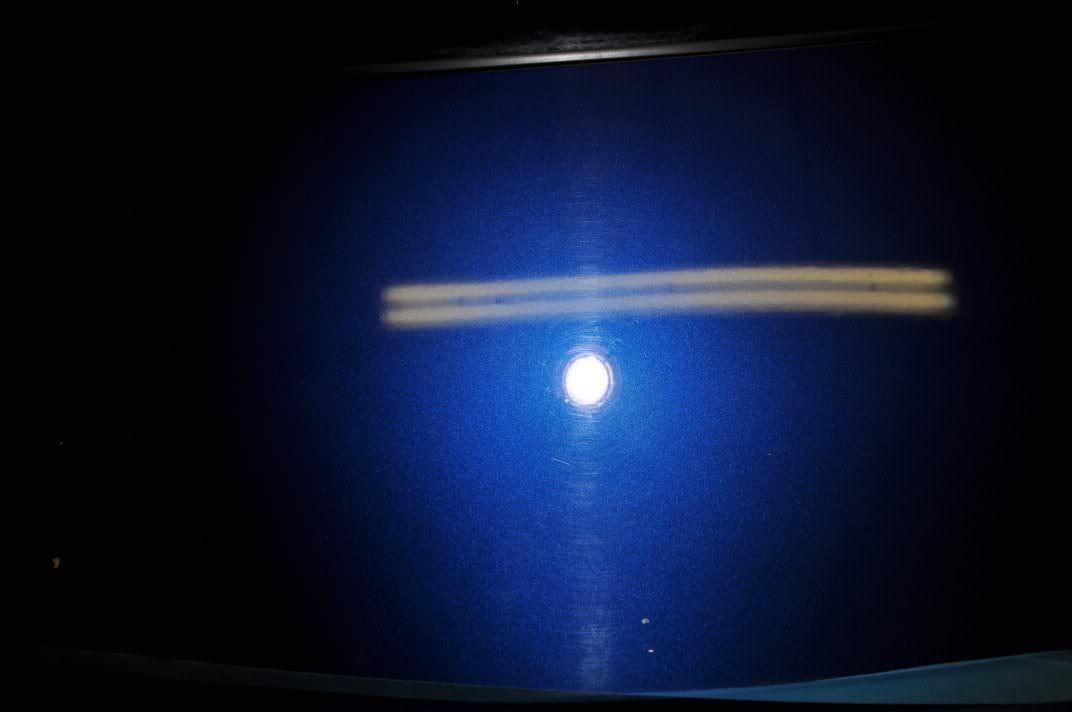
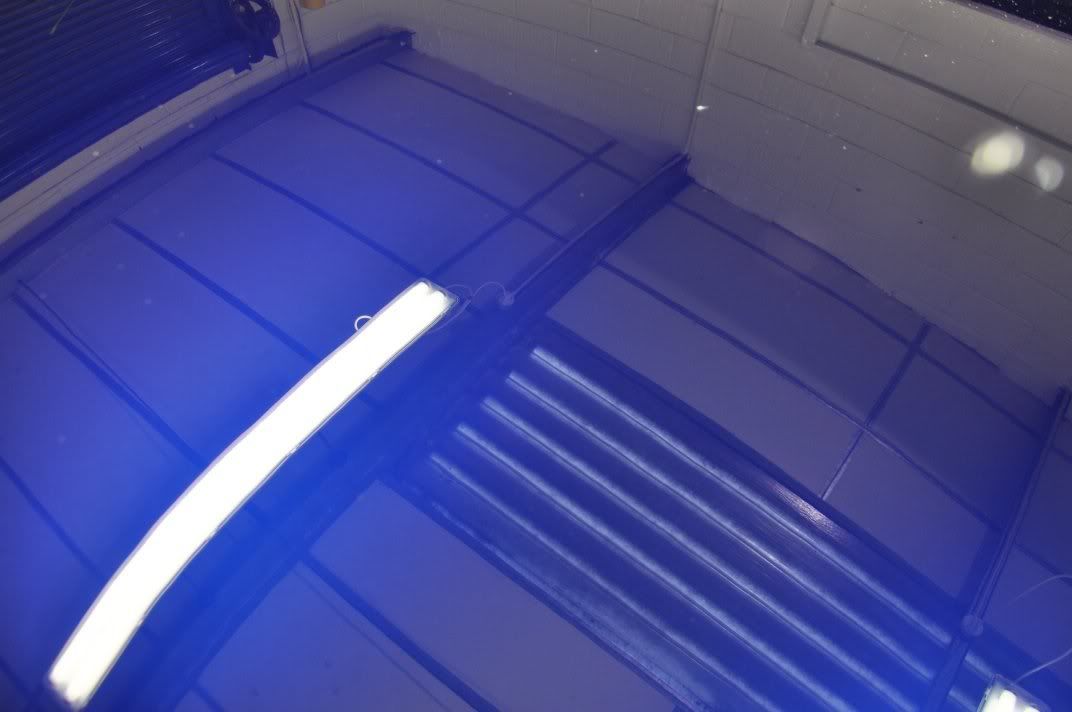
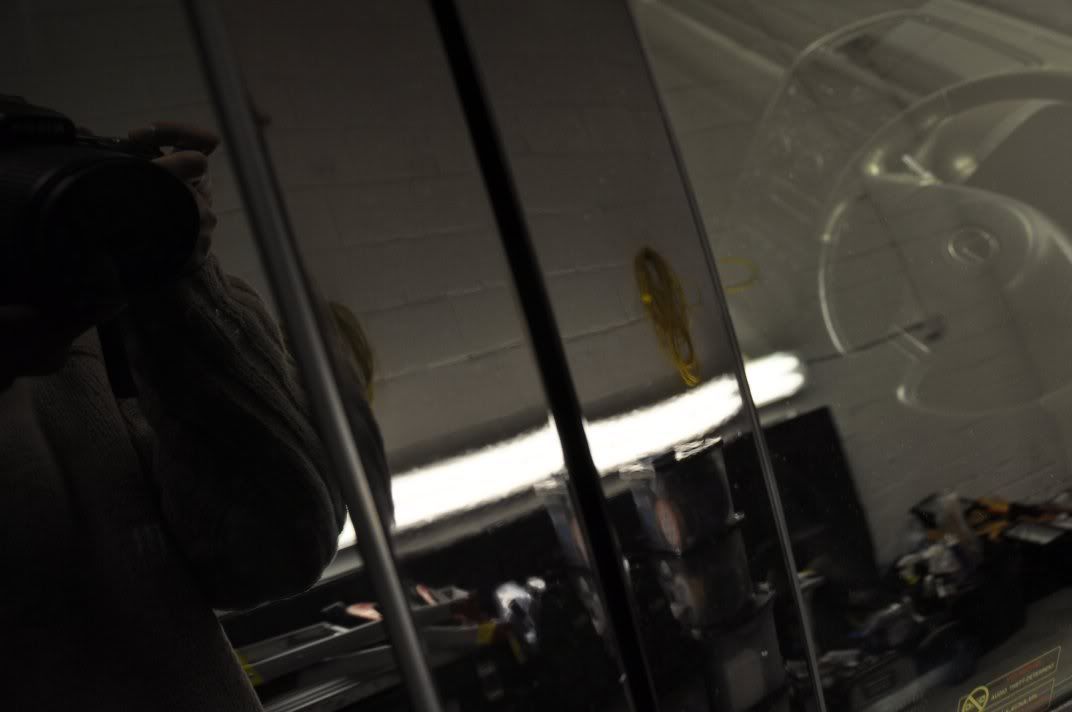
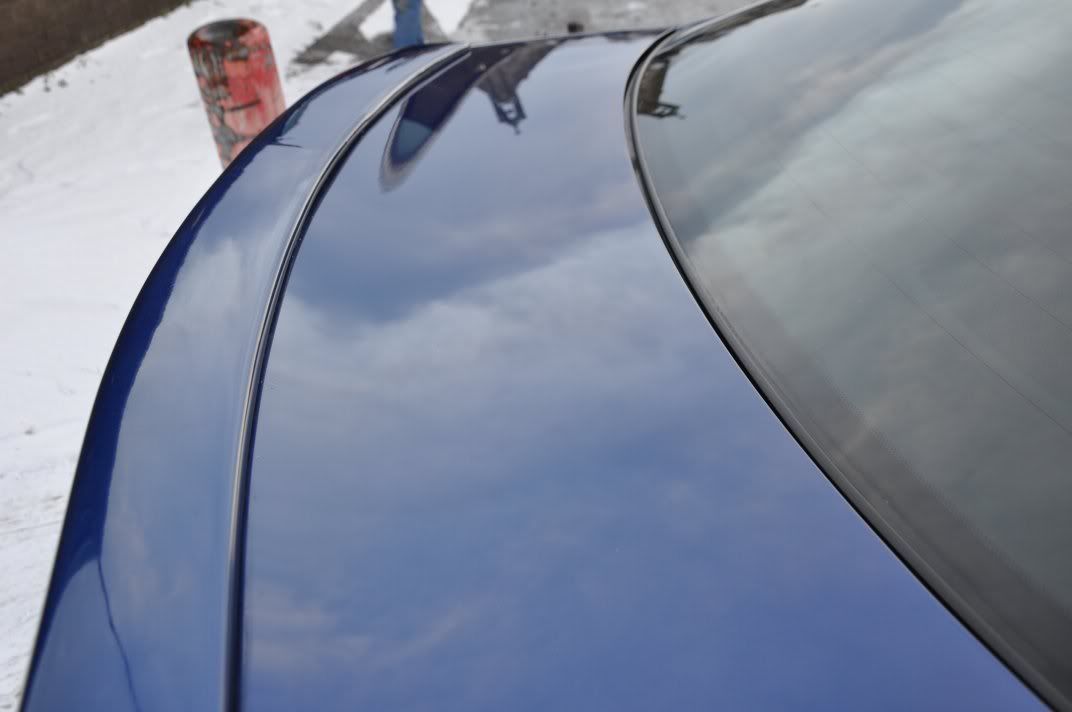
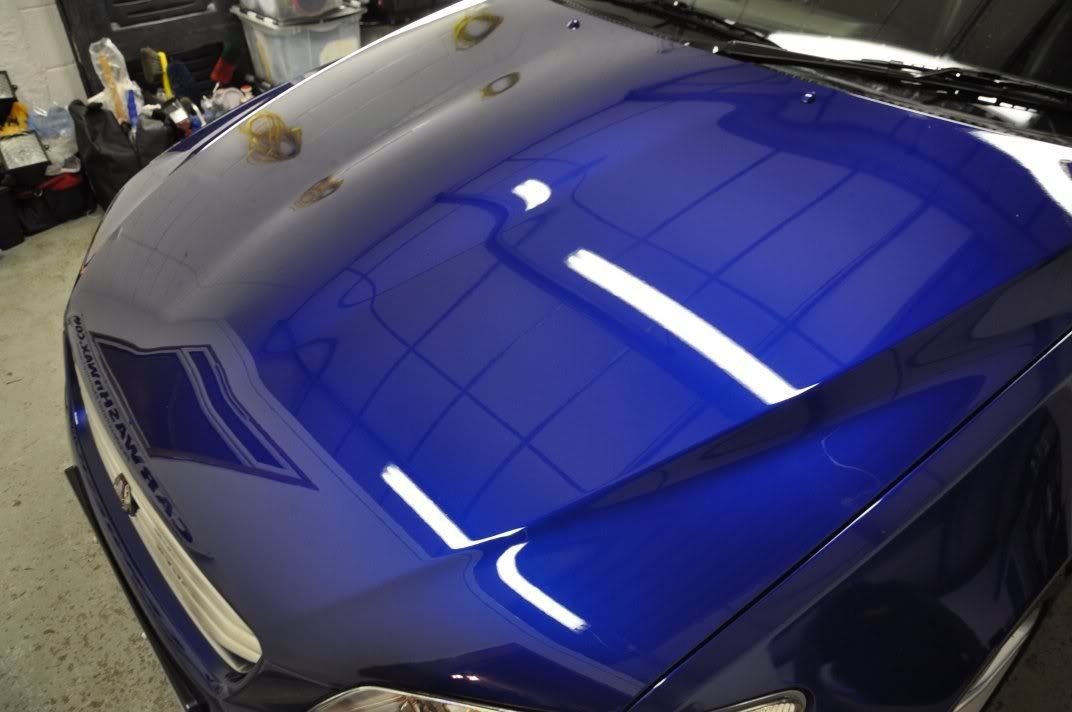
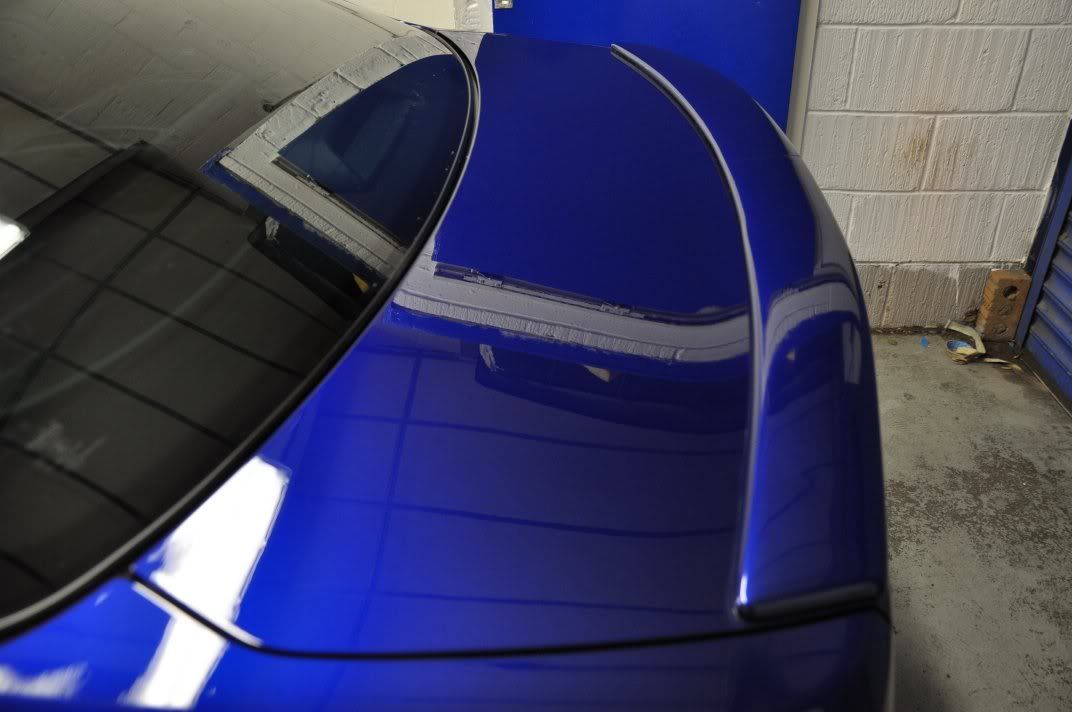
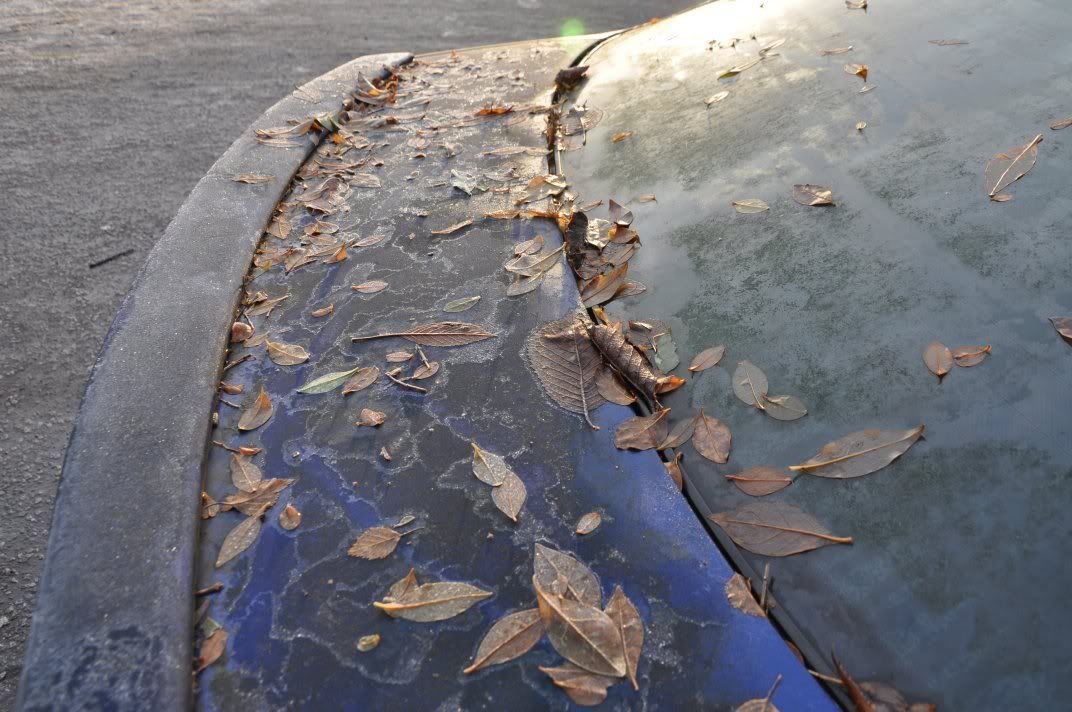
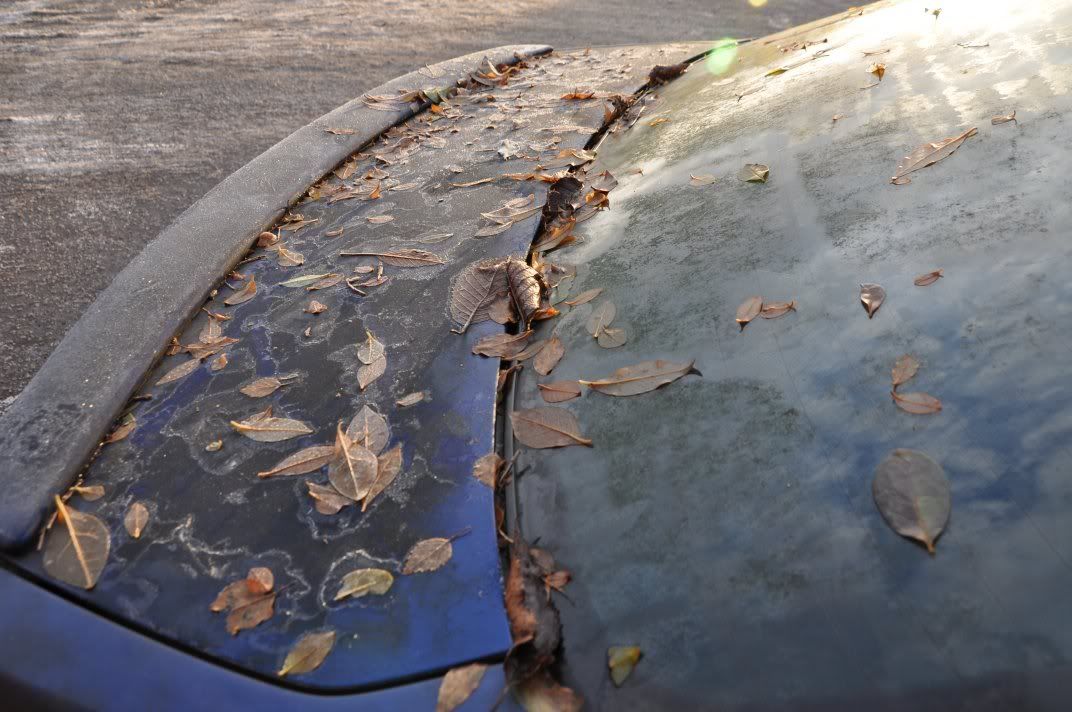
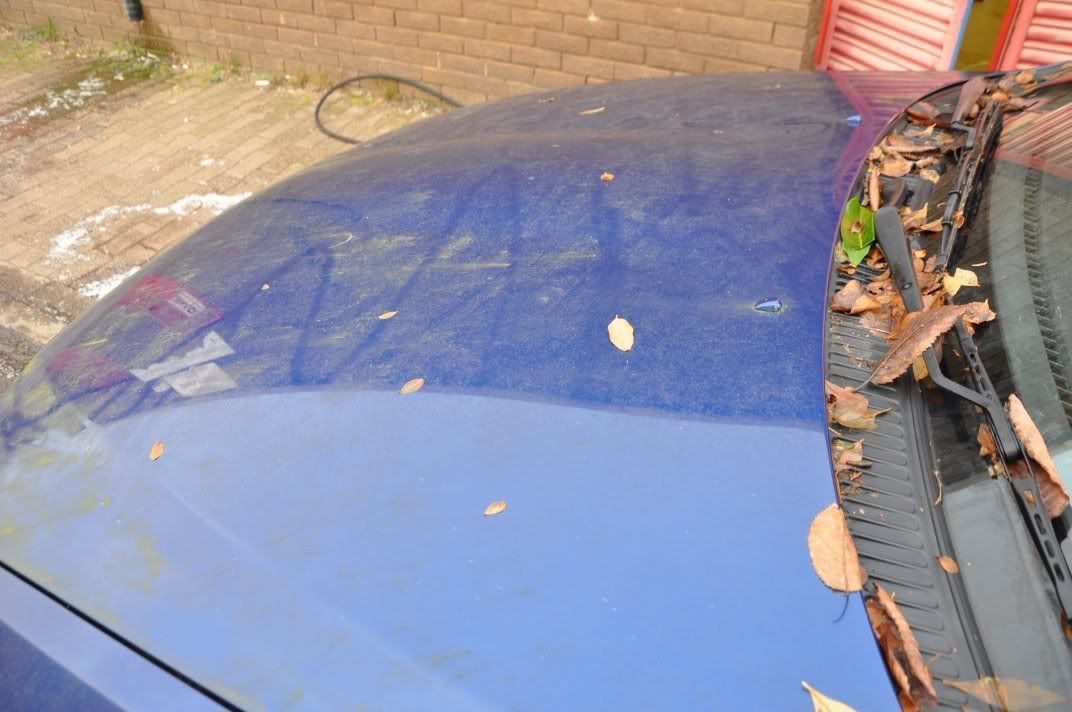
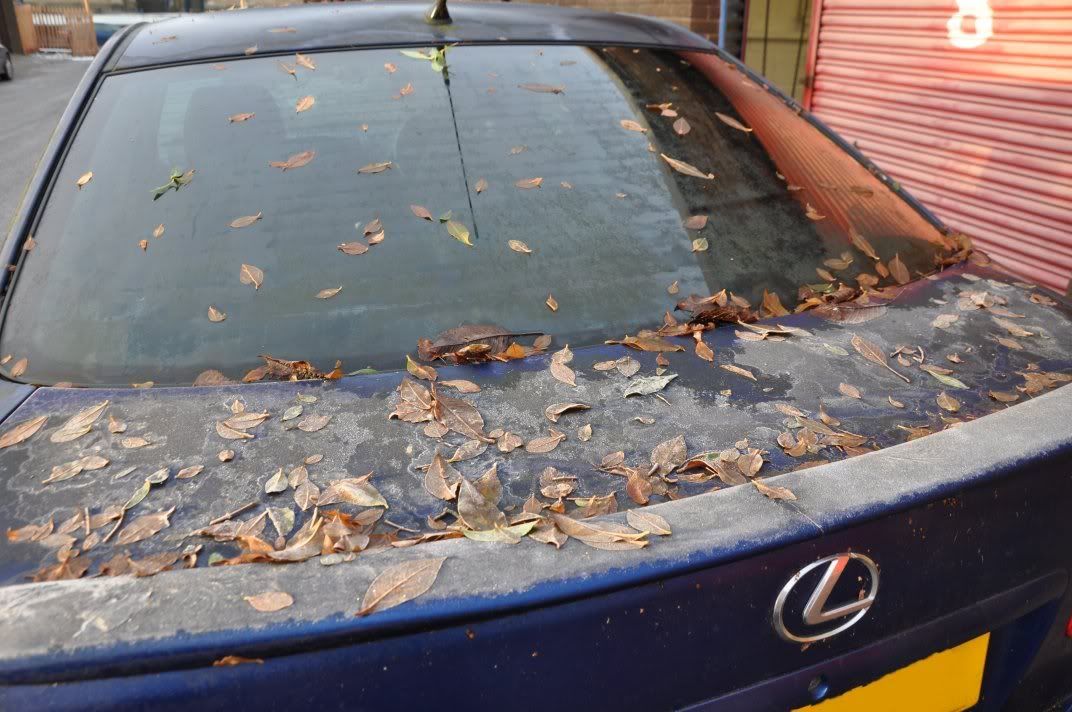
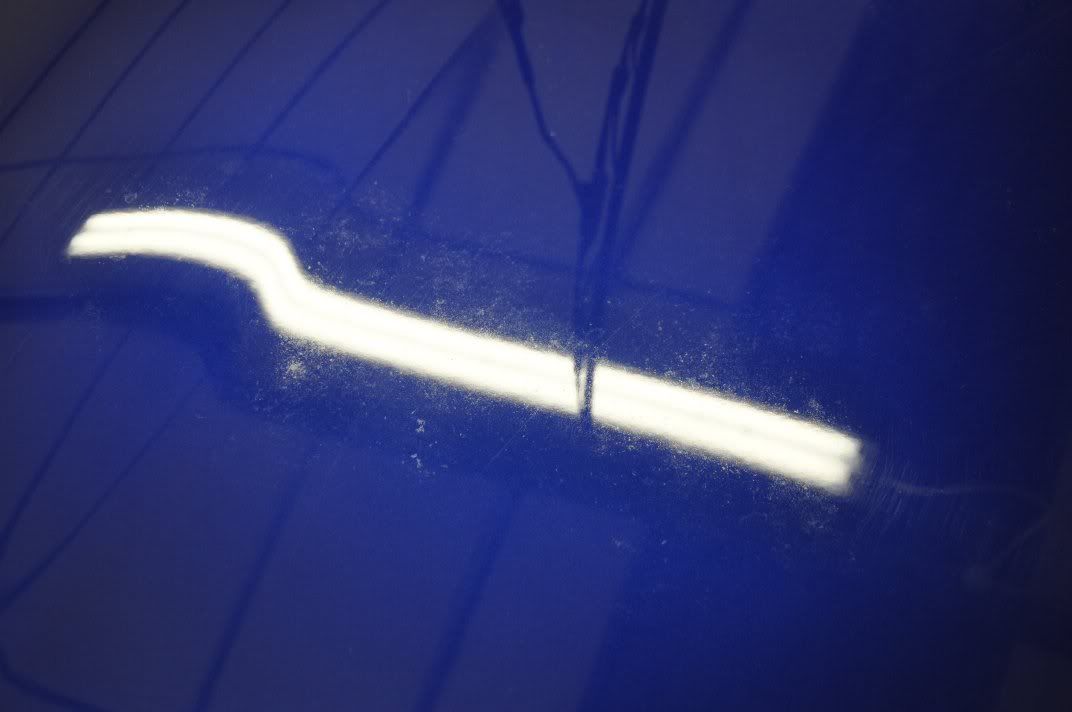
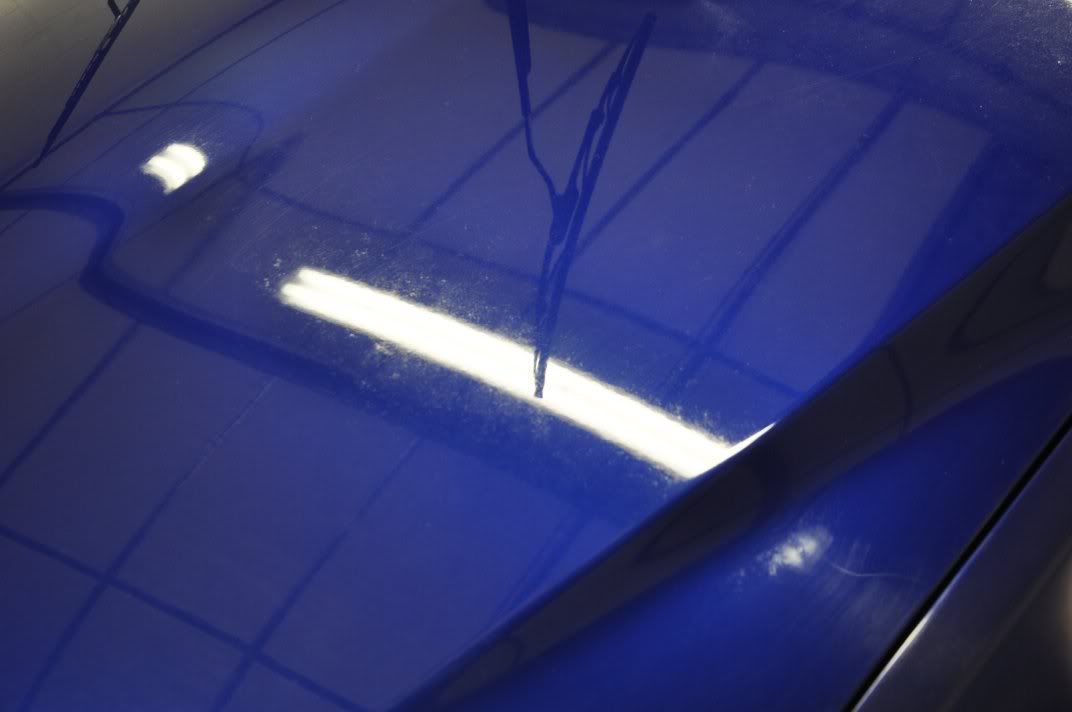
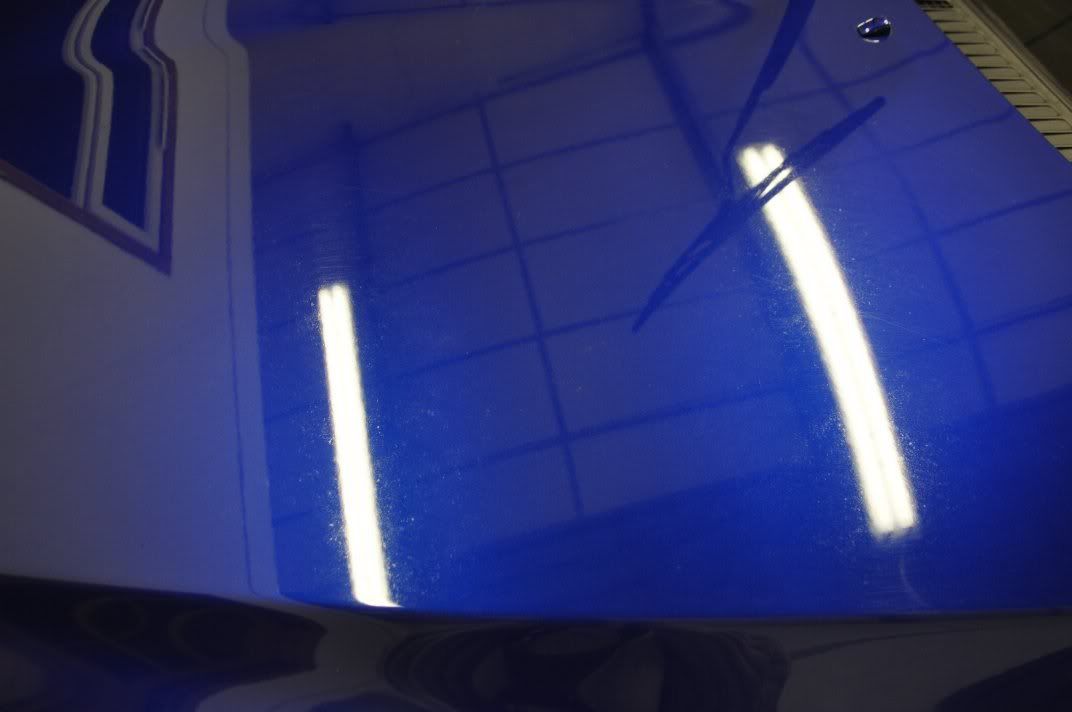
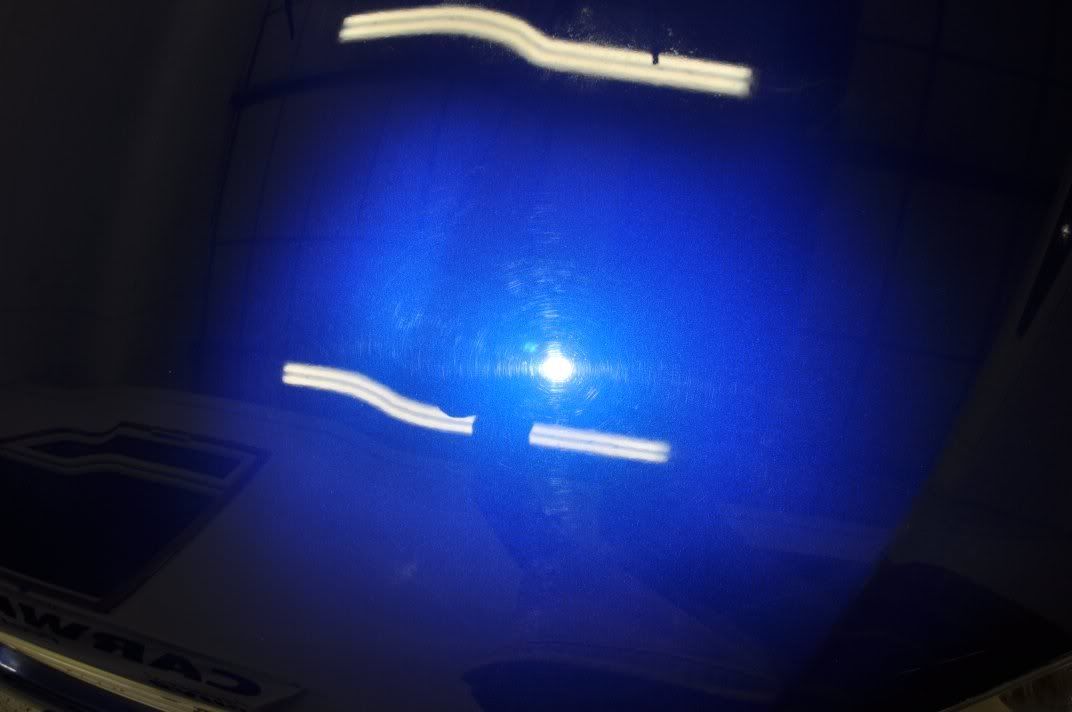
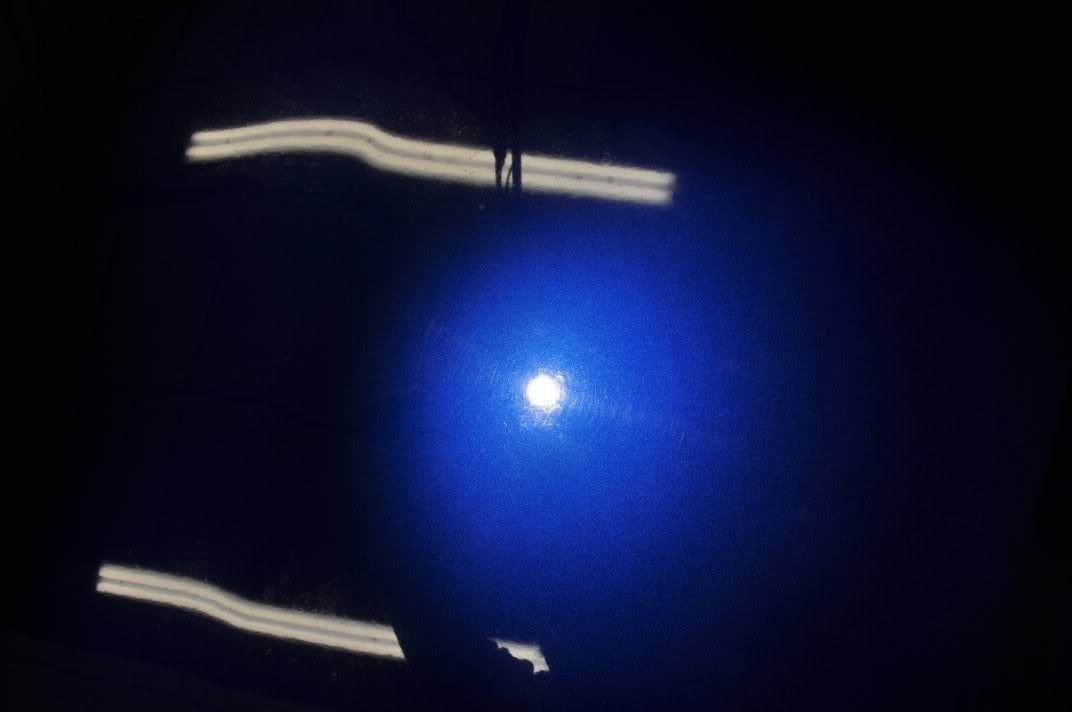
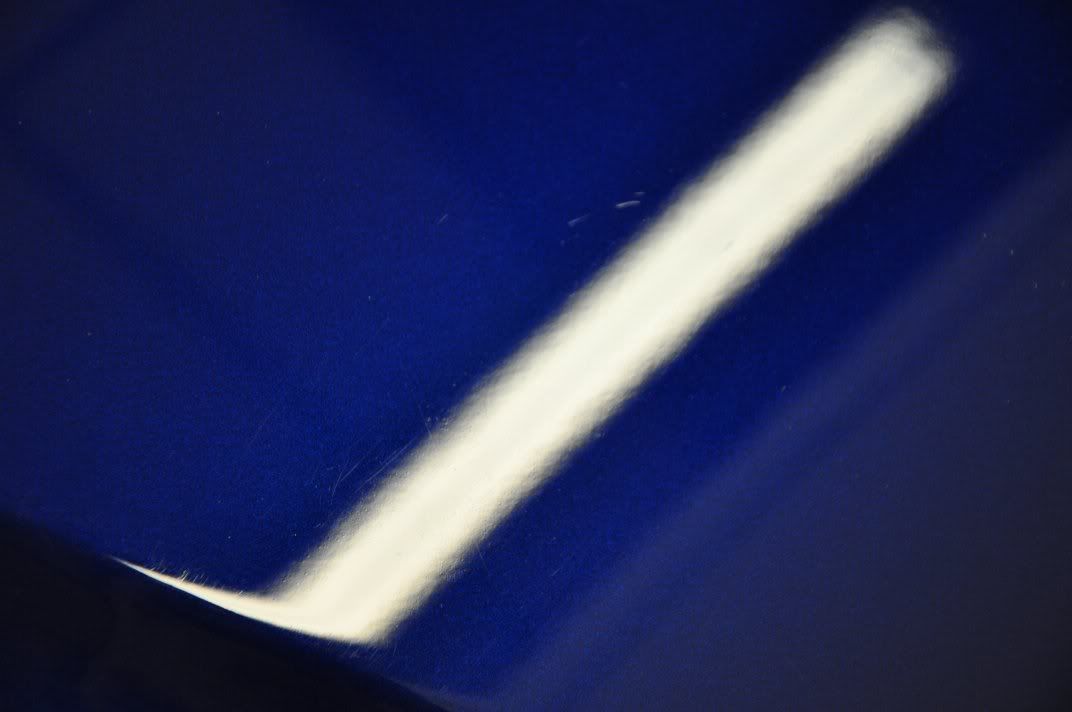
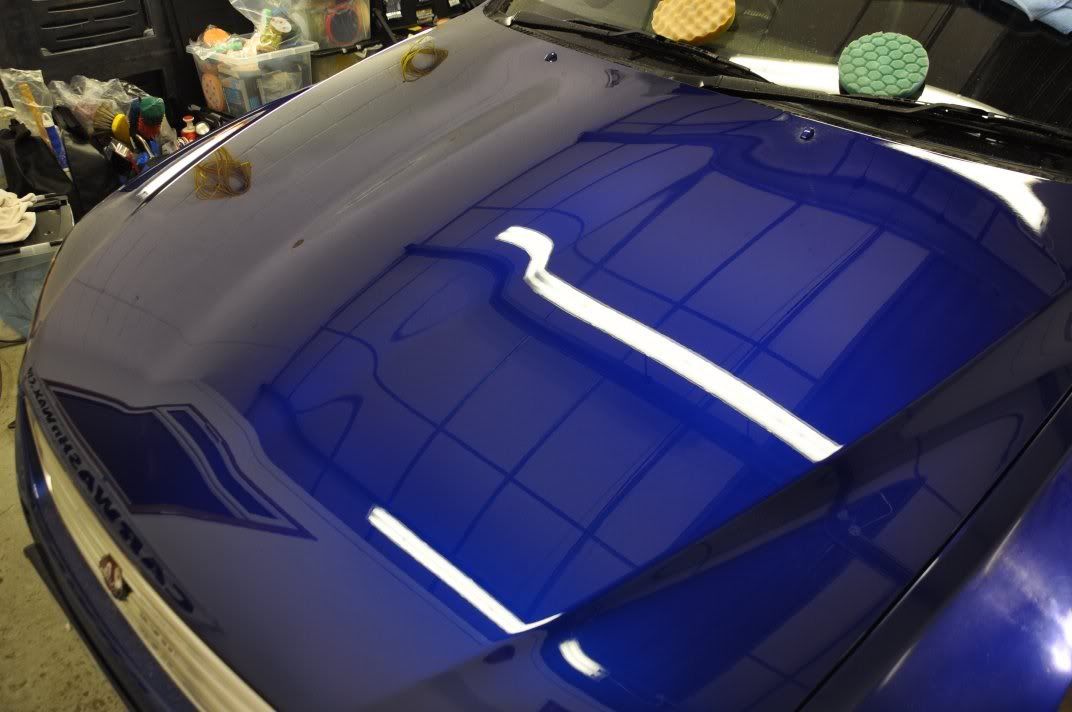
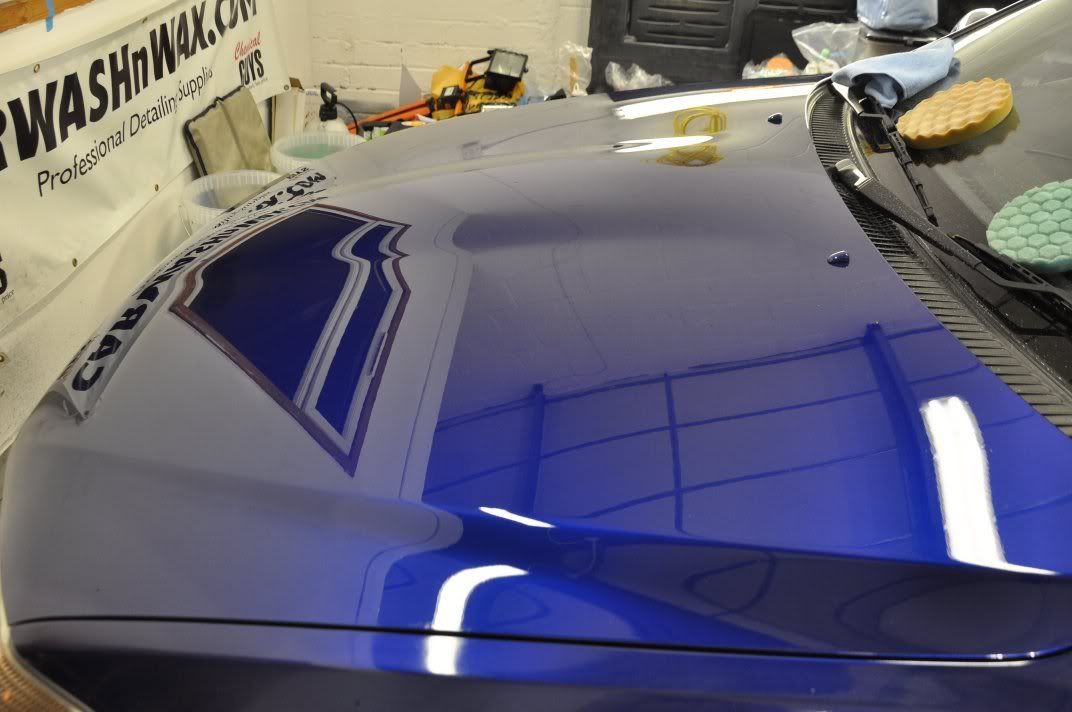
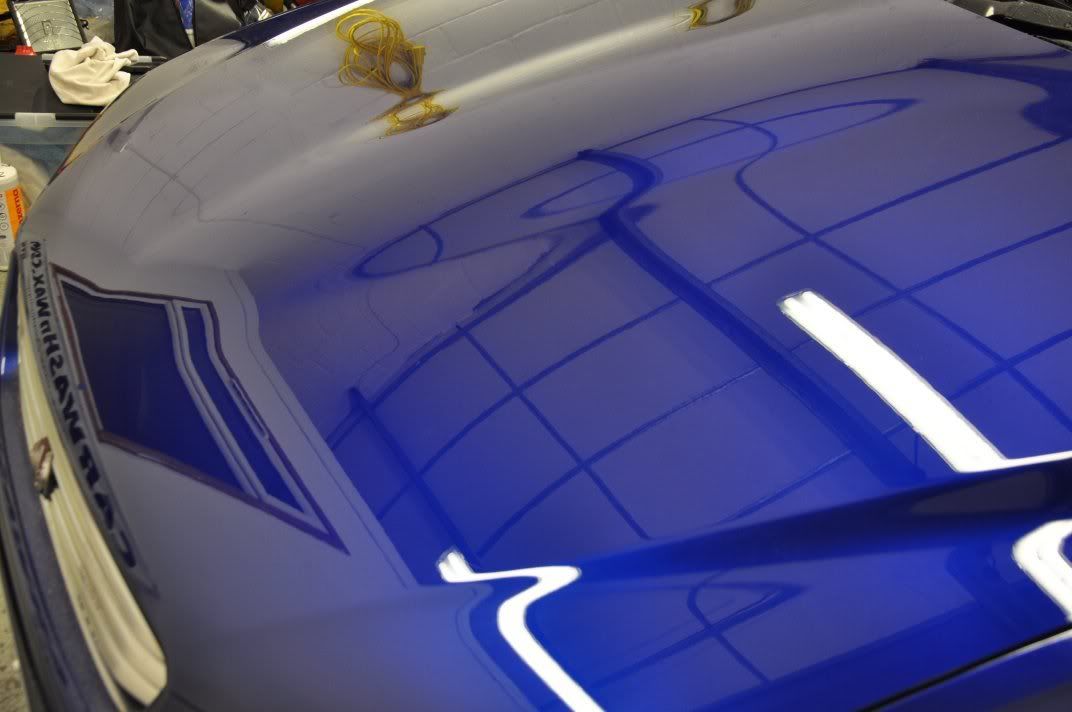
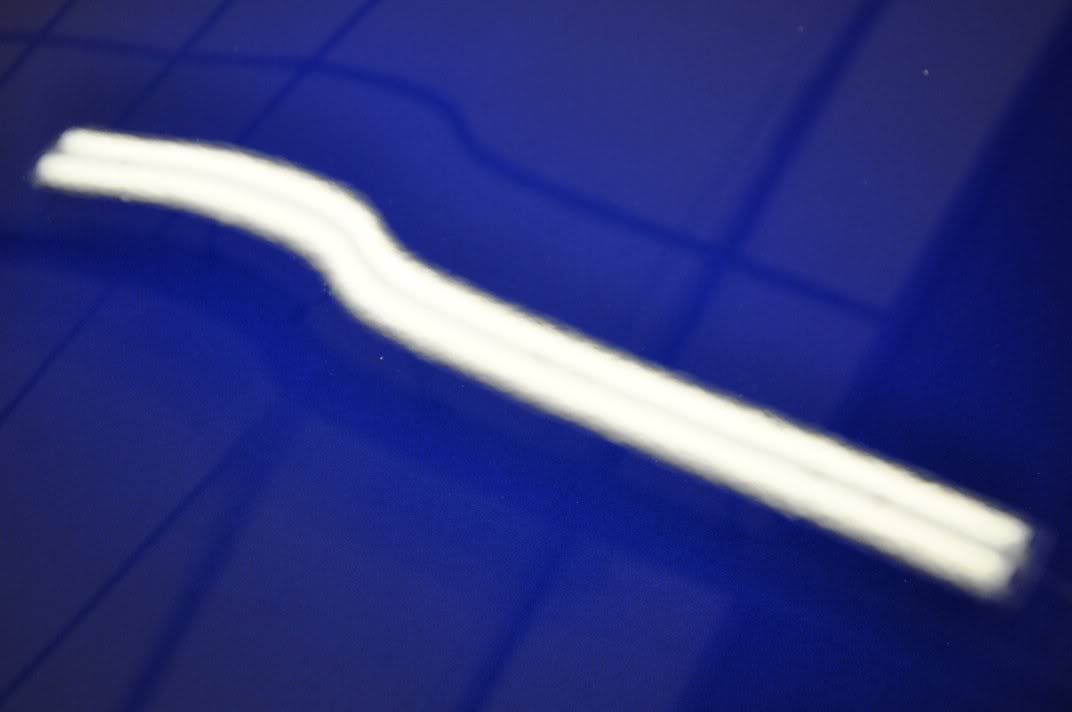
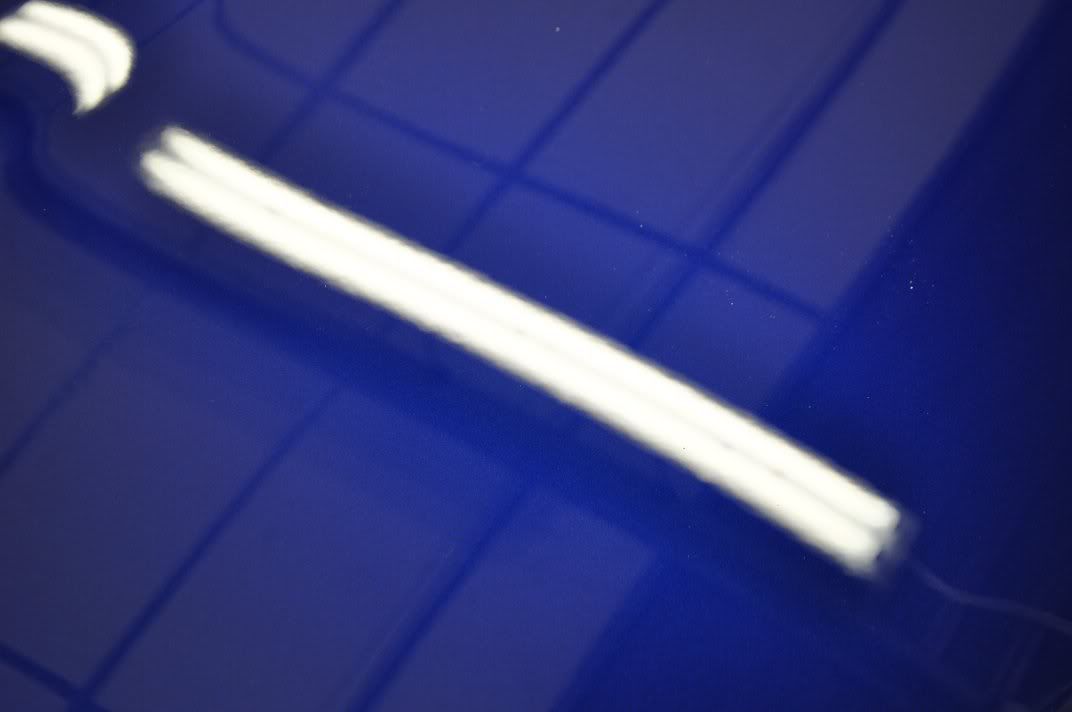
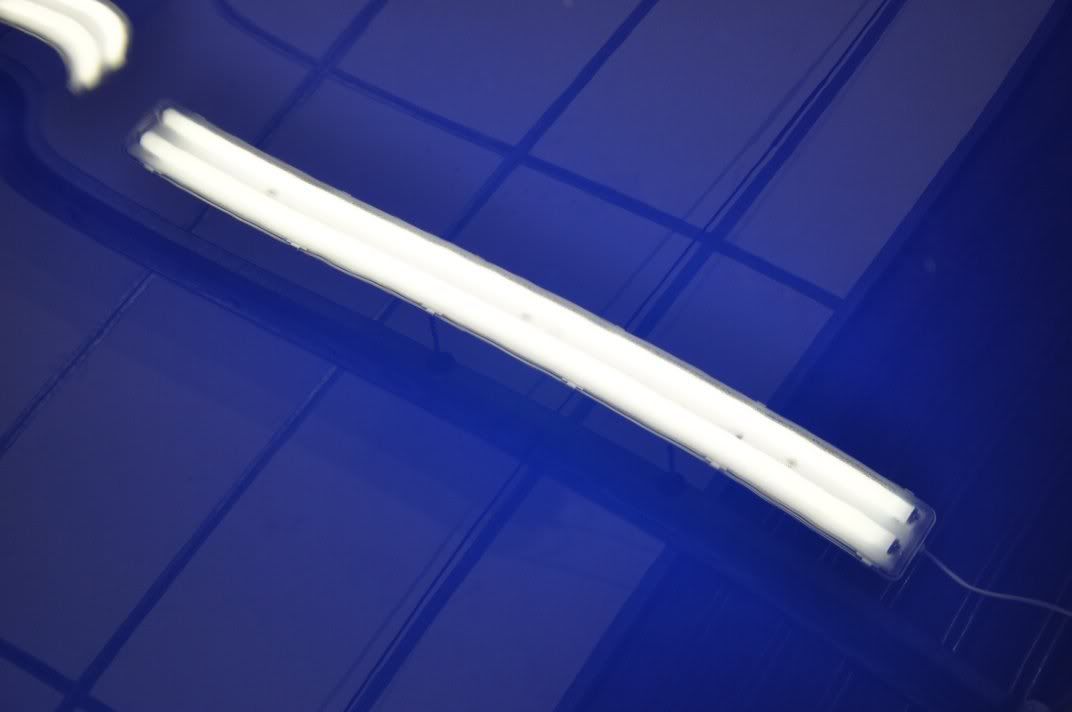
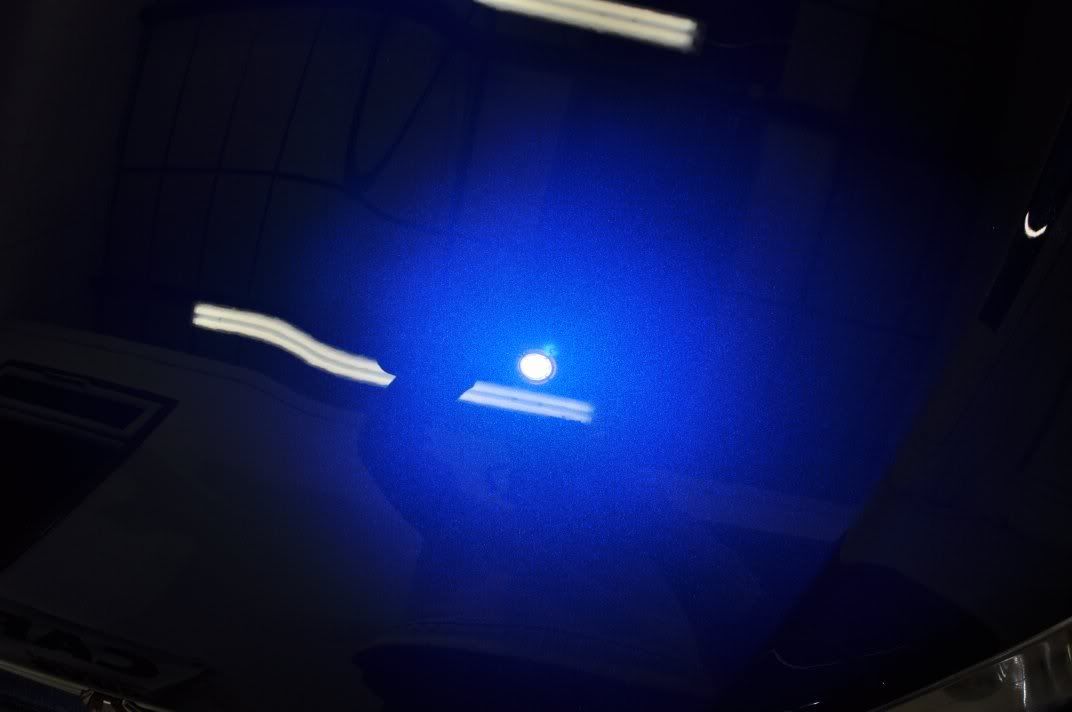
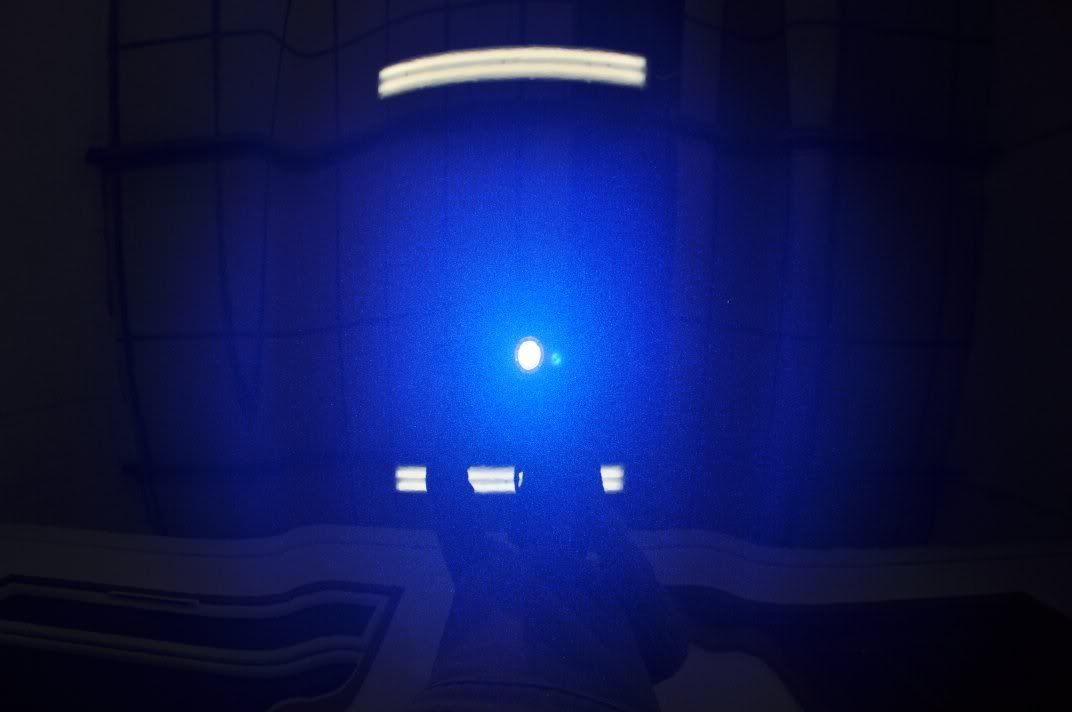
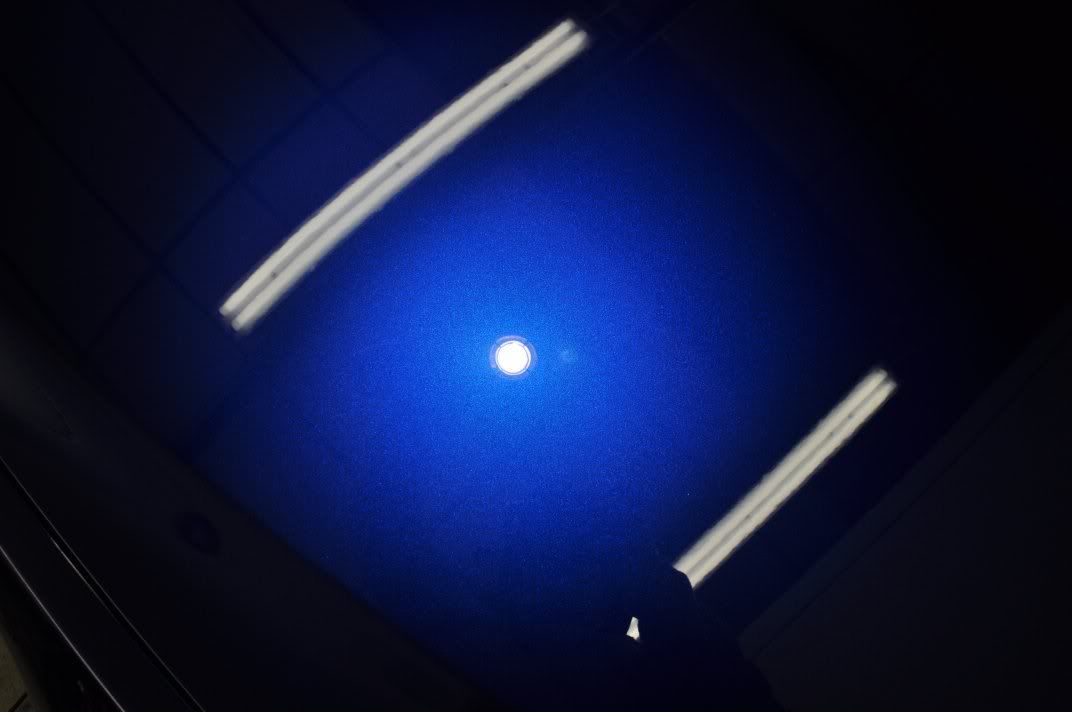
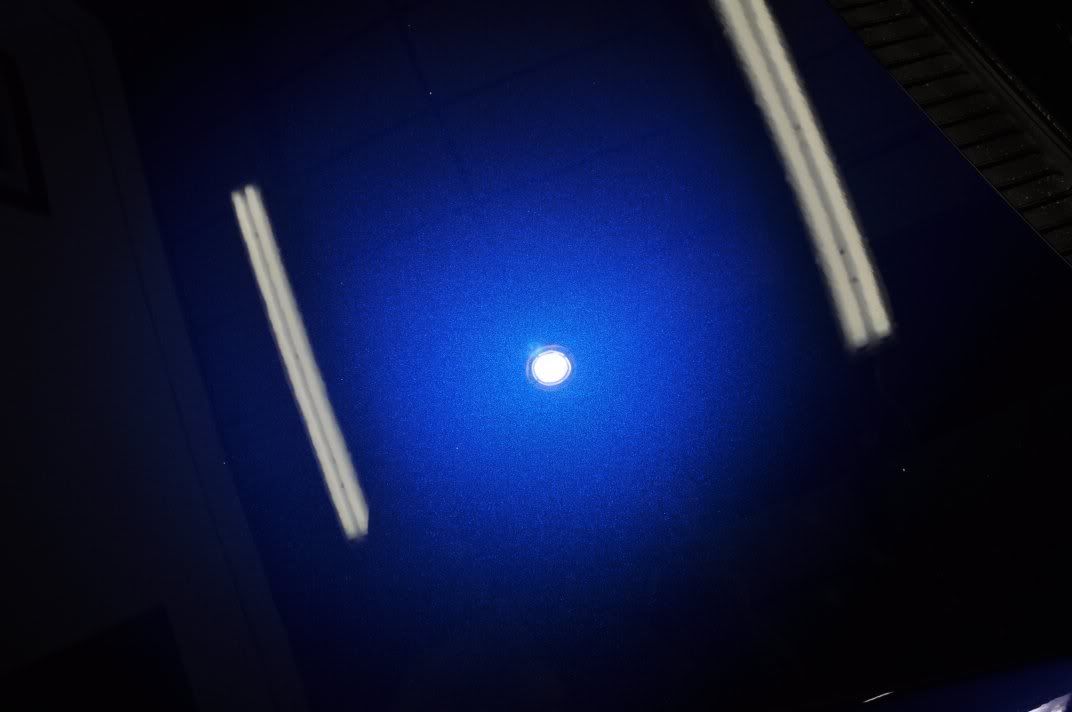
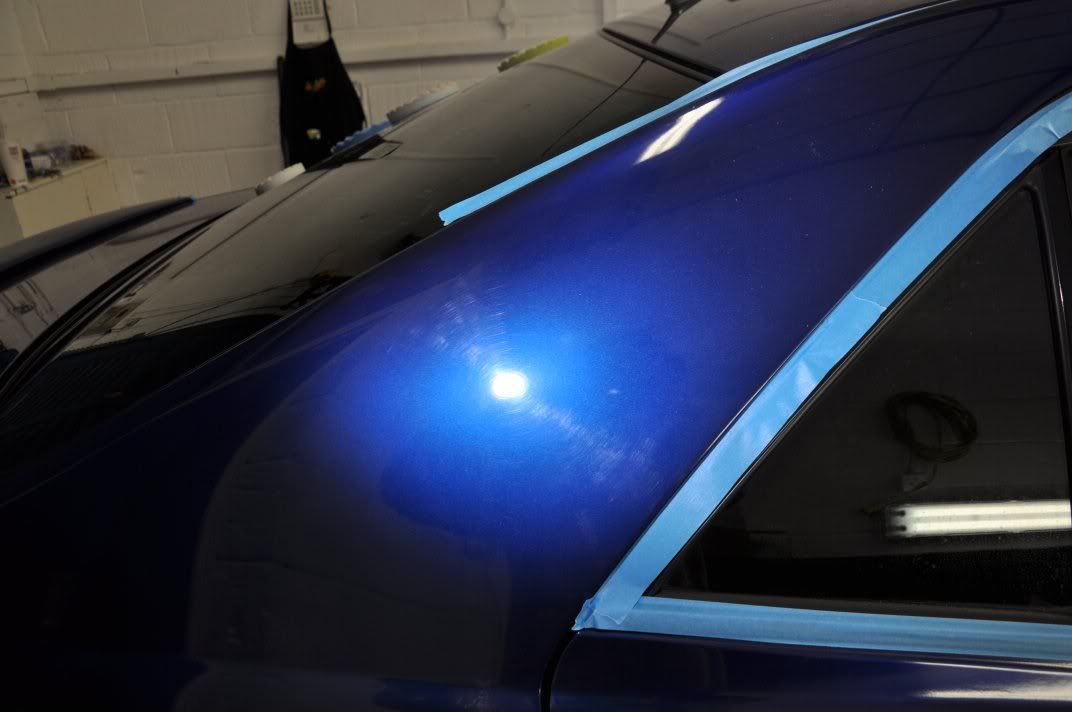
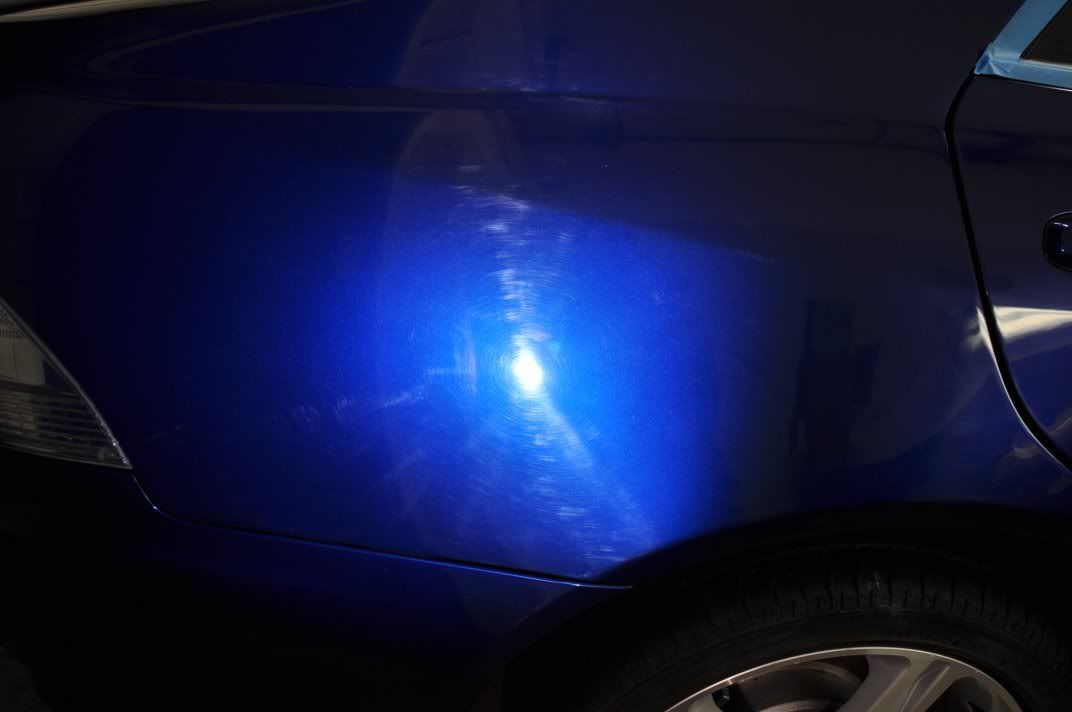
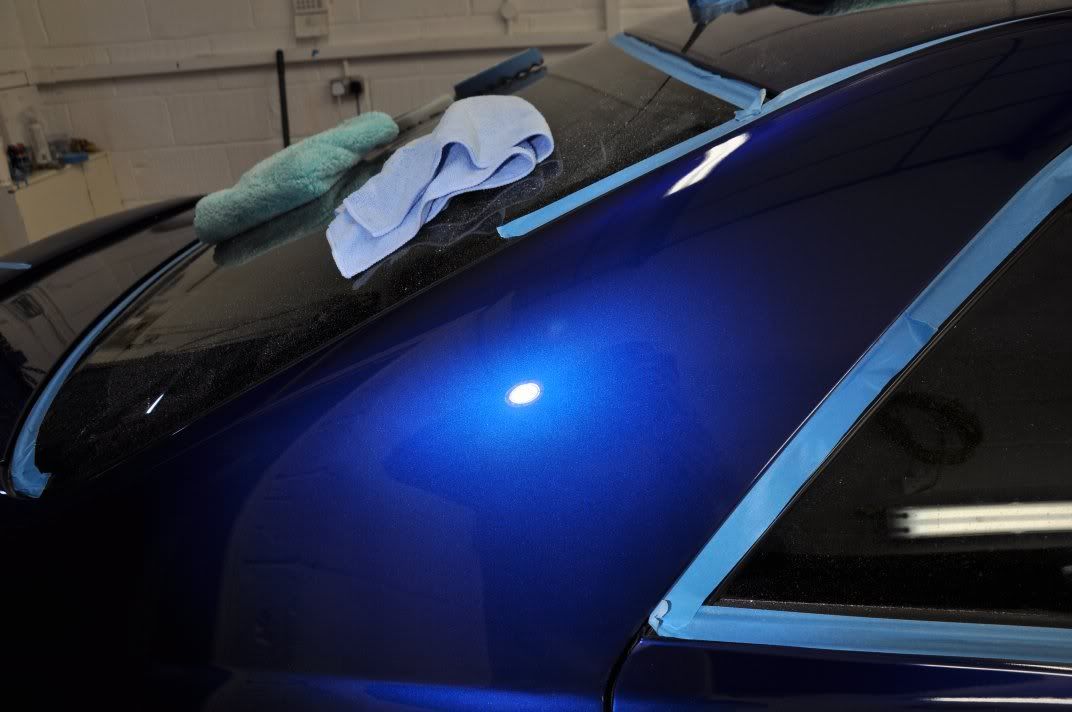
    Easily the most time consuming panel to correct however was the roof where the etching was at its worse:


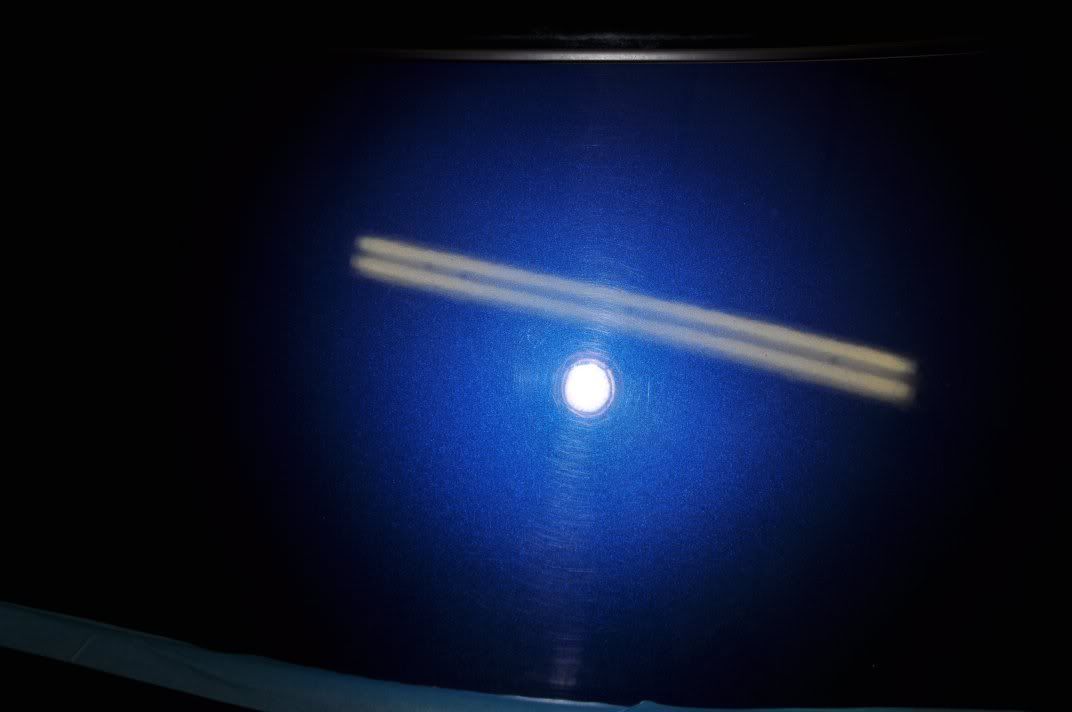
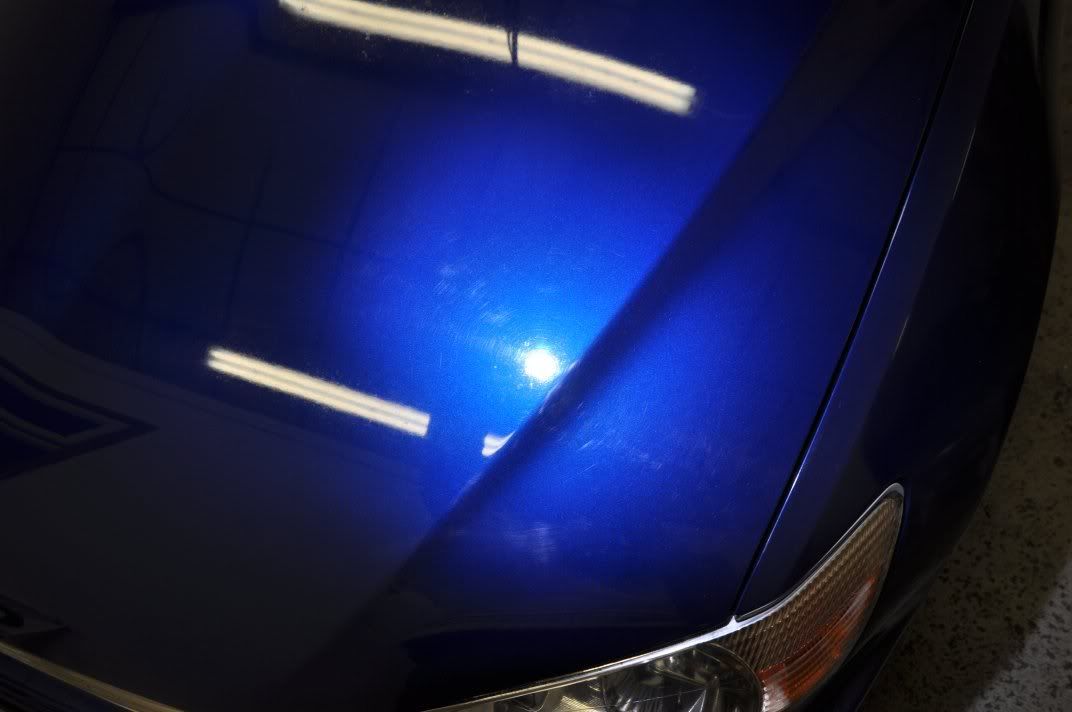
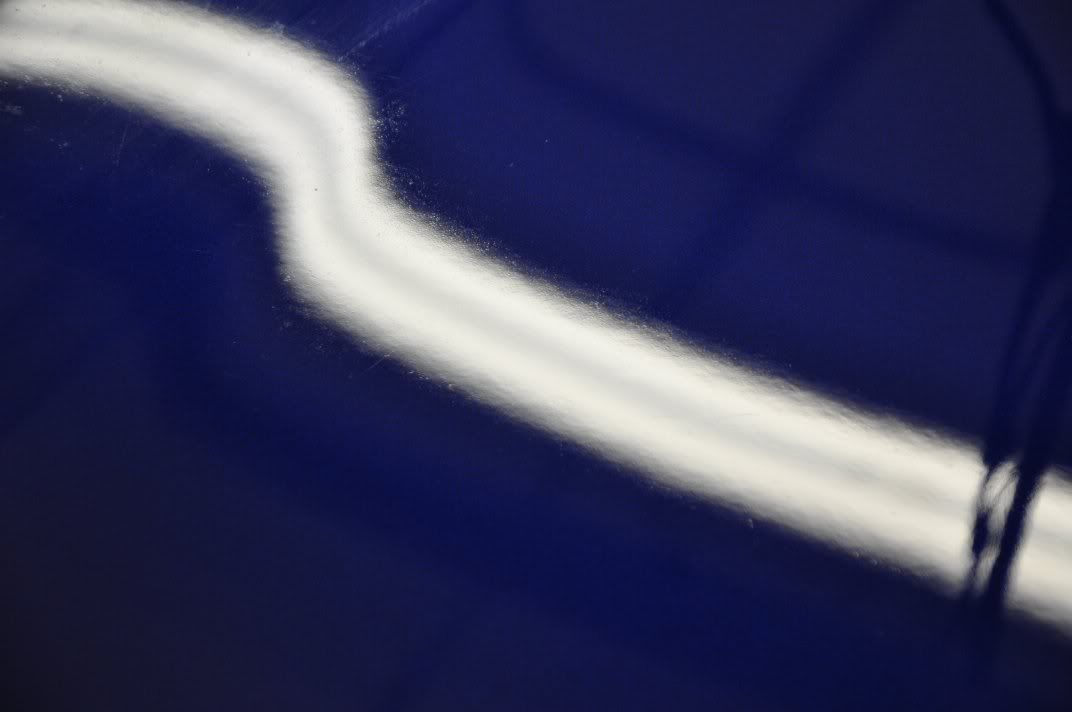
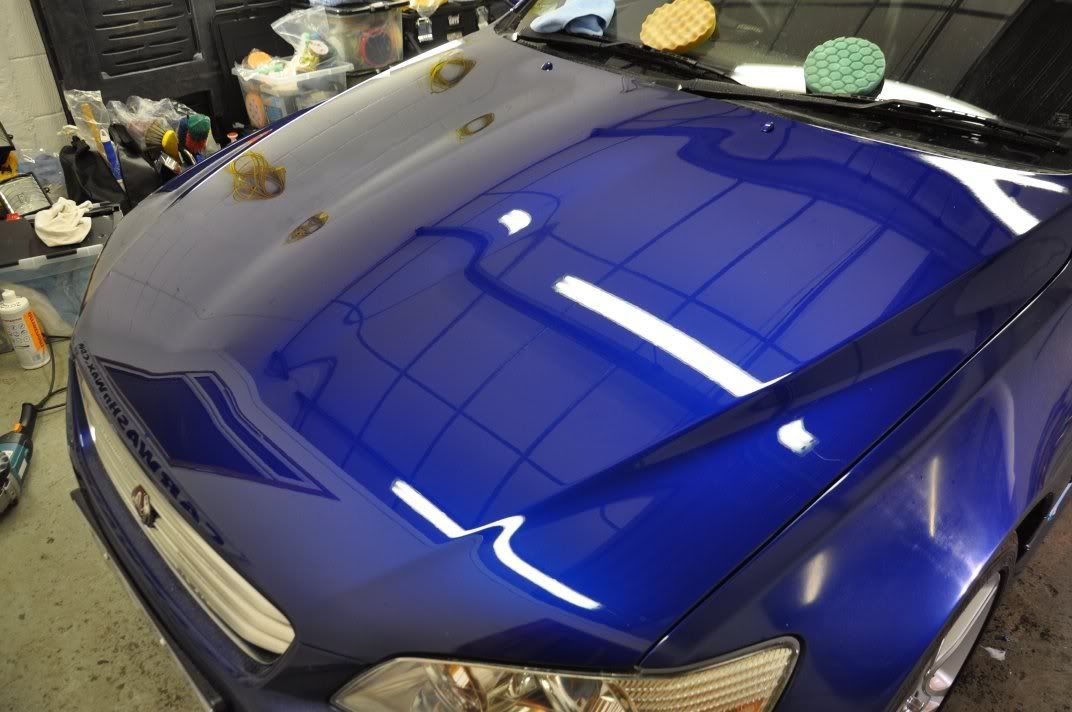
    Multiple hits of Fast Cut Plus as deemed safe were used to remove this etching, with the finish then being refined using Intensive Polish and Meguiars #205 to leave the following – a fairly significant turnaround, but at the cost of about 10um of paint:


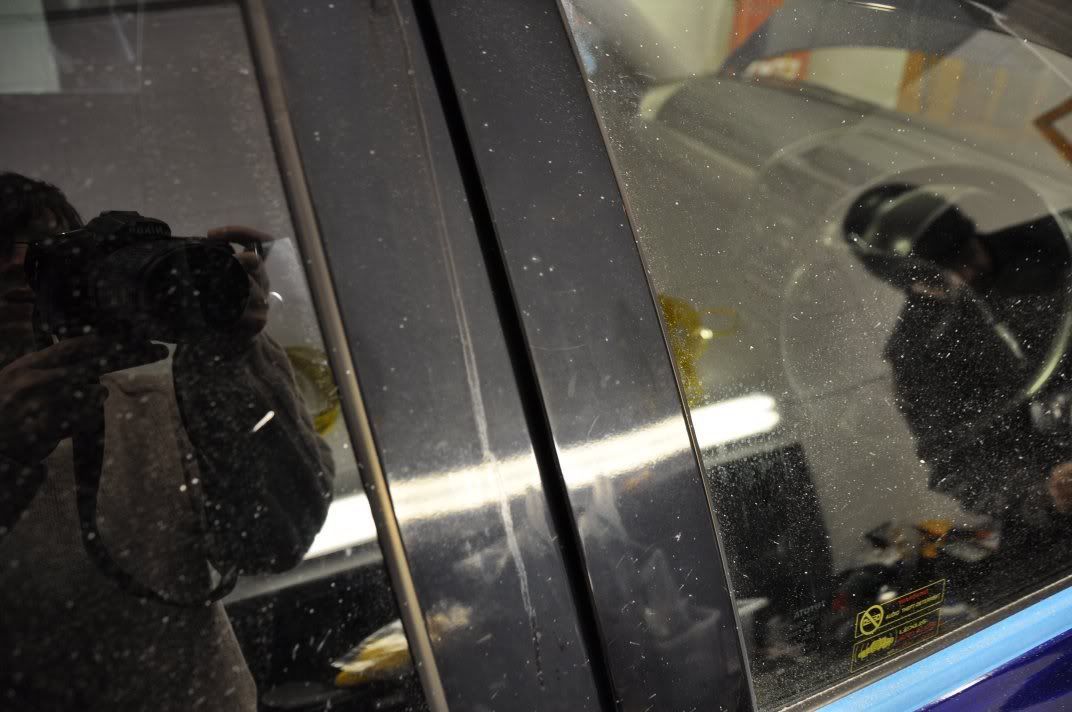
    The gloss black trim was looking rather sorry for itself before:


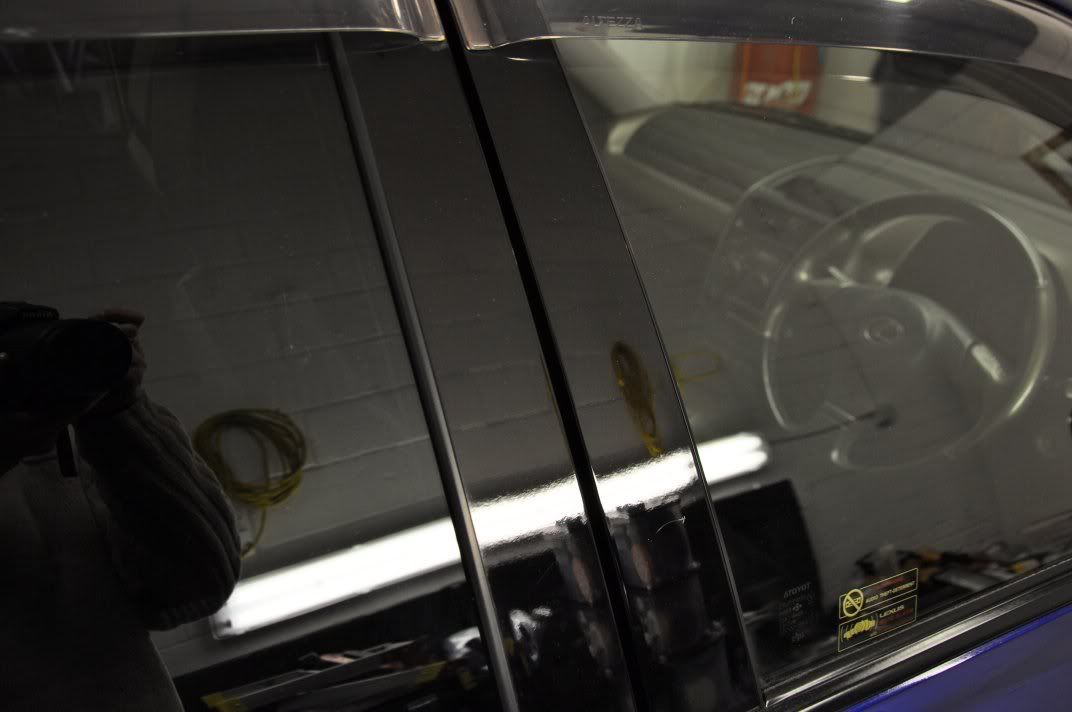
    Cheered up nicely after:


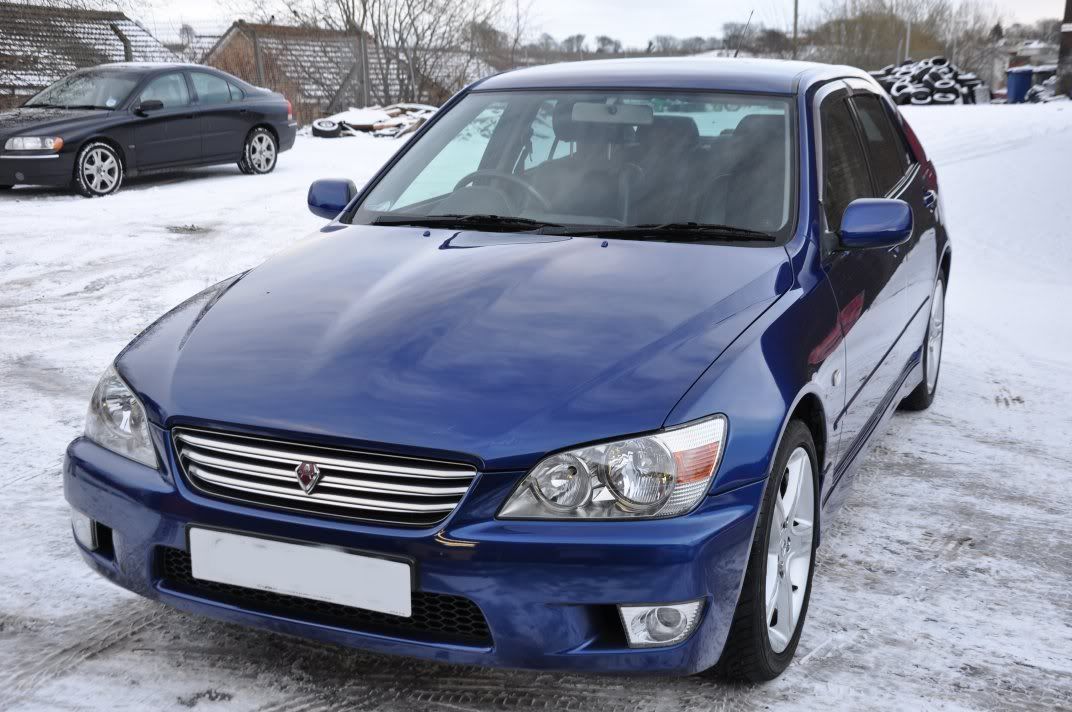
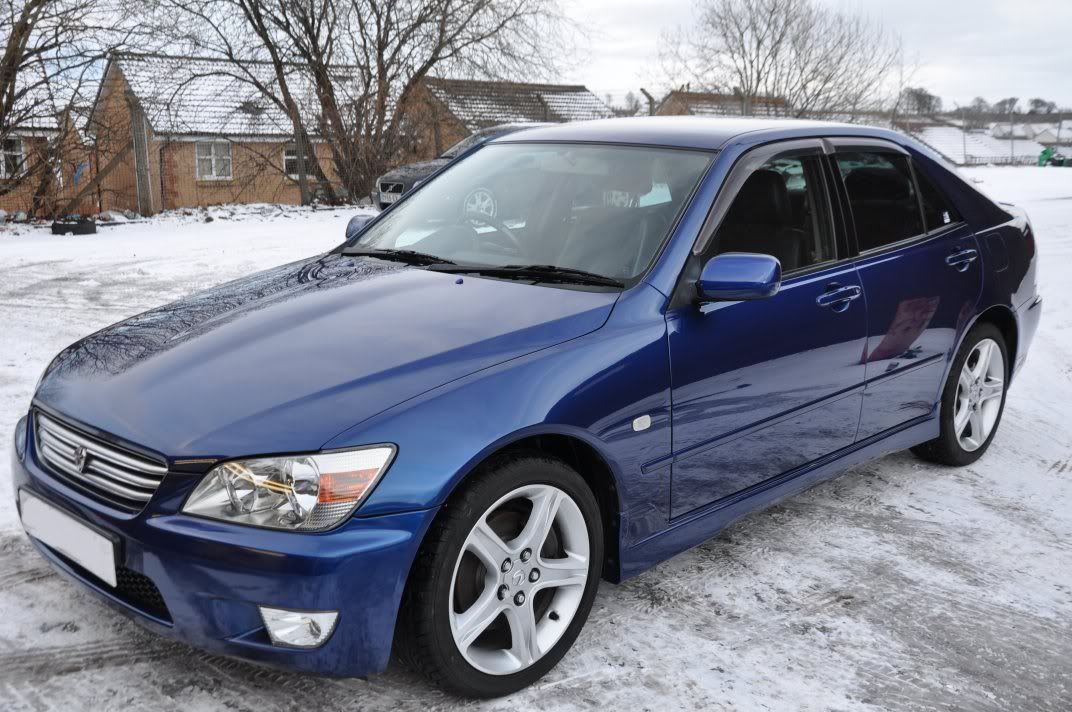
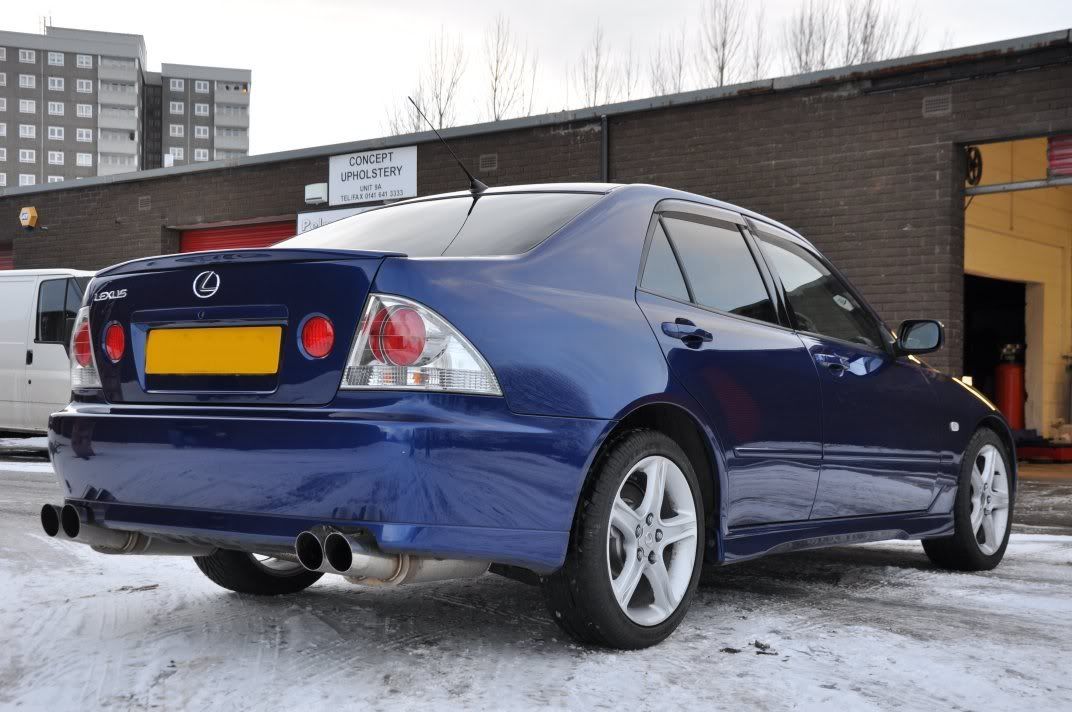
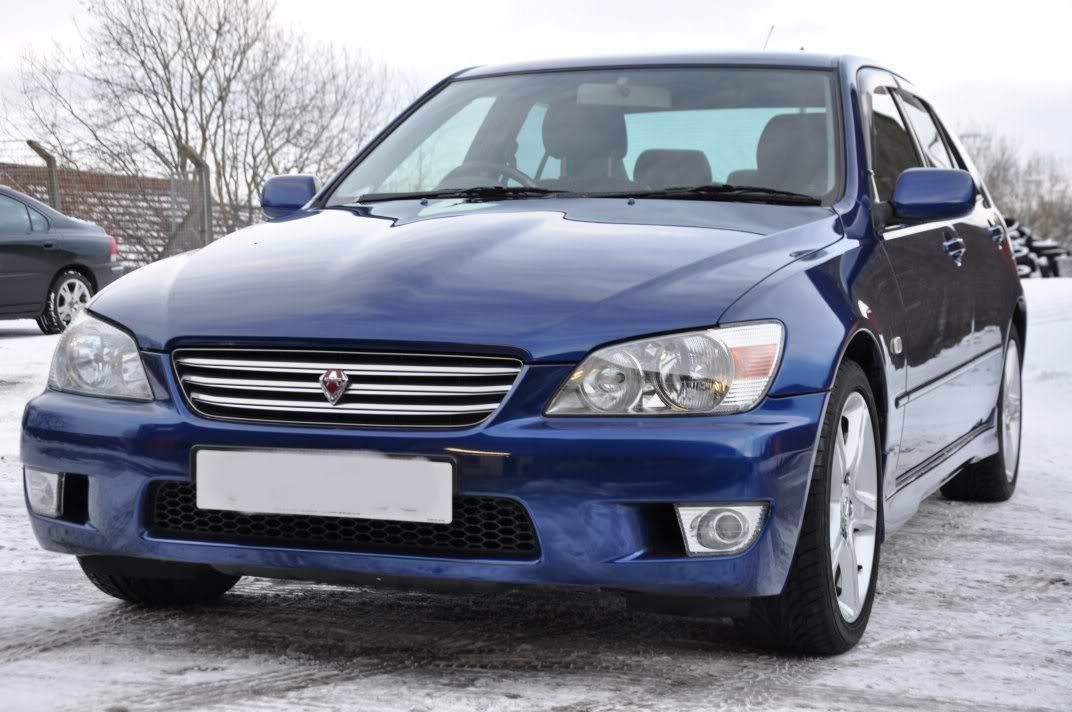
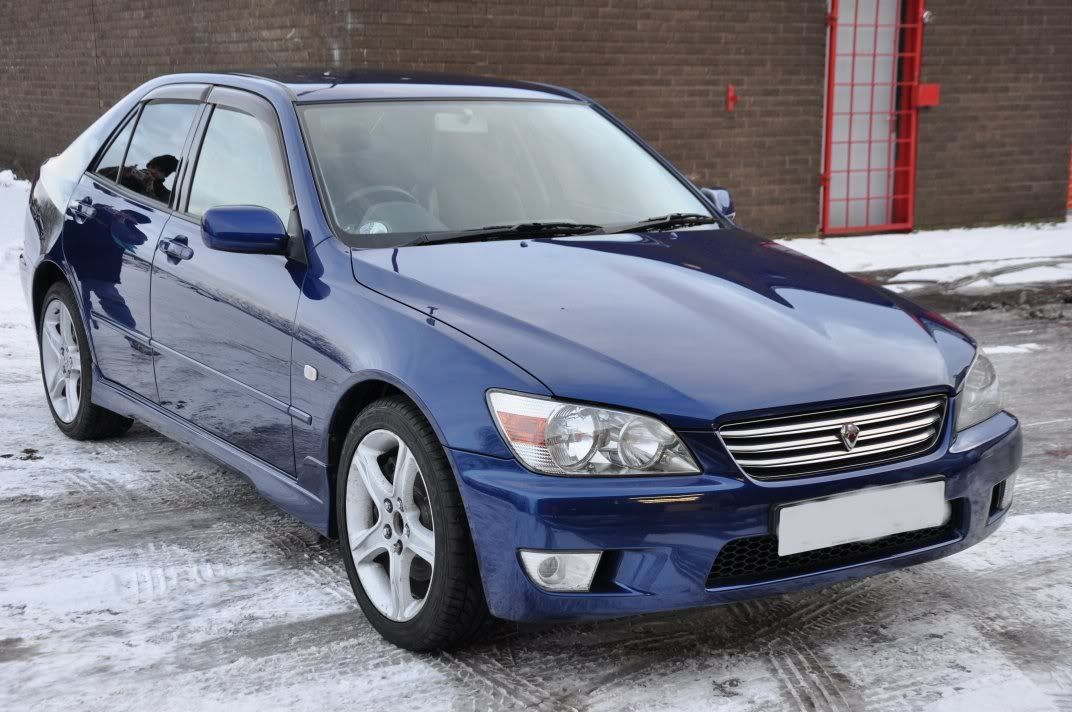
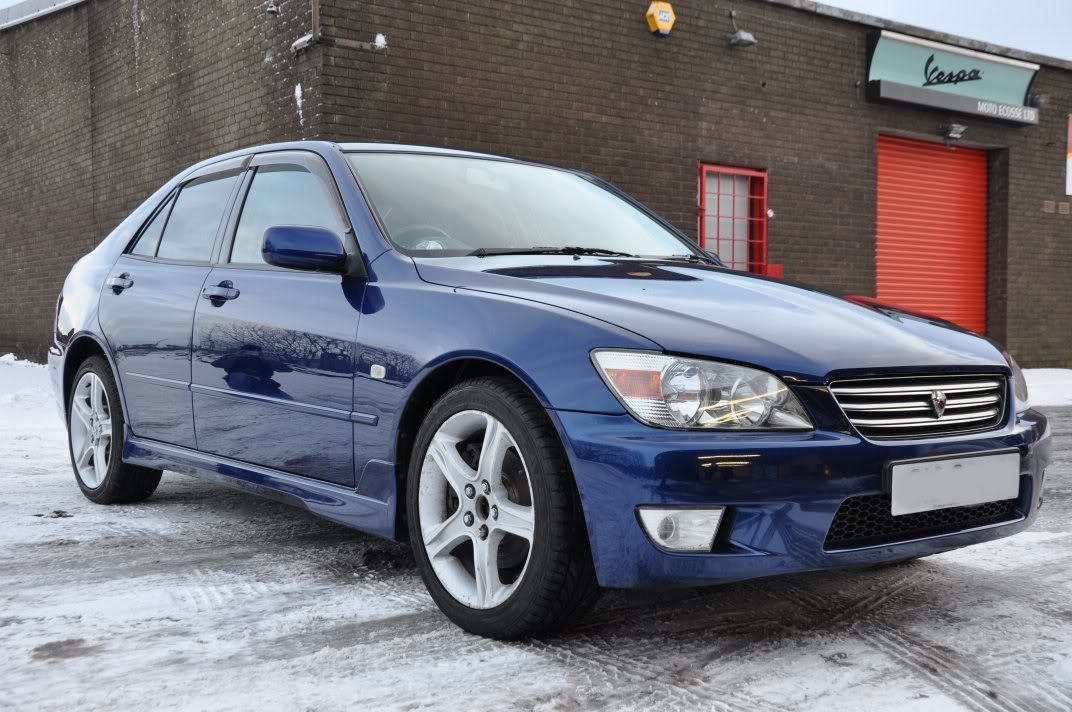
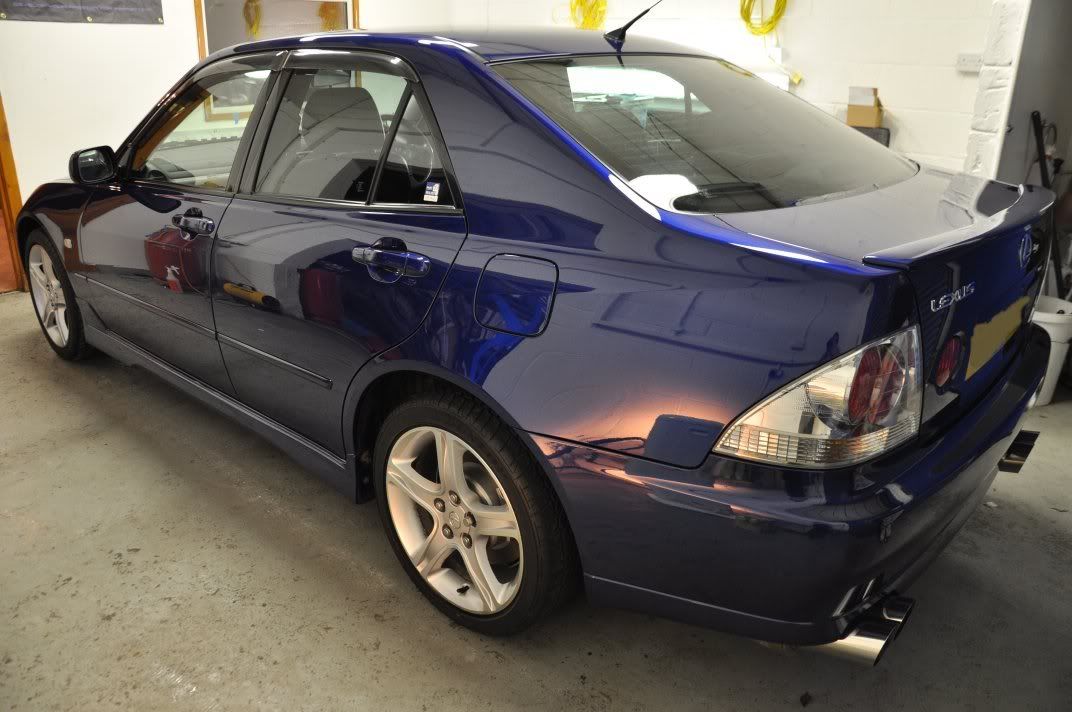
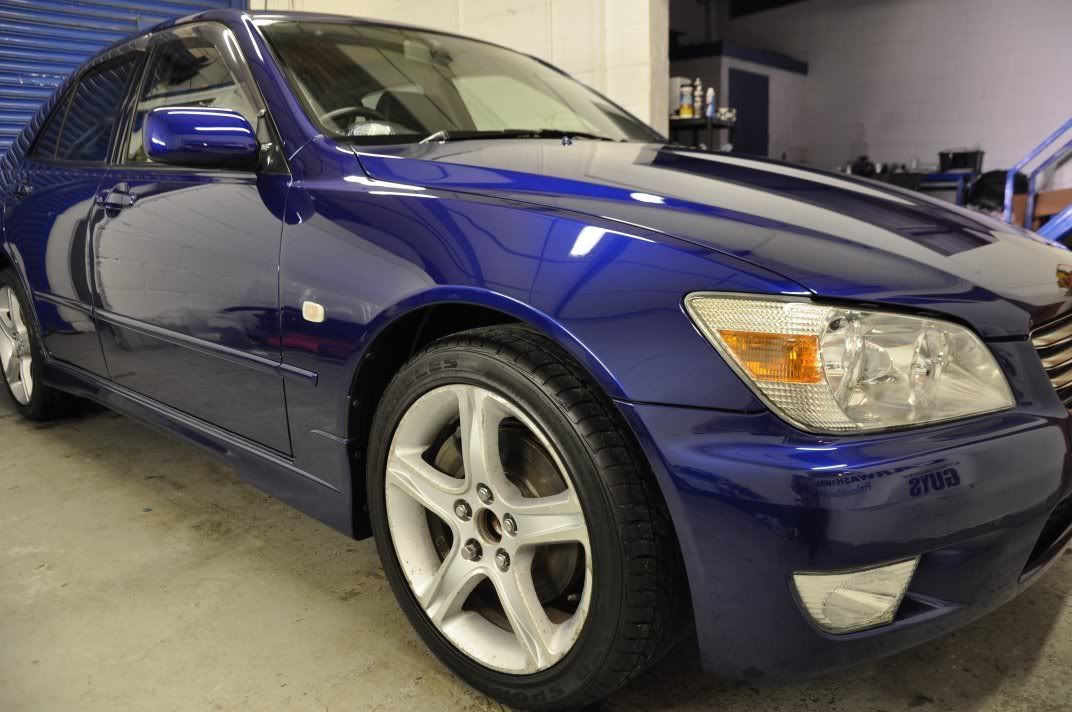
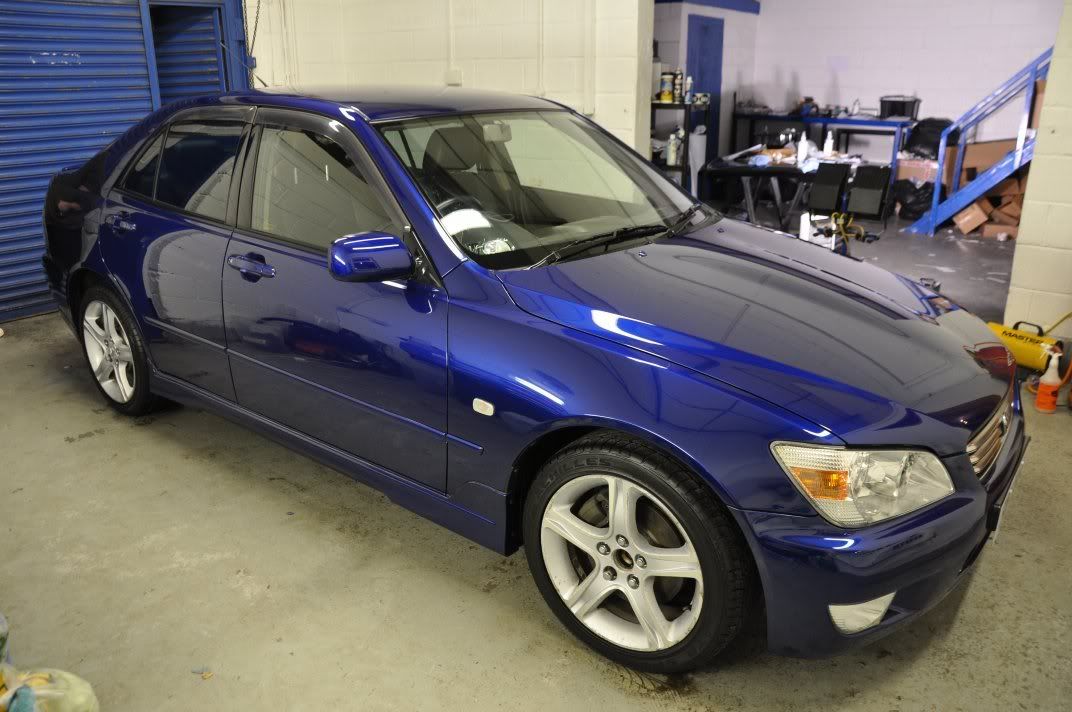
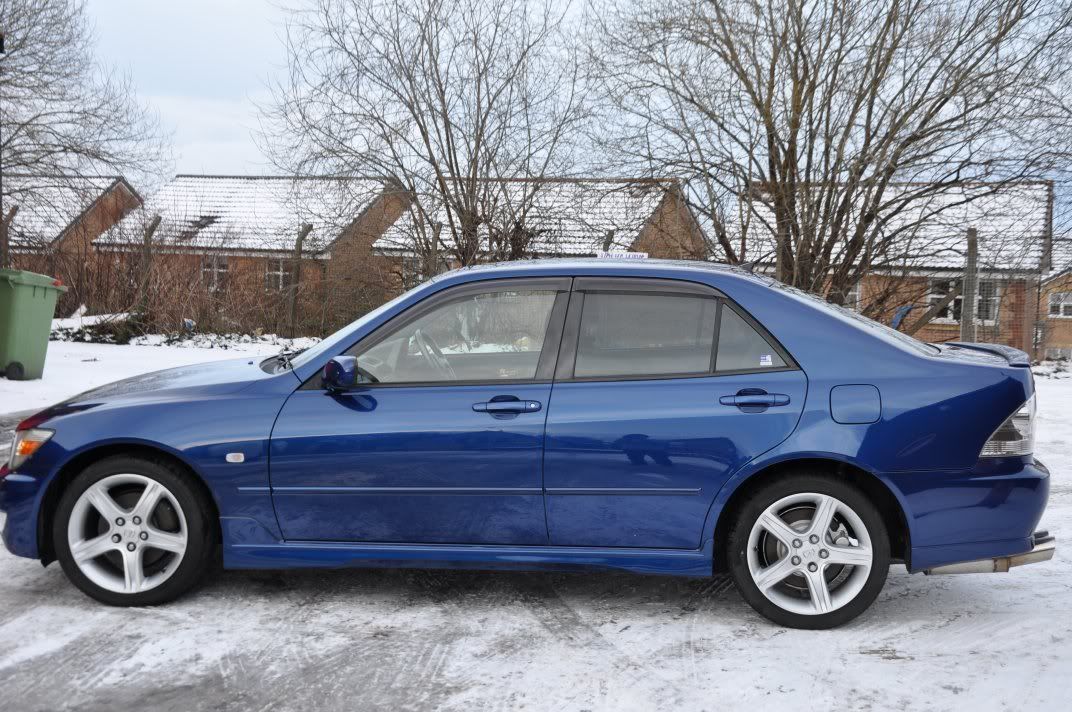
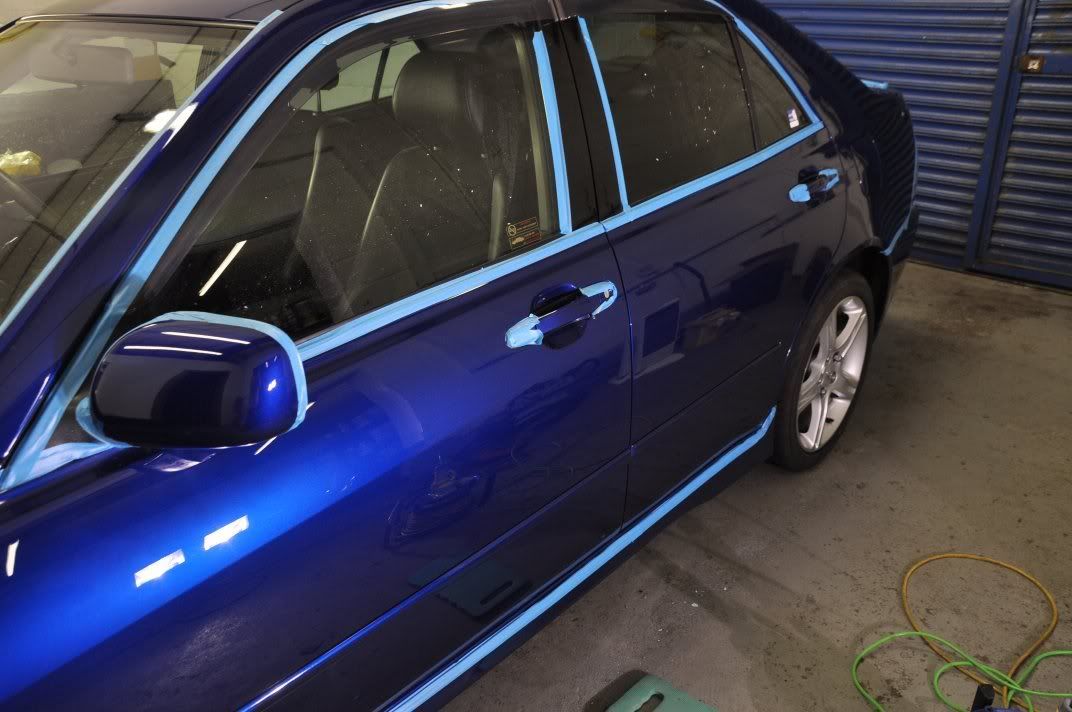
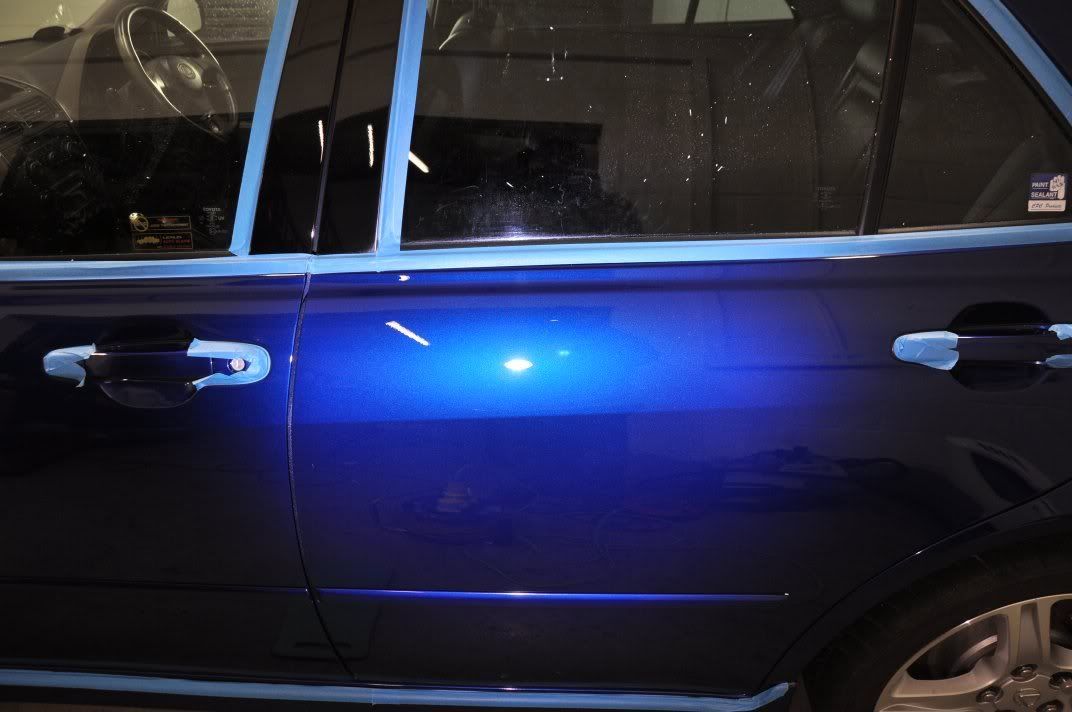
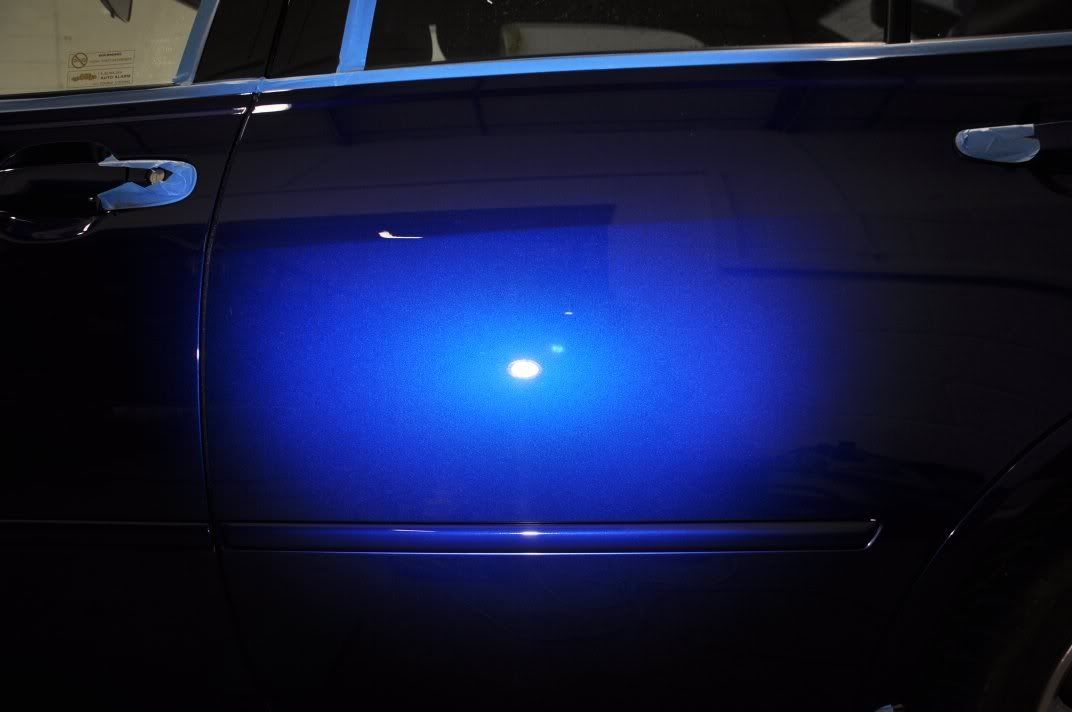
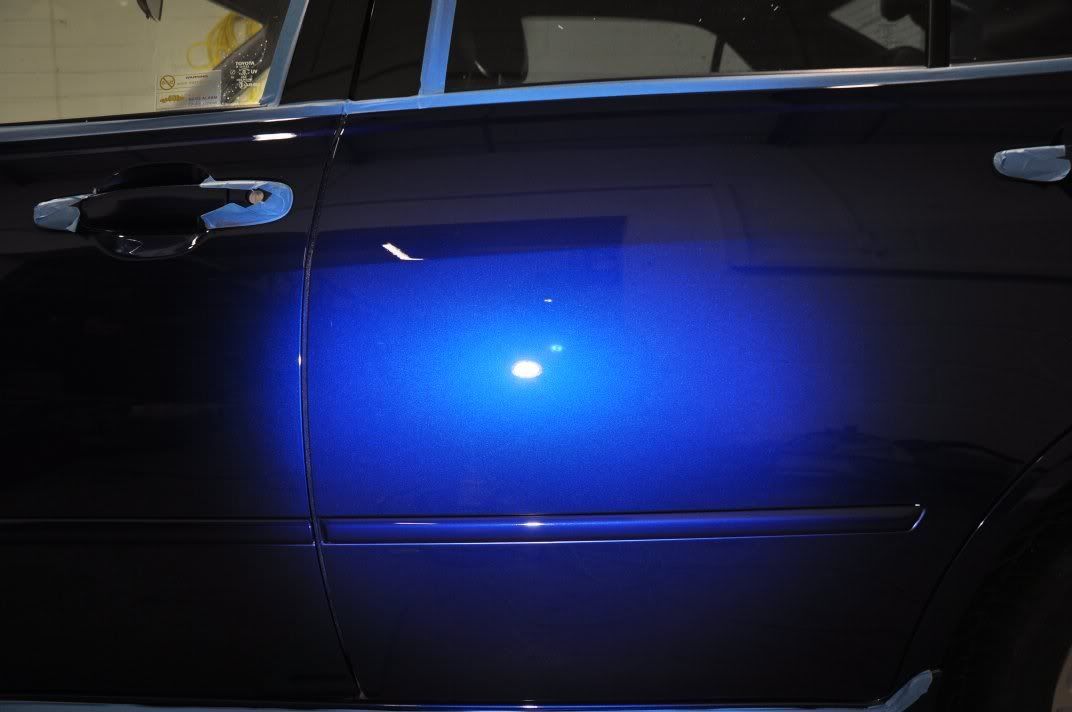
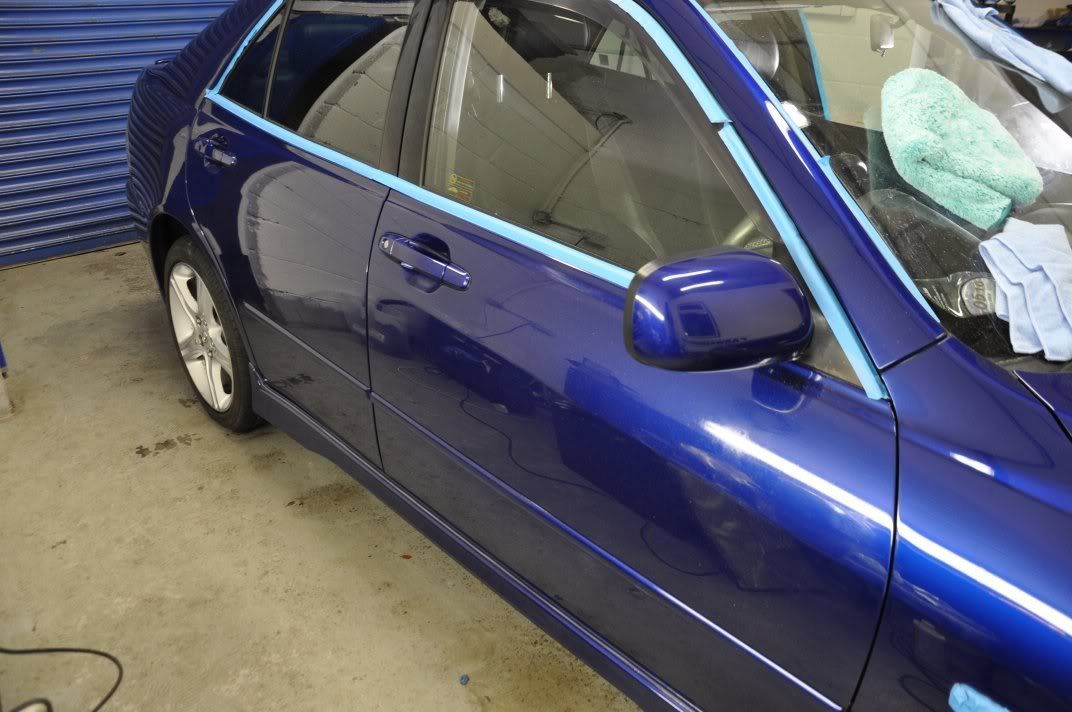
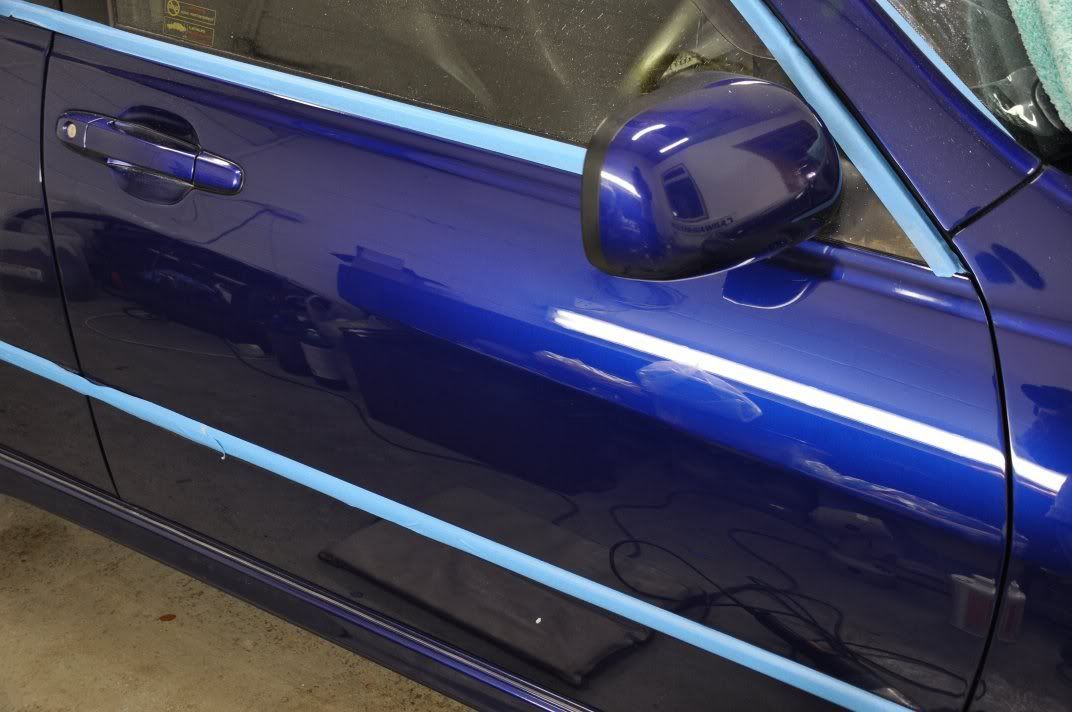
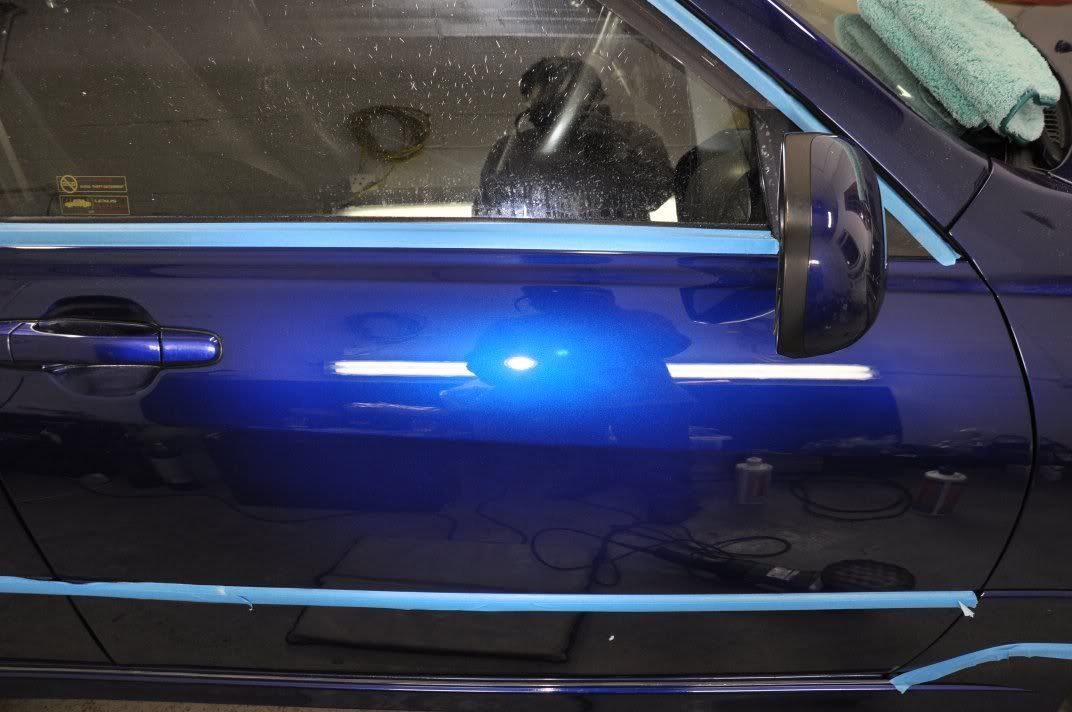
    As much as we would have loved fully completed after shots outside in the daylight, I’m afraid time simply did not allow and we were not willing to rush anything just for the sake of some after shots – so we took the car to the completion of the machine polishing stage and around 3pm we got the following “after” pics in the slightly fading afternoon light... pics do well to show the turnaround though ... Still a few bits to do at this stage (protection, glass, tyres and trim, and arches to be dressed), but we wanted to take these pics to give an idea of the level of turnaround achieved on this car in the daylight. Enjoy :


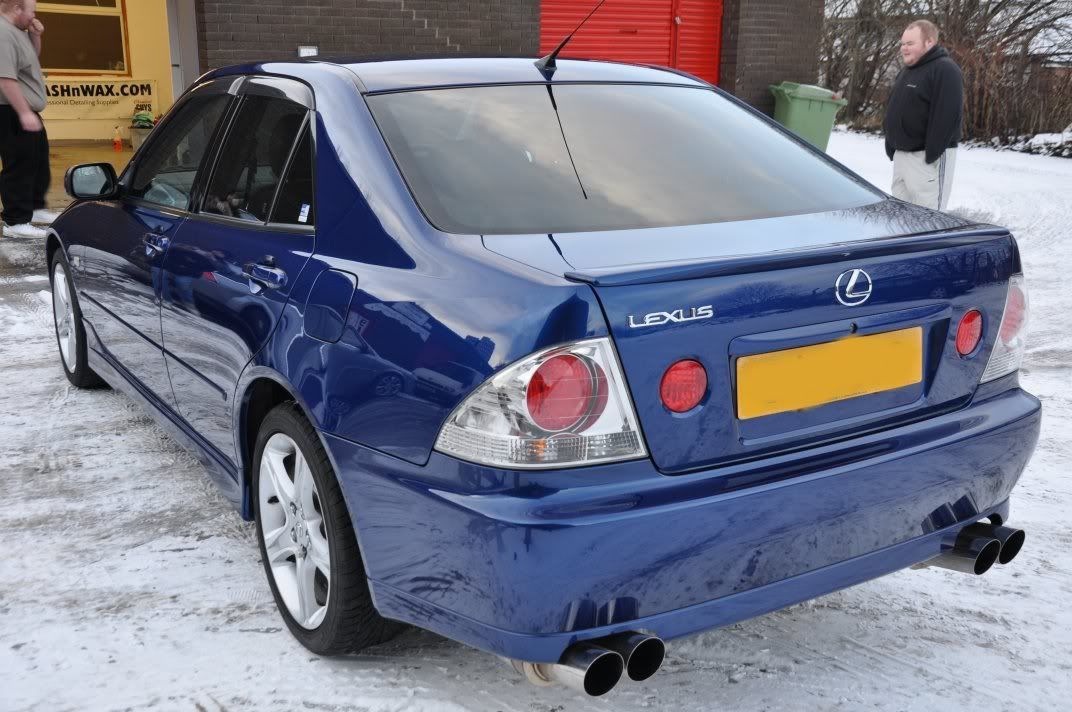
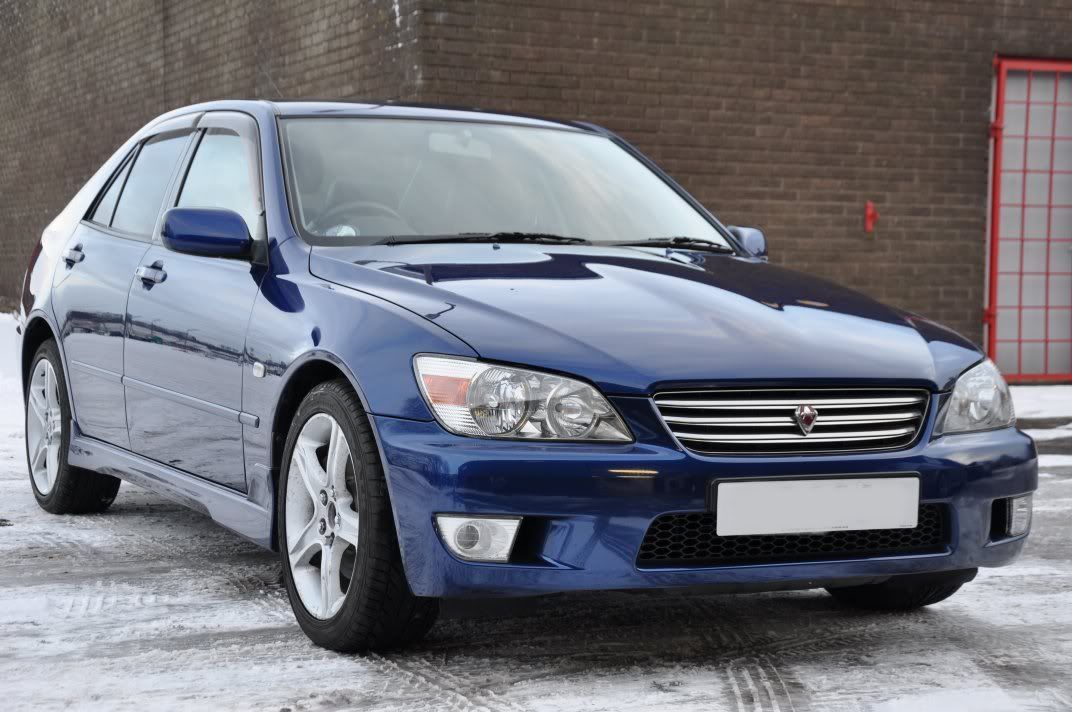
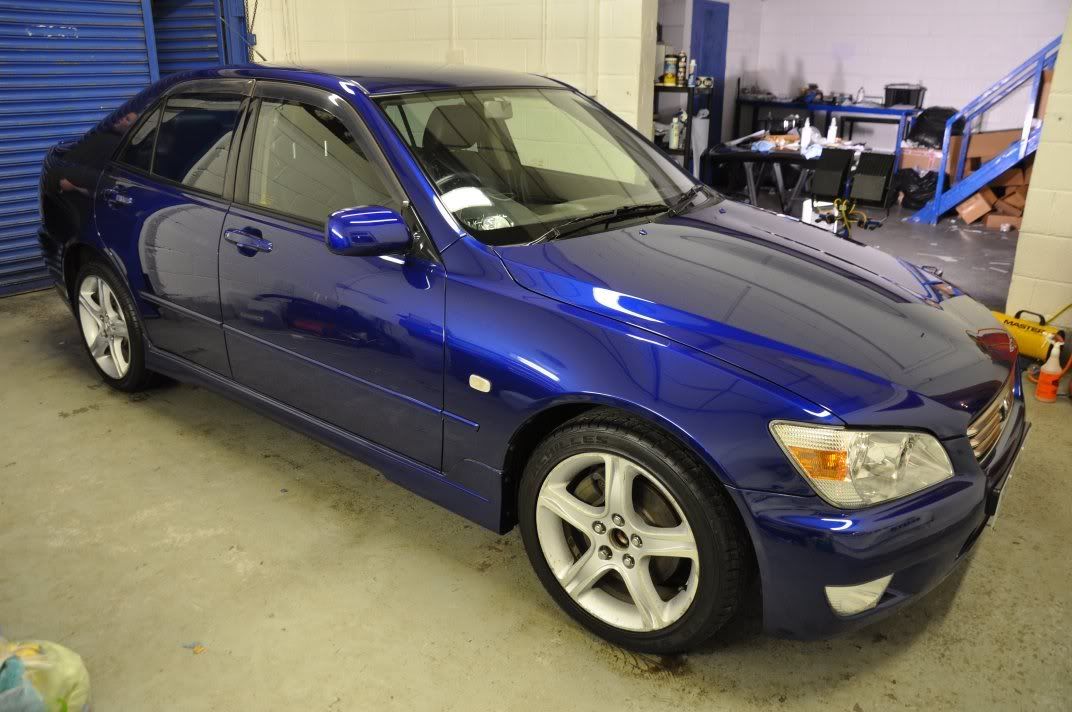
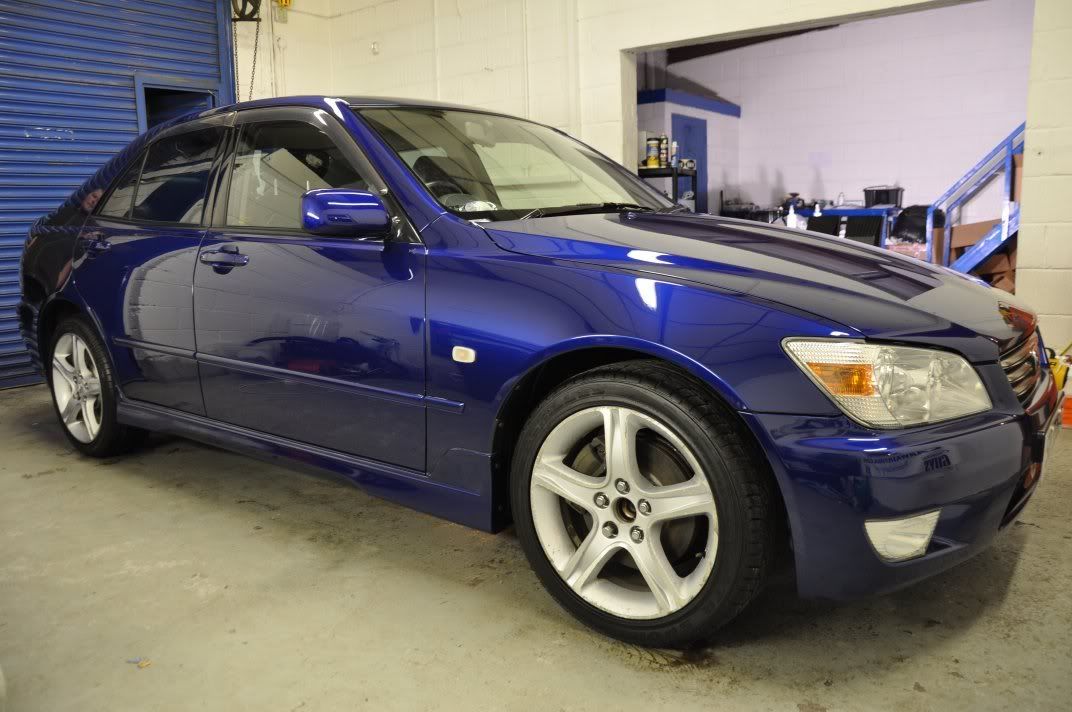
    Rolled back inside for completion, the car was protected using a concours carnauba wax, tyres dressed with Espuma RD-50. Wheels protected with FK1000P although they were being removed from the car shortly after this detail for a refurb. Arches dressed with All Seasons Dressing. Chemical Guys New Look Trim Gel used on the rubbers and plastic trim. Glass cleaned with Stoner Invisible Glass. Exhausts treated with Briliant #2 Aluminium & Stainless Steel Polish. The detail was completed 7pm on the Sunday, exterior only, after starting 9am on the Saturday. A long time, but we think well worth it! The final after shots...


    This was certainly a hugely enjoyable detail and a great way for Gordon and I to round off 2009 – going to take a little time off over the festive period and we’ll be back detailing in 2010 as we look to take out detailing team from strength to strength in the coming months – watch this space!

    And on that note – I would like to wish all Meguiars Online members a very merry Christmas and a Happy New Year!

    All the best! :thumb:
    "A thing of beauty is a joy for ever: Its loveliness increases; it will never pass into nothingness; .... "

  • #2
    Re: Lexus IS220 - From Minging to Blinging Mega Turnaround - Ending 2009 In Style!

    Great work as always. The paint looks stunning. Way to go.

    Merry Christmas to you.
    quality creates its own demand

    Comment


    • #3
      Re: Lexus IS220 - From Minging to Blinging Mega Turnaround - Ending 2009 In Style!


      Outside that car looks Amazing!
      Great work once again.
      "Every moment frontin and maxin
      Chillin in the car they spent all day waxin
      "

      Comment


      • #4
        Re: Lexus IS220 - From Minging to Blinging Mega Turnaround - Ending 2009 In Style!

        Beautiful blue and beautiful work!

        Indeed it does look to be a great way to end 2009!

        Merry Christmas, Happy New Year and cheers to what 2010 may bring!!
        For those who fought for it, freedom has a flavor the protected will never know.

        736th GunTrucks "Bakersfield to Bagdad"

        Wife say's I'm "obsessed"!

        Comment


        • #5
          Re: Lexus IS220 - From Minging to Blinging Mega Turnaround - Ending 2009 In Style!

          First part of this post - which I missed off from the initial post!


          Well this will be the last detail for Gordon and myself in 2009 (looking forward to 2010 already!), and we got a cracker of a car to work on to round the year off! Those who know us well will know we love a challenge and we couldn’t have asked for a better one to end our first year working together – a Lexus IS220 that had sat in the owner’s garden for several years!!

          I’ll start the writeup with a few before and after shots to give you an idea of the turnaround achieved... the after shots here are not completed pics, but they are after the machine polishing stage where the vast majority of the finish is achieved though things like tyres need to be dressed etc. However, in order to get afters in daylight we had to roll the car out after machine polishing for these pics.

          The car as it arrived on Saturday morning...


          And after machine polishing on Sunday afternoon...


          Before on the rear three quarter and passenger side...


          And after...


          Before on the bootlid...


          And after...


          A real colour change!

          The keen eyes amongst you will have noticed that this isn’t actually a Lexus IS220 as we know it – it is a Japanese import Altezza 220 with the 2.0-litre 210bhp Beams 4-cyl engine. Its a 1999, and the car had just 12,000 miles on the clock, presumable because it had been sitting around for so long!

          On to the story of the detail


          The car arrived on a cold (-4) Saturday morning and what greeted us certainly made us smile! Perhaps we are a little strange, but the challenge in front of us for turning this car around certainly warms you up on a cold weekend morning! The car on arrival – covered in leaves, and mouldy green mess...


          The first major challenge was to actually clean the car!! We started with a high pressure rinse to remove as much loose grime and leaves as possible, paying attention to shuts out of which half a garden of soil was removed! Following a high pressure rinse the car was then foamed using a foaming TFR and then rinsed off. We then rolled the car inside ready for the wash procedure which in this case was first to wash the car using Optimum No Rinse to remove as much surface grime and loose grit remaining as possible. The car was then washed using G101 at 10:1 dilution, sprayed on and wiped to remove a lot of more ingrained grime, before receiving a second ONR wash. Wheels on the car were badly corroded on the insides and on the spokes, especially near the edges so they were just cleaned gently with Diablo Wheel Cleaner, however the owner will be refurbing these wheels as they really need it. Arches were cleaned out with G101.

          Once washed, it was time to clay the paintwork and glass and we were fully expecting to pull a lot of further ingrained grime from this finish... and we did, a pic of the clay after just one quarter of the bonnet (Chemical Guys Purple):


          Claying took a good three hours on this car – light pressure and keep going on small area until it runs smooth, fold clay to clean side and repeat again and clay would come up dirty again. Fold and repeat and the clay would be cleaner, keep repeating until clay came up clean. We would much rather this grime ingrains into the clay than into our machine polishing pads! At this stage, a very poor smart repair on the passenger wing was apparent, where colour coat has simply been blown over the repair and oversprayed onto the bumper. The resultant finish was, as you can imagine, very poor and contacting the owner we got a quote for him from a local bodyshop whose work we trust to do a proper paint repair on this wing for the owner.

          Once clayed, the full extent of the damage to the paintwork became clear – despite fully removing all of the grime, it has over the course of time etched its way into the paintwork. One of the worst areas was the bonnet...


          Get up close and you can see the damage under the strip lights...


          Swirls did not look too bad though! :lol:


          As usual, we went for out least abrasive first approach and built up to the required level of pad and polish to achieve the correction we wanted. Simply diving in with aggressive compounds is never our way, and should never be the approach to paint correction in my opinion as you risk removing large amounts of paint unnecessarily which should be avoided at all costs.

          So we started with Meguiars #205 Ultra Finishing polish, on a 3M yellow polishing pad applied using a standard Double-Zenith technique by rotary polisher:

          1) Spread the polish at low speed with light pressure and fast machine movements (600rpm)

          2) Begin working the polish at 1200rpm, slightly heavier pressure and slower machine movements

          3) Work the polish at 1500rpm, moderate pressure and steady machine movements for a couple of minutes until the residue looks like it is starting to clear (this is not the polish breaking down)

          4) Refine at 1200rpm, lighter pressure and slower machine movements

          5) Burnish at 900rpm, supporting the weight of the machine for very light pressure and slow 1” per second machine movements

          The end results of this process was significant swirl removal and you could see the true depth of the colour being returned to the paintwork:


          However, deeper RDS and the etching were still present:


          Working up through the combinations, I found that Menzerna PO85RD3.02 on a Chemical Guys Green Hexlogic pad was very effective at the deeper marks using a standard Zenith point method:

          1) Spread the polish at 600rpm

          2) Begin working the polish at 1200rpm, steady machine movements and light to moderate pressure

          3) Work the polish at 1800rpm, steady machine movements and moderate pressure getting heavier towards the end of the set, until the residue goes clear

          4) Refine the finish at 1200rpm, light pressure and slow machine movements

          5) Burnish the finish at 900rpm, light pressure and slow 1” per second machine movements

          However, this still left a degree of etching as you can see from this close up picture...


          Having worked up through the options, and assessed the removal rates as we went, we settled on an aggressive compound for full correction of the bonnet – 3M Fast Cut Plus on a Chemical Guys Yellow Hexlogic Compounding Pad, and the following fast cutting technique (no effort at refining here...):

          1) Spread the compound at 600rpm

          2) Built a little heat at 1200rpm and get compound evenly spread

          3) Work compound at 1800rpm for a few passes with light to moderate pressure

          4) Work compound at 2000rpm with moderate pressure and steady machine movements, monitoring the panel temperatures by laser thermometer, until the defects removed or compound has dried and started to dust

          The compounding process was repeated if required and safe to do so. An important note here for PTG users where the PTG is based on an eddy current measurement, wait for the panel to cool before remeasuring otherwise temperature affects the reading and the device can read high.

          The compounding was then followed by Menzerna PO85RD3.02 Intensive Polish applied using a 3M Yellow Polishing pad and the standard Zenith Point technique described above, the purpose being to knock out any hologramming and to round off some of the deep RDS that still existed but could not be fully removed owing to paint thickness considerations.

          The finish was then fully refined using Meguiars #205 Ultra Finishing polish on a 3M Black Glazing pad, using the standard Double Zenith technique described above. No heavy pressure was used for this refining stage as there were no holograms to correct from the above Intensive Polish stage, simply a case of enhancing the clarity a little. The end results of machine correction and refining on the finish:


          Under the strip lights, we can see the pitting and etching fully removed...


          And under the 3M Sun Gun we can see the quality of the machine finish – hologram free and crystal sharp:


          Both the strip lighting and the Sun Gun are for me very important light sources to use to properly assess the quality of a machine finish: the strip light shows deeper marks that a bright light source can mask such as RDS and the etching (be sure if photographing to manually focus the camera on the surface of the paint and not the light reflection otherwise you wont see the defects in your pictures); the Sun Gun shows swirls and also machine marring if it exists and is the QC light – the finish must pass the Sun Gun test, if not it is refinished until both Gordon and myself are 100% happy with the quality of the finish.

          Meanwhile, while I fought for three hours on the bonnet (I say “fought, but really I was enjoying myself immensely!), Gordon was happily machine polishing the passenger side of the car. In terms of etching this side was not too bad, and the front door had only mild to moderate swirls as well...


          For this panel, Gordon opted for a cutting approach with a finishing polish – good old flexible #205 from Meguiars!! Using a Chemical Guys White Hexlogic pad which has a slightly stiffer foam than the yellow 3M pad and offers greater ability to use pressure for greater cut with the SMAT abrasives in Meguiars’ new polishes. Using a heavier Double Zenith method (greater pressure and higher working speeds), Gordon achieved pretty much full correction using just the finishing polish on this door...


          50/50 (sort of)


          Owing to heavier pressure being used here, the finish will still be refined using Meguiars #205 on a finishing foam with a light pressure Double Zenith method. But that was saved for later on, as Gordon clearly couldn’t resist getting on to correcting the back door which looked like it had been attacked by a wire brush!!


          Correction here was 3M Fast Cut Plus, followed by Meguiars #205 for refining. 50/50 to show the level of correction achieved:


          Both doors were refined to leave the following completed results...


          As Gordon was occupying himself with the rear three quarter and bootlid (see later) I set about the driver’s side of the car starting on the front wing – and you didn’t need any special lighting to see the defects here, standard strip lights were just fine!:


          Under the lights...


          After assessing the paintwork as before, starting with the lightest abrasive combo and working up, I decided on Menzerna PO85RD3.02 Intensive Polish on a 3M Yellow Polishing pad, followed by Meguiars #205 Ultra Finishing Polish on a 3M Black Glazing pad applied as above... to achieve the following results:


          And using the strip lights to check for deeper RDS, panel free of these too :


          Onto the driver’s side and this presented two distinct problems...


          The first of these were the moderate to severe swirls which existed on this side of the car...


          In addition to this there was also etching similar to that on the bonnet underneath the mirror and door handles where the contamination has clearly dropped down over the paint...


          Owing to the severity of the etching, Fast Cut Plus on a Yellow Hexlogic pad was used where it existed to remove it, while other regions received Menzerna Intensive Polish on a Green Hexlogic Pad for a little extra bite over lighter polishing pads but without the need to step to an aggressive compounding pad. The panels were then refined using Meguiars #205 Ultra Finishing Polish on a 3M Black pad as decribed above. The afters... On the driver’s door:


          Etching removed...


          More afters... (note the door handle regions still to be corrected here, which were to be done by hand for ease of access).


          Onto the rear door...


          And rear three quarter...


          "A thing of beauty is a joy for ever: Its loveliness increases; it will never pass into nothingness; .... "

          Comment


          • #6
            Re: Lexus IS220 - From Minging to Blinging Mega Turnaround - Ending 2009 In Style!

            Dave, the car looked impressive enough from the first section of your post..... then I saw the before shots... .

            What an amazing turnaround. This has my vote for Extreme Makeover of the Year!!!!
            Detailing blog: prodetailing.blogspot.com
            Everything else: theseech.blogspot.com

            Comment


            • #7
              Re: Lexus IS220 - From Minging to Blinging Mega Turnaround - Ending 2009 In Style!

              man of the year award
              it only takes a little patience and plenty of PASSION!!

              detailing blog

              http://thedetailers.blogspot.com

              Comment


              • #8
                Re: Lexus IS220 - From Minging to Blinging Mega Turnaround - Ending 2009 In Style!

                I agree with KC here....this is most definately an Extreme Makeover, and definately one of the most extreme of the year (toss up between this and the red van with vegitation)!

                Ohh and since KC didn't say it......MAMMA MIA!!!

                You gotta love a challange, and with this Lexus it just doesn't get any better......ummm well that red van y'all did awhile back.

                I truely can't wait to see what 2010 will bring!
                For those who fought for it, freedom has a flavor the protected will never know.

                736th GunTrucks "Bakersfield to Bagdad"

                Wife say's I'm "obsessed"!

                Comment


                • #9
                  Re: Lexus IS220 - From Minging to Blinging Mega Turnaround - Ending 2009 In Style!

                  Phenomenal. Absolutely phenomenal. Congratulations on a simply fantastic job. Merry Xmas!

                  Comment


                  • #10
                    Re: Lexus IS220 - From Minging to Blinging Mega Turnaround - Ending 2009 In Style!

                    Agreed. This car looks spectacular. Great job!
                    Composers shouldn't think too much, it interferes with their plagiarism. -- Howard Dietz

                    Comment


                    • #11
                      Re: Lexus IS220 - From Minging to Blinging Mega Turnaround - Ending 2009 In Style!

                      WOW that is a lot of pictures lol that lexus came out flawless. very impressive..did you use anything special on the exhaust tips ?
                      Addicted

                      Comment

                      Working...
                      X
                      gtag('config', 'UA-161993-8');