

 Tweet
Tweet
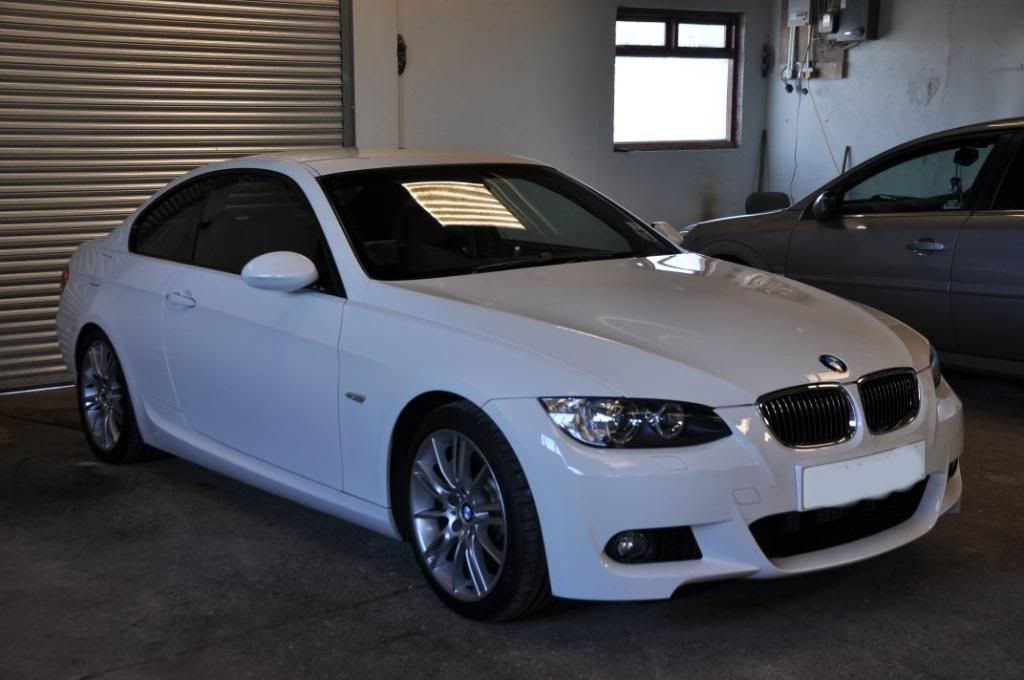
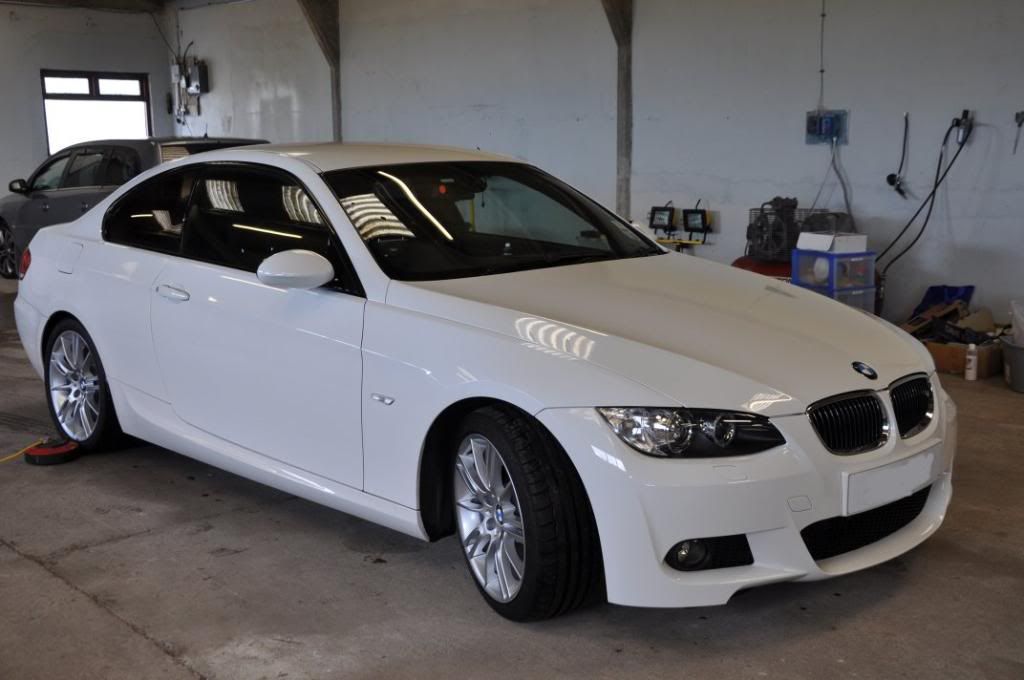
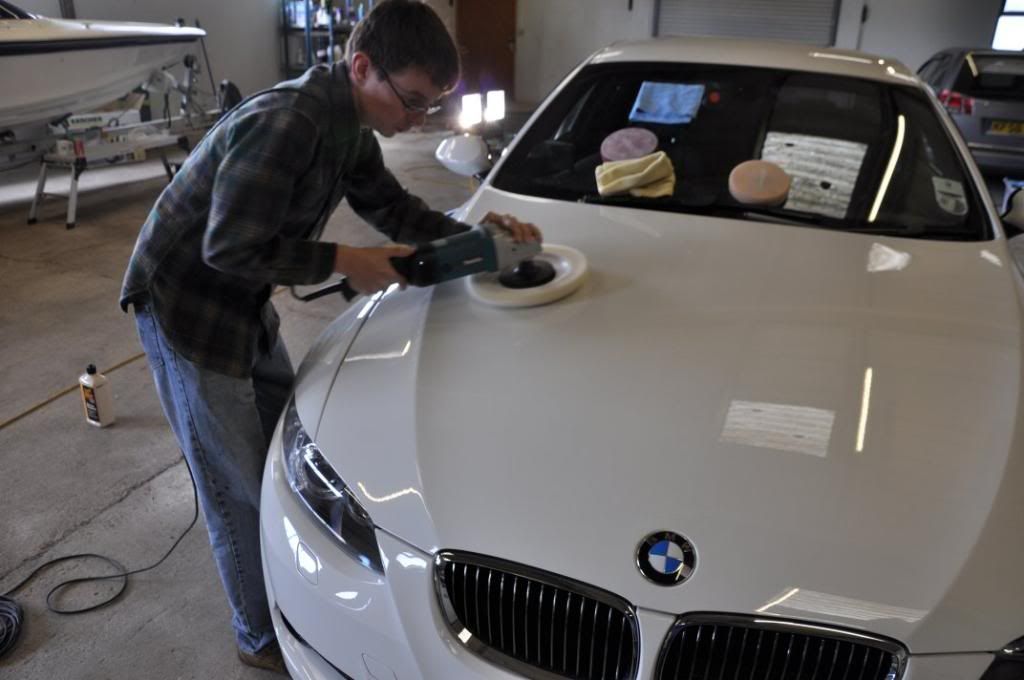
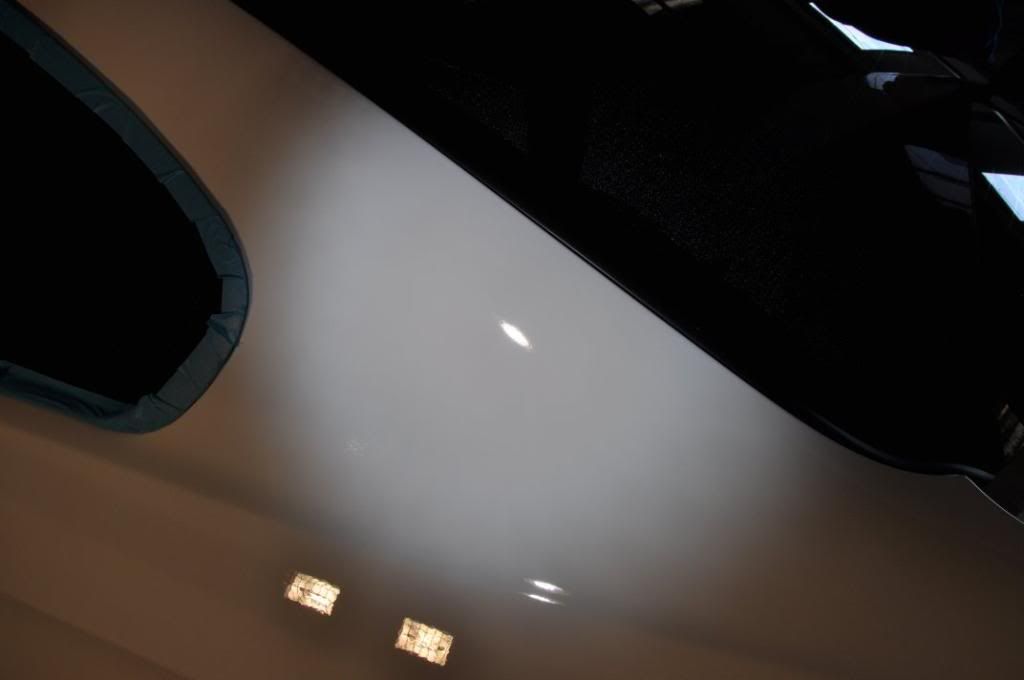
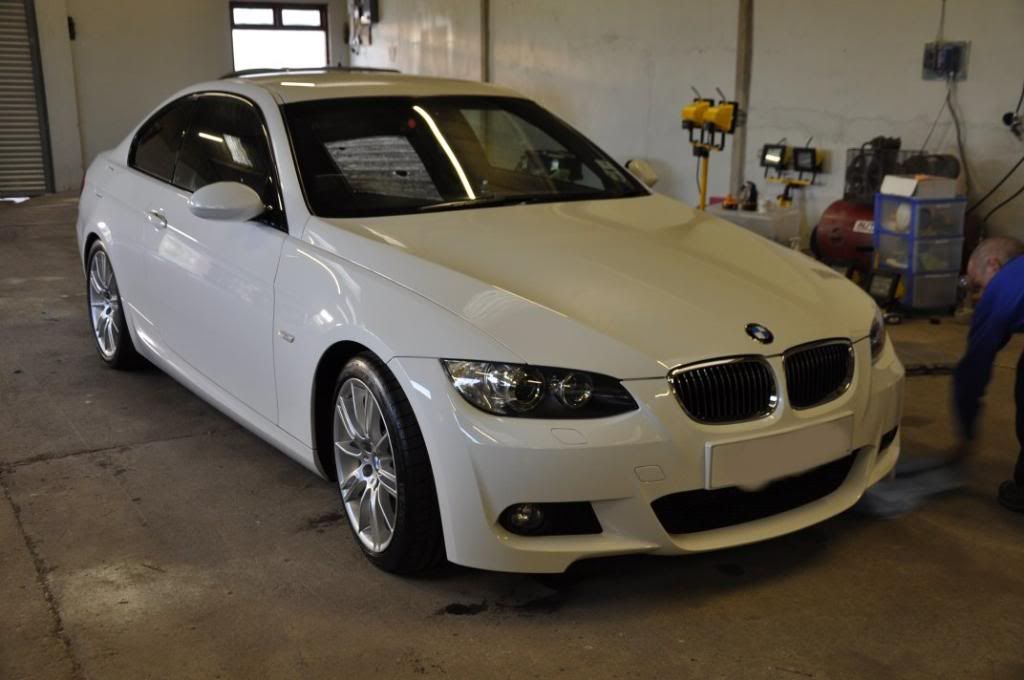
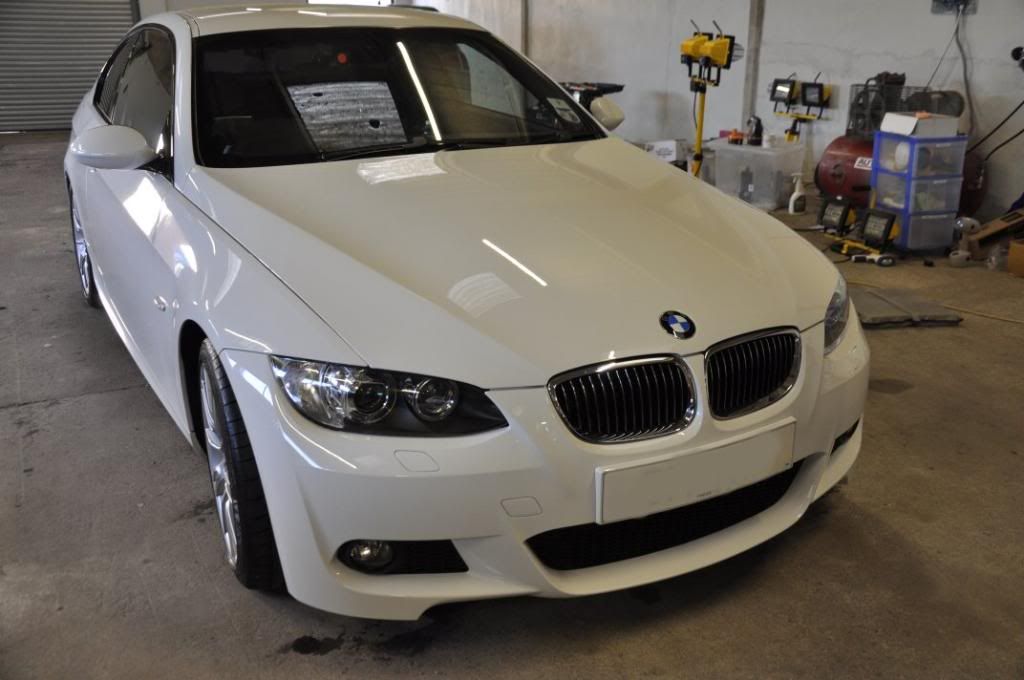
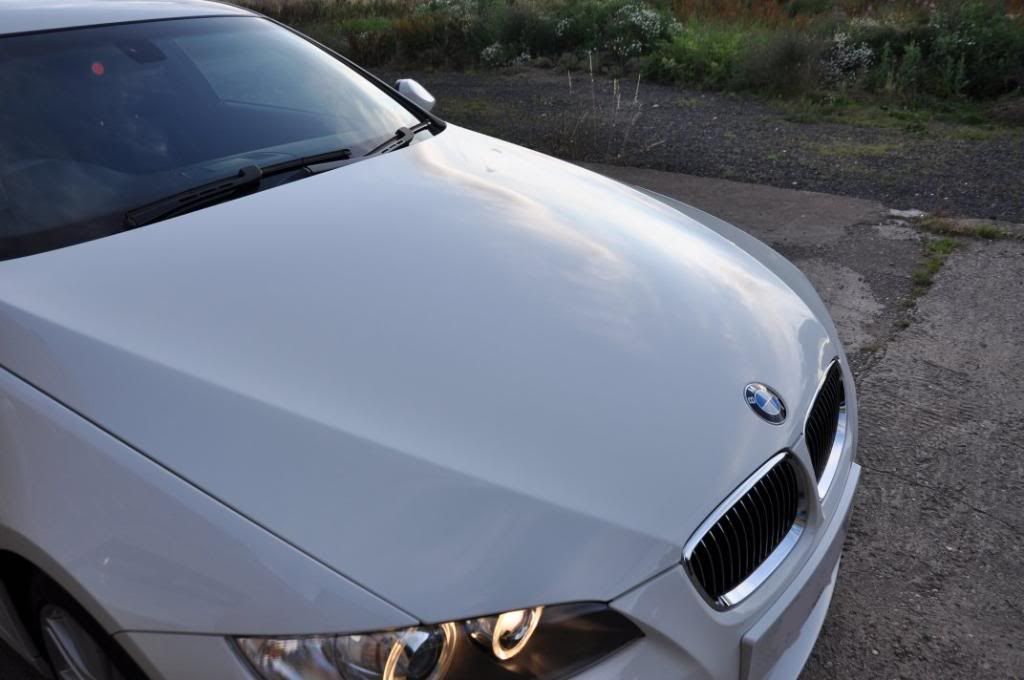
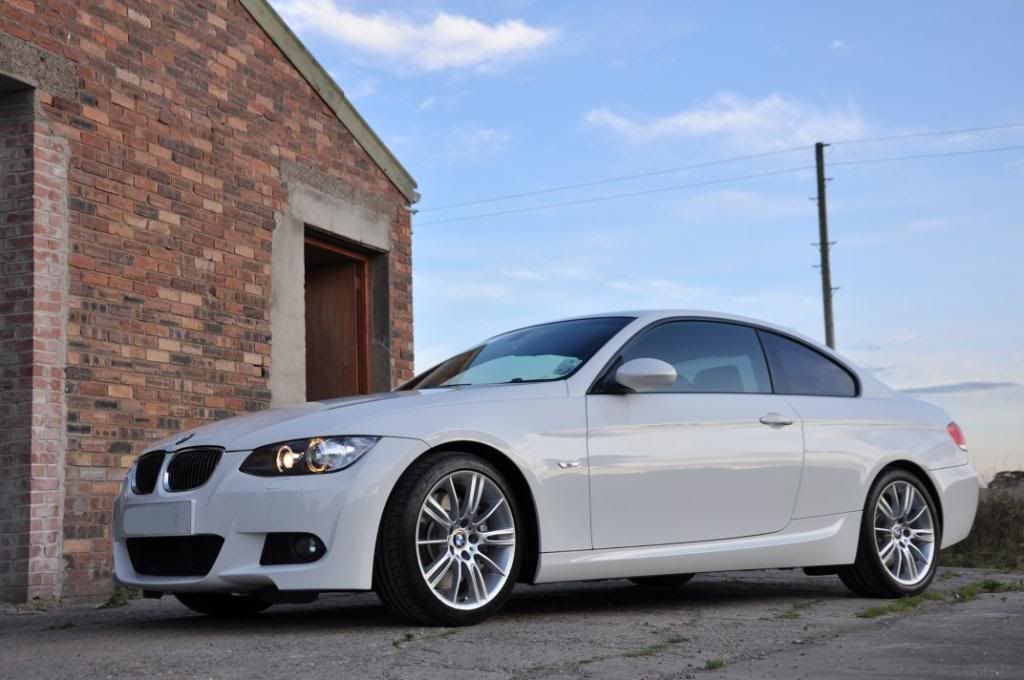
The subject of this weekend's (well, Saturday's, today I had a rare and much enjoyed day off of any sort of work  ) detailing escapades was this, a rather handsome looking white BMW 330d Coupe, arriving looking in reasonably good condition:

This detail was to be a team effort - from a personal point of view, I get a great buzz out of detailing with my good friends, and this day was to be no different: Gordon "Buff It Off Yourself" (caledonia), David "Its Got Bumpers Too" (badly_dubbed) and Dave "Glue Factory" (Dave KG :lol::lol were ready and raring to go! Quality detailing, quality company, great banter - what more could you ask for on a saturday? Little did we know, in these initial pictures, quite what lay ahead today - but more of that a little later on
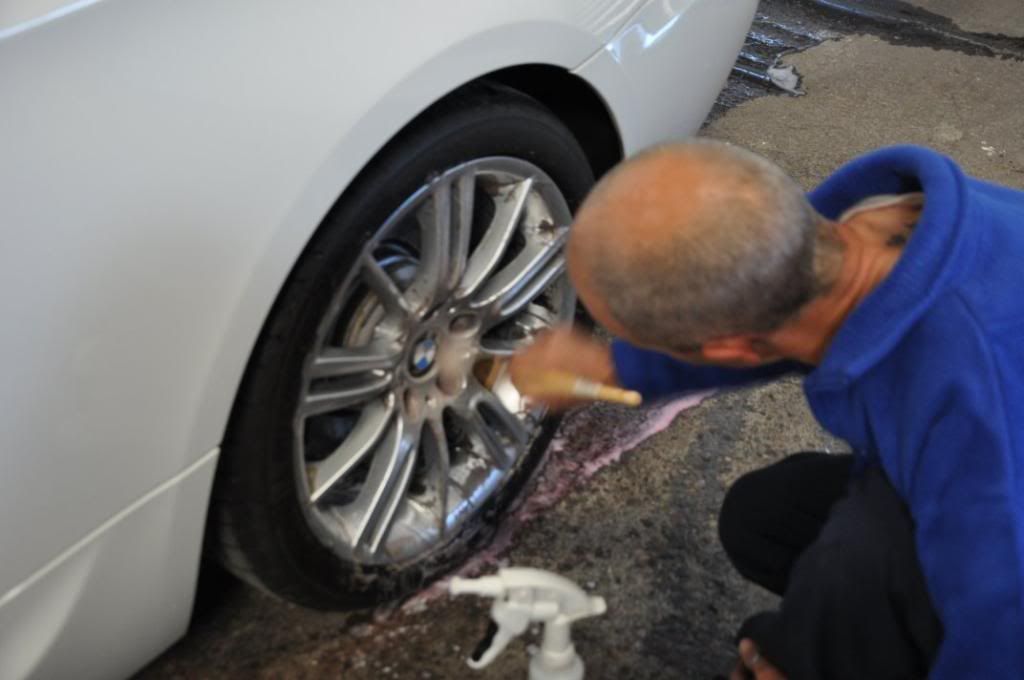
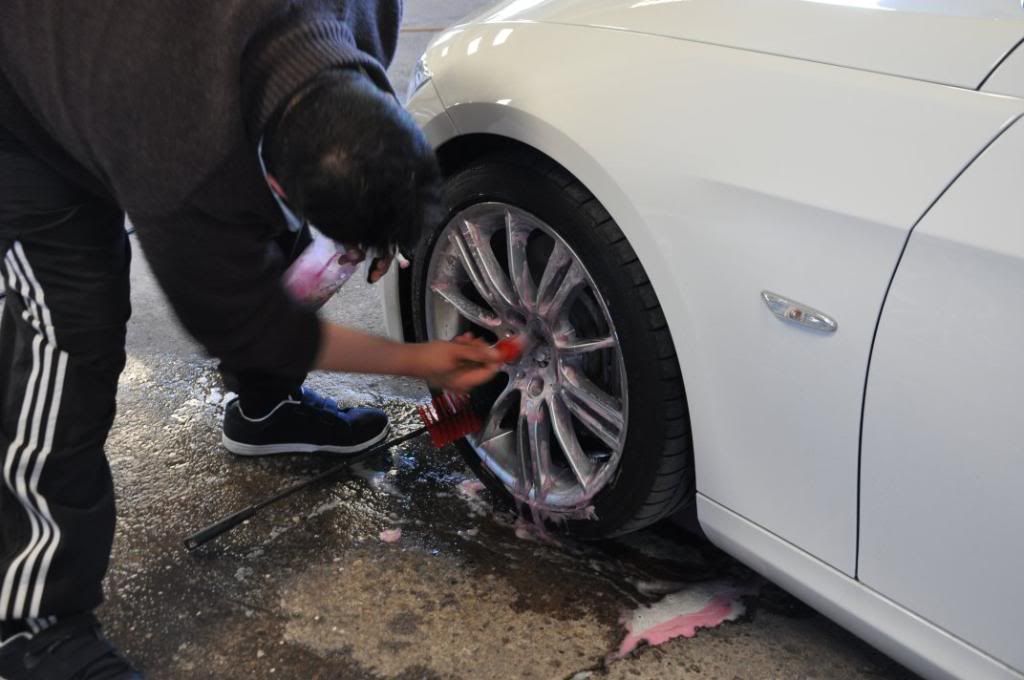
First off, it was down and dirty with the wheels,
Spray on Bilberry Wheel Cleaner, cut in this case 2:1 for the heavier soiling on these wheels...

Gordon and Gautam, the owner, getting stuck in with the brushes to ensure the wheels were thoroughly cleaned...
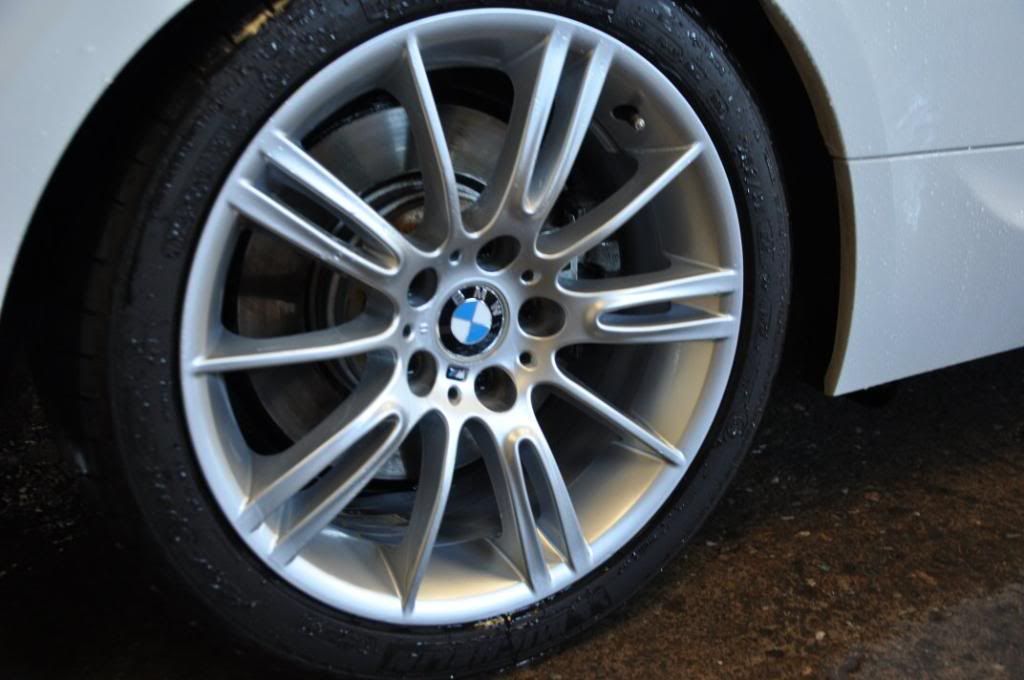
Rinsed off and looking good now:
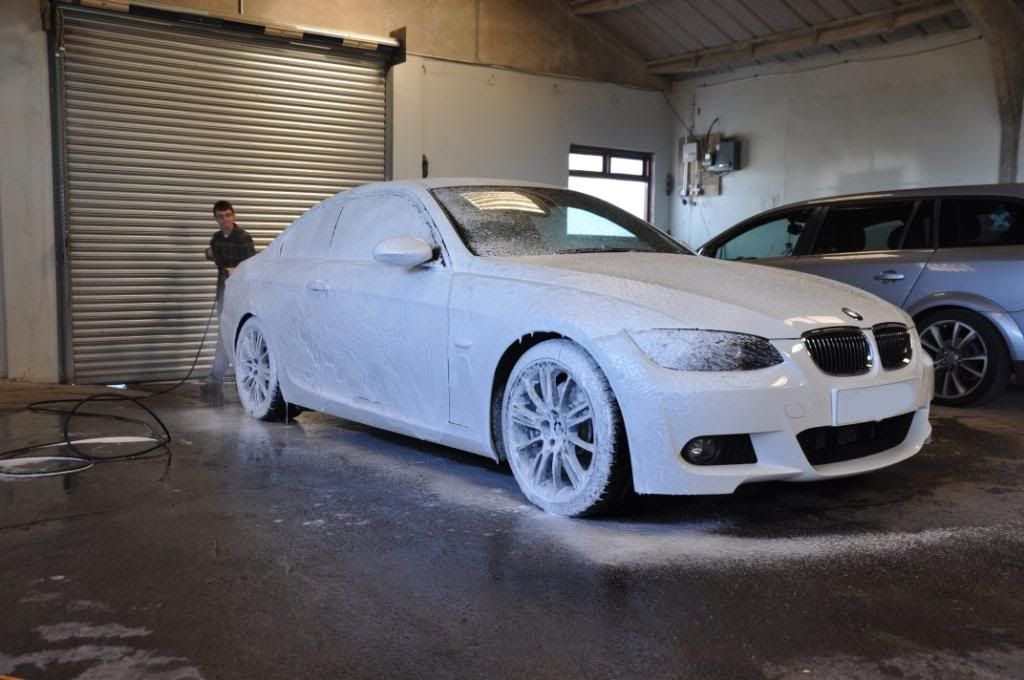
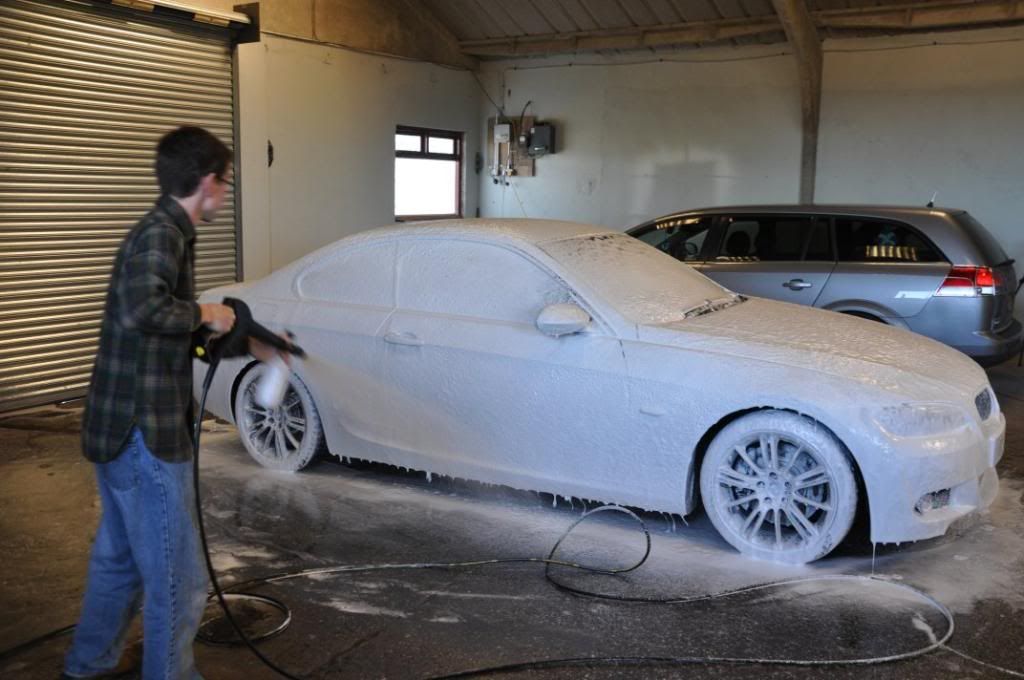
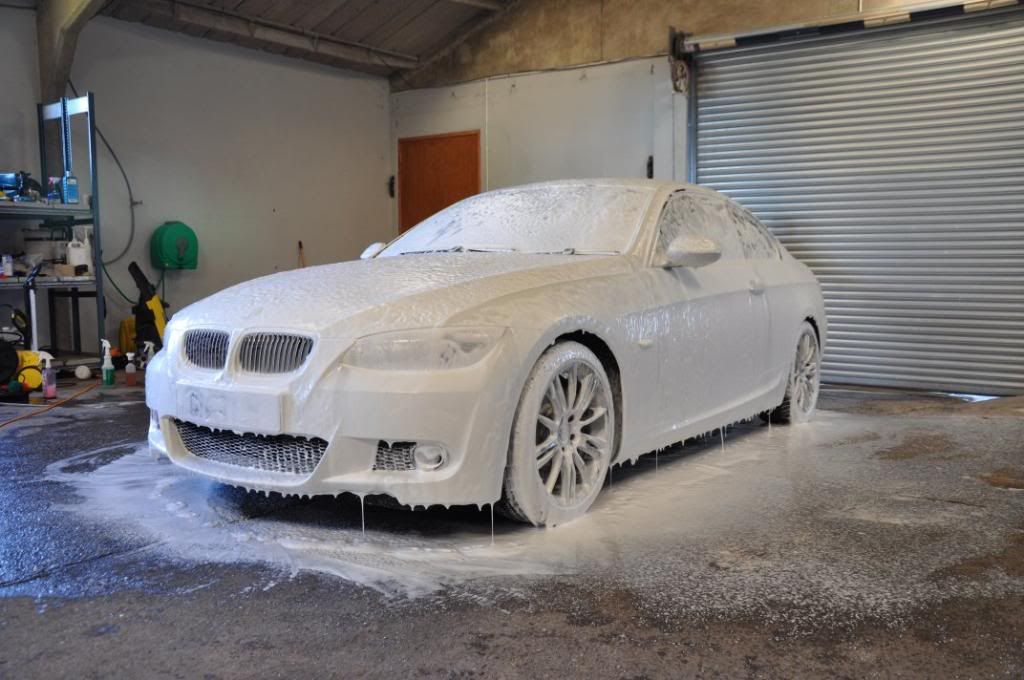
With all wheels and arches thoroughly cleaned it was time to get to work washing the bodywork - first stage of this was a foam with Supa Snow Foam through the foam lance... Now, I would just like to point out at this stage, that contrary to what the photos suggest, I dont dance around the car with the foam gun!! Honest, your honour....
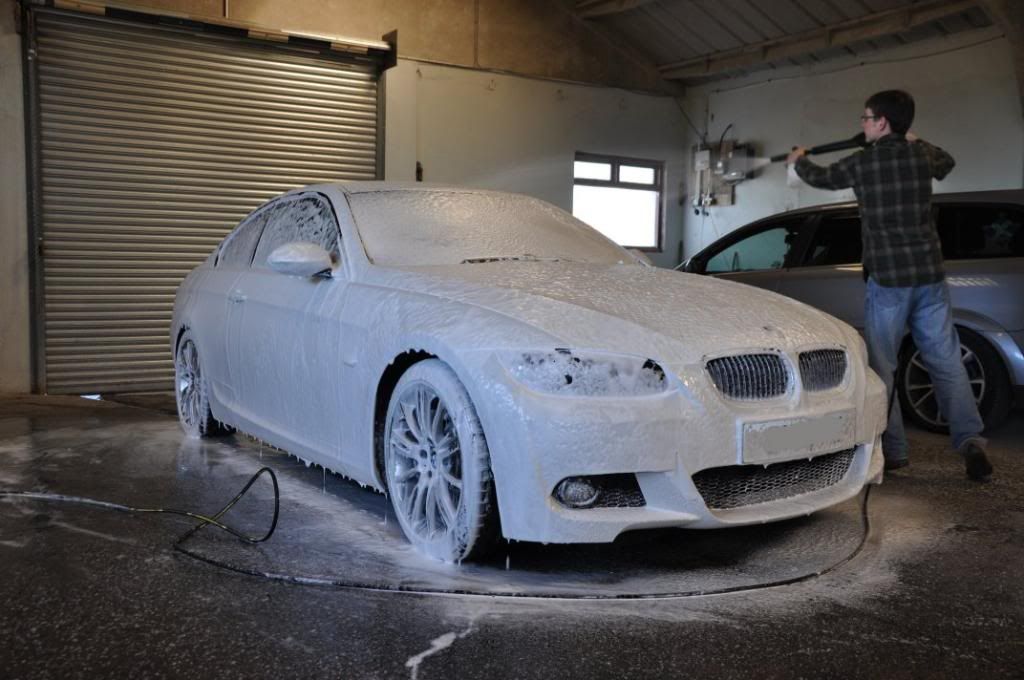
Once I had finished foaming, Gordon dived in with a soft bristled detailing brush to ensure all details were fully cleaned...
Car was then washed with the two bucket method and then clayed to remove bonded contamination using Meguiars Mirror Glaze Mild Clay. The results of just the washing and claying stage were impressive enough, the car looking great at this stage...
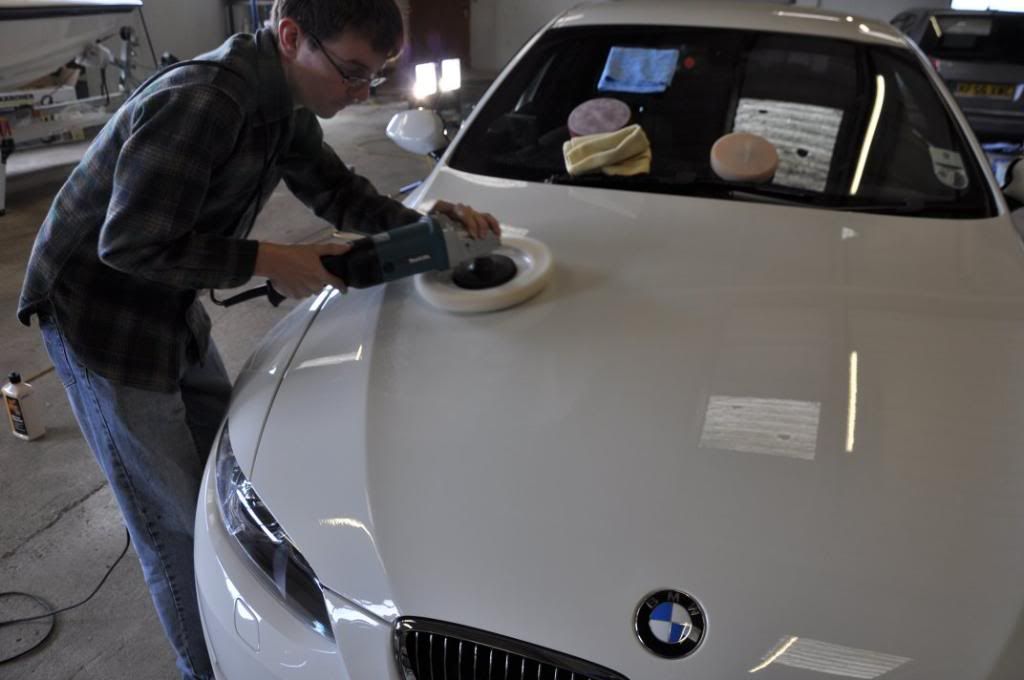
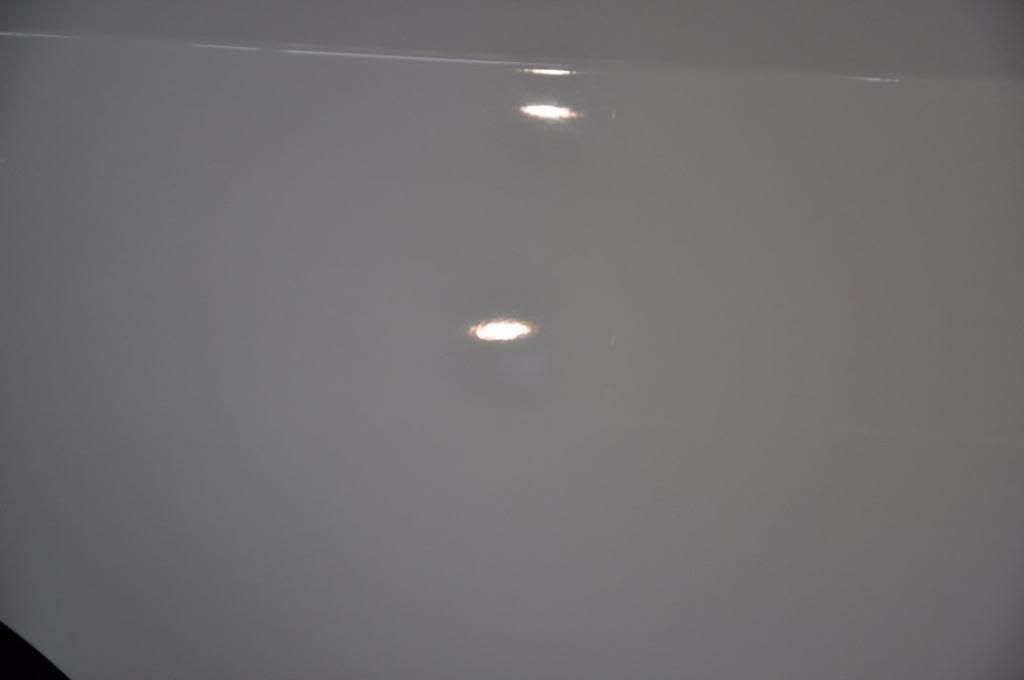
Of course, getting out the Sun Gun changes everything...

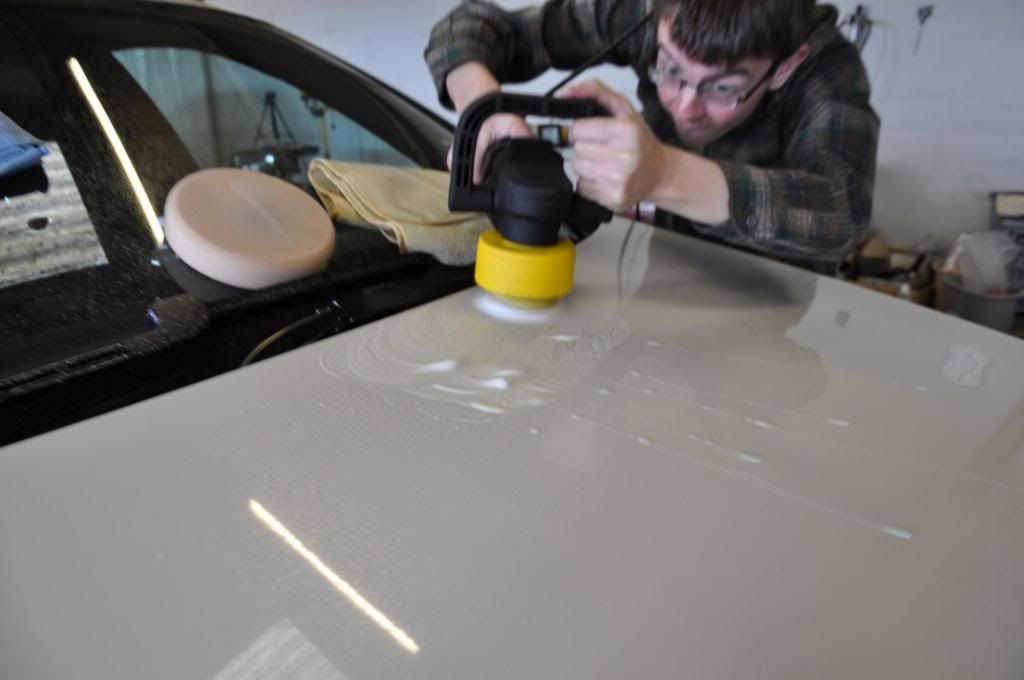
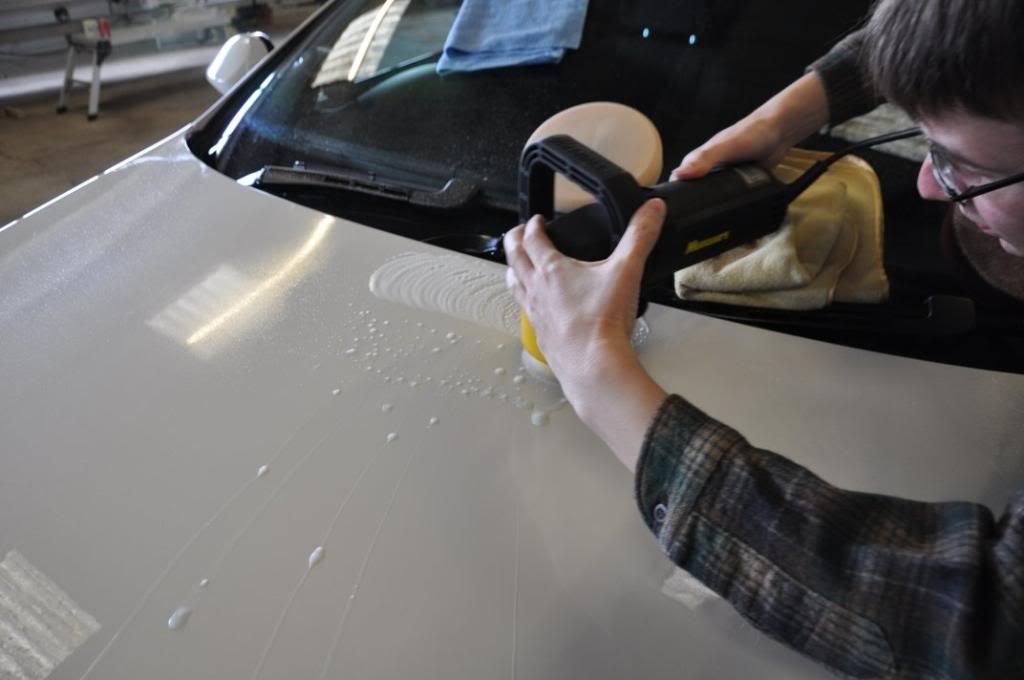
Gordon went for the boot, I went for the bonnet and it was time to get correcting these nasty swirls... this'll be easy, Final Finish, maybe Intensive Polish and we're home and dry... And under the Sun Gun, this was the case, as the Intensive Polish seemed to deal with the light swirls very happily...
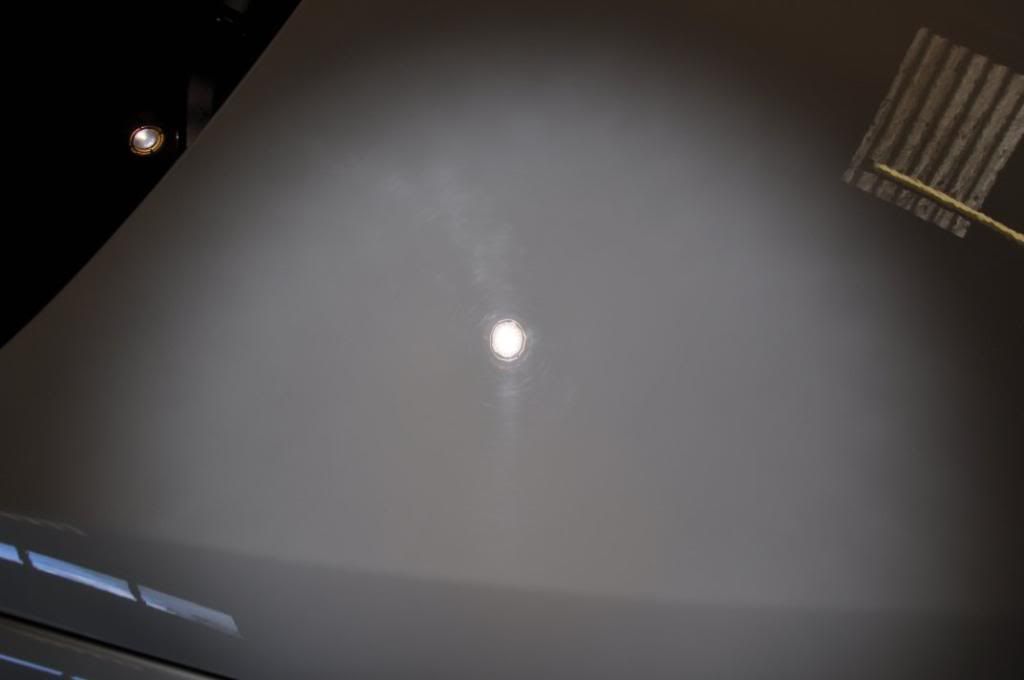
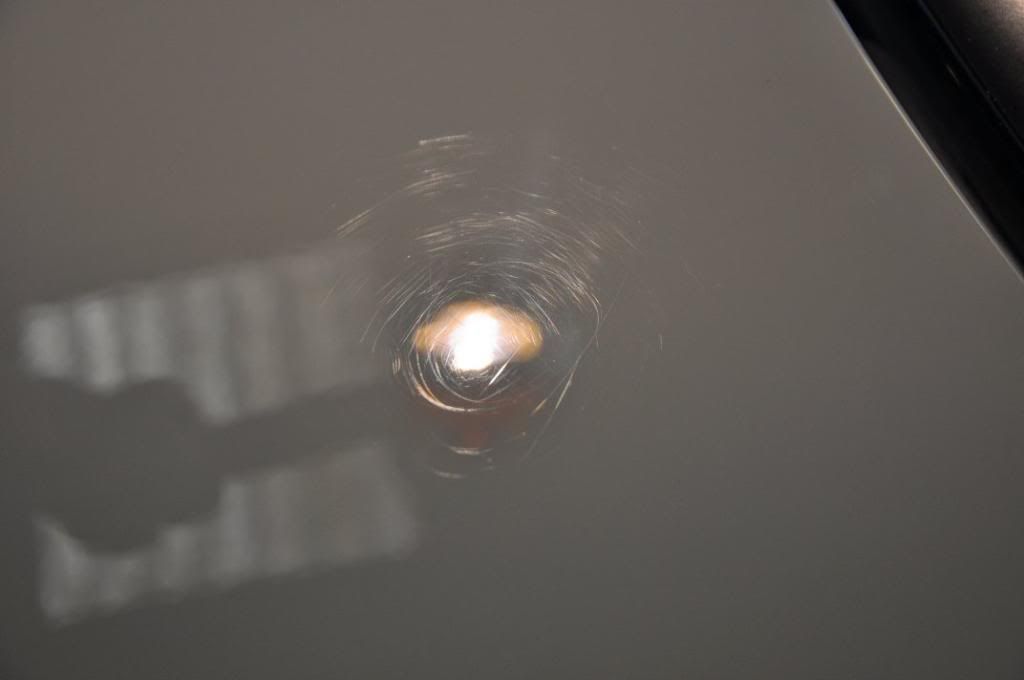
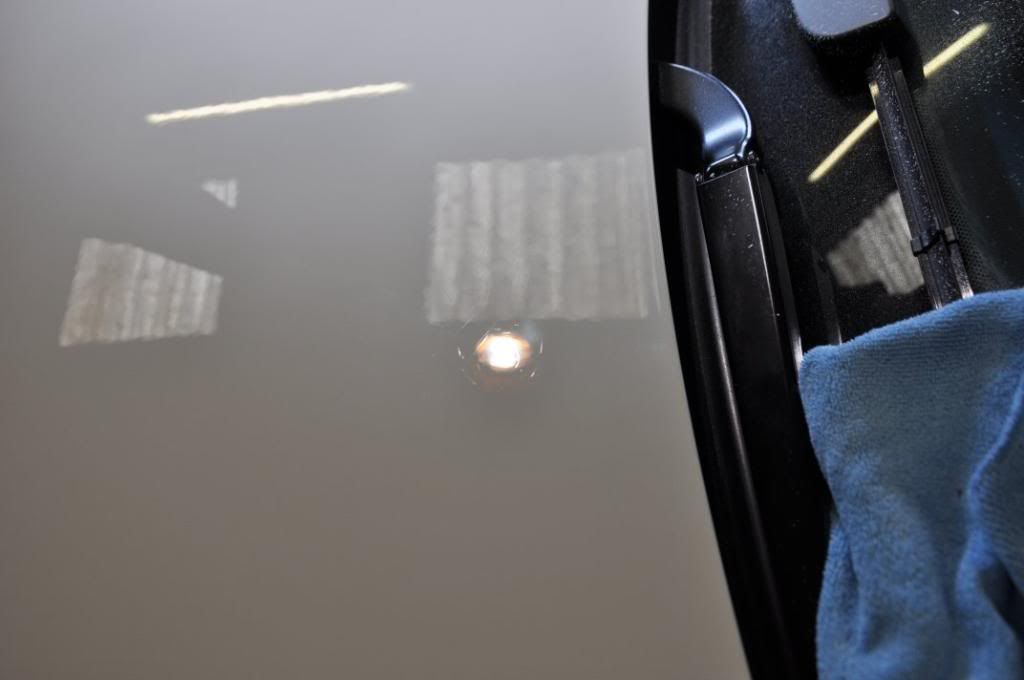
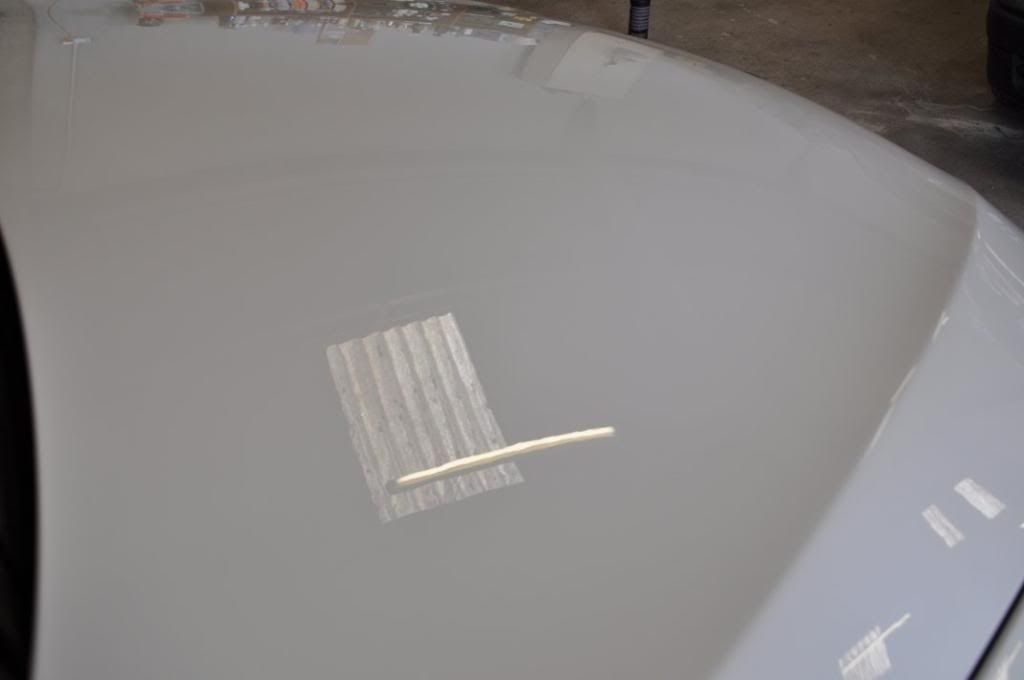
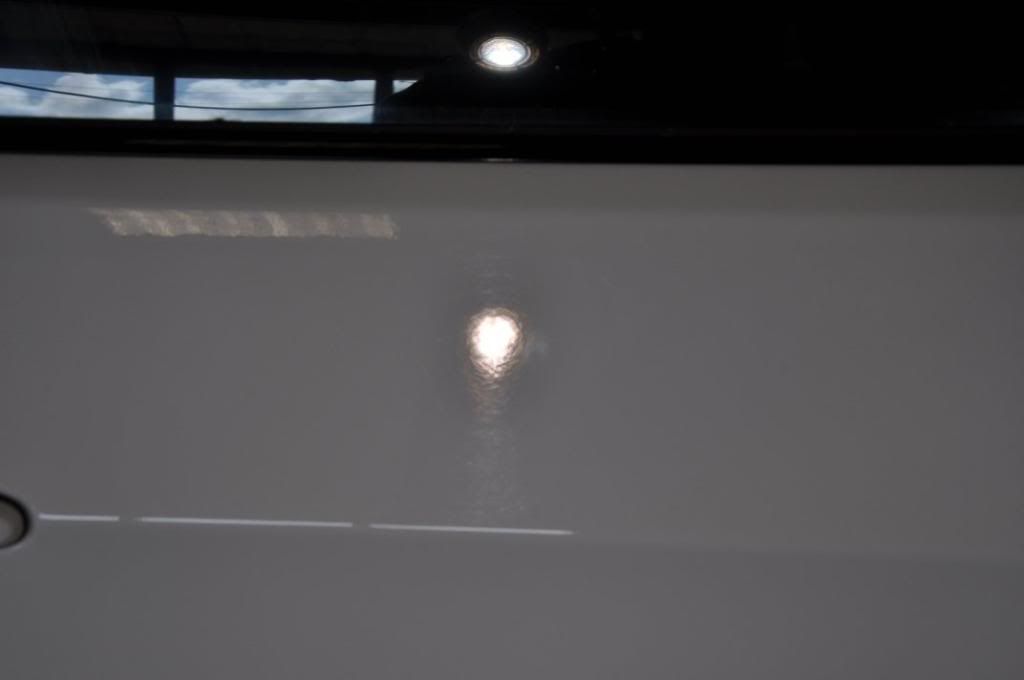
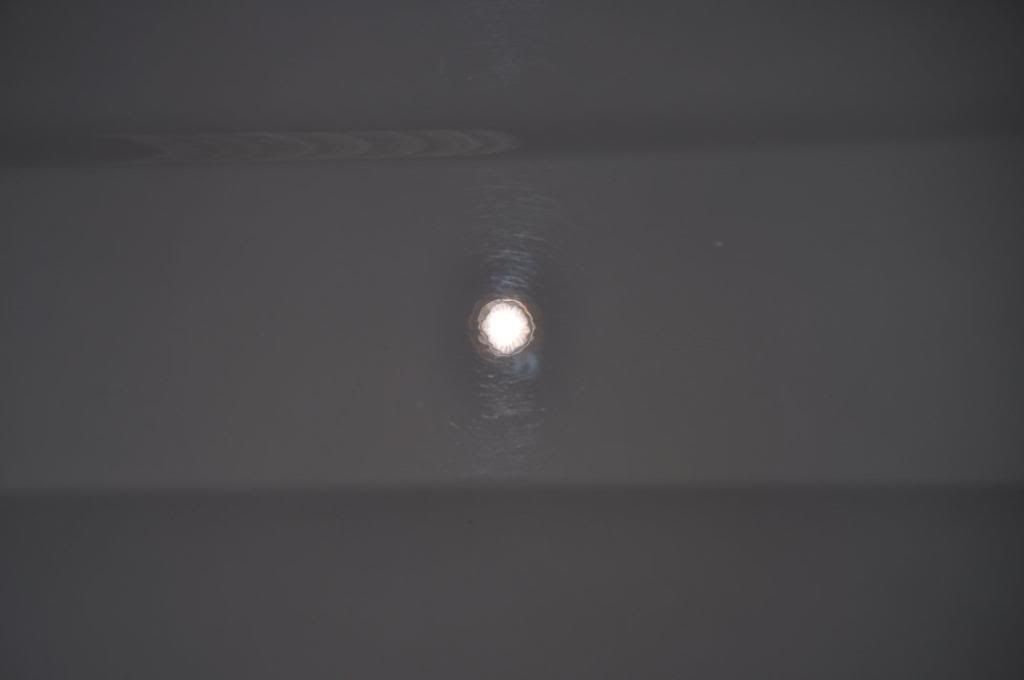
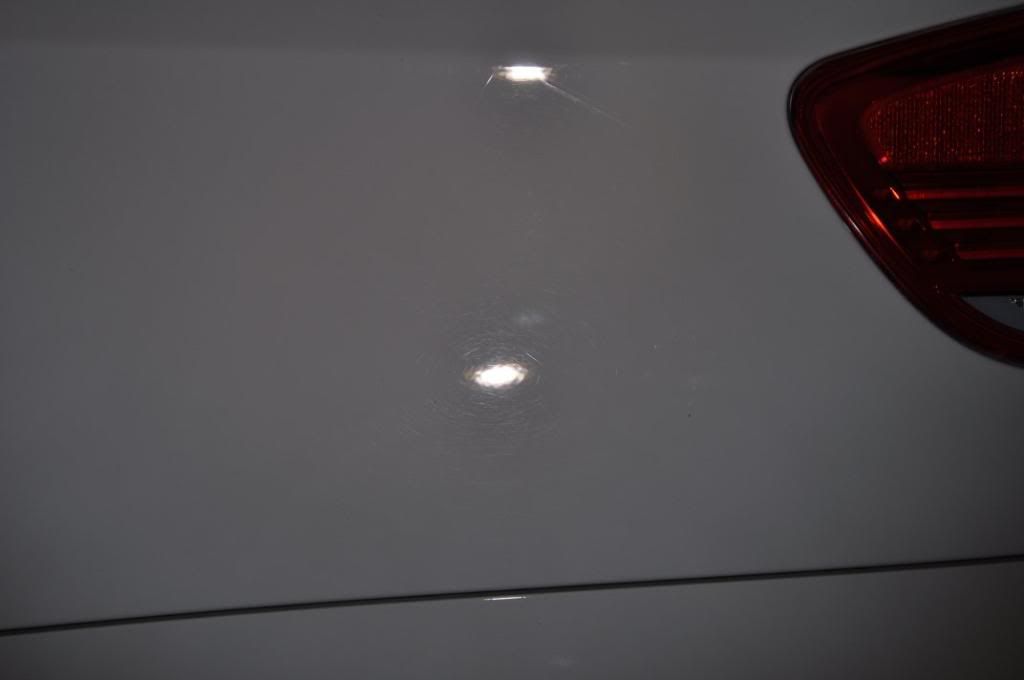
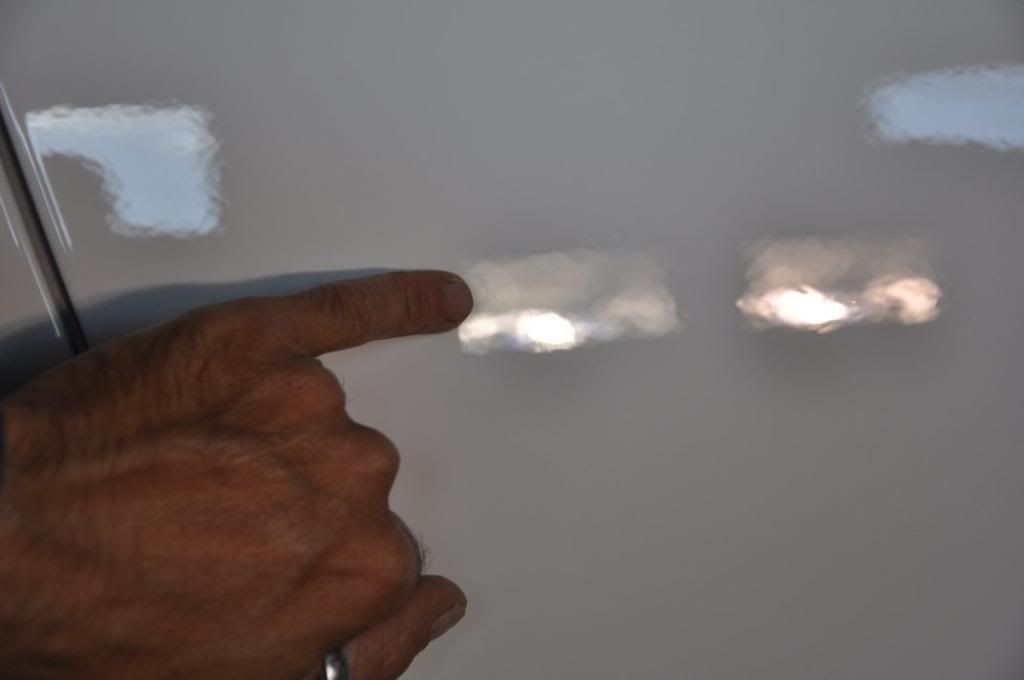
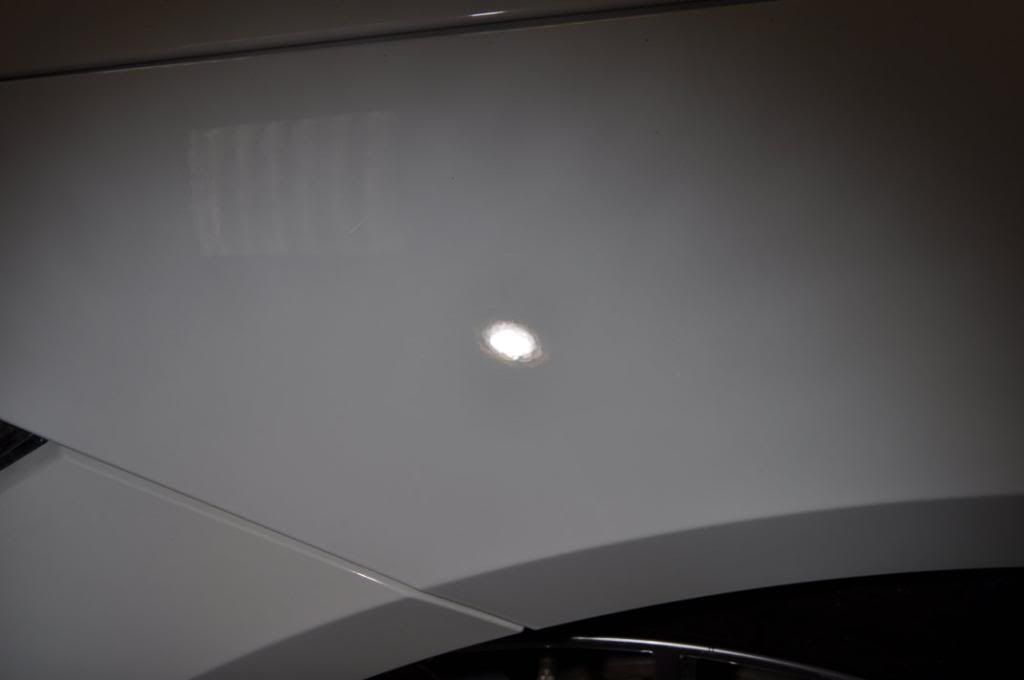
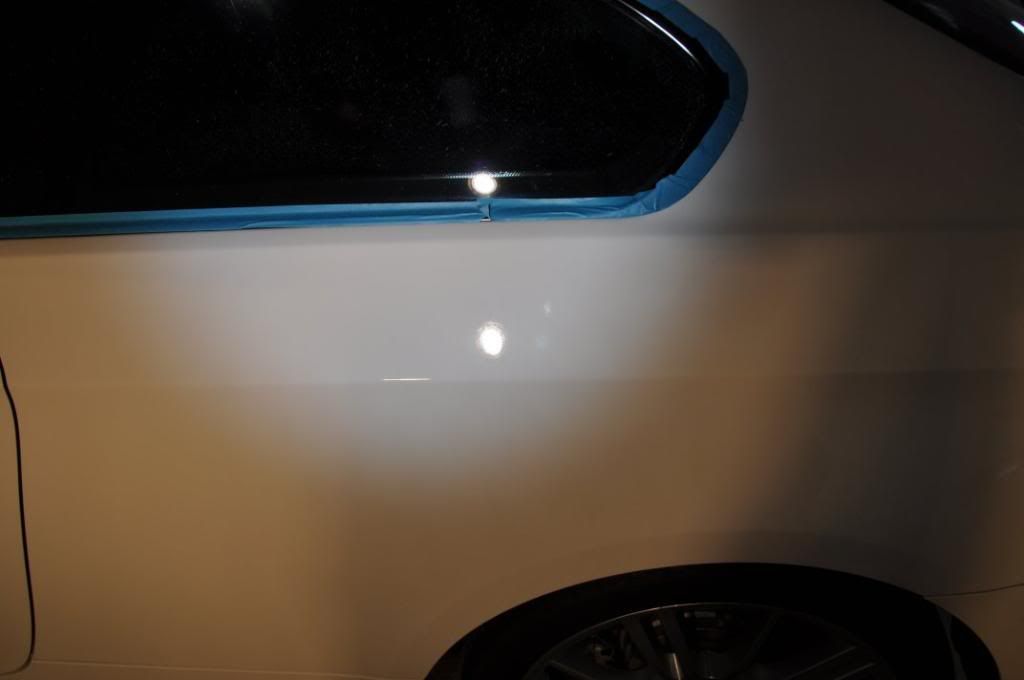
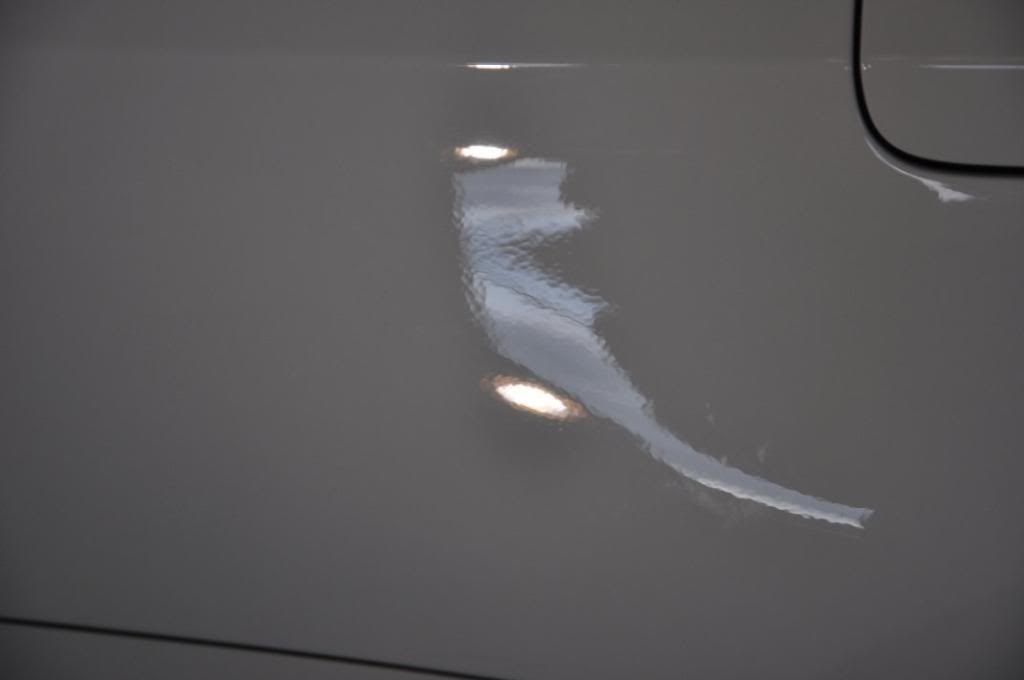
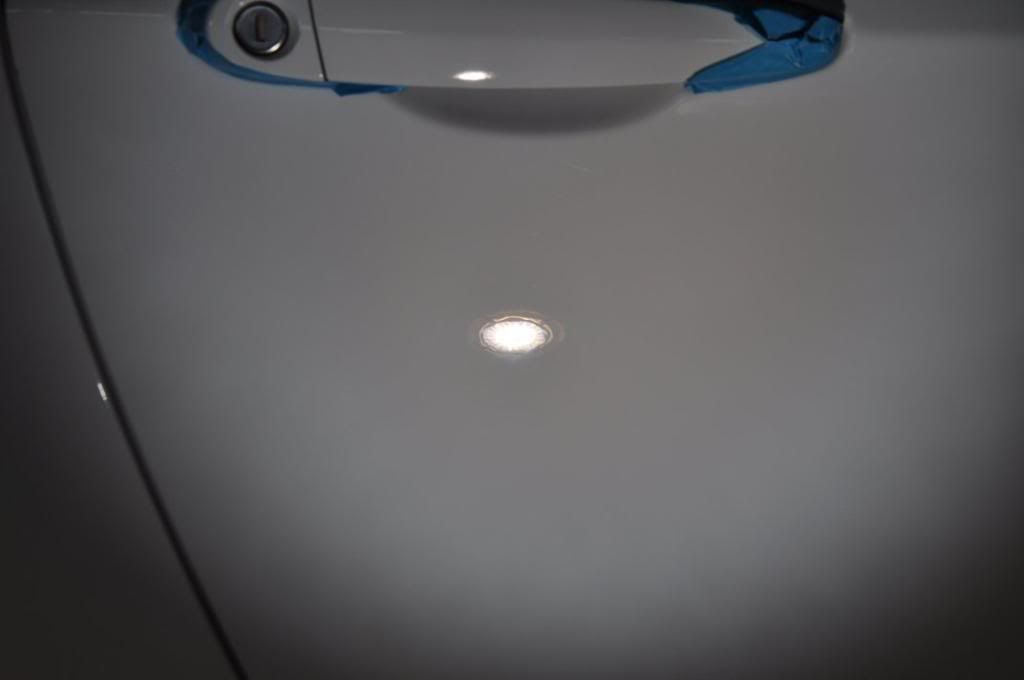
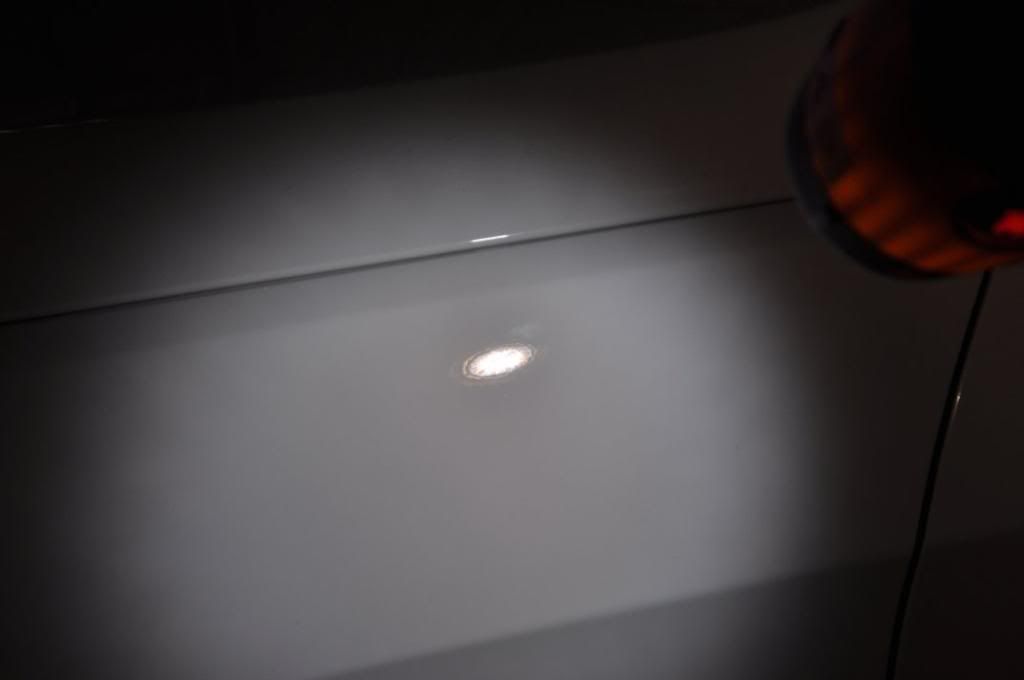
This paint had a different story to tell though, and much much more effort was going to be required!! Have a looky under these strip lights...
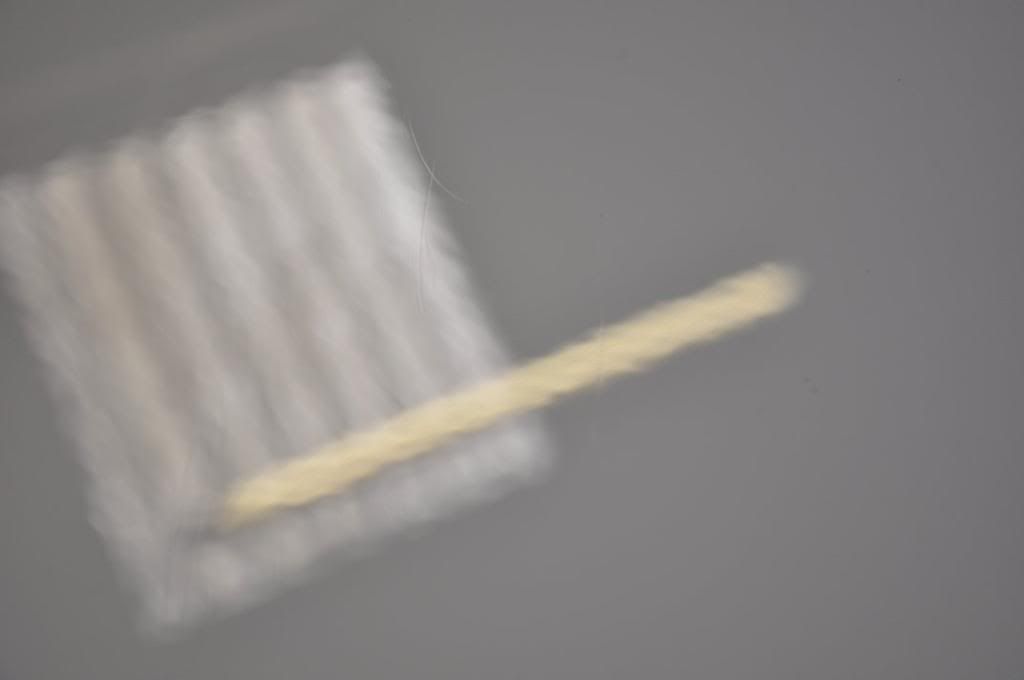
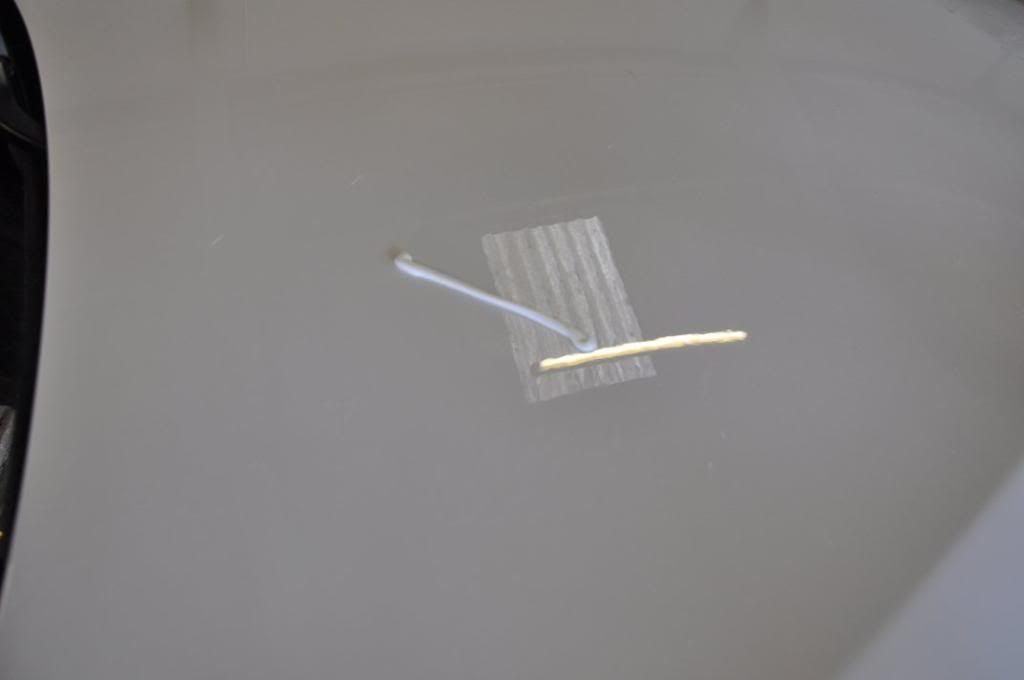
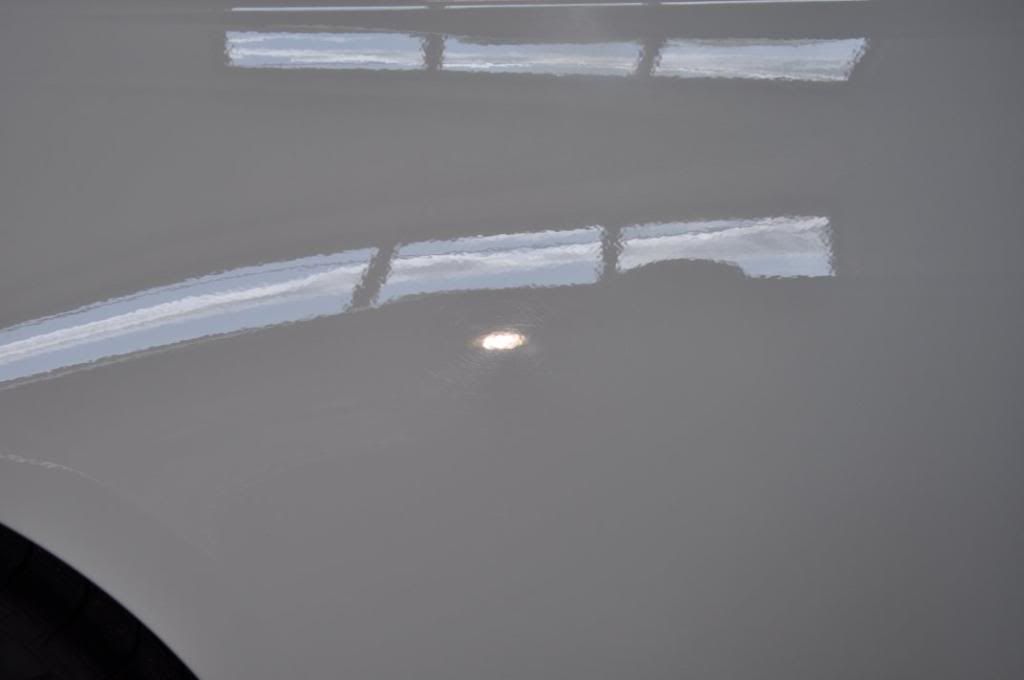
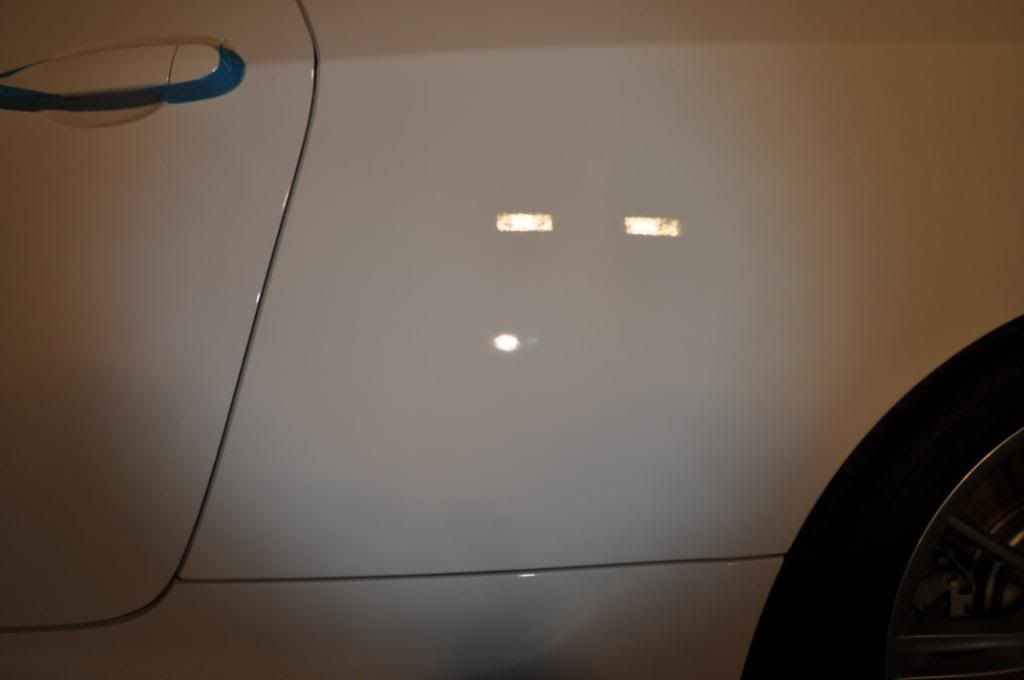
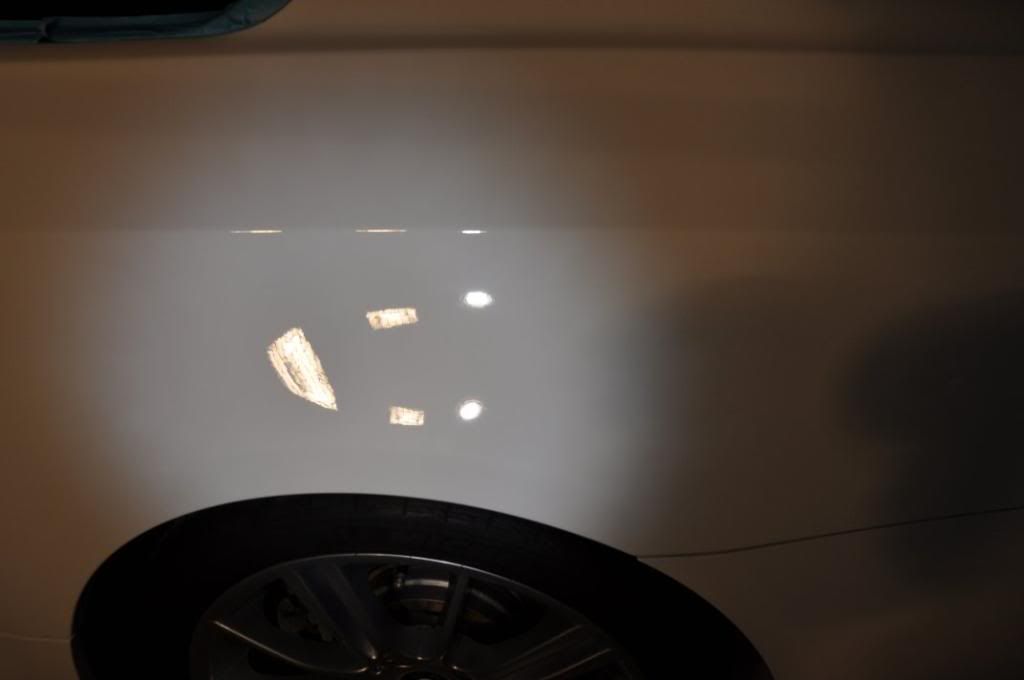
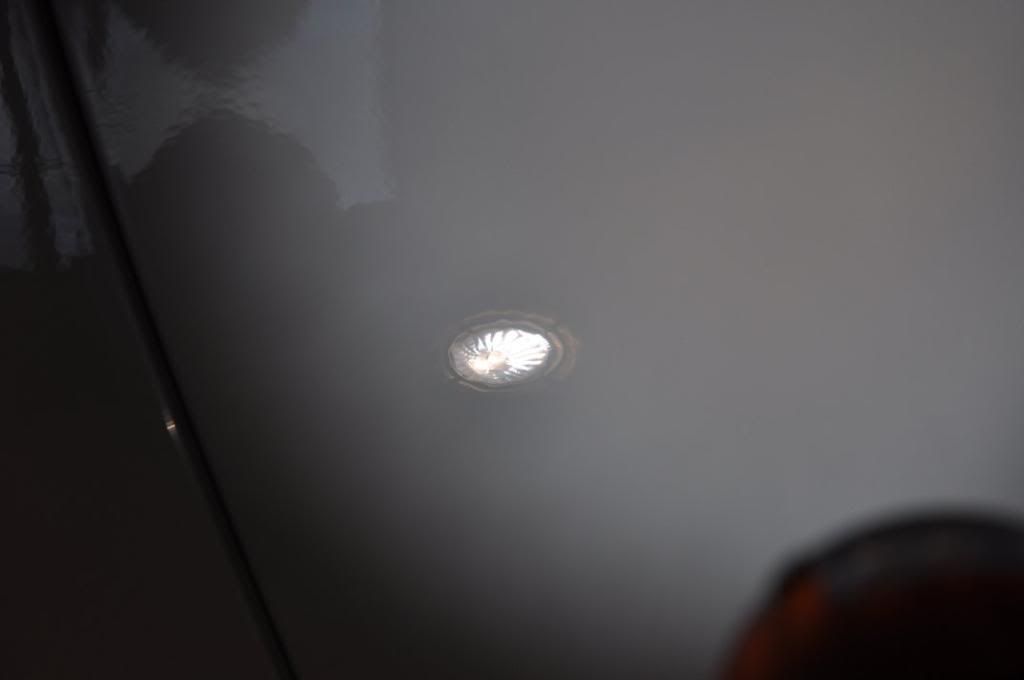
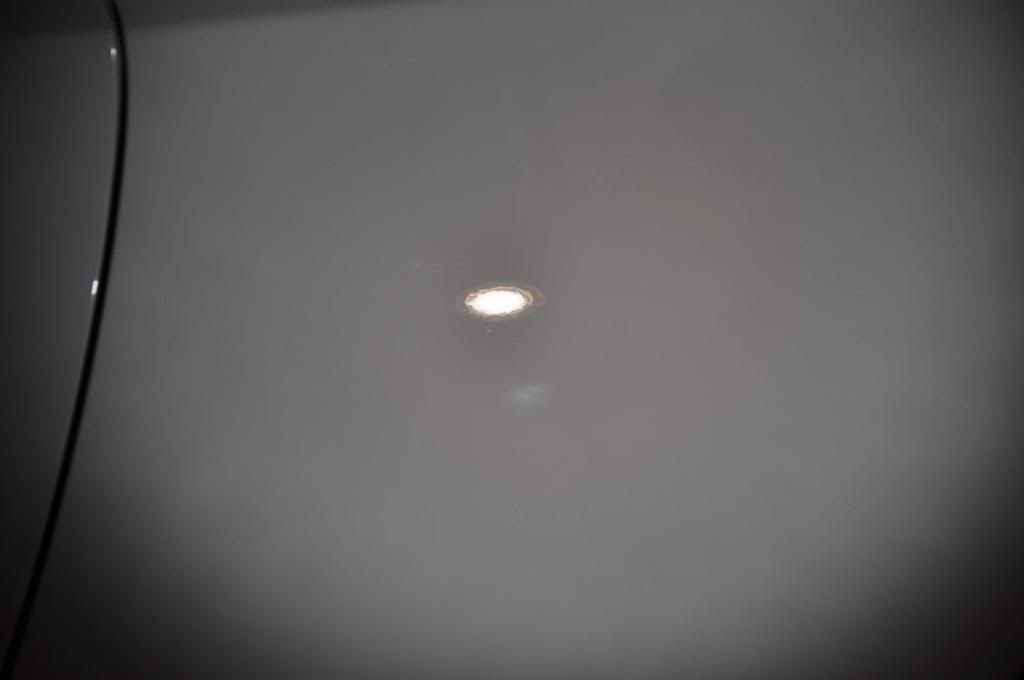
Nice - deep RDS... These marks were my personal favourite though!!
What did we end up using for correction....?
Meguiars #105 Ultra Cutting Compound, coupled to a LakeCountry Light Cutting (do not be deceived by "light" :lol Wool Pad, Makita 9227CB and a hyperactive Scotsman... Having worked up through the cutting combinations, this was found to be the most effective, foam pads while getting correction were achieving it just too slowly and also with too great a heat build up (wool runs cooler, while offering faster paint removal - perfect for large area RDS correction on very hard paint).
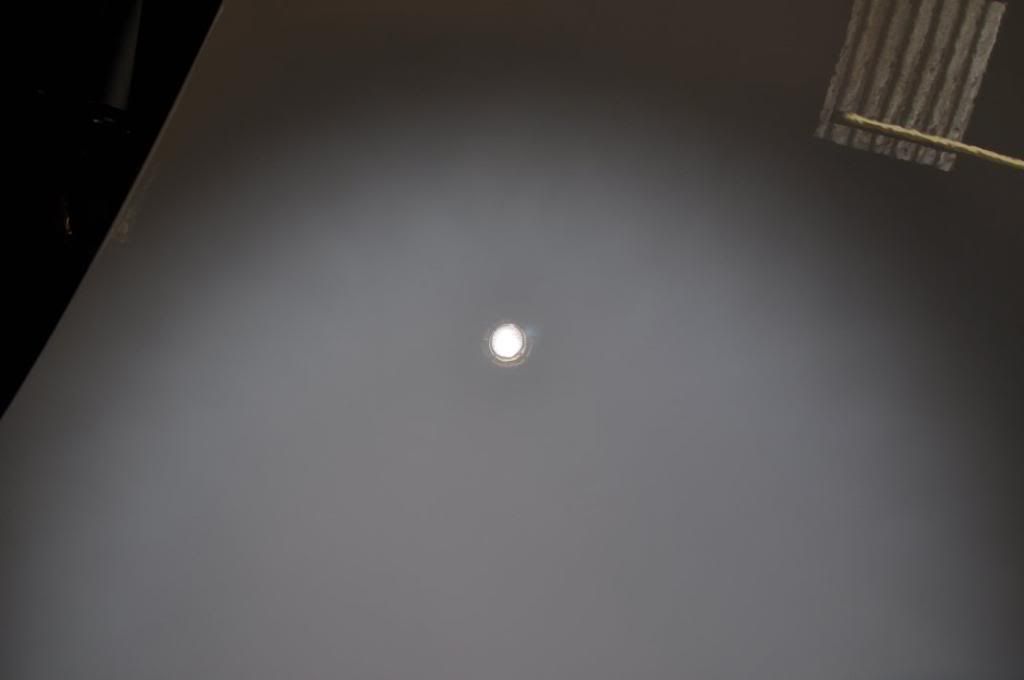
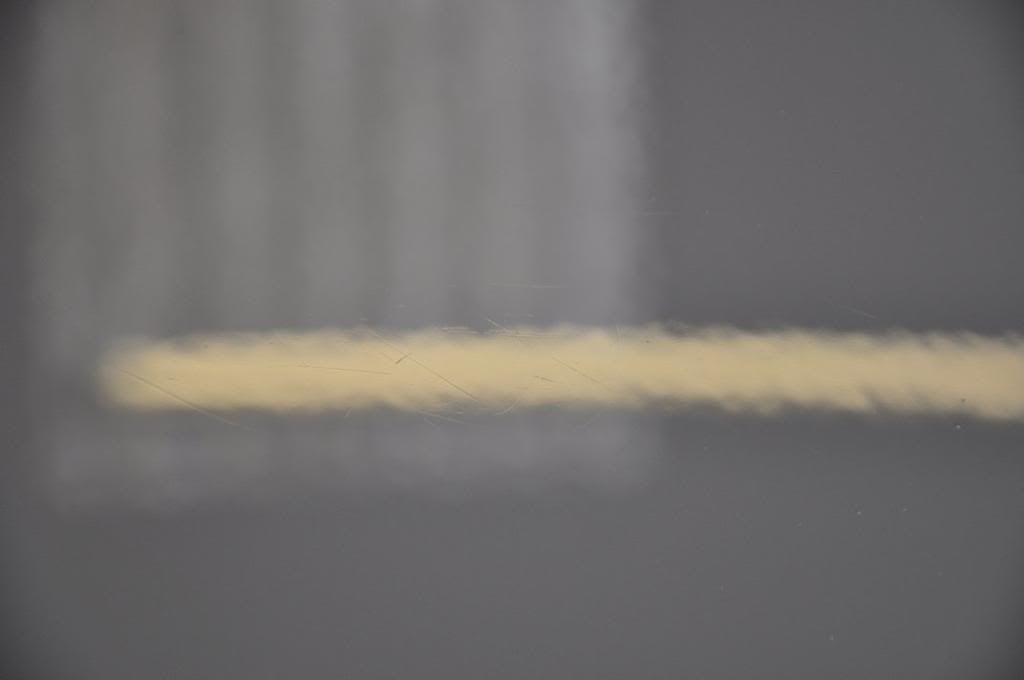
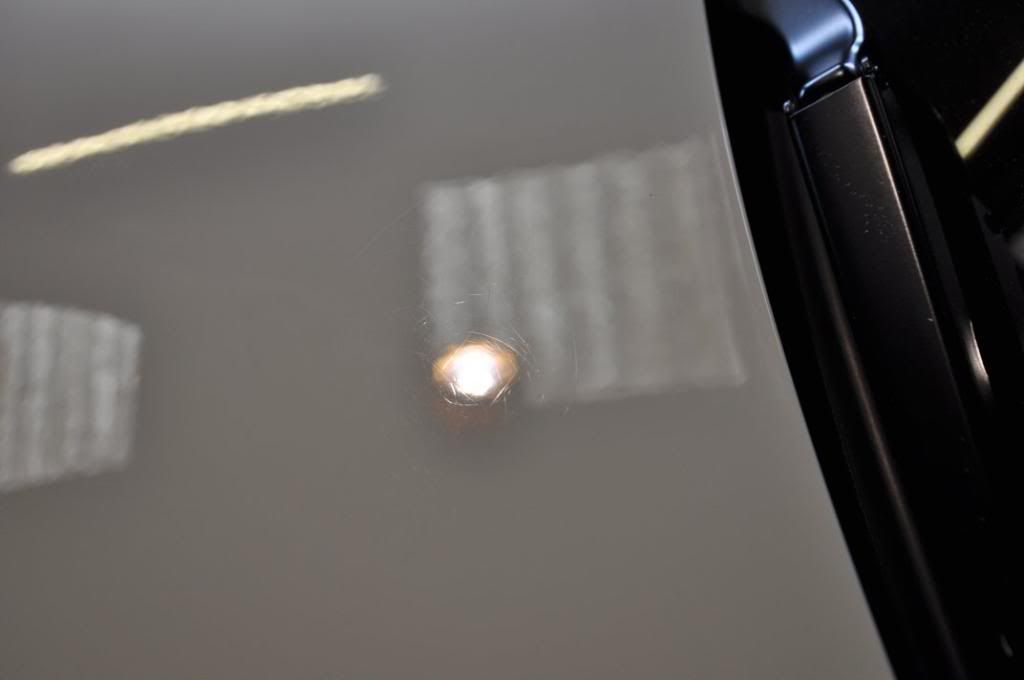
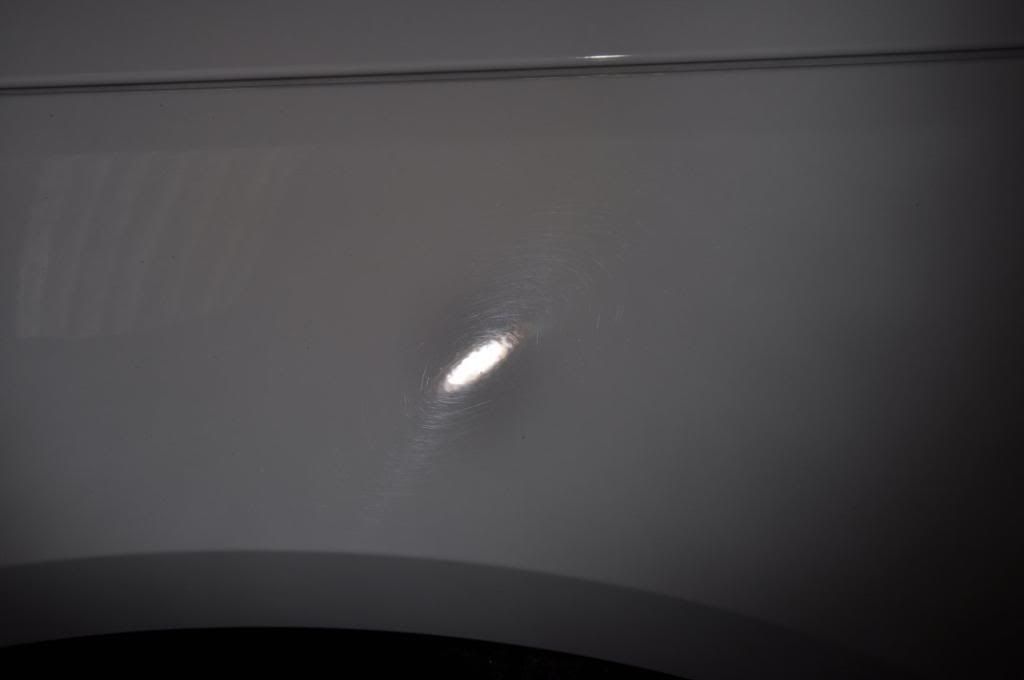
Remember these deep marks, my favourites, above? Well, after one aggressive hit with wool (and roughly 5um knocked out), here's what we now have...
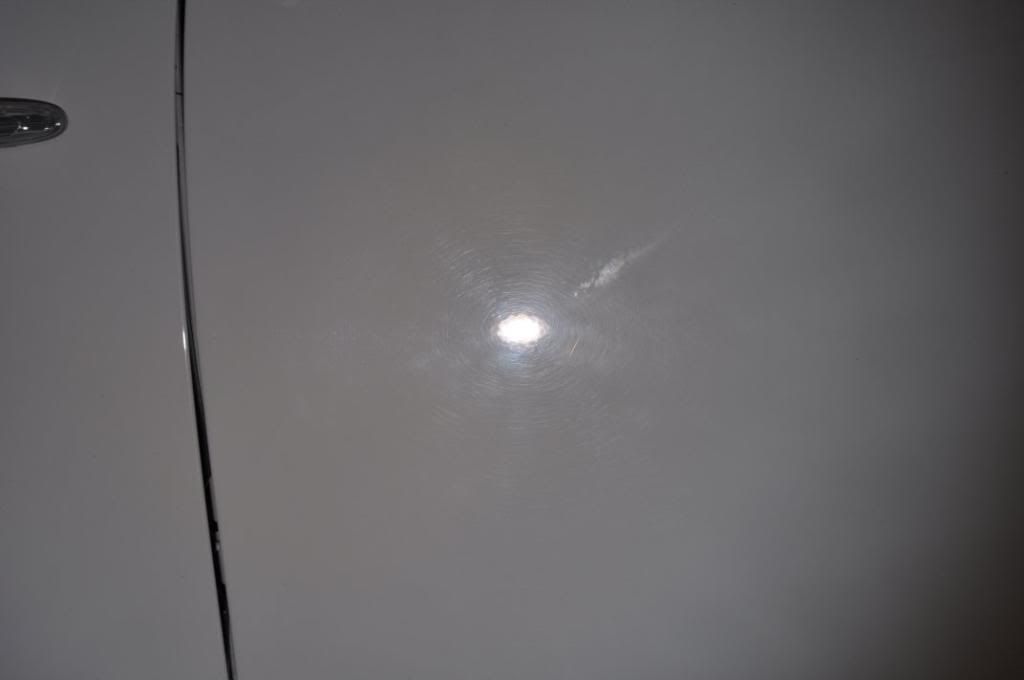
Another hit...
Now do not be decieved here - its not as if I wasn't trying!! I mean, here's me giving the wet sanding a run out on these marks, check out the full on concentration - I'm gonna murder these swirls, oh yeah!!
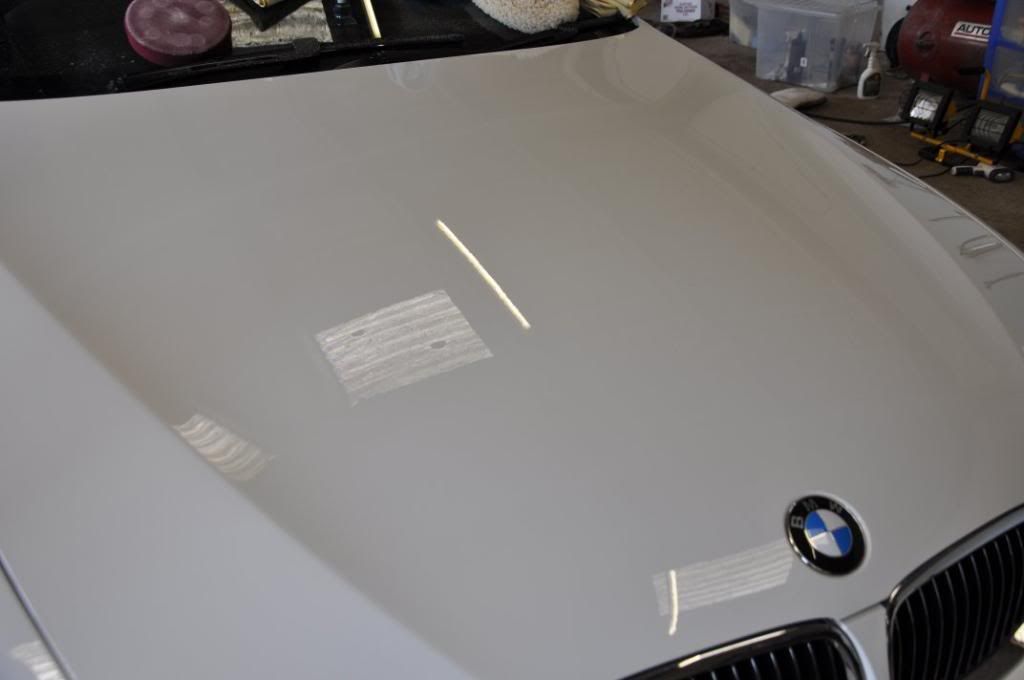
Except no... 2000 grit barely touched them, hence the wool above!! Four hits of wool, one hit of IP later and we have the following...
Not perfect, so why stop? Well, it would have been easy to keep hitting it with wool - I was getting a good workout afterall! But one has to exercise common sense here as well, we have a car which is barely a year old, knocking out huge amounts of paint and leaving massive thin spots is not good news! So with sensible paint removal achieved, here I believed I had struck a balance between effective defect correction, minimising the marks notably, while still maintaining a healthy paint thickness in the region.
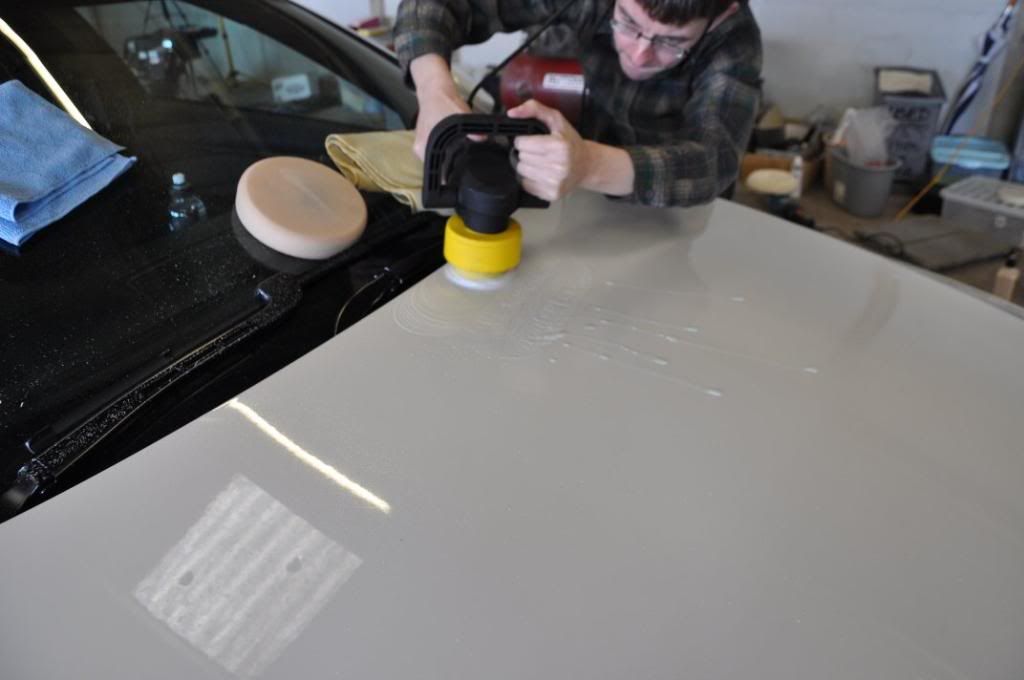
So this wool pad lark, how was it working? Well, my methods were as follows... Note, i have used a small backing plate on this pad - I found this allowed my to focus pressure down through the wool more effectively which allowed for greater correction. However, you must exercise care here and ensure you have the pad well centerred - an off balance 8" wool mop will throw you about like a rag doll in a hurricane, not great near a panel edge!!
So, first of all, place a line of compound on the paint - Meguiars #105 was used here:
Feather the trigger to pick the compound up into the wool and spread around - dont try it at higher speeds, you'll be redecorating your garage!
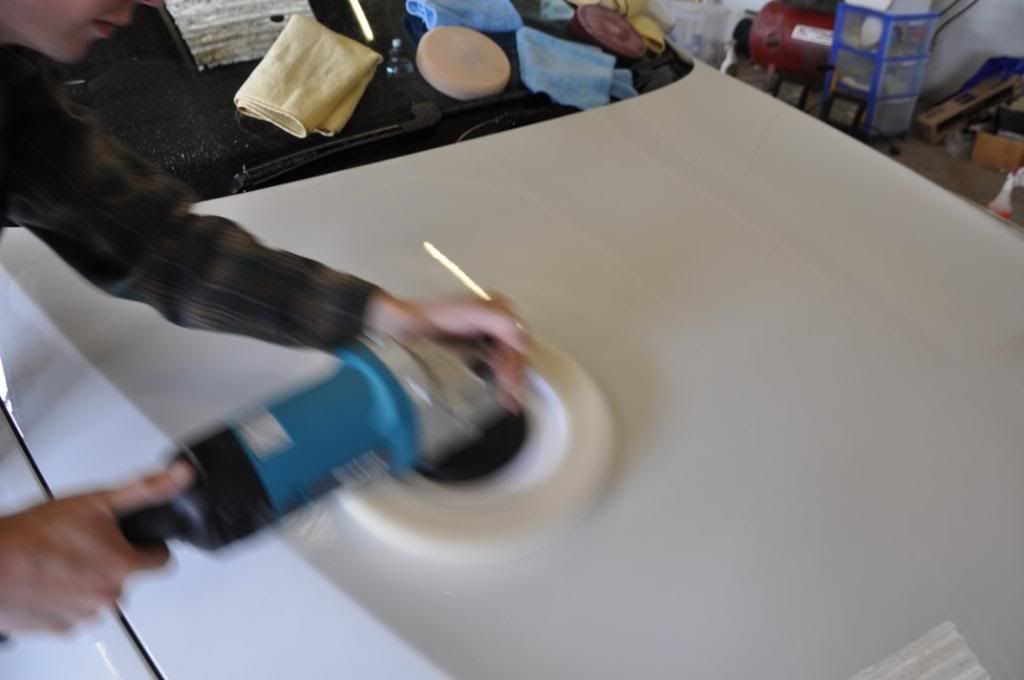
Get the speeds up, winding up in the first instance to 1500rpm and moving the machine fairly quickly to get the compound well spread out over the work area...

Then its time to do the serious work. At around 2500rpm, make steady passes with firm pressre (lightening off round edges) to get the best cut from the SMAT abrasives of #105. Work at this rate until defects removed or compound begins to dry...
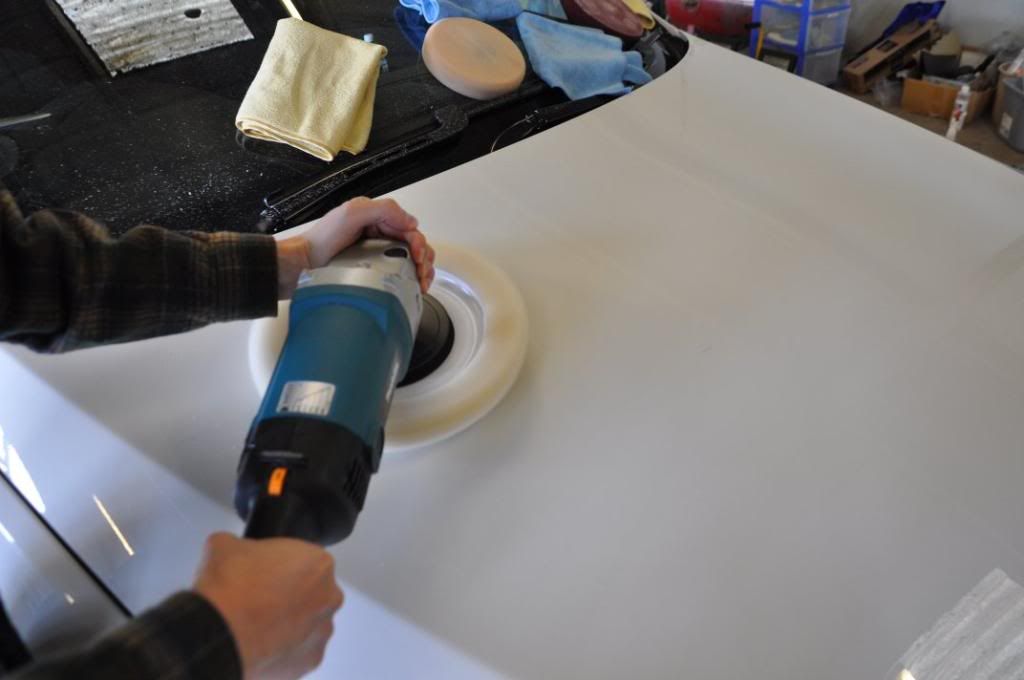
The whole bonnet was corrected using wool, owing to large area of RDS,
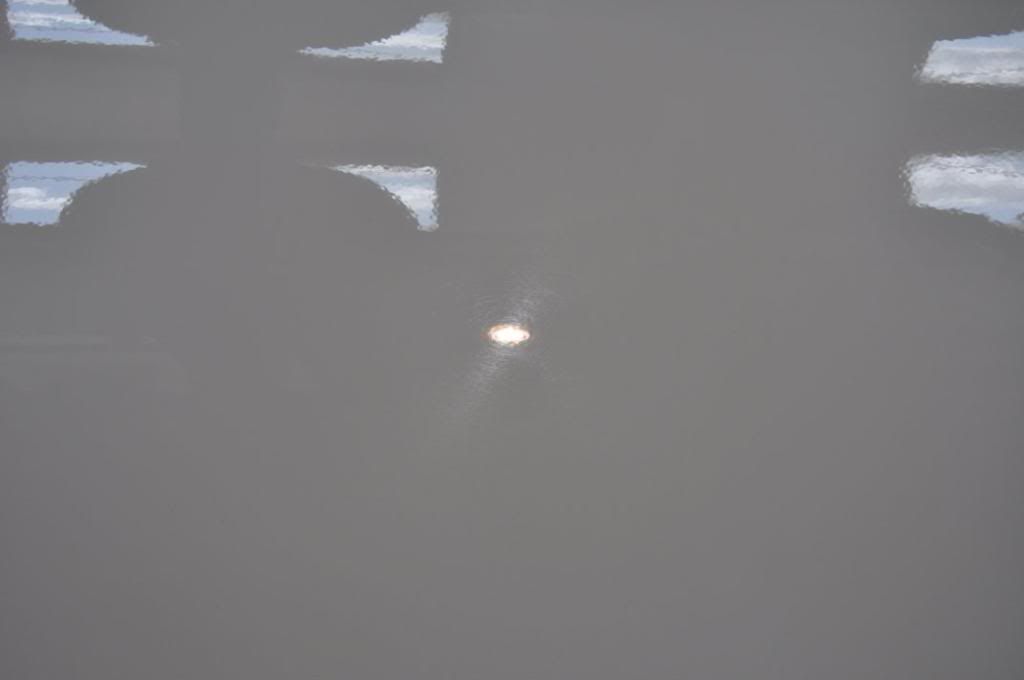
Now normally, one would expect very pretty hologramming and tails from wool compounding - its an aggressive technique, a bit like taking a wrecking ball to a brick wall when Fast Cut would be a sledge hammer... But not on this paint, oh no... This paint finished down LSP ready with #105 on a wool cutting pad!!! Think I'm joking? ... Well, here's the paint after #105 and wool...
Now either I am some sort of android that can finish a compound down by wool, or this paint was seriously hard. The latter, I believe to be the case
It would have been rude not to finish this paintwork properly though - so onto my finishing polish of choice (regular readers, you get no prizes for guessing this one...) - Meguiars #205 Ultra Finishing Polish, coupled to a Meguiars W9006 tan finishing pad.
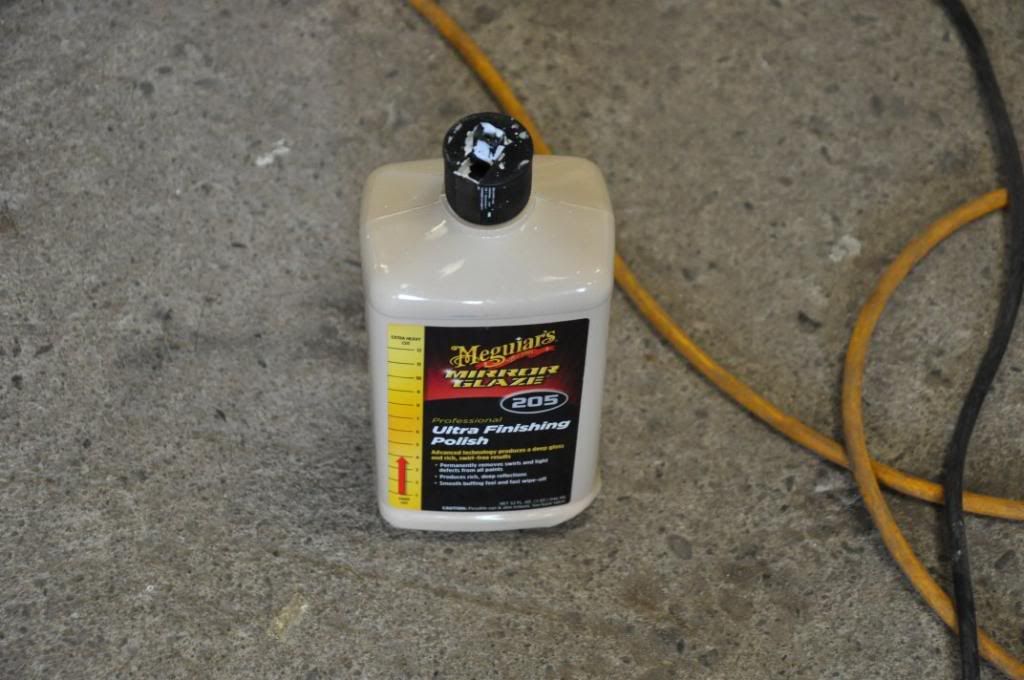
Predictable - yes I am ... Reliable, quality results from this polish... Most definitely...

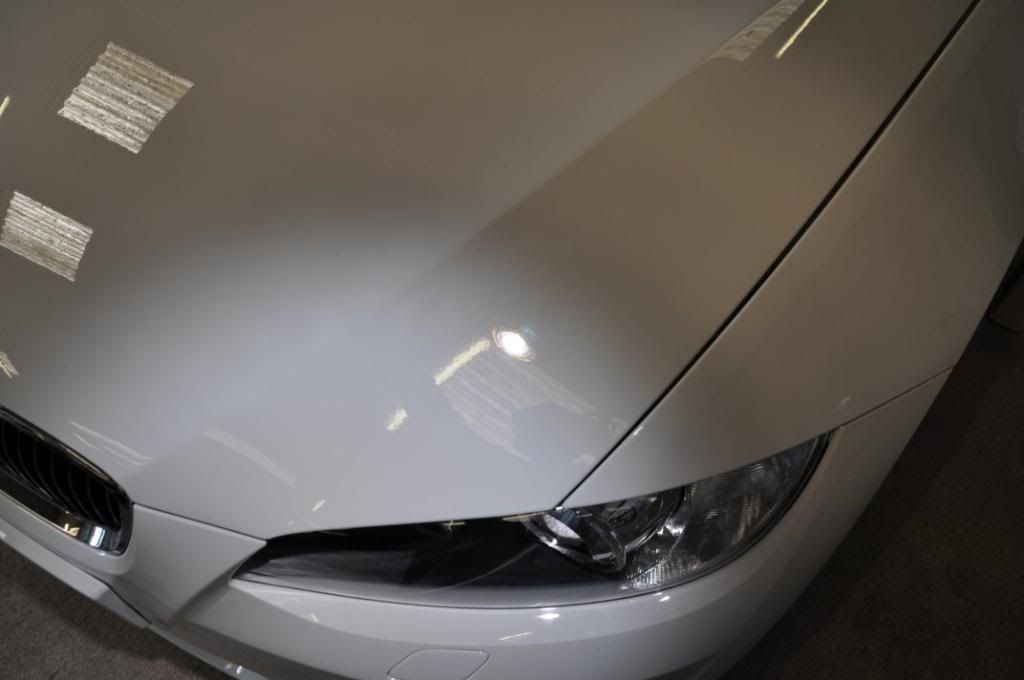
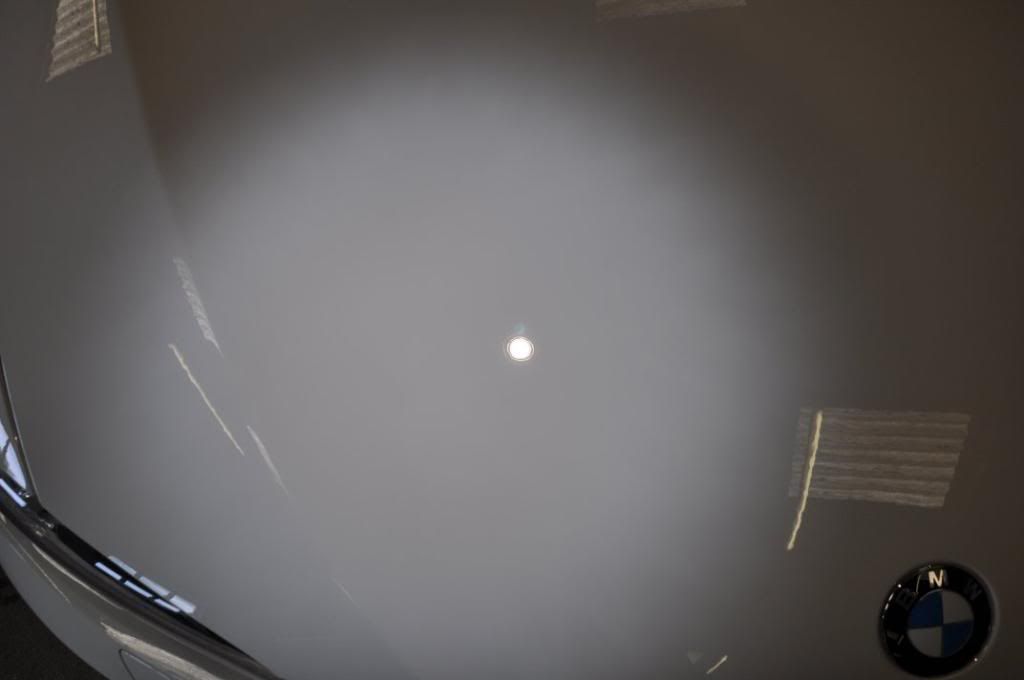
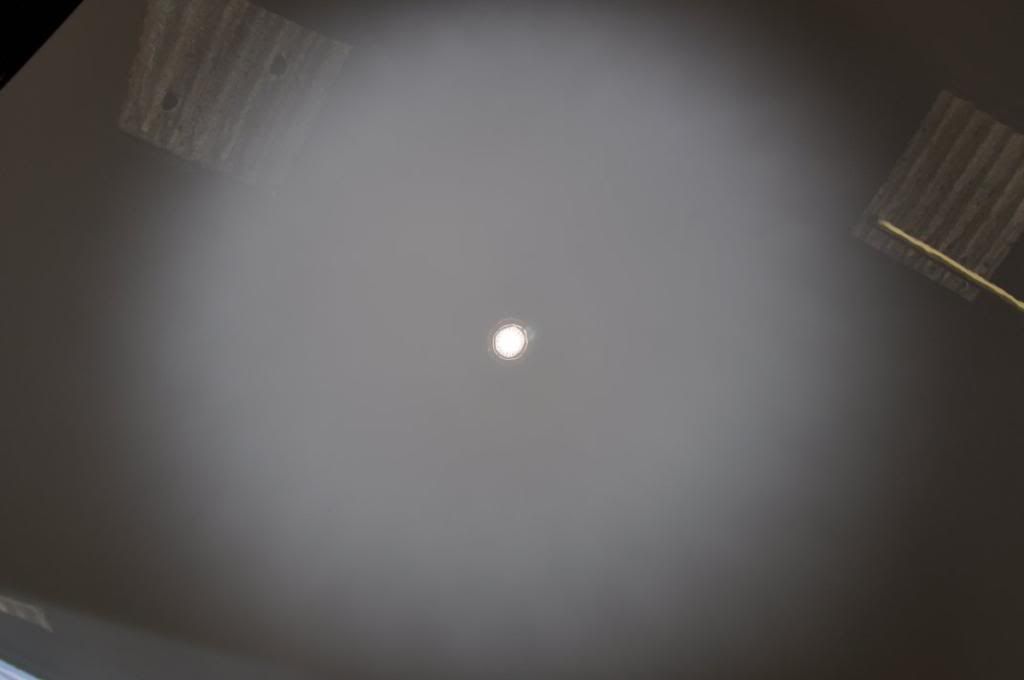
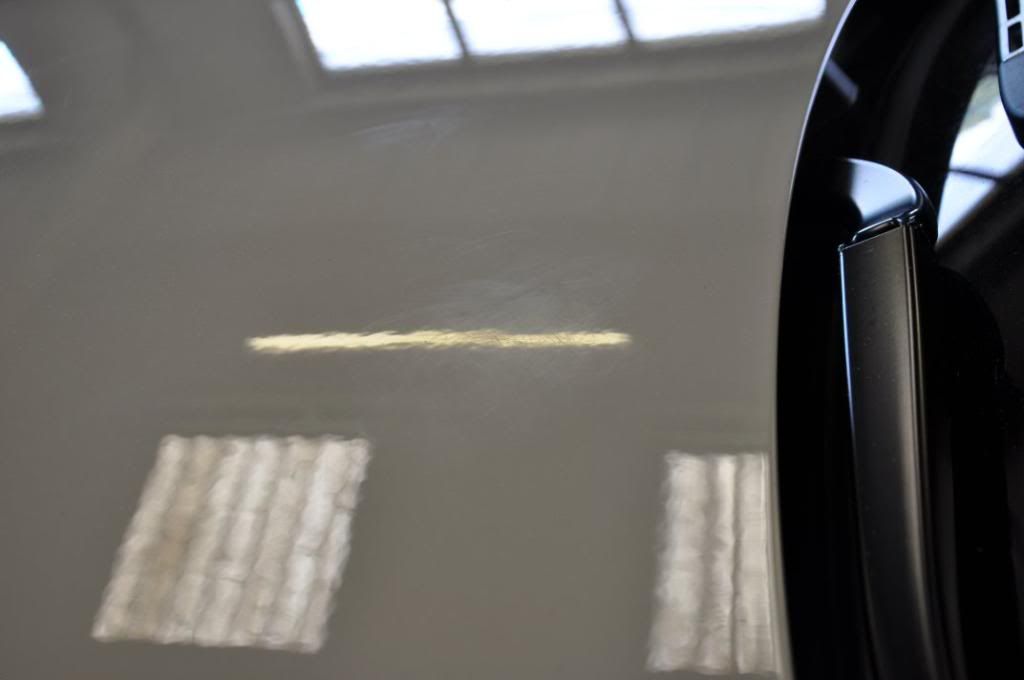
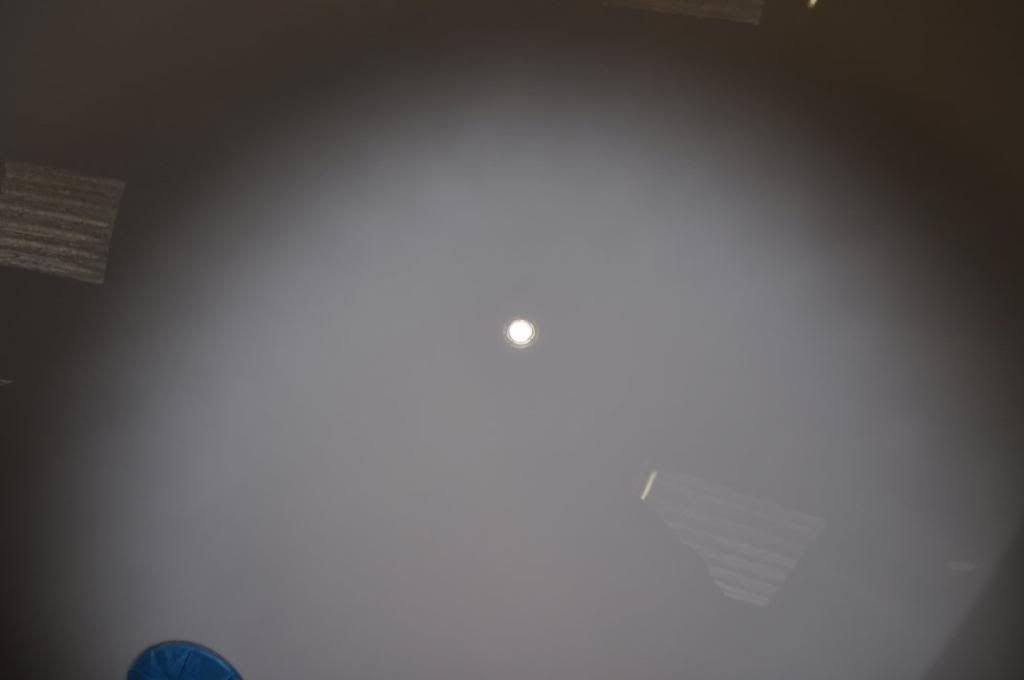
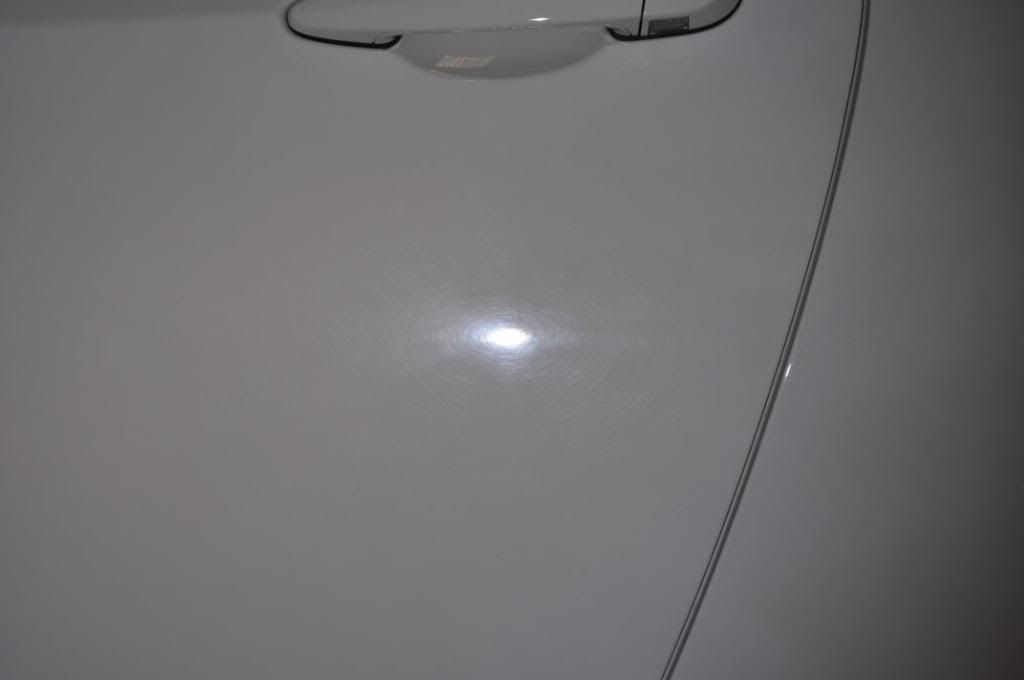
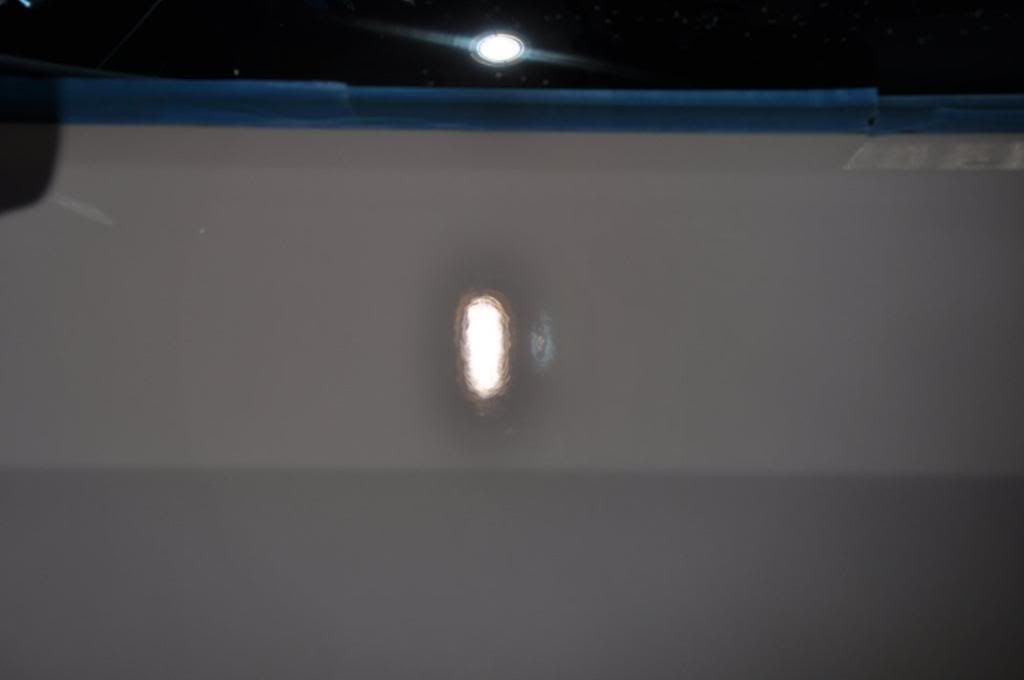
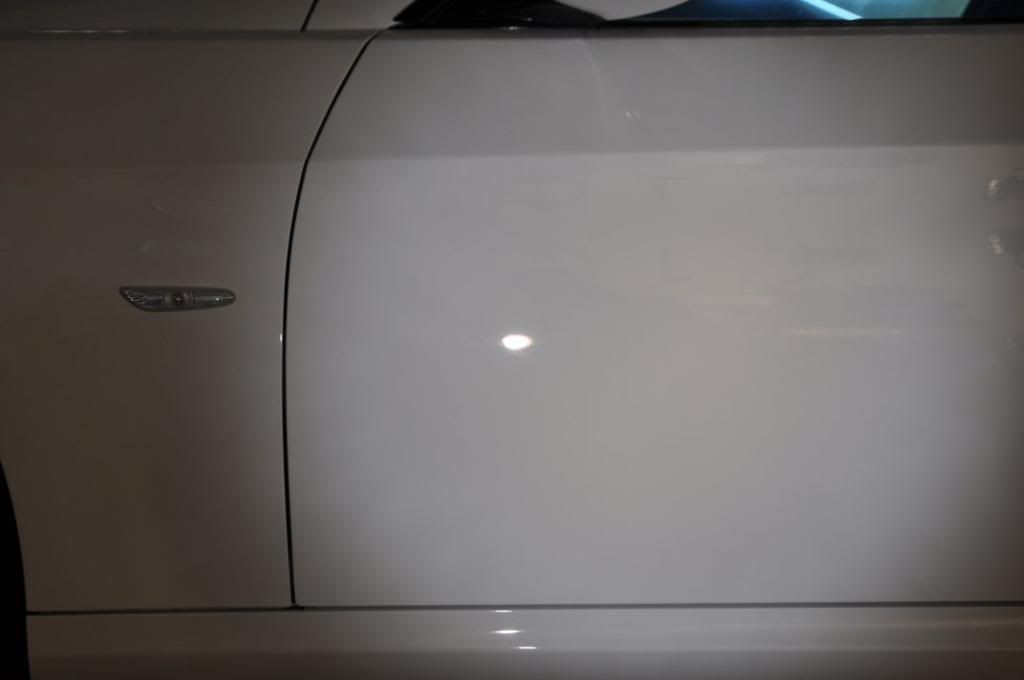
Spot the RDS now (hint, use the strip light )
Looking good I thought, and so was the boot after Gordon's efforts (with foam and #105)... Time for lunch
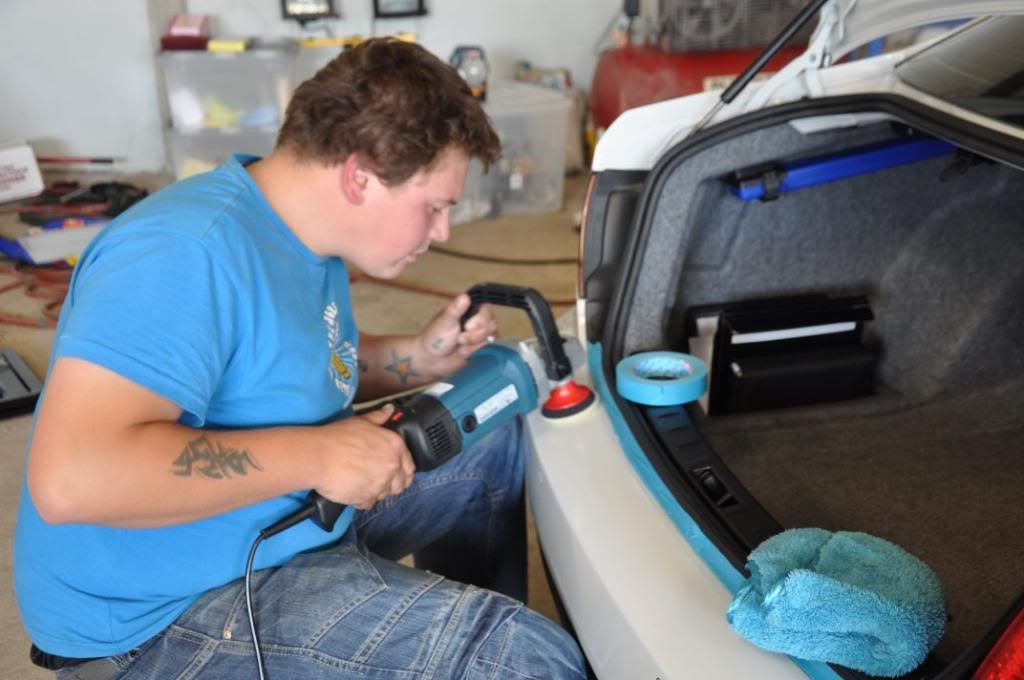
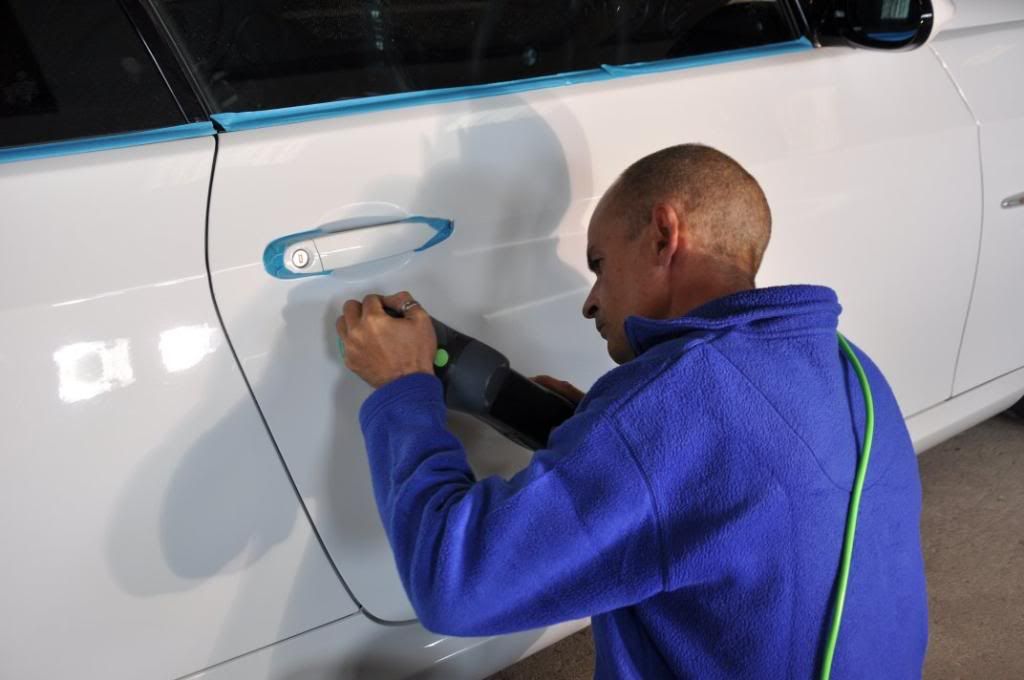
Returning to the unit, and David "Its Got Bumpers Too" was ready and raring to go with us now... as the name suggests, he was kitted up with a spot pad, and sent off to do the bumpers :lol: Plastic panels require careful heat control, and thus a lot more patience in the correcting phase (sometimes, you just cant be so aggressive, so a slow and steady approach is required) - we decided David was the most patient!
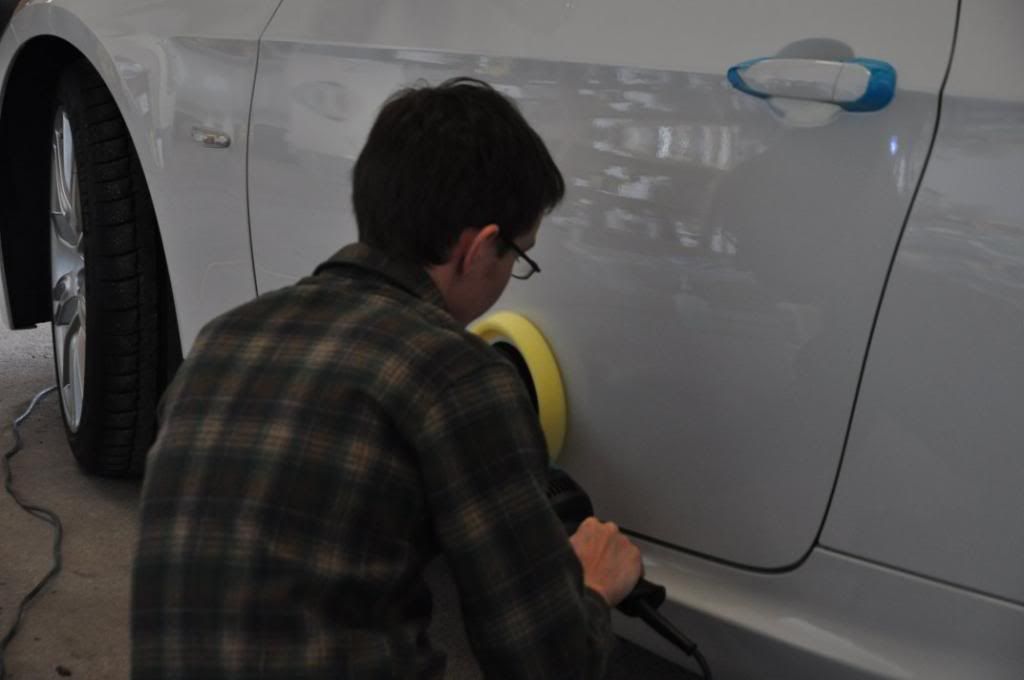
The sides were Gordon and I's challenge - and we took one each ... The befores, down both sides...


And away we go Different products were used throughout, depending on severity of the marks... Among them:
Menzerna Intensive Polish PO85RD3.02
Spread at 600rpm; Couple of passes at 1200rpm; Worked at 1800rpm till residue clear.
3M Fast Cut Plus
Spread at 600rpm; Couple of passes at 1200rpm; Worked at 2000rpm till residue clear, marks removed, or it started to dust.
All finishing carried out with (altogether now! :p) - Meguiars #205! Using a Double Zenith Technique of increasing speeds and pressures together.
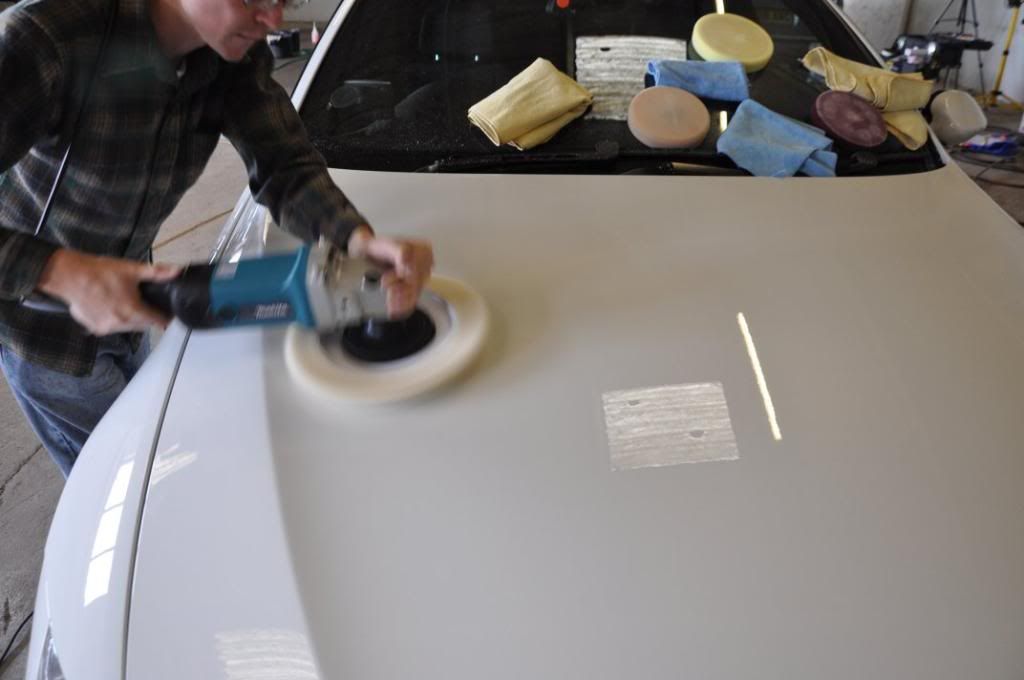
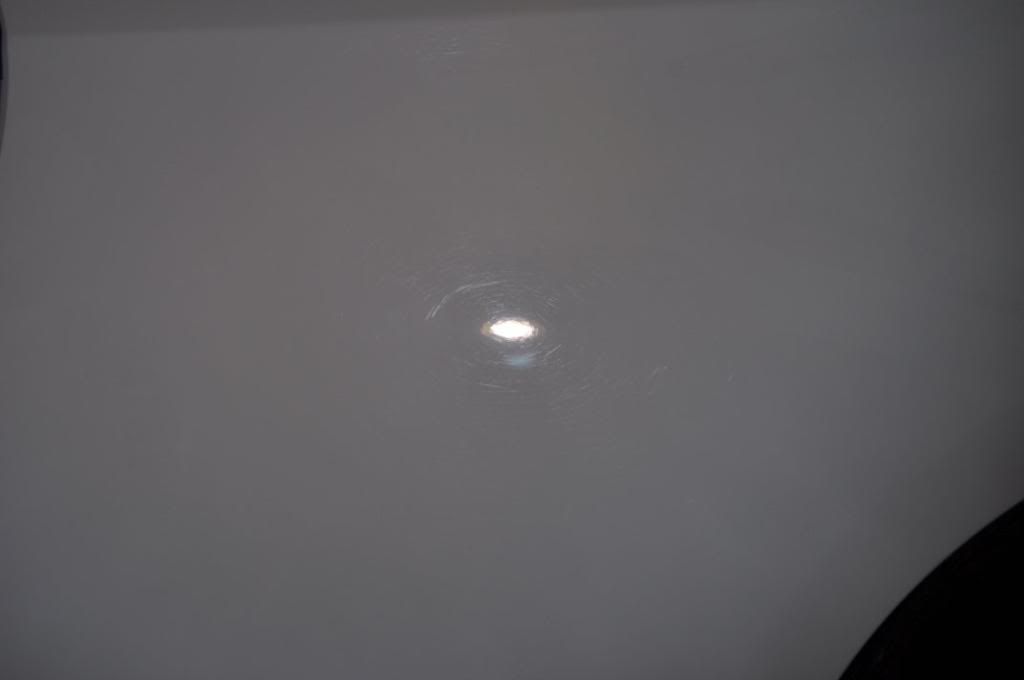
Gordon finding more RDS...
Then posing for the camera (sorry, then polishing them out using Fast Cut Plus on a 3M Compounding pad):
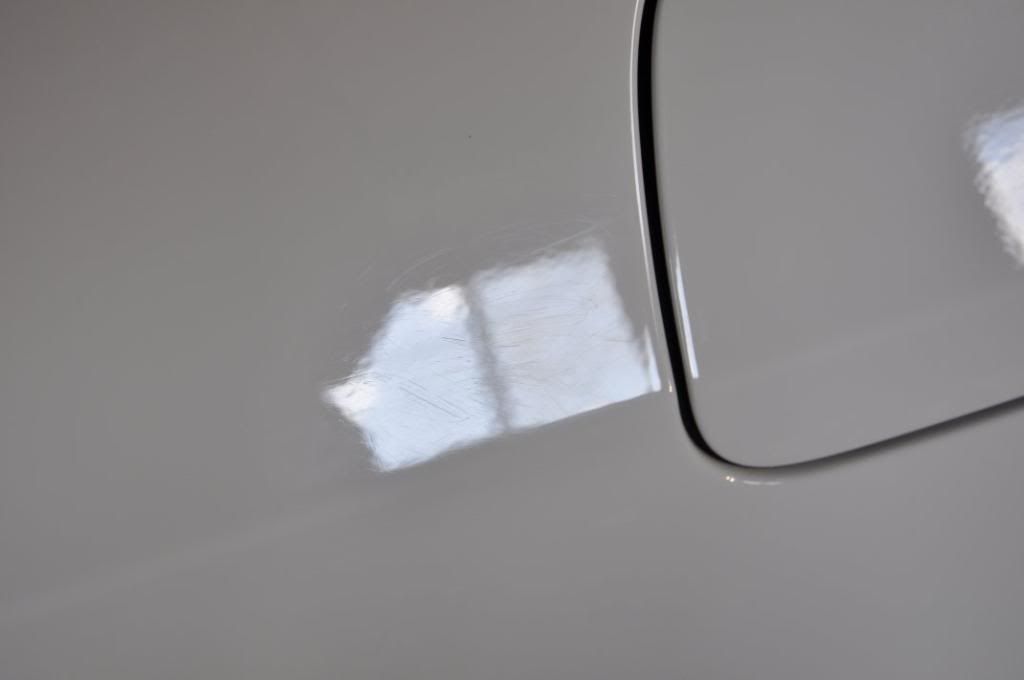
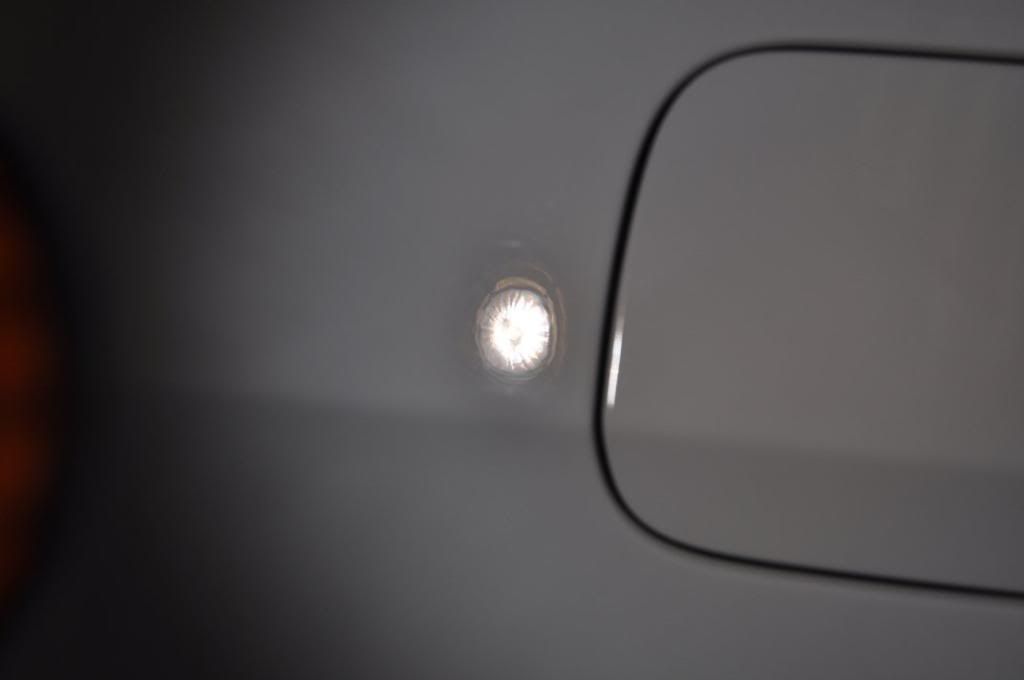
Take note of these marks behind the fuel filler cap - there'l be afters of these later, but this is the before:
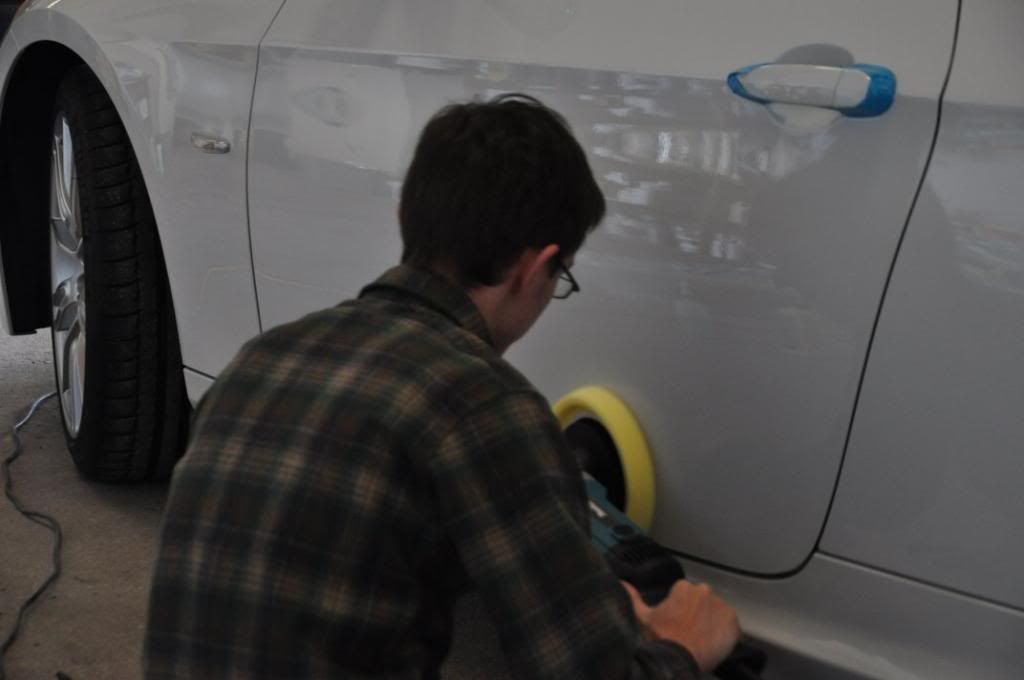
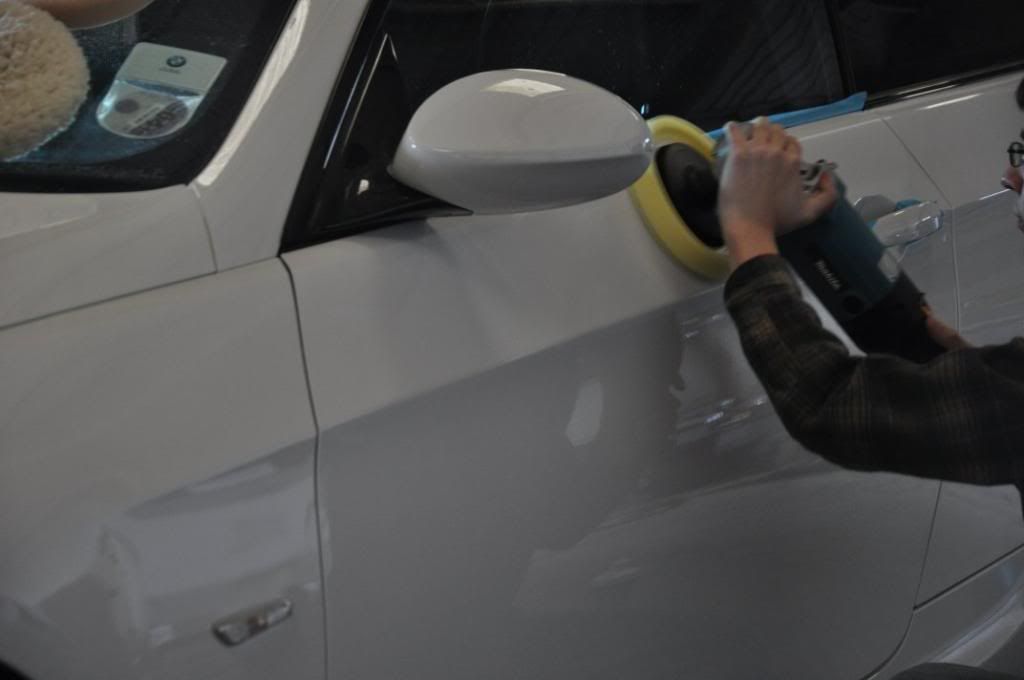
My turn to pose... on the "easy" section too, the door required just Intensive Polish to fully correct it:
Several hours work, plenty of banter and fun, and we found ourselves running out of areas to polish!! So onto the after shots from the machine polishing stage...

Remember the marks behind the filler cap? Gordon sorted them out nicely...
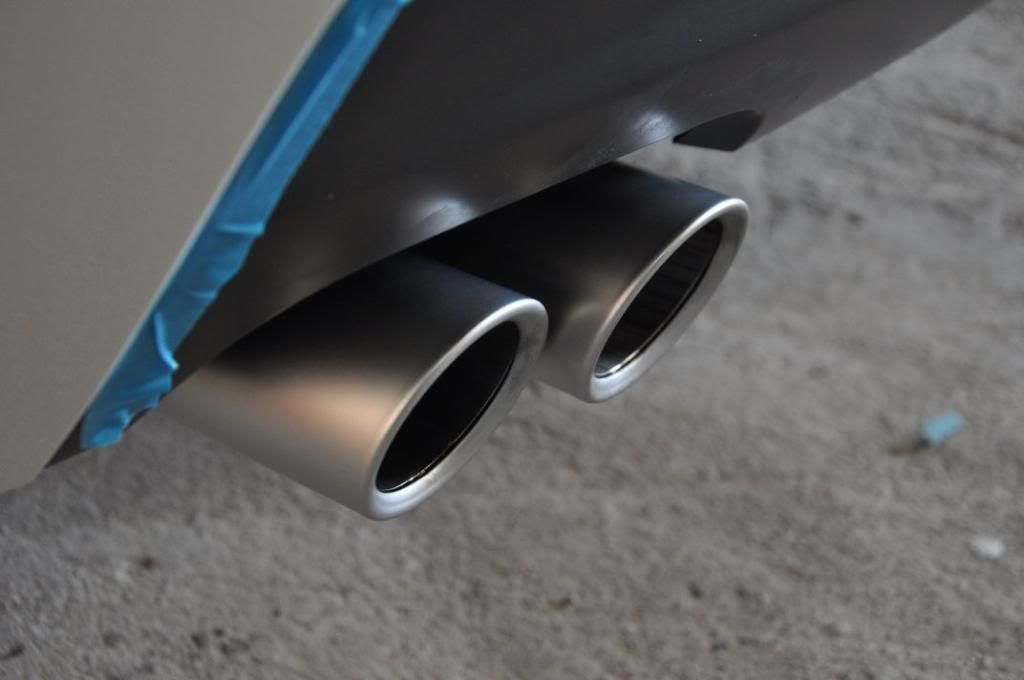
Tail pipes had a nice tar covering, and general slight fading...

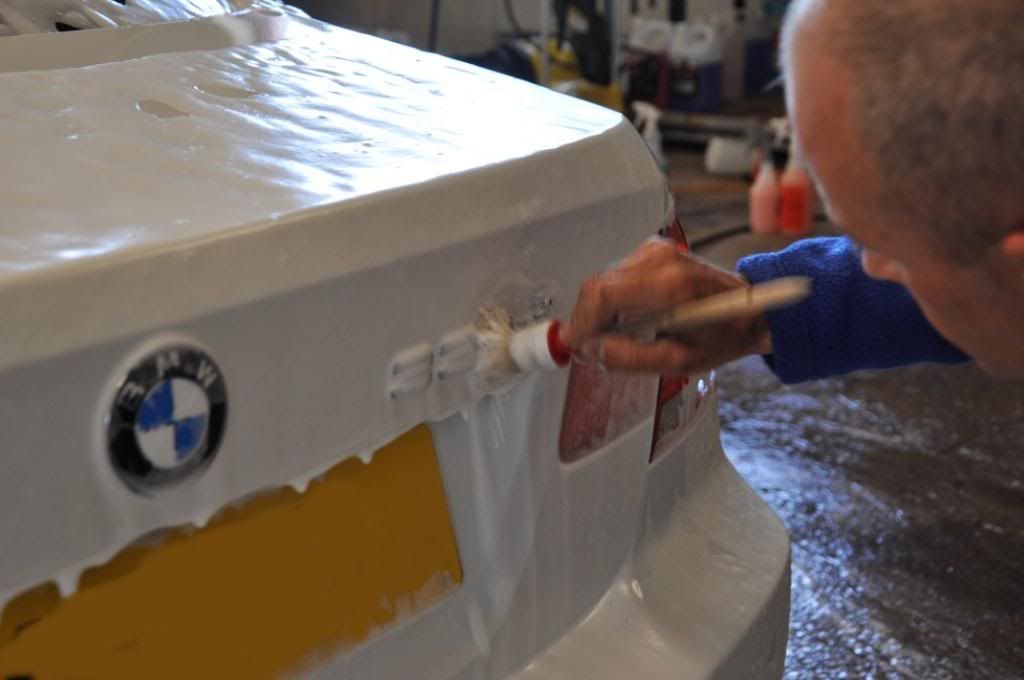
Briliant #1 Metal Restorer followed by Briliant #2 Chrome & Hot Area dealt with that, after pic below (note the Renaissance wax is seen here curing, applied super thinly - can you see it? You shouldn't be able too... Apply this too thick and it will be very hard to remove!)
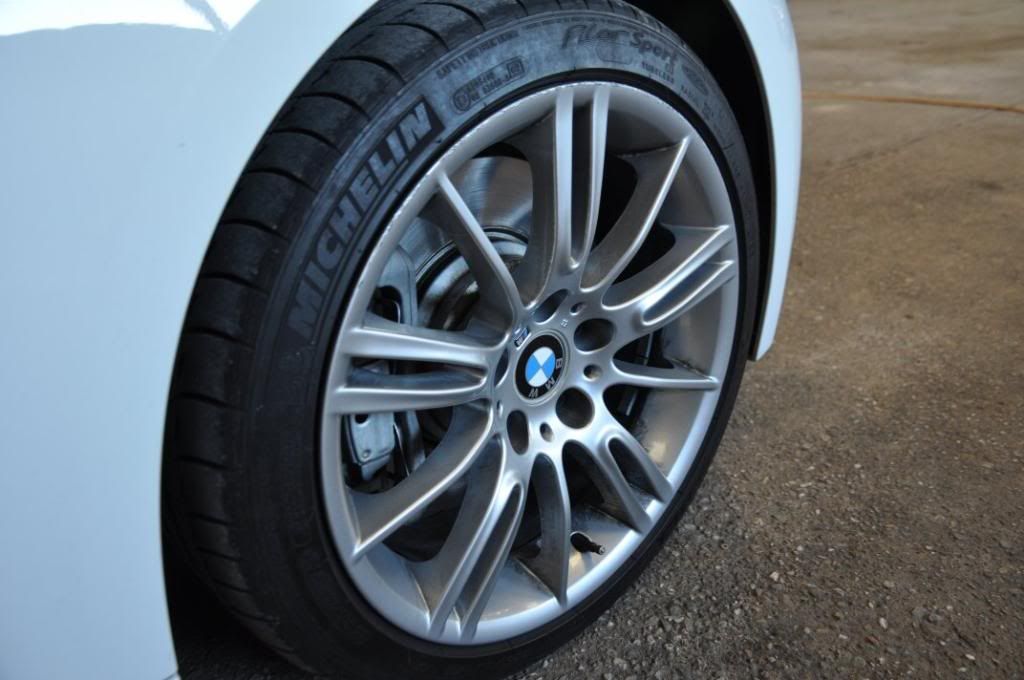
After polishing - the car received Duragloss #105 followed by Collinite #845IW Wax. Tyres with Meguiars Endurance, plastics with All Seasons Dressing. Wheels waxed with FK1000P, arches (front only, rears are carpet) dressed with All Seasons Dressing. Glass with Stoner Invisible Glass.
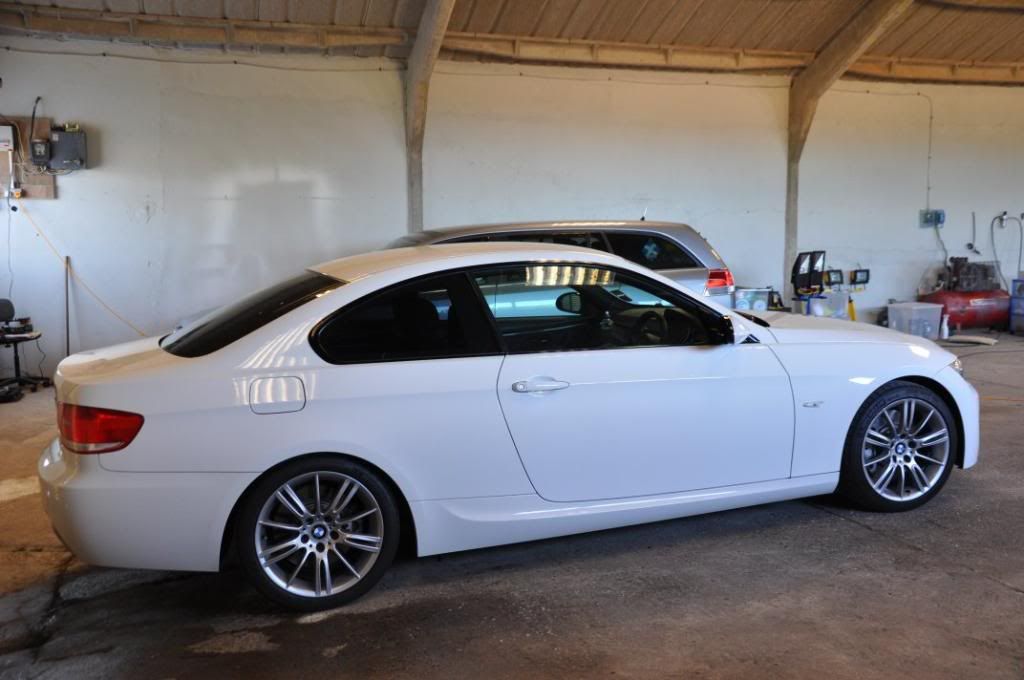
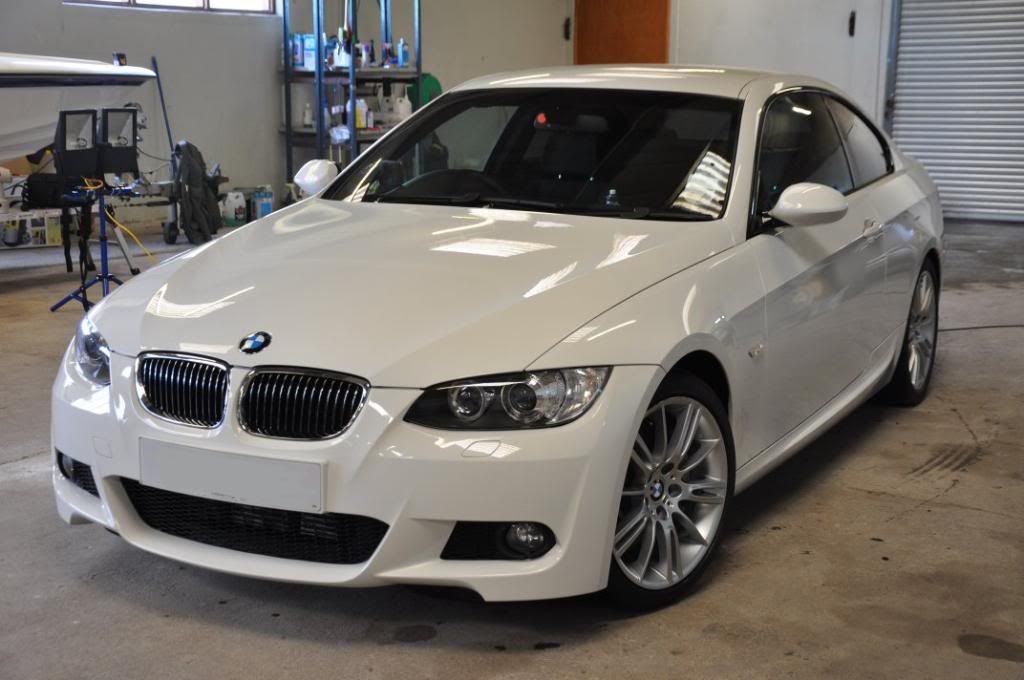
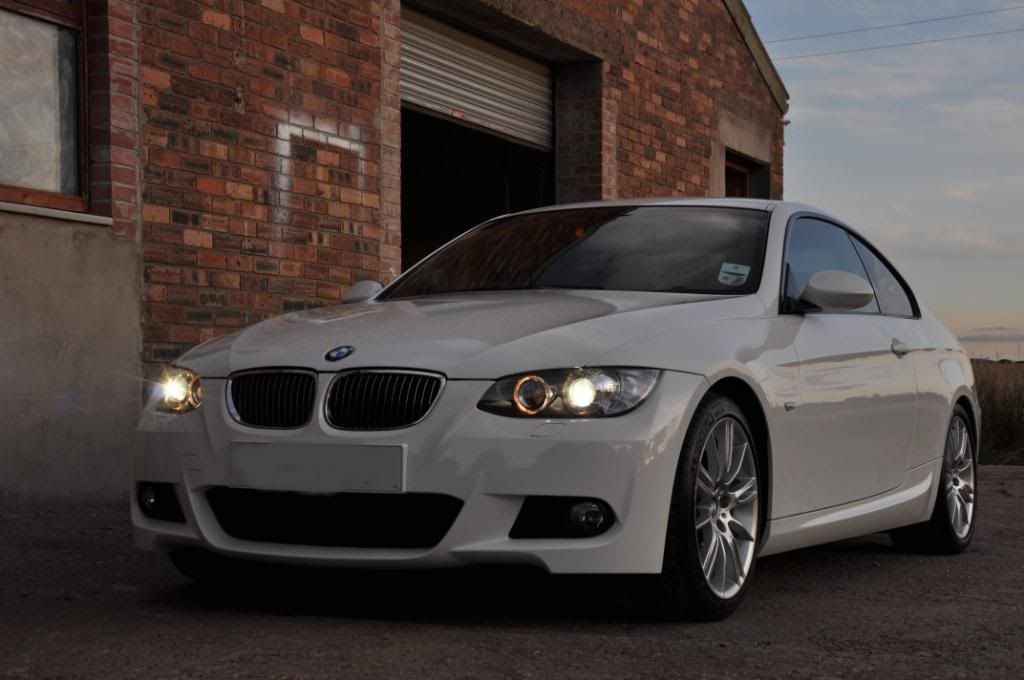
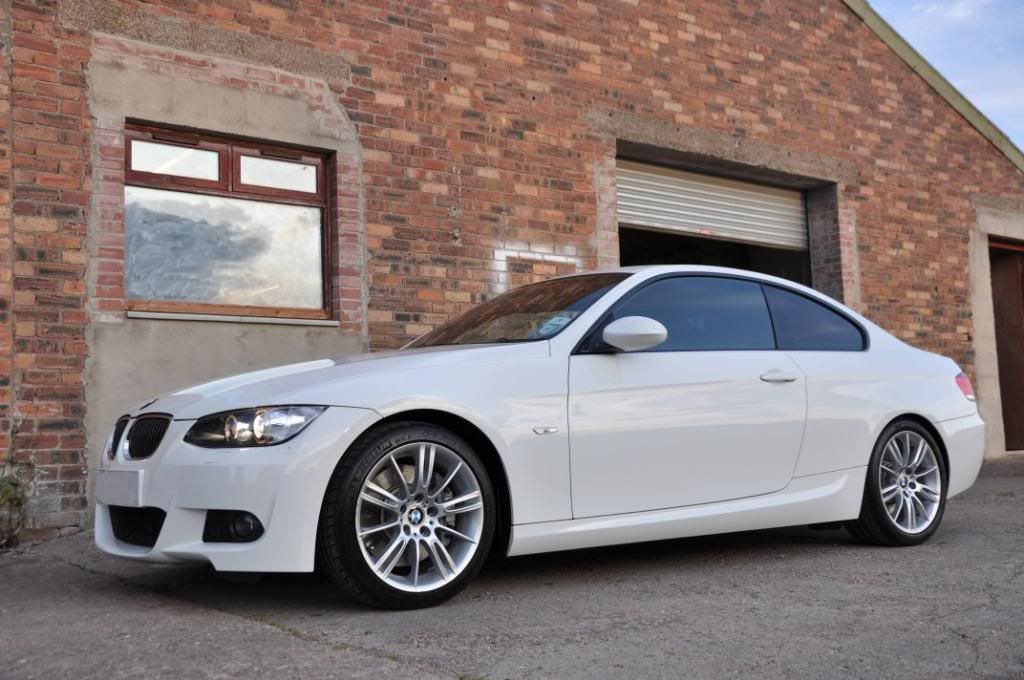
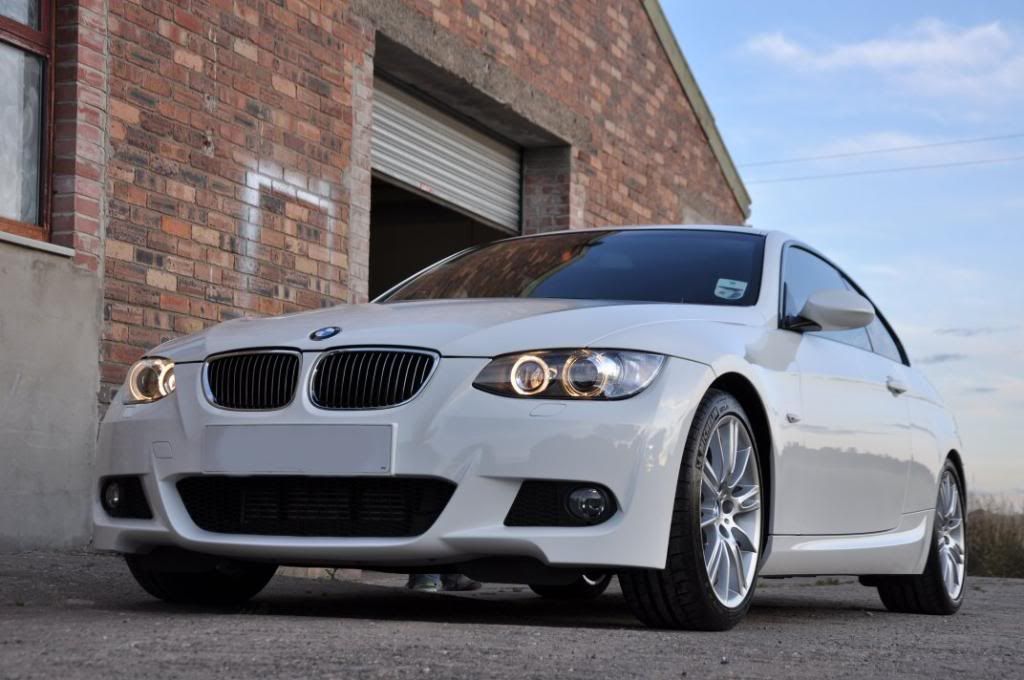
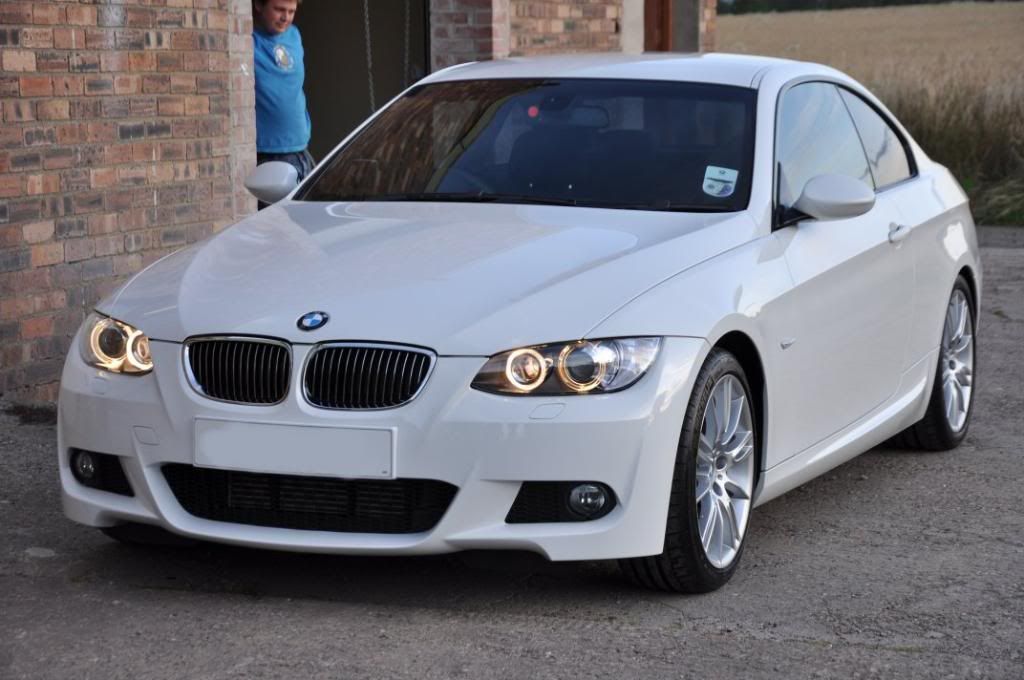
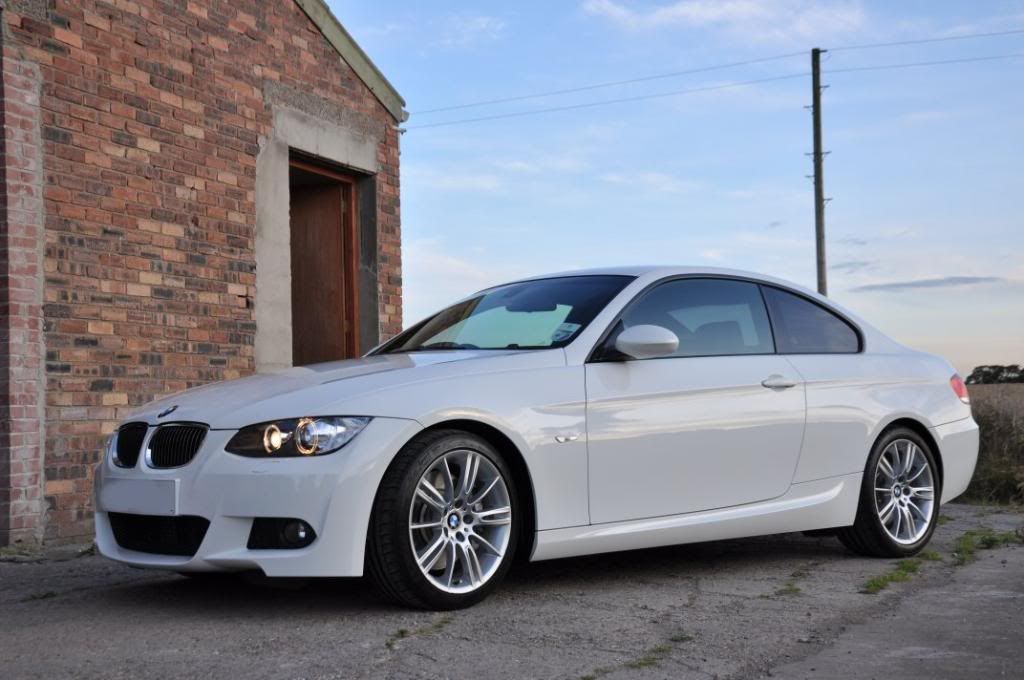
Indoors, a couple of aftershots...

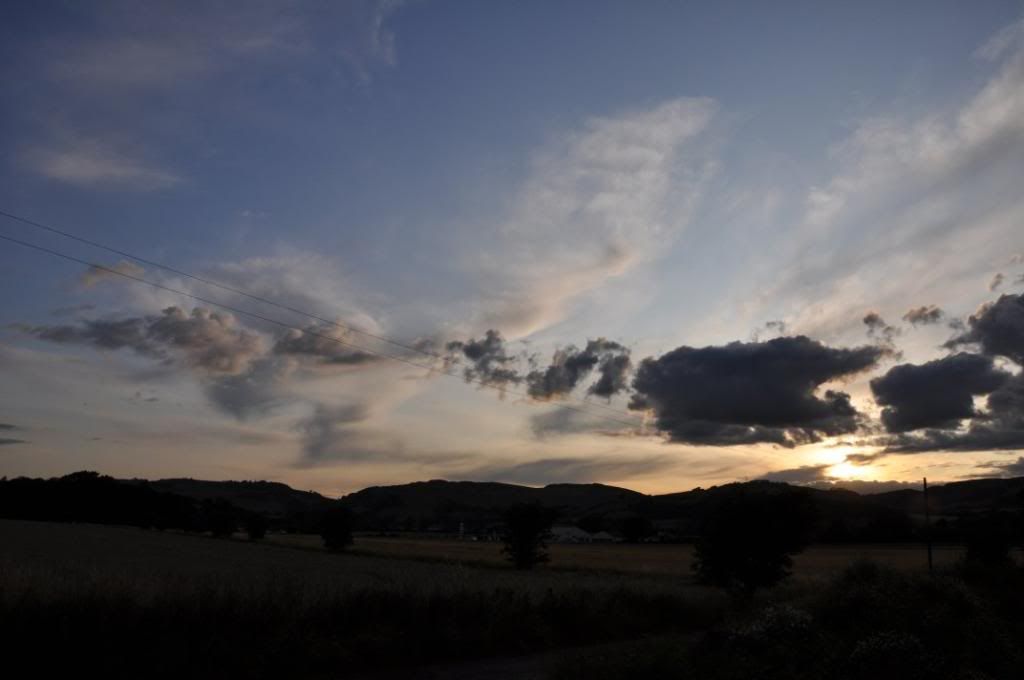
The evening was beautiful though...
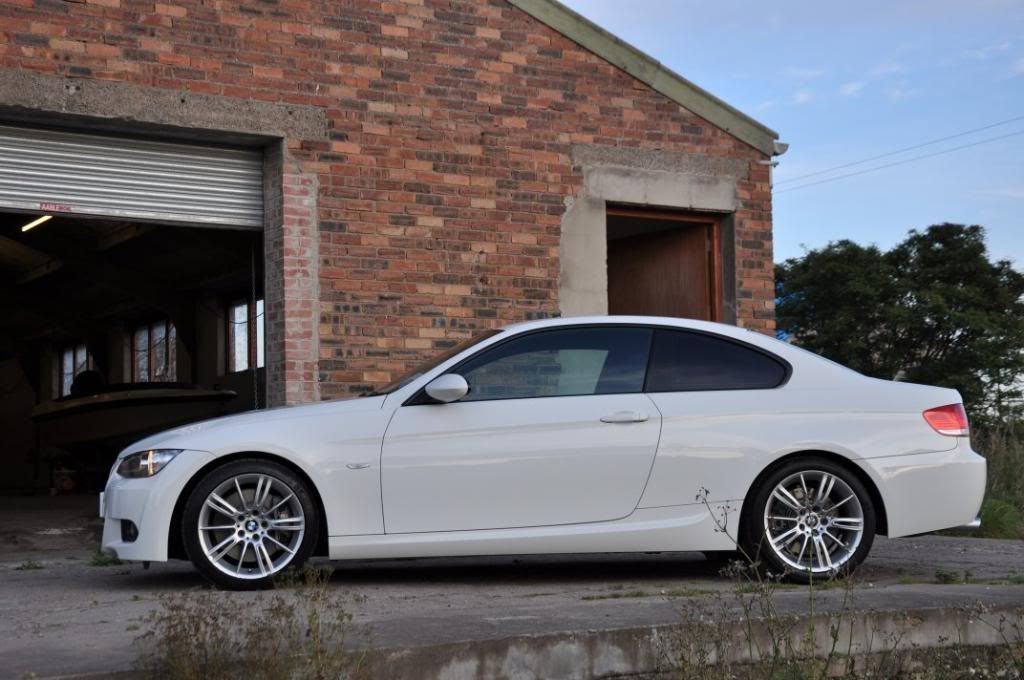
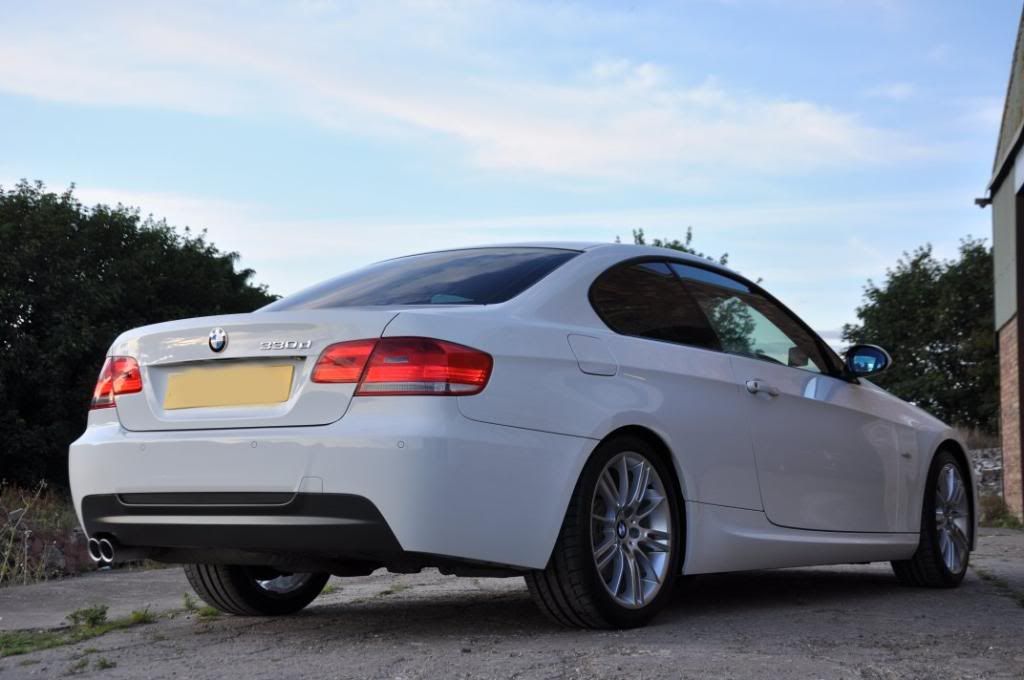
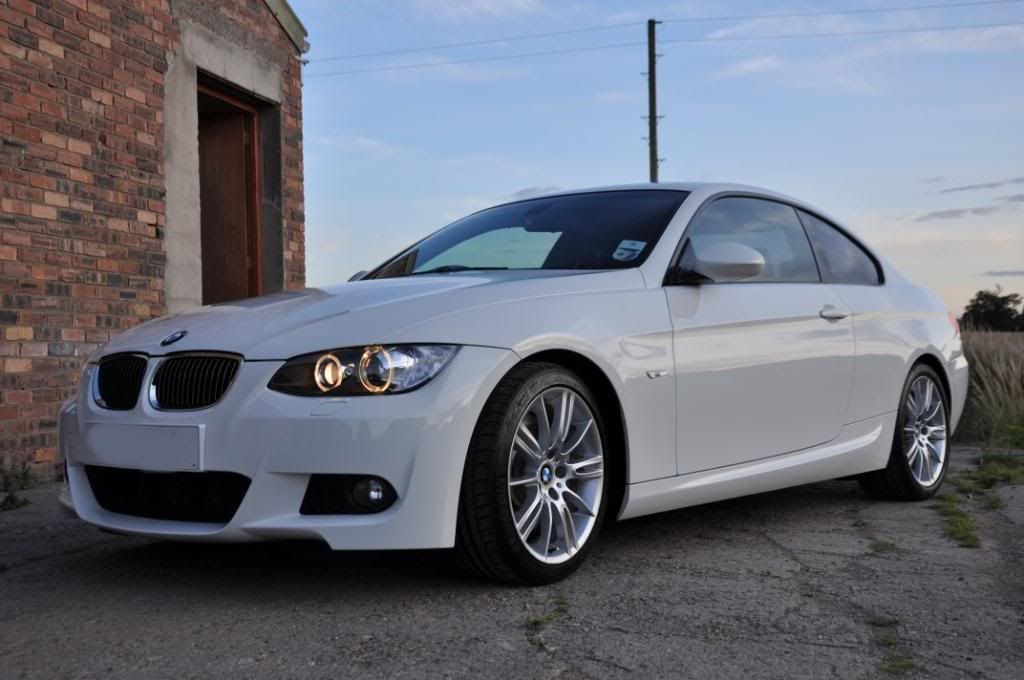
So outdoors for the after shots, and I admit, I got a bit carried away with the camera but I hope you do enjoy the pics...


One happy owner, time for the three detailers to chill out... our rewards:
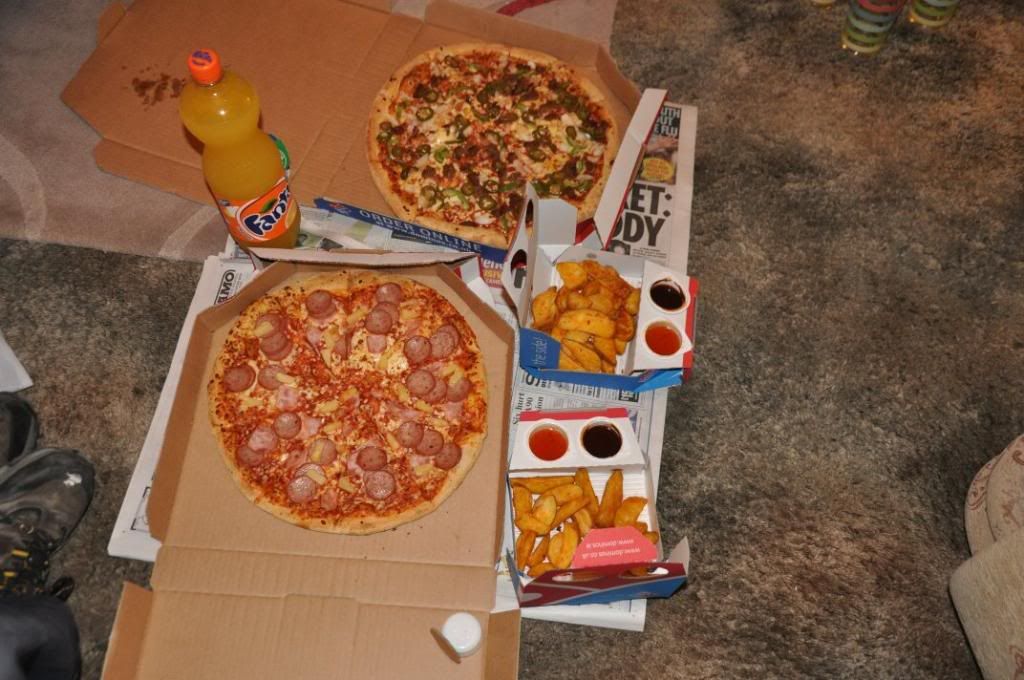
Mmm, healthy! Perfect for debating the joys of detailing, the enjoyment of bumpers, and just how old Gordon actually is after he admitted that he has touched dinosaurs :lol:
A cracking day was had, and you may notice that a lot of my recent detailing has got a team ethos to it... look out for more, team detailing is going to be the way forward for me, the enjoyment of working with good friends with like minds takes detailing to another level! Here's to the next one :thumb:
) detailing escapades was this, a rather handsome looking white BMW 330d Coupe, arriving looking in reasonably good condition:This detail was to be a team effort - from a personal point of view, I get a great buzz out of detailing with my good friends, and this day was to be no different: Gordon "Buff It Off Yourself" (caledonia), David "Its Got Bumpers Too" (badly_dubbed) and Dave "Glue Factory" (Dave KG :lol::lol
were ready and raring to go! Quality detailing, quality company, great banter - what more could you ask for on a saturday? Little did we know, in these initial pictures, quite what lay ahead today - but more of that a little later on First off, it was down and dirty with the wheels,
Spray on Bilberry Wheel Cleaner, cut in this case 2:1 for the heavier soiling on these wheels...
Gordon and Gautam, the owner, getting stuck in with the brushes to ensure the wheels were thoroughly cleaned...
Rinsed off and looking good now
:With all wheels and arches thoroughly cleaned it was time to get to work washing the bodywork - first stage of this was a foam with Supa Snow Foam through the foam lance... Now, I would just like to point out at this stage, that contrary to what the photos suggest, I dont dance around the car with the foam gun!! Honest, your honour....
Once I had finished foaming, Gordon dived in with a soft bristled detailing brush to ensure all details were fully cleaned...
Car was then washed with the two bucket method and then clayed to remove bonded contamination using Meguiars Mirror Glaze Mild Clay. The results of just the washing and claying stage were impressive enough, the car looking great at this stage...
Of course, getting out the Sun Gun changes everything...
Gordon went for the boot, I went for the bonnet and it was time to get correcting these nasty swirls... this'll be easy, Final Finish, maybe Intensive Polish and we're home and dry... And under the Sun Gun, this was the case, as the Intensive Polish seemed to deal with the light swirls very happily...
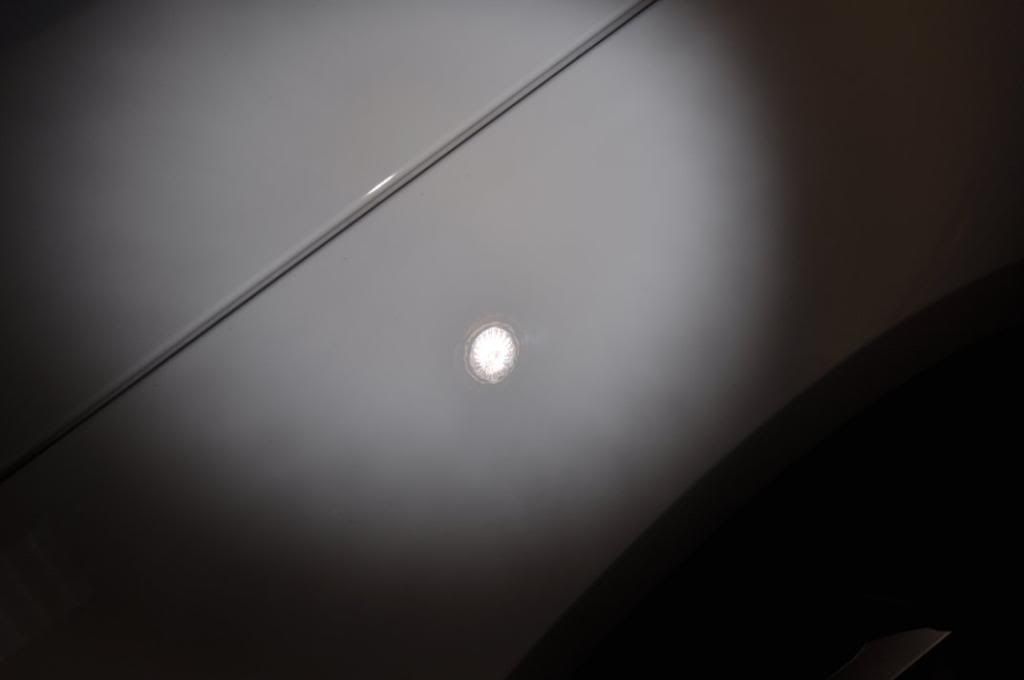
This paint had a different story to tell though, and much much more effort was going to be required!! Have a looky under these strip lights...
Nice - deep RDS... These marks were my personal favourite though!!
What did we end up using for correction....?
Meguiars #105 Ultra Cutting Compound, coupled to a LakeCountry Light Cutting (do not be deceived by "light" :lol
Wool Pad, Makita 9227CB and a hyperactive Scotsman... Having worked up through the cutting combinations, this was found to be the most effective, foam pads while getting correction were achieving it just too slowly and also with too great a heat build up (wool runs cooler, while offering faster paint removal - perfect for large area RDS correction on very hard paint).Remember these deep marks, my favourites, above? Well, after one aggressive hit with wool (and roughly 5um knocked out), here's what we now have...
Another hit...
Now do not be decieved here - its not as if I wasn't trying!! I mean, here's me giving the wet sanding a run out on these marks, check out the full on concentration - I'm gonna murder these swirls, oh yeah!!
Except no... 2000 grit barely touched them, hence the wool above!! Four hits of wool, one hit of IP later and we have the following...
Not perfect, so why stop? Well, it would have been easy to keep hitting it with wool - I was getting a good workout afterall! But one has to exercise common sense here as well, we have a car which is barely a year old, knocking out huge amounts of paint and leaving massive thin spots is not good news! So with sensible paint removal achieved, here I believed I had struck a balance between effective defect correction, minimising the marks notably, while still maintaining a healthy paint thickness in the region.
So this wool pad lark, how was it working? Well, my methods were as follows... Note, i have used a small backing plate on this pad - I found this allowed my to focus pressure down through the wool more effectively which allowed for greater correction. However, you must exercise care here and ensure you have the pad well centerred - an off balance 8" wool mop will throw you about like a rag doll in a hurricane, not great near a panel edge!!
So, first of all, place a line of compound on the paint - Meguiars #105 was used here:
Feather the trigger to pick the compound up into the wool and spread around - dont try it at higher speeds, you'll be redecorating your garage!
Get the speeds up, winding up in the first instance to 1500rpm and moving the machine fairly quickly to get the compound well spread out over the work area...
Then its time to do the serious work. At around 2500rpm, make steady passes with firm pressre (lightening off round edges) to get the best cut from the SMAT abrasives of #105. Work at this rate until defects removed or compound begins to dry...
The whole bonnet was corrected using wool, owing to large area of RDS,
Now normally, one would expect very pretty hologramming and tails from wool compounding - its an aggressive technique, a bit like taking a wrecking ball to a brick wall when Fast Cut would be a sledge hammer... But not on this paint, oh no... This paint finished down LSP ready with #105 on a wool cutting pad!!! Think I'm joking? ... Well, here's the paint after #105 and wool...
Now either I am some sort of android that can finish a compound down by wool, or this paint was seriously hard. The latter, I believe to be the case
It would have been rude not to finish this paintwork properly though - so onto my finishing polish of choice (regular readers, you get no prizes for guessing this one...) - Meguiars #205 Ultra Finishing Polish, coupled to a Meguiars W9006 tan finishing pad.
Predictable - yes I am
... Reliable, quality results from this polish... Most definitely...Spot the RDS now
(hint, use the strip light )Looking good I thought, and so was the boot after Gordon's efforts (with foam and #105)... Time for lunch
Returning to the unit, and David "Its Got Bumpers Too" was ready and raring to go with us now... as the name suggests, he was kitted up with a spot pad, and sent off to do the bumpers :lol:
Plastic panels require careful heat control, and thus a lot more patience in the correcting phase (sometimes, you just cant be so aggressive, so a slow and steady approach is required) - we decided David was the most patient! The sides were Gordon and I's challenge - and we took one each
... The befores, down both sides...And away we go
Different products were used throughout, depending on severity of the marks... Among them:Menzerna Intensive Polish PO85RD3.02
Spread at 600rpm; Couple of passes at 1200rpm; Worked at 1800rpm till residue clear.
3M Fast Cut Plus
Spread at 600rpm; Couple of passes at 1200rpm; Worked at 2000rpm till residue clear, marks removed, or it started to dust.
All finishing carried out with (altogether now! :p) - Meguiars #205! Using a Double Zenith Technique of increasing speeds and pressures together.
Gordon finding more RDS...
Then posing for the camera (sorry, then polishing them out using Fast Cut Plus on a 3M Compounding pad):
Take note of these marks behind the fuel filler cap - there'l be afters of these later, but this is the before:
My turn to pose... on the "easy" section too, the door required just Intensive Polish to fully correct it:
Several hours work, plenty of banter and fun, and we found ourselves running out of areas to polish!!
So onto the after shots from the machine polishing stage...Remember the marks behind the filler cap? Gordon sorted them out nicely...
Tail pipes had a nice tar covering, and general slight fading...
Briliant #1 Metal Restorer followed by Briliant #2 Chrome & Hot Area dealt with that, after pic below (note the Renaissance wax is seen here curing, applied super thinly - can you see it? You shouldn't be able too... Apply this too thick and it will be very hard to remove!)
After polishing - the car received Duragloss #105 followed by Collinite #845IW Wax. Tyres with Meguiars Endurance, plastics with All Seasons Dressing. Wheels waxed with FK1000P, arches (front only, rears are carpet) dressed with All Seasons Dressing. Glass with Stoner Invisible Glass.
Indoors, a couple of aftershots...
The evening was beautiful though...
So outdoors for the after shots, and I admit, I got a bit carried away with the camera but I hope you do enjoy the pics...
One happy owner, time for the three detailers to chill out... our rewards:
Mmm, healthy!
Perfect for debating the joys of detailing, the enjoyment of bumpers, and just how old Gordon actually is after he admitted that he has touched dinosaurs :lol:A cracking day was had, and you may notice that a lot of my recent detailing has got a team ethos to it... look out for more, team detailing is going to be the way forward for me, the enjoyment of working with good friends with like minds takes detailing to another level! Here's to the next one
:thumb:


 TOP
TOP


Comment