

 Tweet
Tweet
This Caravan sports 19" wheels painted matte black, blacked out taillights, full exhaust, and a few other tricks. Plans include a slight drop and maybe some red calipers 

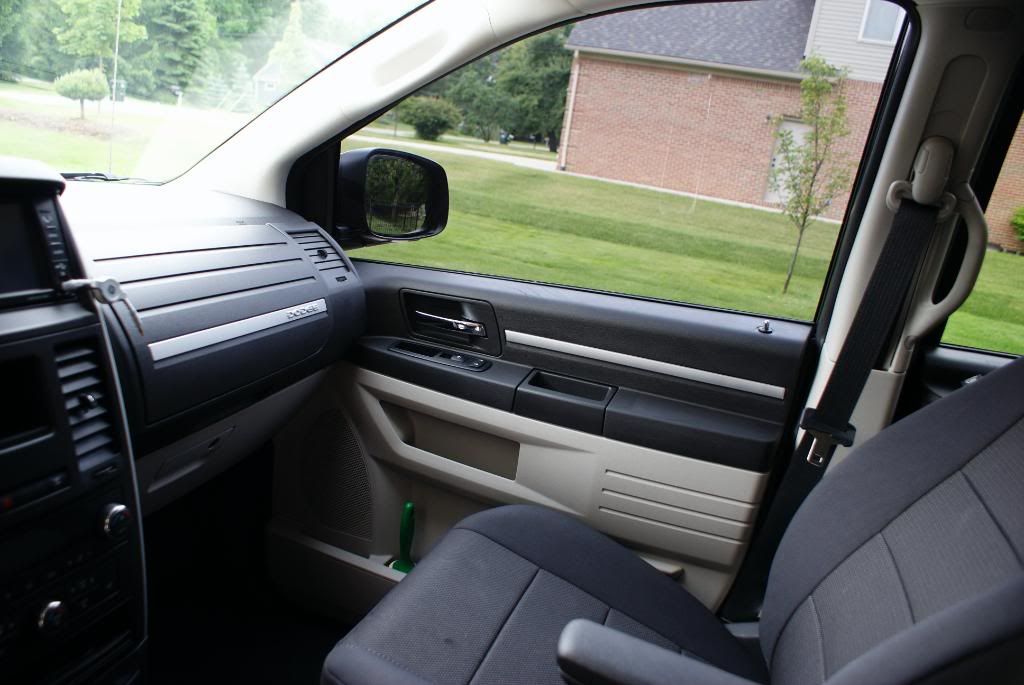
The owner takes very good care of al his cars, and this was no exception. With only swirling, we agreed on a one-step polish to clear it up and make the metallic paint sparkle. The interior was stripped of the 3rd row seats, and required deeper cleaning, typical of a minivan.

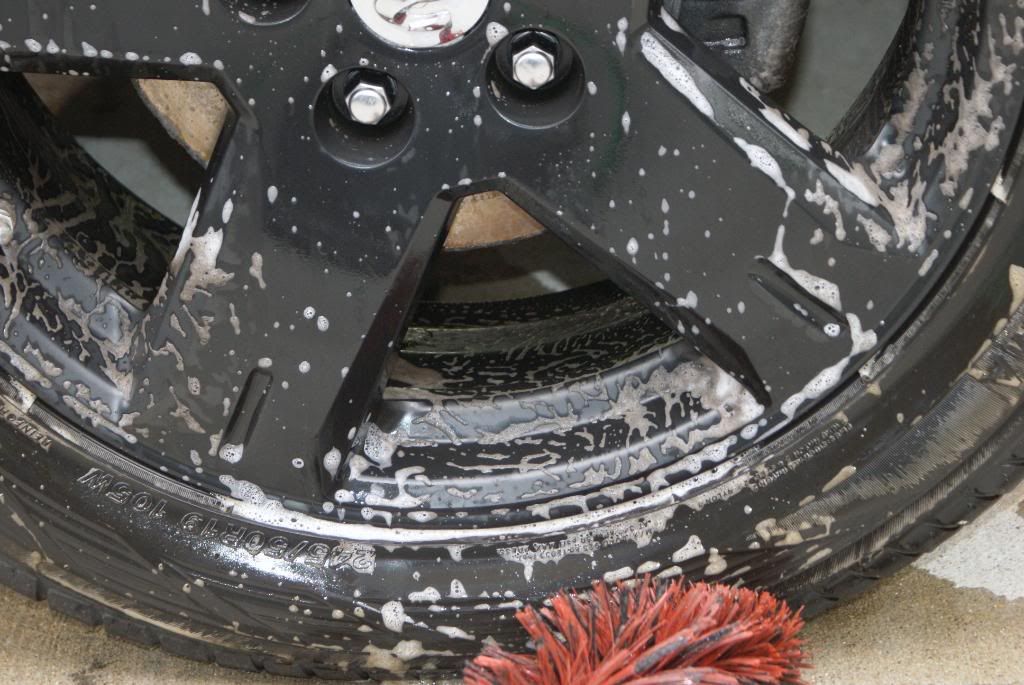
We started by washing the vehicle's underside and wheels first. I find getting this done in the beginning works best for me. Any overspray from the APC, Degreaser, or Hyper Dressing will get washed off prior to polishing. For the wheels, APC was all that was needed. Some degreaser for the fenders took care of the light soil.


The engine was also cleaned with the typical Meg's Degreaser, APC at 4:1, and various brushes. After wash and blow drying, the engine was dressed with Megs HD 4:1 for a natural shine.


engine after:


This is also the best time to clean the cowl:

Washing consisted of Stoner's Tarminator Bug and Tar remover on the fascias and lower portions of the body, then Megs Gold Class cut 1:1 in the foam gun over the whole car left to dwell, then washed with my "no bucket" method. I have 3 mitts ready to go, one for each "side" (roof + hood + trunk, driver side, pass side) with the foam gun on full time spraying right before the mitt. I use more soap this way, but save some time filling up buckets and rinsing them out, and IMO use less water in the process. I always have a bucket available if the soil is too deep, though. 2 bucket method still works best for heavily soiled vehicles, and larger ones where you have to wash and rinse sections at a time.


After washing we clayed the vehicle. The paint was very clean, and claying took a relatively short time.
After a good blow dry, it was time to tape:

I like to use 3M green tape. I feel it sticks better, especially when hot or cold, and "bends" better to make it around turns in the trim with one piece. The less time cutting tape, the quicker it goes. The blue 3M painter's tape keeps falling off for me
I broke the hod up into sections to see what method would give me the best result. This was a "one-step", so I was looking for both correction and clarity to go directly to LSP. This Chrysler paint turned out to be quite hard, and I could not achieve both with one step...
picture of hood before touching:


I started out with PO85RD on the rotary with a LC CCV "constant pressure" orange light cutting pad. This pad works great! It has a softer foam backing, and the pad "sucked" onto the paint nice and flat. The rotary was easier to keep level with this pad than with a normal LC pad. I dig it!

As you can see, this did not provide the cut necessary to correct. IMO, this was just not enough. So I did the second test panel with the same pad, but using Meg's Ultimate Compound:

which provided the cut necessary. It also looked to clear up nicely. But I knew that there would be some trails left behind especially with the orange pad. I decided to break out the PC and try the same combo:

...but it did not cut enough or quick enough. I figured there was no way I was going to be able to pull off a "one step" with this one. Oh well, a multi-step it will be. I was actually content to be able to do a multi-step. I love working on black cars! And the client is a great guy, the kind who would go the extra mile for me if he had to. So it was a no brainer! Lets get this thing PERFECT!
So back to the rotary and LC CCV orange with Megs UC over the entire hood:


then I changed to a LC White pad with M205 on the rotary to clean up the trails:


Lets go back to uncorrected:

...and corrected:


So I did the whole vehicle this way, including the roof. The results are stunning. This color really sparkles! This pic is focusing on the particles, which is why the sun looks hazed:

After polishing, I did the trim dressing. Trim was cleaned prior to polishing with APC 10:1 and various brushes. Now all that was left to do was dress with my favorite dressing: Megs Trim Detailer. Check this out:


Not only does this stuff work for trim, check out how it works on other matte black stuff, like the painted wheels:


I had done the wheels with Hyper Dressing wipe at 4:1, but they still looked meh. Trim Detailer was the ticket to making these wheels look awesome! 3M tire restore was used for a matching satin finish to the tires.
While I was doing the polishing, Armando was doing the interior. Vacuum, DP interior cleaner, and APC 10:1 where necessary (like the rear cargo area panels). Topped with DP Interior Protectant...


Do not forget the overhead console and tailgate trim!
Anyways, after polishing I applied 2 coats of Blackfire Paint Sealant. This provided so much gloss I opted not to top with wax. There was no need! This stuff leave the finish very slick. I dig it! A final wipe with Z8 and on to the AFTERS!:


and a final shot with TDR in the reflection

I am very pleased with the outcome of this vehicle. I charged a one-step since that was what I quoted, but this multi-step was a pleasure to do and went very quickly since the body is so flat. I constantly try to outperform myself, and this was a good opportunity to show off to the client with black paint He already booked another vehicle for next week 
Enjoy!
Jacob
The owner takes very good care of al his cars, and this was no exception. With only swirling, we agreed on a one-step polish to clear it up and make the metallic paint sparkle. The interior was stripped of the 3rd row seats, and required deeper cleaning, typical of a minivan.
We started by washing the vehicle's underside and wheels first. I find getting this done in the beginning works best for me. Any overspray from the APC, Degreaser, or Hyper Dressing will get washed off prior to polishing. For the wheels, APC was all that was needed. Some degreaser for the fenders took care of the light soil.
The engine was also cleaned with the typical Meg's Degreaser, APC at 4:1, and various brushes. After wash and blow drying, the engine was dressed with Megs HD 4:1 for a natural shine.
engine after:
This is also the best time to clean the cowl:
Washing consisted of Stoner's Tarminator Bug and Tar remover on the fascias and lower portions of the body, then Megs Gold Class cut 1:1 in the foam gun over the whole car left to dwell, then washed with my "no bucket" method. I have 3 mitts ready to go, one for each "side" (roof + hood + trunk, driver side, pass side) with the foam gun on full time spraying right before the mitt. I use more soap this way, but save some time filling up buckets and rinsing them out, and IMO use less water in the process. I always have a bucket available if the soil is too deep, though. 2 bucket method still works best for heavily soiled vehicles, and larger ones where you have to wash and rinse sections at a time.
After washing we clayed the vehicle. The paint was very clean, and claying took a relatively short time.
After a good blow dry, it was time to tape:
I like to use 3M green tape. I feel it sticks better, especially when hot or cold, and "bends" better to make it around turns in the trim with one piece. The less time cutting tape, the quicker it goes. The blue 3M painter's tape keeps falling off for me
I broke the hod up into sections to see what method would give me the best result. This was a "one-step", so I was looking for both correction and clarity to go directly to LSP. This Chrysler paint turned out to be quite hard, and I could not achieve both with one step...
picture of hood before touching:
I started out with PO85RD on the rotary with a LC CCV "constant pressure" orange light cutting pad. This pad works great! It has a softer foam backing, and the pad "sucked" onto the paint nice and flat. The rotary was easier to keep level with this pad than with a normal LC pad. I dig it!
As you can see, this did not provide the cut necessary to correct. IMO, this was just not enough. So I did the second test panel with the same pad, but using Meg's Ultimate Compound:
which provided the cut necessary. It also looked to clear up nicely. But I knew that there would be some trails left behind especially with the orange pad. I decided to break out the PC and try the same combo:
...but it did not cut enough or quick enough. I figured there was no way I was going to be able to pull off a "one step" with this one. Oh well, a multi-step it will be. I was actually content to be able to do a multi-step. I love working on black cars! And the client is a great guy, the kind who would go the extra mile for me if he had to. So it was a no brainer! Lets get this thing PERFECT!
So back to the rotary and LC CCV orange with Megs UC over the entire hood:
then I changed to a LC White pad with M205 on the rotary to clean up the trails:
Lets go back to uncorrected:
...and corrected:
So I did the whole vehicle this way, including the roof. The results are stunning. This color really sparkles! This pic is focusing on the particles, which is why the sun looks hazed:
After polishing, I did the trim dressing. Trim was cleaned prior to polishing with APC 10:1 and various brushes. Now all that was left to do was dress with my favorite dressing: Megs Trim Detailer. Check this out:
Not only does this stuff work for trim, check out how it works on other matte black stuff, like the painted wheels:
I had done the wheels with Hyper Dressing wipe at 4:1, but they still looked meh. Trim Detailer was the ticket to making these wheels look awesome! 3M tire restore was used for a matching satin finish to the tires.
While I was doing the polishing, Armando was doing the interior. Vacuum, DP interior cleaner, and APC 10:1 where necessary (like the rear cargo area panels). Topped with DP Interior Protectant...
Do not forget the overhead console and tailgate trim!
Anyways, after polishing I applied 2 coats of Blackfire Paint Sealant. This provided so much gloss I opted not to top with wax. There was no need! This stuff leave the finish very slick. I dig it! A final wipe with Z8 and on to the AFTERS!:
and a final shot with TDR in the reflection
I am very pleased with the outcome of this vehicle. I charged a one-step since that was what I quoted, but this multi-step was a pleasure to do and went very quickly since the body is so flat. I constantly try to outperform myself, and this was a good opportunity to show off to the client with black paint
He already booked another vehicle for next week Enjoy!
Jacob


 TOP
TOP

Comment