

 Tweet
Tweet
Apollogies for the poorer quality pics in this thread, some were taken using my old Fuji camera which is rather on its last legs!
A very enjoyable day for myself and Stuart yesterday, detailing a Ferrari 360 Spider - a particularly special day for Stuart as well as this was the first Ferrari that he has worked on
I appologise for the lack of pictures in this writeup, I'm afraid I'm struggling to hold my little Fuji camera steady at the moment after a recent lab accident where I burned a few of my finger tips and my thumb ... But still managed to get a fair few in focus , and the SLR was on a tripod
The day kicked off with the washing stage - wheels and arches first,
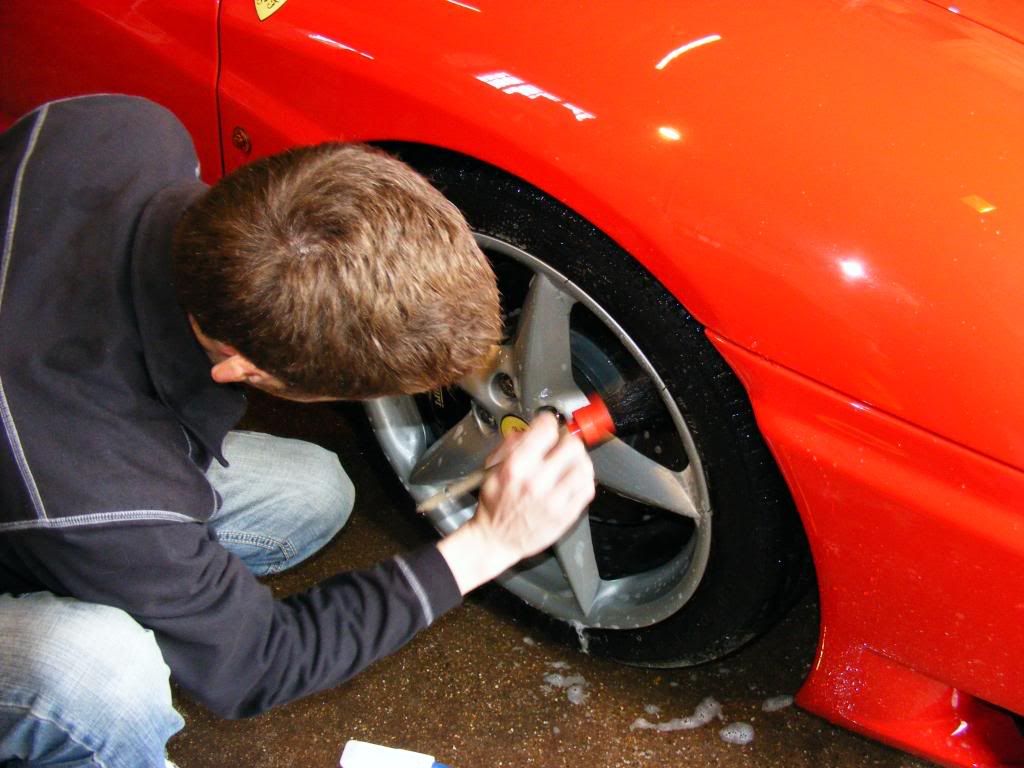
and then onto the bodywork.
During the washing stage it became immediately apparent that there was something not quite right with the paintwork beyond the standard swirls and some hologramming - the paint felt like sandpaper! The fabric roof showed exactly what it was: paint overspray, which thankfully cleaned easily enough off of the hood with Autoglym Fabric Roof Cleaner. The car felt as if it has been in the bodyshop where paint was being sprayed but uncovered such that it picked up a light to moderate coat of overspray all over...
The car was clayed with Zaino Z18 until it felt much smoother, using Meguiars Last Touch as a lube.
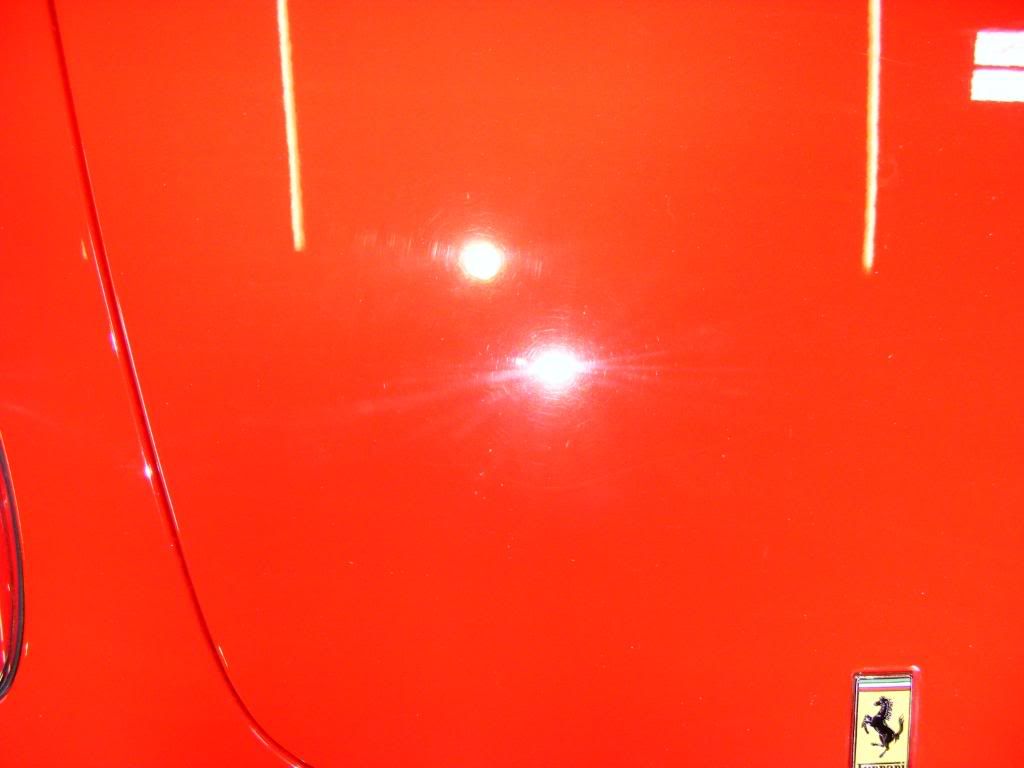
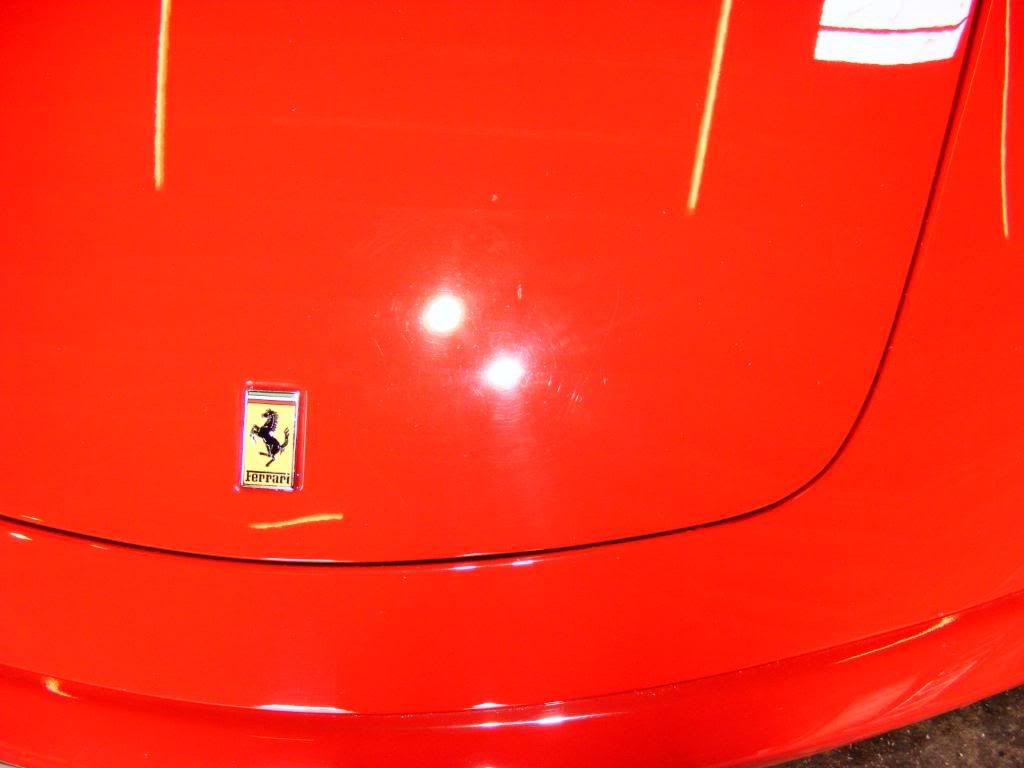
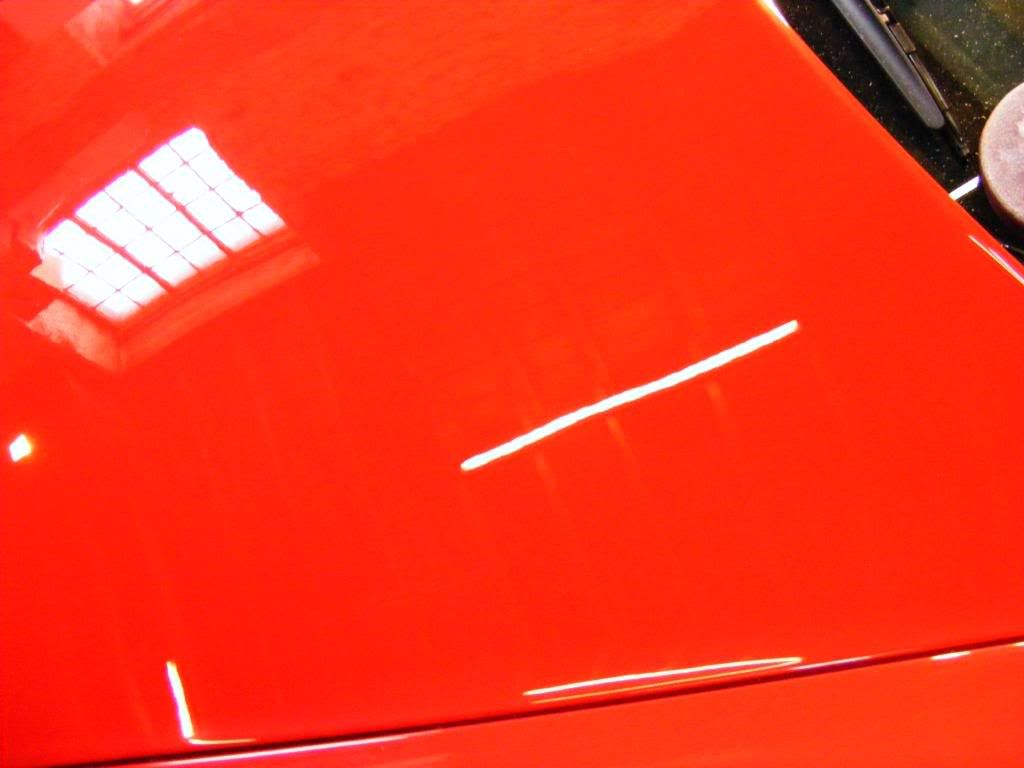
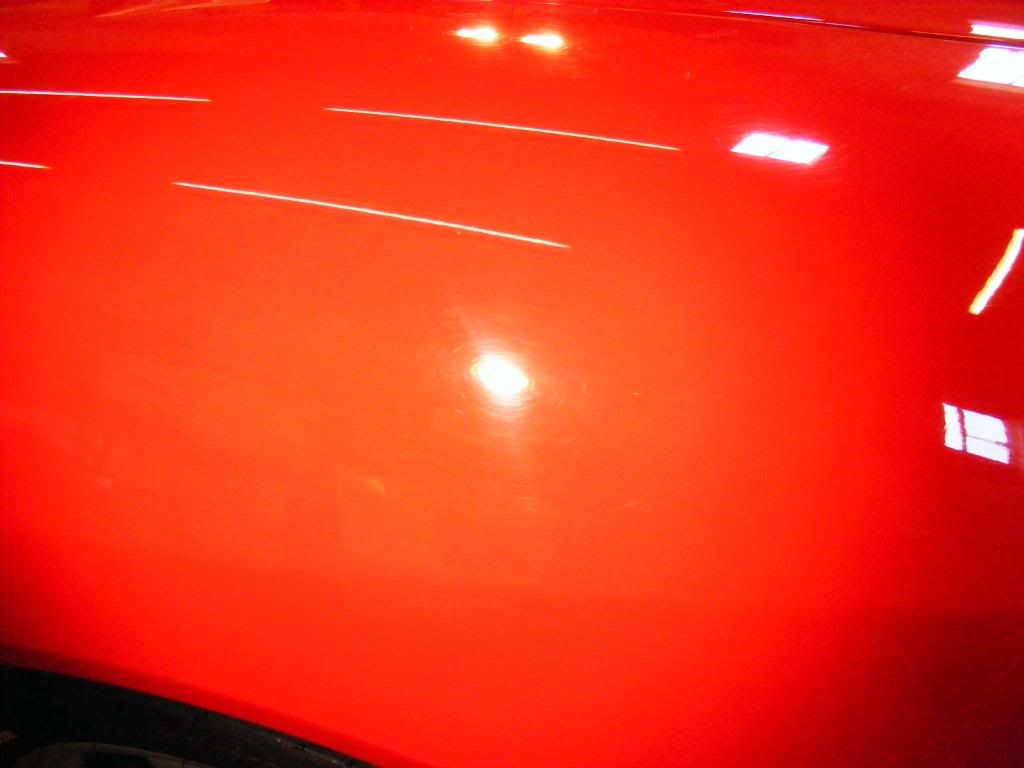
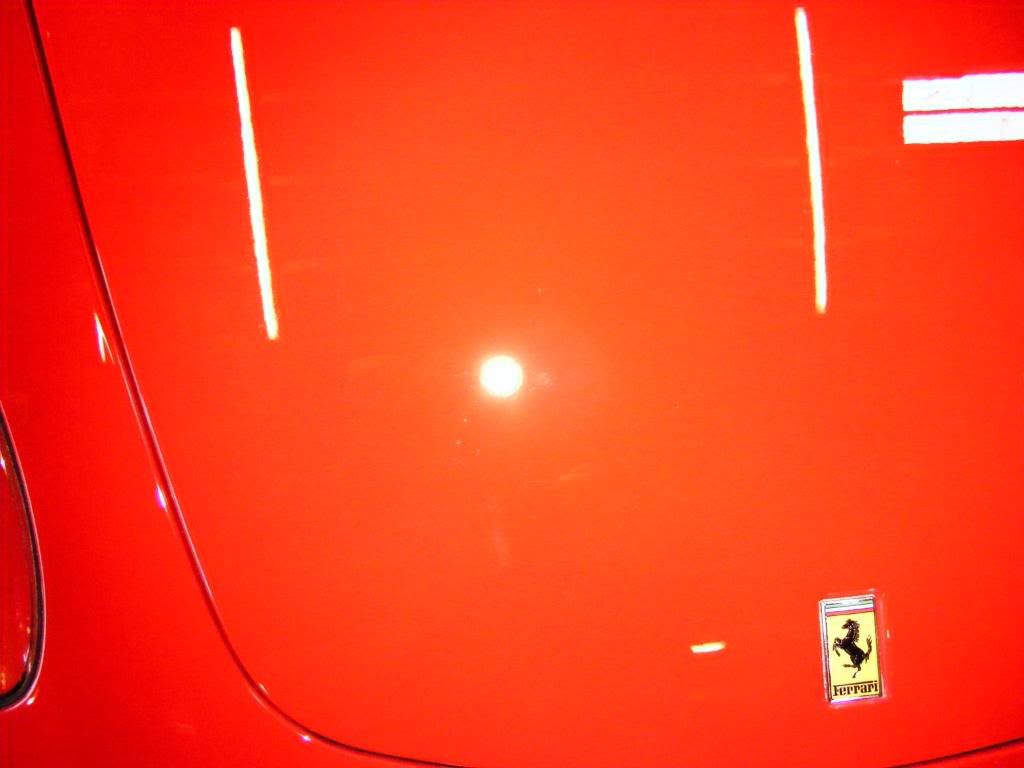
Assessing the paintwork, we can see standard swirls and hologramming under the Sun Gun:
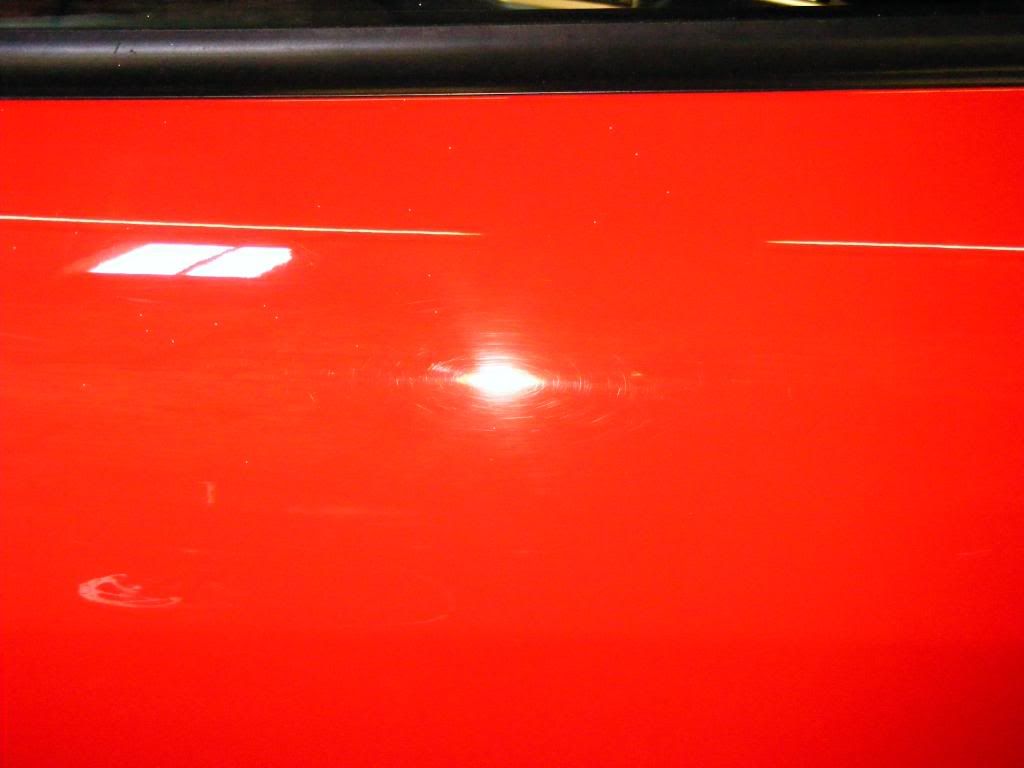
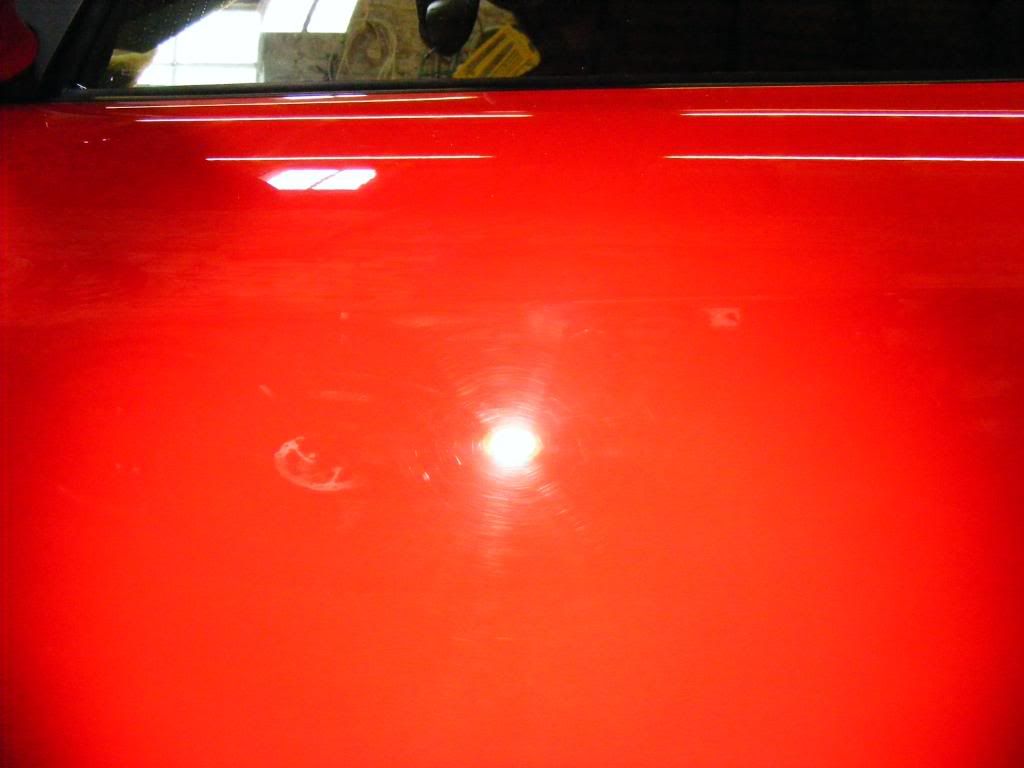
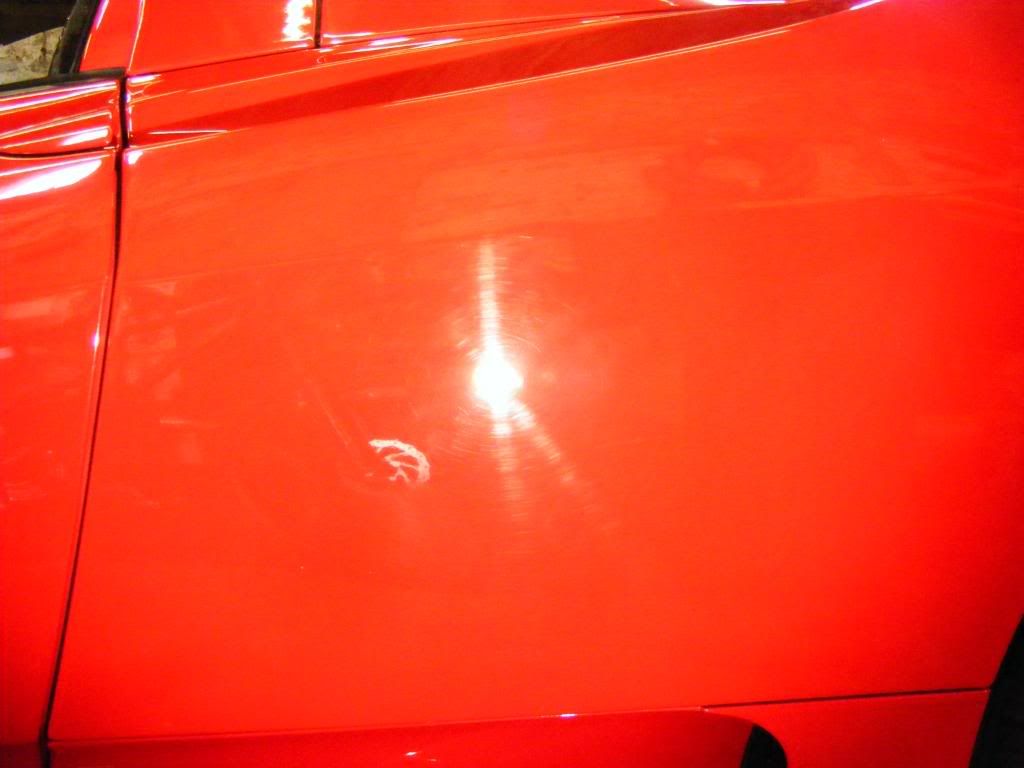
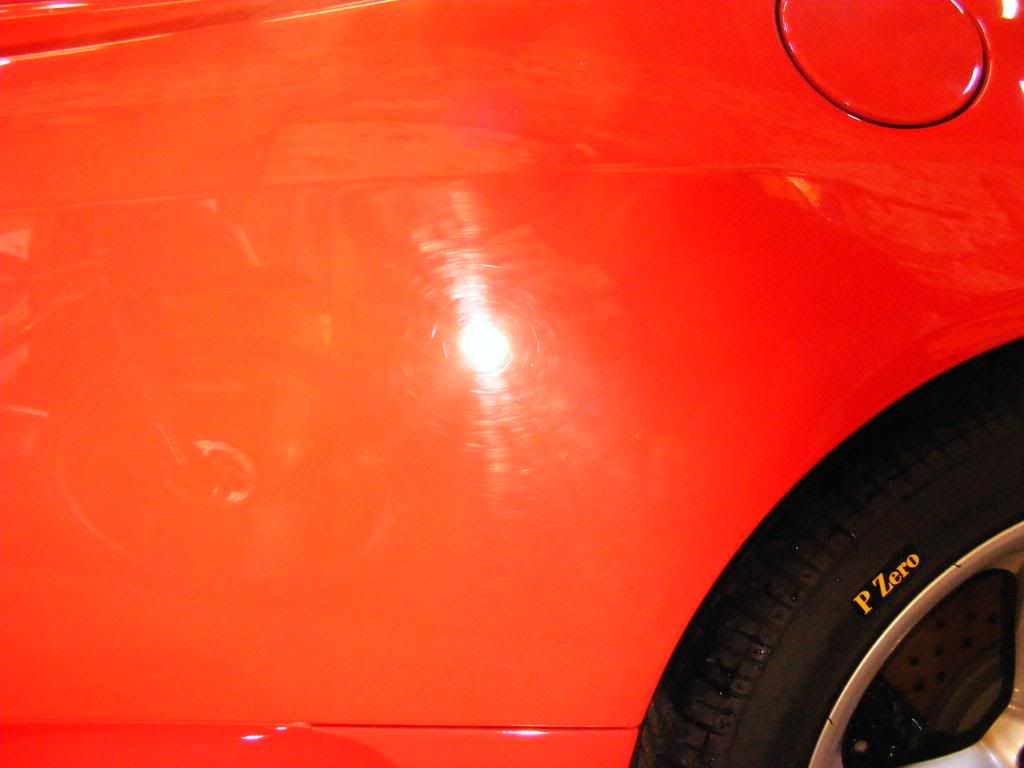
Some typical RDS (owner has cats...) - some of these could not be fully removed safely:
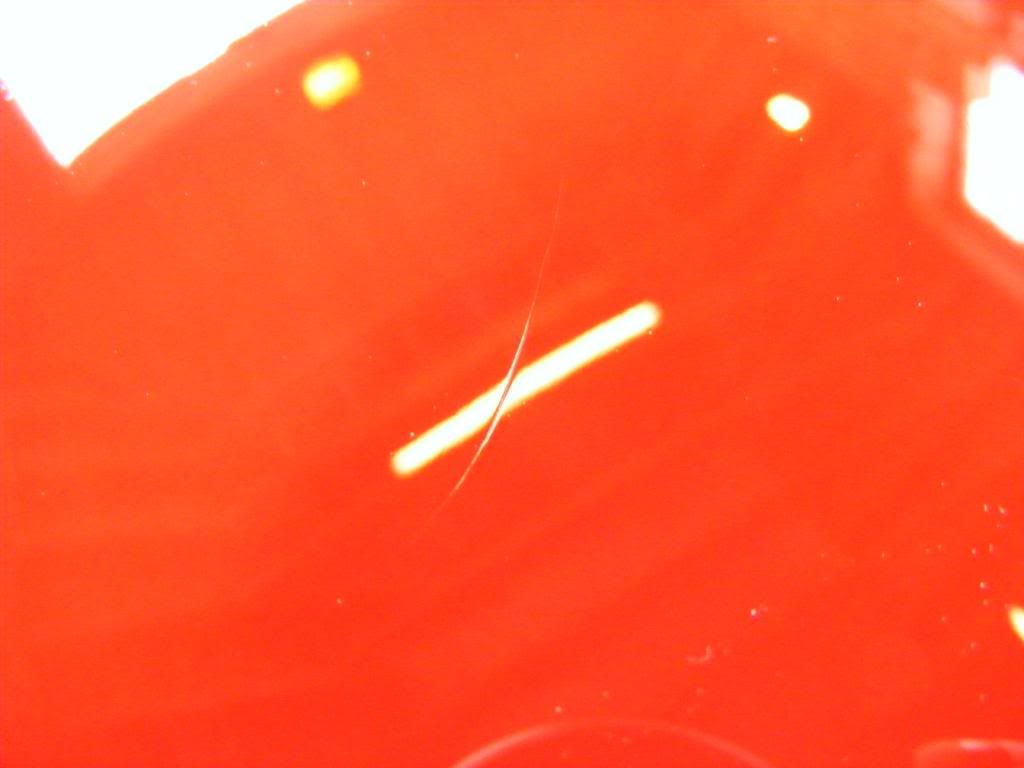
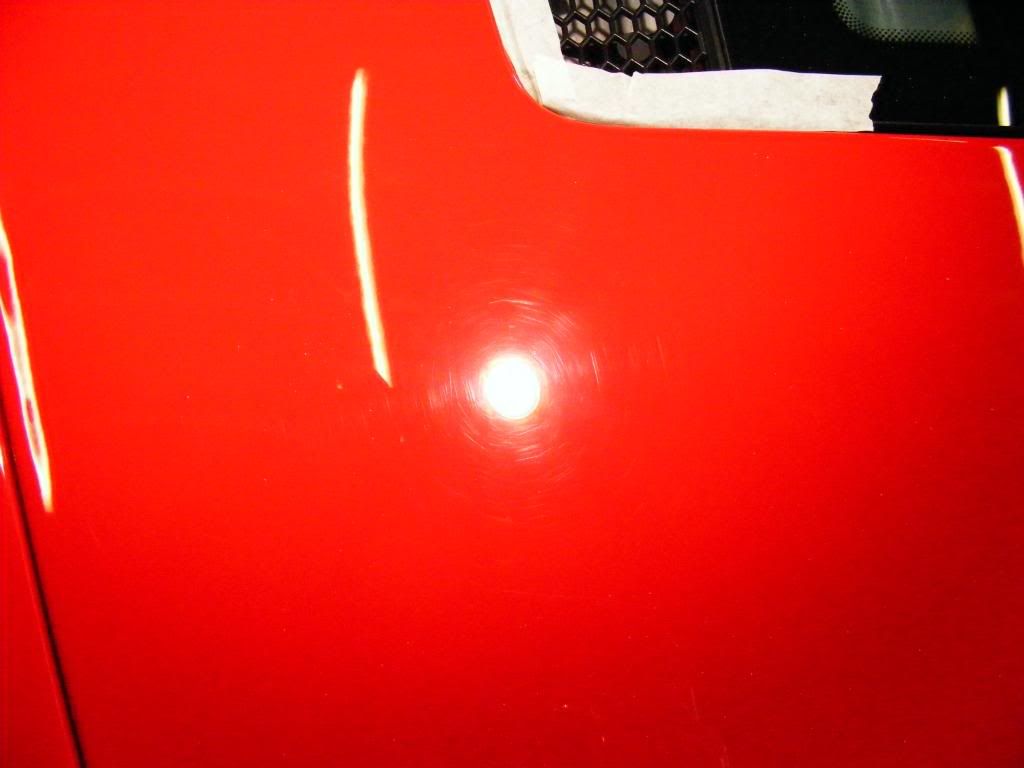
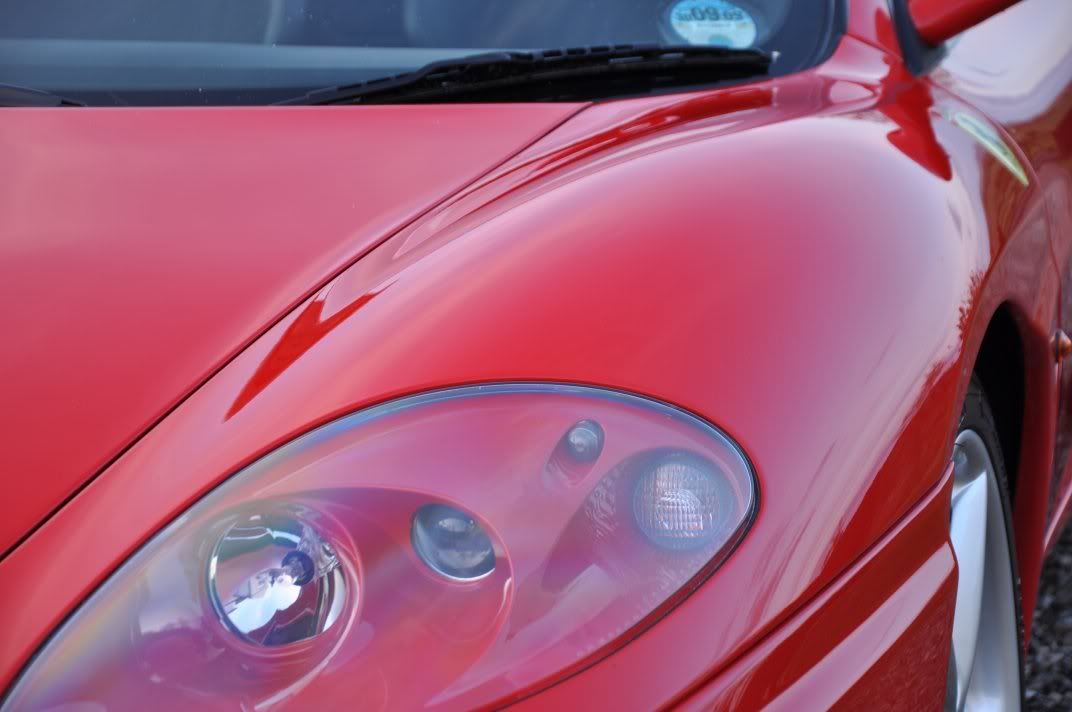
The biggest flaw in the finish for me though was revealed under the garage strip lighting however... after assessing that Menzerna Intensive Polish was good for taking out all of the swirls and hologramming it became apparent that there was more to the paint than met the eye! Although smooth after claying, there was also lots of little dimples in the paintwork, that looked like little pin pricks as if whatever had been sitting on the paint had etched a little into the paint... Only under the garage striplight could you really see what they were...
(took about 20 attempts with my slightly shaky hands to get that in focus!)
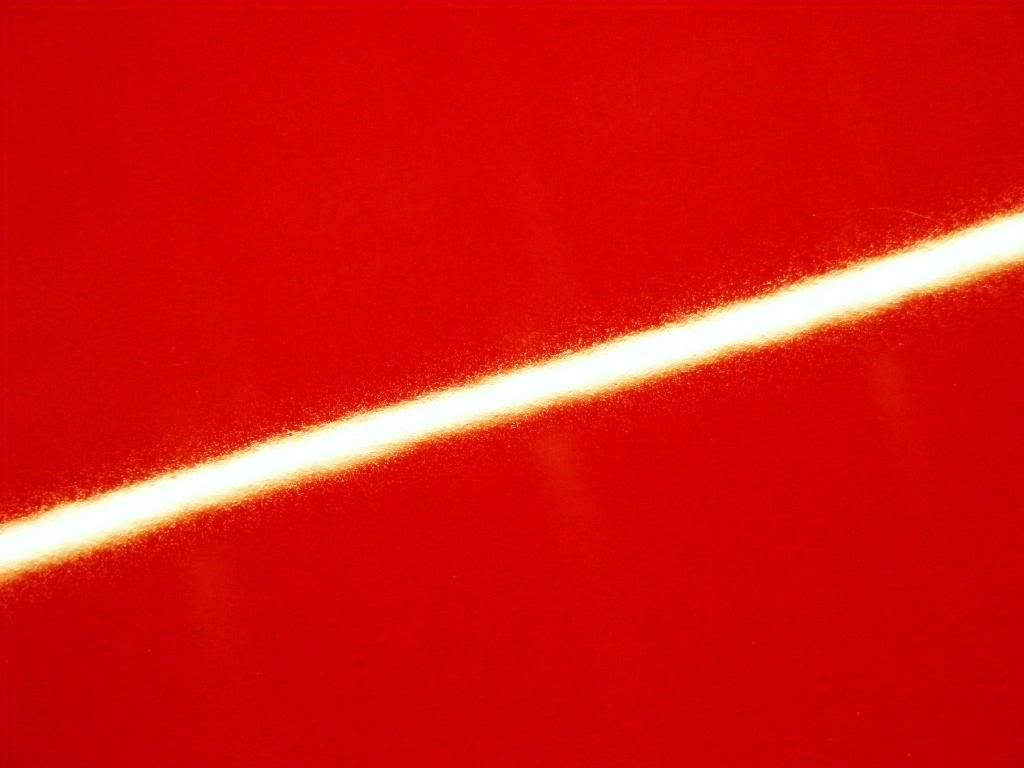
Despite being small, they were doing a good job of robbing the finish of its gloss leaving just a dead, flat look. Removal required 3M Fast Cut Plus on a cutting pad, to give this...
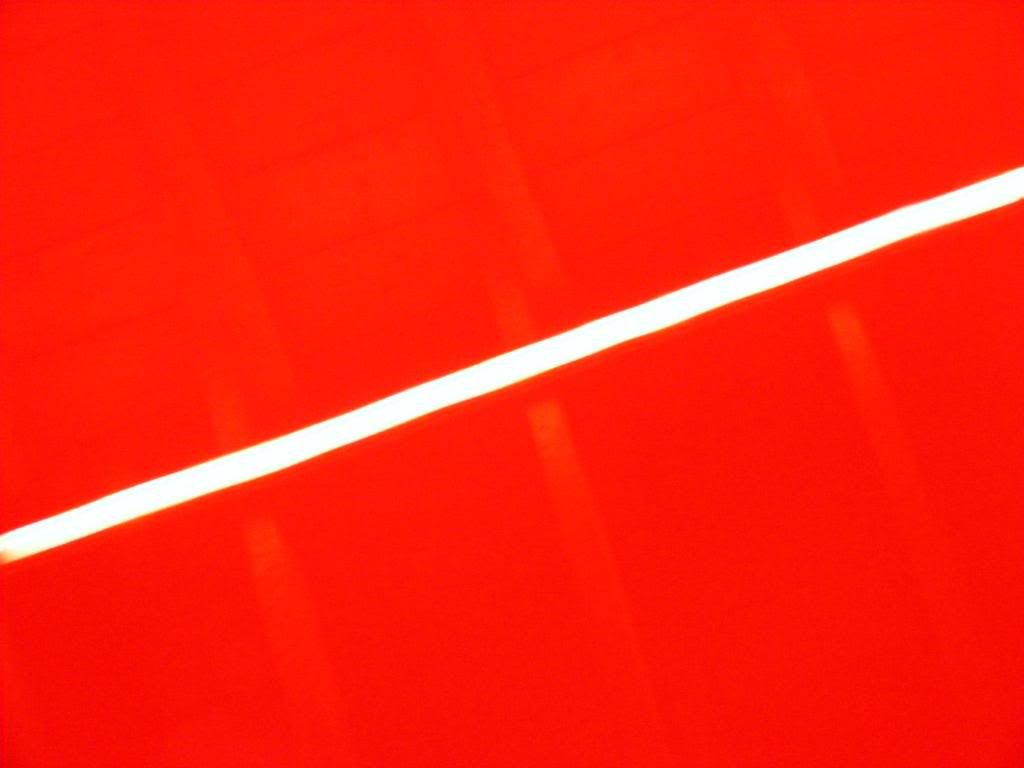
Refined...
Much better! This affected all of the flat panels of the car - bonnet, wing tops, rear buttress tops and engine cover. All of these regions received Fast Cut Plus where I deemed the paint thickness was suitable.
Other regions of the car were corrected using Menzerna PO85RD3.02 Intensive Polish on a polishing pad. A little Fast Cut was used on deeper scratches, however there were regions where we could not safely achieve 100% correction, one particular region being behind the seats where the roof touches the paint. Thinner paint readings on the gauge meant we worked with caution in here, and while 100% correction was not achieved, the polishing process was carried out with maximum possible safety to the finish which to me is more important than all out correction.
All of the car was refined using Menzerna PO85RD Final Finish on a 3M Blue Waffle finishing pad.
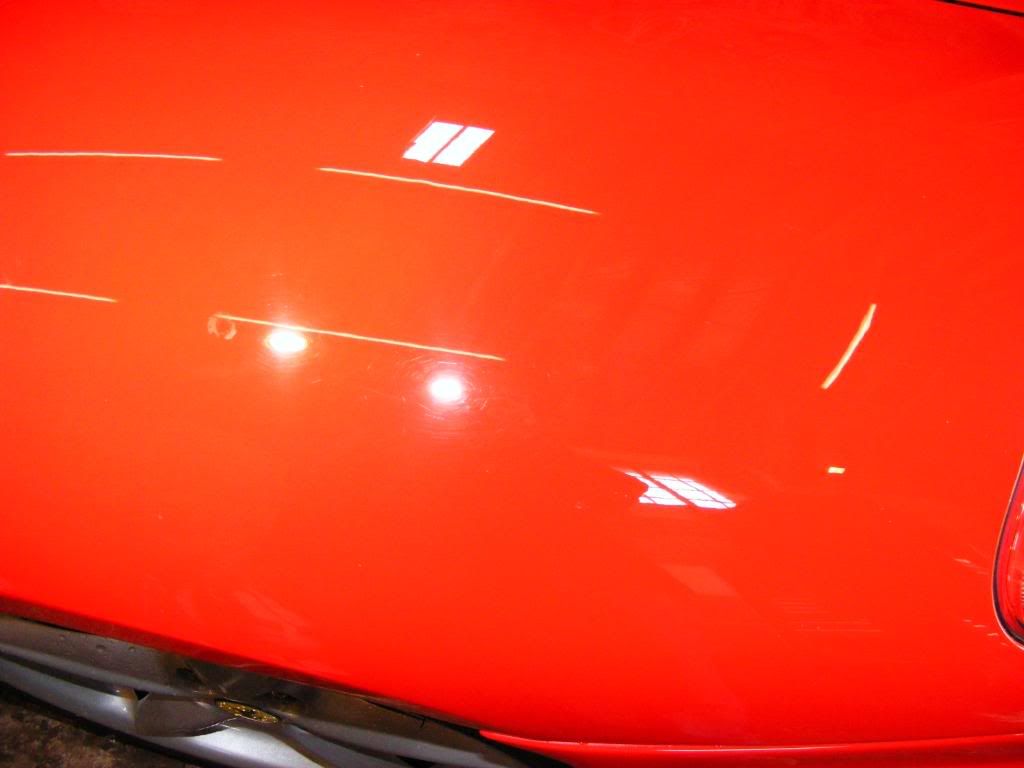
Before correction:
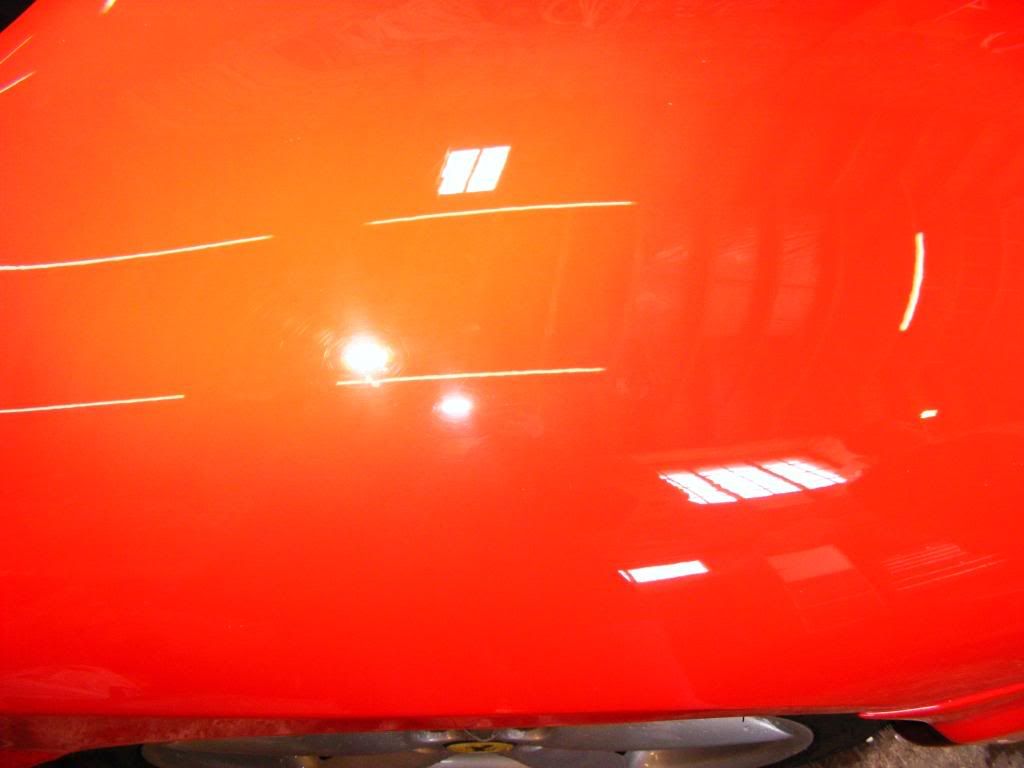
After correction:
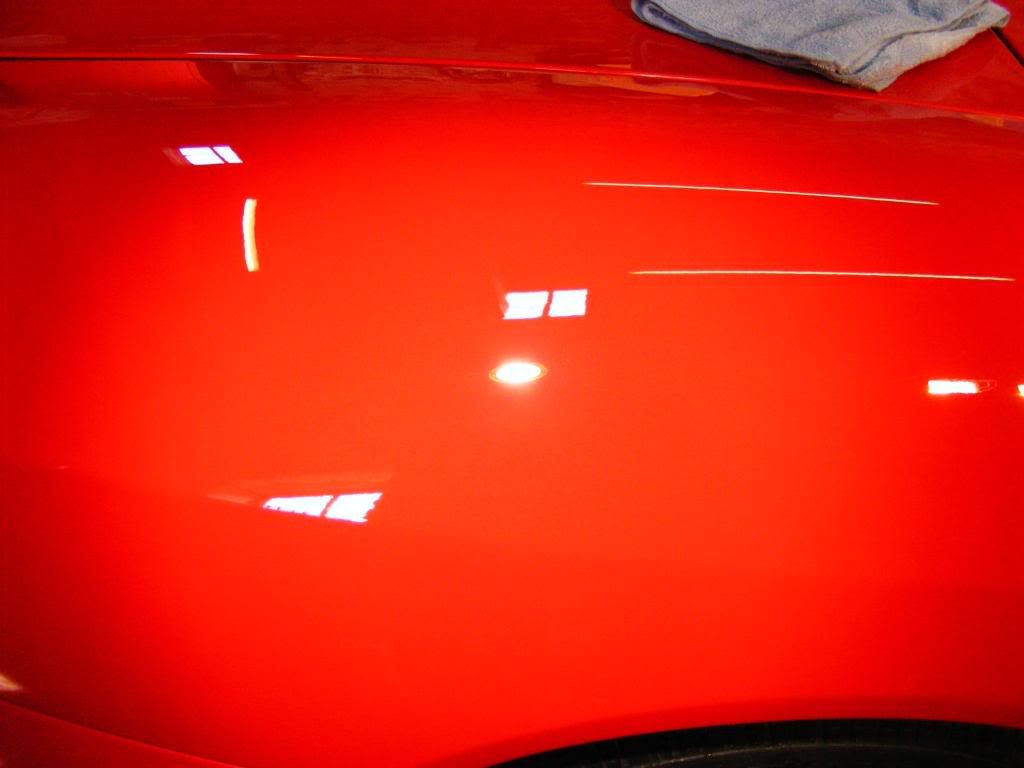
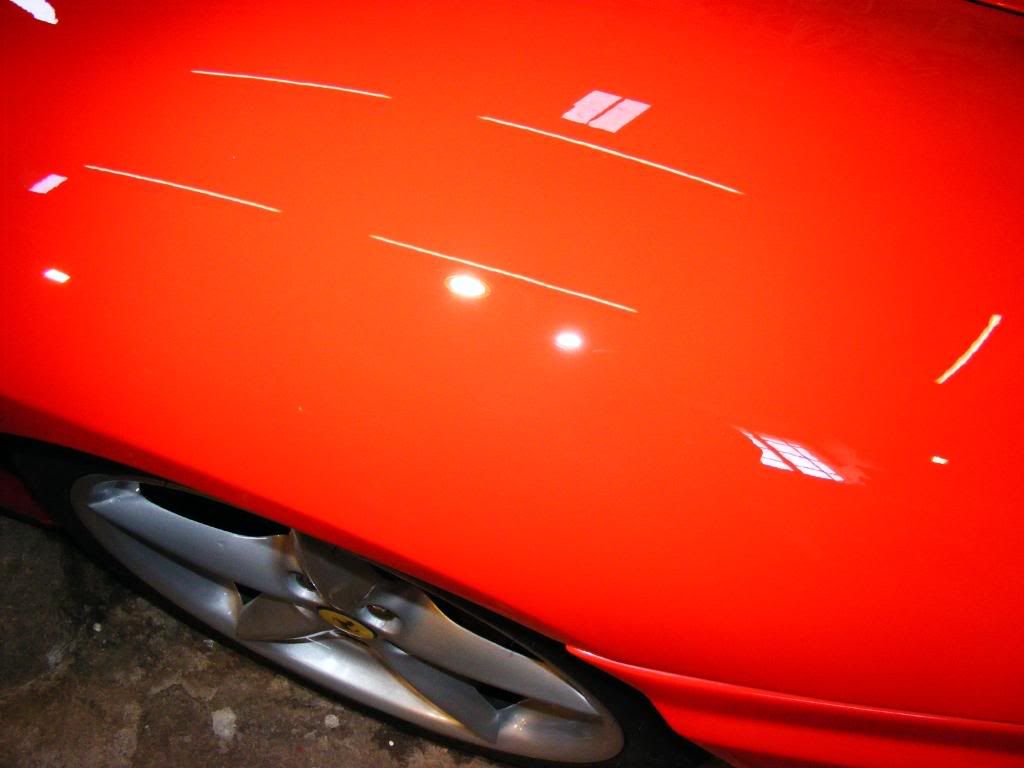
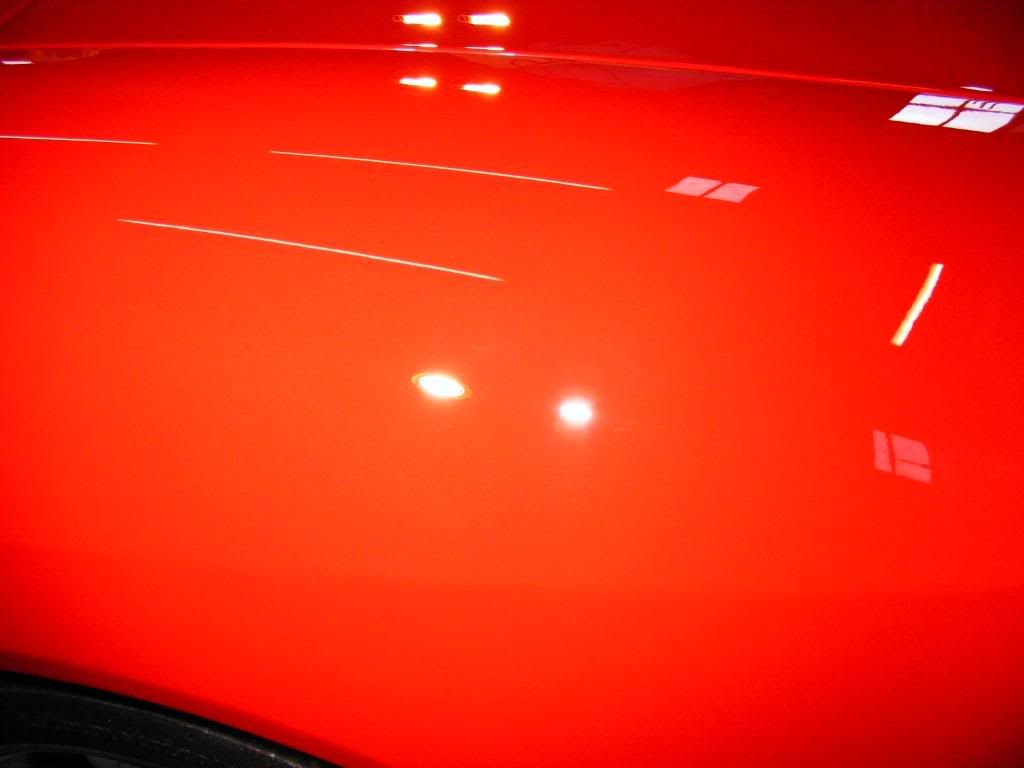
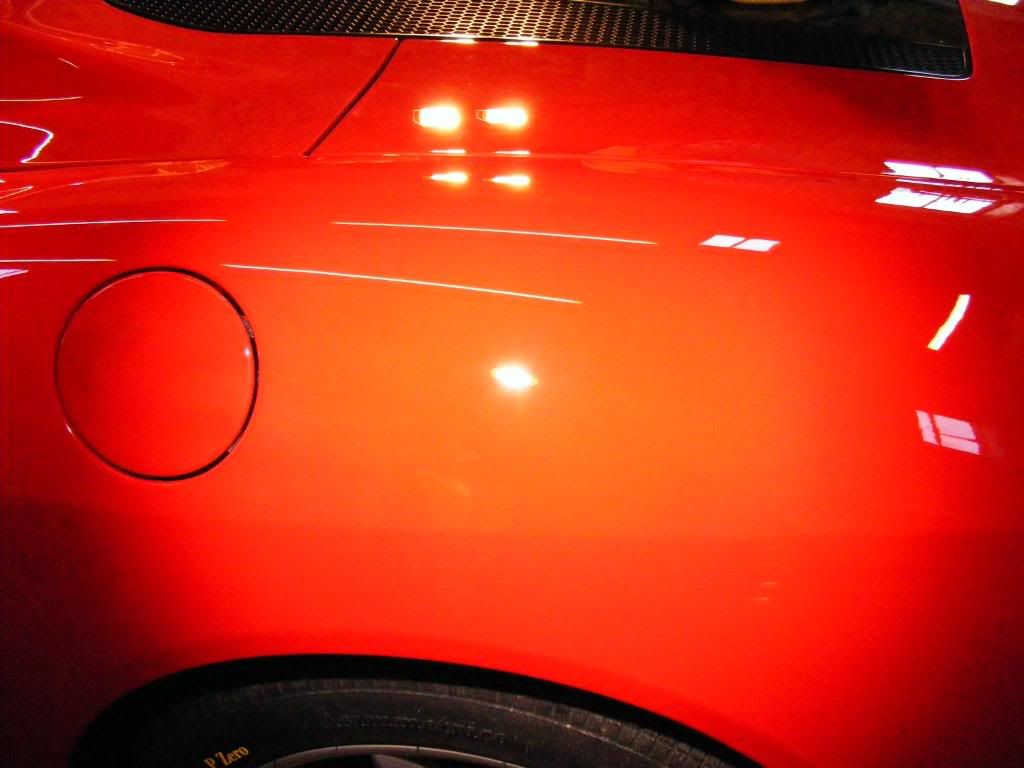
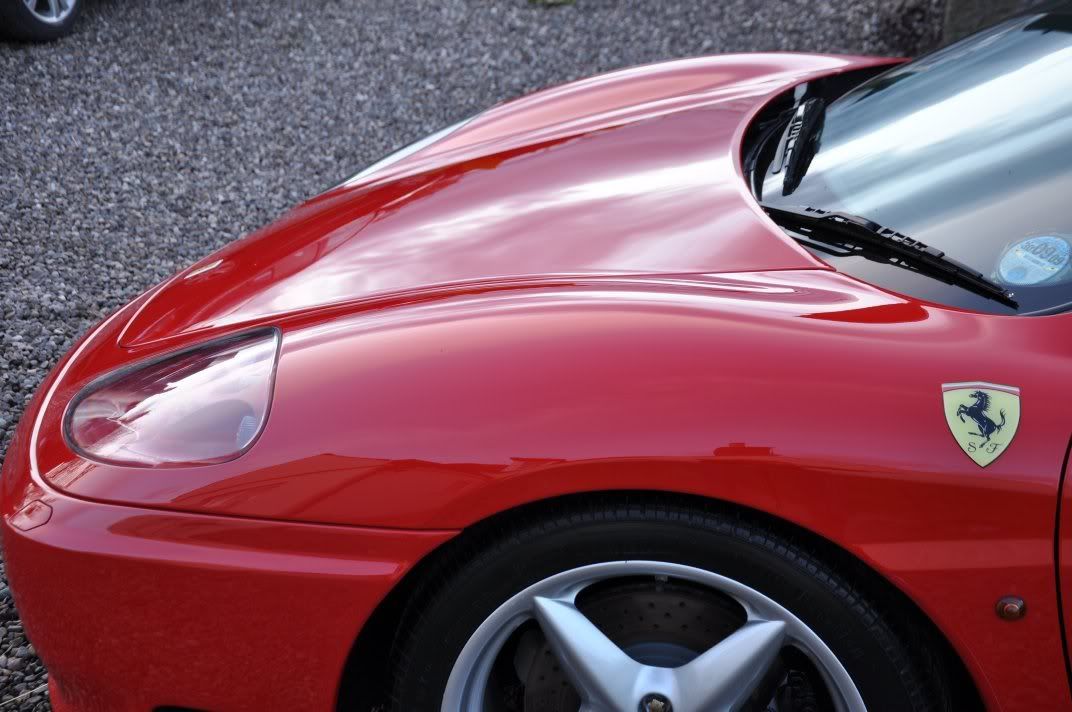
Resultant gloss on the red from the machine polishing alone was impressive

After polishing choice on this car was Lusso Revitalising Cream as a cleaner and glaze to add a little extra wet sheen to the paintwork which really for me suited the solid red. Protection was Valentines Concours Wax, chosen also for the slightly glazed look it leaves where the wetness suits the solid dark colours, and also chosen for its good durability.
The glass was cleaned using Swissvax Crystal, rubbers with Swissvax Pneu, arches and plastics with All Seasons Dressing, tyres with Meguiars Endurance, wheels sealed.
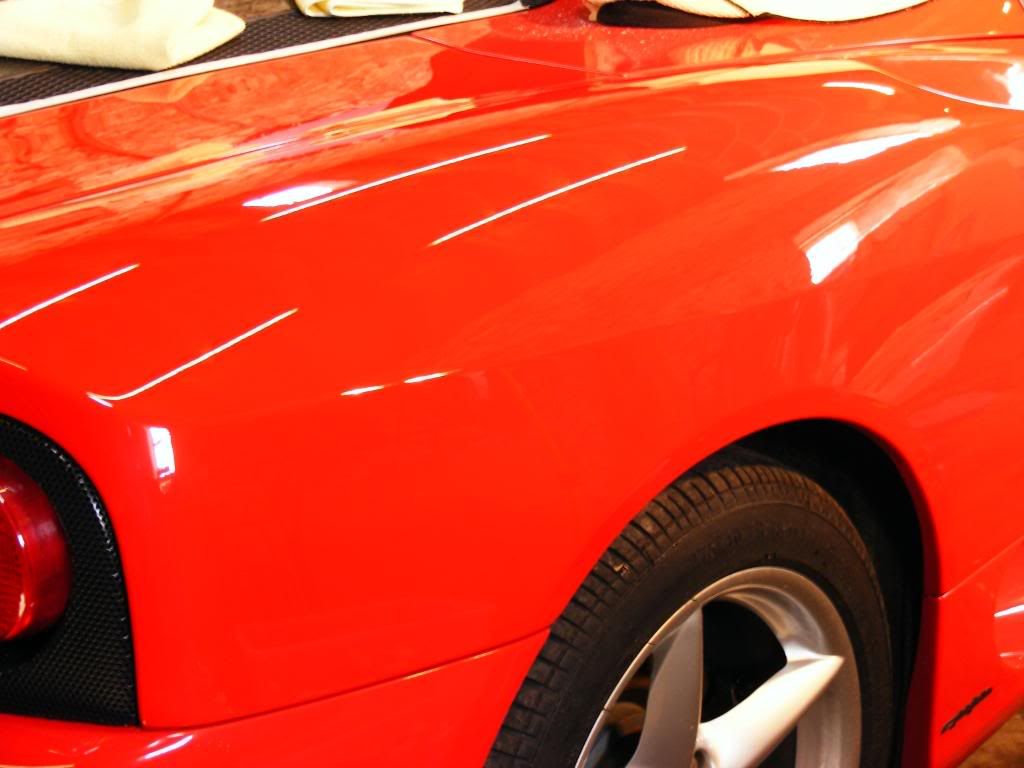
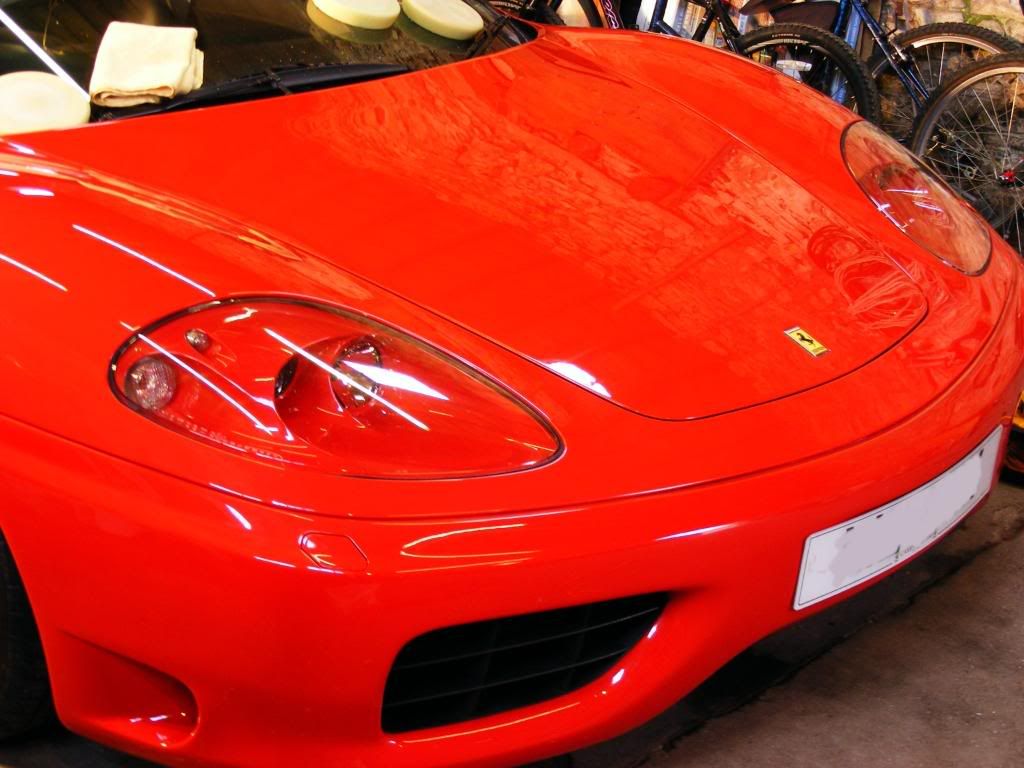
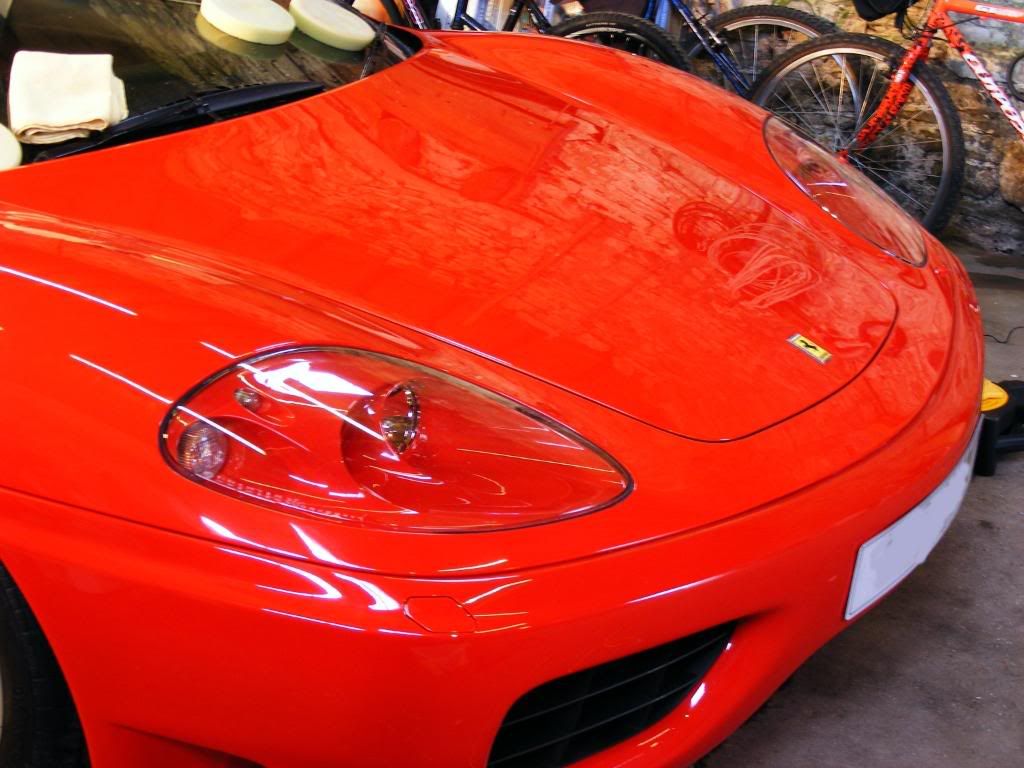
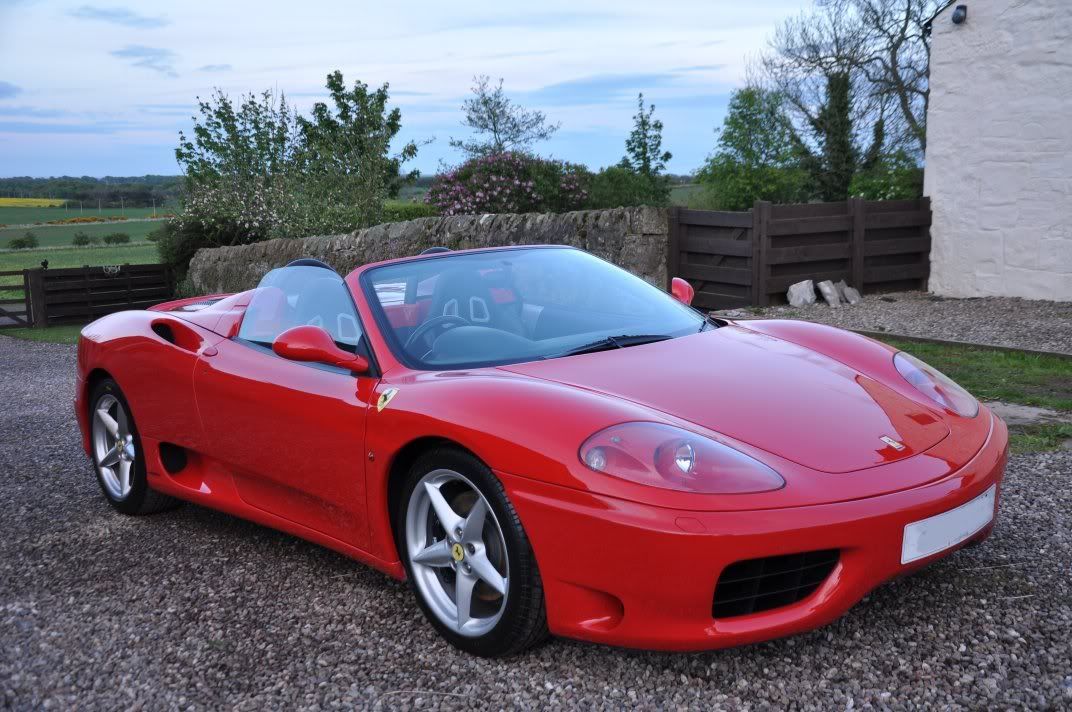
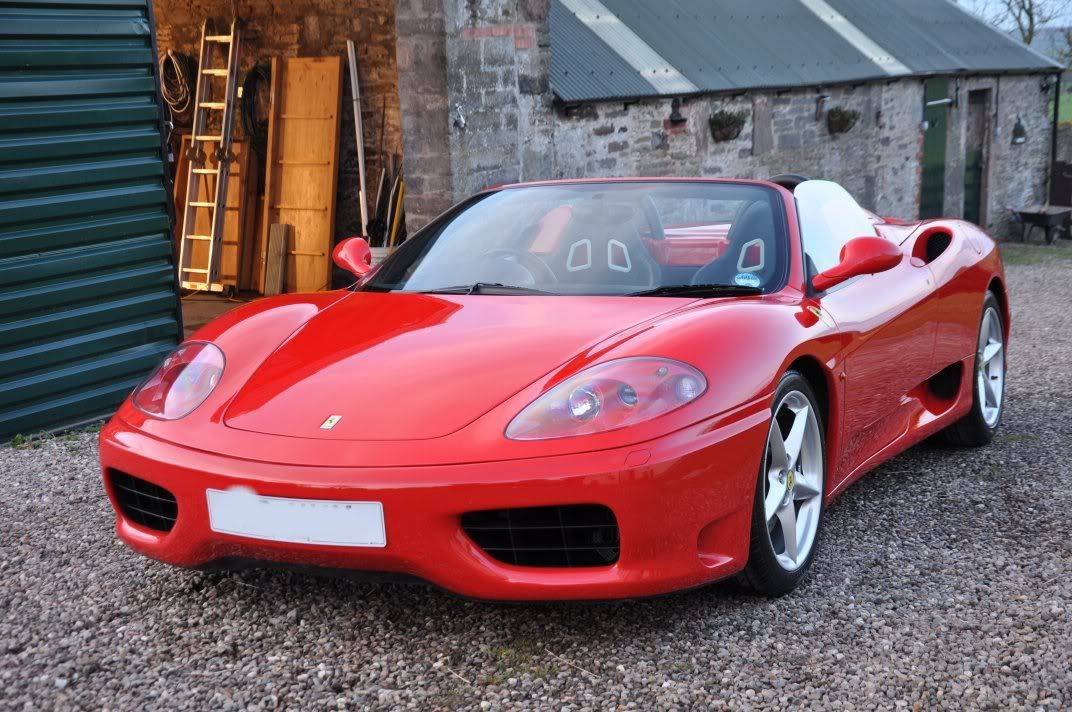
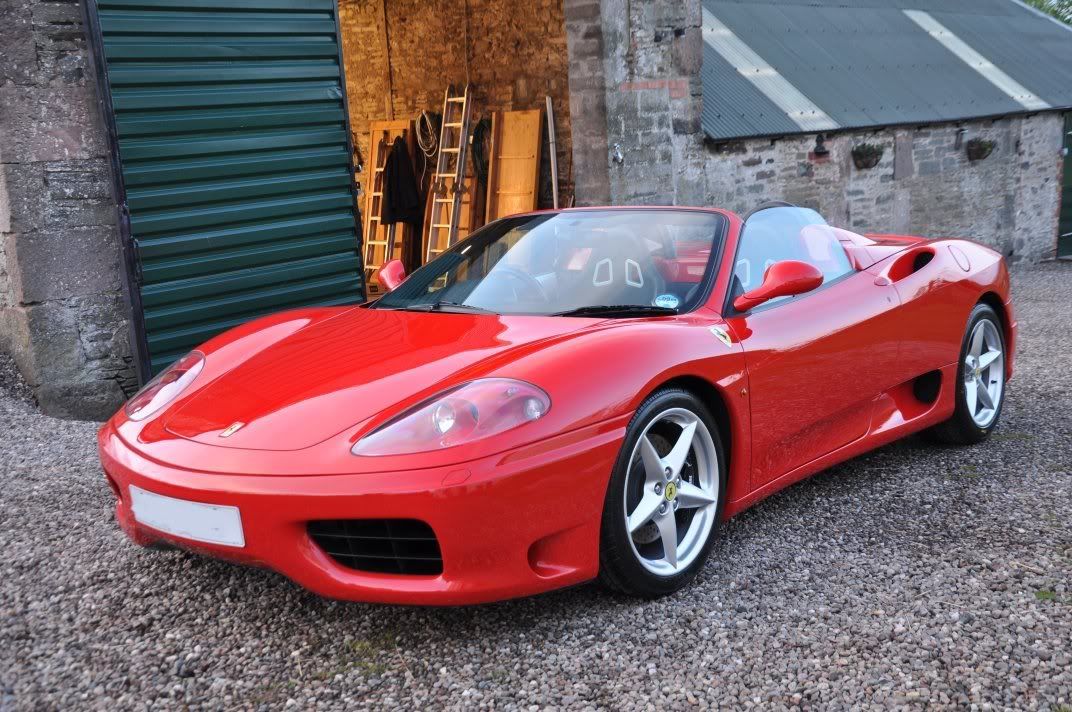
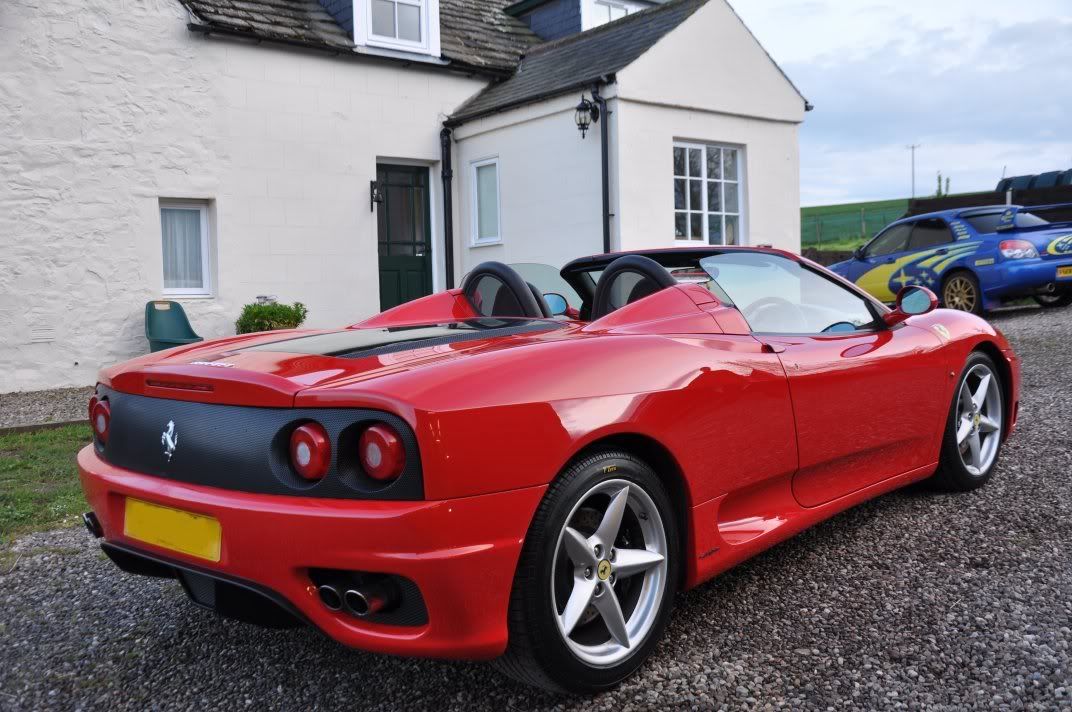
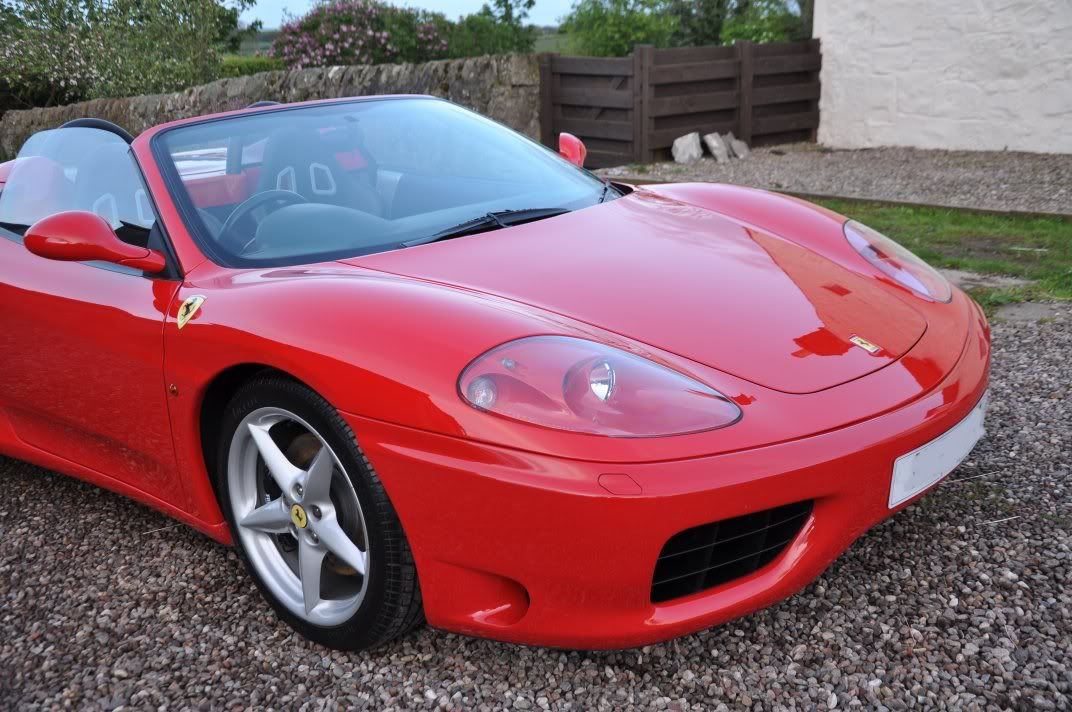
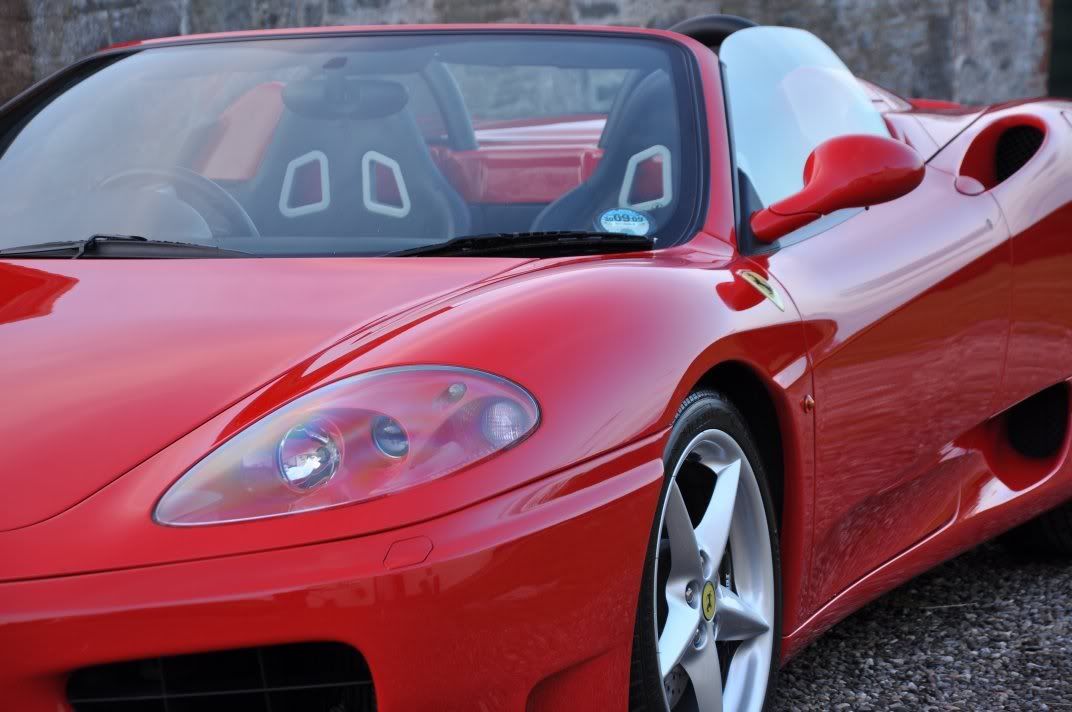
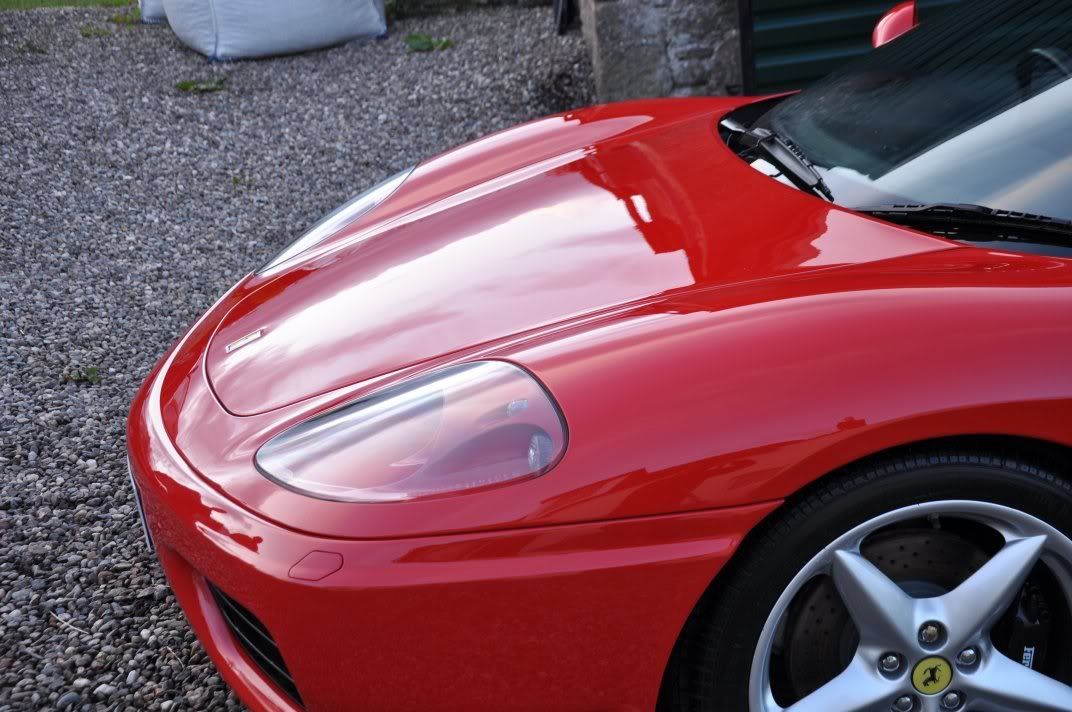
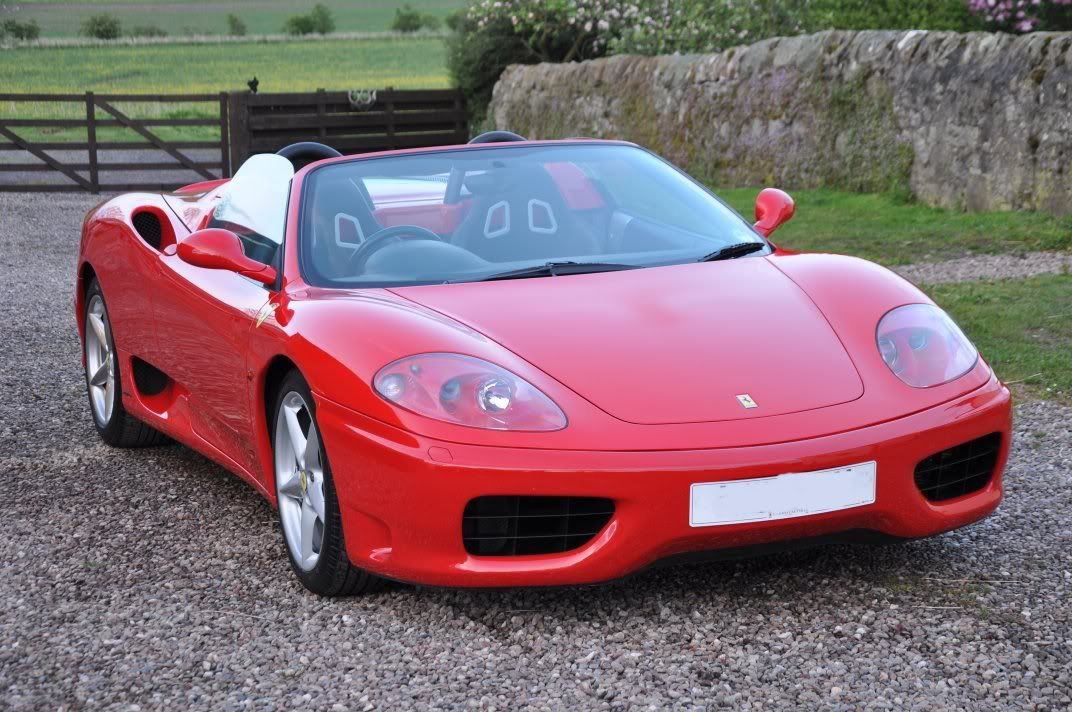
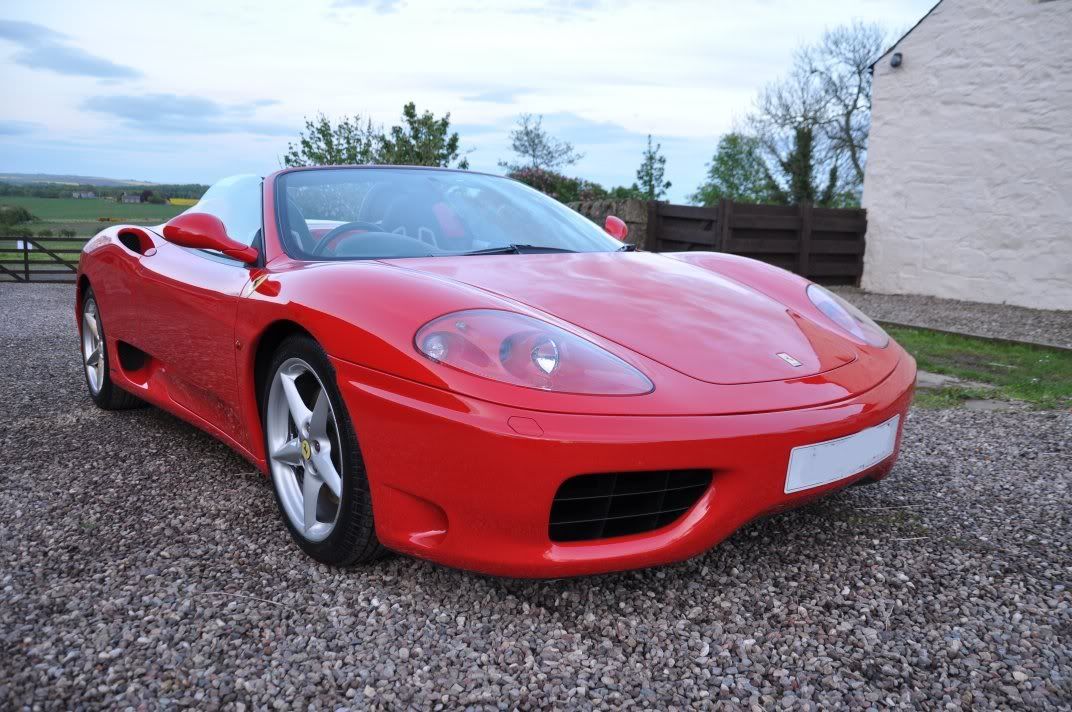
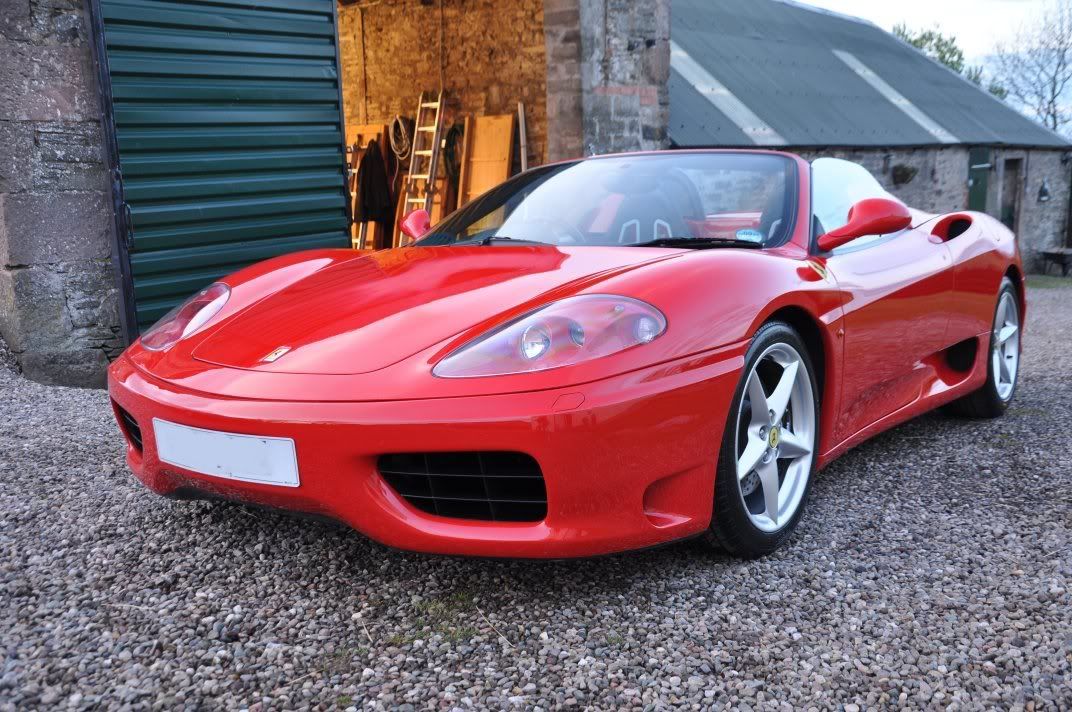
After pics, taken using my Nikon D90 on a tripod (hence, more in focus!):
A huge thanks to David and his wife for their hospitality throughout the day - it was really appreciated! I think I drank my own bodyweight in coffee! :thumb: Really enjoyable day this detail, and solid red is such a rewarding colour to work on
A very enjoyable day for myself and Stuart yesterday, detailing a Ferrari 360 Spider - a particularly special day for Stuart as well as this was the first Ferrari that he has worked on
I appologise for the lack of pictures in this writeup, I'm afraid I'm struggling to hold my little Fuji camera steady at the moment after a recent lab accident where I burned a few of my finger tips and my thumb
... But still managed to get a fair few in focus , and the SLR was on a tripod The day kicked off with the washing stage - wheels and arches first,
and then onto the bodywork.
During the washing stage it became immediately apparent that there was something not quite right with the paintwork beyond the standard swirls and some hologramming - the paint felt like sandpaper! The fabric roof showed exactly what it was: paint overspray, which thankfully cleaned easily enough off of the hood with Autoglym Fabric Roof Cleaner. The car felt as if it has been in the bodyshop where paint was being sprayed but uncovered such that it picked up a light to moderate coat of overspray all over...
The car was clayed with Zaino Z18 until it felt much smoother, using Meguiars Last Touch as a lube.
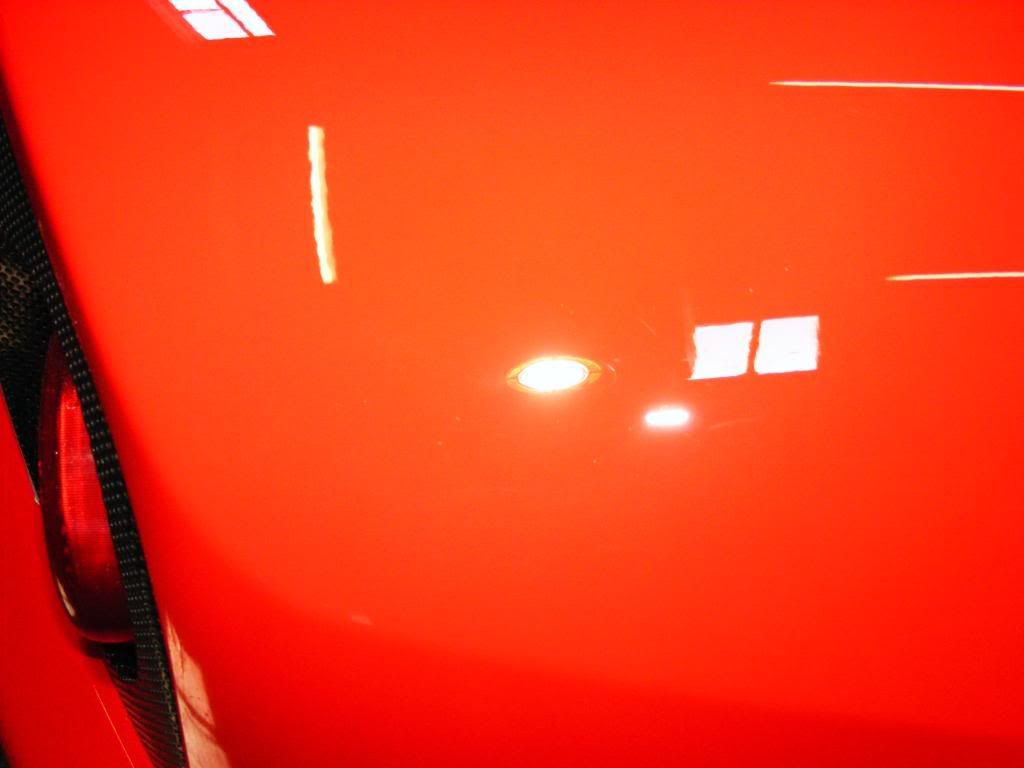
Assessing the paintwork, we can see standard swirls and hologramming under the Sun Gun:
Some typical RDS (owner has cats...) - some of these could not be fully removed safely:
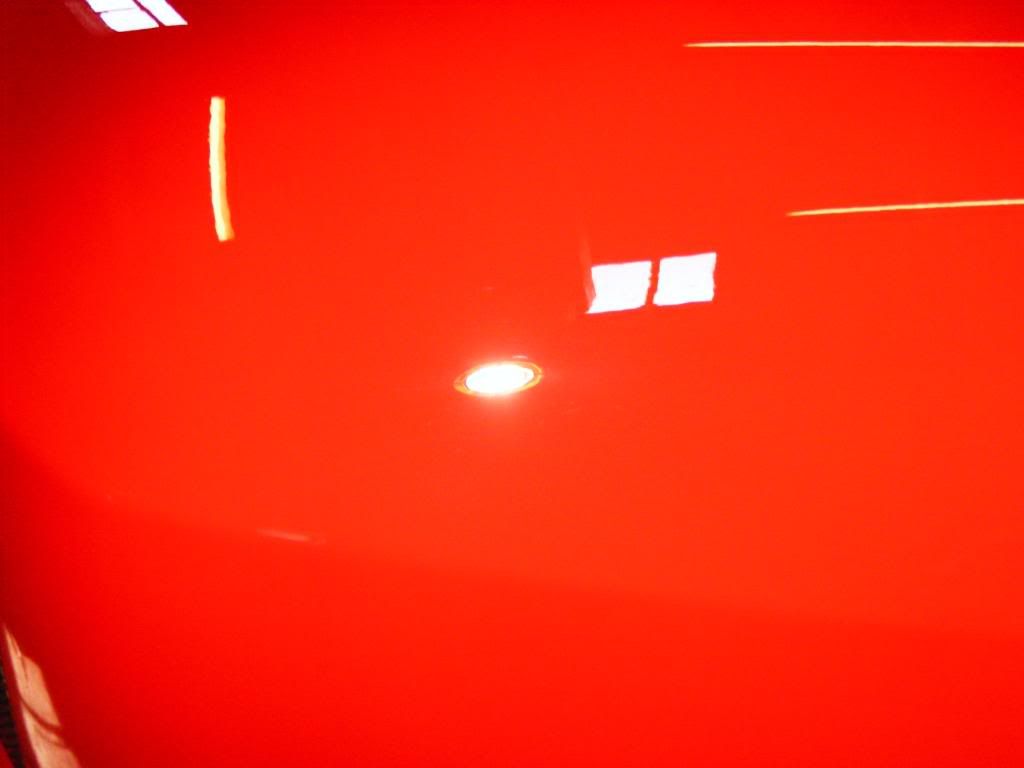
The biggest flaw in the finish for me though was revealed under the garage strip lighting however... after assessing that Menzerna Intensive Polish was good for taking out all of the swirls and hologramming it became apparent that there was more to the paint than met the eye! Although smooth after claying, there was also lots of little dimples in the paintwork, that looked like little pin pricks as if whatever had been sitting on the paint had etched a little into the paint... Only under the garage striplight could you really see what they were...
(took about 20 attempts with my slightly shaky hands to get that in focus!)
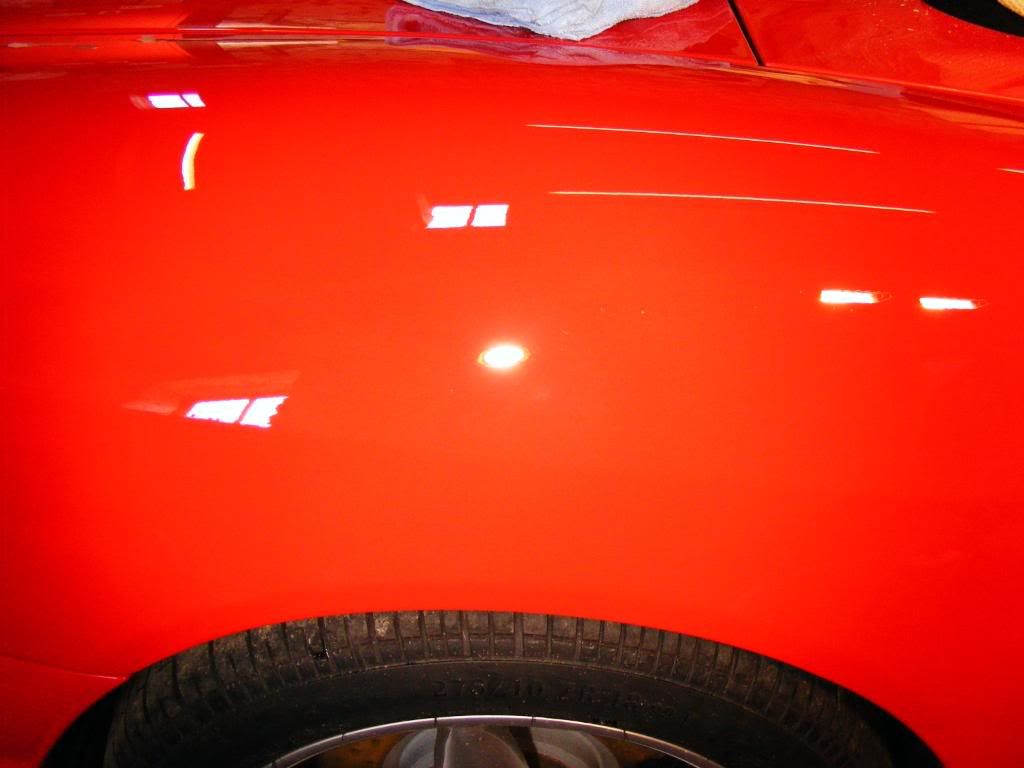
Despite being small, they were doing a good job of robbing the finish of its gloss leaving just a dead, flat look. Removal required 3M Fast Cut Plus on a cutting pad, to give this...
Refined...
Much better! This affected all of the flat panels of the car - bonnet, wing tops, rear buttress tops and engine cover. All of these regions received Fast Cut Plus where I deemed the paint thickness was suitable.
Other regions of the car were corrected using Menzerna PO85RD3.02 Intensive Polish on a polishing pad. A little Fast Cut was used on deeper scratches, however there were regions where we could not safely achieve 100% correction, one particular region being behind the seats where the roof touches the paint. Thinner paint readings on the gauge meant we worked with caution in here, and while 100% correction was not achieved, the polishing process was carried out with maximum possible safety to the finish which to me is more important than all out correction.
All of the car was refined using Menzerna PO85RD Final Finish on a 3M Blue Waffle finishing pad.
Before correction:
After correction:
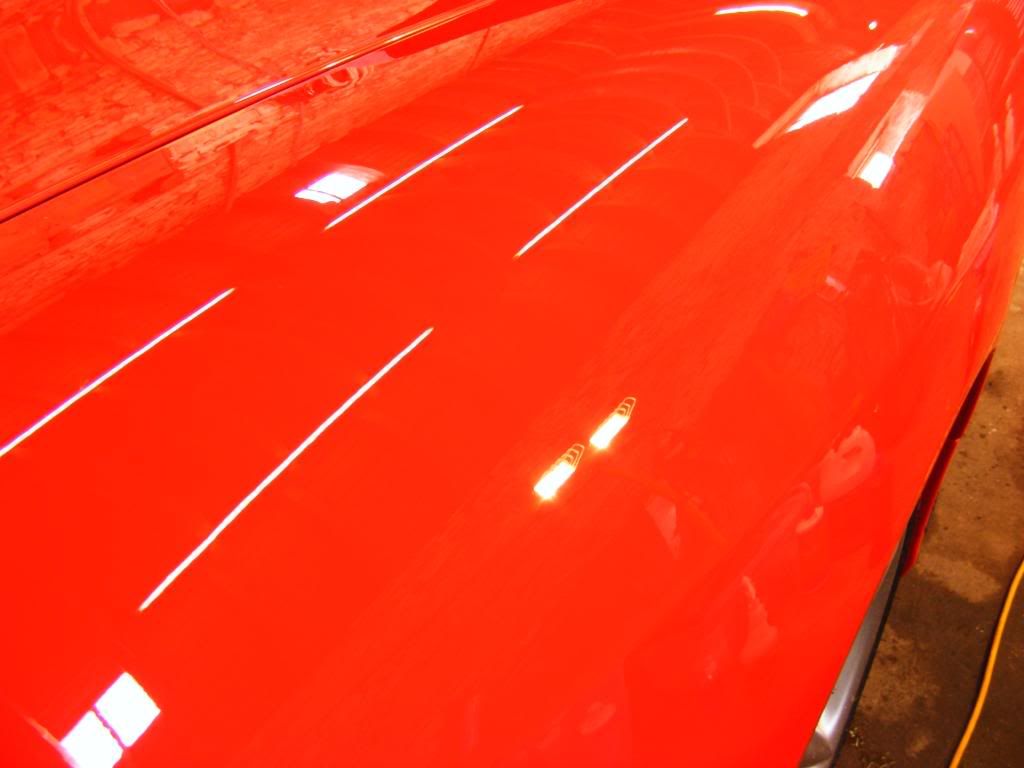
Resultant gloss on the red from the machine polishing alone was impressive
After polishing choice on this car was Lusso Revitalising Cream as a cleaner and glaze to add a little extra wet sheen to the paintwork which really for me suited the solid red. Protection was Valentines Concours Wax, chosen also for the slightly glazed look it leaves where the wetness suits the solid dark colours, and also chosen for its good durability.
The glass was cleaned using Swissvax Crystal, rubbers with Swissvax Pneu, arches and plastics with All Seasons Dressing, tyres with Meguiars Endurance, wheels sealed.
After pics, taken using my Nikon D90 on a tripod (hence, more in focus!):
A huge thanks to David and his wife for their hospitality throughout the day - it was really appreciated! I think I drank my own bodyweight in coffee! :thumb: Really enjoyable day this detail, and solid red is such a rewarding colour to work on
 TOP
TOP

Comment