• If this is your first visit, be sure to check out the FAQ by clicking the link above. You may have to register before you can post: click the register link above to proceed. To start viewing messages, select the forum that you want to visit from the selection below.

Announcement

Collapse
No announcement yet.

2008 Infiniti M35: Detailing Worklog

Collapse
X
 
  • Filter
  • Time
  • Show
Clear All
new posts

  • humblepie
    replied
    Re: 2008 Infiniti M35: Detailing Worklog

    @Firstson

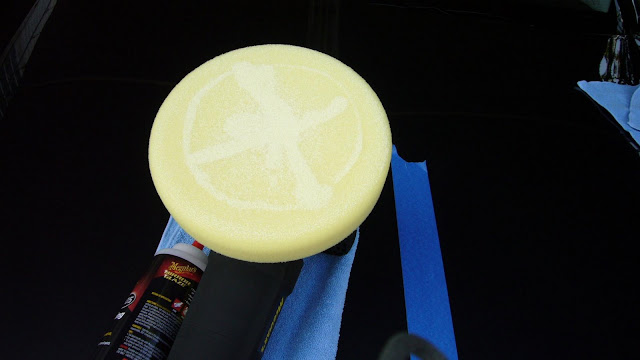
    Haha thanks. Unfortunately, I haven't had time to work on the rest of my car. I've been trying to get some mechanical issues worked out w/ the dealer first.

    It's a little disappointing how dusty the car gets after a wash, but there's not much you can do about that.

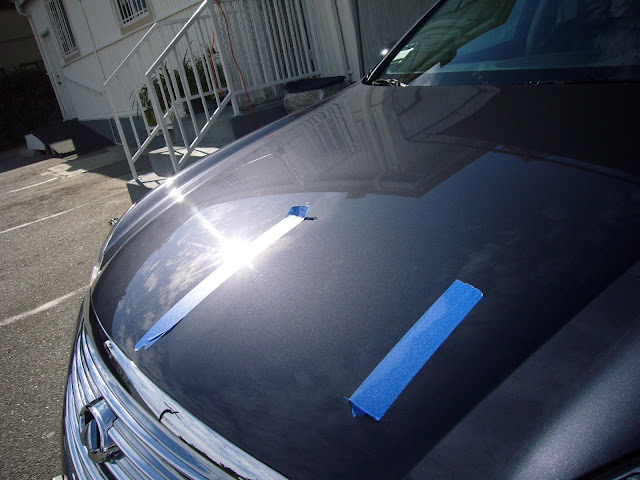
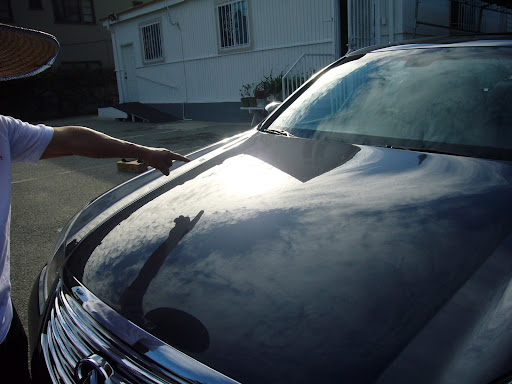
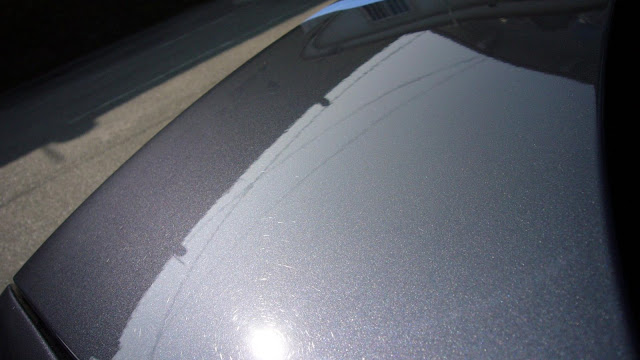
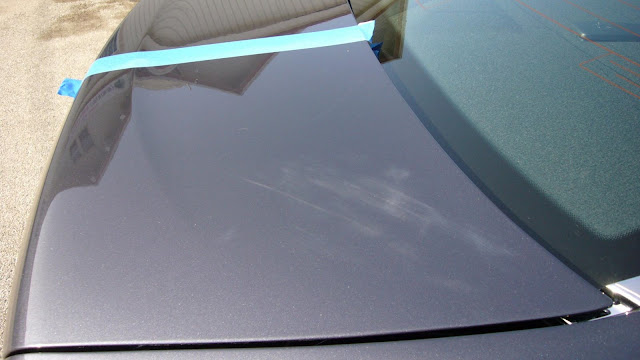
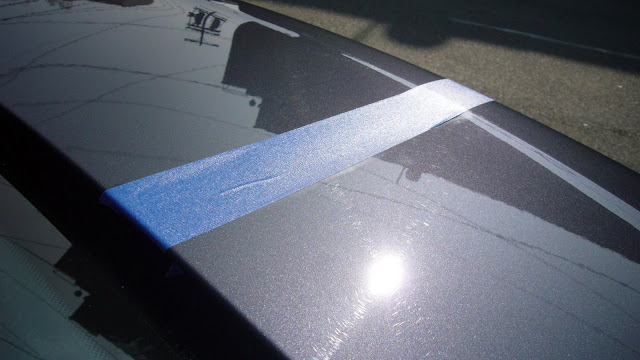
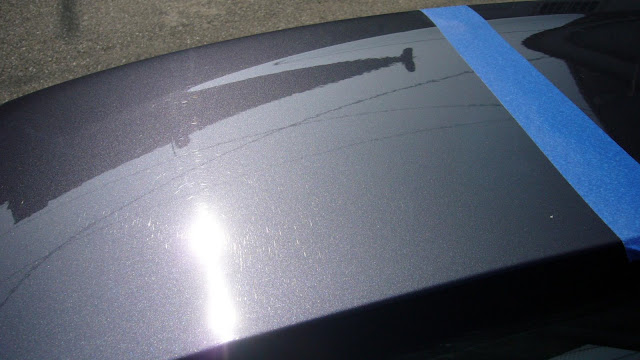
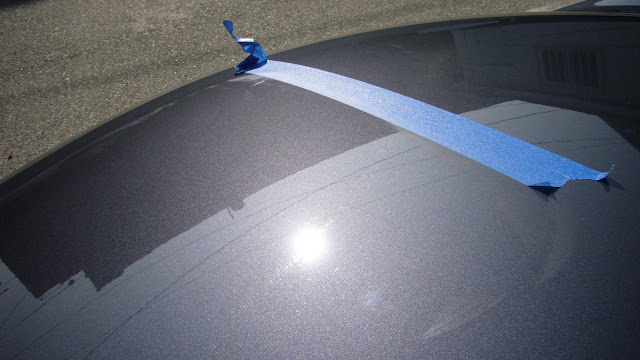
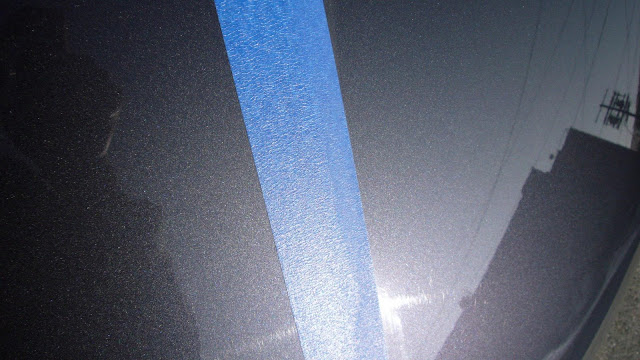
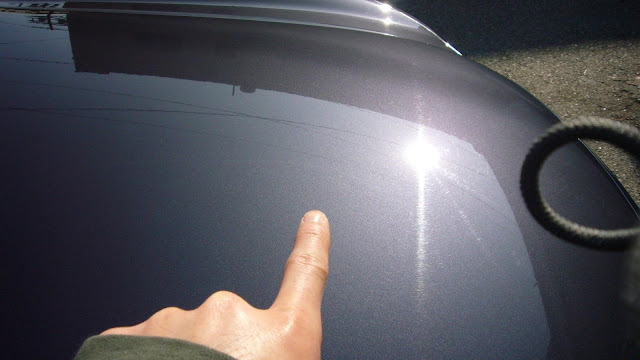
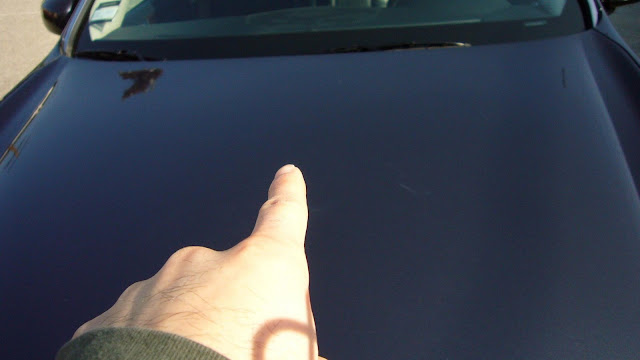
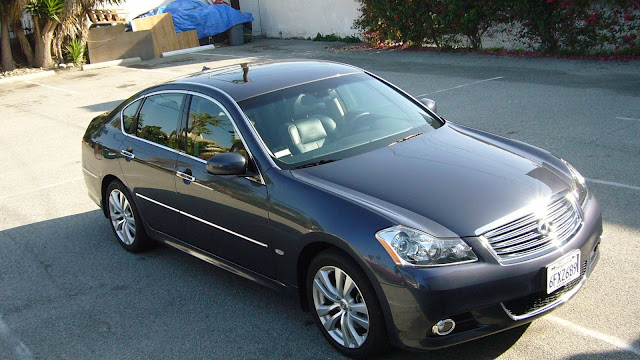
    I was admiring my car in midday sunlight and I'm still amazed at how much better the hood looks compared to the rest of the car. It really makes me want to go at it again sooner rather than later

    Leave a comment:


  • Firstson
    replied
    Re: 2008 Infiniti M35: Detailing Worklog

    You have done a ridiculously thorough job documenting this humblepie, and you'll really appriciate it later. I've gotten out of the habit of taking pictures of my jobs, and i always wish I could see them right after being done. Have you been driving this car while you're workin on it. I have my Dodge magnum on lock down while i was working on it for 5 days after christmas. Such a temptation . But people will stare when you're done.
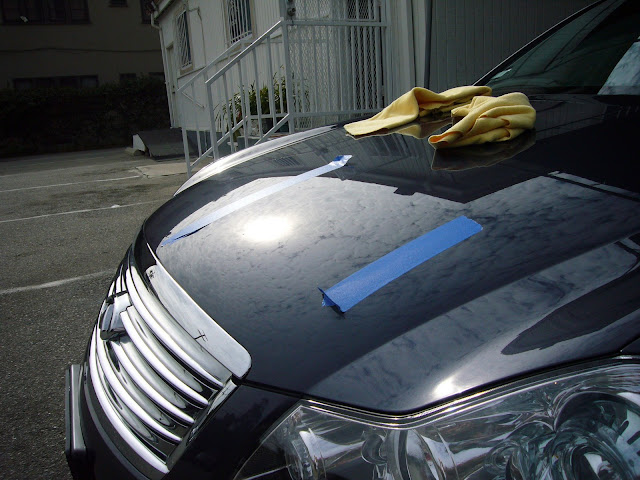
    Peace

    Leave a comment:


  • humblepie
    replied
    Re: 2008 Infiniti M35: Detailing Worklog

    Originally posted by J. A. Michaels View Post
    This has been a very good thread. Thank You for taking the time and effort to document your whole process. It has been a good read. Car looks much better.
    No problem. I'm just giving back in my small way after learning so much from the wealth of free information here at MOL.

    Leave a comment:


  • J. A. Michaels
    replied
    Re: 2008 Infiniti M35: Detailing Worklog

    This has been a very good thread. Thank You for taking the time and effort to document your whole process. It has been a good read. Car looks much better.

    Leave a comment:


  • humblepie
    replied
    Success!

    Web album has been updated and organized. You can fully zoom into the 3 mega pixels pics if you view it from the web album.

    Today I tried my second attempt at removing the swirls and it was a success! I probably removed around 70%, which I'm more than happy with. Plus, there were almost no holograms/micro marring. I could slightly see it but it was really hard to notice and after wiping down with quick detailer, I wasn't sure if I could see it any longer.

    After each application, I would verify my results in the sunlight to see my progress and it was quite thrilling every time I saw the swirls go away. At times I swore I did a good job, but I saw little to no improvement. So I had to try again on the same area, focusing on proper techniques. Then, I saw significant results.

    What I did different:

    - Biggest difference: I worked in small work areas (16"x16" roughly).
    - Used speed setting 5 to remove swirls
    - Marked the pad with a sharpee so I could verify the pad was always spinning
    - I made sure to clean my pad on the fly every other application
    - I went slower
    - Worked the m205 in longer (almost too long in some cases, but I"ll improve on the timing with experience).

    Lessons Learned:


    - One thing I realized is w/ a liquid wax + DA application of the liquid wax, wiping the wax clean with a MF towel isn't that hard. So I wont be ordering a cutting pad nor using the MF bonnets I bought.
    - Only used like 30% of my 12oz m205 bottle from ADS after both sessions. So I think the 12oz bottle will be more than enough for the full body work.

    Onto the pictures:

    The weather was overcast initially so I was really disheartened that I wouldn't be able to verify my results:


    Fortunately, the sky cleared up as I was working on the test spot. So I was able to verify! You should really look at this pic from the web album and zoom in, then you'll be able to clearly see the difference b/t the spot test (right) and the test (left)


    This is the entire hood finished with M205:


    After NXT 2.0:


    Thank you everyone at MOL
    Last edited by humblepie; Jan 22, 2009, 01:47 AM.

    Leave a comment:


  • humblepie
    replied
    Re: 2008 Infiniti M35: Detailing Worklog

    @Mike

    Thanks for taking the extra time to check into the issue w/ Lenny. It means a lot to me that you guys at Meg's are so dedicated. Also, I feel fortunate to be within driving distance from the garage.

    I have no problems with getting less than perfect results as far as swirl removal is concerned. I just want to see it close to perfection at least once is all However, holograms or micro marring isn't desirable on any level for me. So if I can't get the desired results on the test spot, then I'll just be content with the car as is. I will still attend the Saturday class though for some expert opinion.

    @Firstson
    Thanks for the great suggestion!

    Leave a comment:


  • somarr
    replied
    Re: 2008 Infiniti M35: Detailing Worklog

    I too am looking forward to the results. I like the write-up and supporting pictures. I am researching and observing as I am now the proud owner of a G110. Unfortunately, the temperature here will not allow me to detail yet....

    Leave a comment:


  • Firstson
    replied
    Re: 2008 Infiniti M35: Detailing Worklog

    Hey humblepie, its been a while since i posted here but i've been studying for the last 2 years and come a long way. I keep my 2007 Dodge magnum almost pristine these days but it took me a while to really figure out the key to getting a good finish, i constantly had trouble with micro-marring when i first starting polishing. First i noticed you talked about spreading the product with your finger, and i know every suggestion or videa i've seen or heard suggest simply spreading a ring around the pad and then spreading it evenly over your work surface before you work it in.
    Biggest discovery was that of work time, i read once that micro-marring may be caused by not working the product long enough, and sure enough, theres always more time than you may thing. When i work product, #80 is still my standard with an 8006 pad, i work until the product is almost completely clear with almost a look of baby oil spread over the panel. As long as your finger swiped across the product easily leaves a trail your good. Not working the product long enough could be your problem, thats where i found my magic solution. Best of luck!!!

    Peace

    Leave a comment:


  • Mike Phillips
    replied
    Re: 2008 Infiniti M35: Detailing Worklog

    Hi Daniel,

    Just replied to your question here about bringing your car to Meguiar's Garage and letting us take a look at it.

    January 24th - Saturday Open Class - Car Care 101


    Mark already touched on the speed setting tip, also if you haven't already, make some marks on the back of your backing plate so you can easily tell when the pad is rotating and when it's not rotating as swirls are removed best when the pad is rotating.

    I also checked with Lenny House back in New Jersey just now on the phone. He had a black, 2008 Infinity G35 or G37, he doesn't remember except it was a 4-door.

    Lenny is an accomplished and professional detailer and he said that nothing they tried would bring the finish to perfection, it always had some amount of swirling on it. He has every correction product, every type of buffing pad and machine and all the waxes you can name and said it was frustrating because they just couldn't get the paint to perfection. It started out swirled from the dealership, was taken to a couple other detailers where it was swirled out more and then finally brought to Lenny's shop where Lenny was able to undo all the damage instilled by previous detailers but he could not get it 100% perfection.

    At the time, M205 was not out yet so he didn't have M205 to try.

    If you haven't dialed in a recipe for success for your car's paint by the 24th, try to come to Meguiar's Garage about an hour early and we'll see if we can't science out a successful approach before the class starts.

    We love a challenge!

    Leave a comment:


  • roushstage2
    replied
    Re: 2008 Infiniti M35: Detailing Worklog

    When performing defect removal, you are better off starting with the polishing pad as the finishing pads generally won't give you the true correcting ability of the product. Then as Mark said at the end of his post:
    Also, if you get more defect removal from the process I described, but still have holograms, try using that process followed by working the area a second time with a finishing pad and/or less pressure.
    Also, if you order M105, make sure it's the new D/A approved formula and not the "original."

    Leave a comment:


  • humblepie
    replied
    Re: 2008 Infiniti M35: Detailing Worklog

    Thanks Mark.

    I'm feeling more confident already. I'll prob give it another go on Friday or next Monday (MLK Day)

    Leave a comment:


  • Markus Kleis
    replied
    Re: 2008 Infiniti M35: Detailing Worklog

    During defect removal you want to basically always use speed setting 5, unless you have a special need to really slow it down.

    First things first, bump up the speed.

    Next thing to consider is pressure and work time. When I was working with M205 via G110 I noticed a very long work time, but when working a 2x2~ area (or slightly less) I would do 1 quick pass at moderate speed and pressure to spread the product, followed by 2-3 passes at a slow speed, with moderate to heavy pressure (making sure the pad kept spinning).

    Then, around this point I would generally notice the M205 to start to turn just slightly more white than clear, and spread less easily on the paint. At this point I would make 1 pass at a slow speed, with moderate pressure, making sure that I could see the product on te paint being altered as I passed over. After passing the whole area, I then went to LIGHT pressure and slow speed and passed over the whole area 1-2 passes.

    You may want to try shortening the work cycle a little from mine as you *may* have softer paint, which *may* be causing the "holograms." So, try that out, and try a little less pressure on the final passes.

    Also, if you get more defect removal from the process I described, but still have holograms, try using that process followed by working the area a second time with a finishing pad and/or less pressure.

    Leave a comment:


  • humblepie
    replied
    Re: 2008 Infiniti M35: Detailing Worklog

    Just to clarify, the hologram/micro-marring takes the shape of a wave like aurora borealis (pic attached), but the w/ the shininess of a soap bubble. It is evident throughout the entire portion where I spot tested.

    I've been reading that perhaps finishing w/ a cleaner wax would be advised for situations like this. I do have the small sampler bottle of Meg's Cleaner Wax, so maybe I should give this a try w/ the w9207.

    Leave a comment:


  • humblepie
    replied
    Re: 2008 Infiniti M35: Detailing Worklog

    I started thinking about what I can do better next time and here a few thoughts:

    1) Tape off exactly (all 4 corners) the area I'm working on to get a precise before/after shots

    2) I used speed setting of 4, but I think I'll try 5 this time

    3) Apply more pressure to the pad. I think I was only applying a little more pressure than was required for the pad to stay flat on the paint.

    4) Work in a smaller area, maybe 12x12 to really work in the product

    5) Prime the pad really well - spreading it w/ my fingers evenly over the entire pad.

    6) Work the polish longer. I think I only spent a minute on each application and when I swiped my finger on the paint, it was still wet.

    Leave a comment:


  • humblepie
    replied
    Re: 2008 Infiniti M35: Detailing Worklog

    Spot Testing

    Web album has been fully updated and organized. It stores the original resolution pics, so you can really zoom in. Here are a few highlights:

    I first decided to see how the M205 by hand would work for the plastic mid section and chrome trims. As you can see, something was wrong b/c the color was so black. It ended up that the little bit of black rubber trim was being wiped.


    So after I only focused on the plastic it was much better


    The finished results look slightly better w/ a quick pass of the M205 by hand. Left panel was unaffected. Right panel is where the M205 was applied.


    The problem is with this hazing / hologramming (notice the area where the reflection catches my camera). Perhaps I need to go over the area w/ QD and it will improve a little b/c all the M205 wasn't wiped off completely.


    Just for the heck of it, I tried M205 by hand on the paint and it wasn't that effective hehe. But at least, I know it can't be done by hand and that the paint isn't super soft


    I sectioned off the trunk into 3 portions. Left (Hand), Mid (Nothing), Right (G110 + M205 w/ w9207)


    As you can see, the swirls are still there on the right panel:

    I'm not sure what this smudge is. I don't think it was hazing. It's prob some left over residue I didn't get off fully


    Left Side (by hand):


    Right Side (w/ DA + G110 + w9207)


    So as you can tell, there's not that great of an improvement in the swirls. So I decided to 1) move up to the w8207 polishing pad and 2) use the hood has a spot test so that I can hopefully get some better angles.

    I noticed that the M205 wasn't evenly spread on the pad even after 2 applications (meaning apply, wipe, apply wipe).


    Also, I noticed some of the foam was flaking off the w8207 onto the paint - like glitter. Perhaps the w9207 did this as well, but b/c the w9207 is darker in color I didn't notice the tiny flakes. I think what the flakes of the w8207 indicates is that the pad wasn't primed evenly enough w/ the m205 and that perhaps I was getting close to a dry buff point. Or maybe it's just a new pad and it does this on the first time use

    Another thing I forgot about was to clean the pad on the fly. Although w/ a new pad and just spot testing, it probably wouldn't matter that much.

    Hood: Left Side (nothing) Right side (M205)

    Note: From this camera angle the left side of this picture is the right side of the hood.


    After about 2 more passes and varying the pressure applied, I decided to call it a day for now. I took the painter's tape off and took a set of final pics:

    It almost appears the top half of this pic (which is the right side of the hood) has slightly less swirls, but it's just barely better (if in fact it is improved)


    I noticed some hazing or holograms on the area where I used the DA. This is after I wiped it all down w/ QD. It's hard to tell from the pic, but the sun really makes it apparent.


    The car still looks awesome from a few feet away though


    Initial spot testing proved to be educational. At some point, all that theory you learn in class has to be put into practice. No matter how much you plan ahead some things you just got to experience first hand.

    I might have to purchase the M105 and see if I like those results better than the M205.

    I was a little disappointed in the results in that I didn't see much. However, I was able to review what I did and next session I'll be able to improve on it. I signed up for the Saturday class (Jan 24). So hopefully, I'll get some pointers there.

    In the meanwhile, if any of you can chime in on tips. It would be much appreciated for the next time I go at it Especially, the hazing/hologram on the hood. Is that the result of my technique or will it go away if I just wax it up?

    Leave a comment:

Your Privacy Choices
Working...
X