

 Tweet
Tweet
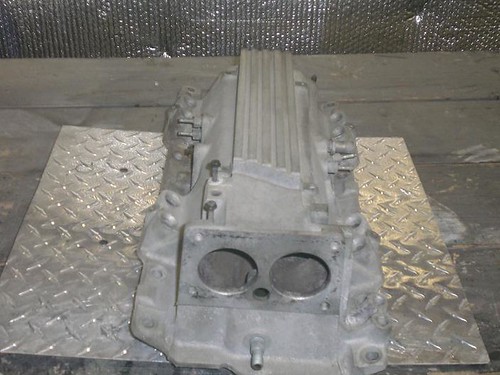
This is a LT1 intake I powder coated for a buddy at work about 7 months ago and wanted to share with you guys and to post on mol to try to help save these pictures(long story). any ways this pic is after I already had it soaking in my parts washer for a couple days and glass beadd and then a bake off, prep and wiped down ready for the ribs on the top of intake to be polished.

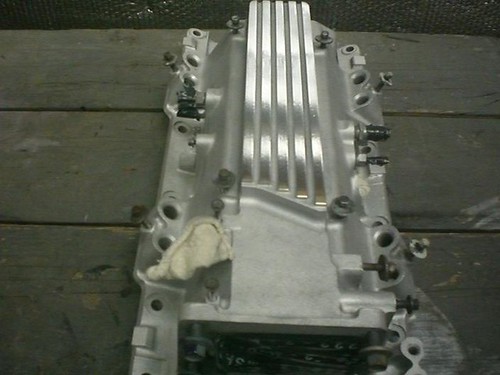
These two pictures is after I sanded them starting with 80grit, then up with 120grit, moved on up again with 220grit and then 320grit and again up to 400grit and last with 600grit to try and get it as smooth as possible. As you can see if you look closely the ribs in these two pictures aren't as smooth in the finished intake because I had a little learning practice, the top of the intake was to close to the top of the burners on my stove and turned the clear yellow, sooo! I had to cut off the powder coated clear with a razor blade and resand starting with the 320grit and moved up to the 600grit and the out come was much better.

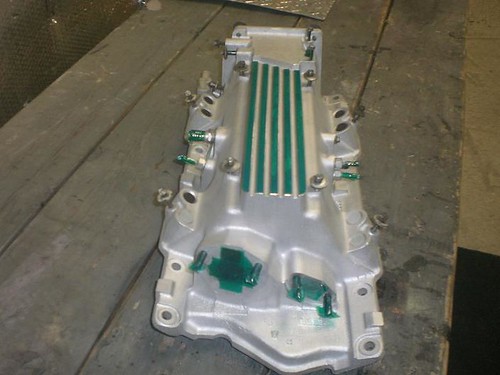
And this picture is with the polished ribs taped off with high temp powder coating tape so when I powder coat the intake I wont get the red powder on the ribs that I've already sanded and polish twice.LOL!!! And also because I don't want to have the powder coating to cure to the ribs.
And this is in the my oven (my stove in my garage just for powder coating ONLY)

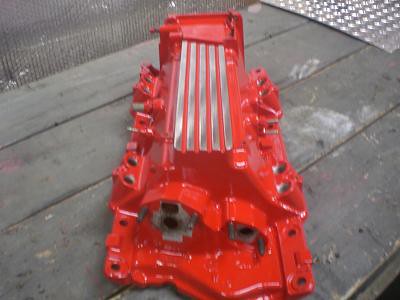
The next two pictures are after I already cured the intake and applied a coat of clear over the whole intake to help lock in the shine and make sure it will stay this way for a very long time!!!!!

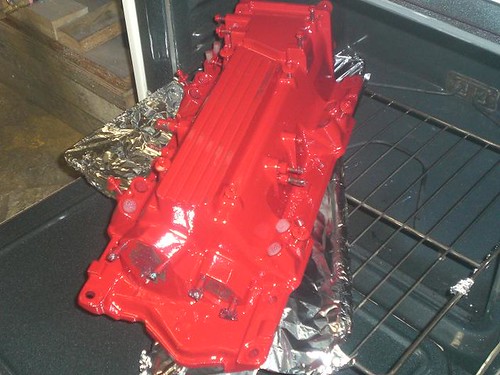
Now everything has cooled down after about an hour or so and the taped removed

Hope everyone likes this one, if so I've got another one to do for my self that I'm going to start on in a couple weeks or so and will/can post up more or better info if anyone might be interested in it?
These two pictures is after I sanded them starting with 80grit, then up with 120grit, moved on up again with 220grit and then 320grit and again up to 400grit and last with 600grit to try and get it as smooth as possible. As you can see if you look closely the ribs in these two pictures aren't as smooth in the finished intake because I had a little learning practice, the top of the intake was to close to the top of the burners on my stove and turned the clear yellow, sooo! I had to cut off the powder coated clear with a razor blade and resand starting with the 320grit and moved up to the 600grit and the out come was much better.
And this picture is with the polished ribs taped off with high temp powder coating tape so when I powder coat the intake I wont get the red powder on the ribs that I've already sanded and polish twice.LOL!!! And also because I don't want to have the powder coating to cure to the ribs.
And this is in the my oven (my stove in my garage just for powder coating ONLY)
The next two pictures are after I already cured the intake and applied a coat of clear over the whole intake to help lock in the shine and make sure it will stay this way for a very long time!!!!!
Now everything has cooled down after about an hour or so and the taped removed
Hope everyone likes this one, if so I've got another one to do for my self that I'm going to start on in a couple weeks or so and will/can post up more or better info if anyone might be interested in it?
 Test Hoods Are Cheap And Most Of The Time Free


Comment