

 Tweet
Tweet
Hi Guys, due to wet sanding a fair bit. I thought I would add this post.
You will need:-
Wooden cocktail sticks.
A small pencil eraser.
Bucket with grit guard. Grit guard optional.
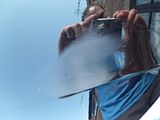
3000 grit paper. I would suggest Megs Unigrit paper. It really works well and does not clog.
And lots of patience.
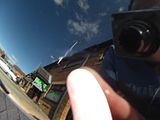
Paint depth gauge optional.
Cotton bud
Good quality microfibre towels.
Foam applicator pad
In most touch up pens you will get a little wire brush in the cap. Simply key up the stone chipped area and the surrounding. I would suggest getting a wooden cocktail stick. To remove any loose paint if there is any.
Use a cotton bud with a dab of acetone or something similar on the area to clean and make sure there is no traces of wax etc left behind.
Get a cocktail stick and break into 2. Give your touch up pen a good shake to mix up the paint. Now inside you will find a small applicator brush.
Use the brush to apply a small amount of paint to the end of the pointed part of the cocktail stick. Simply hold the cocktail stick vertically into the stone chip and allow the paint to run in. The key is less is more!!!!
Dont fill the chip in one go allow the paint to dry. And keep applying more paint untill the the chipped area is sitting slightly higher than the painted surface.
Allow to dry for 24hrs before wet sanding. Please note you are using the colour coat only not the clear.
Pics although not very clear of blobs of touch up paint on my car

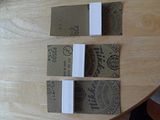
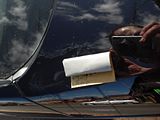
Cut paper down into smaller sections to wrap around your eraser. Also If using different grades of paper make a mark on the back before you cut the paper down. To identify grades 3000/2500 etc...
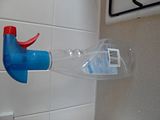
Bucket with grit guard. Used spray bottle. Add to both warm water with washing up liquid and a good quality car shampoo Megs Gold Class in my case.
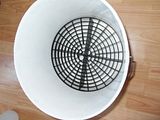
Allow paper to soak in bucket for at least 30 mins prior to use.
If you are sanding with varies grades always sand in the opposite direction left to right with 2500. Followed by Front to back with 3000 so you can clearly see you are sanding level.
You always want to finish with a back & forth motion.
Hold your mini sanding block at 10 o clock not 12 oclock. And sand front to back. Reason being you dont want any contaminants getting between your sanding block and paper and causing scratches.
Your spray bottle is to be used as a lubricant during sanding apply libreally and check progress after every 8-10 strokes. Wipe the surface clean with your microfibre.
If you can still see the outline of the chip or the surface is not the same colour that has been sanded carry on. With another 6-8 strokes. Wipe the surface clean with your microfibre
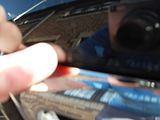
You will be able to feel when sanding that it gets smoother once the chip is smoothed out flat to the surface.
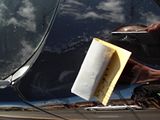
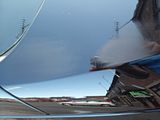
A correctly sanded panel should look like this.
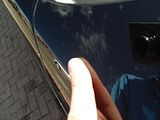
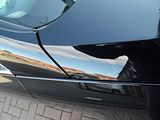
I would suggest a medium cut compound like Meg Scratch X 2.0 and a soft foam applicator pad like the Megs one I'm using. The great thing with Megs compounds they have deminsihing abrasives and tend not to scratch. I simply appllied a small drop to a foam pad and rubbed front to back around 20 times.

Wiped clean with a clean microfibre towel and these were the results

Repeat the above process for every chip you have.
Rappy
115 microns before 113 microns after
127 microns before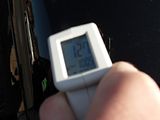 125 microns after
I have removed 1-2 microns of paint. 25.4 microns= 1mm. Basically you are removing a very small amount of paint.
You will need:-
Wooden cocktail sticks.
A small pencil eraser.
Bucket with grit guard. Grit guard optional.
3000 grit paper. I would suggest Megs Unigrit paper. It really works well and does not clog.
And lots of patience.
Paint depth gauge optional.
Cotton bud
Good quality microfibre towels.
Foam applicator pad
In most touch up pens you will get a little wire brush in the cap. Simply key up the stone chipped area and the surrounding. I would suggest getting a wooden cocktail stick. To remove any loose paint if there is any.
Use a cotton bud with a dab of acetone or something similar on the area to clean and make sure there is no traces of wax etc left behind.
Get a cocktail stick and break into 2. Give your touch up pen a good shake to mix up the paint. Now inside you will find a small applicator brush.
Use the brush to apply a small amount of paint to the end of the pointed part of the cocktail stick. Simply hold the cocktail stick vertically into the stone chip and allow the paint to run in. The key is less is more!!!!
Dont fill the chip in one go allow the paint to dry. And keep applying more paint untill the the chipped area is sitting slightly higher than the painted surface.
Allow to dry for 24hrs before wet sanding. Please note you are using the colour coat only not the clear.
Pics although not very clear of blobs of touch up paint on my car


Cut paper down into smaller sections to wrap around your eraser. Also If using different grades of paper make a mark on the back before you cut the paper down. To identify grades 3000/2500 etc...

Bucket with grit guard. Used spray bottle. Add to both warm water with washing up liquid and a good quality car shampoo Megs Gold Class in my case.


Allow paper to soak in bucket for at least 30 mins prior to use.
If you are sanding with varies grades always sand in the opposite direction left to right with 2500. Followed by Front to back with 3000 so you can clearly see you are sanding level.
You always want to finish with a back & forth motion.
Hold your mini sanding block at 10 o clock not 12 oclock. And sand front to back. Reason being you dont want any contaminants getting between your sanding block and paper and causing scratches.


Your spray bottle is to be used as a lubricant during sanding apply libreally and check progress after every 8-10 strokes. Wipe the surface clean with your microfibre.
If you can still see the outline of the chip or the surface is not the same colour that has been sanded carry on. With another 6-8 strokes. Wipe the surface clean with your microfibre
You will be able to feel when sanding that it gets smoother once the chip is smoothed out flat to the surface.
A correctly sanded panel should look like this.


I would suggest a medium cut compound like Meg Scratch X 2.0 and a soft foam applicator pad like the Megs one I'm using. The great thing with Megs compounds they have deminsihing abrasives and tend not to scratch. I simply appllied a small drop to a foam pad and rubbed front to back around 20 times.

Wiped clean with a clean microfibre towel and these were the results


Repeat the above process for every chip you have.
Rappy
115 microns before
 113 microns after
127 microns before
 125 microns after
I have removed 1-2 microns of paint. 25.4 microns= 1mm. Basically you are removing a very small amount of paint.
 . As usual least aggressive to get the job done.

Comment