If this is your first visit, be sure to
check out the FAQ by clicking the
link above. You may have to register
before you can post: click the register link above to proceed. To start viewing messages,
select the forum that you want to visit from the selection below.
Announcement
Collapse
No announcement yet.
Damp-Sanding a 1956 Chevrolet Belair with Meguiar's Unigrit Foam Finishing Discs
Re: Damp-Sanding a 1956 Chevrolet Belair with Meguiar's Unigrit Foam Finishing Discs
Originally posted by ClearlyCoated
Was there any discussion to removing the emblems for a more thorough sanding?
I posted a comment about this on CorvetteForum since it answers your questions I'll just copy and paste it...[indent We didn't remove any of the script or trim because we only had Saturday to do the work, so it had to be done in one day and I didn't want to get into removing speed nuts and crusty, rusting nuts off chrome pot metal. I don't mind doing this if I'm not rushed but after looking at the script and other trim components it looked like there would be some potential problems to start trying to remove the fasteners and nuts.
[/indent]
Just to note, I'm the biggest proponent of removing trim when time allows...
When sanding by hand, you sand in one direction, I think I have an article or two on this topic in this forum group, (the wet-sanding forum group),
When machine sanding it's less important the direction you move the sanding and more important that you keep the sanding moving at all times and focus on the task at hand, that is only sand as much as you need to in order to remove the defects and/or reach your goal. I tend to sand in a crisscross pattern as the goal is UMR
UMR = Uniform Material Removal
The highest goal is to leave as much paint on the car besides not making a mistake.
Awesome! Could we get more information on the compounding-polishing steps taken?
While I'm very comfortable with the Meguiar's product line I only shared the sanding portion of this project because I used a different compound and polish for removing the sanding marks.
The key important point of this post was to share,
Unigrit sanding discs cut fast, we only used 2 discs for this Behemoth of a car and sanded it down in around 40 minutes with two of us doing the work.
Unigrit sanding discs leave a uniform sanding mark pattern that buffs out quick and easy
What was the issue with the car that required damp sanding? I assume this has been repainted and has a good amount of clear on it. Seems like this could be a pretty risky procedure on a factory paint. Would love to hear your advice.
Hi Bob,
Long time no see...
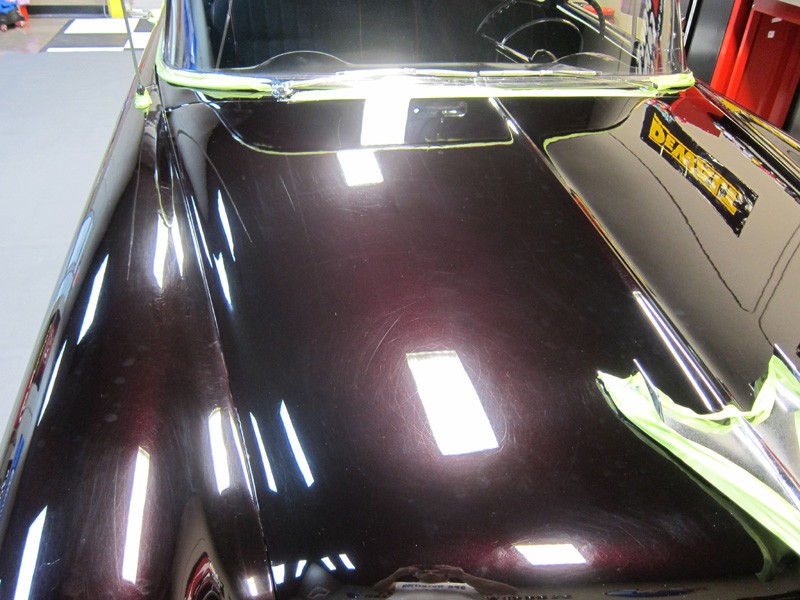
This "House of Kolor" paint job is around 20 years old, it was completely scoured with swirls and scratches. My co-worker Matt measured the paint and anywhere from 12 to 18 mils of paint...
Now that's a measurement of total film build not just the thickness of the clear but that's where we had to make a Go/No Go decision and then cross our fingers. Most people should not attempt sanding a factory finish, at least without some practice first and without first taking the risks into consideration because factory paints are so thin and usually very hard as they are baked-on at around 300 degrees. It's such a crime that car manufactures put so little clear paint on cars as it makes the job of even just "normal" defect removal like a bird dropping etching risky. All I ever hear in the "industry" is there's no plan for this, (thin paint), to ever change into the future.
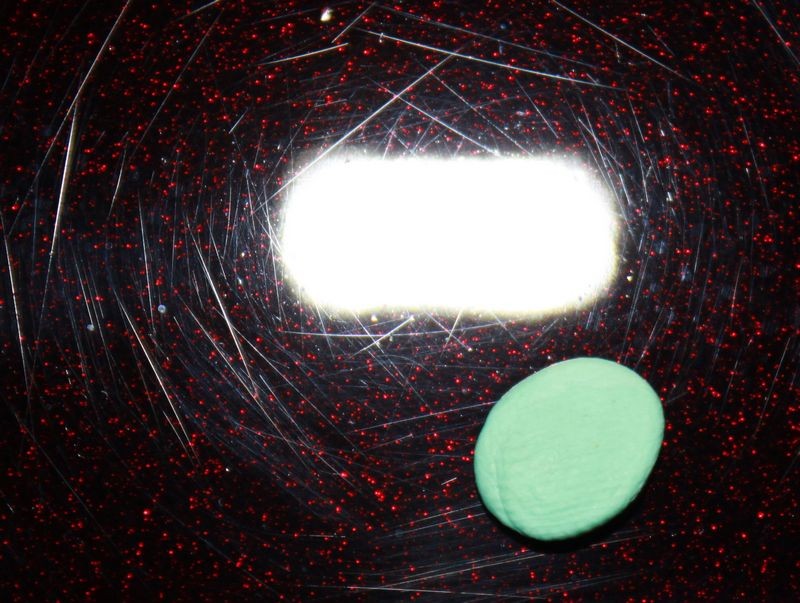
Here's some before shots...
Here's a photography technique for capturing swirls and scratches using your camera's flash, give your camera something to focus on, this could be a coin, your finger touching the surface or in this case a small piece of detailing clay placed on the paint.
This truck is supposed to show up today for a video on Tuesday... this will be damp-sanded also...
Mike Phillips 760-515-0444 showcargarage@gmail.com "Find something you like and use it often"
 Tweet
Tweet


Comment