• If this is your first visit, be sure to check out the FAQ by clicking the link above. You may have to register before you can post: click the register link above to proceed. To start viewing messages, select the forum that you want to visit from the selection below.

Announcement

Collapse
No announcement yet.

fixing a scratch

Collapse
X
 
  • Filter
  • Time
  • Show
Clear All
new posts

  • fixing a scratch

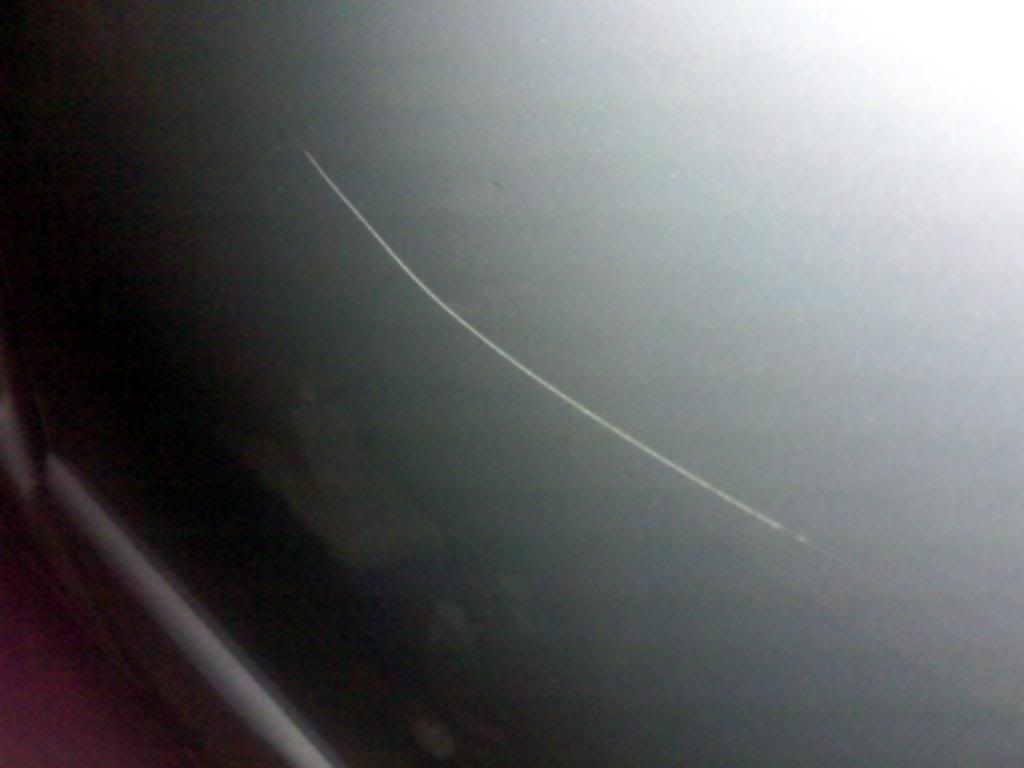
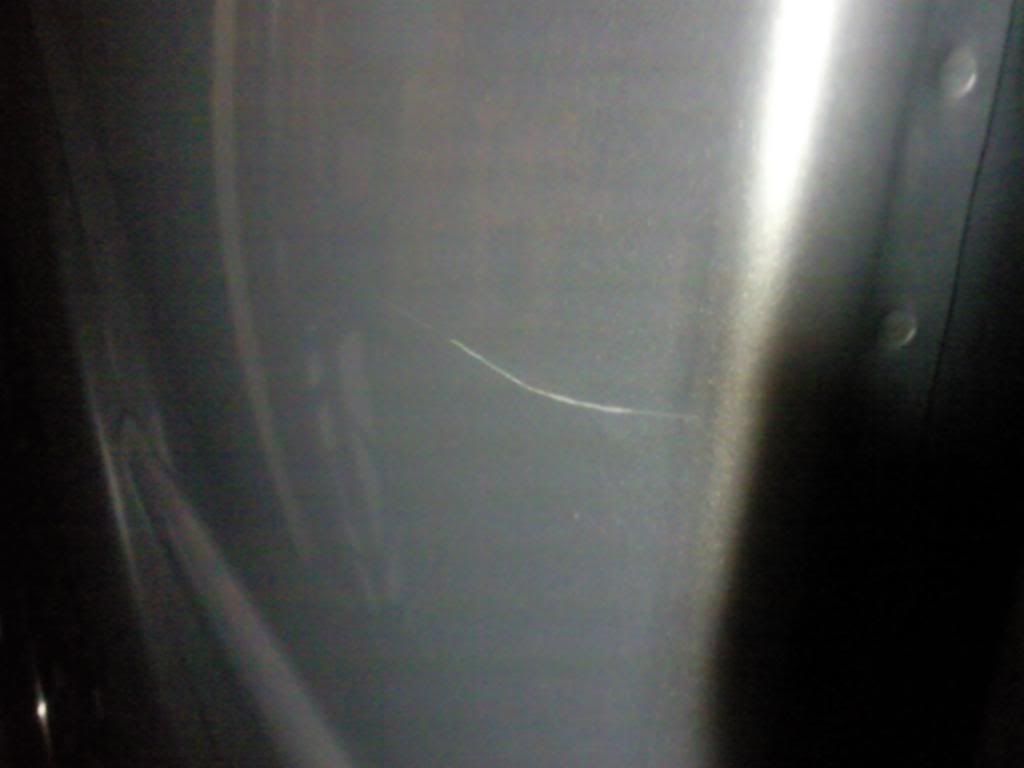
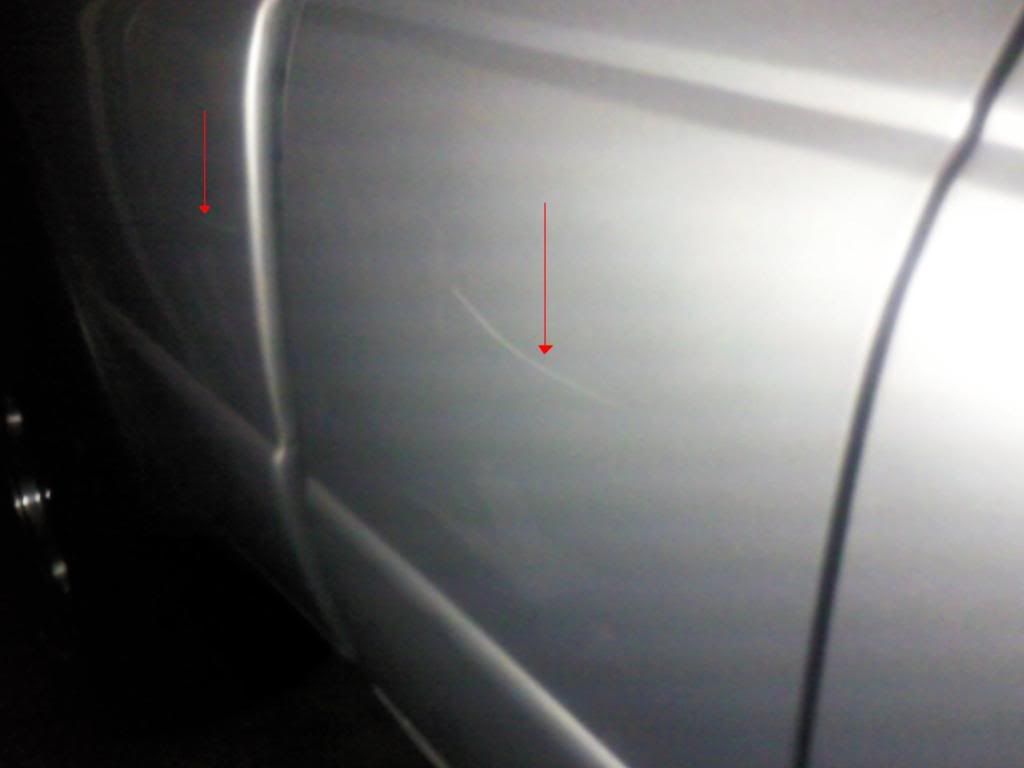
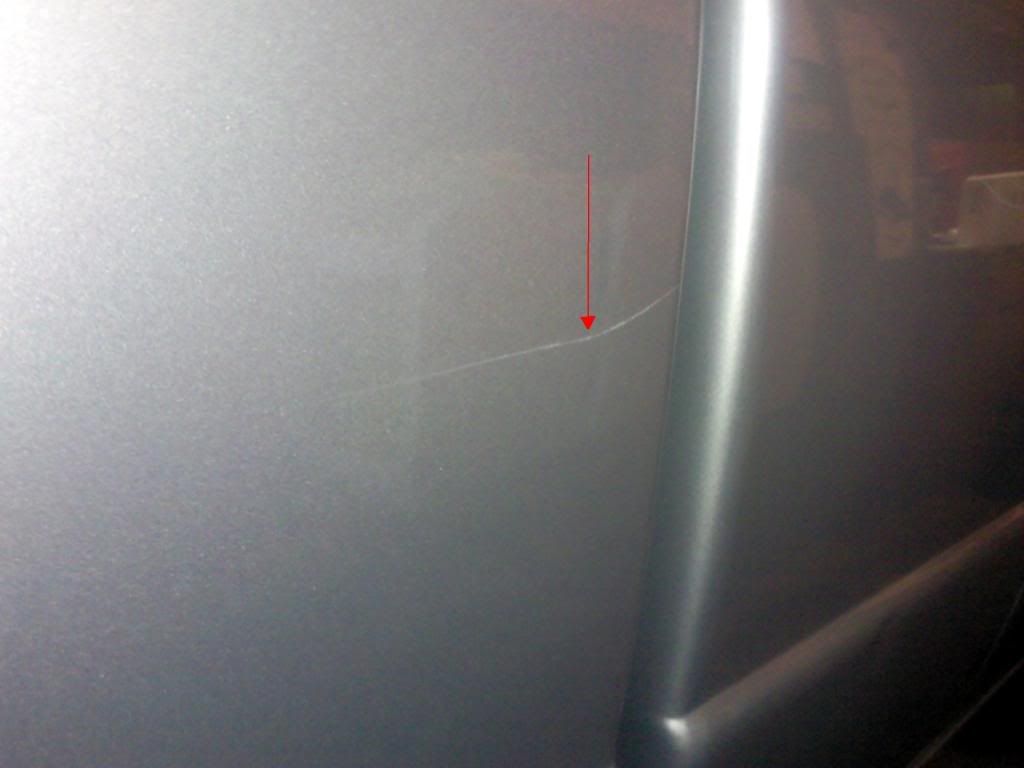
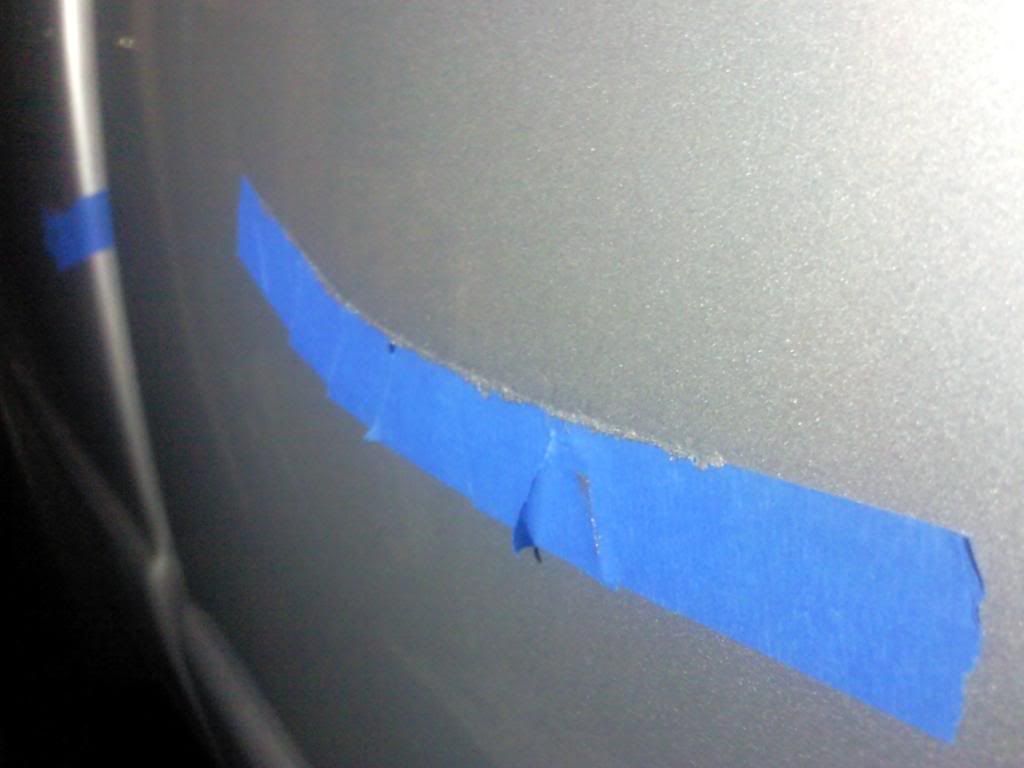
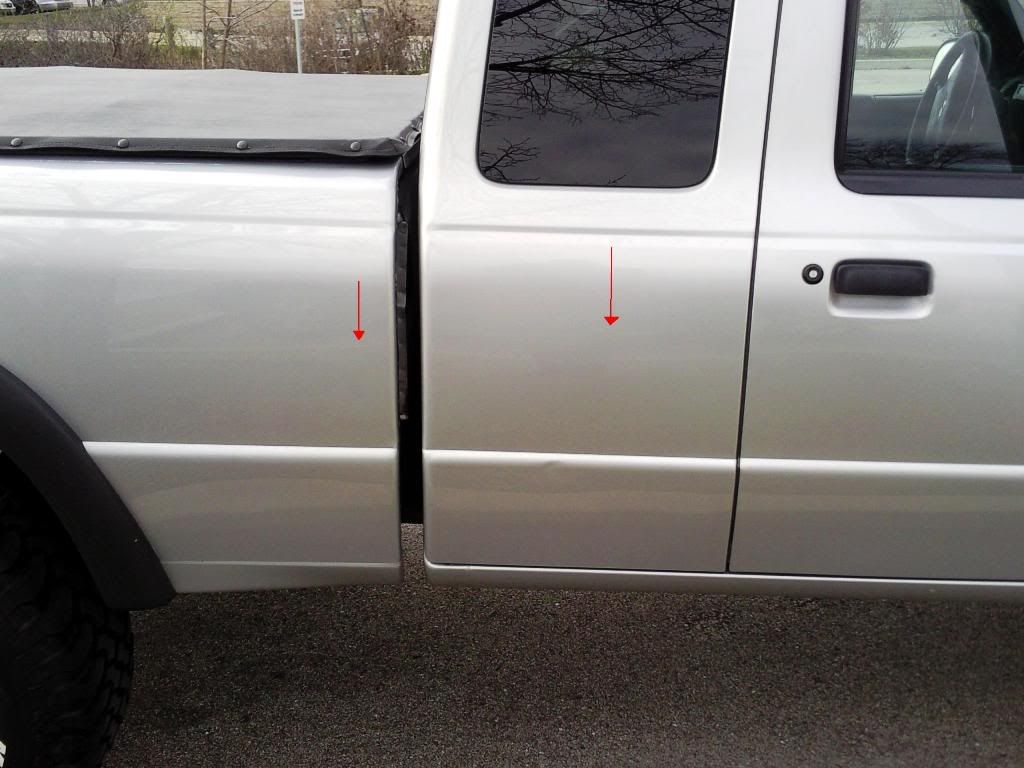
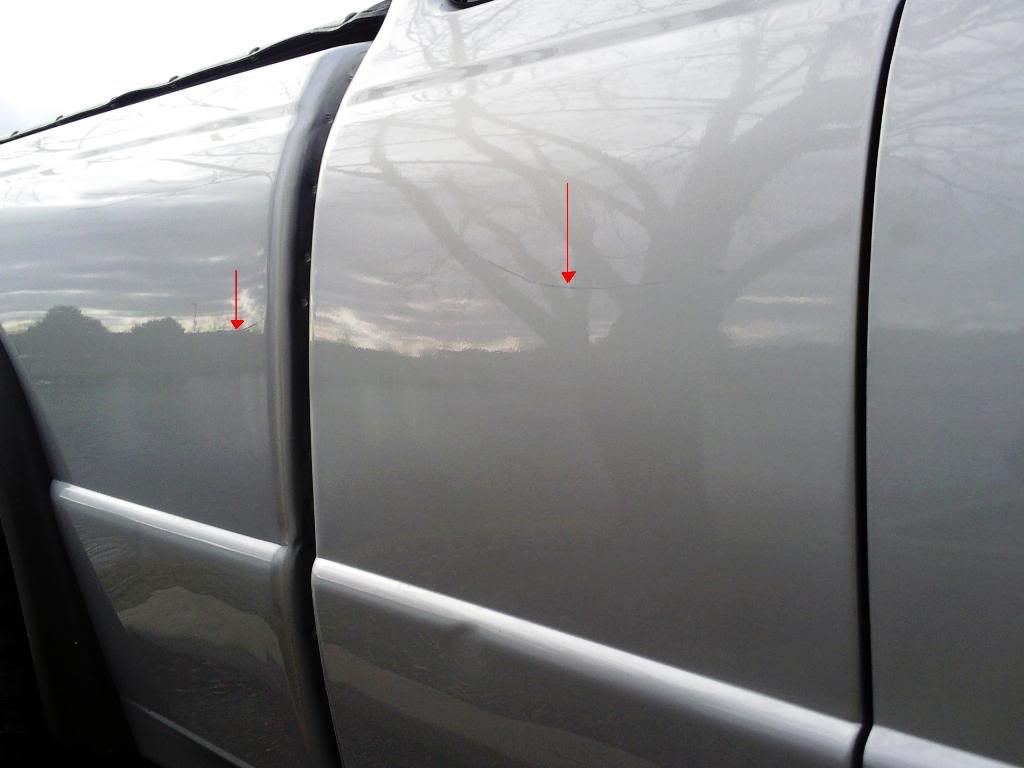
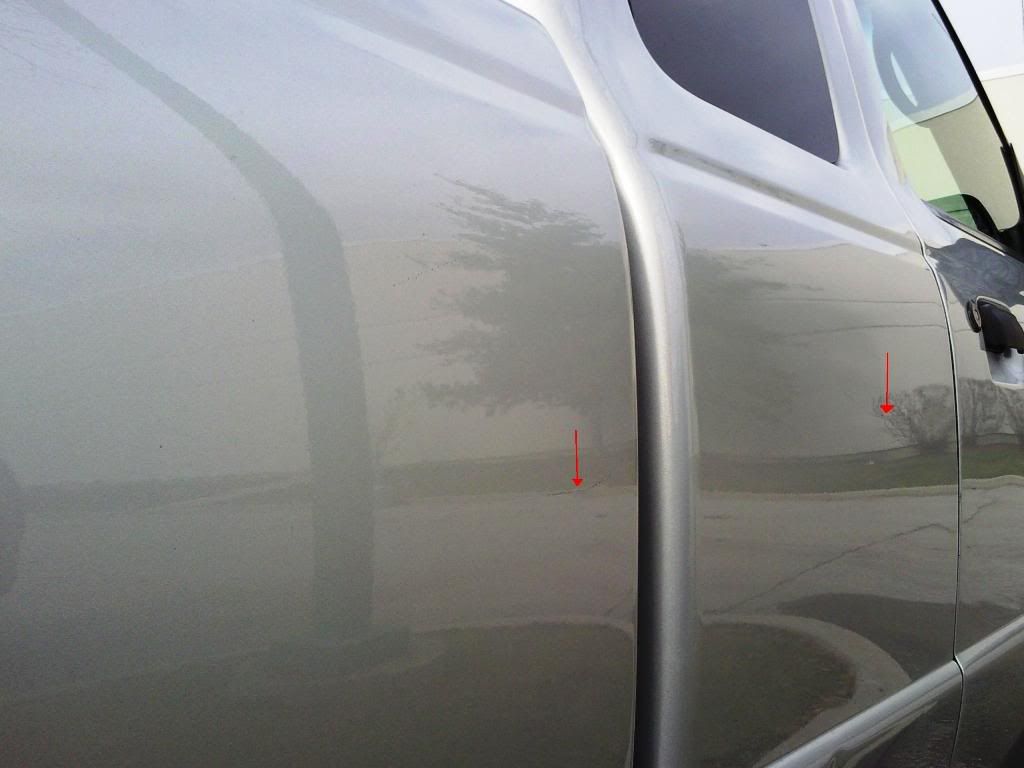
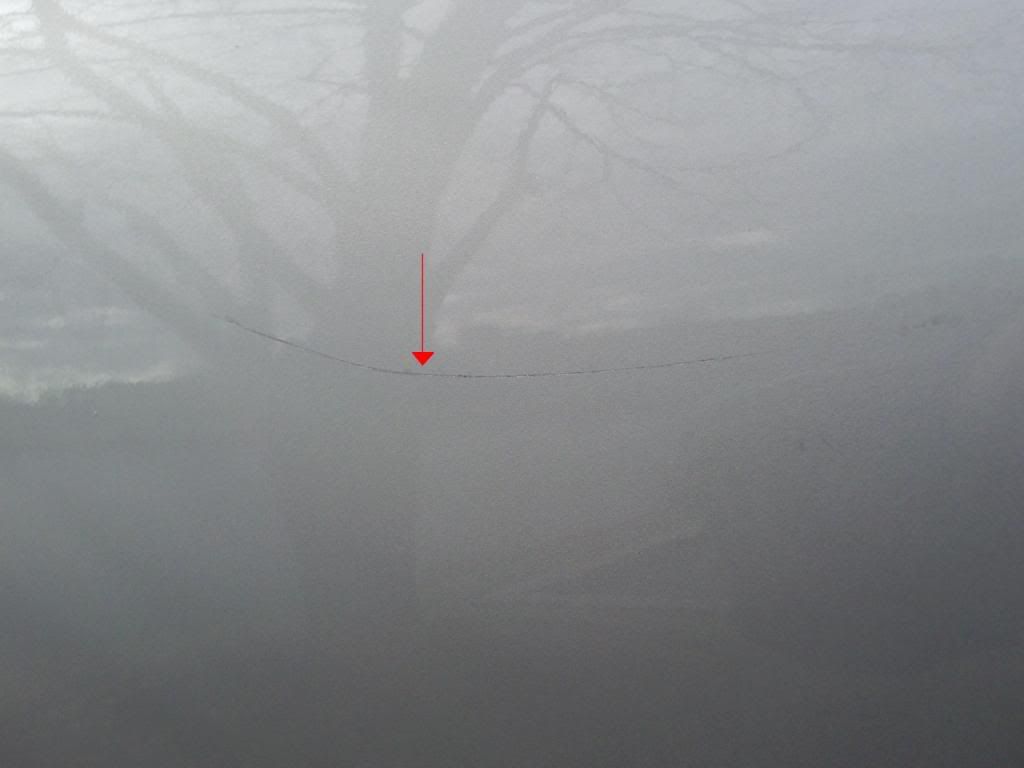
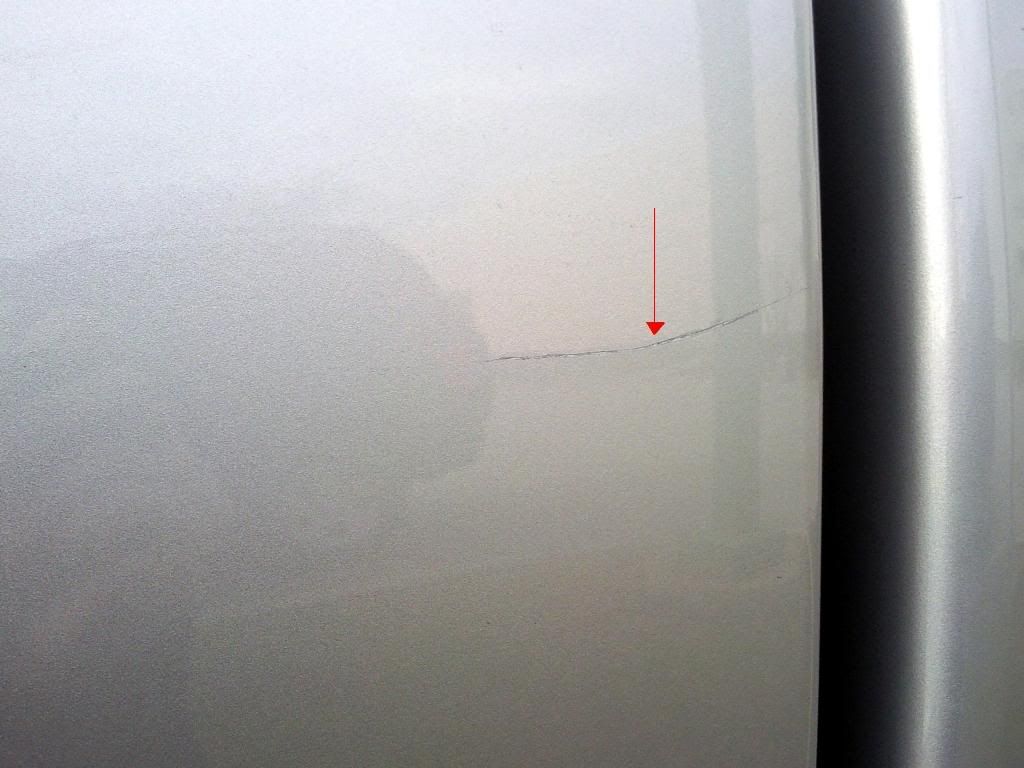
    My question is, when filling a scratch with touch up paint, I have read that I still need put some clear coat on it.... I have 4 longer scratches that I would like to experiment on my truck. The truck is metallic silver so I know the results will not be as good, but I hope they look better then it looks now. I know a good 2-3 layers of paint might workout well and then level it out with clear? or should I fill the scratch completely with paint, sand it down a little bit, and use 1-2 thin coats of clear. I'm comfortable with sanding, I just never filled anything but rock chips before... Thanks for the help (I'll document my process as soon as I can get to it)
    Generally here's what I do for rock chips:
    -I cut out sand paper with a whole punch and place the little circles on a pencil and clean up the area with that
    -using a toothpick I fill the chip in layers (waiting between layers to dry)
    -once dry I sand the chips even with the body and compound out the sanding marks

    Rafal

  • #2
    Re: fixing a scratch

    there are kits... I think Langka ( don't quote me ) that I believe don't require a clear. Check it out; if not, can use the same process as chips. If clear is needed, I'd take the level-with-clear approach myself. Give some pics when you can.

    Comment


    • #3
      Re: fixing a scratch

      I just don't want to spend more money, the previous order left me some touch up paint (even though it doesn't look like he used it anywhere) from here http://www.paintscratch.com/ and he left me the clearcoat as well... so I was just wondering thanks!

      Comment


      • #4
        Re: fixing a scratch

        Rafal, you sound like you're pretty adept at fixing rock chips - your process sounds excellent and we've seen it used in the past to great effect - so working a scratch is very much the same thing. While finishing off with a little clear is the best approach overall, it does complicate the process just a bit. Filling with color and then sanding level before applying the clear may leave you with a less than desirable result, although perhaps not so noticeable on silver. As long as the color touch up matches perfectly, you should be fine just building your last layers with clear and then leveling and compounding that.
        Michael Stoops
        Senior Global Product & Training Specialist | Meguiar's Inc.

        Remember, this hobby is supposed to be your therapy, not the reason you need therapy.

        Comment


        • #5
          Re: fixing a scratch

          Originally posted by Michael Stoops View Post
          Rafal, you sound like you're pretty adept at fixing rock chips - your process sounds excellent and we've seen it used in the past to great effect - so working a scratch is very much the same thing. While finishing off with a little clear is the best approach overall, it does complicate the process just a bit. Filling with color and then sanding level before applying the clear may leave you with a less than desirable result, although perhaps not so noticeable on silver. As long as the color touch up matches perfectly, you should be fine just building your last layers with clear and then leveling and compounding that.
          Thanks for the kind words, I guess JomboB5 made me think a little bit and I always wanted to dry Dr. Colorchip so I placed an order, lol, I might do a couple scratches this way, and a couple with Dr. Colorchip and compare the 2... might be a good experiment.

          Rafal

          Comment


          • #6
            Re: fixing a scratch

            OK, so as proven Dr. Colorchip does not work on scratches! I don't have pictures, but I put the paint on for 5 min, removed the smudges with the blending solution... pulled the paint out from the scratch, ok, needs longer curing time... did the same steps, waited 1 hour, pulled the paint out... directions say can be left on for 2 hours... so I did that.. still pulled the paint out from the scratch. SO i'm thinking, I can let this sit for 2+ hours and wetsanded it flat, but then what would be the point of using it? so I don't like how it works on scracthes. I have a few test vehicles lined up to see how it works on silver paint with actual rock chips.... in the meantime here are the pics of how I fixed the scratches the only way I know how:

            Scratches were prepped with a little sanding and degreasing.
            Here's what I'm working with:
            Scratch #1:


            Scratch #2:


            Scratch #1 and #2 (I put the arrows in because of the low quality of the pics... sorry)


            Scratches filled (they were taped on both sides, but I took the top layer off to show the "mound of paint"):
            #1:


            #2:


            Finished (the paint is silver so the scratches will be noticible, and I knew that, I just wanted to get something in there to prevent rust.... but it ended up looking a little better then I expected because from about 4 feet away or more, you can't see them at all at any angle! The picture were taken from only a couple feet away)

            #1 and #2:


            #1:


            #2:


            I will post more pics after I get the test vehicles done with Dr. Colorchip later this week.

            Rafal

            Comment


            • #7
              Re: fixing a scratch

              I found Dr. Colorchip to work quite well. Here's some pics where my garage door didn't open all the way and got my spoiler.
              Here's before:


              and here's is after, but before polishing and wax:

              Comment


              • #8
                Re: fixing a scratch

                Fascinating. I never thought to use painters tape to line up next to scratches.

                In cases where the scratch is not down to the base coat but you don't want to remove surrounding clearcoat, do you normally just fill it with only clear coat with that method?

                Comment


                • #9
                  Re: fixing a scratch

                  Originally posted by xantonin View Post
                  Fascinating. I never thought to use painters tape to line up next to scratches.

                  In cases where the scratch is not down to the base coat but you don't want to remove surrounding clearcoat, do you normally just fill it with only clear coat with that method?
                  generally I carefully tape around the entire scratch (top and bottom) and get as close the edge as possible. If the scratch is in the clear coat then you buff it our obviously... but if it past the clear, but you can still see color in it after you clean it... it's really your call at that point. I think I would still fill it once, with paint, and then top off with clear

                  Comment


                  • #10
                    Re: fixing a scratch

                    Originally posted by zeegs View Post
                    I found Dr. Colorchip to work quite well. Here's some pics where my garage door didn't open all the way and got my spoiler.
                    Here's before:


                    and here's is after, but before polishing and wax:
                    those look great, but I think the main difference between yours and what I have is the thin length and sharpness of the scratch. I'm thinking maybe yours worked so well because the scratches you had were more of a u shape so the scratch was wider at the base, where mine was more a v with a very fine base and thus it was hard for the paint to stick... either way great job on fixing them!

                    Rafal

                    Comment


                    • #11
                      Re: fixing a scratch

                      Mine was basically the center of my spoiler, my truck only has a few inches of clearence and I have never checked to make sure the garage door opened fully, this time it didn't. Took me half the day to get the tracks lined up and work properly again, but the scratches only took a few minutes, with time for drying and removing the smeared paint.

                      Comment

                      Your Privacy Choices
                      Working...
                      X