• If this is your first visit, be sure to check out the FAQ by clicking the link above. You may have to register before you can post: click the register link above to proceed. To start viewing messages, select the forum that you want to visit from the selection below.

Announcement

Collapse
No announcement yet.

How to wetsand properly?

Collapse
X
 
  • Filter
  • Time
  • Show
Clear All
new posts

  • How to wetsand properly?

    Hi to you all. This is my first post (thread) by the way. I am from Singapore (Malaysia)

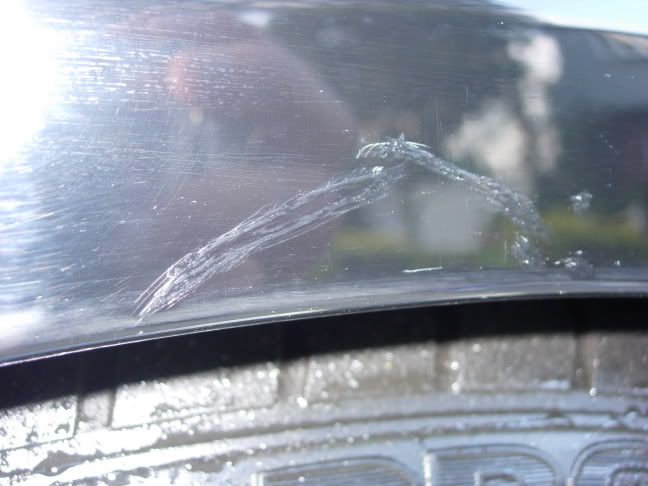
    I recently accidentally scratched the edge of my car bumper and paints came off. I touched up the area with some touch up paint bought from local car shops (Autobacs).

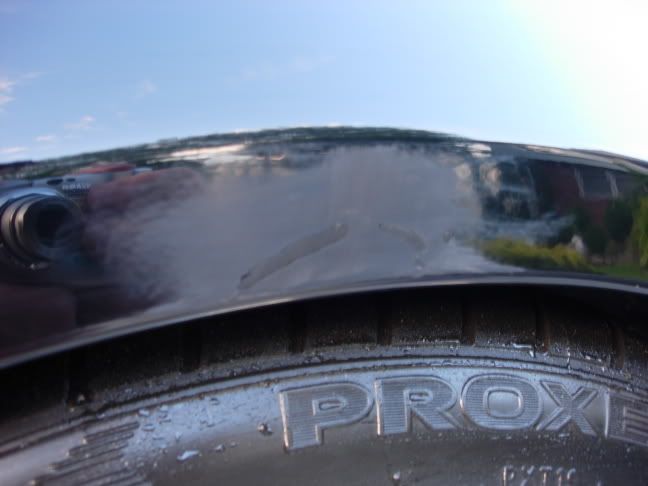
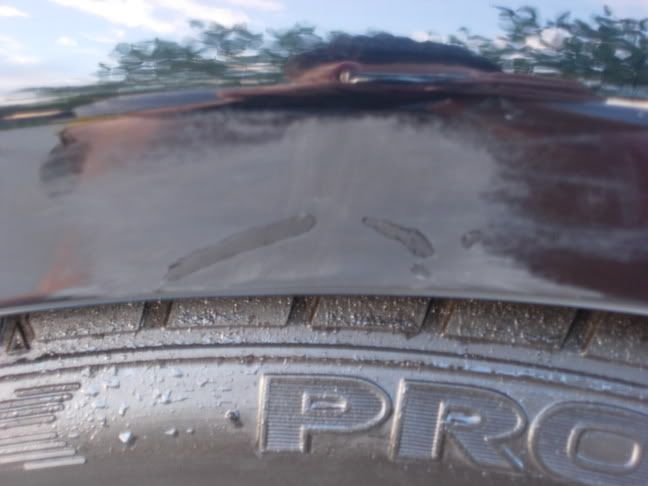
    Now the edge is ok to look at from a distance but upon a closer look, there r blobs... It is like the touched-up area is higher than the base paint of the car. I hope you get what I mean. So the next step is to wetsand it down?

    I cant get hold of Meguiar's sanding paper here, but still I would be able to source at least a 2000-grit sanding paper. Basically I just wetsand it to be same level as the base paint? After that just apply a coat of polish and then clean it???

    Any advice... Thanks!

  • #2
    Re: How to wetsand properly?

    heres a few tips

    Hand Sanding Techniques (http://meguiarsonline.com/forums/showthread.php?t=27410) Here's a few tips for how to use a backing pad with your choice of sandpaper when hand sanding. For this article we'll be using #2500 Unigrit® Finishing Papers (http://www.meguiarsdirect.com/product_detail.asp?T1=MEG+UNIGRIT+2500)

    Comment


    • #3
      Re: How to wetsand properly?

      The scratch is basically deep down to the plastic... I covered it up using touch up paint. Will wetsanding really make it close to workshop finish???

      Comment


      • #4
        Re: How to wetsand properly?

        I would recommend practicing wetsanding on a scrap panel first. I had a bad experience my first time

        Comment


        • #5
          Re: How to wetsand properly?

          I would try to wet-sand on another car first

          How was ur first experience like?

          Comment


          • #6
            Re: How to wetsand properly?

            Process:

            1. Confirm that scratch is too deep to be polished out (If your finger nails gets caught in it, it is too deep.

            2. I would then clay the area and follow up with rubbin alcohol over the scratch to remove any possible wax or contaminates the clay may have missed. When you clay, be sure to do an area larger then the scratch. If you have a PC for polishing, I would clay a 1' x 1' area. If you are going to polish by hand, you can clay maybe 4" or so all around the scratch. Polishing by hand will be a chore!

            3. After alcohol has evaporated, use a match stick or toothpick, or fine fine paint brush (Not the one included with the T/U paint) and fill in the scratch. The less you can put into the scratch the better. Try to do several light fills as opposed to one thick one. Continue filling until the T/U paint is just slightly above the level of the factory paint. Allow a few days to dry. One day will probably be enough, but IMHO the more the better.

            4. Soak one sheet of 2000 grit, one of 2500 and one sheet of 3000 Grit wet/dry sandpaper (Unigrit preferred) in a small bucket of water with a drop or 2 of car wash soap. Allow to soak for at least 20-30 minutes (Some let it soak overnight). During this time, prepare a spray bottle of water mixed with a few drops of car wash soap. The soap adds to the lubricity.

            5. Start with 3000 grit wrapped around a sanding block or even a high density foam pad would work. The idea is that you want uniform pressure across the entire sanding surface. Using your hand will yield in waves cauise by the surface variations in your fingers/hand. I bought a 3M rubber sanding squegee that was like $1 or $2. It is about the size of a credit card and as thick as maybe 1/8" or so.

            6. Use your spray bottle to spray the area you are about to sand. The more water the better. Using the 3000 grit around the squegee, sand the t/u paint in one direction. I believe I tried focusing just on the t/u paint first until it got close to level with the factory paint. Once it was close, I sanded perpendicular to the scratch. Be sure to constantly dip into the soaking bucket and continuously spray the area you are sanding. KEEP IT WET!!!

            7. If 3000 grit is not leveling enough, move to 2500 or 2000 to level and then 3000 grit to finish. ALWAYS finish with the highest grit possible. This makes polishing SOOOOOOOOOOOOO much easier. If you are polishing by hand, you may want to see if they have 3500 or 4000 grit.

            8. You'll be able to see when the paint is level because the sanded/dull area will be uniform.

            9. CHECK THE PROGRESS OFTEN!!! To check the progress, you want to dry the area with a MF towel and inspect. DO NOT GO TOOOOOOO FAR!!! There comes a point where you may have to settle on it not being perfect. Once the surface is flat and uniform, you are done!

            10. Now you will need your polishes. By hand, I believe Meguires Scratch X works well to remove 3000 grit sanding marks. By machine, use a coarse polish with a polishing pad and follow up with a fine polish and finsihing pad! I normally go right for the Menzerna PG on a cutting pad, then Menzerna Intense Polish on a polishing pad....then Final PolishII on a finishing pad. I recently invested in Menzerna SIP and PO106FF polishes which is all that is needed for this, but may be pricey for those of you that don't do a lot of detailing.

            11. Seal with your favorite wax or sealant!

            Pictures below:

            I fixed a nice gash on my fender! here are some pics. Unfortunately no before's of the scratch before I touched it up.

            Post Touch Up - Pre Wet Sanding

            This image has been resized. Click this bar to view the full image.

            This image has been resized. Click this bar to view the full image.

            This image has been resized. Click this bar to view the full image.


            During Wetsanding - Used Meguires UNIGRIT wet/dry - 2000 grit followed by 3000 grit

            This image has been resized. Click this bar to view the full image.

            This image has been resized. Click this bar to view the full image.

            This image has been resized. Click this bar to view the full image.


            After 3000K and polishing with Cyclo and Menzerna polishes (IP followed by FPII)
            This image has been resized. Click this bar to view the full image.

            This image has been resized. Click this bar to view the full image.

            This image has been resized. Click this bar to view the full image.

            http://www.fjcruiserforums.com/forum...step-step.html

            Comment


            • #7
              Re: How to wetsand properly?

              I will try to get the finest sandpaper later after work... Thanks man...

              Comment


              • #8
                Re: How to wetsand properly?

                Originally posted by Shingkyo View Post
                I would try to wet-sand on another car first

                How was ur first experience like?
                my first experience was me looking at primer in a matter of seconds

                you really need to know what your doing. do you have a rotary buffer too?

                Comment

                Your Privacy Choices
                Working...
                X