• If this is your first visit, be sure to check out the FAQ by clicking the link above. You may have to register before you can post: click the register link above to proceed. To start viewing messages, select the forum that you want to visit from the selection below.

Announcement

Collapse
No announcement yet.

Perfect Clarity Headlight Restoration Kit

Collapse
X
 
  • Filter
  • Time
  • Show
Clear All
new posts

  • #31
    Re: Perfect Clarity Headlight Restoration Kit

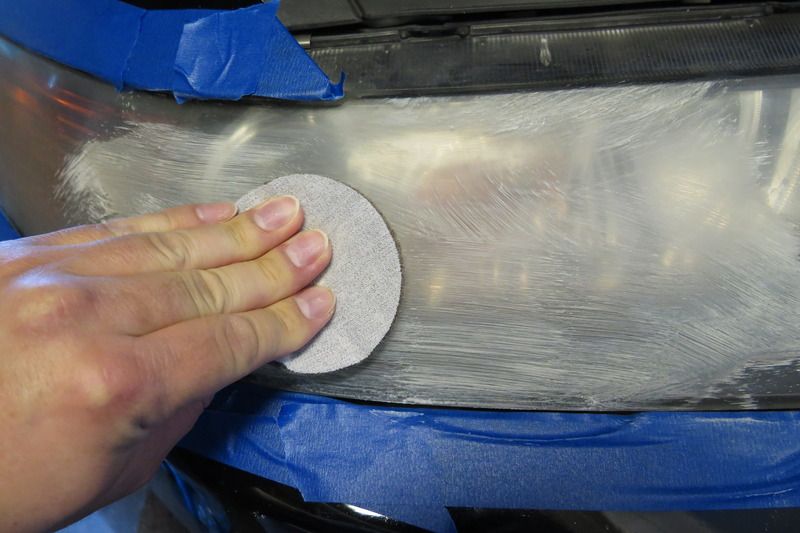
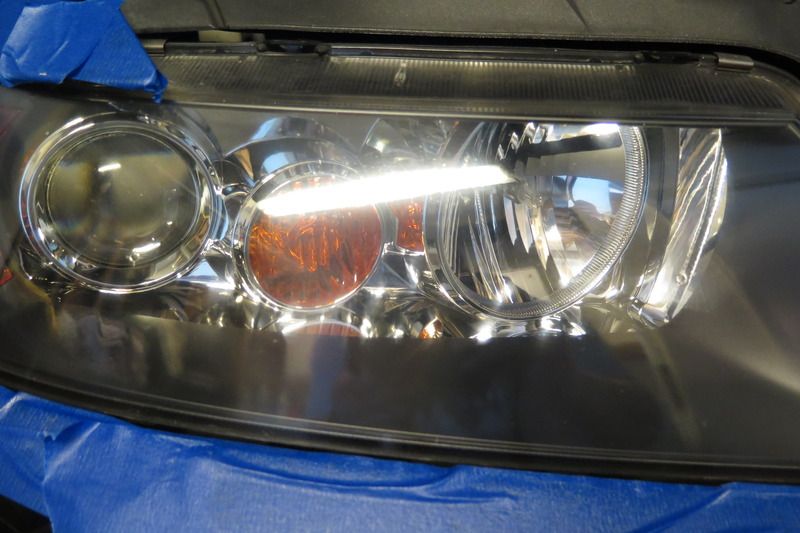
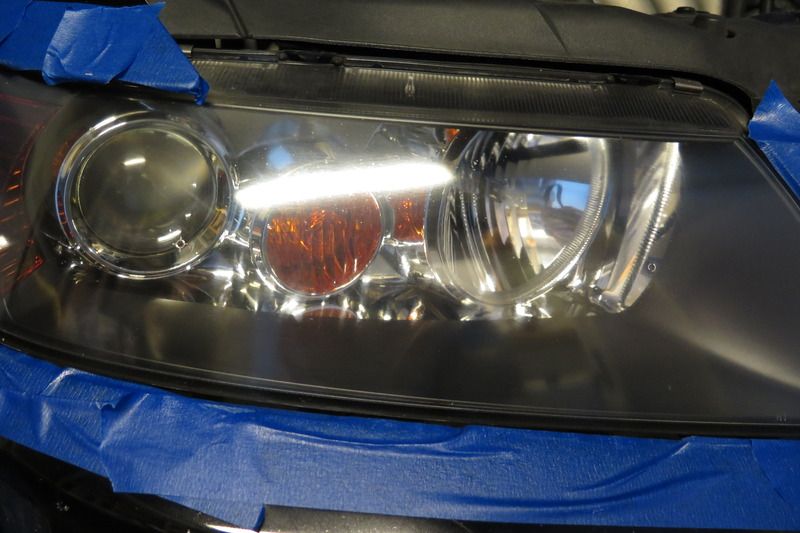
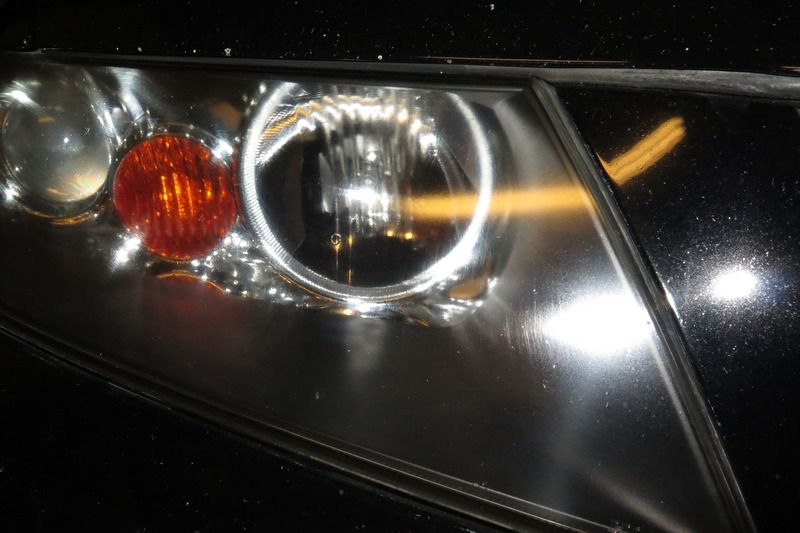
    Check out Art's video. Check out around 8:40 min on the comment about sanding. But this is a nice simple 2 step process.

    99 Grand Prix
    02 Camaro SS

    Comment


    • #32
      Re: Perfect Clarity Headlight Restoration Kit

      My brother just picked this up at Autozone. Price here is $24.99. Was expecting the price of $19.99.
      99 Grand Prix
      02 Camaro SS

      Comment


      • #33
        Welcome to California. Lmao.

        Comment


        • #34
          Re: Perfect Clarity Headlight Restoration Kit

          I have 2 questions about this product.

          1st question is can I use my Griots 3 inch dual action polisher to clean the headlight with the compound. Or is the process to rub in one direction.

          2nd question is I am In Northern NJ and a friend needs to have his headlight done. It has been averaging around 25* F here as a high temperature. I have no garage to work in. What is the absolute minimum temperature to apply the sealant?

          I purchased the product at Advance Auto today.
          Ed

          Comment


          • #35
            From what I understand it shouldn't be used with a DA polisher. It can be used with a drill attachment such as the DA Power System, but not not recommended with a DA.

            Not sure about temp.

            Comment


            • #36
              Re: Perfect Clarity Headlight Restoration Kit

              but DA power system is a dual action polishing tool, so i don't see why you can't use a DA polisher

              Comment


              • #37
                Re: Perfect Clarity Headlight Restoration Kit

                By all means, you can indeed use the scuff pad on a DA provided you have a 3" backing plate for your DA. We don't recommend using the liquid with a typical foam polishing pad as it is really engineered to use with a scuff pad of this aggressiveness. What you never want to do is polish out the scuff marks, or sanding marks if you choose that option instead, before applying the UV spray coating. That spray coating needs the scuffed surface in order to "bite" and hold. A totally smooth surface does not offer this "bite" and you'll have problems.

                We recommend using this product above 55F for best results, which is pretty much the same as any typical aerosol spray paint, to which this has some similarities (it's essentially a high UV screening clear coat, after all!).
                Michael Stoops
                Senior Global Product & Training Specialist | Meguiar's Inc.

                Remember, this hobby is supposed to be your therapy, not the reason you need therapy.

                Comment


                • #38
                  Re: Perfect Clarity Headlight Restoration Kit

                  Mike,

                  Thanks for the information on the DA. I did notice on tha package after that it did say that it can be used on DA. As far as the temperature I am going to have to wait as it is only going to be a high of 50*F. This week but that will include rain. My only other option is to remove the lenses and bring them in the basement and work on them there. It might be a better option as I can let them cure.

                  If if I bring them in and do it in the basement can I use heat lamps to help cure them?

                  Thanks for the input

                  Comment


                  • #39
                    Re: Perfect Clarity Headlight Restoration Kit

                    This product looks pretty sweet from the video I watched on YT, I have a question though. My headlights are in bad shape, but it's not normally what I see. I'll post a picture and maybe someone here can comment on if this product would work for me.


                    Both headlights look like this, if I run my hands across them I can feel whatever it is. It doesn't seem to be affecting my visibility at all, or not nearly as much as hazy headlights. But, I hate how it looks and would like to correct it. This product looks great but I'm not even sure what exactly is wrong with my headlights.

                    Any ideas or suggestions here would be great.

                    Comment


                    • #40
                      Re: Perfect Clarity Headlight Restoration Kit

                      Just tried this on my 2004 Acura TSX. Needless to say my headlights were pretty bad....


                      After some buffing......


                      After the 1st coat....


                      After 2nd coat....


                      I noticed that it had some swirl marks in it and it seemed that the 1st coat came out better than the 2nd. Maybe I didn't scrub enough, not enough of the spray, too much spray???


                      Overall, I am VERY IMPRESSED with this product! So easy to apply and all for $20!!!!! You can't beat that!

                      Comment


                      • #41
                        Re: Perfect Clarity Headlight Restoration Kit

                        Tried this product today on my wife's Mercedes GL450 and made an interesting observation that may save some headache for many in the future. During Step 2 sprayed both headlights with 2 coats of clear protectant (as instructed) and they looked absolutely fantastic. Then I thought about adding the 3rd coat just to make UV protection even stronger for our brutal California sunlight. After applying the 3rd coat to one of the headlights all of a sudden it lost its clarity. It was not foggy by any means but you could tell the difference between the two headlights and the one with 2 coats looked much clearer.

                        I ended up stripping the coating from one of the sides using IPA and sand paper and started the process from the very beginning. At the end applied two coats only and everything looks even now. Now sure why applying the 3rd coat would diminish the clarity but this is what happened on my car.

                        Hope this helps someone.

                        Alex

                        Comment


                        • #42
                          Re: Perfect Clarity Headlight Restoration Kit

                          Thanks for the feedback, Alex. It may well be the time you allowed between the two coats and the third on that one lens, or the amount of product you sprayed the third time. This product seems to prefer a slightly "wet" coat rather than a light "dusting" coat - it self levels better with a slightly heavier, wetter coat. In any event, it's great that you were able to sort the issue and end up with the sort of finish you were looking for in the end.
                          Michael Stoops
                          Senior Global Product & Training Specialist | Meguiar's Inc.

                          Remember, this hobby is supposed to be your therapy, not the reason you need therapy.

                          Comment


                          • #43
                            Re: Perfect Clarity Headlight Restoration Kit

                            Hey mike,

                            I love the results I got with this kit... I have done 2 sets of lights and have some clear coat and abrasive liquid left over, but the sanding pads are gone (used a da with a 3" backing plate and interface pad).

                            What color scotch brite pad can I use with this system so I don't waste the leftover product?
                            GO GREEN WASH N' WAX 119 Morton St Yuba City, CA 95991 (530) 301-5300
                            http://www.yubacitydetailing.com http://www.google.com/+yubacitydetailing http://www.youtube.com/yubacitydetailing

                            Comment


                            • #44
                              Re: Perfect Clarity Headlight Restoration Kit

                              I posted my picture a page back and have a question. I bought the kit and just finished up. After applying the paste and buffing it off, the weird oxidation looked pretty much the same. I sprayed the UV coat and it instantly got a lot better. After applying the 2nd coat it looked even better still. Now the actual clarity of my headlight looks 95% better, but I'm still seeing the oxidation spots, not nearly as bad though. I'm wondering if I just didn't scrub enough. Since I'm not exactly sure even what the spots are I don't know if they can ever come out. I will post an update picture later, but my question is. Let's say I want to re-do this process from the start. What's the best way to strip the UV layer so I can start over? I'm VERY HAPPY with the results amazed even, but the OCD detailer in me is king of wiggin out when I look at them at the right angle and see the spots still there. Dunno if I can ever get them 100% removed, or at least to an unnoticeable level but I want to try. I noticed a few posts back someone mentioning IPA + sand paper, what grit should I use? I have Menzerna's Top Inspector which should work well as an IPA. Need to go get some sand paper though

                              To anyone reading this, this kit is so easy to use, buffing the paste off with a MF towel was probably the most involved spot. Dunno if I used too much or waited too long, but I ended up after a few minutes using a damn MF to get to remaining solution off.

                              Comment


                              • #45
                                Re: Perfect Clarity Headlight Restoration Kit

                                Are you sure the issue is not in the inside?

                                You could start over with step 1. That will get it off.
                                99 Grand Prix
                                02 Camaro SS

                                Comment

                                Working...
                                X
                                gtag('config', 'UA-161993-8');