• If this is your first visit, be sure to check out the FAQ by clicking the link above. You may have to register before you can post: click the register link above to proceed. To start viewing messages, select the forum that you want to visit from the selection below.

Announcement

Collapse
No announcement yet.

Buffing single stage cured paint

Collapse
X
 
  • Filter
  • Time
  • Show
Clear All
new posts

  • Buffing single stage cured paint

    Hello

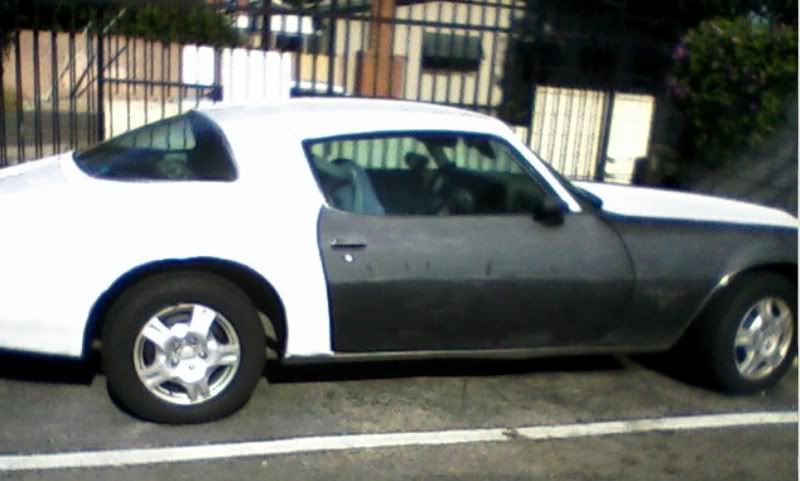
    Today I decided to detail my old Vectra for the first time
    It was repainted many many times since manufactured in 1995, and my guess that it has a pretty thick layer of paint & prime (havent measured that though)

    Paint color is dark blue, had severe cobwebs, many random light scratches, orange peel (although the paint is soft), and lost most of it's gloss already (looks pretty dull)
    Last paint job was done 6 months ago, so I'm pretty sure it's cured

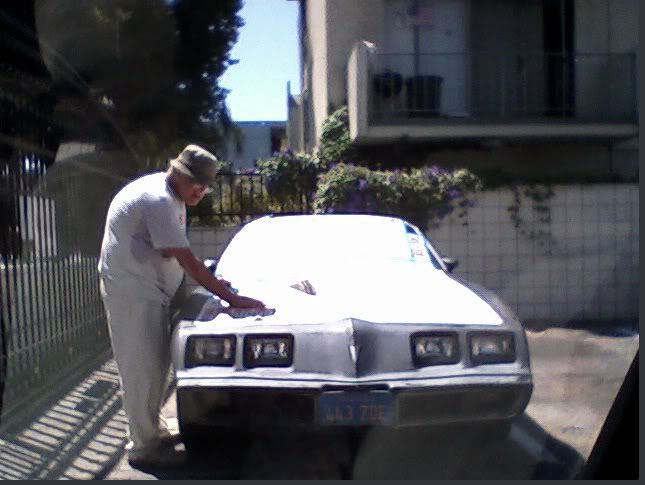
    So, washed my car, dried it, clayed it with a mild clay bar and last touch, then started buffing...

    I started with a foam cutting pad, using #84, and a rotary buffer at speed 3.5
    I applied much pressure, and went through different passes in overlapping lines... Then I noticed that this combination was actually doing nothing
    However, the pad was colored in blue, so I knew that my car uses a single stage paint

    So, I decided to move up in the scale, and again, using a cutting pad, and #85, and some aggressive buffing
    I noticed a very slight enhancement

    So I finally moved to my wool cutting pad using #85, and started to buff aggressively...

    Only with that combination, I started to see some noticeable difference
    Cobwebs became fewer, and the paint started to shine again

    I continued with this combination for the rest of the hood, and the hood was somehow shinning (Had to reapply the compound to the pad for atleast 6 times using those X marks), with some cobwebs still existing, and the same orange peel appearance (although the paint was very soft and polished)

    I also noticed that the process left no swirl marks at all.... Although I expected from the wool pad to leave much

    Next, I started to go down the scale again to add more shine
    So I used a polishing pad, with #84... Which actually added nothing to what I already had
    So I knew that this is the best I can have


    Plenty of questions in my mind...

    1. Is claying really a mandatory step ?? The clay bar is somehow expensive, and the paint was soft before and after claying, and I really didnt notice any difference after claying, and the clay bar wasnt collecting any dirt
    2. Why didn't the wool pad leave any swirl marks ? I was using much pressure, and was moving slowly using #85
    3. Why is there still some cobwebs, although I used this aggressive combination... Do I need to move to #95 or #105 ??
    4. I always hear that single stage paints are easier to buff... Why #85 alone didnt do the job ?
    5. Why did the wool pad added gloss to the paint, rather than cutting through the paint ?
    6. Why I couldnt get some extra shine when I moved down the scale again to #84 and even #83?
    7. That stupid orange peel effect... I can see it but I can never feel it with my hand... The paint is really soft... Any way to remove it ?
    8. How to clean those colored pads ? I thought of using some thinner... Would that hurt the pad ?
    9. I'm consuming too much product during the process... Buffing only the hood needs at least 6 X marks... I reapply the product when I see that the old application is almost dry (both the hood and the pad), and I know that dry buffing is dangerous, so I reapply again... Is this normal ?? Is there a way to cut some costs here ?
    10. The surface was somehow hot when I started the process... Did that affect anything ?

    Sorry for the too much questions
    It's just that I want to understand everything and build my technique

    Thanks in advance !

  • #2
    Re: Buffing single stage cured paint

    You are in a hot/sunny environment, I would expect your paint to be a bit dry. (even though new, hard to say the quality). The dry paint will absorb more product. Although 6 X's for a hood doesnt seem too out of line.

    Not sure about the use of the wool pad/#84/#85, etc; have to let someone experienced chime in on those.

    But I would try to use a lot of polishing oils in the future when the paint is fixed up... something like #80 which is a mild cleaner/polish, or a pure polish like #7/DC Polish, to keep the paint moisturized. Then wax after of course.
    2017 Subaru WRX Premium - WR Blue

    Comment


    • #3
      Re: Buffing single stage cured paint

      Originally posted by asalah View Post
      Plenty of questions in my mind...

      1. Is claying really a mandatory step ?? The clay bar is somehow expensive, and the paint was soft before and after claying, and I really didnt notice any difference after claying, and the clay bar wasnt collecting any dirt
      Claying is really only mandatory if the finish needs it. While we would expect it to in your area, you would know better since you can get your hands on the car and we can't from here. If the clay wasn't showing anything being picked up, then that's a pretty indicator that you didn't much of a surface contamination issue


      Originally posted by asalah View Post
      2. Why didn't the wool pad leave any swirl marks ? I was using much pressure, and was moving slowly using #85
      Normally we would recommend only light to moderate pressure when using any pad on a rotary. Even so, we would expect to find some level of buffer swirl with M84/M85 on a wool pad. You mentioned a speed of 3.5 and we assume that's the dial setting of the buffer. Do you know what rpm this spins the buffer at? We would expect defect correction to happen in the 1400 rpm to 1800 rpm range, depending on the paint, pad, level of defect, operator skill, etc.


      Originally posted by asalah View Post
      3. Why is there still some cobwebs, although I used this aggressive combination... Do I need to move to #95 or #105 ??
      Even though this paint is single stage, it is quite possible that it's very hard. How large or small an area were you working on each time? You should be confining your work area to no more than 2' x 2' (60cm x 60cm)

      Originally posted by asalah View Post
      4. I always hear that single stage paints are easier to buff... Why #85 alone didnt do the job ?
      Generally speaking, they are. But that also assumes you're talking about an older type lacquer single stage paint, and not a modern catalyzed single stage. Also, we anticipate that the paints you're using in Egypt are quite a bit different than what we use here in the States. We know that paints used in Europe are quite a bit different than what's used here, and in Asia they are different still.


      Originally posted by asalah View Post
      5. Why did the wool pad added gloss to the paint, rather than cutting through the paint ?
      On some really hard paints you end up fairly easily smoothing out or almost burnishing the upper surface of the paint, yet you can't cut deep enough to remove the most severe defects. We've seen this first hand many times on very hard single stage white paint so we understand your frustration.


      Originally posted by asalah View Post
      6. Why I couldnt get some extra shine when I moved down the scale again to #84 and even #83?
      Depending on the quality of the paint and the quality of the paint job, it may require wet sanding in order to bring out the maximum gloss. Now, please understand that we are not suggesting you start wet sanding this car, just making an observation here.


      Originally posted by asalah View Post
      7. That stupid orange peel effect... I can see it but I can never feel it with my hand... The paint is really soft... Any way to remove it ?
      We assume that by "soft" here you mean smooth and silky and not what we generally mean by the word "soft". As we use the term here in the States, a soft paint is one that's very easy to correct - not the situation you're faced with at all. But as for the orange peel, you're right - you can't feel this very fine texture but it does detract from the appearance of the finish. The only way to effectively remove it is to wet sand and then rotary buff. But that takes us back to the earlier discussion - we are not recommending that you wet sand as it is a very advanced process and things can go bad on you very quickly. But if the orange peel is that bad it may be a huge reason why you're just not able to get the ultimate finish you're looking for. Very glossy paint with heavy orange peel just doesn't look good no matter what. If the texture of this orange peel is very fine (ie, the high and low spots are very closely spaced) then the paint is always going to look dull unless you do wet sand. Any chance we can see a picture or two of the finish?


      Originally posted by asalah View Post
      8. How to clean those colored pads ? I thought of using some thinner... Would that hurt the pad ?
      Soap and water is all you really need. Don't expect to remove 100% of the blue pigment that has been picked up, but you should be able to get most of it out.


      Originally posted by asalah View Post
      9. I'm consuming too much product during the process... Buffing only the hood needs at least 6 X marks... I reapply the product when I see that the old application is almost dry (both the hood and the pad), and I know that dry buffing is dangerous, so I reapply again... Is this normal ?? Is there a way to cut some costs here ?
      You may be consuming too much product, but we kind of doubt it. In your environment it may well be that the paint is very dried out and therefore you need more product in order to avoid having the paint just pull all the moisture out of the product. I've had that happen on badly dried out paint when using M105, and the end result was extreme frustration. I had to move to much wetter, more oily product - M80. It sounds as though in your case the M85 and paint get along OK, but we suspect the paint job isn't the best. Again, pictures will help tremendously. I can also tell you that I recently had the opportunity to work on an old Ferrari that spent the last several years in Kuwait and the paint was horribly cobweb swirled and very hard. And it was single stage. The car was shipped to California to be sold at auction and I was tasked with cleaning it up a bit. Unfortunately I only had 2 hours to work on it so it was quite a challenge. But the desert heat and lack of humidity did some definite damage to this paint, and the car had been beautifully restored just a few years ago. There was a photo album in the back seat documenting the entire restoration process, and the car was immaculate when finished. Then it was shipped to Kuwait and the desert started degrading the paint.


      Originally posted by asalah View Post
      10. The surface was somehow hot when I started the process... Did that affect anything ?
      Only in that it might have made the buffing process more tedious as hot dry air and a hot surface will conspire to dry out the compound. When that happens it becomes gummy and sticky, and can be very difficult to remove or almost impossible to use.

      OK, so where do you go from here? Get us some images if you can, but if the paint job is less than wonderful you may be at an impasse. Sometimes a painter will shoot the paint and call it a day. The peel is so tight and small in texture that reflections lack clarity and definition. While compounding can help to some degree, sometimes wet sanding is almost mandatory. Add to that the drying effects of your environment, the extreme level of cobwebs that have only served to "open" the paint even deeper down, and your expectations may have to be lowered.
      Michael Stoops
      Senior Global Product & Training Specialist | Meguiar's Inc.

      Remember, this hobby is supposed to be your therapy, not the reason you need therapy.

      Comment


      • #4
        Re: Buffing single stage cured paint

        Certified Car Crazy.......
        Good questions asalah!!!
        What a great post and follow up Maestro Stoops......!!!!!

        Comment


        • #5
          Re: Buffing single stage cured paint

          OK, thanks everybody for stopping here and trying to help

          Michael, thanks very much for the detailed explanation ! That was really helpful !
          I'll bring you some shots for the car tomorrow to show you the hood after buffing, and maybe one side of the car (left untouched)

          Btw, if it needs wet sanding then I will go for that (I already have meguiar's 1500 & 2500grit sanding papers)
          I'm starting a detailing business soon using Meguiar's products, and I need to prove to myself that I'm capable of covering all what it needs

          I guess that dealing with those dry/cheap paint will be part of my daily job, so I'll need to live with that

          Comment


          • #6
            Re: Buffing single stage cured paint

            Adding one crazy info I got today

            I measured the paint thickness for different points in the hood and the top of the car
            The gauge reads and average of 600microns (around 24mils) !!!

            Comment


            • #7
              Re: Buffing single stage cured paint

              Here are some shots for my hood

              It has some gloss
              Yet it has much orange peel (though the surface is very smooth, and I really cant feel this peel with my hands)

              Paint is very thick (24mils), and last repainting was done 6 months ago


              Comment


              • #8
                Re: Buffing single stage cured paint

                btw, if you say that my paint is too cheap to be restored, I'll accept that

                Comment


                • #9
                  Re: Buffing single stage cured paint

                  Originally posted by asalah View Post
                  btw, if you say that my paint is too cheap to be restored, I'll accept that
                  Well, we wouldn't go so far as to say that! Looking at the three images you posted, the first one doesn't look all that bad but as you get in closer the third shot looks more like a painting by Monet than a clear reflection in paint. Overall the paint looks reasonably glossy, but it is so loaded with orange peel as to lose all clarity in the reflections.

                  Regarding the overall thickness of the paint on this car, that's obviously down to the previous paint jobs being layered on top of the original rather than stripping the car down fully prior to respray. When measuring paint on a factory paint job we usually see readings in the 4.5 to 6.5 mil range, and can generally assume that 1.5 to 2.5 mils of that is clear coat. But on a respray, unless the painter tells you how much clear he shot, you can't really know for sure.

                  Now, if you're comfortable with wet sanding and rotary compounding to subsequently remove the sanding marks, then go for it. We don't recommend this process to complete novices (you'd be shocked at the crazy things some people get themselves into!!) but if you've done it before, and/or you're looking to push your skill set and you don't mind running into potential problems on this car, then this could be a great opportunity. This may have been a low budget paint job, but with proper sanding to remove the orange peel and a follow up compounding, it is very likely that this paint can be made to look outstanding. There are plenty of cases online documenting people who literally repainted their cars with a roller and a couple gallons of Rustoleum, including at least one here on MOL: My "rustoleum $50 roll-on paint job"
                  Michael Stoops
                  Senior Global Product & Training Specialist | Meguiar's Inc.

                  Remember, this hobby is supposed to be your therapy, not the reason you need therapy.

                  Comment


                  • #10
                    Re: Buffing single stage cured paint

                    YOU KNOW YOU'RE A REDNECK....

                    Let me share this original paint job I saw being done right here in my own parking look.... Car was black... now being repainted, (cough), white.


                    Comment


                    • #11
                      Re: Buffing single stage cured paint

                      Originally posted by Michael Stoops View Post
                      Now, if you're comfortable with wet sanding and rotary compounding to subsequently remove the sanding marks, then go for it. We don't recommend this process to complete novices (you'd be shocked at the crazy things some people get themselves into!!) but if you've done it before, and/or you're looking to push your skill set and you don't mind running into potential problems on this car, then this could be a great opportunity. This may have been a low budget paint job, but with proper sanding to remove the orange peel and a follow up compounding, it is very likely that this paint can be made to look outstanding. There are plenty of cases online documenting people who literally repainted their cars with a roller and a couple gallons of Rustoleum, including at least one here on MOL: My "rustoleum $50 roll-on paint job"
                      OK I believe I'd love to go through the sanding experience....
                      When you say "wet sanding", I would assume sanding by hand, correct ?

                      I need to learn the best techniques to do this effeciently (as I'm opening my detailer shop soon, and I need to be ready for all painting conditions)
                      If you believe that sanding by hand is best, then I'll go for it
                      If you believe DA sanding is better... I'll go for it as well...

                      So far here's my plan (for sanding by hand)...
                      1500 grit wet sanding by hand
                      2500 grit wet sanding by hand
                      #85 with wool pad on rotary @ 3.5
                      #84 with foam cutting pad on rotary @ 3.5
                      #80 with polishing pad on rotary @ 2.5
                      Waxing

                      If you have a better plan please let me know about it
                      And I understand for sure that "it depends"... Just like to know your thoughts

                      Comment


                      • #12
                        Re: Buffing single stage cured paint

                        Strangely enough, when it comes to wet sanding the process is actually less aggressive via DA than it is by hand. Also, DA sanding will usually result in a more uniform sanding mark - especially for a new user. When sanding via DA it is important to have a foam interface pad between the backing plate and sanding media when dealing with very sharp body contours as this helps to prevent sand-through. Now, since you're goal is to eliminate orange peel you may want to skip the interface pad so that you can cut more quickly - at least with the 1500 grit. But put the interface pad on when refining with 2500 grit. Also, don't sand right to the edge of a panel as that makes compounding much more difficult and increases the risk of burn through on a panel edge.

                        If you decide to sand by hand, it is critical to use a backing pad of some sort, otherwise you will cut deeper where your fingers give the most pressure on the sand paper, and that will result in an uneven and wavy appearance to the paint surface. Sand in one direction with the 1500 grit and then 90 degrees to that direction with the 2500 grit.

                        Whether you hand sand or DA sand it is critical to flush the paper and work area regularly with clean water. The abrasive media and the paint you're removing will otherwise build up between the paper and paint surface and you'll end up with small particles that will cut a deep groove into the paint, leaving behind "tracers" that are quite deep and require very aggressive compounding to remove. Cleanliness is critical here. This is for true wet sanding, as opposed to "damp" sanding with our latest UniGrit sanding and finishing discs. Not sure if these are available in your area yet, so be sure to follow the manufacturers directions with whatever sanding media you choose. But stick with some good, quality sanding media here - Meguiar's UniGrit, 3M Trizact, or Mirka products will all suit you well here.

                        Once the sanding is done your compounding/polishing steps sound good. Just remember to clean your pads often as you go and break down the M85/M84 uniformly as you go to get consistent cut across the work area. If you have access to M105 we highly recommend it in place of these two, but if you're familiar with M85/M84 then stick with them. You'll be experimenting enough with the sanding; using compounds you're familiar with will be a nice change of pace!!

                        Good luck, take your time, think about what's happening, and check your work often. Remember, you can always go back and sand a little more, but once you take paint off it's kind of tricky to put it back on!!
                        Michael Stoops
                        Senior Global Product & Training Specialist | Meguiar's Inc.

                        Remember, this hobby is supposed to be your therapy, not the reason you need therapy.

                        Comment


                        • #13
                          Re: Buffing single stage cured paint

                          Thanks very much for the detailed explanation

                          I already have Meguiar's 1500 & 2500 sanding papers, but unfortunately no sanding discs (though I have the G220v2)
                          I'll try the sanding procedure during next weekend, and will share the results with you

                          Comment

                          Working...
                          X
                          gtag('config', 'UA-161993-8');