

 Tweet
Tweet
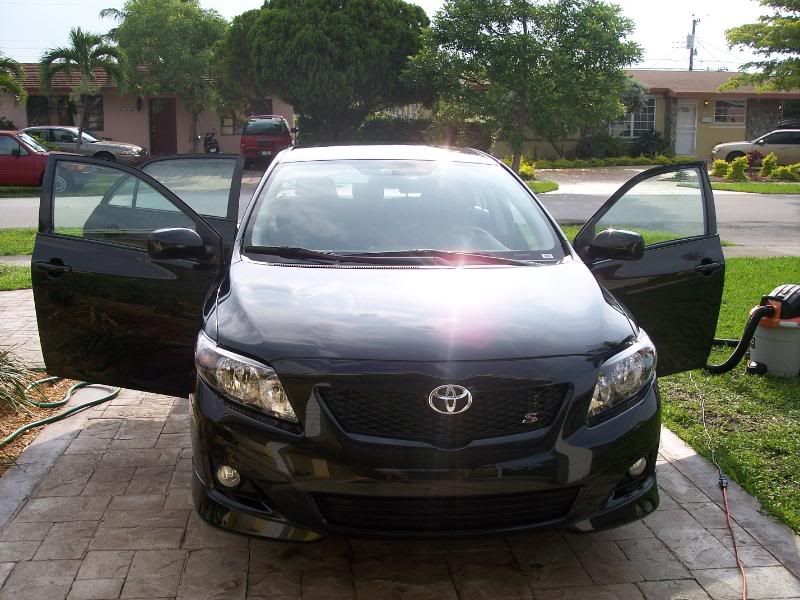
This customer (a coworker) has a 2008 Toyota Corolla S with about 8500 miles on the odometer. It's only had one or two washes in the seven months since she picked it up from the dealer so surface damage was actually very minor.
About two months ago, someone ran a redlight and she t-boned them pretty flush...thank goodness she was just cruising at low speeds when it occurred. Anyway, front bumper and hood had to be replaced as well as lights, radiator support, etc. The body shop (Progressive Concierge Claim Service-approved repair facility) was contracted by the insuraqnce company so I never got to speak to them about not finishing the paintwork with a rotary prior to delivery. When she got the car back she immediately called me to ask about "rainbows" on her hood...
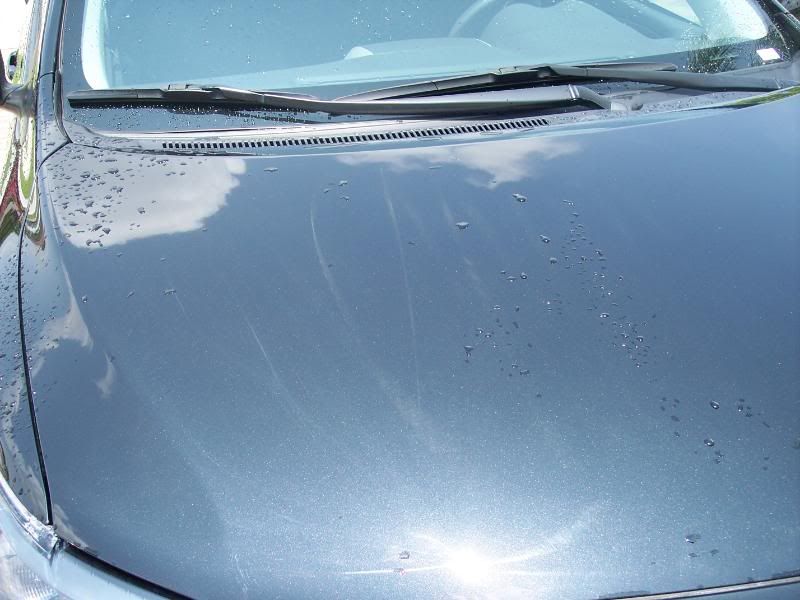
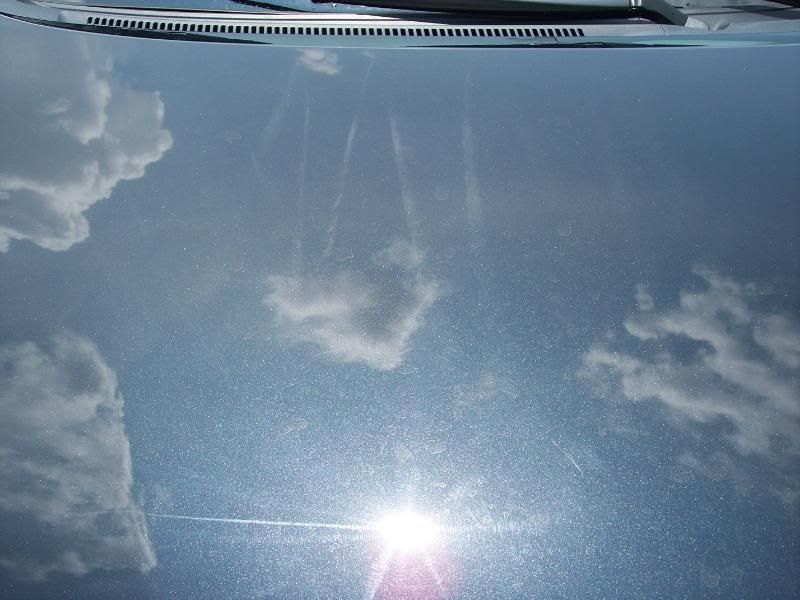
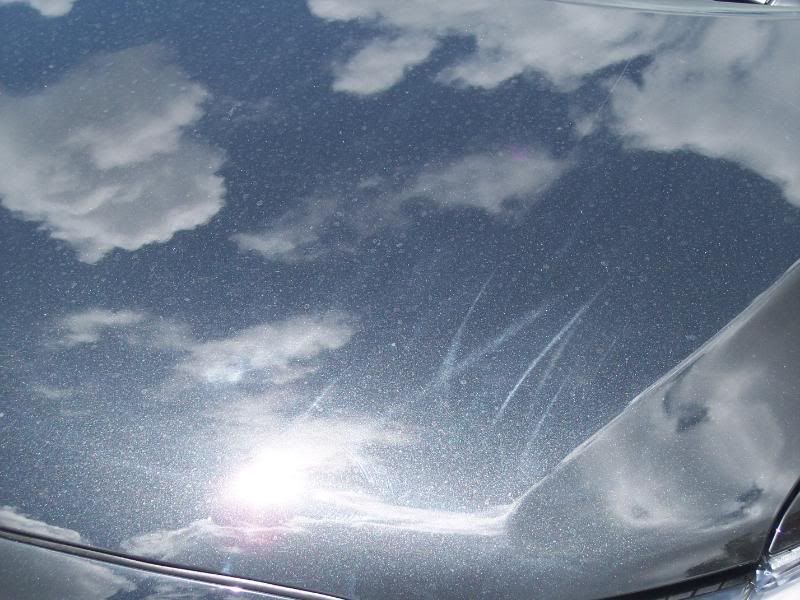
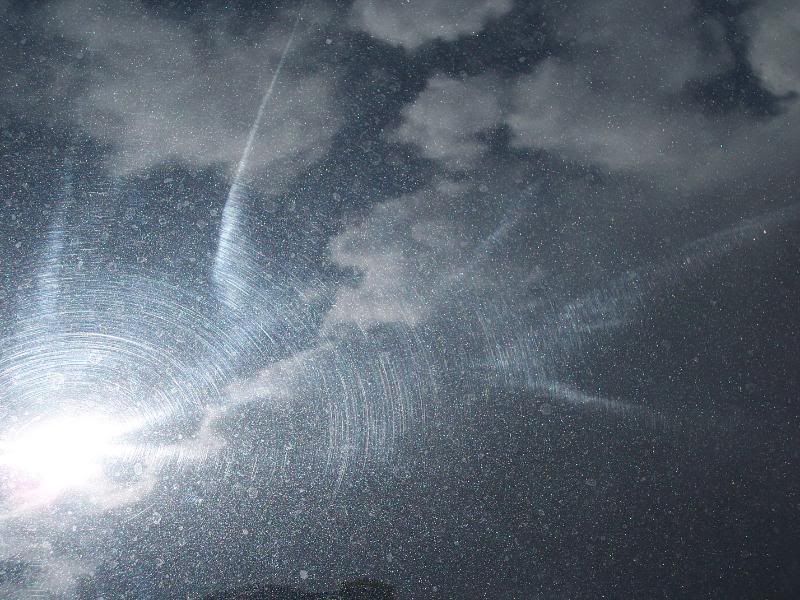
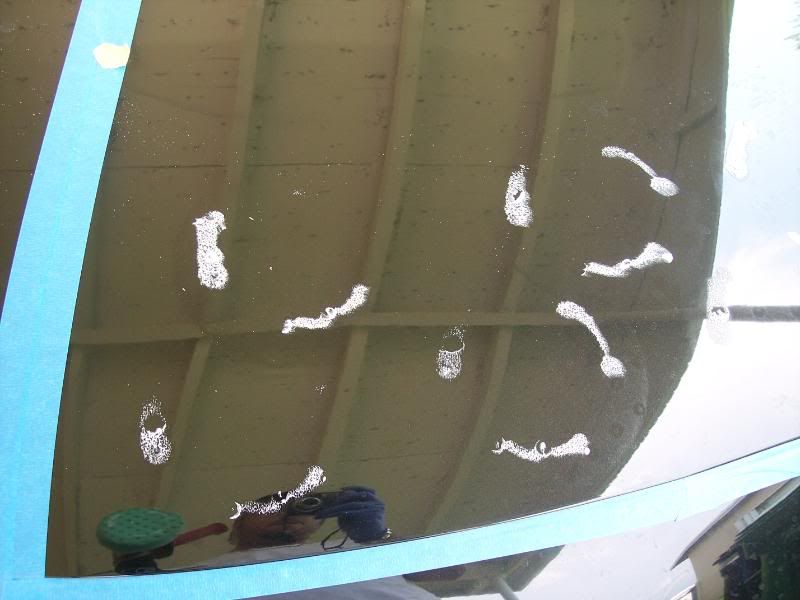
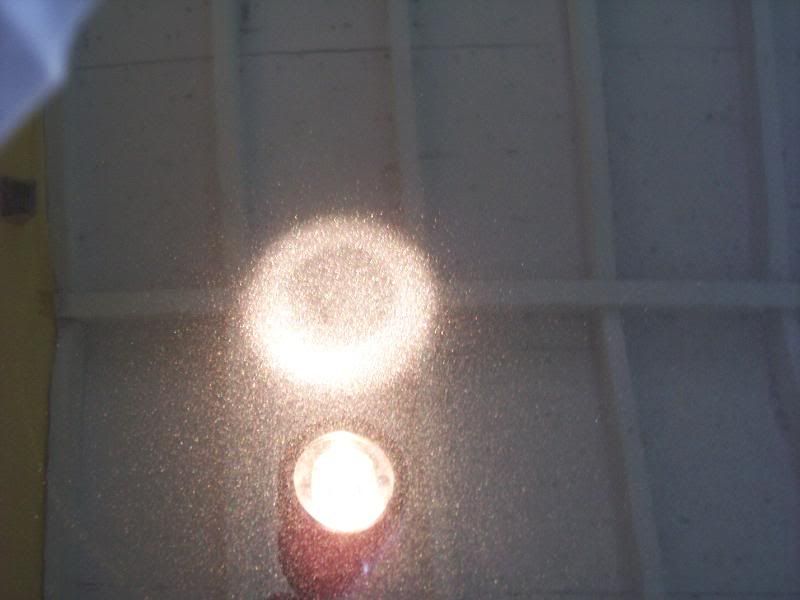
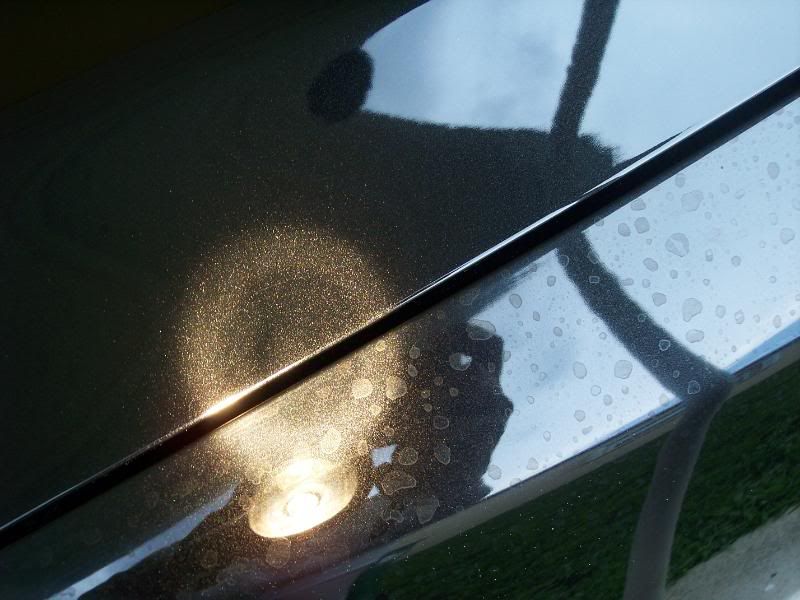
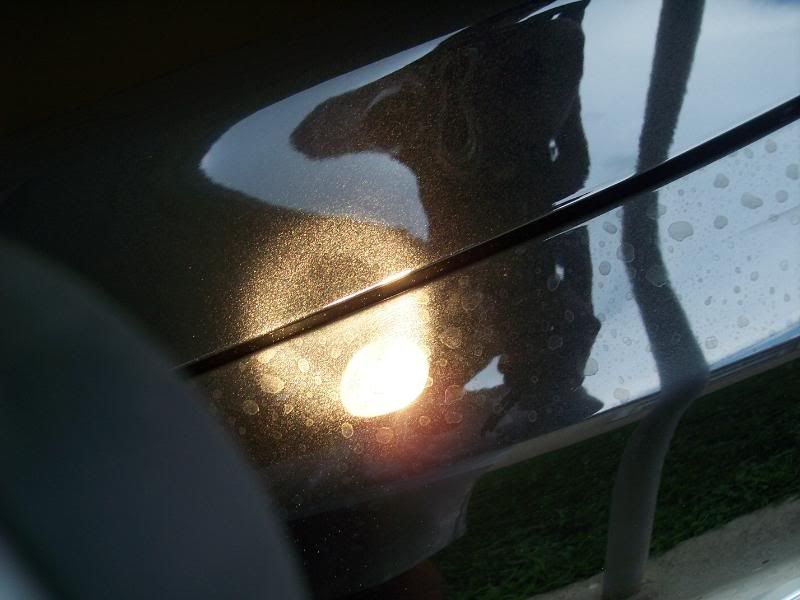
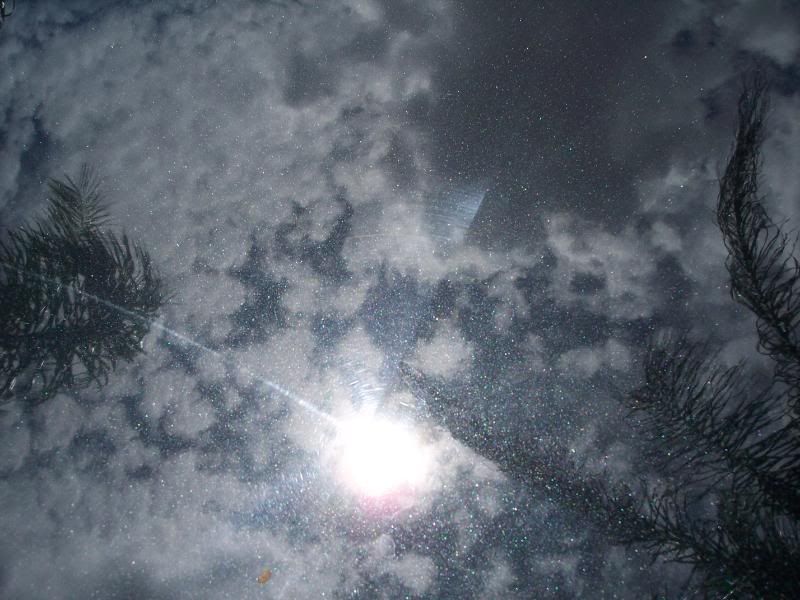
Drove over to her house and found horrible holograms and buffer trails from the rotary used to finish the surface during blending on the quarter panels and hood. You could tell some clown just set it to 3000 rpm's and was swinging it back and forth just to get it done and out the door. The final wash at the body shop and again at the Progressive Claims facility prior to delivery instilled massive amounts of swirls as seen below:
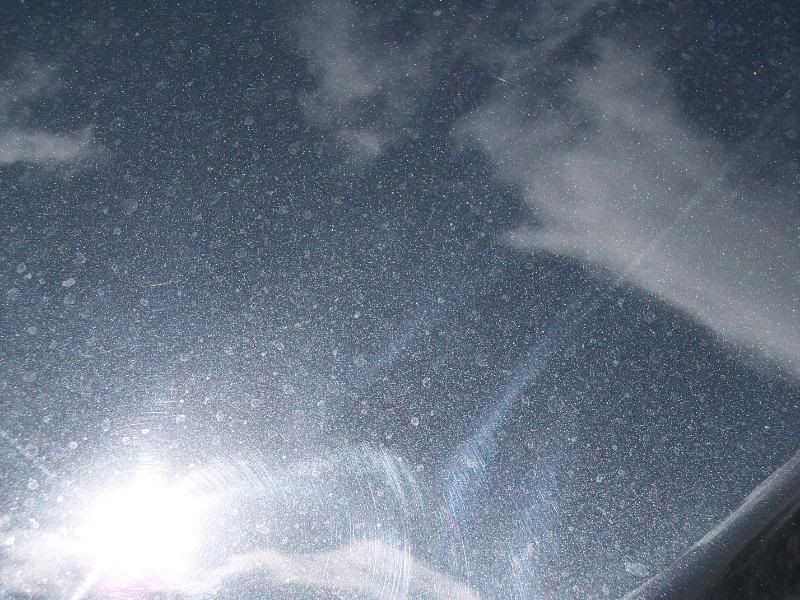
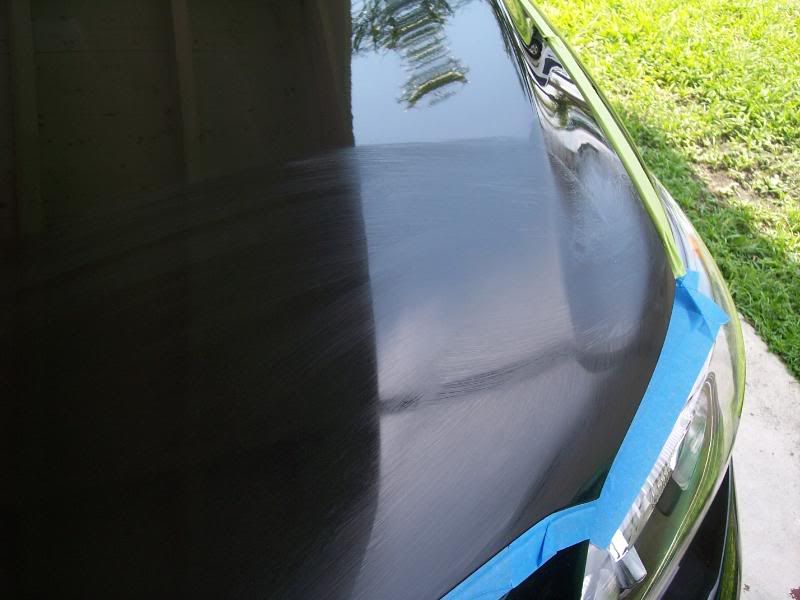
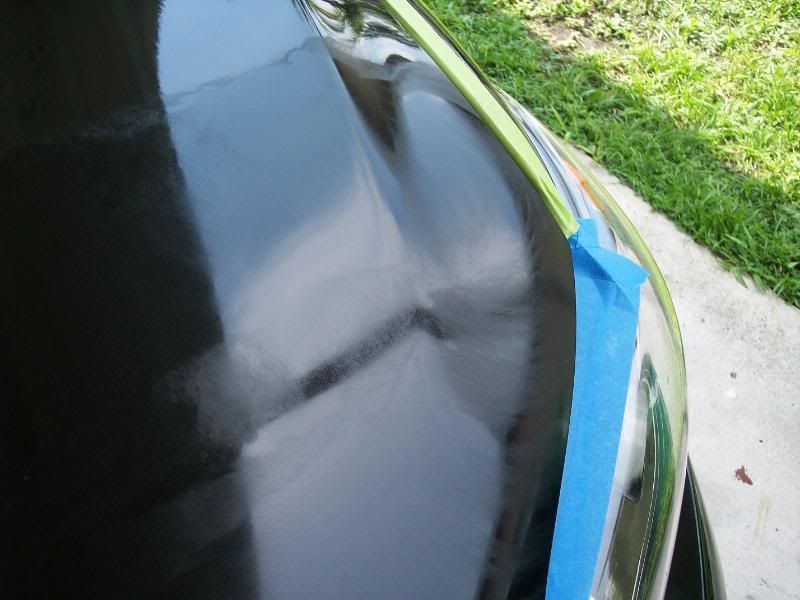
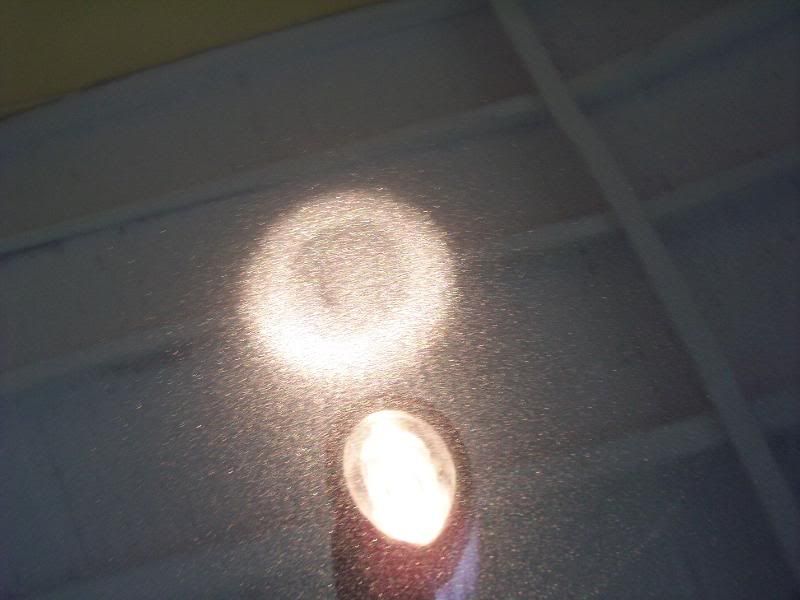
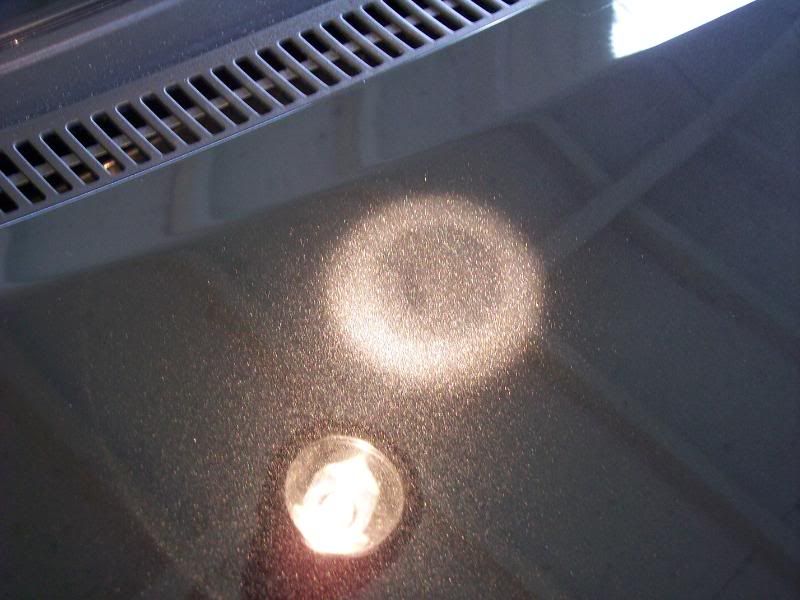
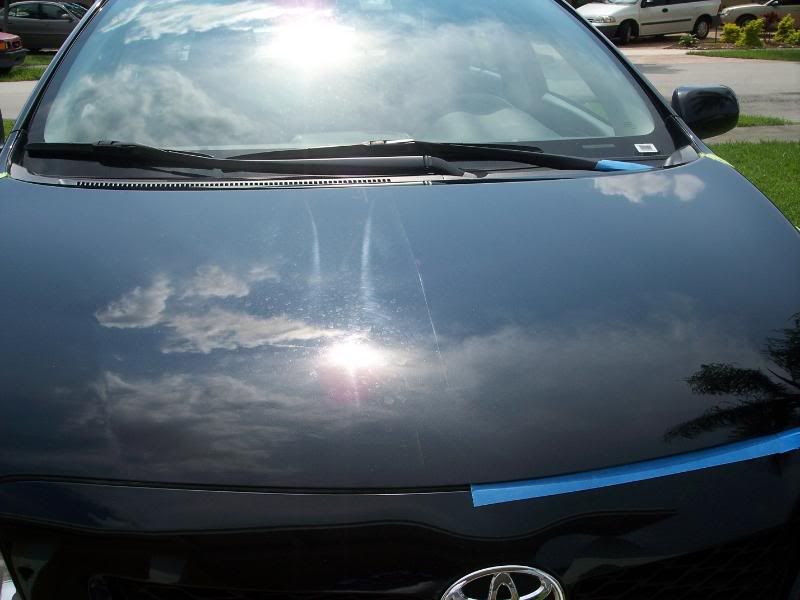
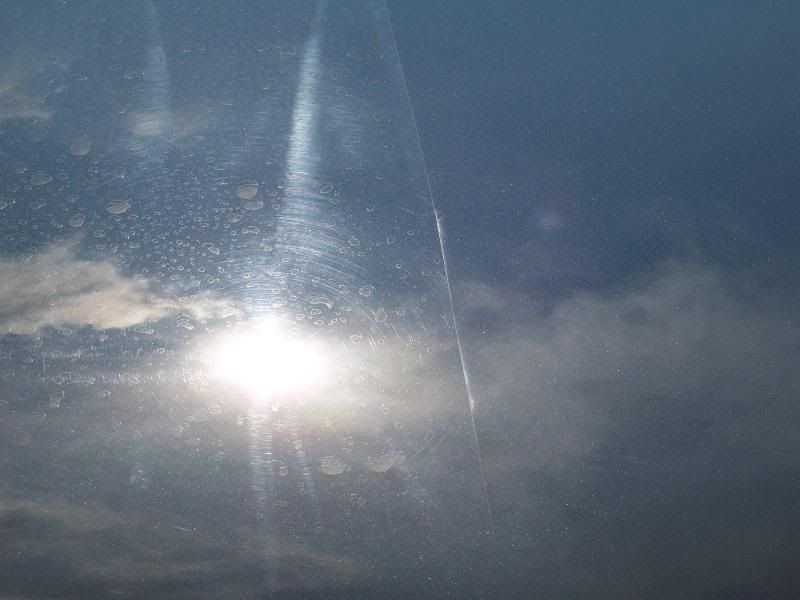
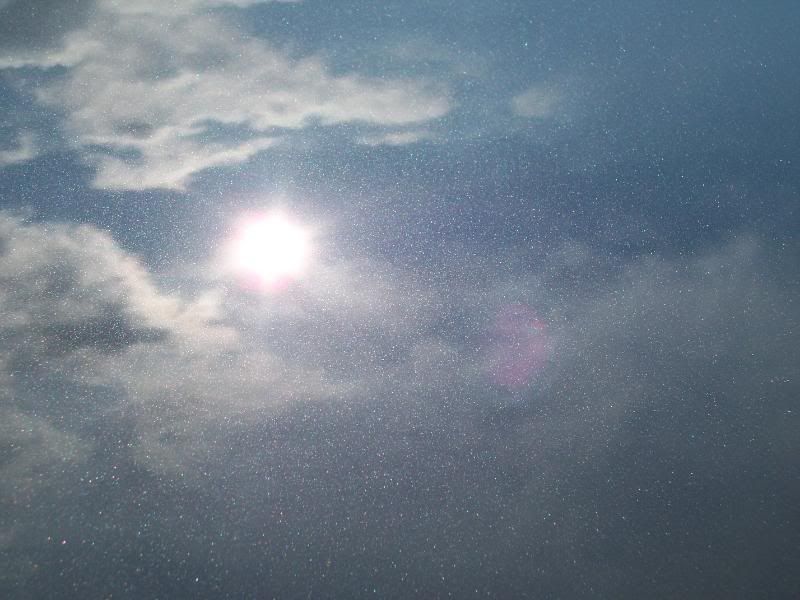
Originally I had planned on a two-step correction since I had not received my Flex from ADS at the time of initial booking. For the test spot I picked a spot on the hood and attacked it with a tried-and-true combination...LC CCS Orange/M105/PC7424. After completing my passes over the work area, I performed an IPA wipedown and the results showed an 85% reduction in swirling and hologramming as seeh in this pic:
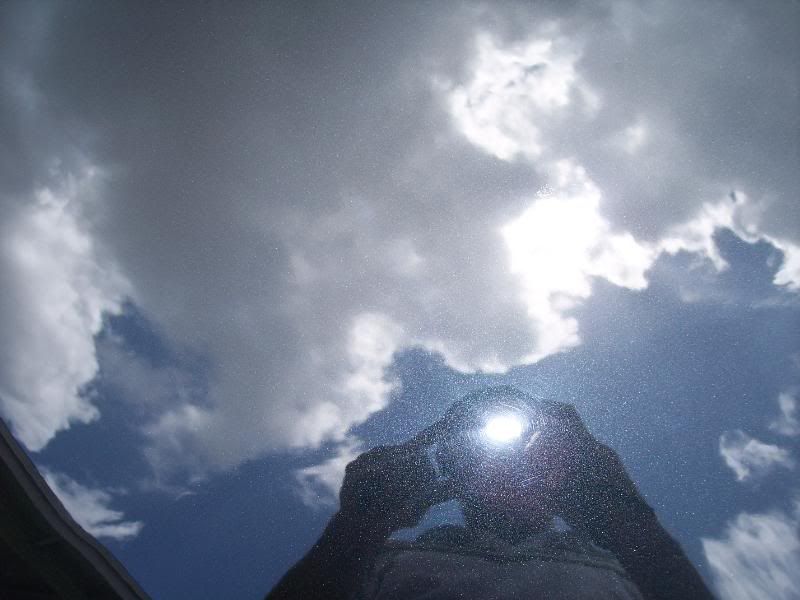
Based on these results I originally quoted the customer on a two-step correction planning to go over the car with M105/CCS Orange followed by M205/CCS White via PC7424. After receiving my Flex and seeing the added corrective ability, I decided to test out some new techniques and theories on this car. I remembered how well the Flex/D151 performed on the LRP Audi I had done (http://meguiarsonline.com/forums/showthread.php?t=34266) and since this was a referral from the same household I knew water etching was going to be an issue.
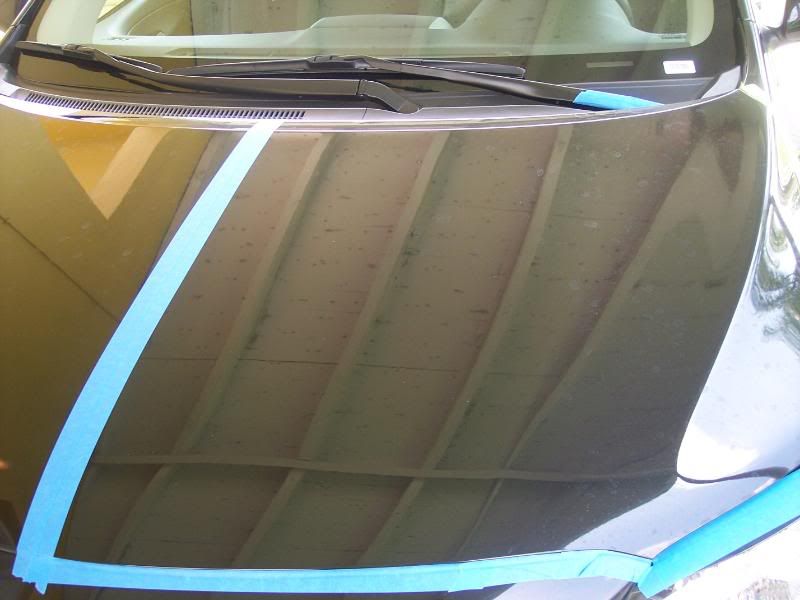
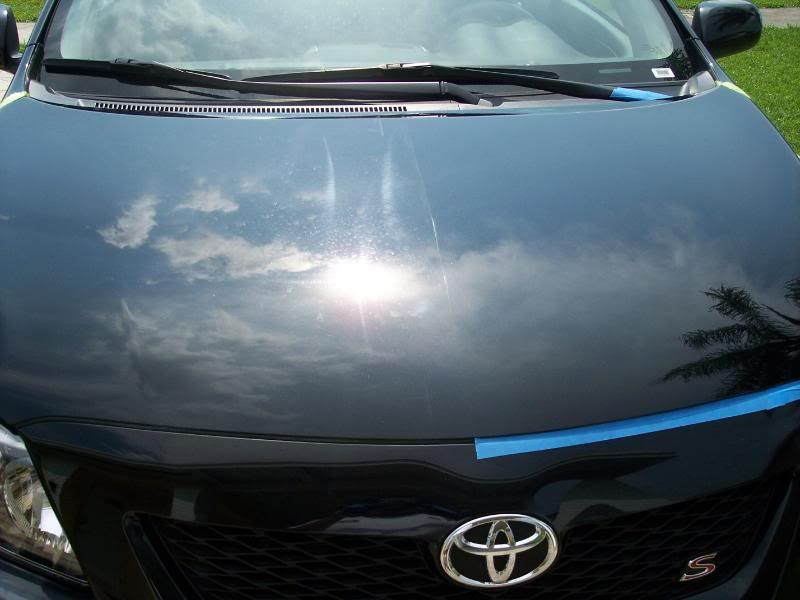
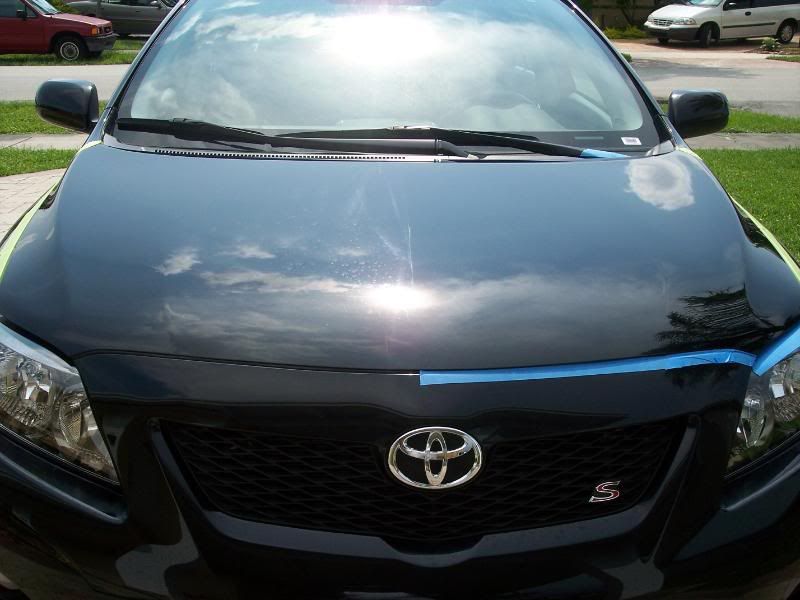
Pulled out the Flex to perform some testing on the hood. Went with an ADS-spec CCS Green polishing pad and some M205. Proceeded to tape off the hood area and give it a go.
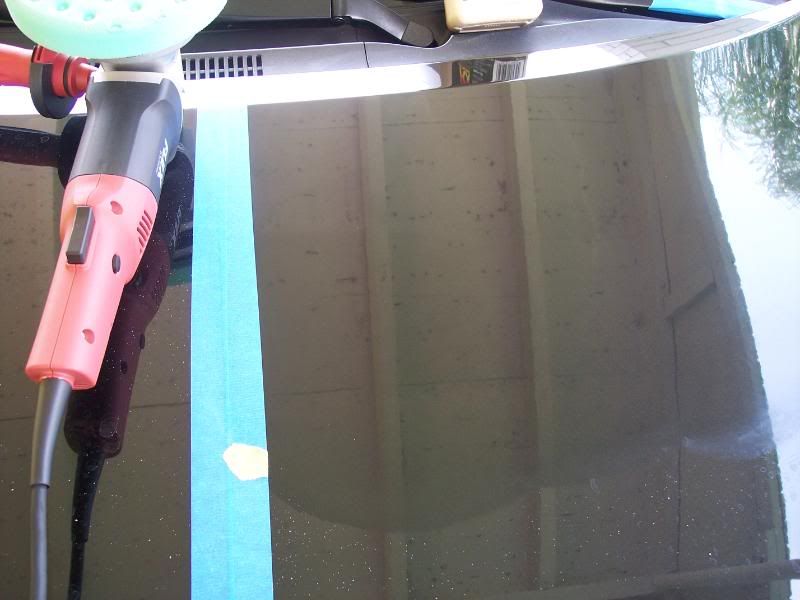
Taping off the hood...
Tools of the trade...
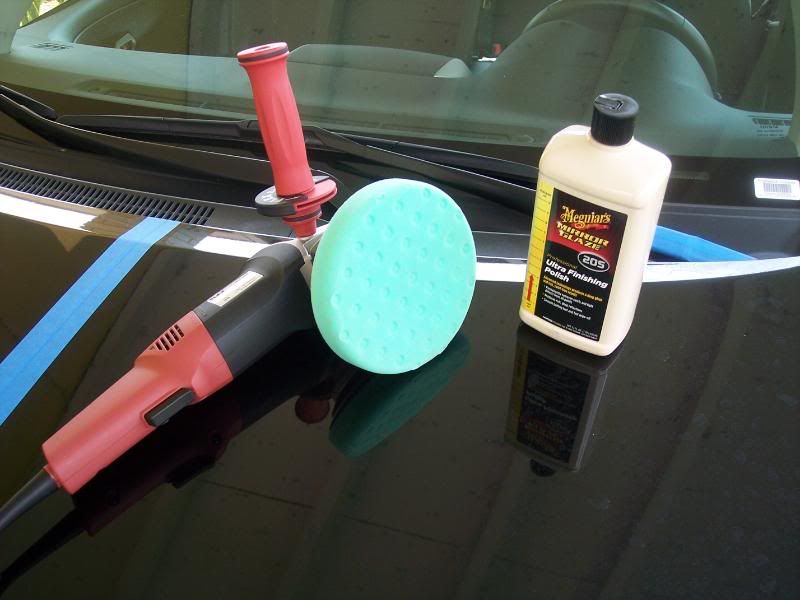
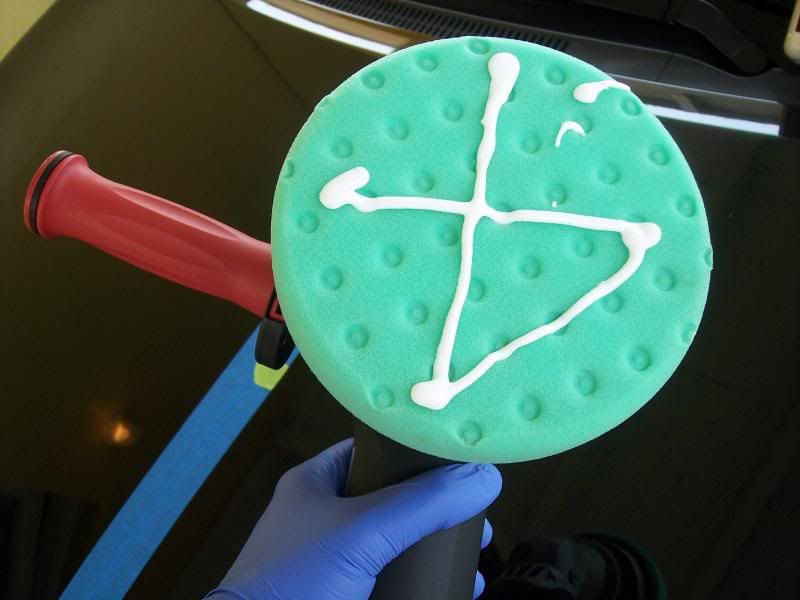
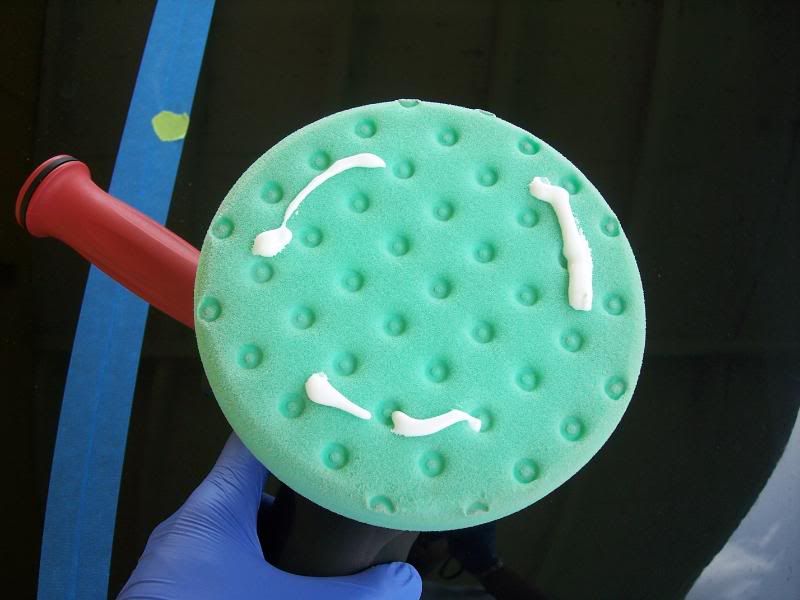
Prime the pad with a quick spritz of XMT Pad Conditioner and then lay down a large "X" of product...
At this point after 3 vertical and 3 horizontal passes over the work area I stop. Some have asked me what the product "looks like" at my typical stopping point so I snapped some quick pics...
These next shots are of the polishing process itself. Since the pad has already been primed and worked over an area, less product is needed for the next section...
Then "kiss" the pad to the surface of the paint to begin distributing product...
Without touching the trigger, spread the product around the work area with the pad...
Now lightly squeeze the trigger and go over the work area to evenly distribute product and prepare for full correction (notice the pad circles in the product)...
Hmmmm, starting to look good after final wipe...
Under the lights...
Does this flake stand out or what...
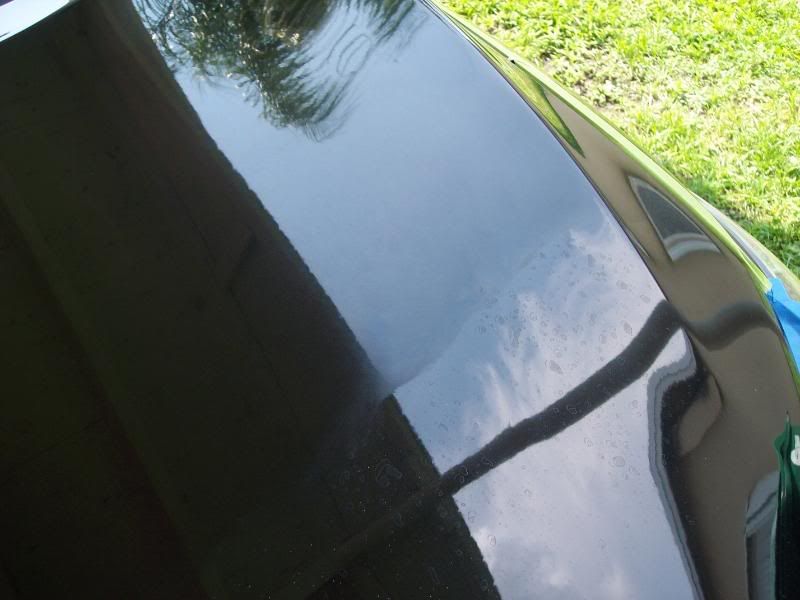
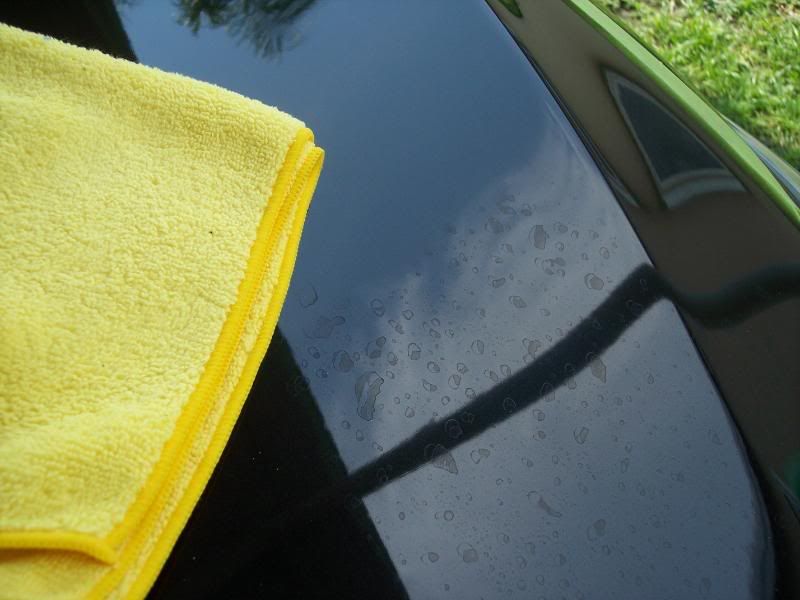
Did I mention water etching...
Time for Mother Nature to judge...
Directly in the work area...
Paint Preparation Process:
1. Pre-soak with Pure Oceans Orange Boat Cleaner
2. Apply DP Wheel Gel and allow to dwell on rims/tires
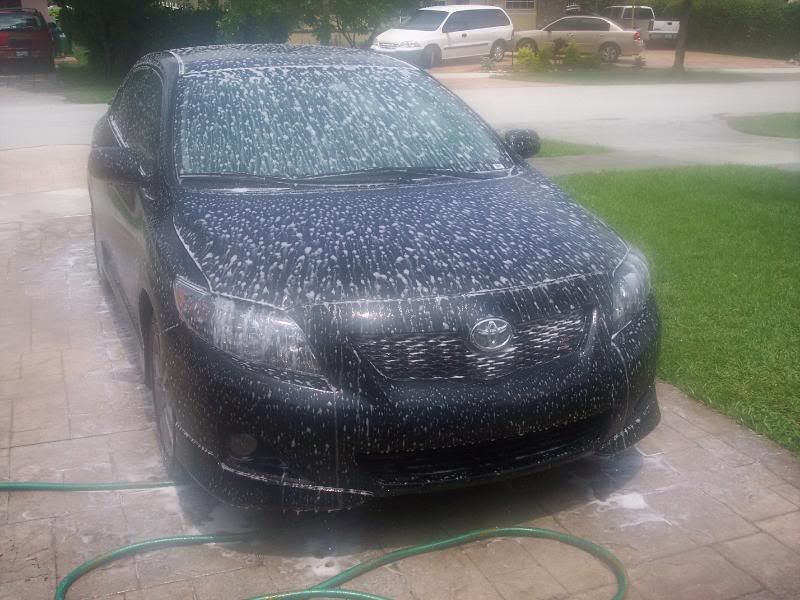
3. Wash vehicle with last of my sample of Meguiar's Soft Wash Gel using 1-bucket/foam gun method with HD grout sponge
4. Cleaned wheel wells/rims/tires with assortment of brushes and remaining wash solution
5. Paint dried with synthetic chamois and Armor All drying towels
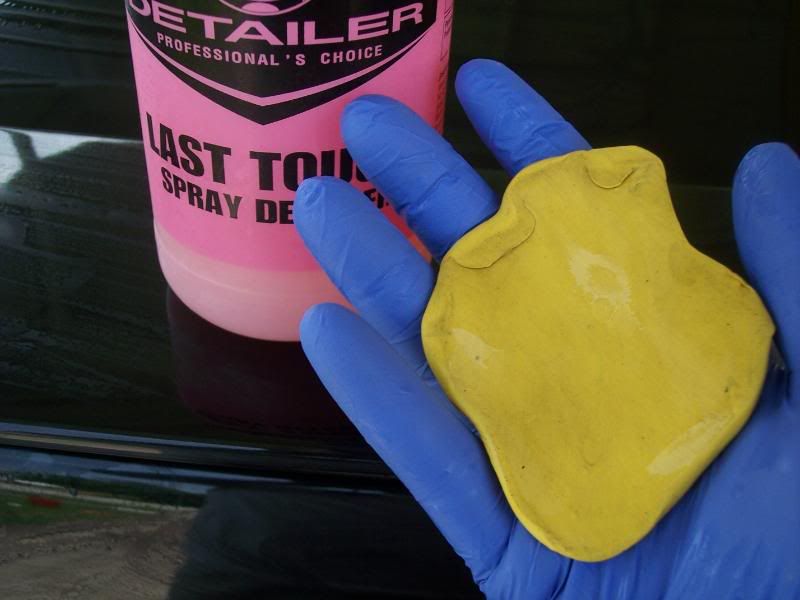
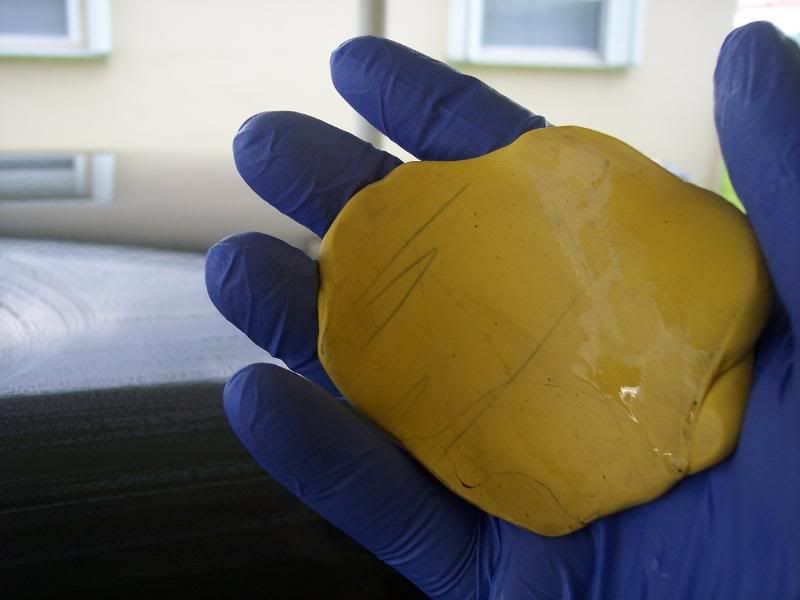
6. Paint clayed with Mother's clay bar with Meguiar's Last Touch (1:1) as lubricant
7. Final soak/rinse with PO Orange Boat Cleaner to remove any clay/lube residue
8. Vehicle dried using previous method and taped in preparation for polishing
Today was the first in a week we've had steady sunshine so I really wasn't expecting to get to the car. Once I started working I realized I left my camera in the house. Temps were in the low 90's with high humidity and my house has the A/C set on 65 all the time so when I ran outside and started snapping pics I did not realize the lense had fogged so I wasted a ton of pics including the exterior "before" shots and some washing and interior pics. Here's what survived...
Wheel cleaning 50/50...
Fair amount of contamination...
Paint Correction Process:
1. Applied M205 via Flex 3401 Dual Action Polisher with an ADS-spec LC CCS Green Polishing pad on speed setting 6
2. Wipedown after each section with clean microfiber only...no IPA or quick detail product
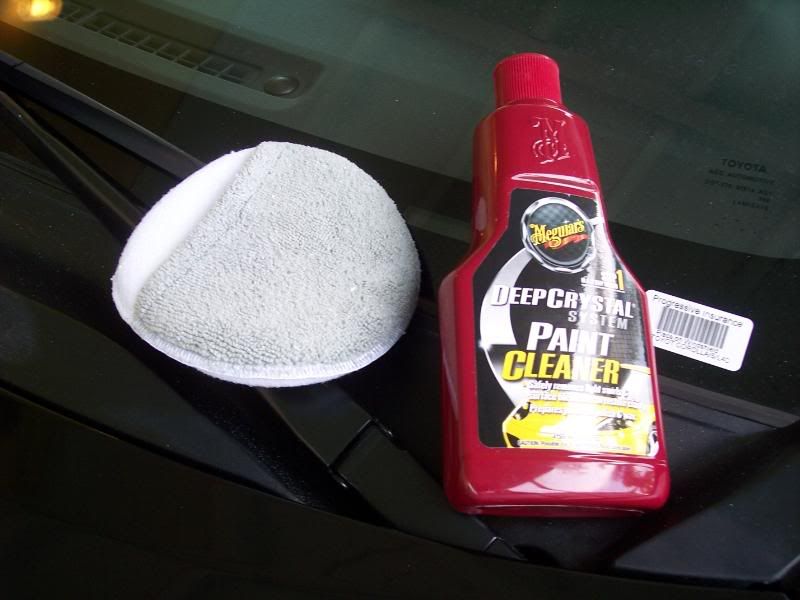
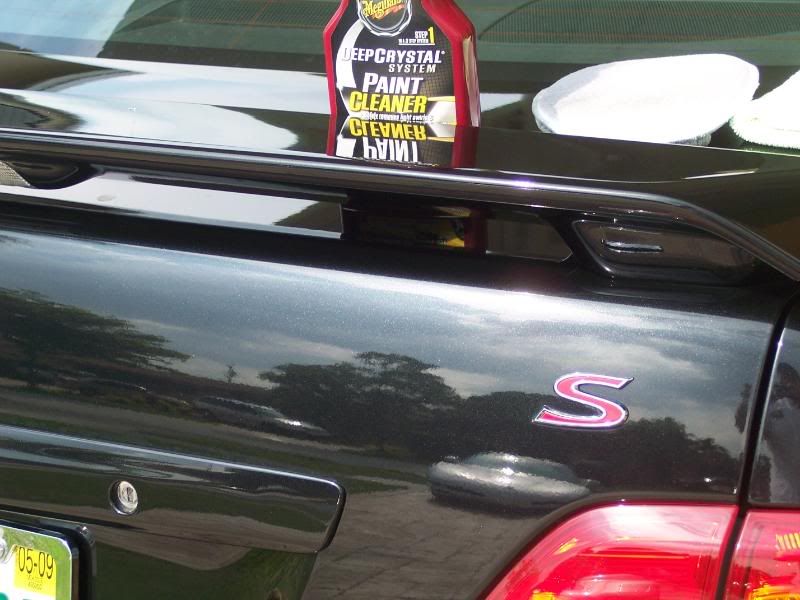
The sun was popping in and out of the clouds interspersed with intermittent quick rain showers so after polishing I had to deal with some areas of dried polish and some water spotting from the rain. As a solution I got to try a paint cleanser from Meguiar's...DC1 Paint Cleaner. Used an Autogeek combo applicator with terry on one side and a microfiber grip pocket and touch-up section on the other.
Materials...
Driver's door washed/clayed/polished/cleansed and passenger door with freshly applied paint cleanser...
Both doors complete...
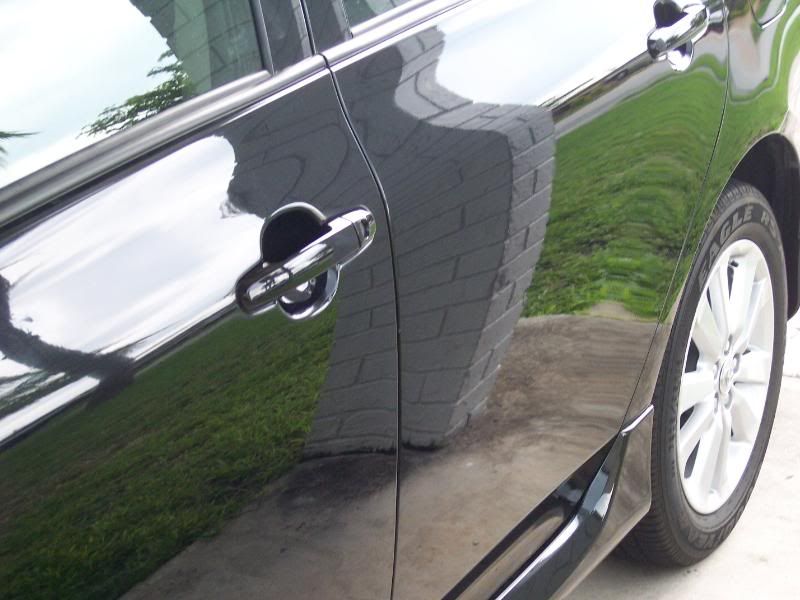
Paint surface looking close to 100% at this stage...
The Meguiar's DC-1 Paint Cleaner is very effective at preparing the paint surface for waxing or polishing and is easy to work with. Apply to your applicator...work into the paint surface in circular or straight motions...cover a panel...wipe off with a clean microfiber and you're done.
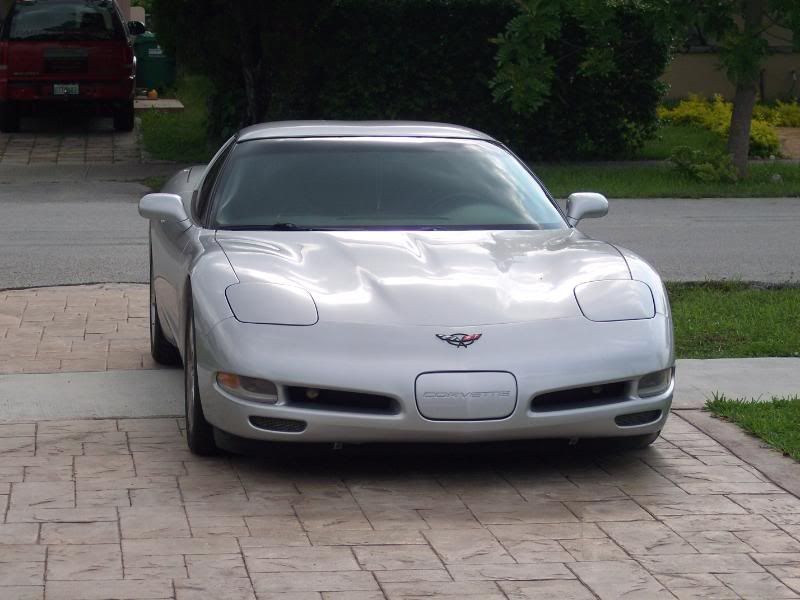
Detail rig looking fairly decent in the background...
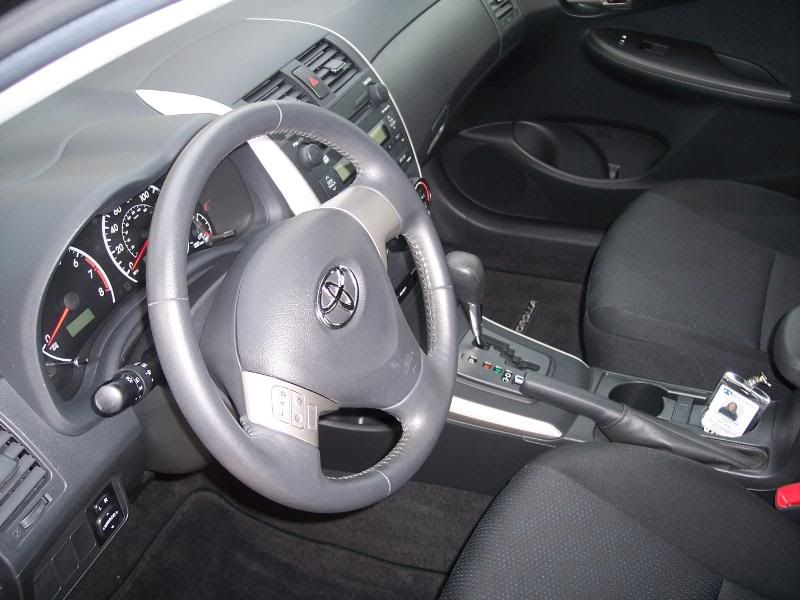
Interior Detail Process:
1. Remove all floor mats, loose trash, coins, tampons, hair clips, and the million other things I found in the car
2. Vacuumed carpeting and seats (cloth)
3. Performed wipedown of all interior plastic and vinyl surfaces with Meguiar's Quik Detail Wipes followed by clean microfiber wipedown
4. Treated all interior glass with Meg's NXT Glass Cleaner
5. Treated interior vinyl with Meg's Supreme Shine Interior Protectant
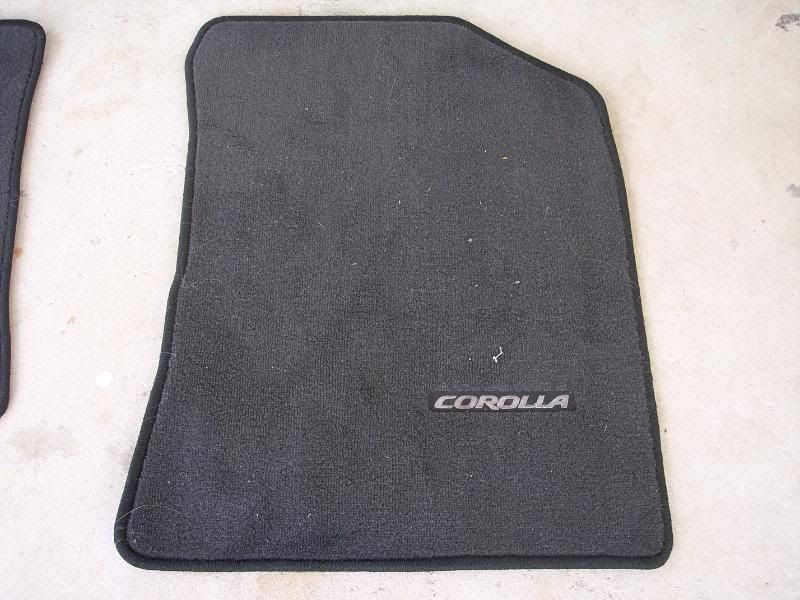
The floor mats were discolored and almost grey when compared to the rest of the carpeting. In an effort to rejuvenate them I decided to give a new product Rick at ADS sent me a try...Meguiar's Carpet and Upholstery Cleaner.
Before...
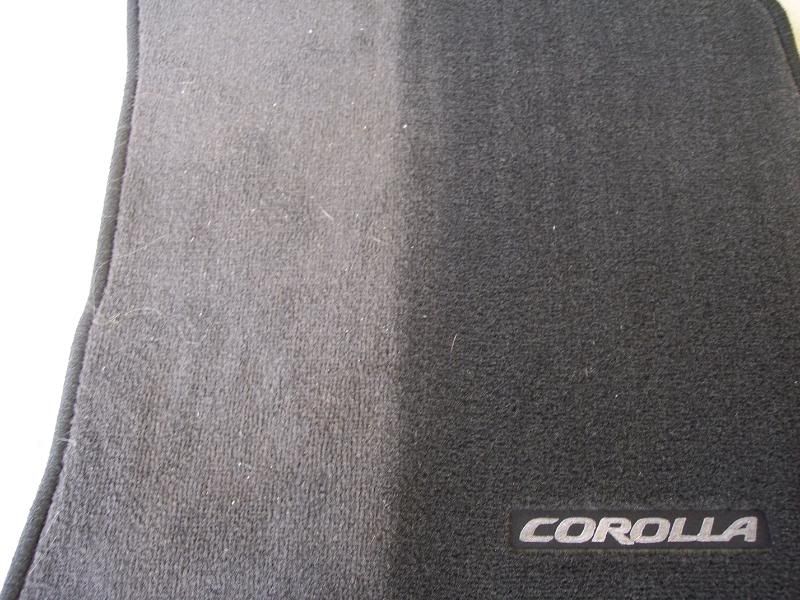
50/50 after brushing and vacuuming...
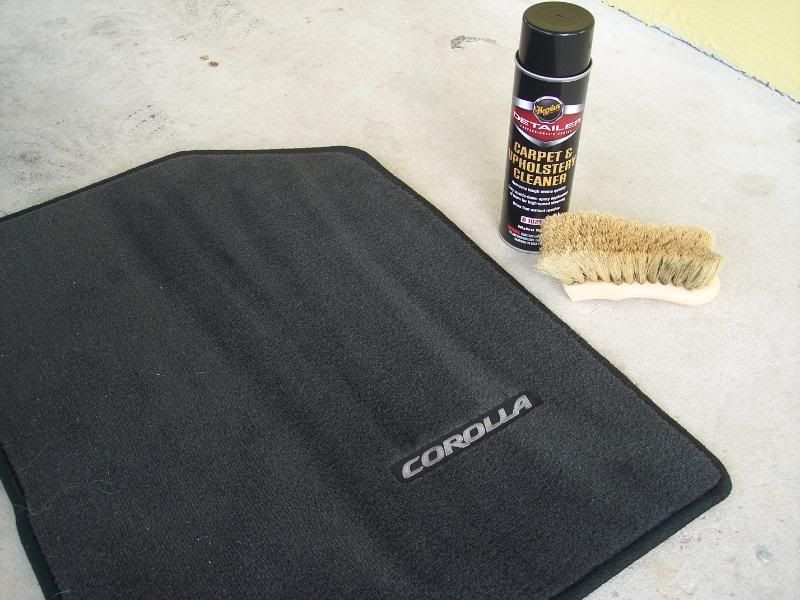
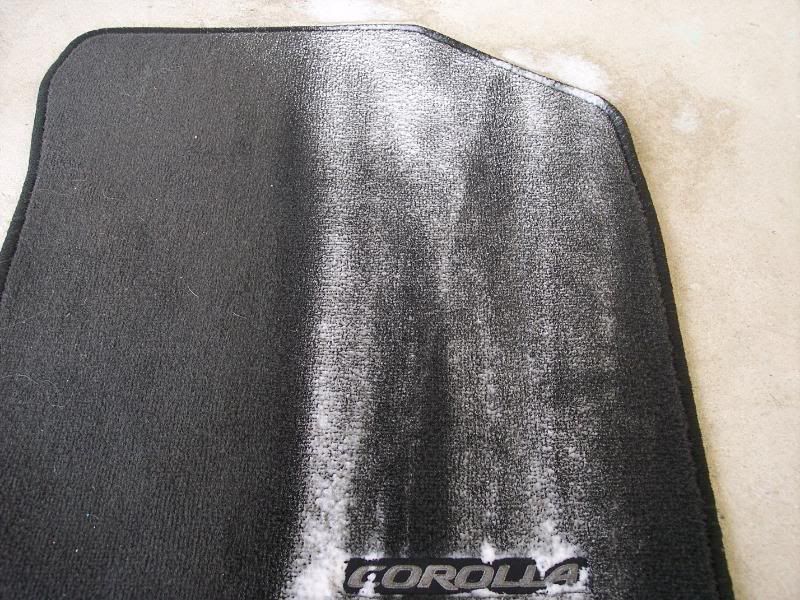
Applying Meg's C&U Cleaner is easy with the upside-down mounted trigger...
Agitate with Tampico Carpet Brush and allow to dry then pass the vacuum head over to pick up any encapsulated dirt/dust. 50/50 of completed section...
Completed interior...
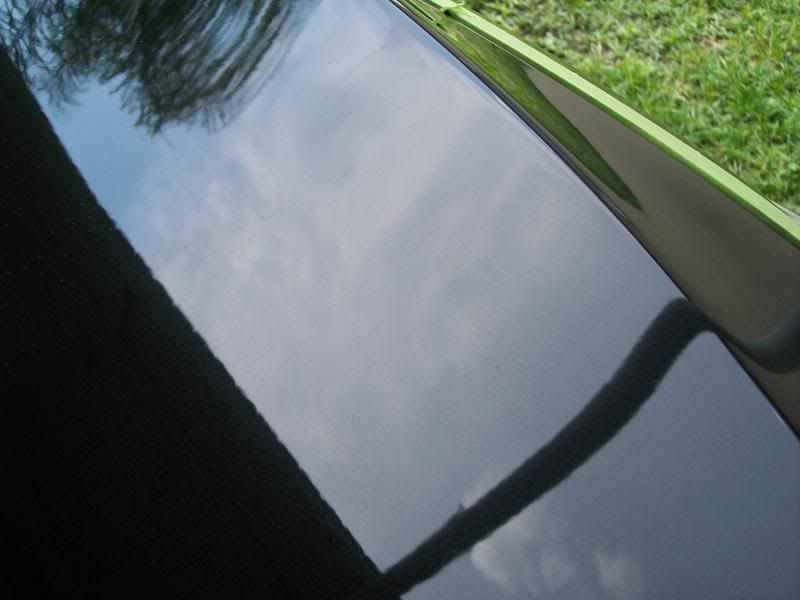
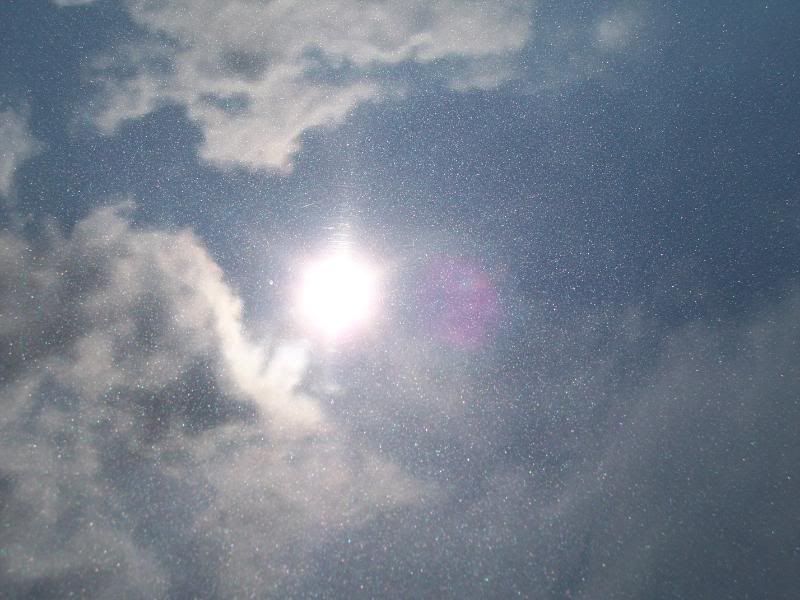
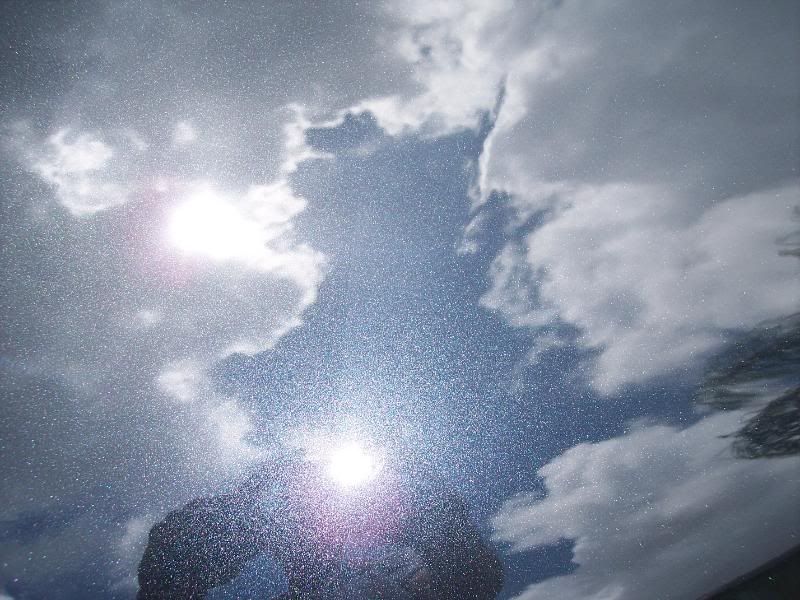
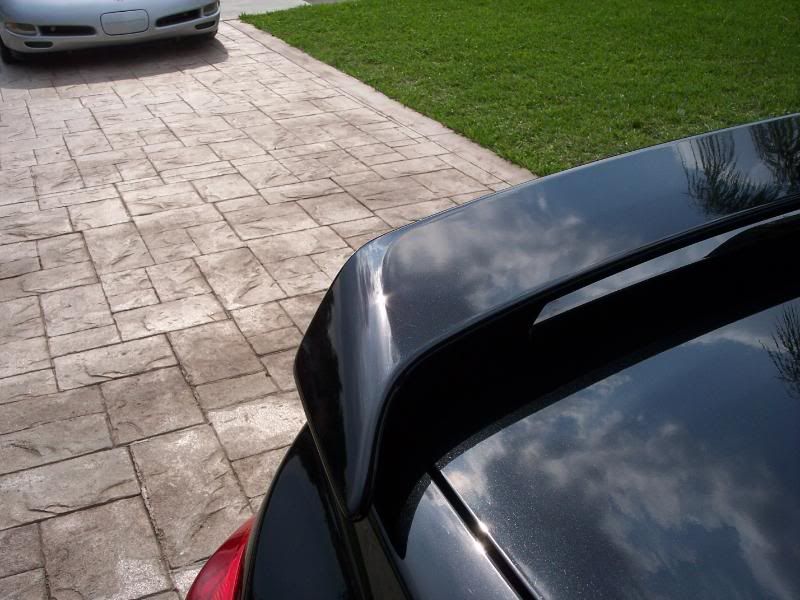
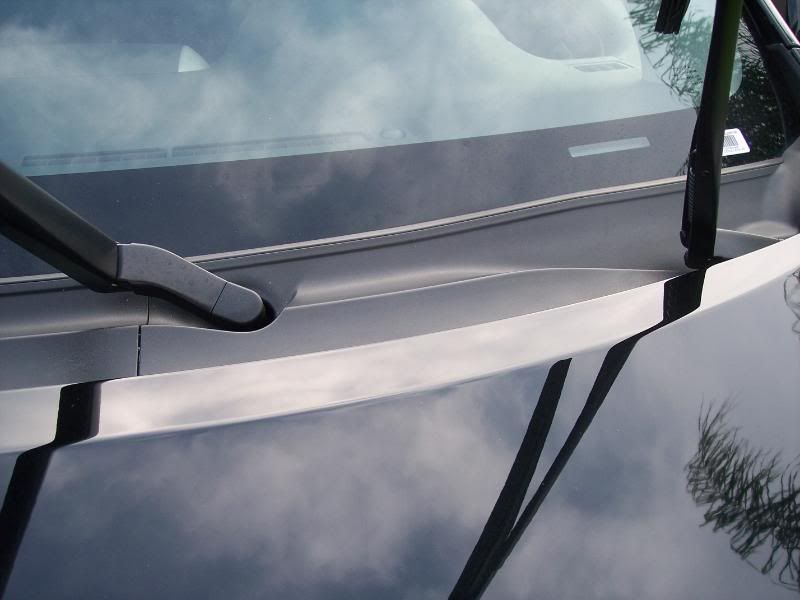
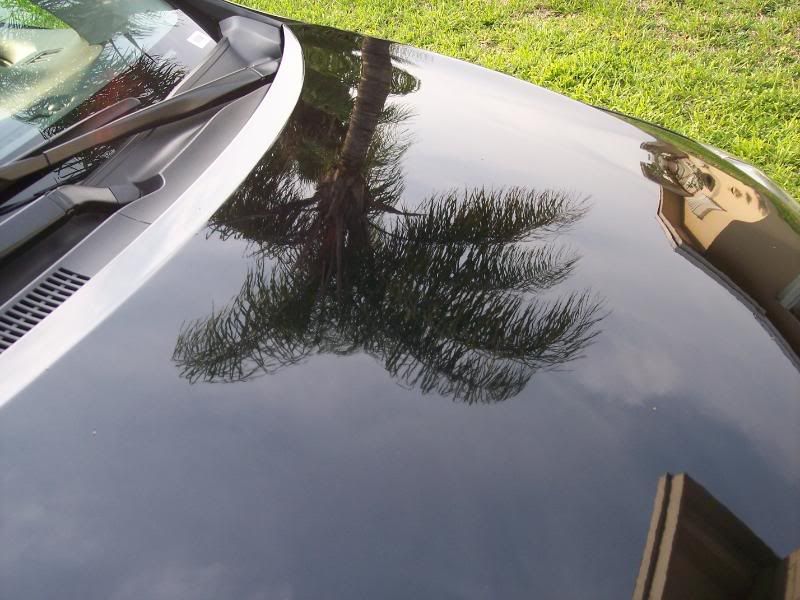
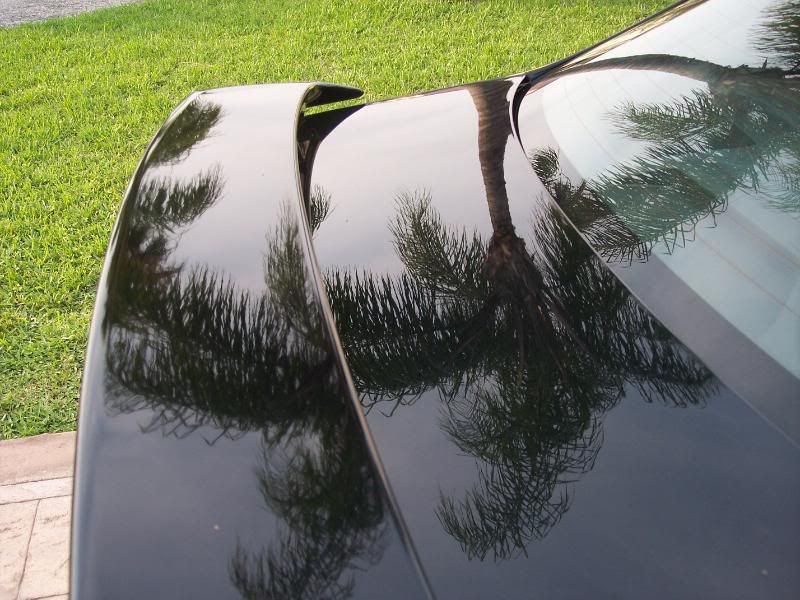
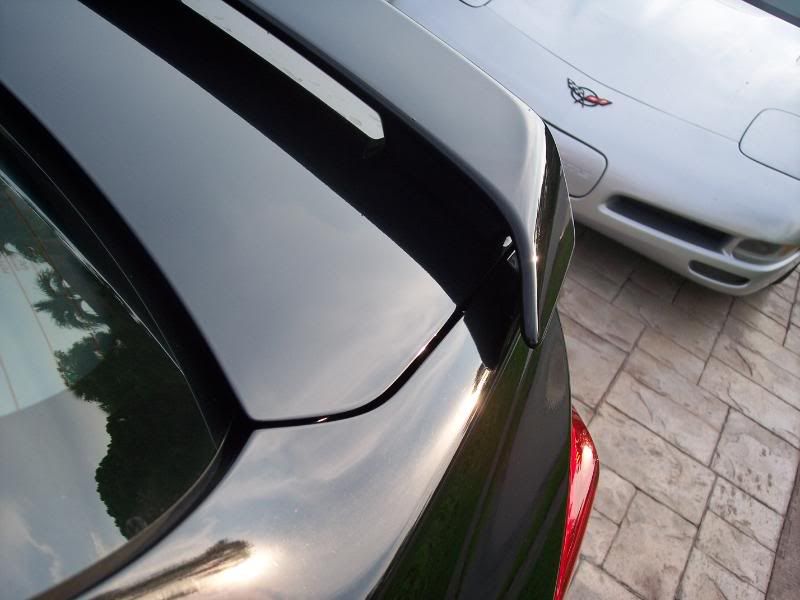
While working on the interior the reflections and reflectivity off of the polished paint (no LSP) were amazing...
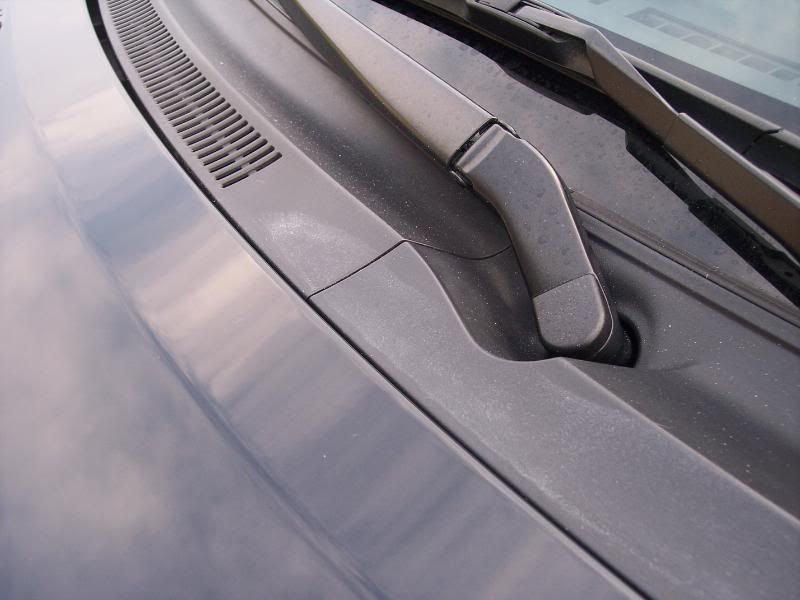
Oops, some dried DC-1 that I missed and allowed to dry on the plastic cowl (yup even I make mistakes)...
But I know how to fix 'em too! (M39 via terry towel)...
Final Presentation Process:
1. All exterior metal surfaces cleaned with Meg's Hot Rims Chrome Polish Liquid
2. Glass cleaned with NXT Glass Cleaner
3. Tires dressed with Meg's High Endurance Tire Gel
4. Rims wiped down with Meg's Last Touch quick detailer and protected with DP Wheel Wax
5. Exterior rubber/vinyl cleaned with M39 and dressed with M40
6. LSP of choice on blacks is always a carnauba for me so I sealed the paint with a coat of NXT 2.0 and topped with Pinnacle Signature Series II
Final pics prior to customer pick up...
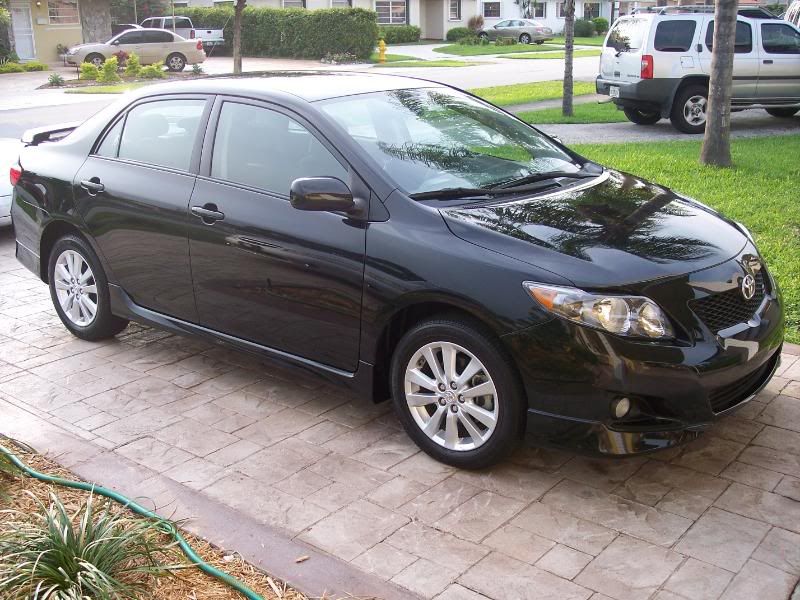
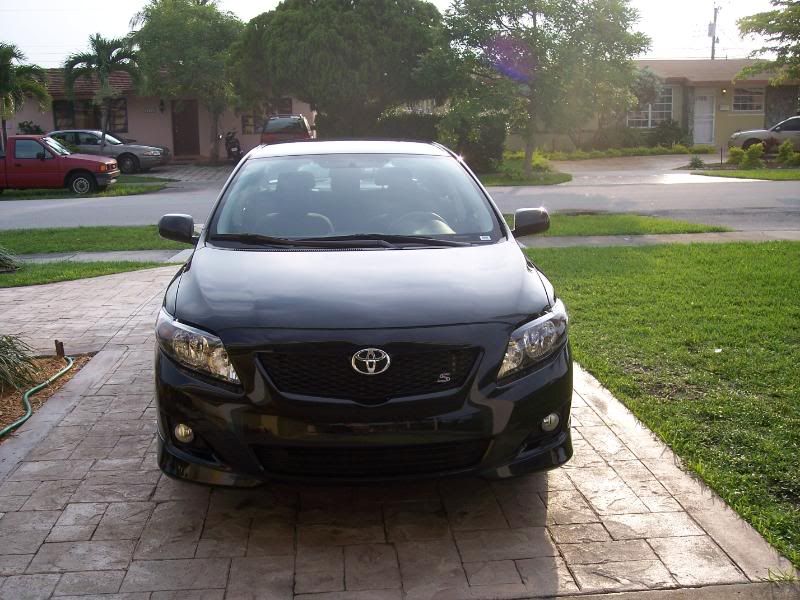

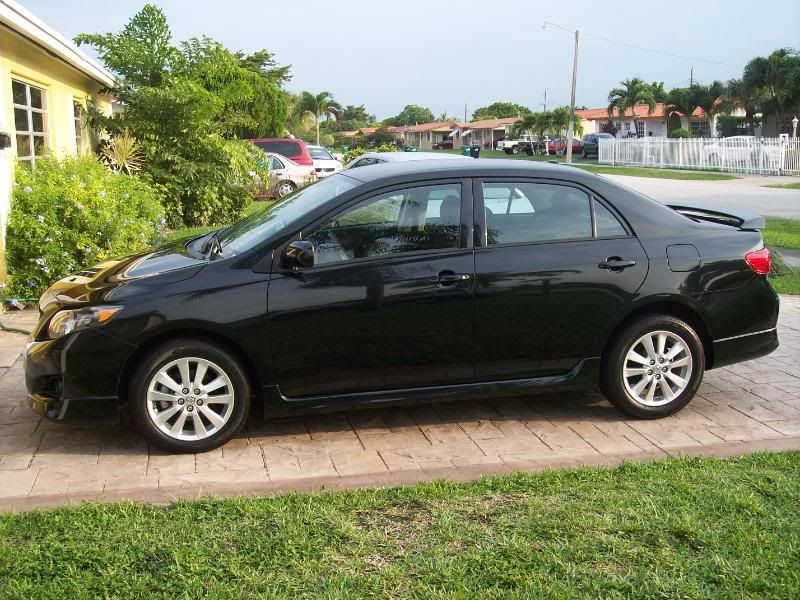
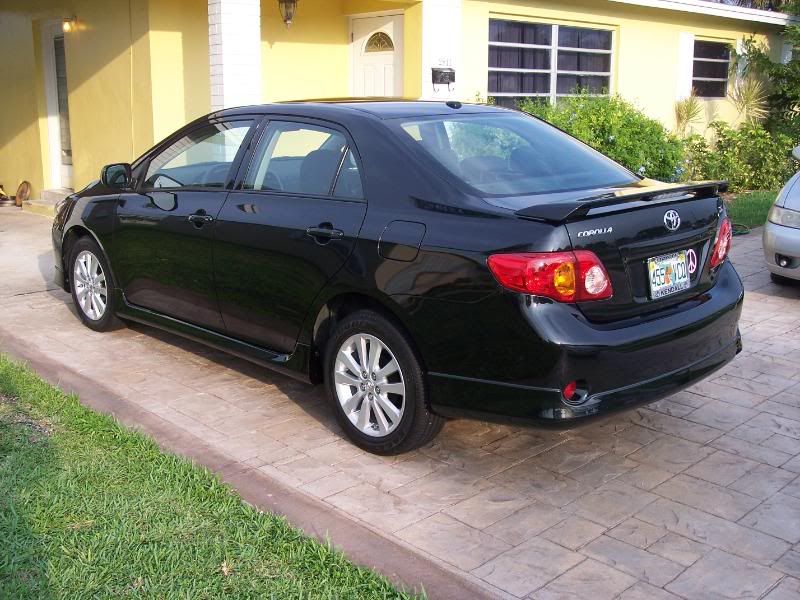
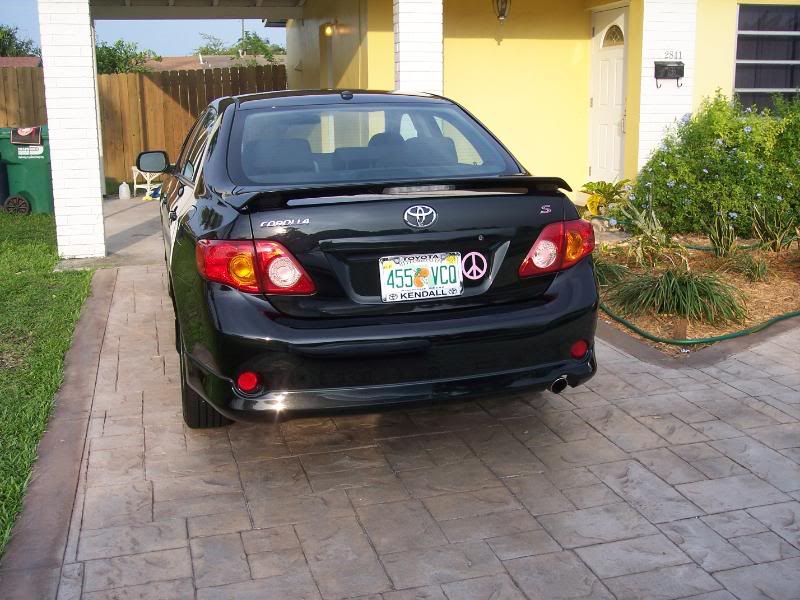
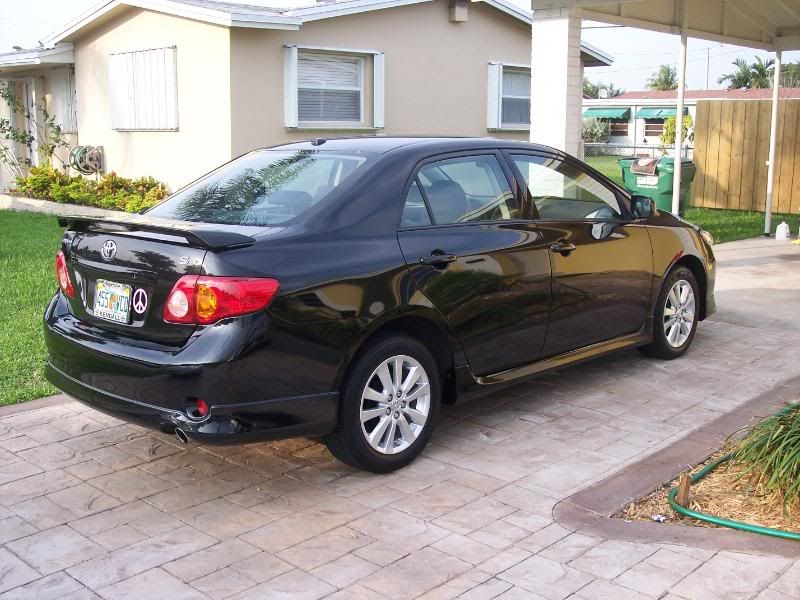
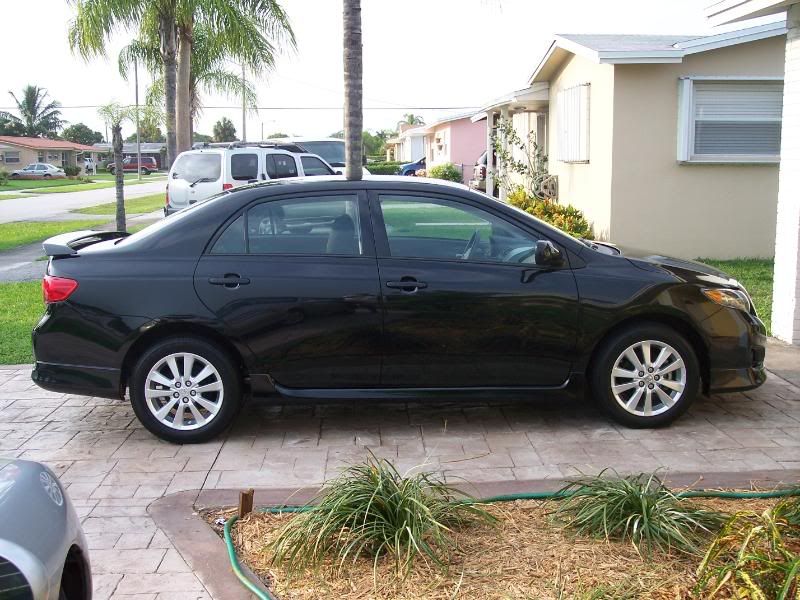
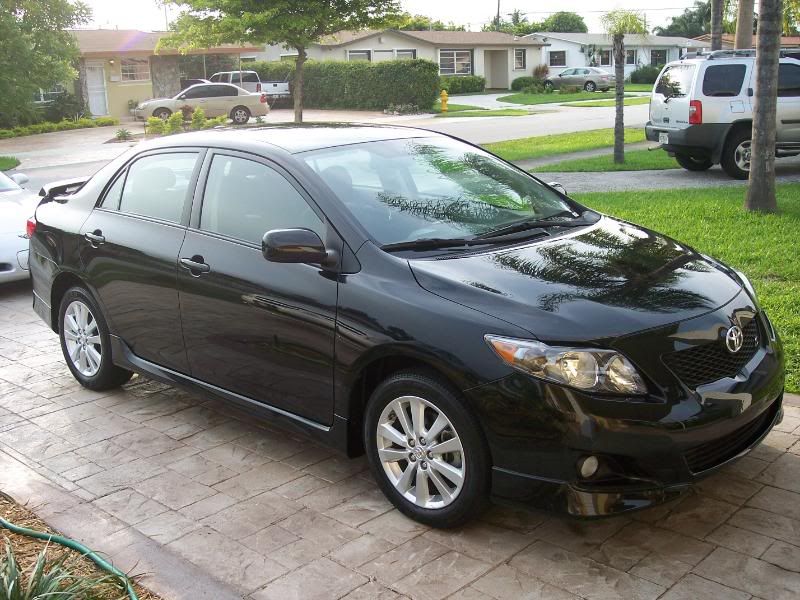
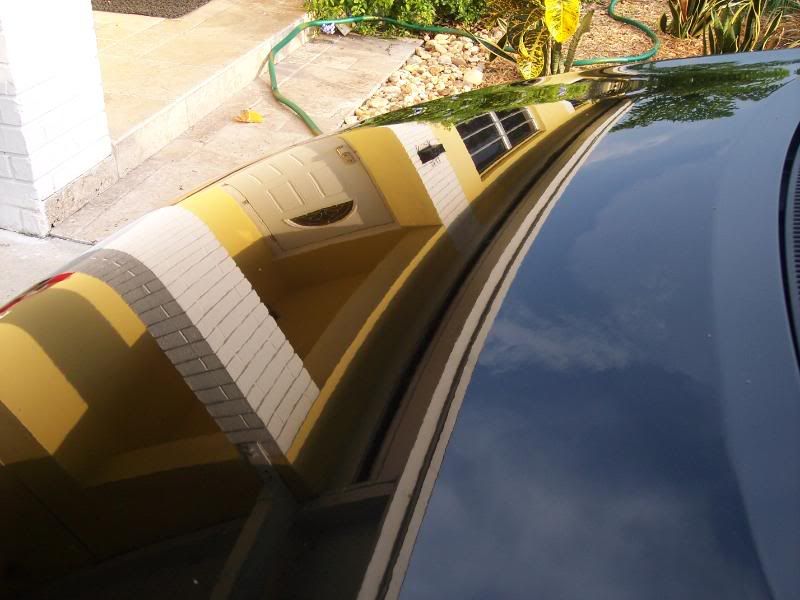
Obligatory reflection shots...
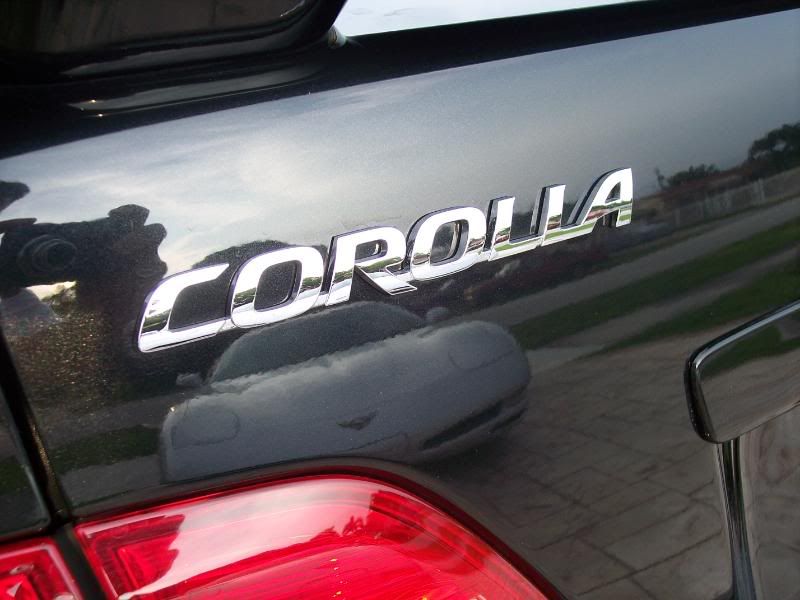
Parting shot...
As always guys, thanks for looking...
About two months ago, someone ran a redlight and she t-boned them pretty flush...thank goodness she was just cruising at low speeds when it occurred. Anyway, front bumper and hood had to be replaced as well as lights, radiator support, etc. The body shop (Progressive Concierge Claim Service-approved repair facility) was contracted by the insuraqnce company so I never got to speak to them about not finishing the paintwork with a rotary prior to delivery. When she got the car back she immediately called me to ask about "rainbows" on her hood...
Drove over to her house and found horrible holograms and buffer trails from the rotary used to finish the surface during blending on the quarter panels and hood. You could tell some clown just set it to 3000 rpm's and was swinging it back and forth just to get it done and out the door. The final wash at the body shop and again at the Progressive Claims facility prior to delivery instilled massive amounts of swirls as seen below:
Originally I had planned on a two-step correction since I had not received my Flex from ADS at the time of initial booking. For the test spot I picked a spot on the hood and attacked it with a tried-and-true combination...LC CCS Orange/M105/PC7424. After completing my passes over the work area, I performed an IPA wipedown and the results showed an 85% reduction in swirling and hologramming as seeh in this pic:
Based on these results I originally quoted the customer on a two-step correction planning to go over the car with M105/CCS Orange followed by M205/CCS White via PC7424. After receiving my Flex and seeing the added corrective ability, I decided to test out some new techniques and theories on this car. I remembered how well the Flex/D151 performed on the LRP Audi I had done (http://meguiarsonline.com/forums/showthread.php?t=34266) and since this was a referral from the same household I knew water etching was going to be an issue.
Pulled out the Flex to perform some testing on the hood. Went with an ADS-spec CCS Green polishing pad and some M205. Proceeded to tape off the hood area and give it a go.
Taping off the hood...
Tools of the trade...
Prime the pad with a quick spritz of XMT Pad Conditioner and then lay down a large "X" of product...
At this point after 3 vertical and 3 horizontal passes over the work area I stop. Some have asked me what the product "looks like" at my typical stopping point so I snapped some quick pics...
These next shots are of the polishing process itself. Since the pad has already been primed and worked over an area, less product is needed for the next section...
Then "kiss" the pad to the surface of the paint to begin distributing product...
Without touching the trigger, spread the product around the work area with the pad...
Now lightly squeeze the trigger and go over the work area to evenly distribute product and prepare for full correction (notice the pad circles in the product)...
Hmmmm, starting to look good after final wipe...
Under the lights...
Does this flake stand out or what...
Did I mention water etching...
Time for Mother Nature to judge...
Directly in the work area...
Paint Preparation Process:
1. Pre-soak with Pure Oceans Orange Boat Cleaner
2. Apply DP Wheel Gel and allow to dwell on rims/tires
3. Wash vehicle with last of my sample of Meguiar's Soft Wash Gel using 1-bucket/foam gun method with HD grout sponge
4. Cleaned wheel wells/rims/tires with assortment of brushes and remaining wash solution
5. Paint dried with synthetic chamois and Armor All drying towels
6. Paint clayed with Mother's clay bar with Meguiar's Last Touch (1:1) as lubricant
7. Final soak/rinse with PO Orange Boat Cleaner to remove any clay/lube residue
8. Vehicle dried using previous method and taped in preparation for polishing
Today was the first in a week we've had steady sunshine so I really wasn't expecting to get to the car. Once I started working I realized I left my camera in the house. Temps were in the low 90's with high humidity and my house has the A/C set on 65 all the time so when I ran outside and started snapping pics I did not realize the lense had fogged so I wasted a ton of pics including the exterior "before" shots and some washing and interior pics. Here's what survived...
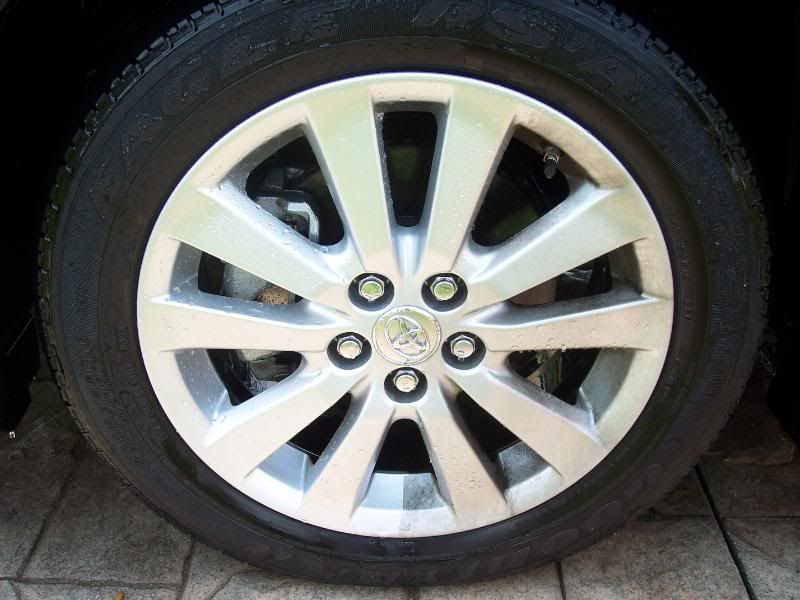
Wheel cleaning 50/50...
Fair amount of contamination...
Paint Correction Process:
1. Applied M205 via Flex 3401 Dual Action Polisher with an ADS-spec LC CCS Green Polishing pad on speed setting 6
2. Wipedown after each section with clean microfiber only...no IPA or quick detail product
The sun was popping in and out of the clouds interspersed with intermittent quick rain showers so after polishing I had to deal with some areas of dried polish and some water spotting from the rain. As a solution I got to try a paint cleanser from Meguiar's...DC1 Paint Cleaner. Used an Autogeek combo applicator with terry on one side and a microfiber grip pocket and touch-up section on the other.
Materials...
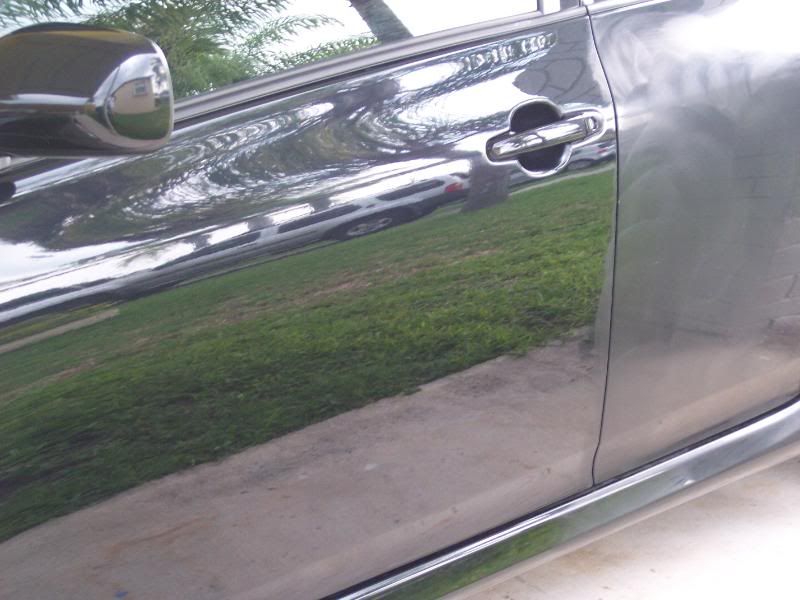
Driver's door washed/clayed/polished/cleansed and passenger door with freshly applied paint cleanser...
Both doors complete...
Paint surface looking close to 100% at this stage...
The Meguiar's DC-1 Paint Cleaner is very effective at preparing the paint surface for waxing or polishing and is easy to work with. Apply to your applicator...work into the paint surface in circular or straight motions...cover a panel...wipe off with a clean microfiber and you're done.
Detail rig looking fairly decent in the background...
Interior Detail Process:
1. Remove all floor mats, loose trash, coins, tampons, hair clips, and the million other things I found in the car
2. Vacuumed carpeting and seats (cloth)
3. Performed wipedown of all interior plastic and vinyl surfaces with Meguiar's Quik Detail Wipes followed by clean microfiber wipedown
4. Treated all interior glass with Meg's NXT Glass Cleaner
5. Treated interior vinyl with Meg's Supreme Shine Interior Protectant
The floor mats were discolored and almost grey when compared to the rest of the carpeting. In an effort to rejuvenate them I decided to give a new product Rick at ADS sent me a try...Meguiar's Carpet and Upholstery Cleaner.
Before...
50/50 after brushing and vacuuming...
Applying Meg's C&U Cleaner is easy with the upside-down mounted trigger...
Agitate with Tampico Carpet Brush and allow to dry then pass the vacuum head over to pick up any encapsulated dirt/dust. 50/50 of completed section...
Completed interior...
While working on the interior the reflections and reflectivity off of the polished paint (no LSP) were amazing...
Oops, some dried DC-1 that I missed and allowed to dry on the plastic cowl (yup even I make mistakes
)...But I know how to fix 'em too! (M39 via terry towel)...
Final Presentation Process:
1. All exterior metal surfaces cleaned with Meg's Hot Rims Chrome Polish Liquid
2. Glass cleaned with NXT Glass Cleaner
3. Tires dressed with Meg's High Endurance Tire Gel
4. Rims wiped down with Meg's Last Touch quick detailer and protected with DP Wheel Wax
5. Exterior rubber/vinyl cleaned with M39 and dressed with M40
6. LSP of choice on blacks is always a carnauba for me so I sealed the paint with a coat of NXT 2.0 and topped with Pinnacle Signature Series II
Final pics prior to customer pick up...
Obligatory reflection shots...
Parting shot...
As always guys, thanks for looking...


 TOP
TOP

 ...i see LSP on here a lot, what does it stand for? sorry, but im a newb! i know its the final step/top coat of wax (right?), but wasnt sure what it meant.
Comment