• If this is your first visit, be sure to check out the FAQ by clicking the link above. You may have to register before you can post: click the register link above to proceed. To start viewing messages, select the forum that you want to visit from the selection below.

Announcement

Collapse
No announcement yet.

C5 Vette - 1st DA Use

Collapse
X
 
  • Filter
  • Time
  • Show
Clear All
new posts

  • C5 Vette - 1st DA Use

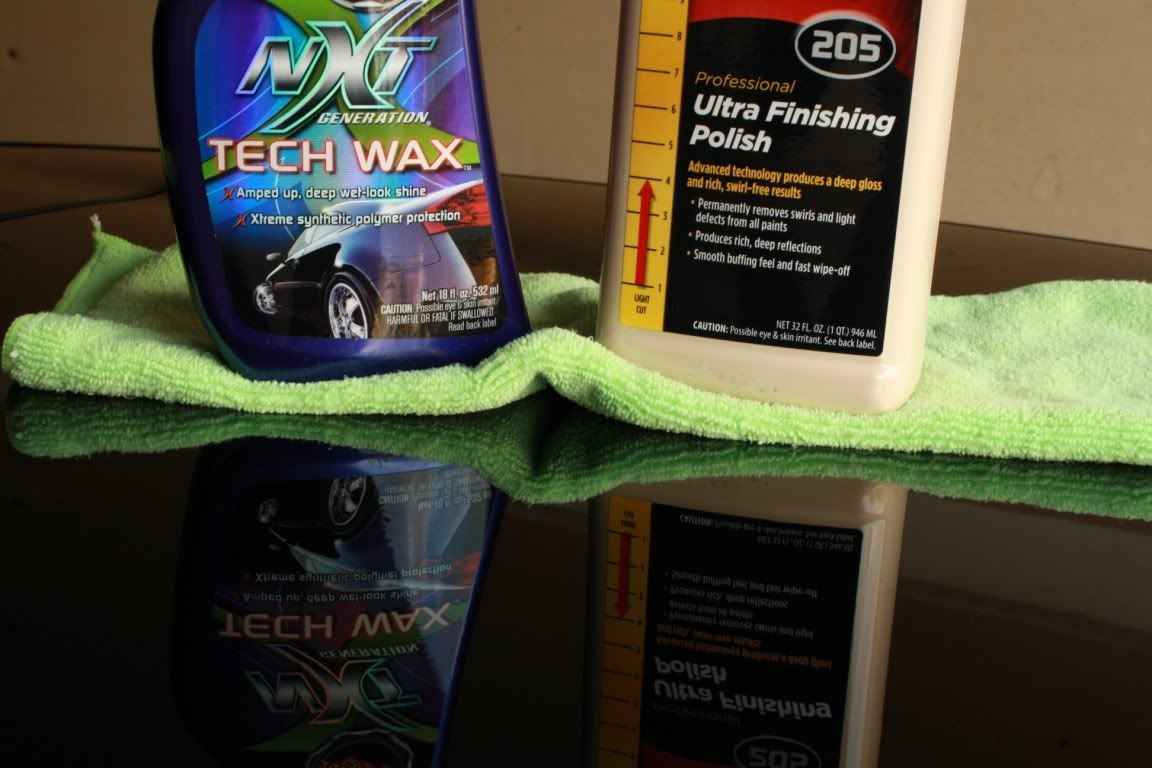
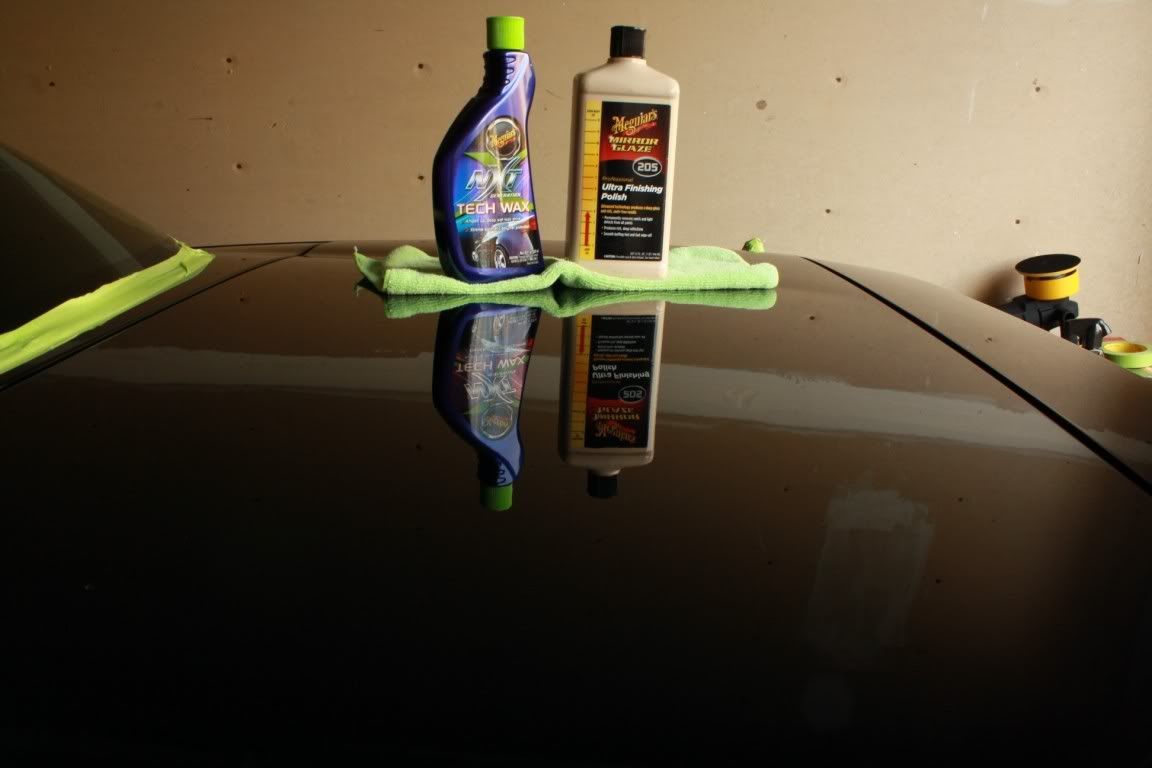
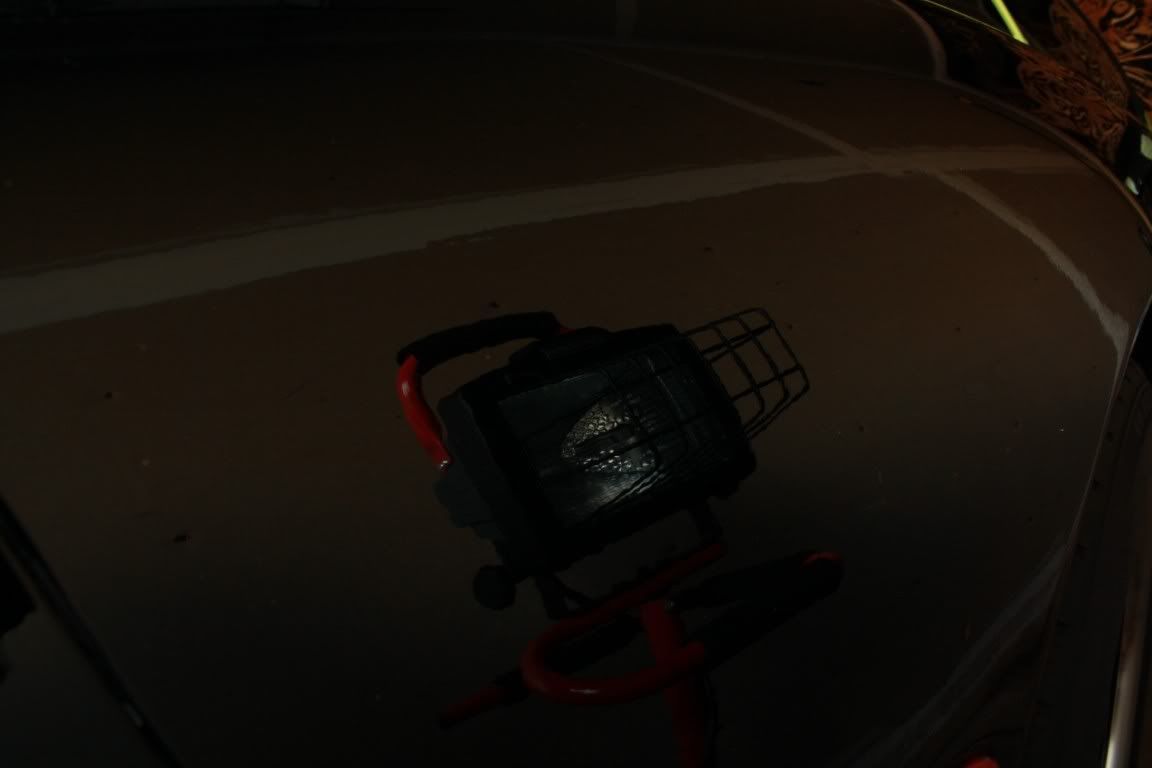
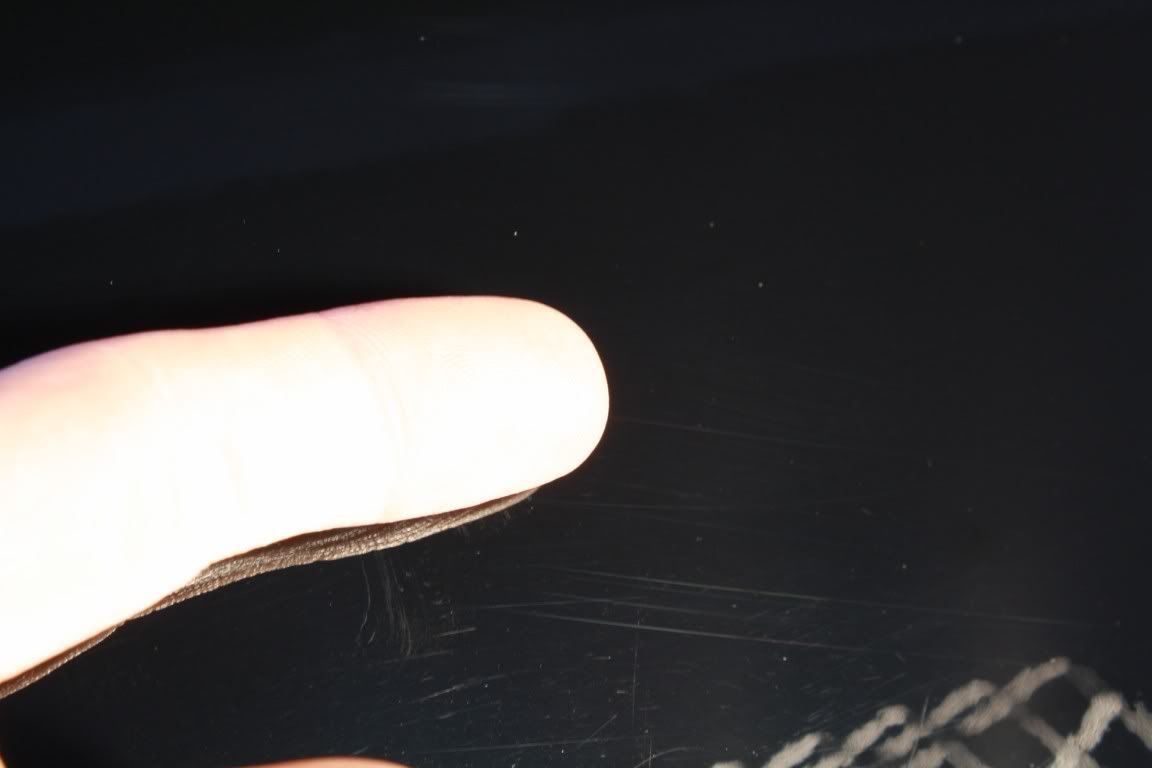
    For the 3yrs I've owned my black 99 C5 Corvette, I've put up with the entire car coated in these light scratches and swirl marks. Our car club had a Meguiars rep do a detail session with us and I was finally able to use the Meguiars DA Polisher and several products. I finally got everything I needed to start this project and got to it over the weekend. Here is what I am currently using in my "process" after a lot of research here.

    Product
    1. Is it safe to use the W7006 Cutting Pad with the G110 and M205? Would it be helpful given my goals/situation?

    2. I was planning on saving my W9000 Finish Pad to use with my NXT Tech Wax. Should I get another one and use it with the M205 for even better results than just the W8006/speed2 combo?

    3. I saw in some of the How-To articles that the recommended approach was to use M105 and then follow it up with M205. I didn’t see this before starting my project, should I purchase M105 and go back and do it right? Could I cause any damage to my clearcoat/paint by going over the panels so many times?

    4. I didn't purchase a nice glaze or polish like M07 Show Car Glaze or the other related products. I would like to get the black as deep as possible and go for the wet look.


    Thanks guys, I've learned a lot from the Meguiars rep that helped us out and a lot on this forum from the Tech Articles. Would love to hear your thoughts on my car as well. I am away on business at the moment, but will take some nice photos of what I am working with when I return.


    99' FRC Corvette
    08' Sky RedLine

  • #2
    Re: C5 Vette - 1st DA Use

    The official stance on the use of the cutting pad is NOT to use it with a DA polisher. The reason Meguiar's says this is because the DA with a cutting pad will very likely leave hazing and/or marring on the paint. For most users, this could be a problem since they may lack the skill or time to properly remove them in the following steps.

    If you are new to using the G110, I would suggest starting with a polishing pad. If you create deep defects with a cutting pad that you later find you do not know how to remove, you may get in over your head.

    I would also have at least 3 polishing pads on hand, and at least 2 finishing pads. After you finishing your polishing with the M205 on the polishing pad you will have to make a personal judgment on whether or not you want to refine the finish further by adding a final pass with M205 on a finishing pad.

    Sometimes you need it, sometimes you do not.

    the M105 is much more aggressive and will offer much more defect removal. If you achieved results that make you happy without it, there is no reason to do it again. The ultimate test is what looks good to you.

    Same logic applies to the use of a pure polish like M07- you need to look at the car and decide for yourself if you are happy with the results. If you feel that it could look better, then figure out what is lacking and come back and post here so we can tell you what is most likely going to give you the results you are after

    Comment


    • #3
      Re: C5 Vette - 1st DA Use

      I worked the car for a considerable amount of time, and I am absolutely unhappy with the results. If the car is in dim light/shade or not in direct sunlight, it looks fantastic with just the M205 I've used so far. When I put my shoplight on it, the defects are blatantly obvious and glaring.

      I have since stopped the project completely until I could seek better advice on what I could change in my process. Here are some sample images of what I have done, and what I am working with. The entire car is covered in scratches that are clearly seen in harsh light.


      99' FRC Corvette
      08' Sky RedLine

      Comment


      • #4
        Re: C5 Vette - 1st DA Use

        I have stopped my project completely, I just don't see the results as acceptable. I've uploaded some photos, but am currently waiting on approval for the post to show up.

        The car has always looked good in the shade and not in direct light/sunlight. I see that the scratches have improved, but they are still way way beyond what I wanted to achieve.

        I'm looking for advice on how to improve my process. I've looked through threads on here for days and all I can gather is that I need to go over all of the panels again, and buy yet another product (M105) to hopefully get the results I'm looking for. I've already spent hundreds getting the right products/tools, I just need a bit more guidance I guess before I'm willing to spend even more.

        What are your thoughts on this particular question?

        3. I saw in some of the How-To articles that the recommended approach was to use M105 and then follow it up with M205. I didn’t see this before starting my project, should I purchase M105 and go back and do it right? Could I cause any damage to my clearcoat/paint by going over the panels so many times? (taking into consideration the steps I've already taken above).
        99' FRC Corvette
        08' Sky RedLine

        Comment


        • #5
          Re: C5 Vette - 1st DA Use

          M205 is NOT a true defect removing heavy hitter- notice the name... it is an Ultra Fine finishing polish.

          Your problem is that you need something more aggressive to remove the initial defects, and then you finish with M205 for the added gloss and clarity.

          Comment


          • #6
            Re: C5 Vette - 1st DA Use

            So I'll grab M105 and start over. I'll stick with a test spot and see how it goes. Unless you suggest another product in place of M105?

            I'll use M105 with a Polishing Pad, then follow it up with M205 with a polishing pad, and finish with a low speed final pass with a Finishing Pad. Anyway, I'll give that a shot as soon as I get a hold of M105 or a recommended replacement.

            Also, what do you guys think about working those panels again with another, more aggressive product? I imagine it would be just fine since the product I was using wasn't very abrasive, right?
            99' FRC Corvette
            08' Sky RedLine

            Comment


            • #7
              Re: C5 Vette - 1st DA Use

              I would get some DA approved M105 (the original version was not for use with a DA polisher), and then some Ultimate Compound.

              I would start with Ultimate Compound since it is more aggressive than M205 by a substantial amount, but less aggressive than M105. If the UC does not get the job done, then use the M105.

              Yes, you will need to use the UC/M105 over the panels you already did. considering it wasn't aggressive enough to reach down to the effects you are aiming to remove, it will be the same as if you never used the M205 since you will remove everything the M205 did and then some anyway.

              Comment


              • #8
                Re: C5 Vette - 1st DA Use

                Originally posted by Mark Kleis View Post
                ...considering it wasn't aggressive enough to reach down to the effects you are aiming to remove, it will be the same as if you never used the M205 since you will remove everything the M205 did and then some anyway...
                Mark is absolutely correct on this point...if the M205 did not remove the defects (swirls) then going over the panel again should be fine. We all know that defect removal is about leveling and clear coat removal and in this case it appears little or none was removed.

                As for bettering your "process" I am not sure there's anything you could do as far as speed settings or number of passes or applied pressure that will improve your results. The truth is that in all of the Corvette's we've done I have realized that there is NO ONE STEP PRODUCT for our cars. Only thing I would add is a Brinkman Dual Xenon light so you can properly inspect your work in-progress.

                The clear coat on a modern Vette is very similar to the Mercedes Benz Ceramiclear. Exceptionally hard and at the same time very scratch-sensitive. That's why the Menzerna SIP/Nano combination works so well...just like it does on the Benz. Any product/pad combination aggressive enough to remove all the defects will impart induced marring of its own. Thus the need for a second product/pad combination of lesser aggressiveness to correct the haziness, holograming, and marring left during the defect removal phase.

                Below is the usual process used on a C5 with a DA polisher. Remember I use Lake Country CCS pads so the products will not be identical to yours but you'll get the idea:

                1. I start off with a CCS Orange Pad (medium cutting) and M105. This is your defect removal step. I use a high speed setting such as 5 or 6 with heavy pressure for the first few passes and medium pressure on the last pass. I do not go down to a 2 speed setting as you did. Use the necessary number of passes until all defects are removed to your satisfaction. If this doesn't do it then you're left with either using a CCS Yellow Pad (heavy cut) which leaves behind a lot of induced damage or moving to a rotary or just living with what's left.

                2. Next I switch to a CCS White Pad (polishing) and M105. Now you're going about the process of removing induced damage. The less aggressive pad will not impart mechanical damage to the surface and the M105 is removing the majority of the induced marring. I usually go one good pass here and inspect. Repeated passes produces diminishing returns here so keep it to two passes max.

                3. Here I reach for another CCS White Pad and M205 (I have also used Ultimate Compound here). This is your final induced damage removal step. At least 75% or so of the induced damage should be gone after Step 2 and this step will chase down the last of it. The polishing pad with the much reduced aggresivity of M205 will remove the last of the micromarring and prepare the surface for jeweling. Again, one or two good passes should be sufficient here.

                4. The last step consists of a CCS Green Pad (light polishing) and M205. This is the jeweling or "burnishing" step. With the last of the micromarring gone you are conducting the final universal leveling and gloss-producing step. I've never needed more than one solid pass here but your results may vary a little. After your final IPA wipedown here, your finish should be deep, glossy, and LSP ready.

                A lot of work? Yes! But the results will be astounding...especially on black. Can some steps be skipped? Sure. All depends on your expectations and what you're willing to live with. Some owners of the Vette's we've worked on have been happy after Step 2. Others skipped Step 3. But it's just never completed with one product/pad combo in one step on Corvette clear. The idea I wanted to impart to you here is the theory of gradually diminishing aggressivity in your product/pad choices to achieve the desired results. Think of it as climbing down a ladder with the most aggressive combinations at the top. As always, use a test spot or test panel and try and determine what works best for you and for your particular car/paint!

                Now, remember, Meguiars does not "officially sanction" the use of any cutting pads with their products. They don't even recommend using the speed setting of 6 on their own machine. We live in a litigious society and that is to be expected. But the truth is their chemists have devised products that are excellent and compare favorably or better than anything currently on the market. The DA combined with M105 is indeed a remarkable defect-removing tool and I think you'll be pleased...just as many other C5 owners (including myself) were when we first used it on our Vette's.

                Let us know how it turns out, if we can be of any assistance, and remember we love pics so keep them coming...

                Comment


                • #9
                  Re: C5 Vette - 1st DA Use

                  Thanks guys, I do appreciate the assistance. I'll see what I can do about grabbing some M105 and Ultimate Compound locally, and get back to it. I think Bounty and I had the same ideas for the most part, but I just wasn't using an aggressive enough product. I'm not afraid of a lot of work to get the results I'm looking for, I'm in no hurry here.

                  Thanks again guys!
                  99' FRC Corvette
                  08' Sky RedLine

                  Comment


                  • #10
                    Re: C5 Vette - 1st DA Use

                    The main reason we don't recommend using our cutting pads with our DA Polishers is because the foam formula is aggressive enough that with some paint systems when used on a tool that oscillates, the foam can actually haze the paint it's that aggressive. This doesn't happen when you use the same pad and chemical on a rotary and the reason is because when you switch to a rotary you switch to a different type of action.

                    It's the aggressive characteristics of the foam being moved in an oscillating fashion that causes the haze.

                    Using a cutting pad with a DA Polisher will remove defects faster but if it dulls the paint down at the same time then that's working backwards and we don't generally teach people to work backwards.

                    Now a seasoned veteran detailer knows he can simply re-polish the paint with a less aggressive pad and a less aggressive product and remove the haze but not everyone is a seasoned veteran and fact is most people if they see your products hazing their paint don't think things through, they instead get upset with the company and then seek help undoing the damage.

                    Personally I've worked on a lot of cars in my life and have the good fortune of teaching lots of classes that includes showing people how to remove swirls and scratches with a DA Polisher and in all cases I can either get the job done using a polishing pad, the right chemical and good technique of the defects are deep enough that the owner of the car should learn to live with them or it's time to switch to a more powerful tool.

                    As for what you can do to get better results?

                    First understand that Corvettes have a reputation for having very hard paint and most of the Pro Detailers that work on Corvettes with scratches like you show in your car's paint are using rotary buffers to get the deep scratches out as the rotary is faster, more powerful and more effective at removing deep scratches out of harder paints.

                    If you're not able to use a rotary, and most people are not, the just keep your expectations grounded in reality because a DA polisher has a clutch in it and that's the safety feature everyone loves because it makes the tool save by preventing your from burning the paint and instilling swirls, at the same time it's the clutch that also limits the correction power this tool offers as compared to a rotary buffer.

                    In other words, in order to remove swirls and scratches you need to remove some paint. When using a DA Polisher, this tool removes paint best when it's rotating the pad against the paint surface, not just vibrating or jiggling. As you increase the pressure to the head of the buffer in an effort to make the tool remove more paint faster, the clutch kicks in and the pad quits rotating and just vibrates or jiggles.

                    See the problem?

                    So the trick to getting the best results using a DA polisher on a car with bad swirls and scratches AND hard paint is to shrink the size of your work area down and focus on using perfect technique.

                    If you read through this it goes over everything technique you need to perfect in order to maximize the cleaning or abrading ability of the DA Polisher. It starts by listing the most common mistakes people make followed by the remedies for these mistakes.


                    How To use: G110 - G220 - G100 - PC/Porter Cable - UDM
                    If you're moving up to machine polishing, be sure to read the below thread before starting...
                    Tips & Techniques for using the G110, G100, G220 and the PC Dual Action Polisher
                    (These are all similar tools)


                    The above thread was posted in 2007 and the very first remedy listed is just as appropriate the day it was posted as it is today in reference to working on your Corvette. Here's the first remedy from the above article.

                    1) Shrink your work area down
                    The harder the paint the smaller the area you can work. The average area should be about 16" by 16" up to 20" by 20" or so. You have to do some experimenting, (called a Test Spot), to find out how easy or how hard the defects are coming out of your car's paint system and then adjust your work area to the results of your Test Spot.

                    The harder the paint, the deeper the defects the smaller the area you want to work. 16" by 16" is pretty small for a pad that's 6" in diameter, but if you're using good technique then you've overlapping your passes by 50% so that gives you a working width of approximately 3" and then a 16" to 20" squarish area is doable.


                    The above is one tip/technique that you can try with a more aggressive product like either the M105 or the Ultra Compound.


                    Besides the above, it's also important to point out that for the deeper scratches, you are more effective to work these out by hand than by machine because you can exert more pressure to a small area with your four fingers pushing down on an applicator pad than you can by applying pressure over the entire face of a 6" pad.

                    This is covered in detail in the threads this link will take you to as removing Random Isolated Deeper Defects is a common problem and the problem starts with education. That is explaining that because modern clear coat paints are harder than traditional single stage paints and quite frankly harder than most people understand as they venture into working on these modern clear coat paints, that circling back to the clutch feature of the DA Polisher, because if you push too hard on the tool the pad will quit rotating, but with your hand you can push pretty hard and keep pushing as long as you have the perspiration.

                    Here are the threads, they are all tagged with the word exert


                    And here's proof the human hand is better and more effective for removing random, deeper defects over the DA Polisher.


                    Scratch Removed using Ultimate Compound

                    The below pictures were taken during the first Saturday Class for 2009 and the thread for that class can be found by clicking the link below.

                    Pictures from the first 2009 Saturday Open Class!


                    It's pretty common to pick up isolated, random scratches in your car's finish over time, especially if your car is a daily driver. Here's an example from one of our recent Saturday Detailing Classes here at Meguiar's where we used the new Ultimate Compound to remove about 98% of scratch right wear your eyes would see it everyday, right above the door handle.


                    Deep Scratch just above the door handle - Original resized to 800 pixels wide after cropping


                    These are all original shots, the photos have not been resized, the portion shown was cropped out of the original.

                    Before


                    After 3 applications of Ultimate Compound


                    After a few more applied by the owner


                    Also, those results were before any wax or any other product was applied. What you see is just the results of Ultimate Compound hand applied using a clean, soft foam applicator pad.


                    How To Remove a Bird Dropping Etching by Hand using M105 Ultra Cut Compound

                    Below is the real-world pictures captured at a recent Saturday Class here at Meguiar's where we used M105 Ultra Cut Compound to quickly and easily remove the etching left by a bird dropping. There were two very blatant etchings on the hood of this Chrysler and as part of a demonstration on technique, we demonstrated both ScratchX and M105. The results were that both product worked but the M105 worked faster with less work and produced better results.


                    Here are the products we used,

                    M105 Ultra Cut Compound
                    ScratchX
                    Soft Foam Applicator Pads
                    Supreme Shine Microfiber Polishing Cloths


                    Taken from this thread...
                    Open Class - Pictures & Comments - June 28th, 2008


                    Here's some before & after pictures of two bird dropping etchings we removed by HAND

                    The first one we removed by hand using M105 Ultra Cut Compound, the second one we removed by hand using ScratchX.

                    The results were both amazing but what most people found interesting was the M105 removed 99.9% of the defect with one application while ScratchX removed about 95% of the defect with 3 applications.

                    ScratchX also required more "Passion behind the pad" for each application while M105 required some passion to engage the product with the paint but nowhere near as much pressure or as much time.


                    First we'll frame up the shot so you can see the car and where the bird dropping etchings were. The etching being pointed to is the one we removed using M105 and just to the left of that spot is the bird dropping etching we removed using ScratchX

                    Except for the first picture, all the rest are original photos, no touch-up work at all was done to them. Some were cropped and resized but that's just so they will fit on your monitor.


                    The finish overall is swirled-out but Bob's going to put his new learned skills and knowledge to work to restore a show car finish for his wife!


                    M105 Before


                    M105 After


                    ScratchX Before


                    ScratchX After


                    Both work if you work them but it was very apparent that for removing below surface defects by hand M105 Ultra Cut Compound was the hands-down winner.


                    And the reason you can remove RIDS by hand faster than with a DA Polisher besides the clutch issue is because when you work by hand you're able to exert more pressure to a smaller area which enables you to remove paint faster as long as you're using a quality abrasive product with good technique.

                    This applicator pad shows you the more isolated and directed pressure when working by hand because the pigment accumulated mostly where your fingers are pushing.

                    But note that when you're working on a clear coat finish by hand in the same way, you're still removing paint as shown in the above picture but because it's clear your eyes can't see it.


                    Summary
                    You should be able able to remove the majority of the more shallow to medium depth swirls and scratches using a DA Polisher with either M105 or Ultimate Compound. For the deeper defects, if your car care goal is to remove them and you understand that after you do all this correction work on your car's paint you'll have to take ownership of the car washing process or the swirls and scratches will just show up again, then you can go after the RIDS Random Isolated Deeper Scratches by hand.

                    Note that removing all the lighter swirls and scratches will make all the deeper swirls and scratches show up like a sore thumb to your eyes. You have a limited amount of clear paint covering the basecoat paint and all the UV protection for the basecoat is in the clear coat, so the more clear coat your remove the less protection for the basecoat you have for the service life of the car.

                    That's why if your car is a daily driver it's usually a better choice to remove the light swirls and scratches and learn to live with the deeper scratches. If your car is a Garage Queen and you personally maintain it including do all the washing and waxing, then this type of car would be a good candidate to remove all the RIDS and create a true show car finish on.

                    There's a more advanced technique for removing RIDS called Feathersanding but it requires the ability to wet-sand and use a rotary buffer and high quality finishing papers like Meguiar's Unigrit Finishing Papers.


                    Experience helps a little too. Below are some pictures from a Side-by-side, before & after demonstration we did for the 2002 Bimmerfest in Santa Barbara.

                    First we used a rotary buffer to buff out one half of the car and remove all of the light scratches. Next, we took little postage size stamps of Nikken Finishing Paper and sanded each individual scratch till it had been removed. Next, we used a compound to remove my sanding marks. The results were a scratch-free flawless finish on a 1991 e34 BMW M5.

                    How To Remove Random Isolated Deeper Scratches using the Feather Sanding Technique

                    Before


                    We compounded the entire finish before starting the below process to remove the shallow scratches and expose the deep scratches.


                    Process


                    Random, Isolated, Deeper Scratches, (RIDS), can be removed, but it is an advanced technique that takes skill, patience and the right products to accomplish successfully. (A little luck helps too!)


                    Hope all that helps?


                    Mike Phillips
                    760-515-0444
                    showcargarage@gmail.com

                    "Find something you like and use it often"

                    Comment


                    • #11
                      Re: C5 Vette - 1st DA Use

                      Study this before starting again with your more aggressive product.


                      Tips & Techniques for using the G110, G100, G220 and the PC Dual Action Polisher
                      (These are all similar tools)

                      After teaching hundreds of classes here at Meguiar's, there are some common mistakes most people make when trying to remove swirls and scratches with a dual action polisher. Most of them have to do with technique.


                      Here's a list of the most common problems
                      1. Trying to work too large of an area at one time.
                      2. Move the polisher too fast over the surface.
                      3. Too low of speed setting for removing swirls.
                      4. Too little pressure on the head of the unit.
                      5. Too much pressure on the head of the unit so the pad quits rotating.
                      6. Not keeping the pad flat while working your product.
                      7. Too much product, too little product.
                      8. Not cleaning the pad often enough.
                      Here's a list of the solutions in matching order,
                      1. Shrink your work area down, the harder the paint the smaller the area you can work. The average area should be and average of about 16" by 16" up to 20" by 20" or so. You have to do some experimenting, (called a Test Spot), to find out how easy or how hard the defects are coming out of your car's paint system and then adjust your work area to the results of your Test Spot.
                      2. For removing defects out of the paint you want to use what we call a Slow Arm Speed. It's really easy to move the polisher too quickly because the sound of the motor spinning fast has a psychological effect to for some reason want to make people move the polisher fast. Also the way most people think is that, "If I move the polisher quickly, I'll get done faster", but it doesn't work that way.
                      3. When first starting out many people are scared of burning or swirling their paint, so they take the safe route of running the polisher at too low of a speed setting, again... this won't work. The action of the polisher is already g-e-n-t-l-e, you need the speed and specifically the pad rotating over the paint as well as the combination of time, (slow arm speed), together with the diminishing abrasives, the foam type, and the pressure to remove small particles of paint which is how your remove below surface defects like swirls or scratches. It's a leveling process that's somewhat difficult because the tool is safe/gentle while in most cases, modern clear coat paints are harder than traditional single stage paints and this makes them hard to work on. This is also why people get frustrated, they don't understand paint technology, all they know is their paint swirls easy and getting the swirls out is difficult and thus frustrating.
                      4. For the same reason as stated in #3, people are scared, or perhaps a better word is apprehensive, to apply too much pressure and the result of too little pressure is no paint is removed thus no swirls are removed.
                      5. Just the opposite of item #4, people think that by pushing harder on the polisher they can work faster and be more aggressive, but the truth is the clutch in the tool is a safety mechanism to prevent burning and will cause the pad to stop rotating, thus less cleaning or abrading action and once in a while this will lead a person to then post on the forum something like this, "Hey my pad doesn't rotate". There needs to be a balance of enough pressure to remove defects and keep the pad rotating but yet not too much pressure as to stop the rotating action. This balance is affected by a lot of things, things like type of chemical, some chemicals provide more lubrication and the pad will spin easier, curved surfaces or any raise in body lines will tend to stop the pad from rotating. This is where experience on how to address these areas comes into play or you do the best you can and move on. It's not a perfect tool, nor a perfect system, but it's almost always better than working/cleaning by hand.
                      6. Applying pressure in such a way as to put too much pressure to one side of the pad will cause it to stop rotating and thus decrease cleaning ability.
                      7. Too much product over lubricates the surface and this won't allow the diminishing abrasives to do their job plus it will increase the potential for messy splatter as well as cause pad saturation. Too little product will keep the pad from rotating due to no lubrication and there won't be enough diminishing abrasives to do any work. Again it's a balance that comes with experience, or another way of saying this would be it's a balance that comes with hours of buffing out a car to learn what to do and what not to do. Information like what you're reading here is just an edge to decrease your learning curve. Hope this is helping.
                      8. Most people don't clean their pad often enough and most of the time the reason for this is because they don't know they're supposed to clean their pad often and they don't know how to clean their pad. Again, that's why this forum is here to help you with both of these things. You should clean your pad after every application of product or every other application of product, your choice, most of the time cleaning your pad after every other application of product works pretty well. It enables you to work clean and enables the foam pad, the polisher and the next application of fresh product too all work effectively. How to clean your pad will be addressed below sooner versus later, but not at the time of this posting. (Sorry, I'm behind a keyboard, not a video camera
                      The first 4 are the most common. Can't tell you how many times we hear a comment like this from someone in the garage after demonstrating the correct technique

                      "That's what I'm doing wrong"


                      The dual action polisher is a gentle tool, that's why people like it. People are afraid of machines because they're worried they're going to either instill swirls or burn through the paint. When they learn that this is pretty hard to do with this machine, so after enough research or after watching a demonstration they learn to trust it and try it.

                      Summary: People like the dual action polisher because it's oscillating action is safe and gentle to the surface.

                      Now follow me on this...
                      For the same reason people love the dual action polisher, (it's safe and gentle), a segment of people get frustrated with it because it won't remove all defects all the time. It won't tackle serious or deep defects quickly and easily. It won't always work on really hard paints. So for the same reason people love this tool, they also hate it, they just don't know why. Maybe after reading this post they will understand.


                      This is the reason this thread is so widely read and you can learn a lot from it if you'll only take the time to read through it.

                      PC + 83 not "Cutting" it! - The Limits of the Dual Action Polisher


                      Even the pictures of the paint on the white truck on the first page and the story behind it are powerful and REAL (This writer took them and did the testing with both the G100/PC and the RB).

                      When the G100/PC with a strong cleaner/polish like M83 and our W-8006 polishing pad doesn't remove the defects to your satisfaction or within an acceptable time limit the answer is not to get more aggressive with a more aggressive pad or chemical or both, the answer is to switch to a more powerful machine like the rotary buffer and or take the car to a Pro who knows how to use a rotary buffer, or learn to live with the defects.

                      Hope this helps...
                      Mike Phillips
                      760-515-0444
                      showcargarage@gmail.com

                      "Find something you like and use it often"

                      Comment


                      • #12
                        Re: C5 Vette - 1st DA Use

                        Thanks guys, I've read all those links...but I'm away from home and it sure wouldn't hurt to go over them again!

                        I want the finish on my car to come as close to perfection as it can get. It's a garage queen that is only out on nice days and I only drive it to car club functions/meets and car shows. I want it as good as I can get it, and I don't care how long it takes.
                        99' FRC Corvette
                        08' Sky RedLine

                        Comment


                        • #13
                          Re: C5 Vette - 1st DA Use

                          Originally posted by Demon_C5 View Post

                          I want the finish on my car to come as close to perfection as it can get. It's a garage queen that is only out on nice days and I only drive it to car club functions/meets and car shows. I want it as good as I can get it, and I don't care how long it takes.
                          If you don't have a Brinkman Swirl Finder Light you're going to want to get one and for your goal it would probably be best to only tackle on panel a day and stretch the project out over a few months.

                          Then after each panel you complete start being more careful how you wipe it down or wash it so you don't put swirls back into the paint.

                          Last time I was in Pep Boys the had the exact Brinkman Flashlight you want to get for around $30.00

                          Here's what you're looking for...


                          Be wary... the Xenon Flashlight aka The Swirl Finder... is a Cruel Master


                          Mike Phillips
                          760-515-0444
                          showcargarage@gmail.com

                          "Find something you like and use it often"

                          Comment


                          • #14
                            Re: C5 Vette - 1st DA Use

                            I'll see if I can pick one up locally. I've been using my 500W shop light, and that essentially does the same thing. Makes the finish look HORRIBLE, where if I turn it off....it instantly looks amazing like in the pictures I posted. I cringe when I go to turn on that light, I hate seeing the true condition of the paint.


                            That light would make it so much easier though. Obviously the large shop light I use has a lot of limitations. Something handheld would be far better.

                            I'd like to set a goal to have the car finished by June 1, since we have a huge car show in June. So we'll see. I think once I have the right product, get the right handskills, and get a method/process going I'll be able to make faster progress.
                            99' FRC Corvette
                            08' Sky RedLine

                            Comment


                            • #15
                              Re: C5 Vette - 1st DA Use

                              I had to order the M105 compound over the weekend and it came in this afternoon. Picked it up and got started right away.

                              First off...I LOVE THAT STUFF!!! My god, it's a thing of beaty.

                              Ok, with that out of the way... It seems to be taking out 90% of the scratches/swirl marks on the first pass. I have refined my process a bit to speed things up. I'm doing one pass per section with M105 (speed 4 moderate pressure) and moving on. I'm going to finish up the whole car, then come back over it with M205 with a low speed pass (2 or 3) and light pressure.

                              A few questions just to make sure I'm doing things right.

                              1. The hard scratches and swirls are virtually gone. Although, it appears that the M105 with the yellow polishing foam pad are leaving very tiny microscopic swirl marks. They are very tough to see, and you have to have a bright light right up against the paint with your head down there to really see them in my garage. I don't know if they will be noticeable in direct sunlight, I might back the car out of the garage once done and see. Is this normal, and will a light pass with M205 decrease their visibility or eliminate them?

                              2. After I finish up with M205, could I still use a glas like Show Car Glaze to really bring out the depth of the black paint and make it that wet look? Is it even necessary since M205 does sort of the same thing (so I read...)?


                              It's going slow...but making progress. Oh yeah, is it even possible to burn the paint at all with the DA using M105 and the yellow foam pad? When looking real close I seem to have either found burned spots or spots that are very very thin paint. One is all the way across the corner seam on the rear bumper piece and the other is on the trunk up in the corner by the windshield. I've worked the rest of the car and have never seen it anywhere else. It may have been there before as it looks like someone used a rotary on it before....
                              99' FRC Corvette
                              08' Sky RedLine

                              Comment

                              • Working...
                                X
                                gtag('config', 'UA-161993-8');